Useful Windows 11 Registry Tweaks to Improve System Performance
Read this article to learn about useful registry tweaks in Windows 11, and how to edit the registry safely and efficiently. In today’s article, we’ll cover a few tweaks to help you improve and simplify your work with Windows 11.
- Step 1. Create a Windows 11 restore point
- Part 2. How to bring back the old context menu
- Part 3. How to remove Bing from the search menu
- Part 4. How to add any app to the context menu
- Part 5. How to disable automatic system updates
- Part 6. How to remove OneDrive from Explorer in Windows 11
- Part 7. How to disable Windows 11 lock screen
- Part 8. How to disable notification and actions center in Windows 11
- Conclusion
- Questions and answers
- Comments
Windows registry is a powerful tool that stores and manages key system settings. Although it may seem so strange and complicated for many users, getting to grips with its functionality may bring you considerable advantages. However, tampering with the registry may get your Windows damaged. This is why we recommend following all instructions strictly and never edit the registry if you’re not sure what you’re doing.

Useful Registry Tweaks for Windows 11
Step 1. Create a Windows 11 restore point
Before you start editing the registry, it’s recommended to create a restore point to be on the safe side. In case your changes to the registry cause any issues with your computer’s performance, you’ll be able to roll back from that restore point.
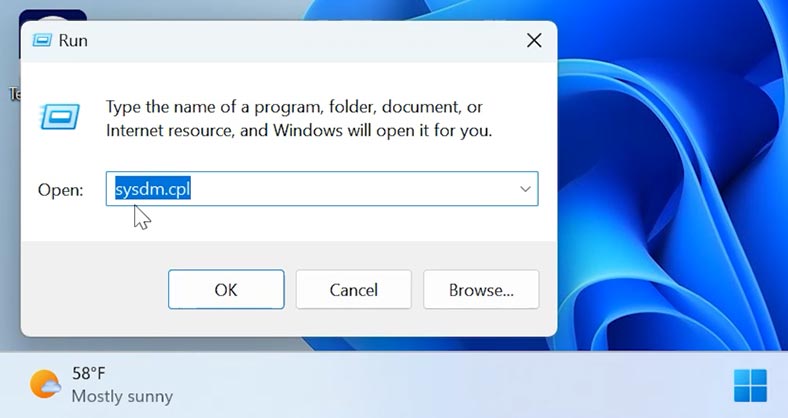
To create one, open the Run window by right-clicking on the Start menu or pressing the key shortcut Win + R. After that, type sysdm.cpl.
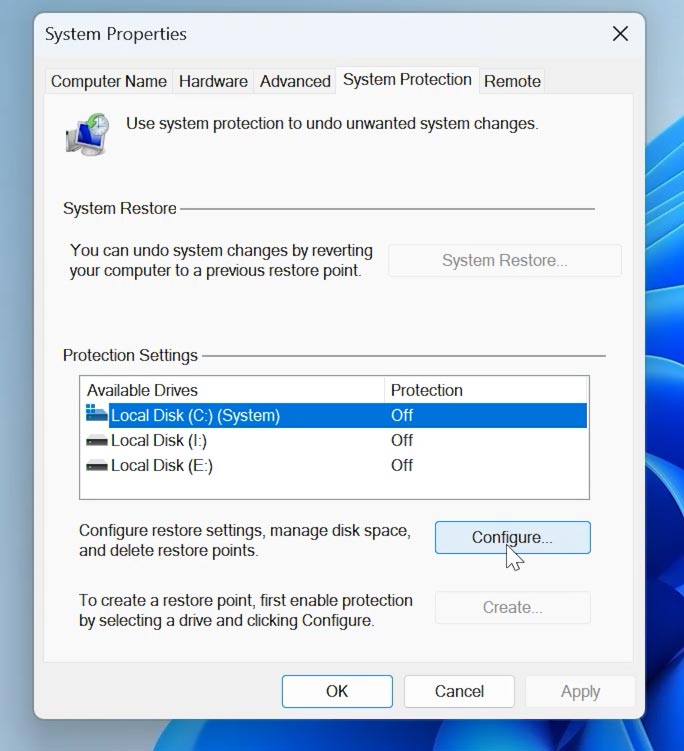
Then open the System Protection tab, select the system drive and click Configure.
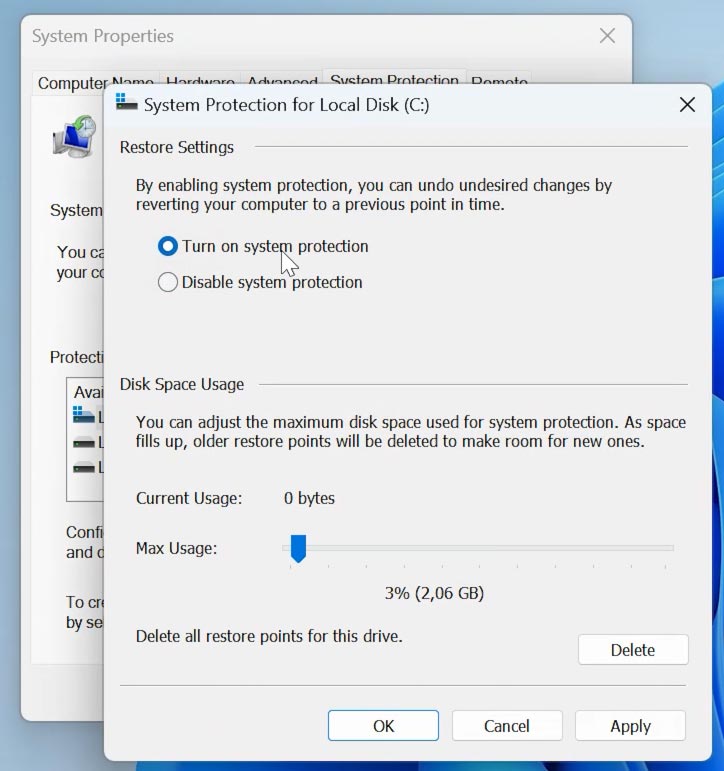
Finally, choose the option Turn on system protection and click ОК.
Once the system protection is enabled, the option to create a restore point will become active. In this tab, click Create.
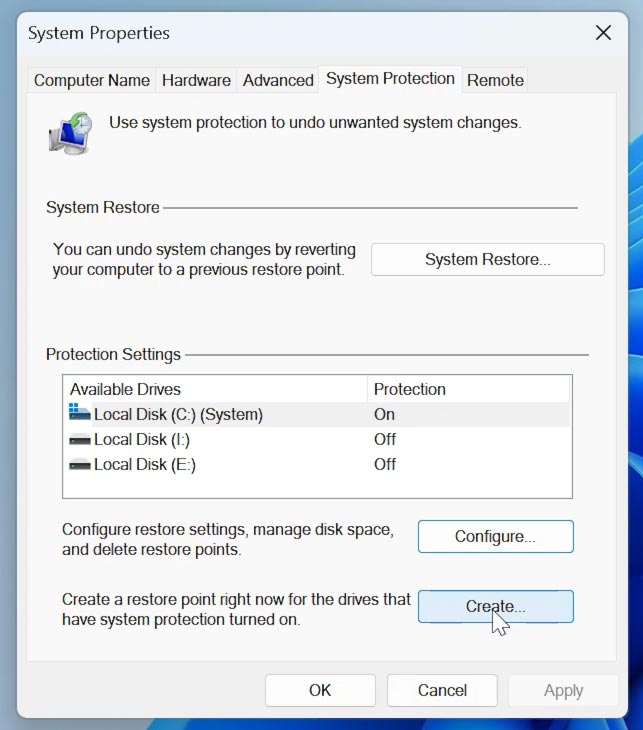
Give a name for the new restore point and hit Create. When it’s over, you’ll get a system backup file which your system will roll back to if any problems arise.
Part 2. How to bring back the old context menu
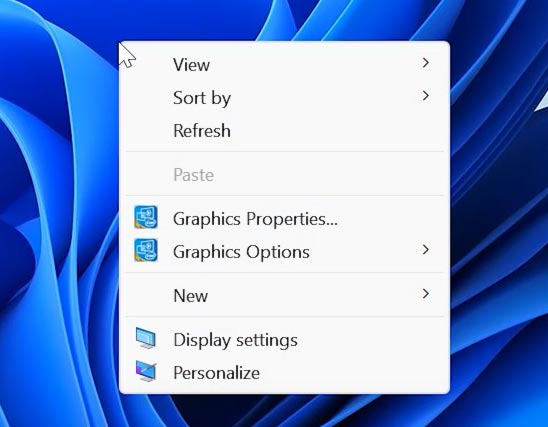
One of the most popular and sought-after registry tweaks for Windows 11 is the one that brings back the old context menu – the way it was in Windows 10.
To do that, open the registry by clicking on the Start menu – Run – type regedit.
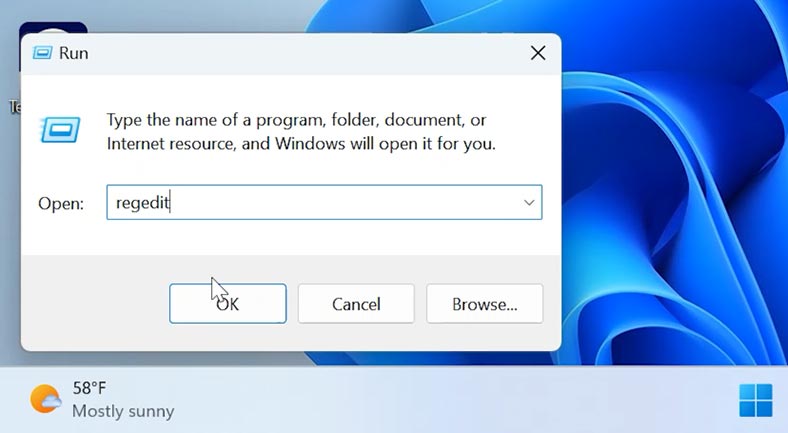
In the registry editor window that appears, follow this path:
Computer\HKEY_CURRENT_USER\SOFTWARE\Classes\CLSID\
After that, right-click on the folder CLSID – click New – Key.
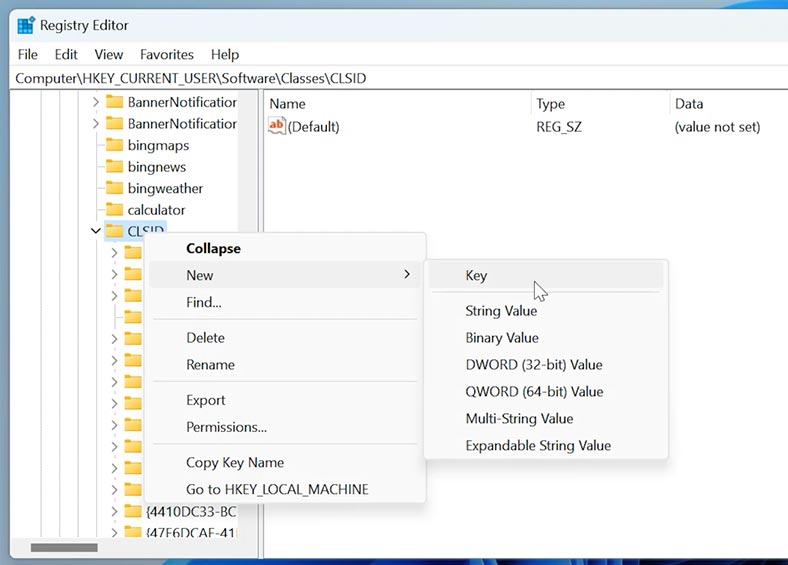
Change its name to {86ca1aa0-34aa-4e8b-a509-50c905bae2a2}.

In this folder, create one more key with the name InprocServer32.
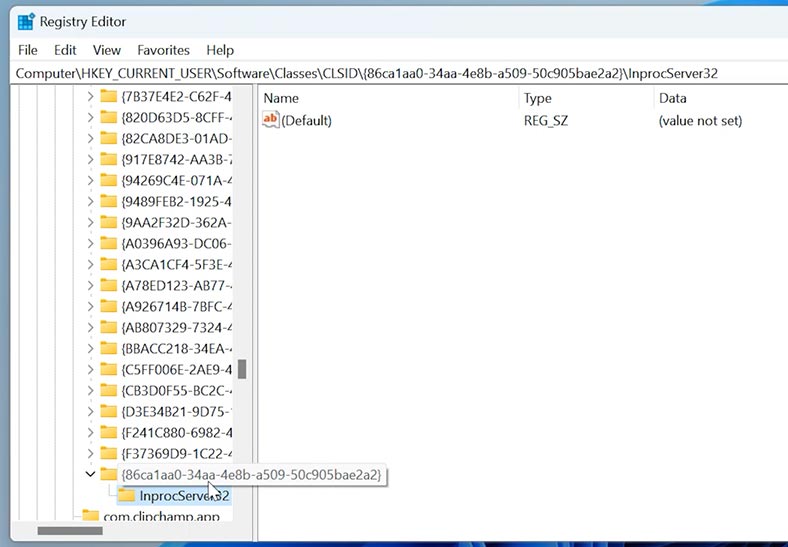
After that, open the DEFAULT file - don’t type anything in this line - and just click OK to save it.
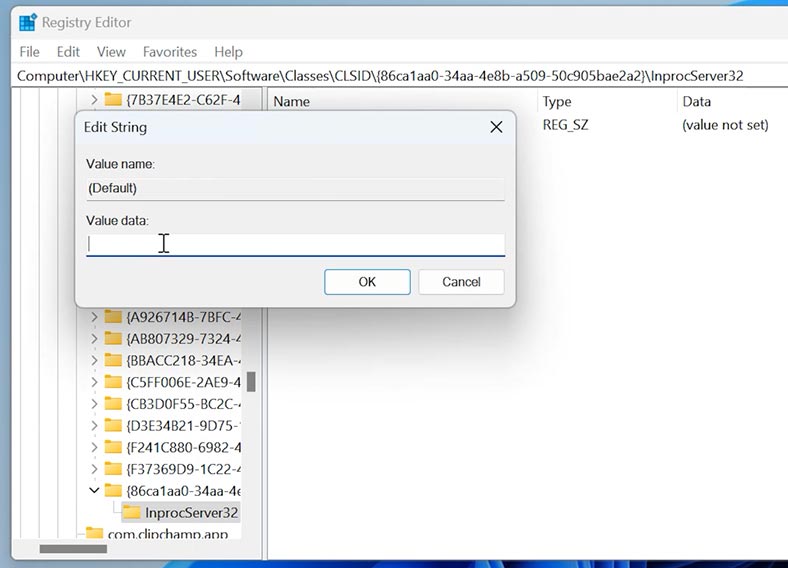
When these changes are applied, right-click on the desktop and you will see: the good old context menu is back again.
Part 3. How to remove Bing from the search menu
Another tweak concerns the Start menu. As you might have noticed, the Bing search window appeared in Windows 11. Every time you use local search on your PC, it also shows you Bing search results. It can be removed by editing the registry a little.
To do it, follow this path:
Computer\HKEY_CURRENT_USER\SOFTWARE\Policies\Microsoft\Windows
Right-click on the folder Windows – click New – Key. Change its name to Explorer.
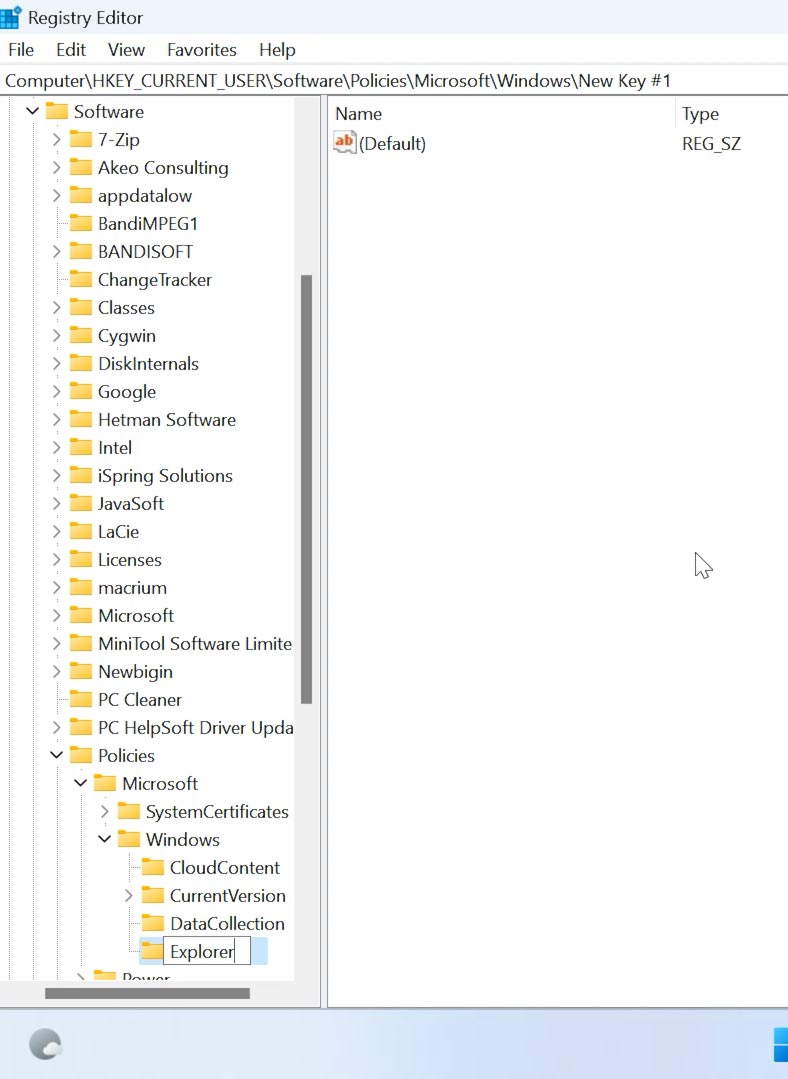
After that, create a new DWORD (32 bit) value.
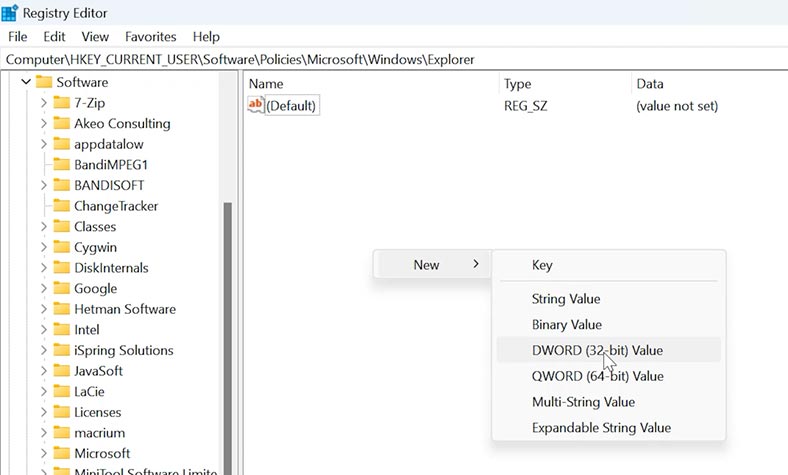
Give it a name DisableSearchBoxSuggestions. And set its value data to 1.

After you reboot the computer or just restart Windows Explorer, the Bing search option will disappear from the Start menu.
To restart the Explorer, open the Task Manager by right-clicking on the Start menu and choosing this option. Find Windows Explorer and click on the button Restart task (it’s above the list, on the right).
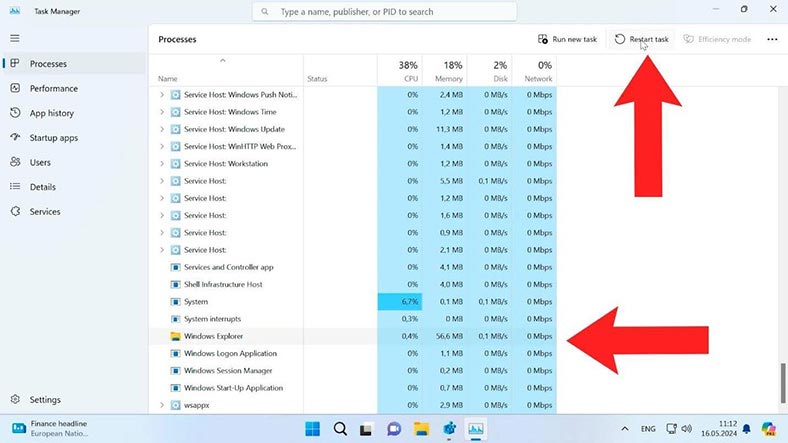
When you open the Start menu and click on the search field, you will see the Bing features are disabled.
Part 4. How to add any app to the context menu
Another tweak related to the context menu helps you to add any app to this menu.
If you often use a specific application, you can add it to the Windows context menu for convenience, by just editing the registry a bit.
To do it, follow this path:
Computer\HKEY_CLASSES_ROOT\Directory\Background\shell
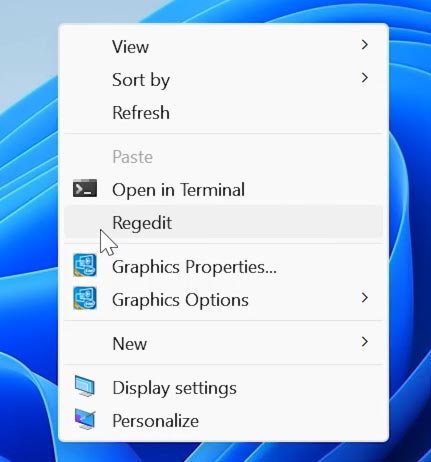
In the shell folder, create a new key with the name of the application. I’ll illustrate it with the example of the registry itself, by adding the registry shortcut to the context menu. I’ll name the folder REGEDIT.
In this REGEDIT folder, I’ll add a key with the name command.
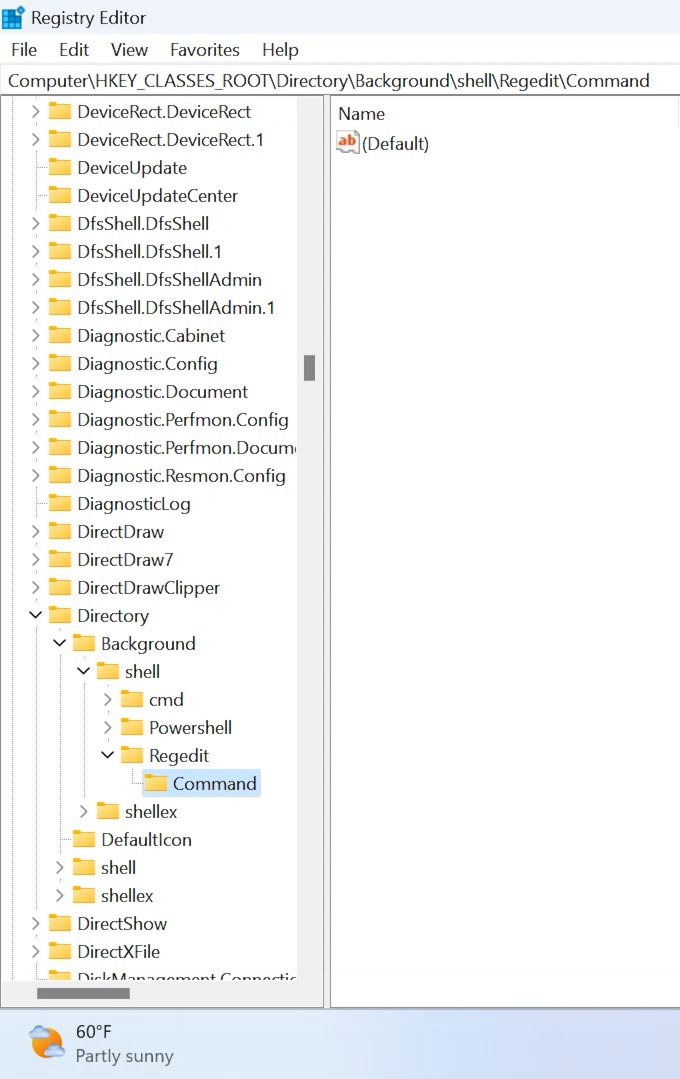
Now let’s find the path to the file that opens the registry. Open Explorer – This PC – Disk С – Windows. Look for the registry’s .exe file, right-click on it and select Copy as path.
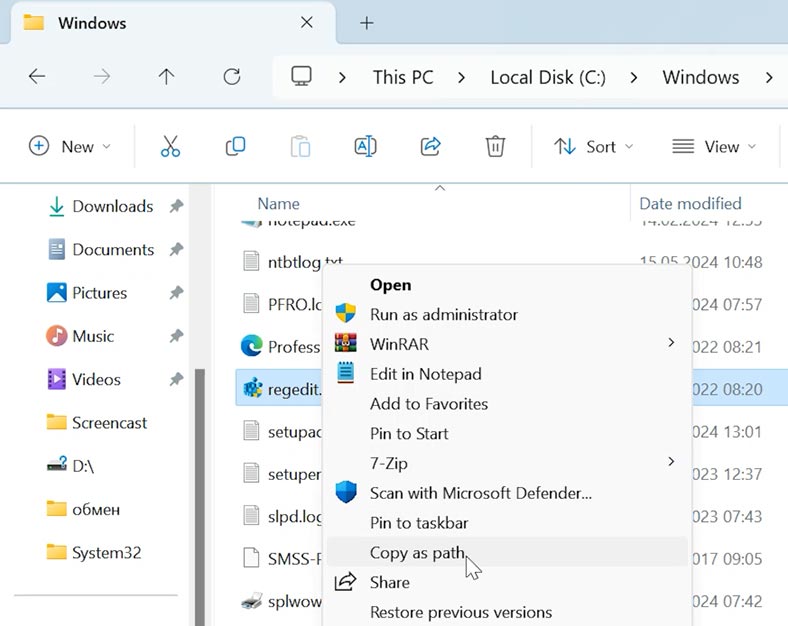
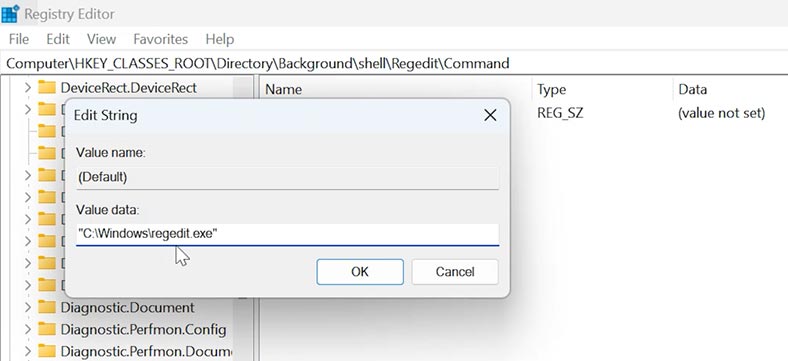
The go back to the registry and open the file Default. Insert the copied path to the file and click ОК, then close the registry.
As you right-click, you will see that your context menu now contains the registry shortcut that you’ve added. Following these steps, you can add any app and run it from this menu.
Part 5. How to disable automatic system updates
If you don’t want your operating system to update automatically, you can stop this process by modifying the registry.
Follow this path to make some changes:
Computer\HKEY_LOCAL_MACHINE\SOFTWARE\Policies\Microsoft\Windows
Create a new key here and give it a name – WindowsUpdate.
In the same folder, create another key with the name – AU.
Now create a new DWORD (32 bit) value, give it a name – NoAutoUpdate, and then set its value data to 1.
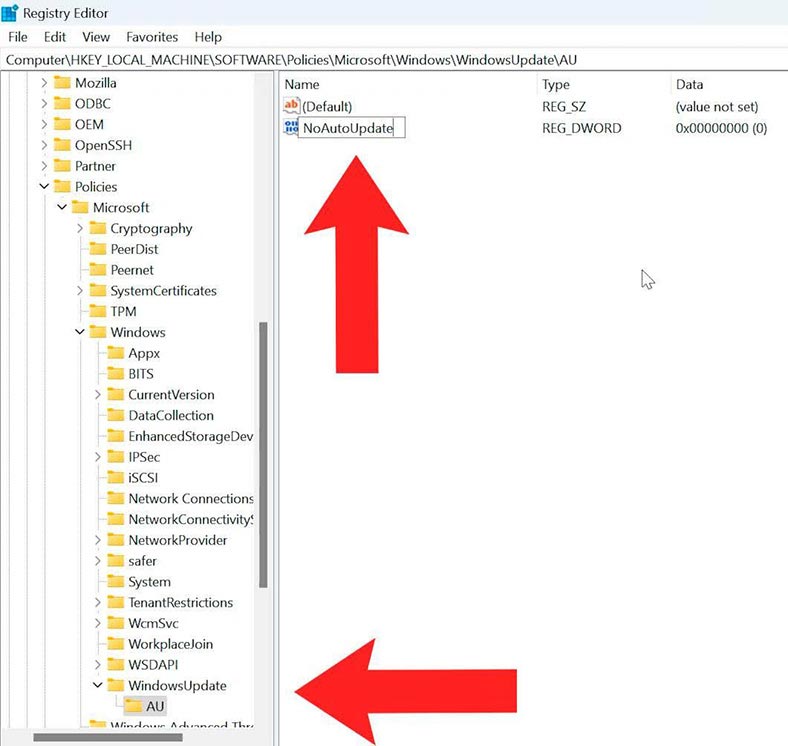
When it’s done, the operating system will no longer receive automatic updates. If you ever want to update your system, you’ll have to download updates manually and install them.
Part 6. How to remove OneDrive from Explorer in Windows 11
To do it, follow this path:
HKEY_CLASSES_ROOT\CLSID\{018D5C66-4533-4307-9B53-224DE2ED1FE6}
And change the key System.IsPinnedToNameSpaceTree by assigning the value – 0.

After that, your Explorer will no longer show the OneDrive shortcut.
Part 7. How to disable Windows 11 lock screen
If you don’t use any passwords and you don’t need that screen, use the registry editor to follow this path:
HKEY_LOCAL_MACHINE\SOFTWARE\Policies\Microsoft\Windows\
Create a new key with the name –Personalization.
Then create a new DWORD (32 bit) value - NoLockScreen, and assign it the value 1.
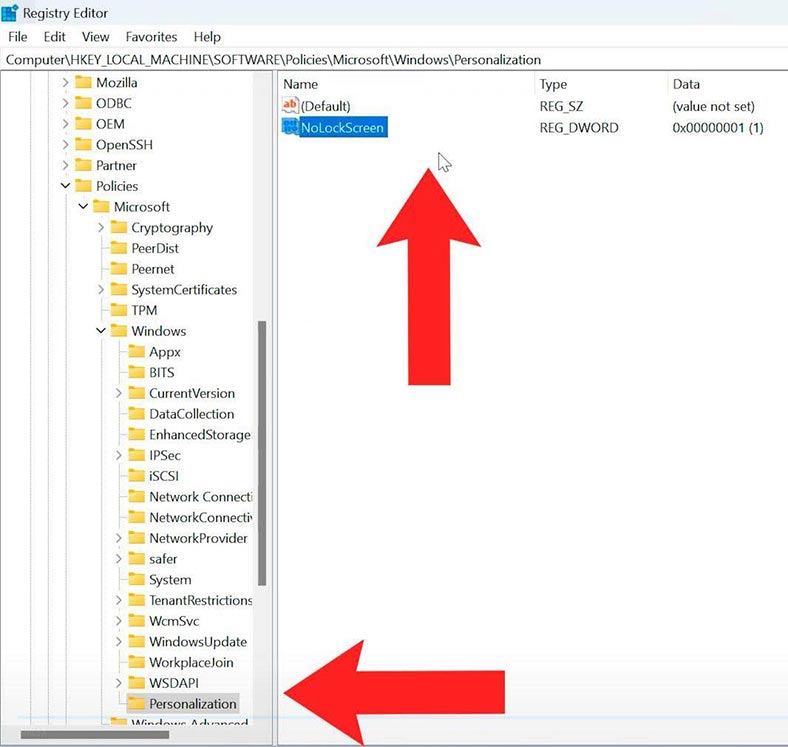
Here you are - the lock screen is disabled. To enable it again, just remove this value or change its value data to 0.
Part 8. How to disable notification and actions center in Windows 11
Windows 11 has brought considerable changes to most common elements of the user interface. The context menu, Start menu, Taskbar, Settings, as well as notification and actions center. If you don’t feel like getting notifications, they can be disabled completely by tweaking the registry.
Follow this path:
HKEY_LOCAL_MACHINE\SOFTWARE\Microsoft\Windows Defender Security Center\Notifications
Then create a new DWORD (32 bit) value - NoLockScreen, and assign it the value 1.
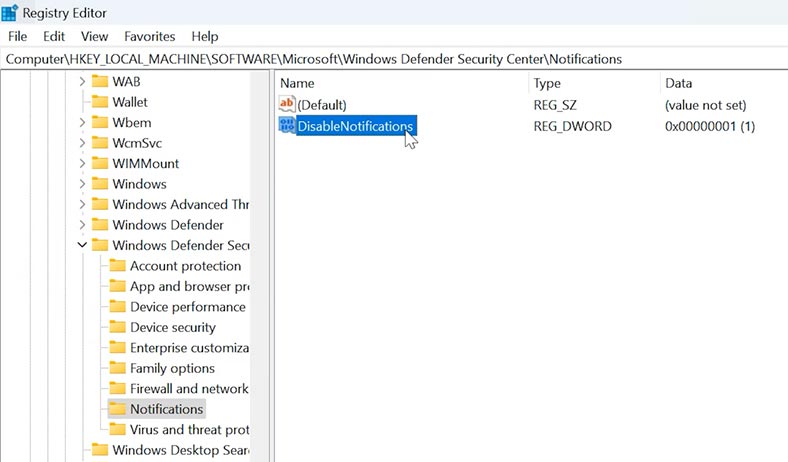
Then follow this path:
HKEY_CURRENT_USER\SOFTWARE\Policies\Microsoft\Windows\Explorer
And here, create a similar value with the name DisableNotificationCenter and assign it the value 1.
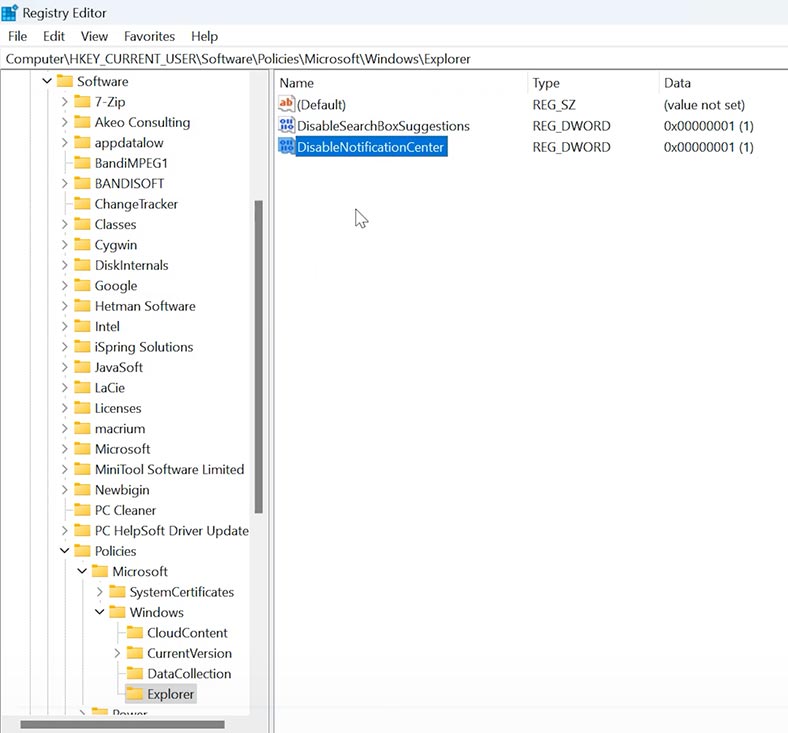
After that, the notification center will be disabled.
Conclusion
As you can see, modifying some registry settings can greatly help to improve your user experience with the operating system by providing additional opportunities and fixing various issues. Always remember to be extremely cautious when making changes to the registry - any careless step can affect the system performance. Stick to the instructions and don’t forget to create backups - even if things go wrong, you’ll be able to bring your system back to normal.


