Recover Data from a QEMU Virtual Machine: Simple Solutions!
Are you facing data loss issues with your QEMU virtual machine and wondering how to recover your valuable data? In this video, we’ll provide you with essential tips, step-by-step methods, and best practices for recovering data from QEMU virtual machines. Read now to learn how to retrieve your data effectively!
- How to install QEMU in Windows
- How to use QEMU in Windows
- How to create a virtual machine with QtEmu
- How to recover QEMU data
- Conclusion
- Questions and answers
- Comments
Virtualization is the easiest way to run one more operating system on your PC without having to install it directly to its hard disk. Instead, the additional operating system is installed to a virtual disk which is represented by a special container file. The most popular hypervisors are VirtualBox and VMware, and they both have a wide range of functions and an easy-to-understand graphical interface.
QEMU is a free open-source program designed to emulate various software products and operating systems. This tool uses hardware virtualization and supports a long list of architectures to be emulated (x86, ARM, MIPS, PowerPC, m68k, Alpha, SPARC, SH-4, CRISv2, MicroBlaze).

🦅 How to Recover Data from a QEMU Virtual Machine. Installing a QEMU Hypervisor in Windows 🦅
How to install QEMU in Windows
The first thing you need for installation is to download a QEMU distribution for Windows. You can get it from the official website – www.qemu.org/download/#windows.
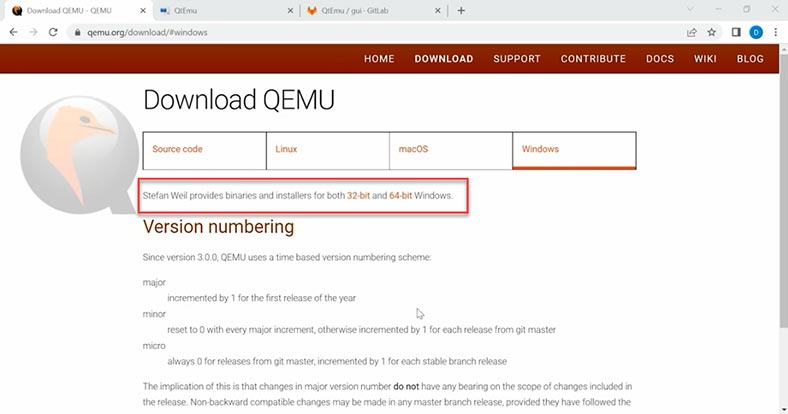
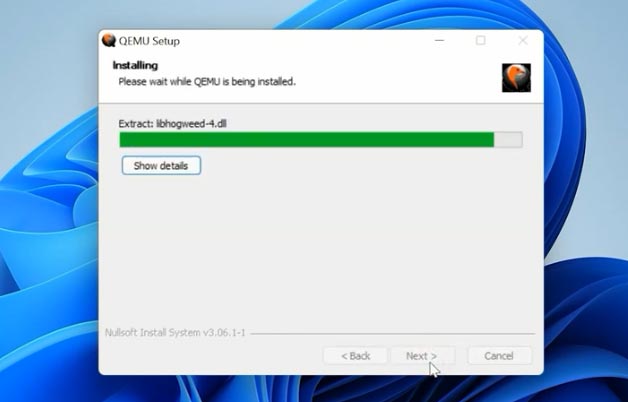
You can choose between 32-bit and 64-bit versions. Choose the latter one and download the corresponding file. Install the program and leave all options at their default values – just don’t change anything.
How to use QEMU in Windows
Unlike VirtualBox and similar hypervisors, QEMU doesn’t have a graphical interface: it can be operated with the command prompt only. Let’s download an ISO image of the operating system which we will install onto the virtual machine. After that, we need to add the QEMU path to the environment variables.
To do that, open the File Explorer and copy the path to the folder containing the program.
С:\Program files\qemu
Then right-click on “This PC” and open “Properties”.
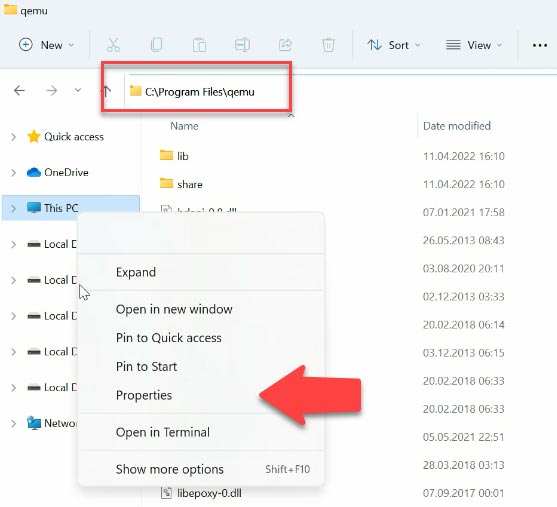
“Advanced system settings”. In the Advanced tab, open “Environment Variables”.
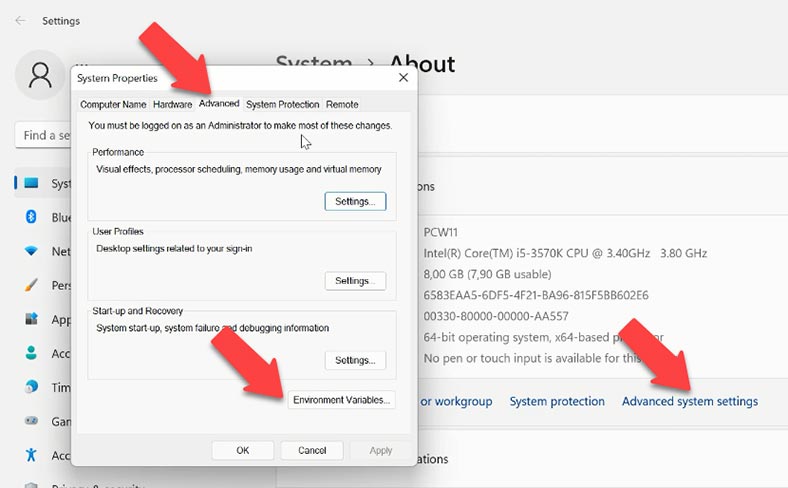
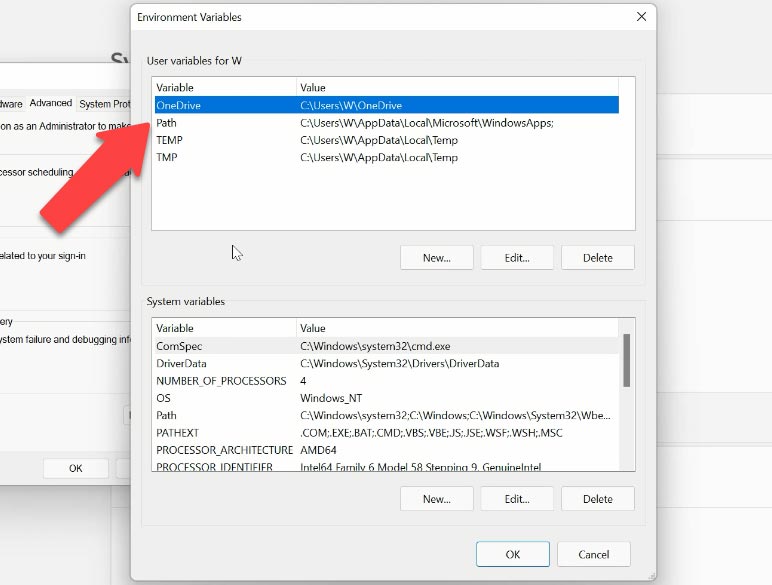
In the field “User variables”, double-click on “Path”.
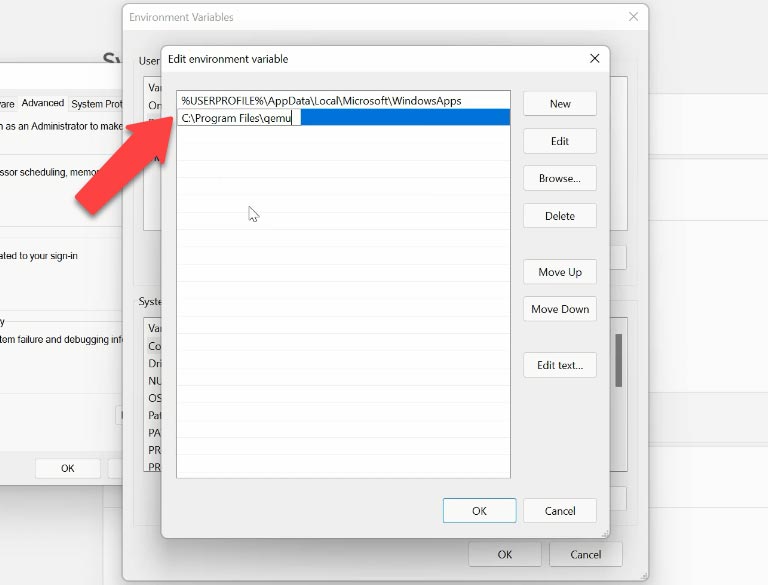
Then click “New” and paste the path to the QEMU folder that you have copied before. Click OK to save the changes and then click OK again to leave the settings.
Before installation, you need to enable a specific Windows component - Windows Hypervisor Platform - or the virtual machine may not start properly. Also, it is recommended to enable Hyper-V or HAXM accelerator to make the virtual machine work faster.
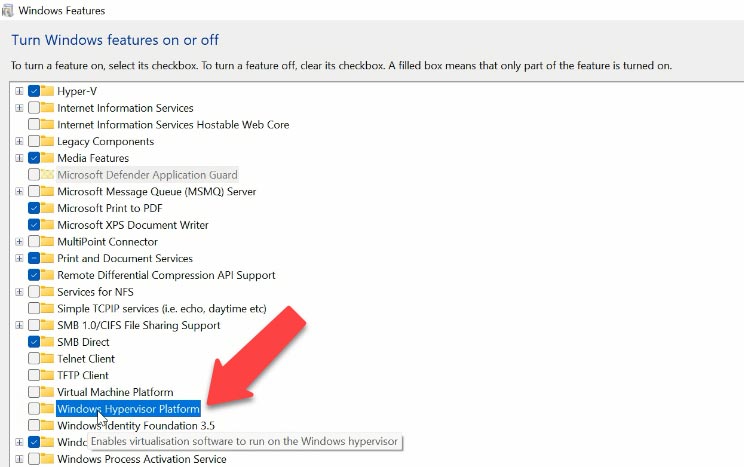
To do it, use the setting “Turn Windows features on or off”. Enable the platform.
The list of commands and settings used to create and manage virtual machines is quite long, but you only need a few to start working.
Launch the Command Prompt as Administrator and begin the installation. For starters, let’s create a folder for virtual machines – C:\qemu. Then go to that folder with the command prompt. Now you need to create a virtual hard disk of 15 to 20 GB. Use the following command:
qemu-img create -f qcow2 ubuntu.qcow2 20G
Where the setting -f indicates the file format, followed by the file name and the file size is given at the end of the command.
Then enter another command to create a virtual machine: it includes certain settings.
qemu-system-x86_64.exe -boot c -m 2048 -smp 2 -L "C:\Program Files\qemu" -vga std -soundhw es1370 -boot menu=on -hda ubuntu.qcow2 -cdrom "D:\ubuntu.iso" -rtc base=localtime,clock=host -net nic,model=ne2k_pci -net user
| Command Description | Command |
|---|---|
| Architecture | qemu-system-x86_64.exe |
| Boot Disk | -boot c |
| RAM Size of the Virtual Machine | -m 2048 |
| Number of CPUs Allocated to the Machine | -smp 2 |
| Path to the Program Folder | -L "C:\Program Files\qemu" |
| Video | -vga std |
| Audio | -soundhw es1370 |
| Virtual Disk | -boot menu=on -hda ubuntu.qcow2 |
| Path to the ISO Image | -cdrom "C:\ubuntu.iso" |
| Time and Network Settings | -rtc base=localtime,clock=host -net nic,model=ne2k_pci -net user |

When you enter the command, the QEMU window appears, the virtual machine boots and the installation of the operating system begins.
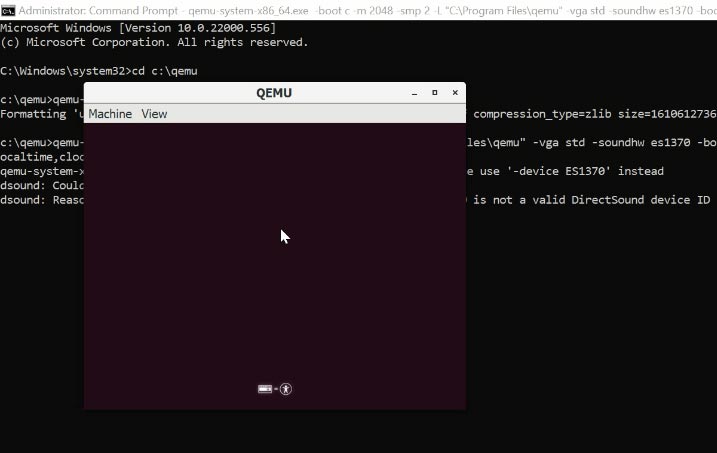
In my case, this is Ubuntu. After the installation is complete and the virtual machine restarts, it boots with the operating system you have installed, and it is now ready for work.
How to create a virtual machine with QtEmu
Also, there is another way to create a virtual machine with the help of the QtEmu graphical interface. This open-source utility for QEMU is designed to simplify the process of creating and managing a virtual machine.
Let’s visit the program’s official website, follow the link to gitlab and download the installation file.
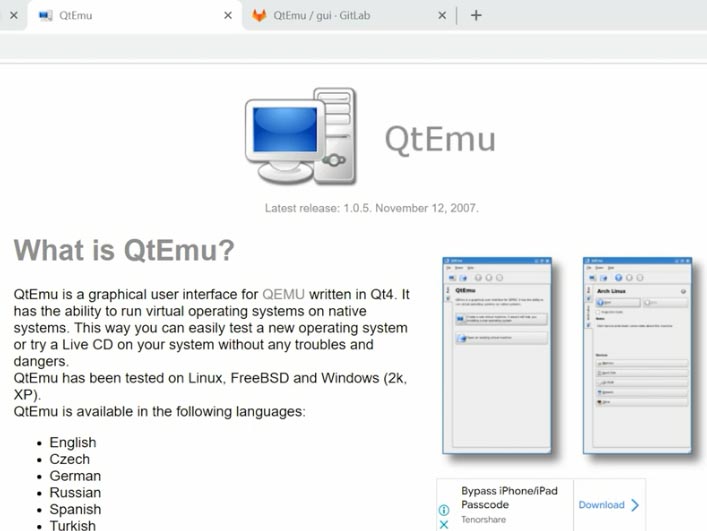
Remember to enable such Windows feature as Windows Hypervisor Platform if you forgot to turn it on before: this feature should be running, otherwise the virtual machine may not start.
To do it, open “Programs and Features” - “Turn Windows features on or off”. Enable the platform.
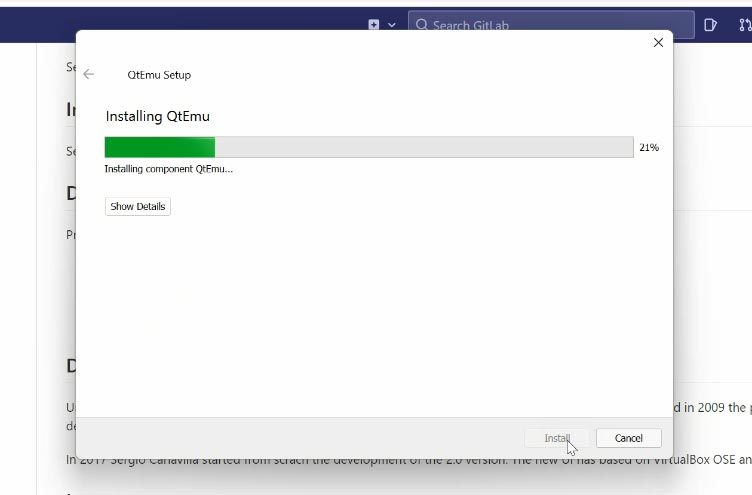
Start the installer and choose where to install the program. After the installation is over, put the program’s shortcut on the desktop for your convenience, and create a folder to store virtual machine files.
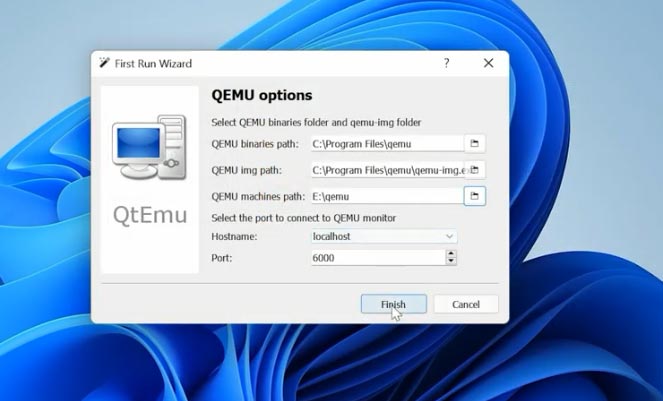
When you start the program for the first time, specify the following settings. In the first field - the path to the folder where QEMU is installed. In the second field - the path to the QEMU-img file. And in this field - the path to the folder where virtual machine files are stored, and then click “Finish”.
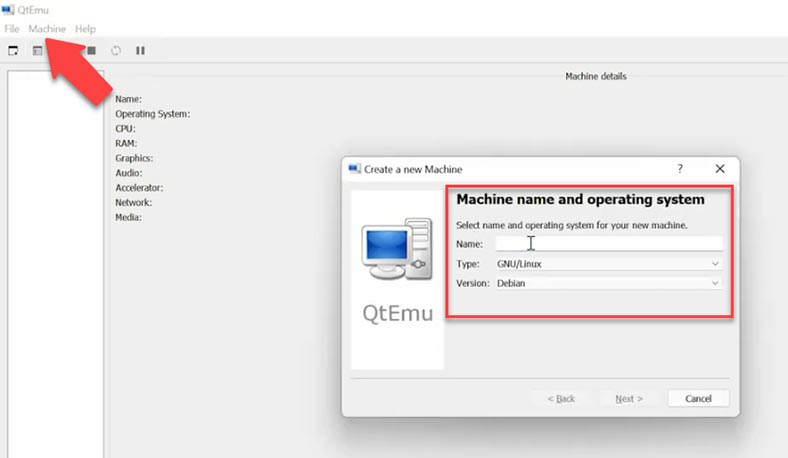
To create a new virtual machine, click “Machine” – “New Machine”, give a name, operating system type, select its version, and then click “Next”. In this Machine page, click “Next” unless you need to choose a specific motherboard setup.
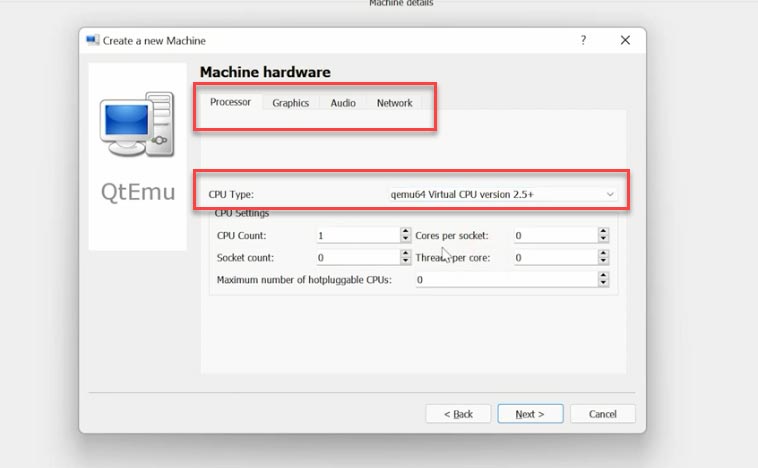
After that, you should choose a proper CPU type, and configure the graphics, sound and network settings. If you get the wrong CPU, the virtual machine may not boot properly.
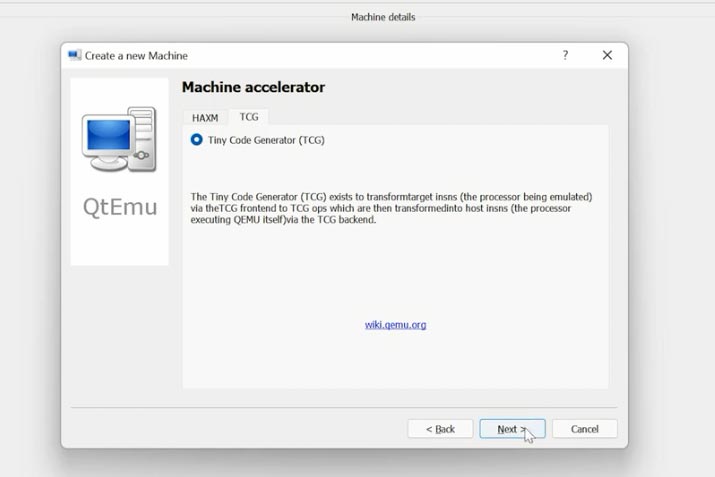
Now you need to choose the accelerator - the default choice is HAXM. Some computers may not support this technology so I recommend to uncheck this box for HAXM and choose TCG instead, then click “Next”.
Sometimes users complain that nothing happens when they start a virtual machine. This problem can be caused by HAXM, so it’s always better to go for TCG to make sure the virtual machine will work on most computers.
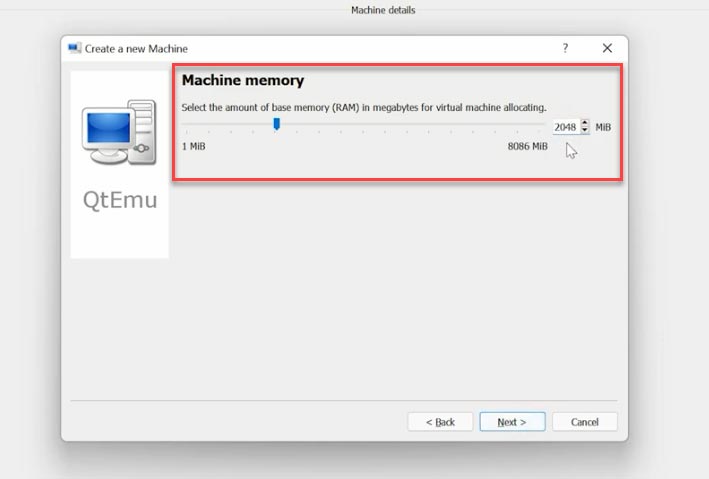
After that, set the RAM size for the virtual machine, and create a virtual hard disk. Specify the disk size and type. Then click “Finish” to complete setup.
After that, right-click on the machine and choose “Machine Settings”.
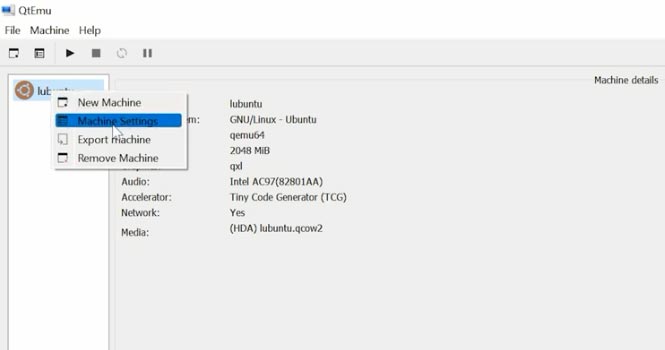
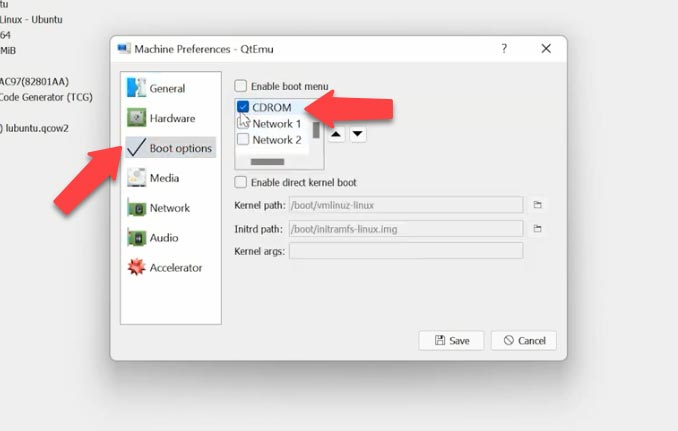
Access “Boot options” and check the box for CDROM, then bring it to the top and enable boot menu.
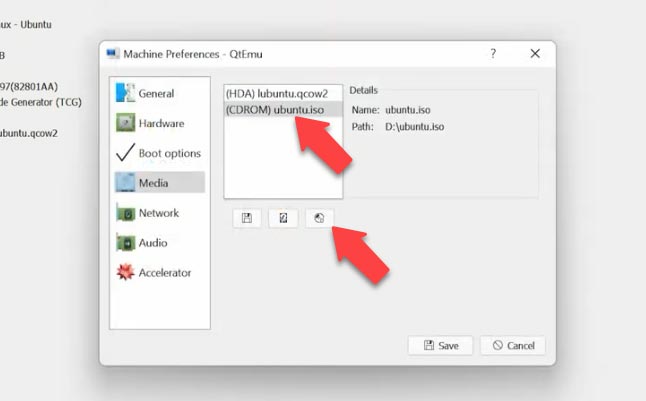
Then jump to the Media tab, click on the disk icon and give the path to an ISO image file of the operating system, and then click “Save”.
Select the virtual machine and click here to start it. The QEMU window opens, the installer boots, and then the installation of the operating system begins.
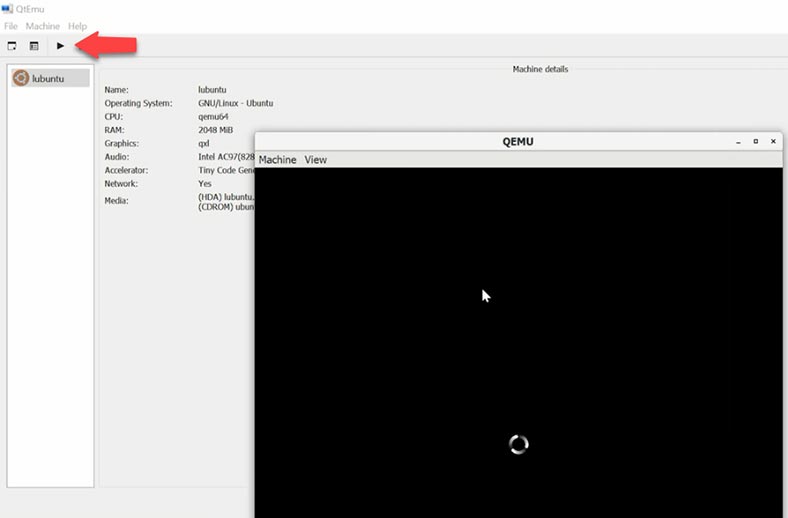
When the installation process is over, the virtual machine will be ready to use.
How to recover QEMU data
All right, we have just explored the process of installing QEMU and creating a virtual machine. But what should you do if - for any reason - you lost access to your virtual machine, deleted the machine files by accident, or lost some mission-critical data stored on the virtual hard disk?
If that’s your case, use a specialized data recovery tool - Hetman Partition Recovery - which can work successfully with most file formats used in popular hypervisors.
It supports all popular file system formats and it can help you restore data after deleting, formatting, and hardware or software errors.
| Format | Description |
|---|---|
| Virtual Machines | The software supports data recovery from virtual disks in the following formats:
|
| File Systems | Hetman Partition Recovery supports data recovery from the following file systems:
|
| Storage Types | Supported are hard drives, SSDs, USB flash drives, memory cards, and external drives connected via USB or other interfaces. |
| Partition Types | The software works with primary, logical, and dynamic partitions. |
| Extensions | Supports working with damaged, formatted, or deleted partitions. |
In a Windows operating system, all you have to do is to download and install the program. If you’re using a different operating system, take the hard disk out of your computer and connect it to a Windows PC.
If you want to recover virtual machine files, connect the disk where virtual disk files were stored, and scan it with Hetman Partition Recovery.
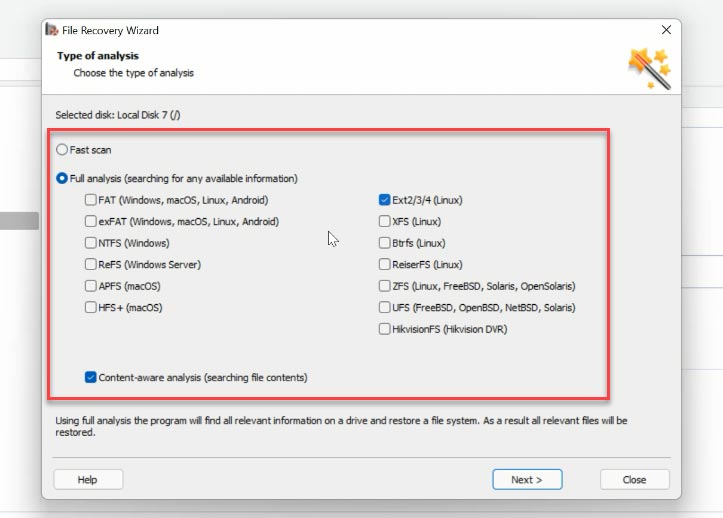
Right-click on the disk and choose “Open”. Select the scan type - “Fast scan” or “Full analysis” if the first option is not available. Before starting “Full analysis”, choose the file system and click “Next”.
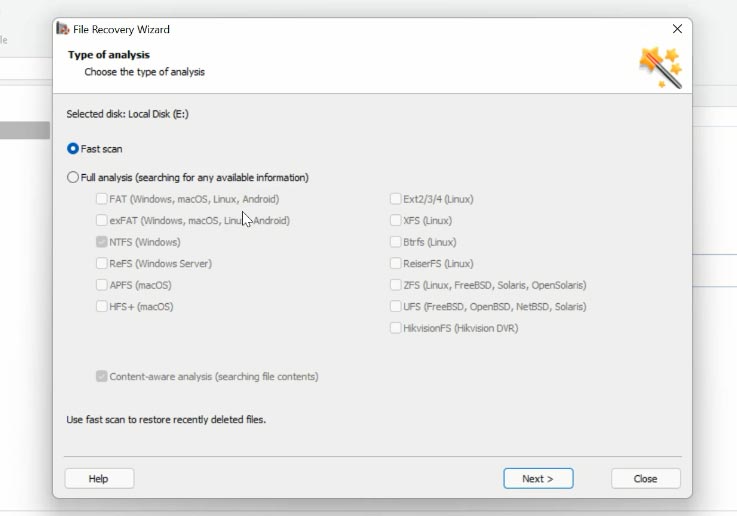
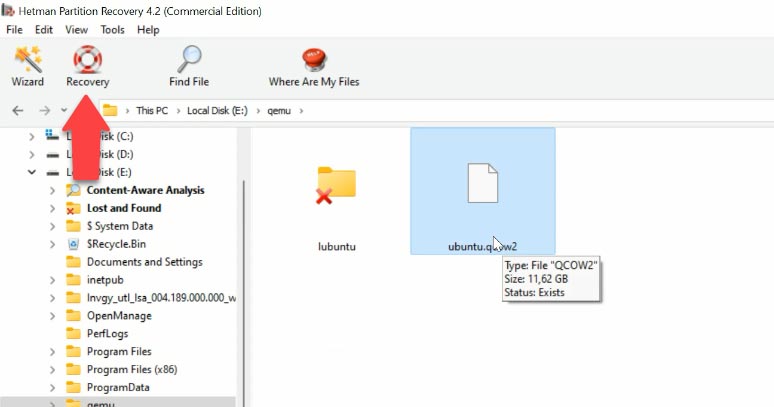
In my case, “Fast scan” is available. Find the folder where the virtual machine files were stored, select the files you want to restore, click “Recovery”, specify the path where you’d like to save the files, and click “Recovery” again.
You will find the recovered files in the directory you have chosen. Here some typical extensions of virtual machine files: qcow, qcow2, .img, .cow, .qed, .vmdk, .vdi, .vhd, .vhdx, .hdd, .hds.
If you failed to boot a virtual machine after system repair operations, or if there is an error when you try to start it, don’t give up: use our program to open that file and recover all of its data.
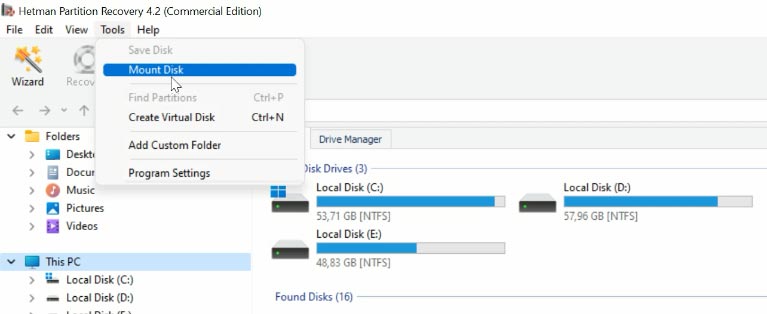
To do it, open “Tools” - “Mount Disk” - and you’ll find two ways to mount it: choose a RAW disk image if you’re dealing with conventional disks, or choose Virtual Machines. You can see the list of files and tools that our program supports.
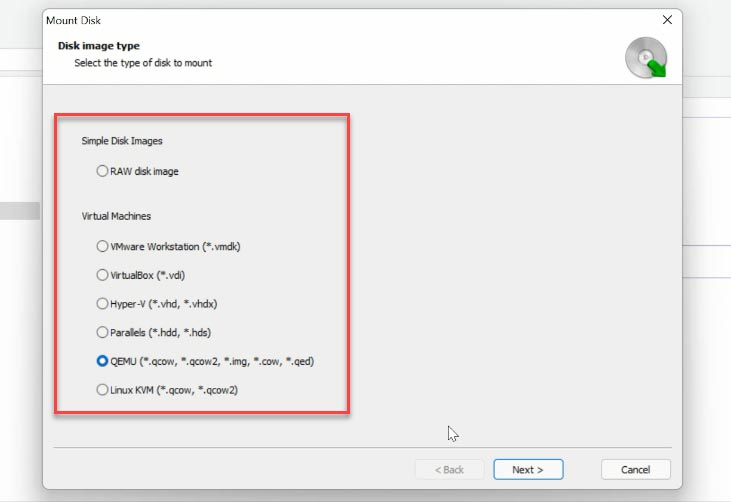
Check the required image type, give the path to the folder containing virtual hard disk files, and click “Select Folder”. The program will display all virtual machine files which exist in such folder, and you can uncheck the boxes for the ones you don’t need now.
To begin searching for data, right-click on the disk and choose “Open”. Then choose analysis type. We recommend starting with “Fast scan”. If the program can’t find the missing files, then go for “Full analysis”.
The program can find all files remaining on the disk without difficulty. The red cross indicates the ones which have been deleted. Click on a file to see its contents in the preview window. With this quick search option you can find a specific file by its name.
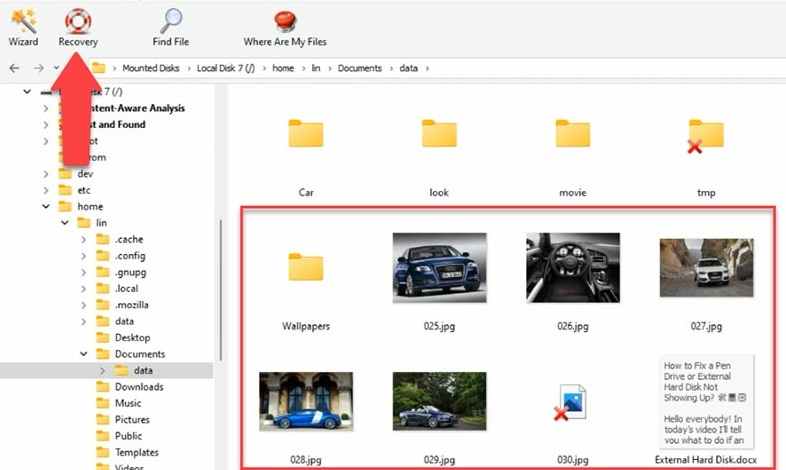
Select the files you need to restore and click “Recovery”, specify the disk where to save the files and click “Recovery” again.
Conclusion
Summing up, what can we say about the QEMU hypervisor? It’s difficult to say if it’s better or worse than VirtualBox or VMware. More likely, it’s an alternative method of virtualization, and it has its own pros and cons. QEMU is less convenient, it requires you to know the manuals, and its performance is very moderate. To accelerate its work in Windows, you need to install and configure HAXM, the Hardware Accelerated Execution Manager. On the other hand, this tool lets you emulate work on various architectures which are not supported by popular hypervisors. And if you ever lose any data - now you know which recovery tool can bring it back in a most efficient way.


Install the bridge-utils package
Write the bridge in the network configuration on the host, add the network adapter to the bridge; it depends on how you set up the network, via netplan or /etc/network/interfaces
Create /etc/qemu/bridge.conf and add to it the line allow bridge_name Connect the virtual machine to the bridge: qemu-system-x86_64 -hda /path_to_disk.qcow -m 1512 -vga qxl -netdev bridge,id=virtual_adapter_name,br=bridge_name -device virtio-net-pci,netdev=virtual_adapter_name,mac=52:54:00:12:34:56