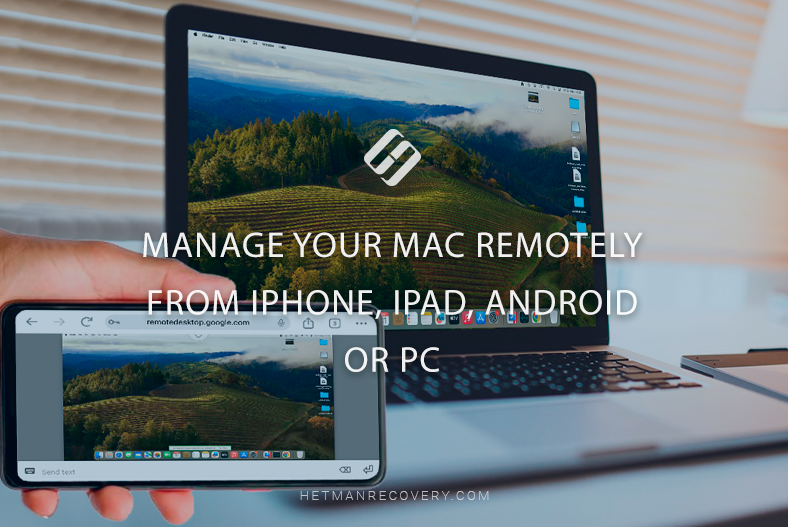
Manage Your Mac Remotely from iPhone, iPad, Android or PC
Read this article to learn how to access your Mac screen remotely from iPhone or another computer. How to configure your Mac for remote access from iPhone, iPad, Android or PC. How to use various tools and apps to manage your computer remotely. How to configure your Internet connection, which software to use, and how to avoid common issues.
- Method 1. Screen Sharing feature
- Method 2. How to enable Remote Management
- Method 3. RealVNC Viewer: Remote Desktop
- Method 4. TeamViewer
- Method 5. Chrome Remote Desktop
- Popular tools to access MacOS remotely
- Conclusion
- Questions and answers
- Comments
Remote interaction with your Mac is a very useful feature which may come in handy in all kinds of situations. You may need it while helping another user to configure their system, or when accessing your files from outside your home.
Although the remote access feature is quite easy, it takes a few steps to start using it, and the actual sequence depends on the particular case.
Also, never forget about security when remote access is enabled. Using a reliable password combined with two-factor authentication will help to protect your data and prevent unauthorized access. In today’s article, we’ll cover several ways to gain remote access to your Mac – from an iPhone or another computer with the help of built-in system features and third-party utilities as well.

Effortlessly Manage Your Mac Remotely from Any Device! (iPhone, iPad, Android or PC)
Method 1. Screen Sharing feature
And the first thing you should do is to configure your Mac for remote access. For this purpose, let’s use the following built-in features: Screen Sharing and Remote Management.
If all you need is just to connect to another Mac and share your screen or show it to others, use the Screen Sharing option.
For this method you don’t need any third-party utilities, since MacOS Monterey or later versions of the operating system already have this functionality embedded.
For successful connection, both computers need to belong to the same network and have MacOS Monterey or higher onboard. Also, both devices must have screen sharing enabled and corresponding permissions activated.
To enable the Screen Sharing feature, open Settings – General – Sharing – Screen Sharing.
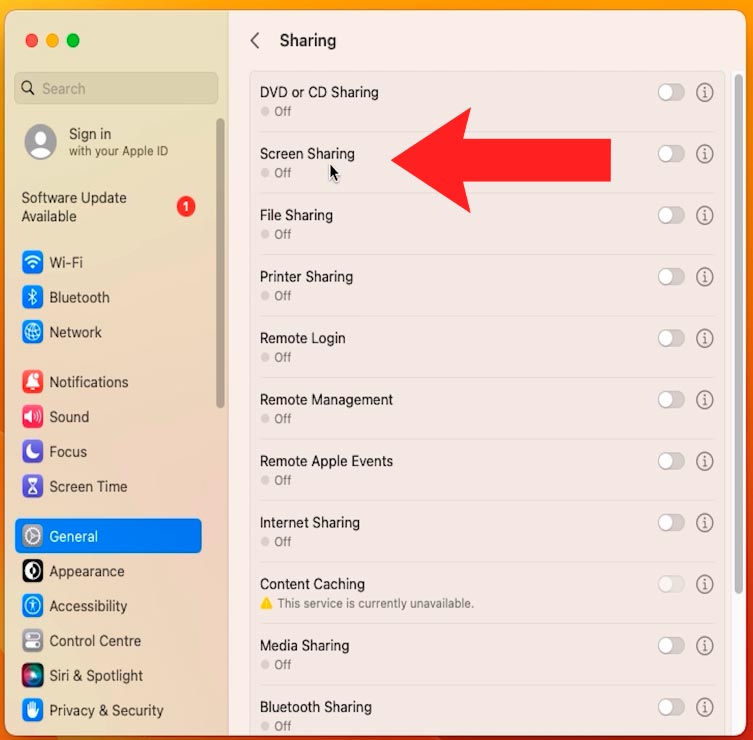
To make sure your Mac is protected from unknown users trying to get access, you need to configure this specific option. Click on the i button next to the line Screen Sharing.
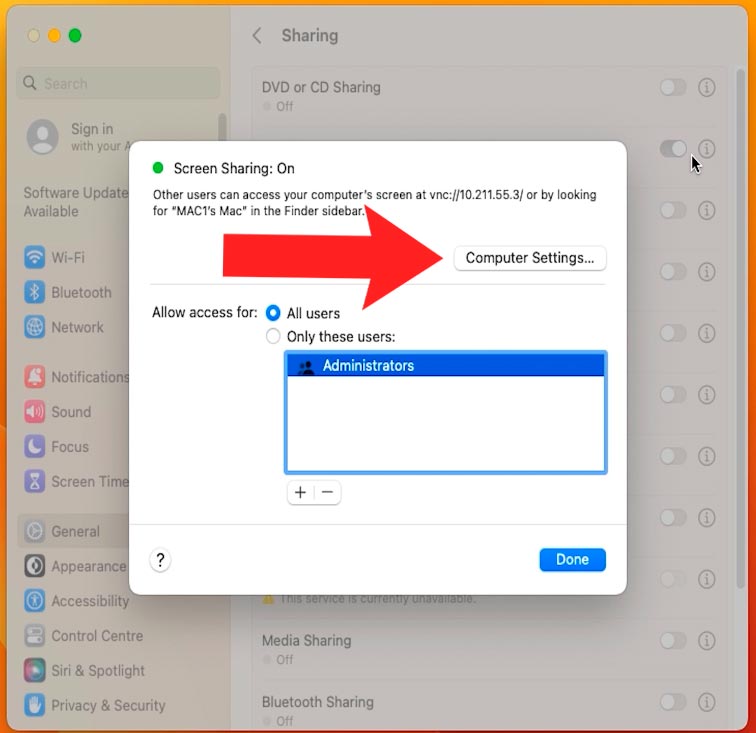
After that, check the box for Anyone may request permission to control screen. As a result, your approval will be required to gain access to your screen.
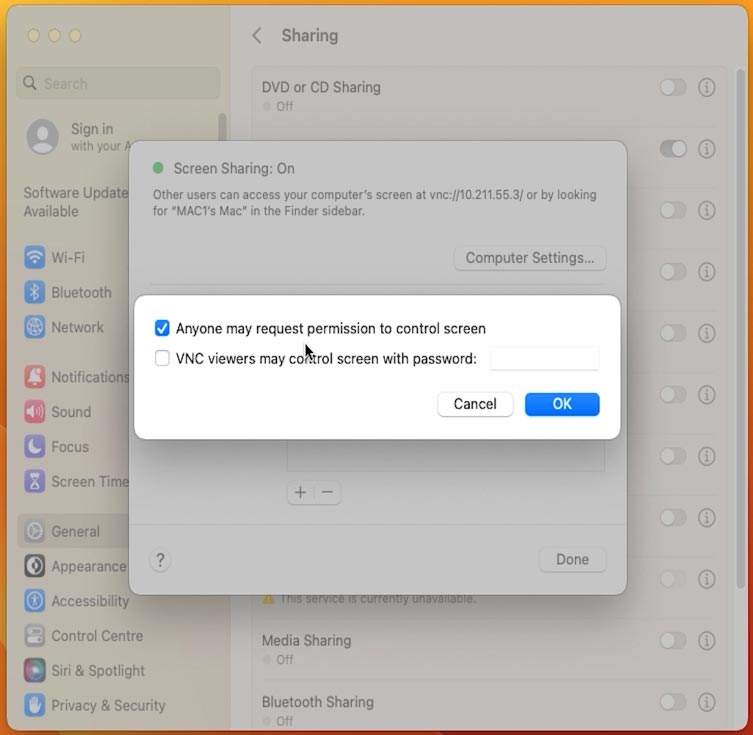
Then enable VNC viewers may control screen with password, and set your access password.
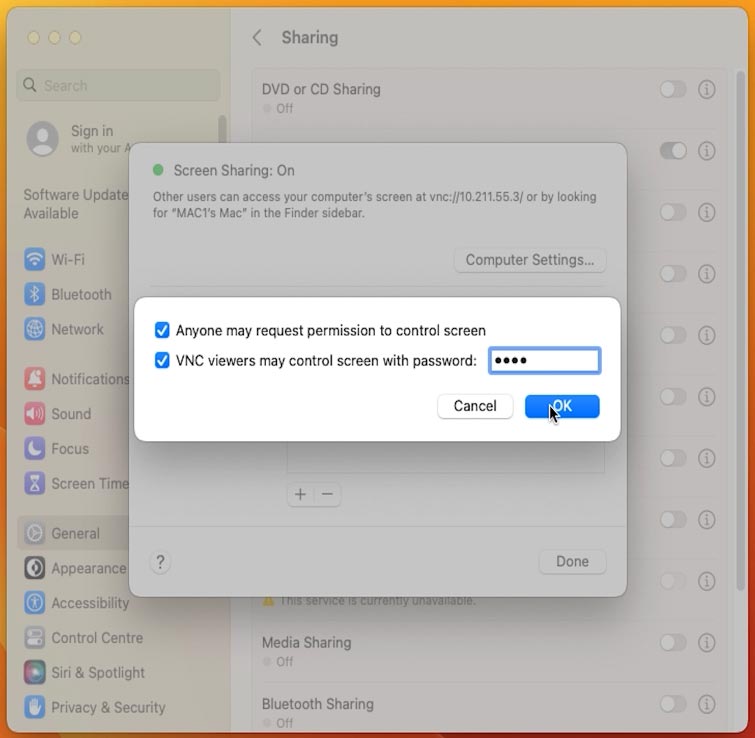
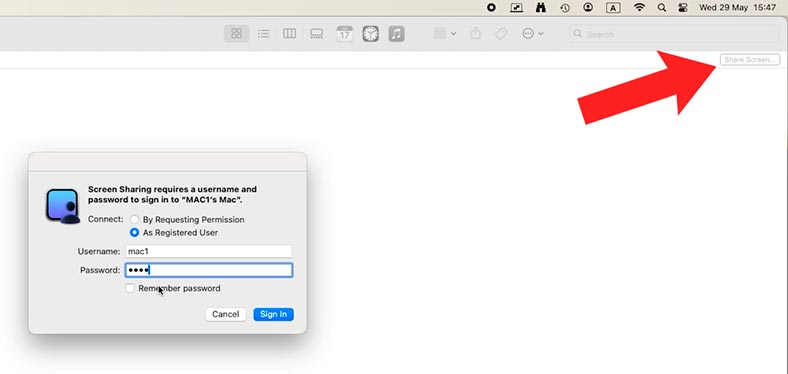
Since the configuration process is over, now you can use the screen sharing feature. To get the things started, open Finder on another Mac. In the Network tab, find the Mac you’d like to connect to.
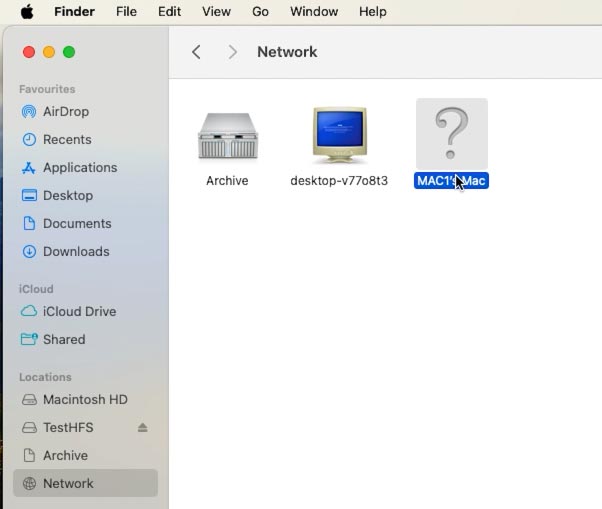
Double-click on it, and then choose Share Screen. Enter the user credentials for which access is allowed.
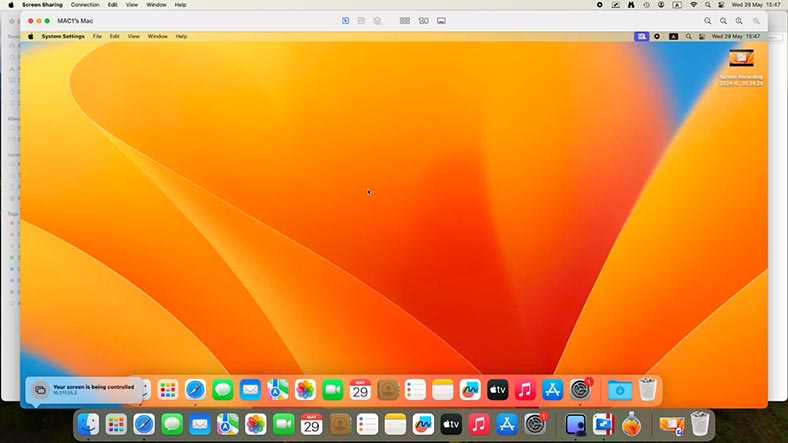
As a result, a window will open, showing you the screen of the particular Mac that you want to control remotely. After that, you’ll gain access to various files and folders on this remote computer, and will be able to add or delete files or folders, use various apps and so on.
Method 2. How to enable Remote Management
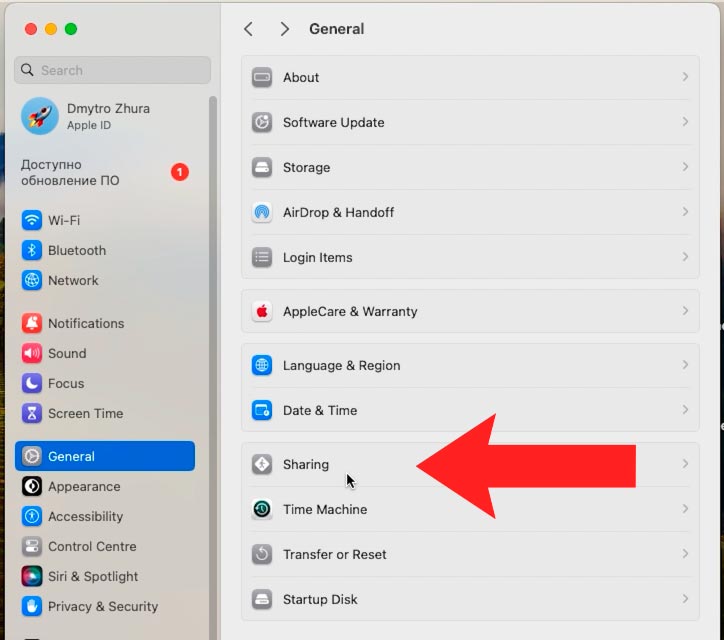
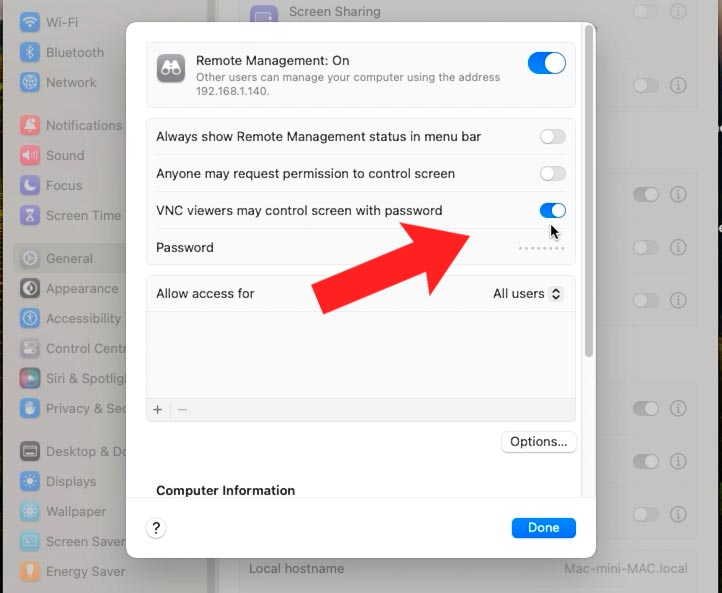
The Sharing menu also contains one more item, Remote Management. To enable it, open Settings – General – Sharing.
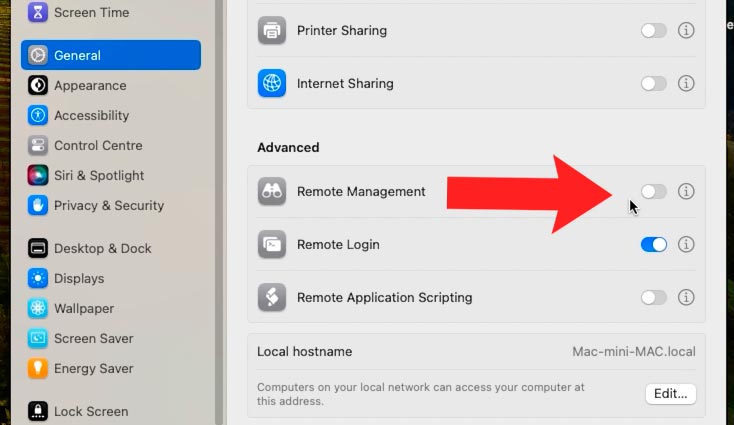
In the Advanced tab, drag the slider to the Enabled position next to Remote Management.
To configure all the aspects, click on the i button. Enable access for VNC viewers and set a password.
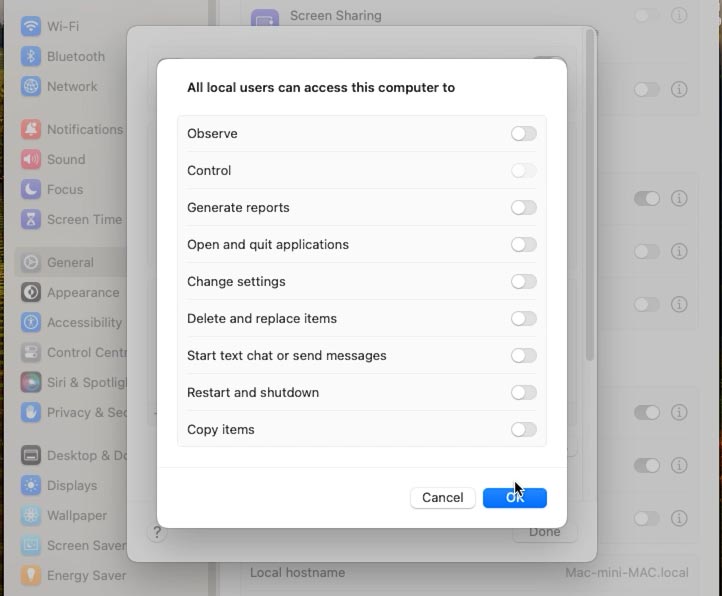
To turn on additional access functions, click on the Options button. Enable the ones you need and click ОК.
Method 3. RealVNC Viewer: Remote Desktop
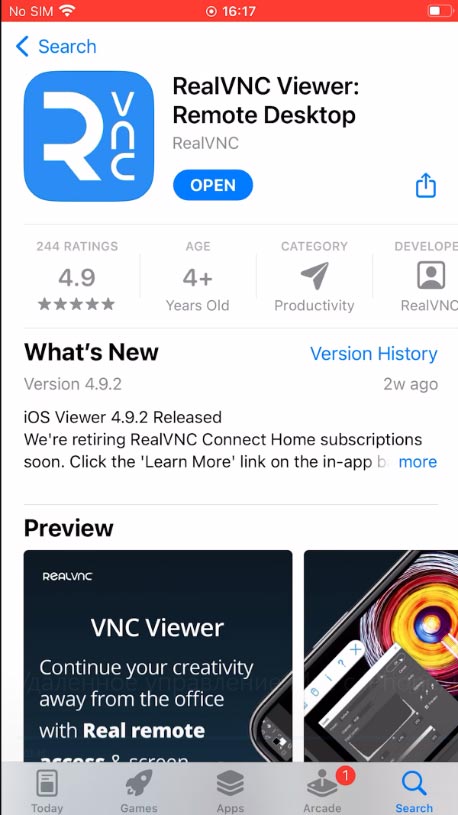
To manage your Mac, from example from an iPhone, visit Appstore and install this app – RealVNC Viewer: Remote Desktop or any similar app. When the installation is over, tap Open.
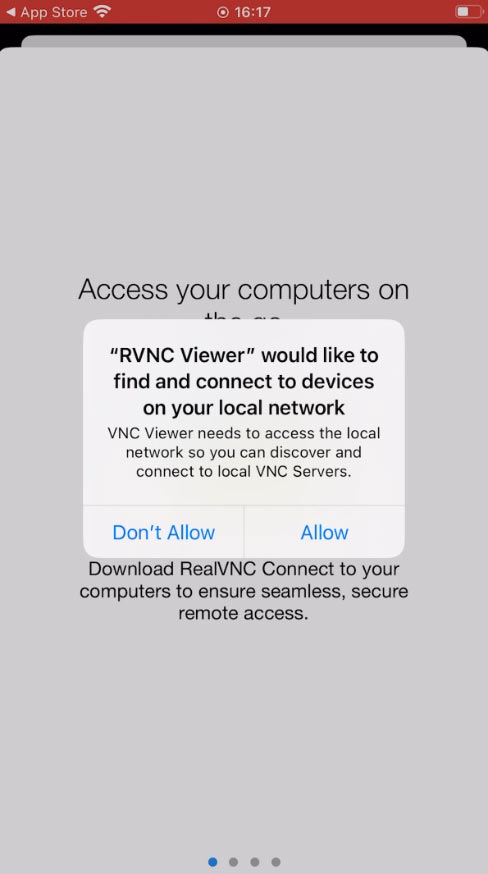
Allow the app to find devices on the local network.
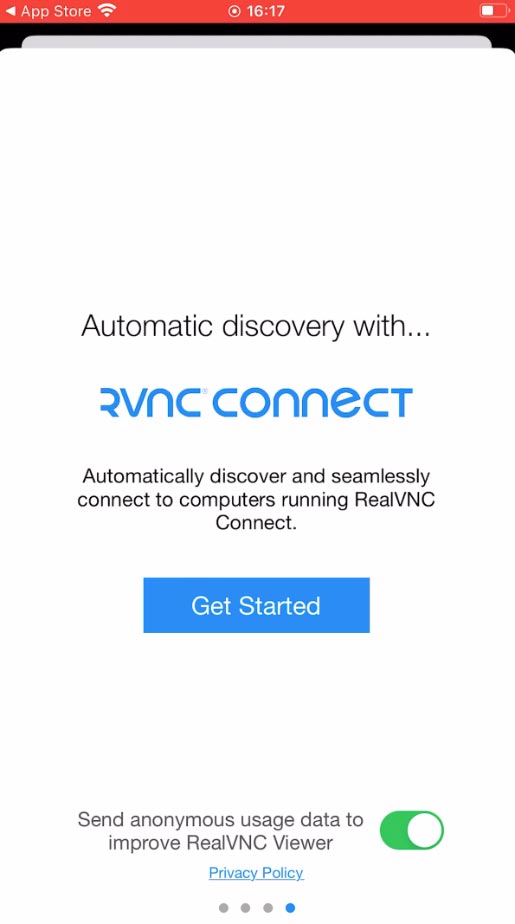
In the last window, tap Get Started.
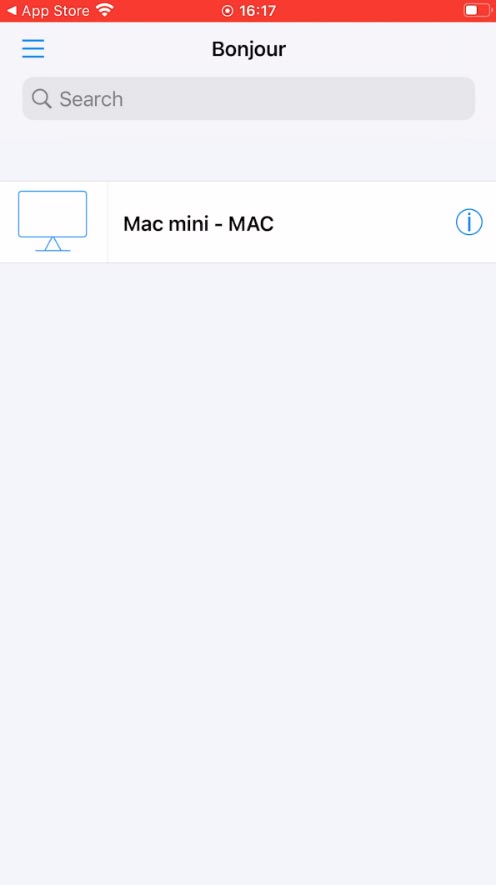
In the app window, open the Bonjour tab. You will see the list of Apple devices connected to the local network.
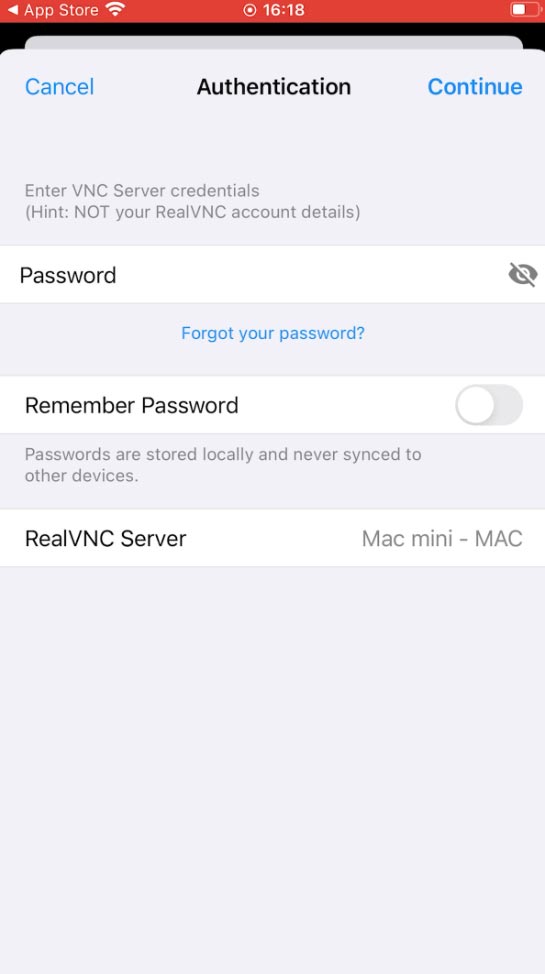
Tap on the device, then choose Connect and enter the password for the user account that is granted remote access, or the password to your Mac user account.
The logon screen will appear on your iPhone. Enter the login and the password for your Mac account.
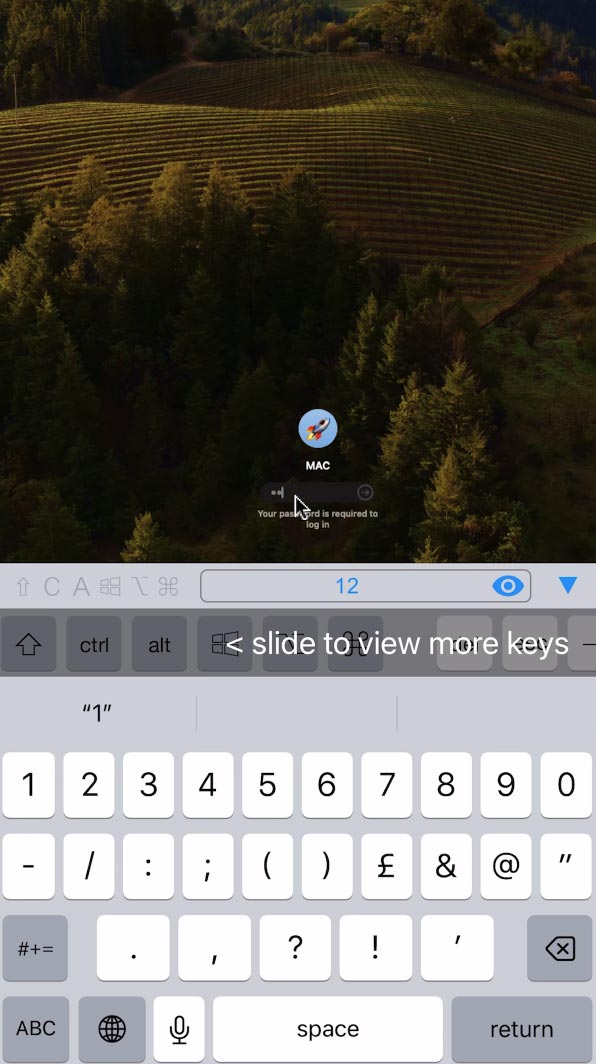
As a result, you will gain access to your Mac from this iPhone. You’ll be able to completely control this Apple computer, files and folders, settings and so on.
Method 4. TeamViewer
For remote access from another Mac or PC, you will need a different utility – for example, Team Viewer, Chrome Remote Desktop or Microsoft Remote Desktop.
For instance, TeamViewer lets you connect remotely to your Mac from virtually anywhere. To arrange a remote connection, download and install TeamViewer on both devices.
Then open the application on both computers. Find the ID and password for the Mac that you need to access.
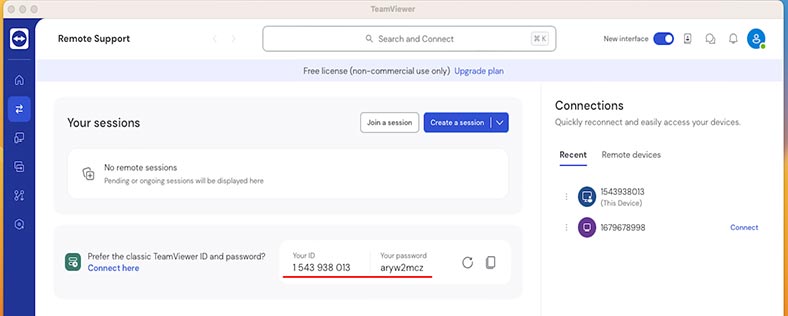
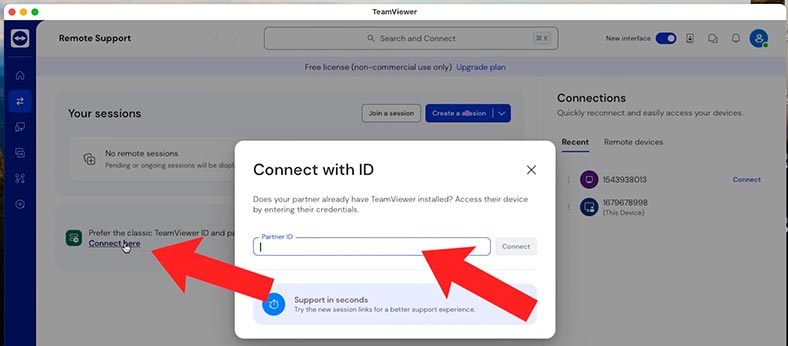
Enter this ID and password into the application window on the computer from which you’d like to connect.
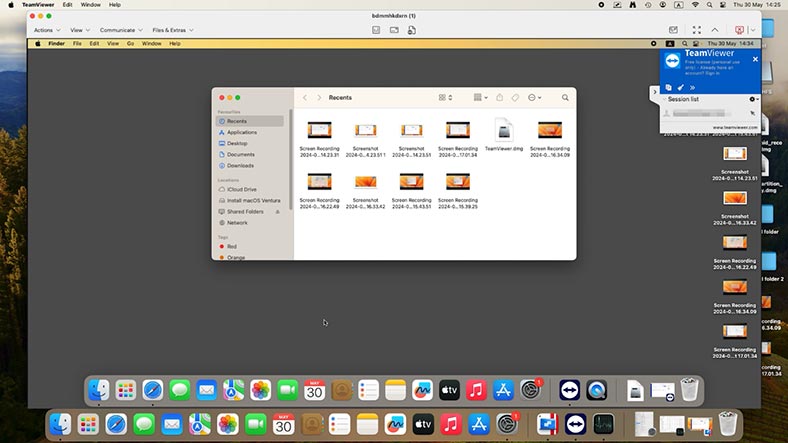
After that, you’ll gain access to the computer’s screen and will be able to manage it remotely.
Method 5. Chrome Remote Desktop
If you use Google Chrome, there is one more easy solution for you. For this method, all you need is a browser, which means that it’s a cross-platform app that works equally well on macOS and Windows. Using this browser, you’ll be able to access all contents of the remote computer.
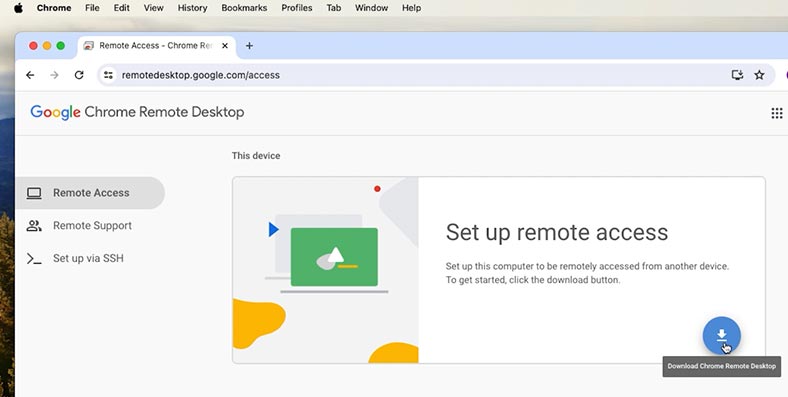
For starters, install the browser on both devices. While on Mac, open Chrome, and go to the Remote Access tab.
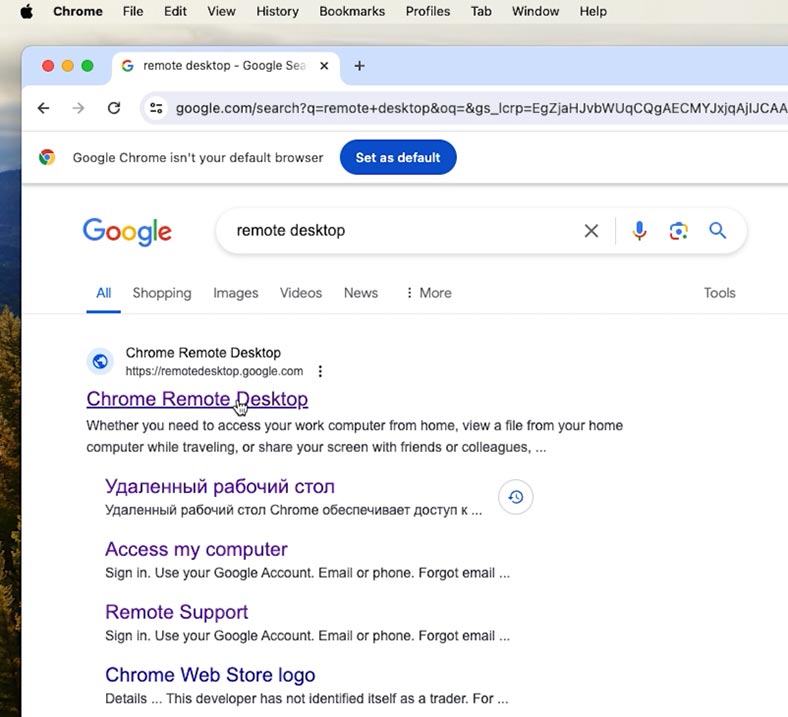
After that, click on the round blue arrow saying Download Chrome Remote Desktop. Just install the extension.
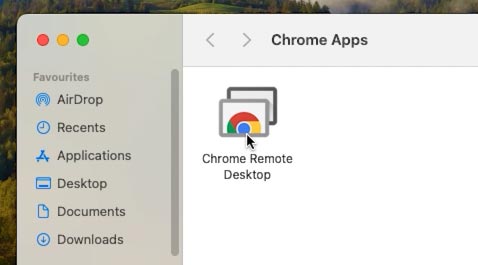
When the app is added, it will appear in the Launchpad.
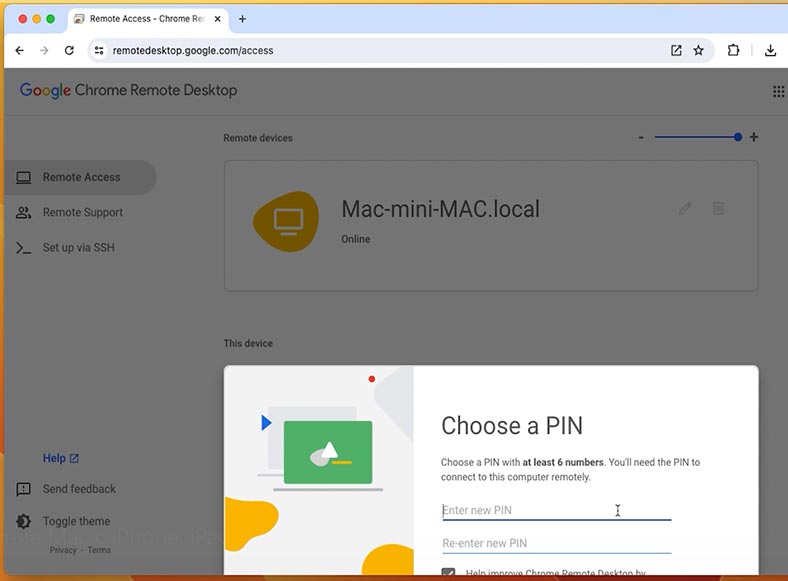
Start it and turn on Remote connection. Enable remote connection, give the device name, set the PIN.
Configure permissions in the system settings, and this list will display available devices that you can connect to.
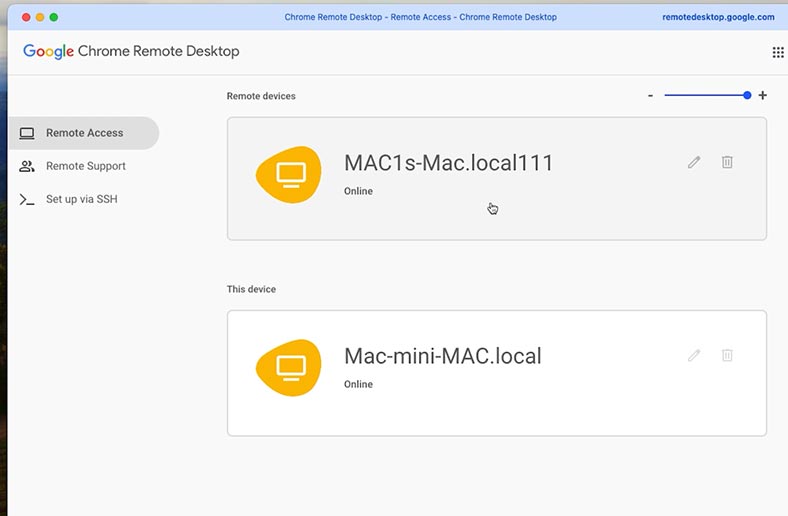
Choose the one you need, enter the PIN, and you will gain access to the screen of this Mac.
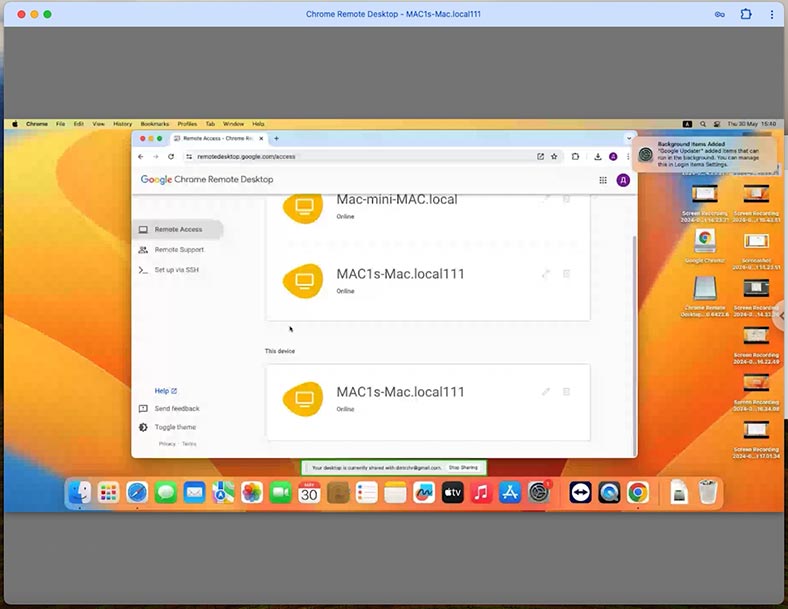
Now this computer will be available at any time as long as it is powered on and running. This is how you’ll be able to connect to your Mac from any other computer with a MacOS, Windows or Linux operating systems, as well as from an iPhone or an Android phone.
To connect from an iPhone open the browser – Remote Access. To connect from an iPhone open the browser – Remote Access – choose the device you’d like to connect to, and type the PIN.
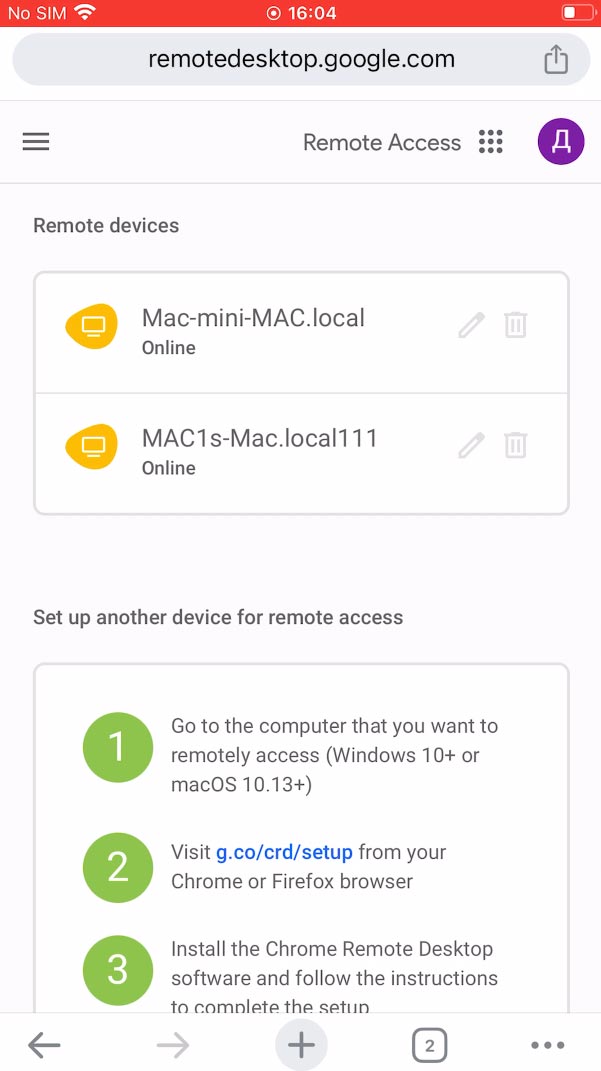
As you can see, now you can control your Mac from iPhone. Which means you can run apps and open files, browse folders, change system settings and so on.
Popular tools to access MacOS remotely
| № | Name | Platforms to connect to | Platforms to connect from |
|---|---|---|---|
| 1. | Screen Sharing | macOS | macOS |
| 2. | Chrome Remote Desktop | Windows, macOS, Linux | Windows, macOS, Linux, Android, iOS |
| 3. | TeamViewer | Windows, macOS | Windows, macOS |
| 4. | Real VNC | Windows, macOS, Linux, Raspberry Pi | Windows, macOS, Linux, Raspberry Pi, Chrome, Android, iOS |
| 5. | Microsoft Remote Desktop for Mac | Windows, macOS | Windows, macOS, Android и iOS |
| 6. | AnyDesk | Windows, macOS, Linux, Raspberry Pi, Android | Windows, macOS, Linux, Android, iOS, Chrome |
| 7. | GetScreen | Windows, macOS, Linux | Windows, macOS, Linux, Android |
| 8. | Devolutions Remote Desktop Manager | Windows, macOS | Windows, macOS |
| 9. | NoMachine | Windows, macOS, Linux | Windows, macOS, Linux, iOS |
| 10. | LogMeIn | Windows, macOS | Windows, macOS, iOS |
Conclusion
Summing up, now you know a few ways to gain remote access to a Mac screen from your iPhone or another computer. Depending on the situation, you can choose any of them as long as it’s comfortable for you.
However, never forget about security: set reliable passwords and use two-factor authentication to protect your data and prevent unauthorized access to your Mac.


