Upgrade to Windows 11: Compatible & Unsupported Devices!
Want to upgrade from Windows 10 to Windows 11? Whether you’re on a compatible device or an unsupported computer, we’ve got you covered! Our comprehensive guide will walk you through step-by-step instructions and expert tips to successfully transition to Windows 11. Say hello to the latest features and enhancements hassle-free!
- Method 1. Your device is compatible with Windows 11
- Method 2. Your computer doesn’t meet the system requirements for Windows 11
- Conclusion
- Questions and answers
- Comments
While trying to update to the latest version of Windows, many users had to face a compatibility error saying “This PC doesn’t currently meet all the system requirements for Windows 11”. This means that such computer doesn’t satisfy the requirements necessary to complete the upgrade and support the new features, as listed in Windows 11 hardware specifications.
| Component | Minimum Requirements for Windows 11 |
|---|---|
| Processor | 1 GHz or faster with 2 or more cores on a compatible 64-bit processor or System on a Chip (SoC). |
| RAM | 4 GB or more. |
| Storage | 64 GB or larger storage device. |
| System Firmware | UEFI with Secure Boot support. |
| TPM (Trusted Platform Module) | TPM version 2.0. |
| Graphics Card | Compatible with DirectX 12 or later with WDDM 2.0 driver. |
| Display | Greater than 9-inch with HD (720p) resolution. |
| Internet Connection | Required for Windows 11 Home setup and some features. |
As the Microsoft official website says, “If you see the warning that your device is incompatible with Windows 11 system requirements, the operating system cannot be upgraded”. If you are sure that your PC meets all the requirements, use the PC Health Check app to determine if your device is eligible to upgrade to Windows 11. Your device must be running Windows 10, version 2004 or later, to upgrade. Free updates are available through Windows Update in “Settings”. – “Update and Security”.
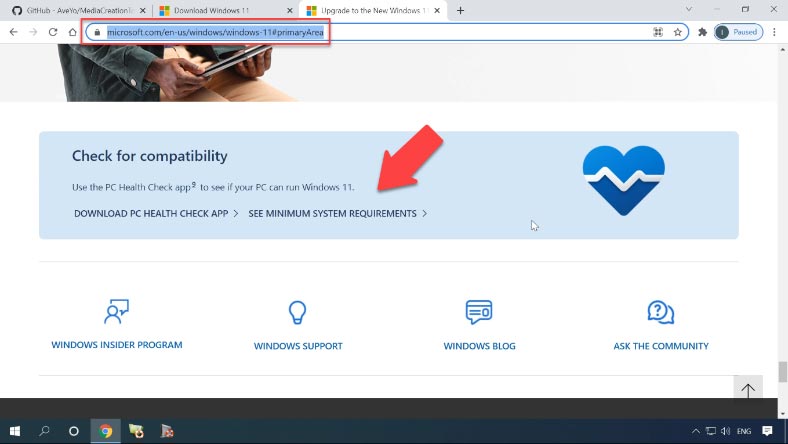
To find out if your computer is compatible with Windows 11, use the official Microsoft utility – PC Health Check. You can download the latest version of this program from the official website.
-
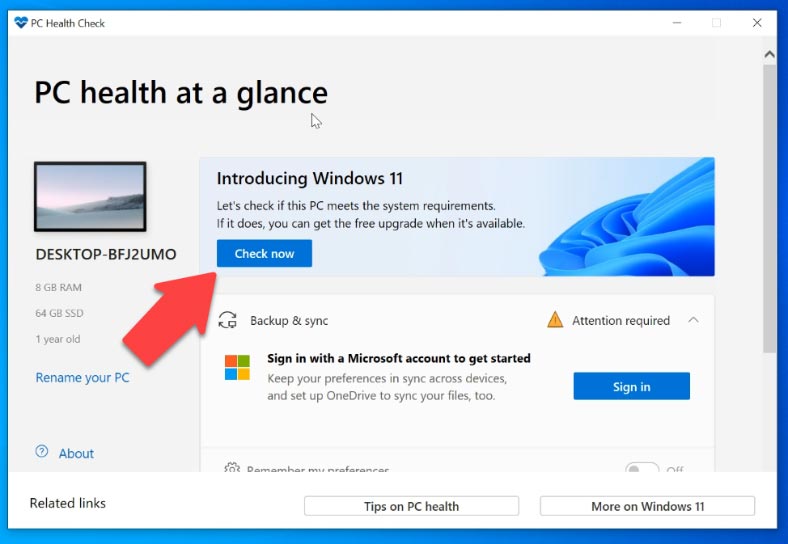
Run PC Health Check. After installation, the utility window opens to give you a brief overview of your computer’s condition.
-
You’ll be offered to check your PC for compatibility with the system requirements. Click “Check now”.
-
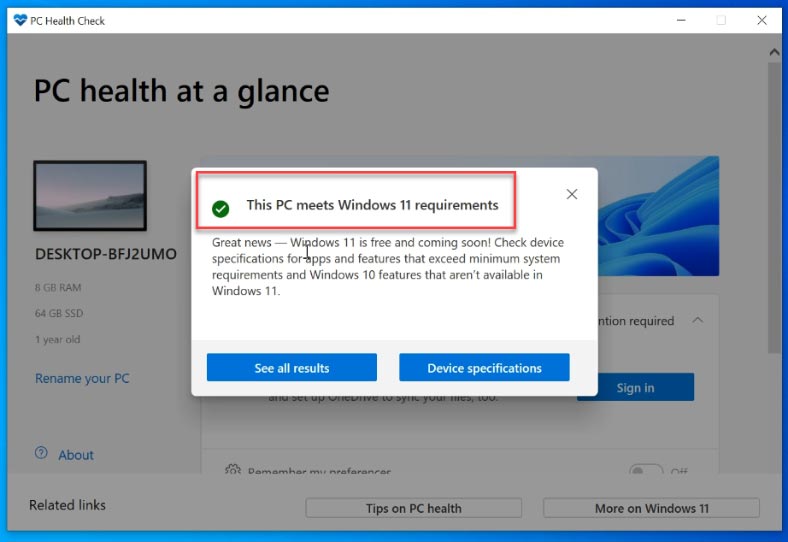
In a few seconds, you will see that your computer is fully compatible with Windows 11.
-
Another possible result is that your computer doesn’t currently meet the system requirements for the upgrade.
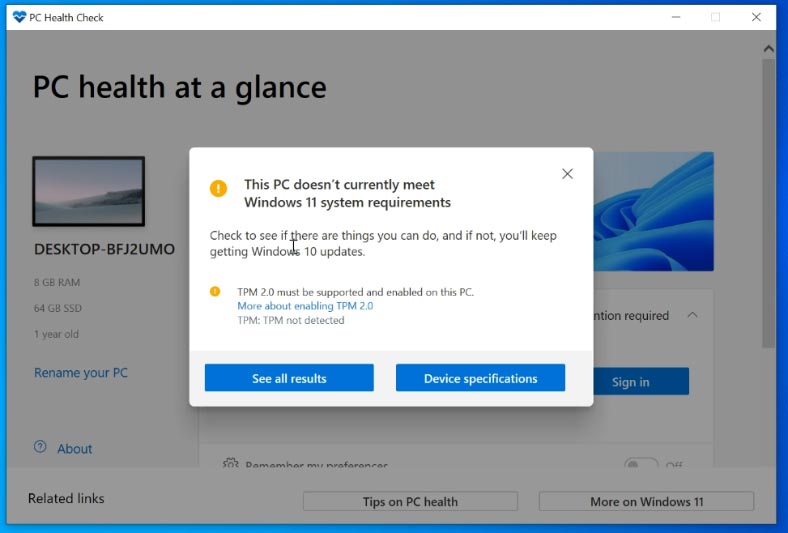
That is why I’m going to show you two ways of upgrading Windows 10 to Windows 11 – for compatible and incompatible devices.
Method 1. Your device is compatible with Windows 11
If your device is compatible with Windows 11, do the following to upgrade:
Go to the special page in Microsoft’s official website and download Windows11 Installation Assistant. It will help us complete the upgrade.
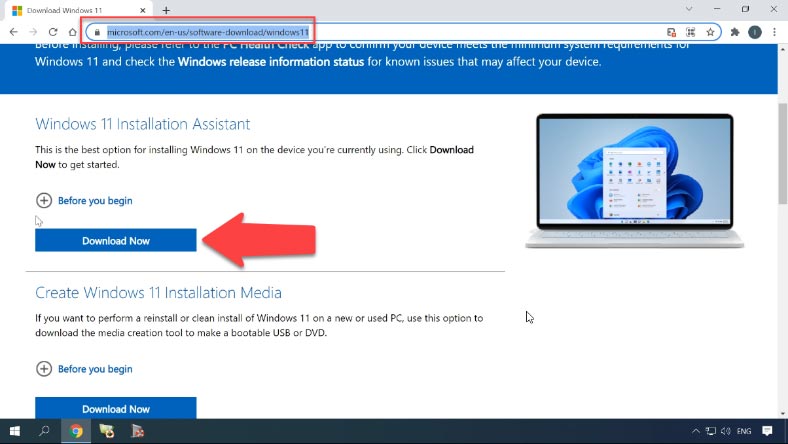
-
Install the program and launch it. Accept the License Agreement. After that, the Windows 11 download will start. To accommodate the files for Windows 11, your computer should have at least 9 GB of free space.
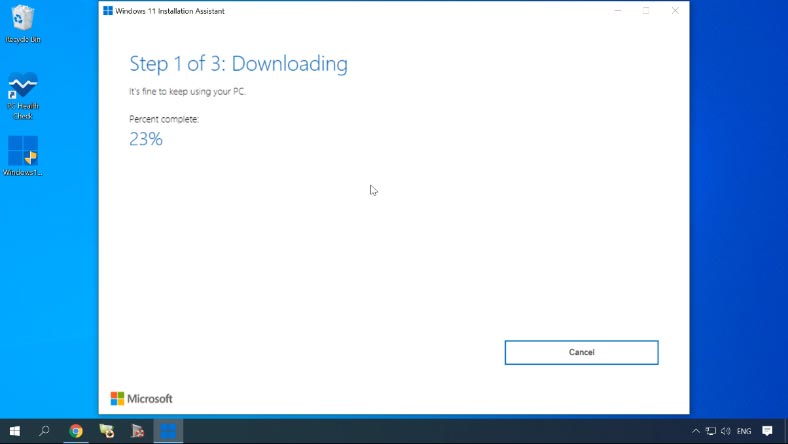
The required files will be downloaded, prepared and installed automatically. When step 3 is complete, you’ll be suggested to reboot your computer so that the installation can be continued.
-
For some time, the screen will remain black while your computer is working on the updates, and it may have to restart several times.
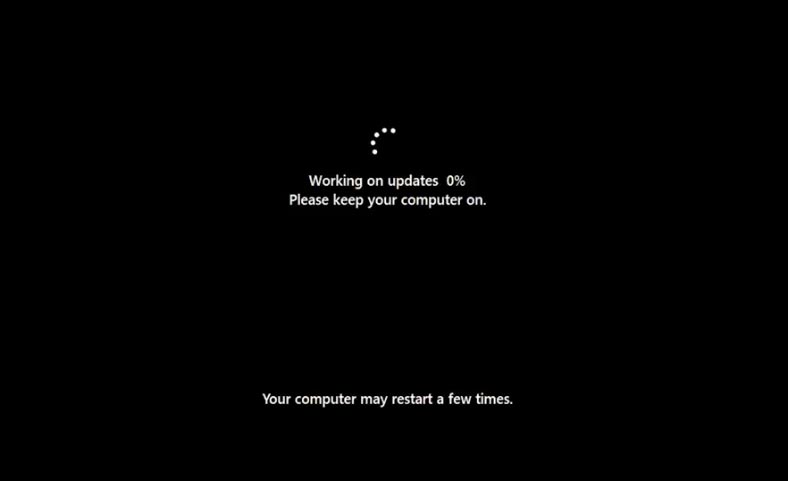
-
After the final restart, you’ll see the sign-in screen, and when you log on, the operating system will get ready to start for the first time.
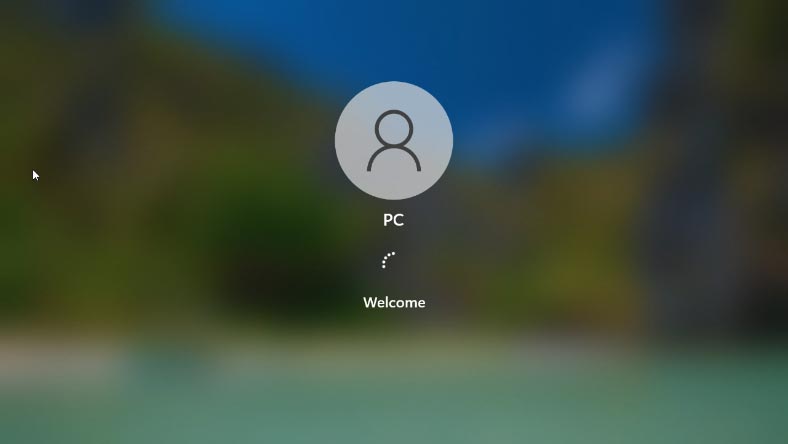
-
When all updates are installed, you’ll see Windows 11 desktop.
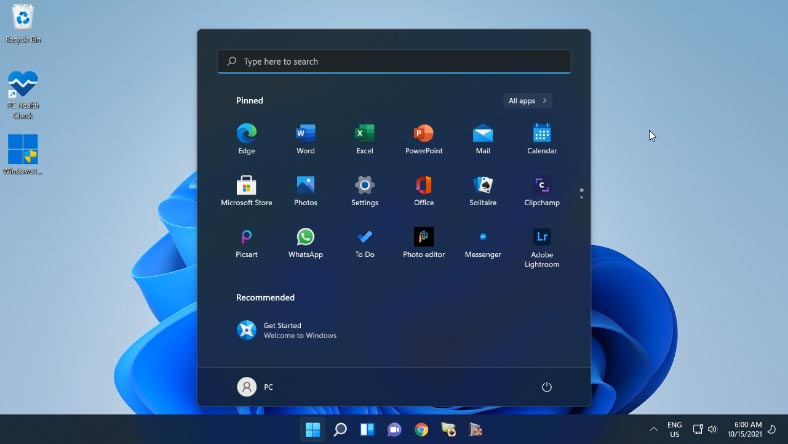
Method 2. Your computer doesn’t meet the system requirements for Windows 11
Now it’s time for the second method you may use when your computer doesn’t meet the requirements for upgrade.
There are many ways to do it, and some may work on your specific computer, and some may not, so it all depends on many factors. Our team has selected two options that worked fine on all computers used for the testing, and seemed the easiest and safest to use.
With the help of Windows 11 Installation Assistant
Although the first option is not an official one, it still lets you upgrade to Windows 11 even if your computer is not compatible, as long as you use the officially provided tool, Windows 11 Installation Assistant.
Go to the special page in Microsoft’s official website and download Windows11 Installation Assistant.
Run Windows 11 Installation Assistant in compatibility mode for Windows 7. Right-click on the Installation Assistant file, Select “Properties” — “Compatibility”. Check the box for the option “Run this program in compatibility mode for” and select Windows 7 from the list of available operating systems. Click Apply/OK.
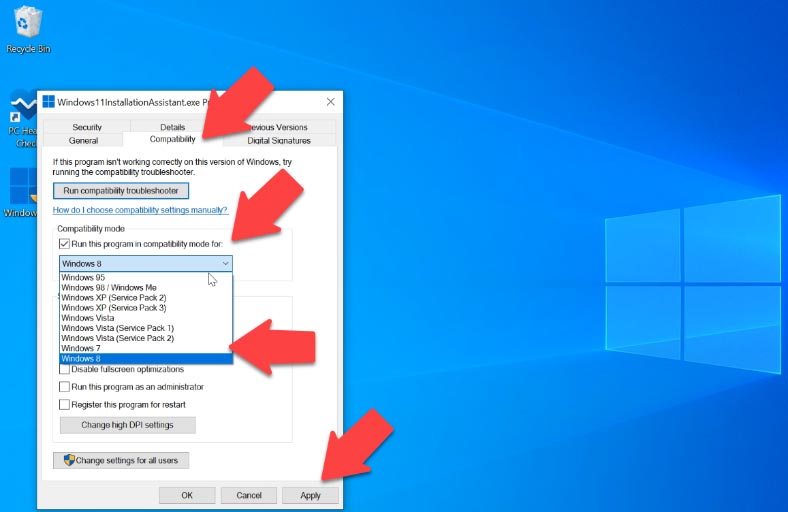
After that, Windows 11 Installation Assistant will run without checking hardware compatibility of your computer. However, it doesn’t mean that you’re safe from any issues or additional checkups at some later time. The most amusing thing here is that we’re actually using an official Microsoft tool. With all that, we should remember that the company has declined all responsibility for any problems that users may encounter while trying to install Windows 11 on incompatible computers.
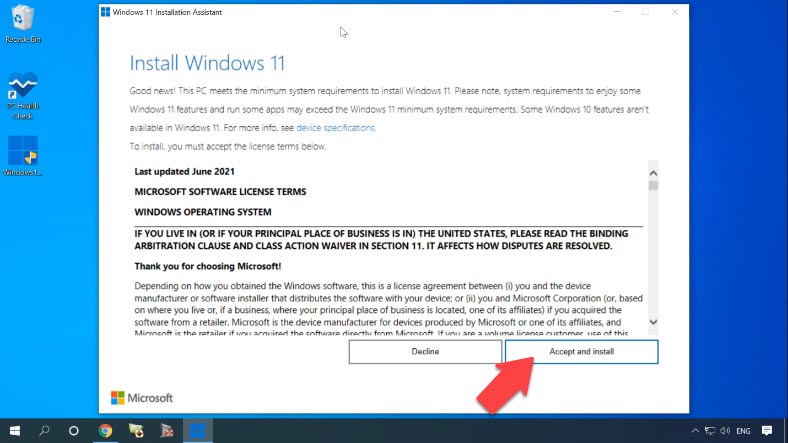
With the help of Universal Media Creation Tool
For the second option, you’ll need a third-party software tool, which makes it absolutely unofficial. You are going to perform all these actions on your own responsibility. Nevertheless, it worked fine on all the computers involved in this test.
To upgrade your operating system in this way, you need to download Universal Media Creation Tool. With this utility, you’ll be able to upgrade to Windows 11 without checking the computer for compatibility. To get Universal Media Creation Tool, visit the corresponding page on GitHub. Click “Code” and choose “Download ZIP”.
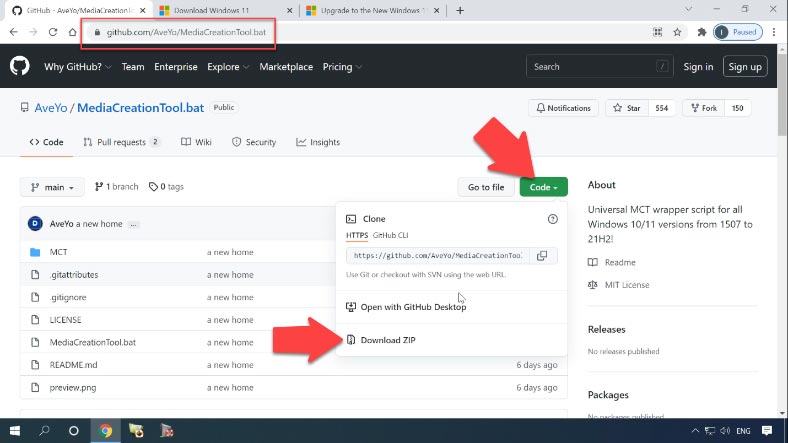
Extract the archive to any folder and run the file “MediaCreationTool.bat” As a result, you may see the system warning from SmartScreen. If it happened, click “More info” and then “Run anyway”.
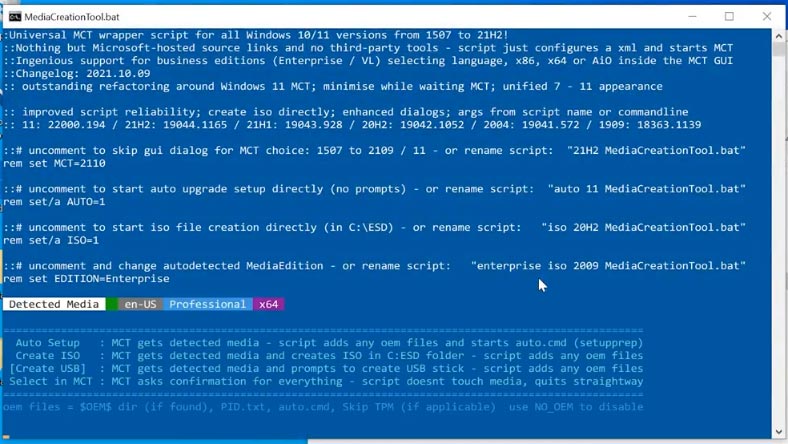
The PowerShell window appears, with a list of Windows 10 versions which can also be downloaded by using Universal Media Creation Tool.
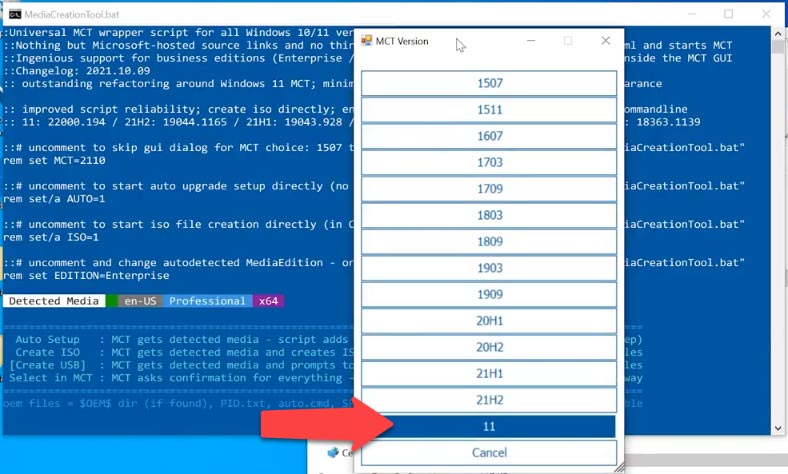
In the MCT Version window, choose item 11 which stands for Windows 11.
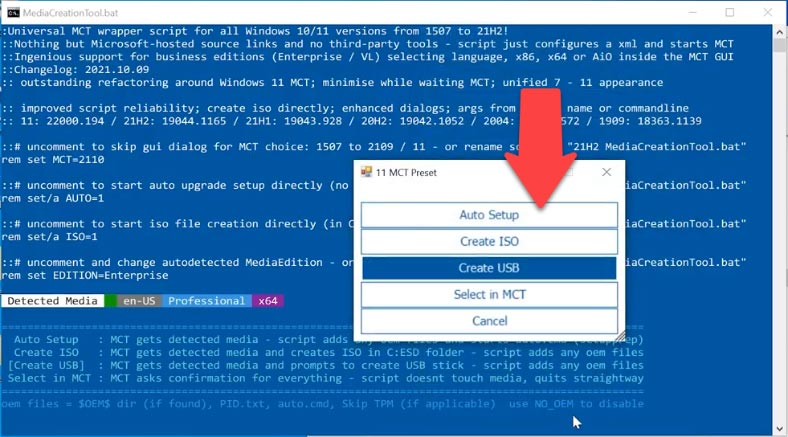
Another menu with a list of actions appears.
To perform an automatic upgrade to Windows 11, choose the line “Auto Setup”. It will start MediaCreationTool and begin upgrading your operating system to Windows 11.
All these steps are performed automatically. When working on them, the computer will restart several times. When the updates are complete, you’ll get a freshly installed Windows 11.
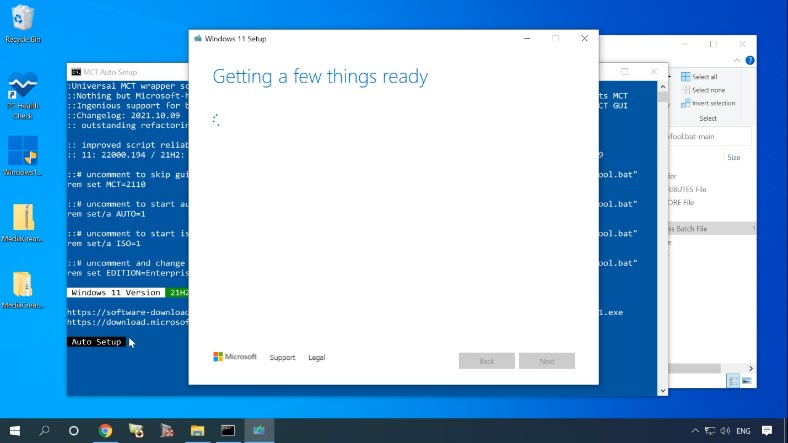
This is the method for upgrading to Windows 11 automatically with Universal Media Creation Tool. What is more, in the folder containing this tool you can also find a file that can disable checking your computer for compatibility with Windows 11. It removes another file with the name “appraiserres.dll” and creates a registry branch that allows to install Windows 11 without TPM 2.0.
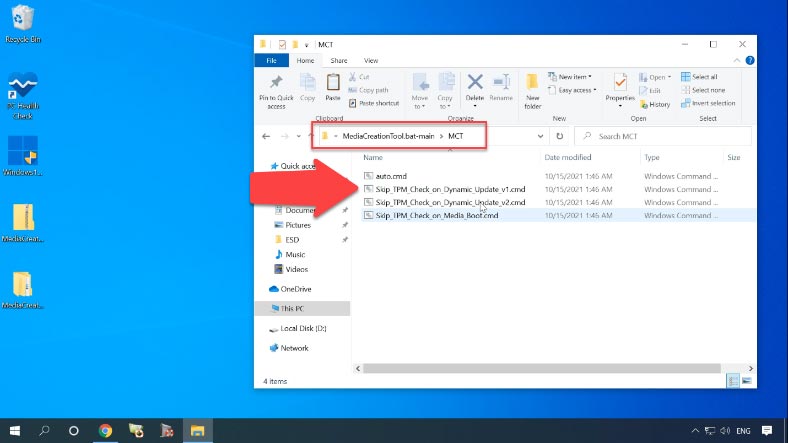
Open the folder “MCT” and select a file with the name “Skip_TPM_Check_on_Dynamic_Update_v1.cmd”. Right-click on it and choose “Run as Administrator”. After that, start Windows 11 Installation Assistant. It will upgrade the operating system, and do it without checking your computer for compatibility.
Conclusion
If you lost some files as a result of installing, reinstalling, updating or resetting Windows, you can bring them back with Hetman Partition Recovery.
| Step | Description |
|---|---|
| Download and Installation | Download and install Hetman Partition Recovery on your computer after reinstalling the operating system. |
| Disk Scanning | Run the program, select the disk where the files were lost, and perform a deep scan. |
| Analyzing Results | The program will show all found files. Review the scan results and find the necessary files. |
| File Recovery | Select the files you need to recover and save them to another storage device or disk to prevent further loss. |
| Completion | Ensure that all important files are successfully recovered and available for use. |

🖥️ How to Upgrade Windows 10 to Windows 11 On a Compatible or Not Supported Computer 💻




Uninstall antivirus - if any antivirus is installed on your computer, uninstall it completely, preferably using the official utility of the antivirus provider (you can find it by searching Uninstall Utility + antivirus name, see How to remove antivirus from your computer).
Avast, ESET and Symantec antivirus products have been observed to cause the error, but it can also occur with other similar programs.
After uninstalling the antivirus, be sure to restart your computer. Attention: The same effect can be produced by computer and registry cleaning utilities that work in automatic mode, remove them too.
Disconnect all external storage devices and all unnecessary USB devices (including card readers, printers, gamepads, USB hubs, etc.).
Make a clean Windows boot and try upgrading in this mode. Read more: Windows 10 Clean Boot (The instructions are also suitable for Windows 7 and 8 clean boot).
Check if you have enough free space on the system partition of your hard drive (the C drive). Ideally, have 20 to 30 GB of free space.
See How to clear your C drive of junk files, How to expand your C drive at the expense of your D drive.
If the error appears in the Update Center, try updating to Windows 10 using the Windows 10 update tool on the Microsoft website (although it might give you the same error if the problem is related to drivers, drives, or programs on your computer).