Recover Data After Resetting Windows 11: Simple Steps!
Need to recover data after resetting Windows 11? Our comprehensive guide has got you covered! Learn step-by-step instructions and expert tips for successfully salvaging your data after resetting your Windows 11 system. Say goodbye to data loss worries and hello to recovered files!
- How to factory reset Windows 11
- Case 1. How to recover data after resetting went wrong
- Case 2. How to recover lost data after resetting with the option “Remove everything”
- Conclusion
- Questions and answers
- Comments
Sooner or later, when your computer starts encountering errors more and more often, its operating system may freeze or fail from time to time. Factory resetting your system looks like the best way to fix the problem once and for good: it’s quick and easy. In fact, reinstalling or resetting the computer’s operating system can fix many various bugs and glitches, but it also means that all computer settings will be restored to their default – or factory – values. What is worse, it can also remove important files and even all your data. Within a few minutes, you’ll learn how to reset a Windows 11 computer safely and without risking your precious personal files. And even if bad comes to worse, you’ll know how to recover data lost after an unsuccessful attempt at resetting or reinstalling an operating system or formatting a hard disk.

👉 How to Recover Data After Resetting Windows 11
How to factory reset Windows 11
Just as any other operating system, Windows 11 may sometimes have issues, especially if you’re using a test build, so you should definitely know how to fix them quickly.
The most general and quick solution to most problems you may encounter while using an operating system is to reset it. This action will restore factory settings, rebuild damaged system files and bring your computer back to normal.
Here’s how you reset a computer:
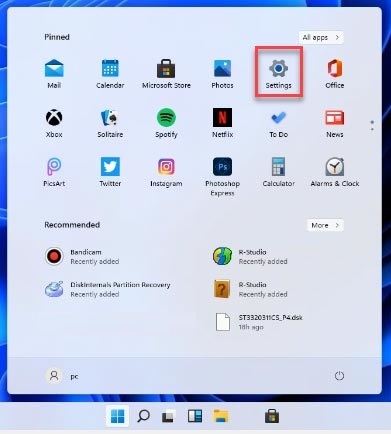
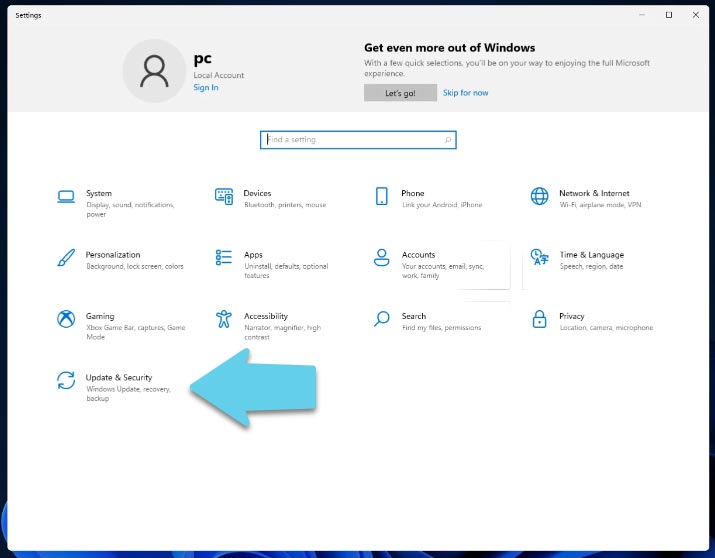
Click on the Start menu and open Settings, or press the key shortcut Win+I. Open the category “Update and Security”.
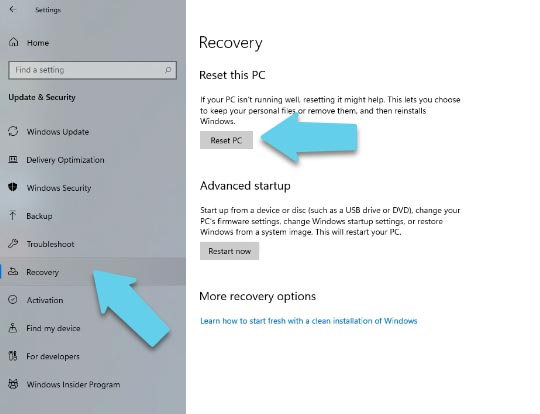
In the left panel, select “Recovery” and then look to the right to find “Reset this PC” – “Restart PC”.
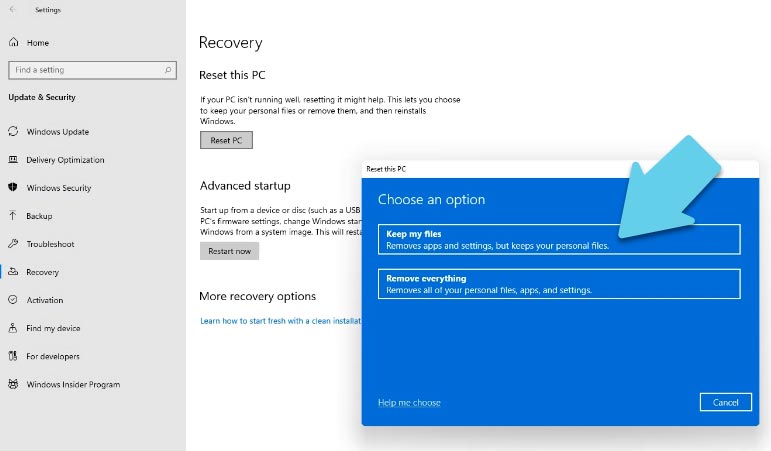
To save your files from removal, choose the option “Keep my files”. But if you want a really brand new start – hit “Remove everything”.
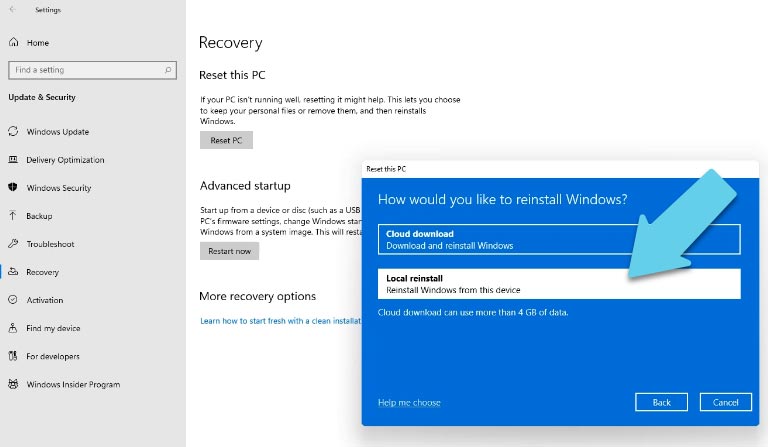
Now choose how the system should be reset – select “Local reinstall” and click “Next.”
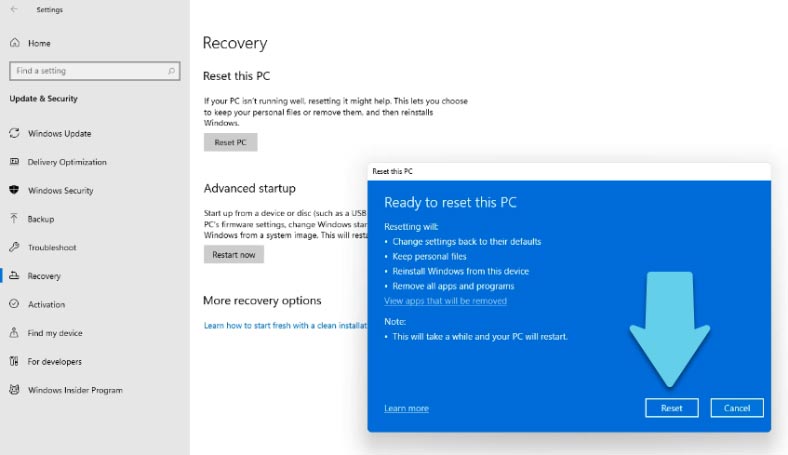
You will see a warning which says that your computer is ready for resetting, and explains the consequences of doing that. Click “Reset” to confirm your decision.
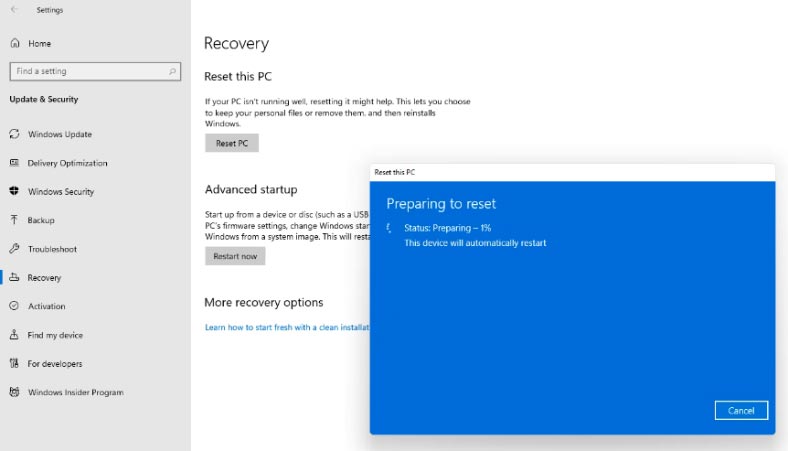
The resetting process will begin; the computer will restart several times, so just wait a little until everything is over.
Case 1. How to recover data after resetting went wrong
If you face a problem with damaged system files, BSOD, or the reset process was interrupted and the computer can’t boot anymore, use Hetman Partition Recovery – a specialized data recovery tool. When you choose to reset your computer and keep your files, they are not moved anywhere and the chances of their being damaged are very little, even if the resetting or reinstalling process was interrupted or halted because of an error: the files are still there, on your hard disk.
Here’s how you can recover them:
Connect the hard disk containing your files to a properly working Windows computer. Start the program and scan the disk.
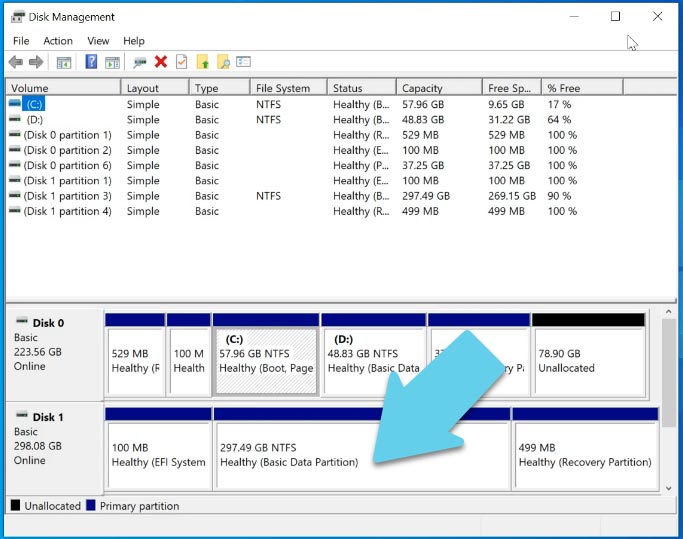
If your choice when resetting the computer was to keep personal files, you will find all your data on the hard disk, inside the same folders where you used to store them.
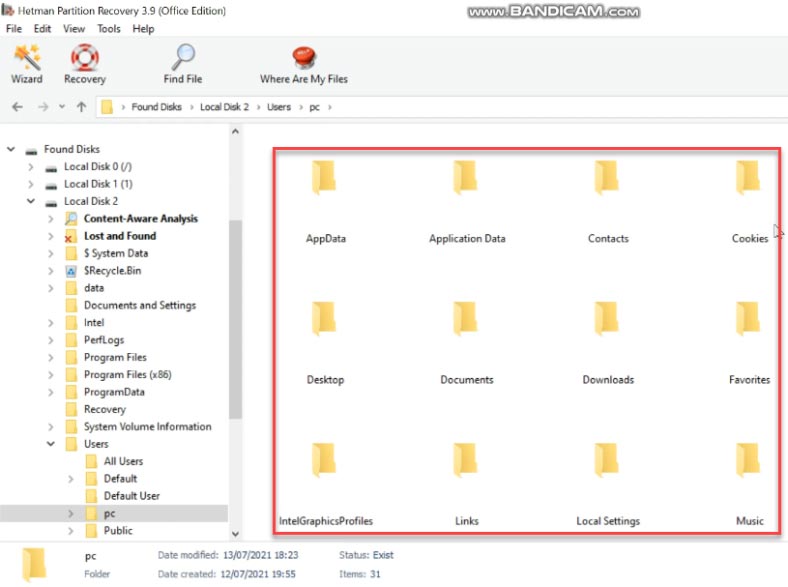
To have your files back, select the ones you need and click “Recovery,” choose where to save them and click “Recovery” again.
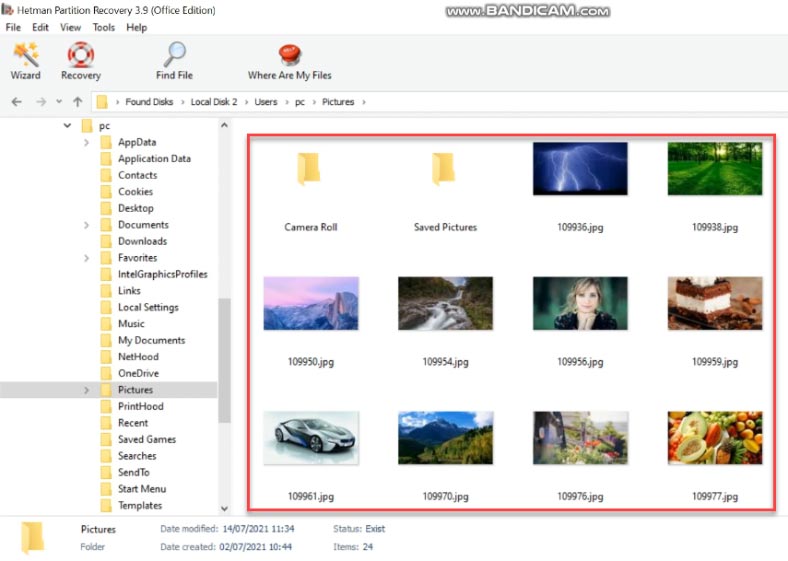
When the entire process is over, you will find the recovered files in the folder you have chosen.
Case 2. How to recover lost data after resetting with the option “Remove everything”
If you accidentally chose the wrong reset option and all your data was removed, don’t give up: even if the files are gone after resetting the computer, they can still be recovered. Provided you haven’t written too much stuff to this hard disk after the reset operation, the files may be still intact.
In fact, erasing a file takes much longer than most people tend to believe, and that is why file recovery operations become possible.
When you restart Windows during the reset operation, the system says files are removed from the hard disk; they are no longer displayed on the disk as the system marks that disk space as good for writing new data, but the deleted files are still available for recovery. You can bring them back with the help of specialized data recovery software.
On the other hand, if the old data has been overwritten, you have very little chance to recover it so easily. That’s why we recommend beginning data recovery as soon as possible after you’re finished with the reset operations. To make sure the file recovery is successful and your data is not going to be erased in the process, you’ve got to choose a reliable tool for the job.
Hetman Partition Recovery knows how to recover files after various scenarios such as factory reset, formatting, system errors, virus attacks and loss of partitions. With this tool, you’ll be able to recover large amounts of data in various formats: documents, images, videos, audio files and archives.
In addition to the high rate of successful recovery and speed of operation, this tool is also 100% safe and will never overwrite your data while trying to recover it. The program has a preview feature to make things easier when you want to find and recover specific files.
To start the recovery process, right-click on the drive and click “Open”.
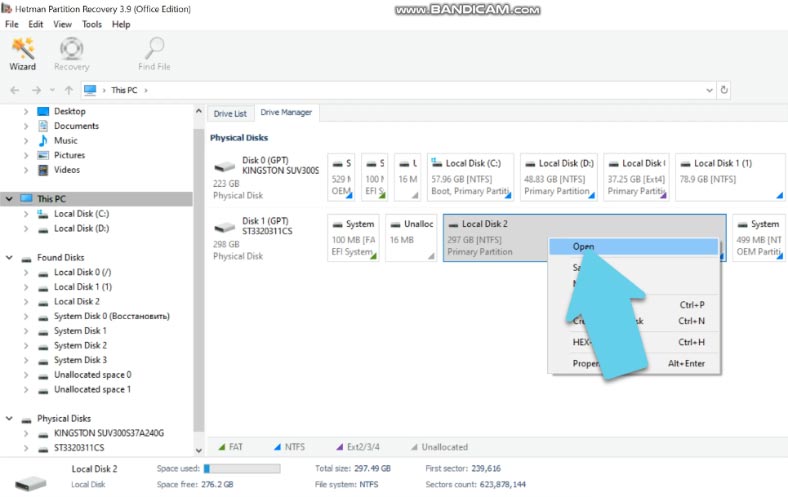
Select the scan type. After the Fast scan, the program displays the disk contents immediately, and deleted files are marked with a red cross.
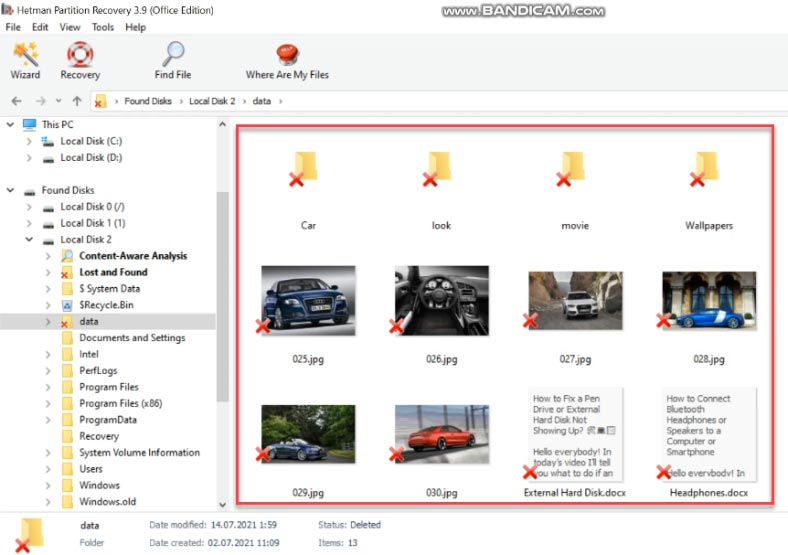
If you’re not happy with the Fast scan result, run Full analysis, which is longer but gives you the chance to find all the information remaining on the disk.
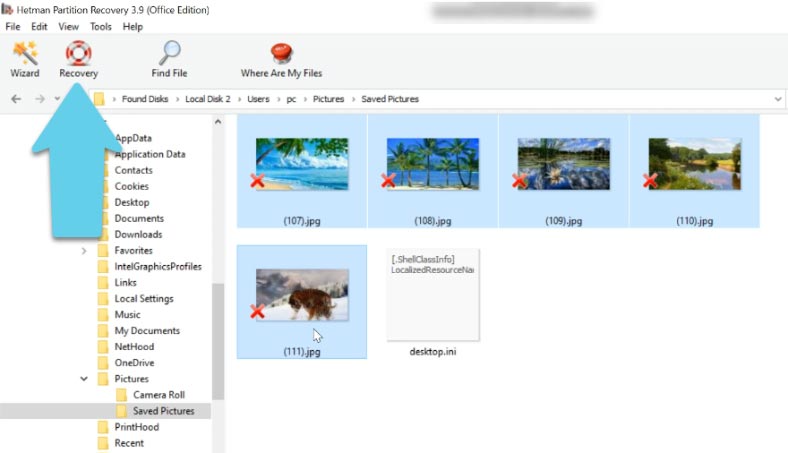
Select the files you want to recover, click “Recovery,” select where you want to save them, and click “Recovery” again.
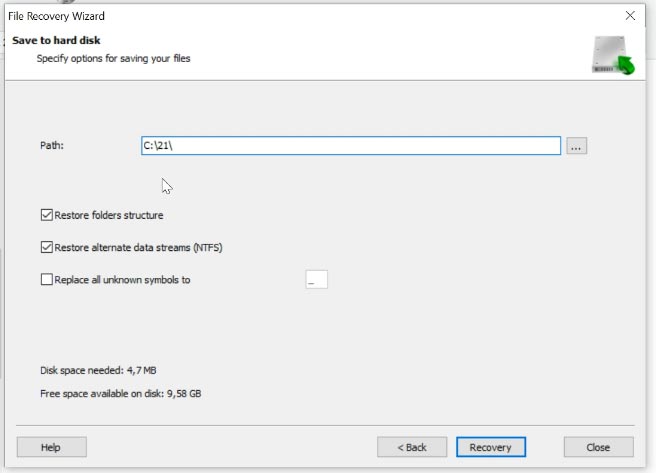
We don’t recommend saving the data to the same disk you are trying to recover it from as it can erase the files; if possible, save the information to another disk. When the recovery process is over, you will find the recovered files in the folder you have chosen.
Conclusion
We’d like to remind you, though, that the best method to prevent data loss is to back up all important information before system reset or any other action involving the risk of file removal.

☝️ How to Install or Upgrade to Windows 11 Without TPM and Secure Boot. Windows 11 Clean Install ☝️


Select Settings > System > Backup & Restore.
Connect the USB storage device containing the backup data to the PS4 console.
Select Restore PS4.
Select the backup file that you want to restore.
Select Yes to restore the data.