Fixing Windows 11 Installation Error: Step-by-Step Guide
Encountering installation errors while upgrading to Windows 11? Don’t worry! In this comprehensive guide, we’ll walk you through step-by-step solutions to fix Windows 11 installation errors. Whether you’re facing compatibility issues, driver conflicts, or system requirements errors, we’ve got you covered. From troubleshooting tactics to expert advice, we’ll help you overcome common installation hurdles and successfully install Windows 11 on your PC. Don’t let installation errors disrupt your upgrade process – read now and get your Windows 11 installation back on track!

☑️ Windows 11 Installation Errors and How to Fix Them
- Error 1. Lack of free disk space is a trivial problem
- Error 2. The error “Windows cannot be installed to this disk. The selected disk is of the GPT partition style.”
- Error 3. “Windows cannot install required files”
- Error 4. What if Windows 11 can’t find hard disks during the installation?
- Conclusion
- Questions and answers
- Comments
There are a multitude of things that may cause an error when installing Windows 11, but quite a lot of widespread issues can be fixed with a few simple steps.
| Error | Solution |
|---|---|
| Your computer doesn’t meet the requirements to install Windows 11 | Check if your computer supports TPM 2.0 and Secure Boot. Enable these settings in BIOS. If the computer doesn’t meet the minimum requirements, installation through the registry editor may be possible. |
| Insufficient disk space | Delete unnecessary files or programs, empty the Recycle Bin. At least 64 GB of free space is required for installation. You can use an external drive or flash drive for temporary file storage. |
| Error: “Can’t install Windows on this disk, selected disk has a GPT partition style” | Disable Legacy Boot mode and switch to UEFI. If the disk uses MBR, convert it to GPT using “diskpart” or during installation through the command prompt. |
| “Windows cannot install the necessary files” | Check the installation media for corrupted files. You may need to re-download the Windows ISO file. Check the USB drive or DVD for physical damage. |
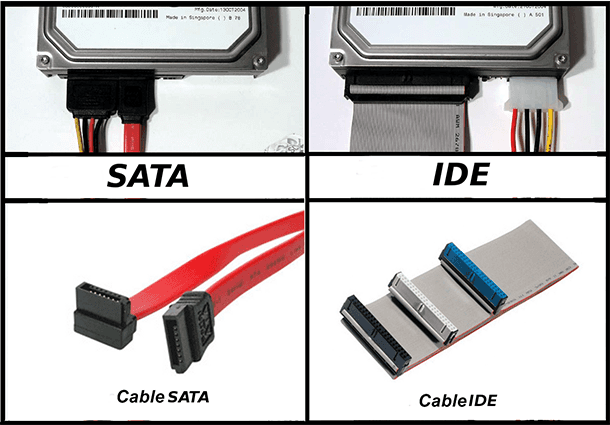
| Windows can’t find the disk during installation | Check the connection of the disk to the computer. You may need to download SATA or NVMe controller drivers from the official website of the hard drive or motherboard manufacturer. |
First of all, you need to make sure that your computer meets Windows 11 installation requirements, since the error related to compatibility with Windows 11 installation requirements (This PC can’t run Windows 11) is the one people encounter most often.
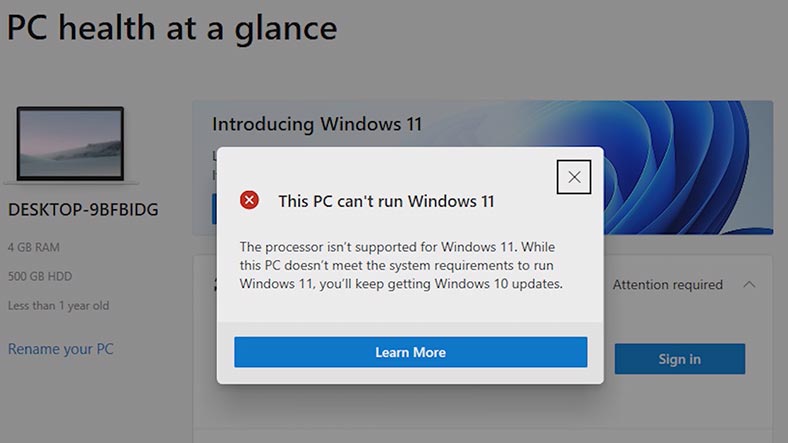
The official requirements for this operating system include 8th generation Intel CPUs or newer, 4 GB of RAM, 64 GB of disk space, TPM 2.0, UEFI and Secure Boot.
To install Windows 11, you need 64 GB of disk space or more. However, to download updates and use certain features you may need some extra storage space.
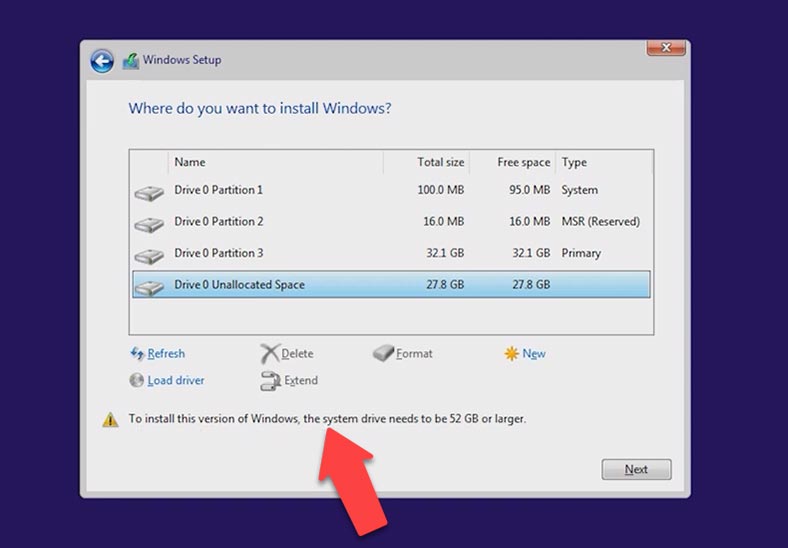
Error 1. Lack of free disk space is a trivial problem
Windows 11 needs at least 64 GB or more, so if you try to install the operating system on a partition smaller than that, you’re going to get an error. All right, you started installation of the operating system after choosing a disk for such installation, and you got an error: “We couldn’t create a new partition or locate an existing one when trying to install Windows”.
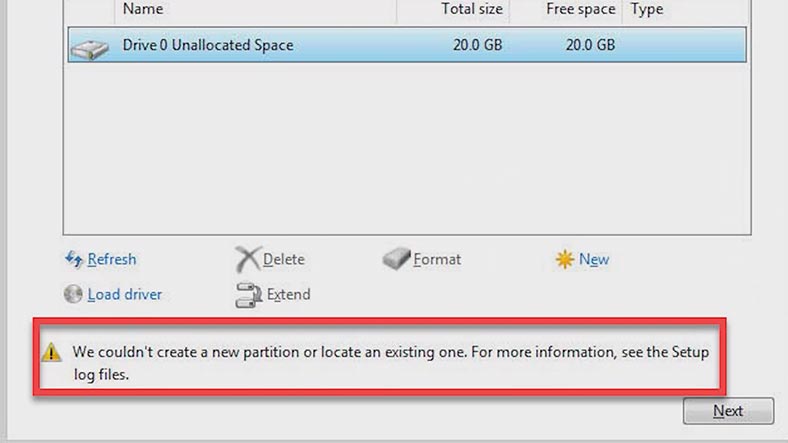
The reason why a new partition can’t be created is the existing partition structure on your hard disk or SSD, and this is the problem that prevents the installer from creating the required system partitions. It occurs when you used to have another operating system installed on that partition before. It marks available partitions as System, Primary and MSR (Microsoft Reserved Partition).
To fix this error, remove all devices from USB ports and repeat your attempt. Also, try removing the installation USB disk when you see this error, then plug it back, and click Refresh.
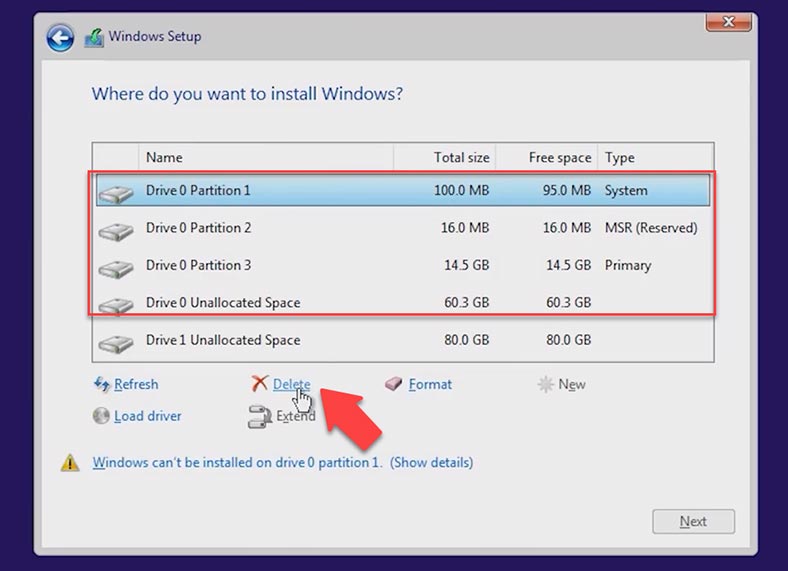
If it doesn’t help, take the following steps, but remember that this method will erase all data on the disk. Click on any partition of the hard disk and click Delete, but it’s even better to remove all partitions from Disk 0. After that, you’ll see a warning that this partition might contain important files or applications. Click OK. Then click on the unallocated space and click Next. It starts the Windows installation process.
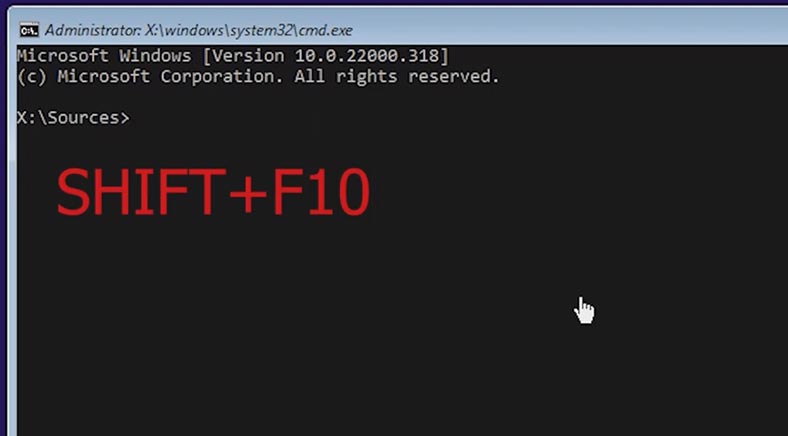
Also, another variant is when the operating system is installed on a disk which was previously used to store data. This means you’ll need to shrink the volume and free up some space to create a system partition. In this case, press the key shortcut Shfit + F10 in the installation menu to run the command prompt.
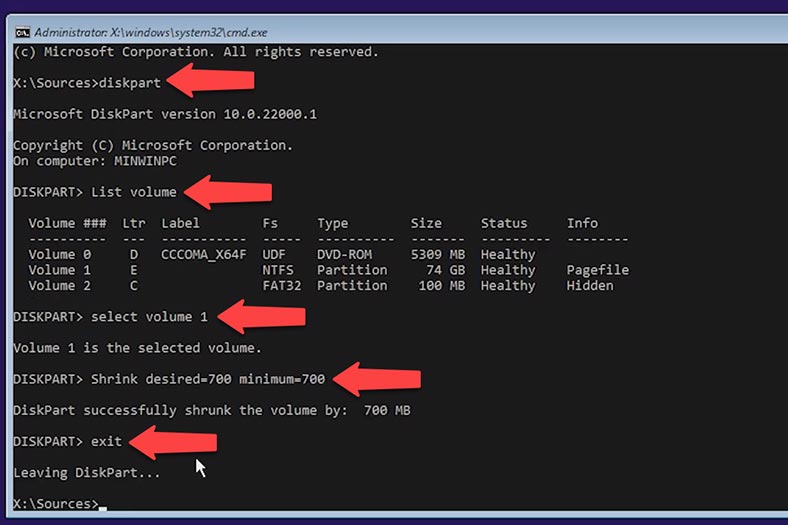
In the command prompt, type the command Diskpart and press Enter. Type the command List Volume, then Select volume and specify that volume. After that, type another command – Shrink desired=700 minumun=700, and exit the command prompt by typing Exit.
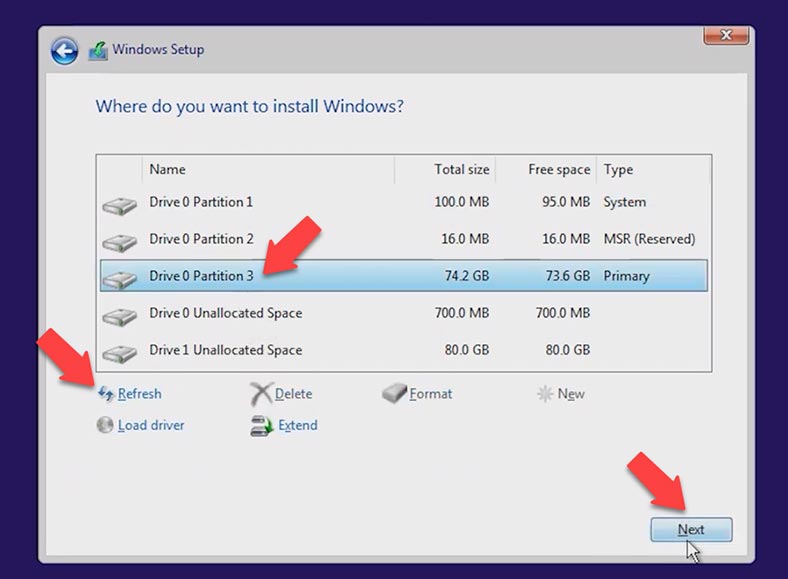
Now click Refresh in the Windows Setup window and click Next. The installation of the operating system will continue, and the system partition will be created in the free space.
Error 2. The error “Windows cannot be installed to this disk. The selected disk is of the GPT partition style.”
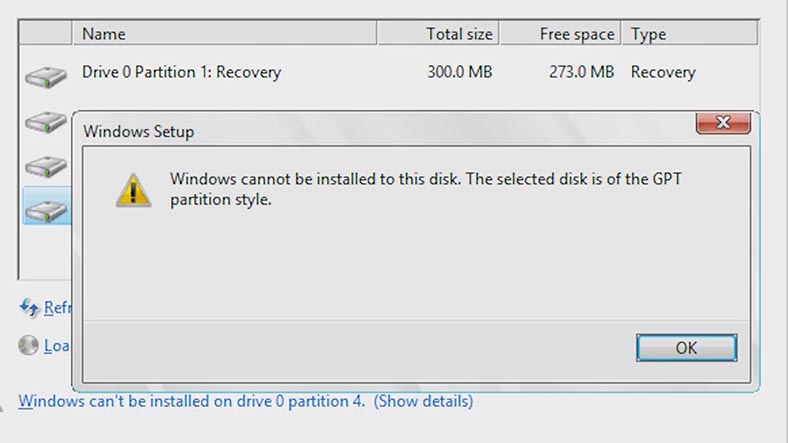
In most cases, this error is caused by hardware incompatibility. One of the requirements for installation of Windows 11 is that your PC should boot in UEFI mode. All previous versions of the operating system didn’t have such a requirement.
MBR partition style is an older one that has certain limitations (no more than 4 main partitions, and the maximum disk size is only 2 TB) and it’s only good for situations when you want to retain compatibility with older 32-bit operating systems.
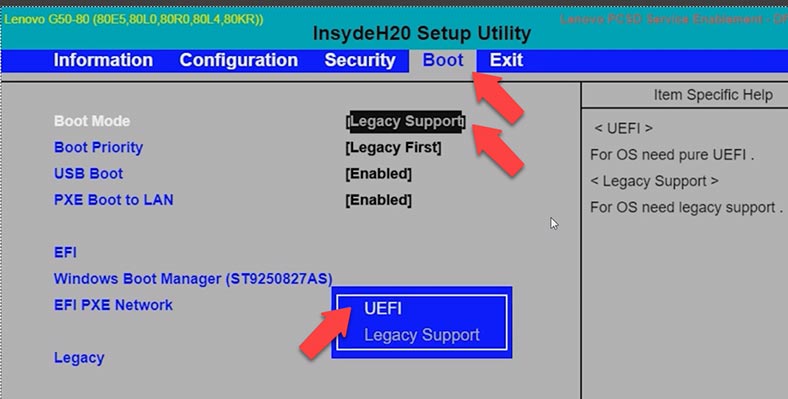
GPT is the new partition style that removes the abovesaid limitations. To fix this error, you need to change the Legacy mode to UEFI.
Shut down the computer, and when powering it on again, press the F2 or Delete key to access BIOS. However, the keys to access BIOS and specific BIOS menu items may differ depending on the manufacturer of your PC. Jump to the Boot tab, choose Boot mode and press Enter, change the value from Legacy Support to UEFI, then press F10 to save the changes and exit BIOS.
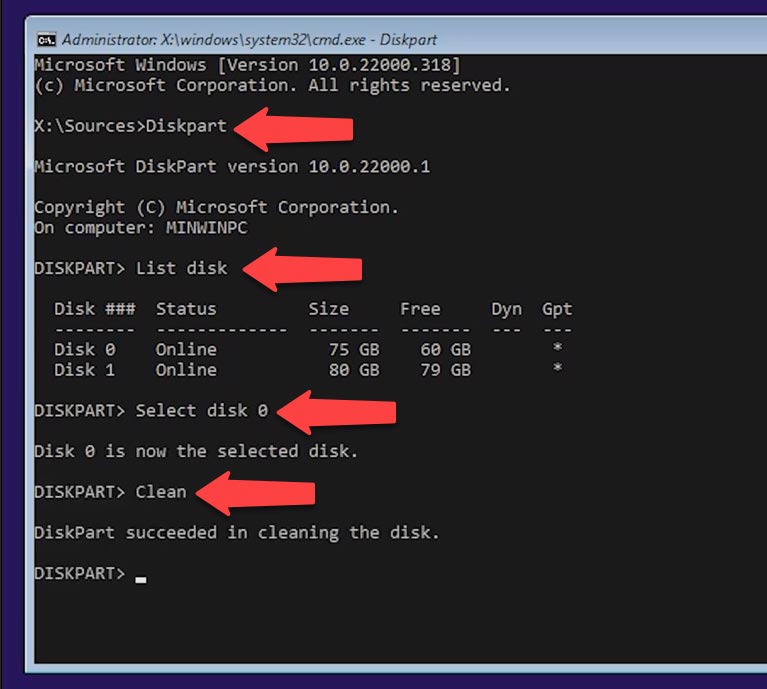
The change from Legacy to UEFI may require you to change hard disk partition style from MBR to GPT. In this case, you’ll need to make some changes at the installation stage. Press the key shortcut Shift + F10, then type Diskpart in the command prompt and press Enter, then type List Disk. Specify the disk you need – run the command Select disk with the number of that disk. After that, type the command clean to erase everything from the disk.
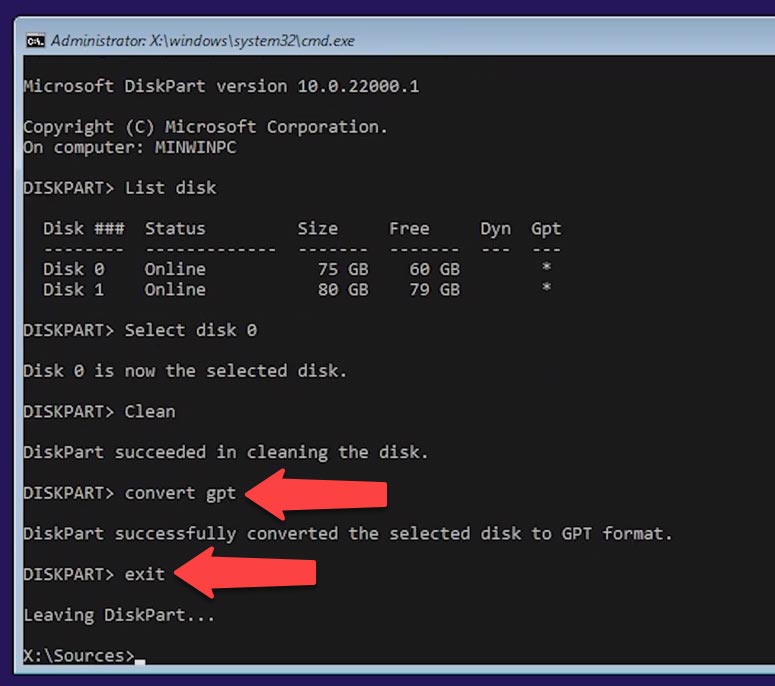
Now convert the disk with the command Convert GPT, and then type Exit. At this stage, you can continue with the installation of the operating system.
Error 3. “Windows cannot install required files”
Sometimes, your computer displays an error with the code 0x8007025D. To fix it, disconnect all unnecessary storage devices such as memory sticks or external drives, and make sure that the disk you want to use for installation of the operating system has enough free space. If the disk lacks free space, the installer will warn you about it.
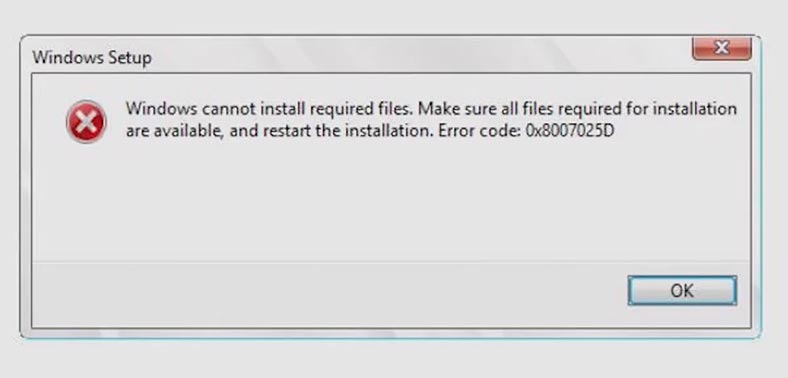
To fix the problem, you have to format the partition – or even better, remove all partitions, and it will erase all the data. After that, you can just continue with the installation. After these actions, the installation should go properly.
Sometimes, this error can be caused by the image of the operating system. That is why we strongly recommend downloading such images from the Microsoft official website only. Also, you can try recording the image to another pen drive. If this error occurs when you use an installation pen drive, you can try using a USB 2.0 port instead of USB 3.0 port, or vice versa.
Error 4. What if Windows 11 can’t find hard disks during the installation?
Most of the time, it occurs when you use the latest generation of Intel CPUs. To fix it, you need to install Intel Rapid Storage Technology driver, and we’ll do it during the installation of Windows 11.
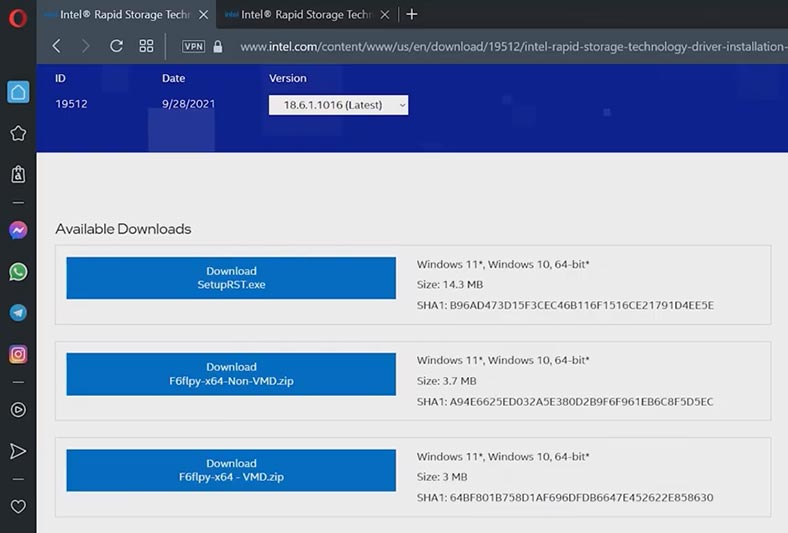
Download the driver for your model from the official website:
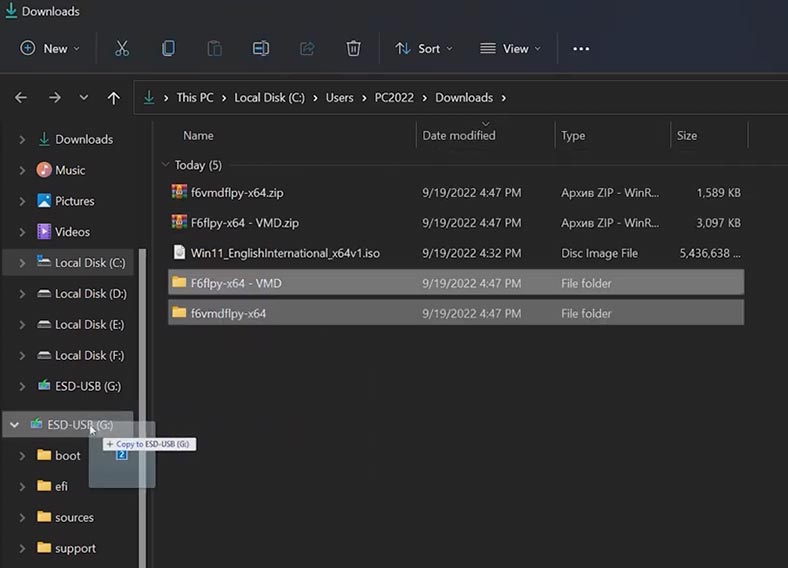
After the drivers are downloaded, extract them to the pen drive used for installation.
Right-click on the file, choose Extract All, click Extract, then copy the folders to the installation pen drive.
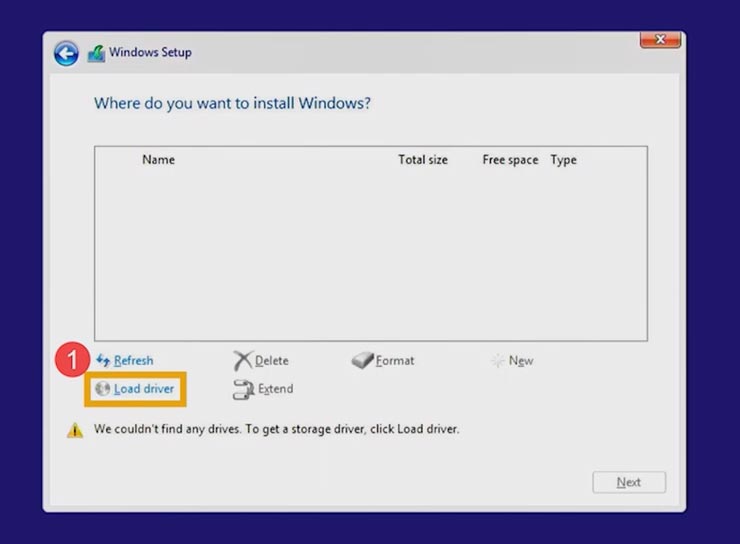
In the Windows Setup menu – at the stage where you need to choose where to install the operating system – click on the option to load the driver and click ОК.
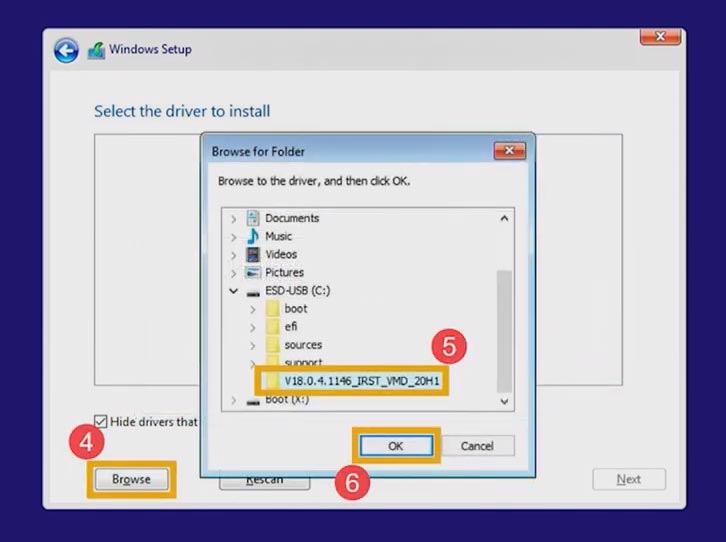
Choose Browse, find the folder on this pen drive, select Intel RST VMD and click ОК; when the driver is installed, the disks will be displayed correctly.
If this method couldn’t fix the problem, you can disable Intel Volume Management Device. However, you need to remember that turning off the VMD feature prevents your computer from being able to use any RAID systems. To turn VMD off, enter BIOS. Most of the time, you need to press the F2 key to access BIOS when you start to boot your computer; when you access BIOS, press F7 or click on the Advanced Mode tab. In the Advanced menu, select VMD Setup menu, and set the option Enable VMD controller to Disabled.
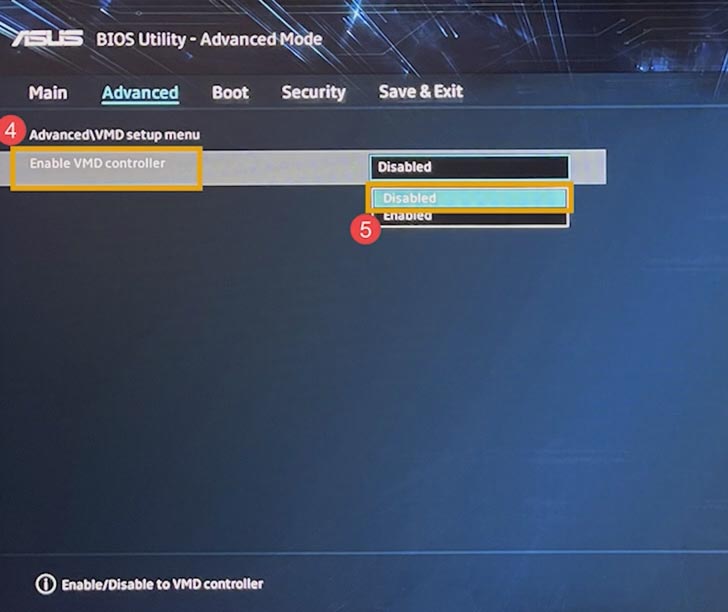
After that, save the configuration and exit the settings by pressing the F10 key and choosing OK. This will make the computer restart. Now you can continue with the installation.
Conclusion
These are the most widespread errors people encounter when installing Windows 11. In theory, there may be other errors related to specific equipment or conditions of a particular computer. If you know any of them, be sure to leave a comment describing it.


