Overcoming VM Data Loss: Recovering Data of a Virtual Machine with Qnap QTS 5.1 on VMWare Hypervisor
Discover how to recover data of a virtual machine with Qnap QTS 5.1 on VMWare Hypervisor in this comprehensive guide. Whether you’re facing data loss due to VM failure or seeking proactive measures, this tutorial provides expert insights and practical solutions. From diagnosing issues to implementing recovery strategies, we’ll equip you with the knowledge and tools necessary to retrieve your valuable data and mitigate downtime effectively. Don’t let VM data loss hinder your operations!
- Getting ready to create a virtual machine with Qnap QTS
- How to create a virtual machine with Qnap on VMWare
- How to install Qnap QTS 5.0 on a PC
- How to create a RAID on Qnap TS-1685
- How to recover data from RAID on QNAP
- Conclusion
- Questions and answers
- Comments
Creating a virtual machine with Qnap QTS can be very useful if you want to create your own data storage or use the functionality of a Qnap network storage in your own local environment without buying any additional hardware. In this article I’ll show you how to create a Qnap virtual machine in VMware, and how to set it up as a local server. You’ll see how to prepare for creating a virtual machine, how to configure its settings, how to install QTS, and how to check if it works properly. We’ll be using Qnap TS-1685 model and one of the latest firmware versions, 5.1.0.2348.

How to Recover Data of a Virtual Machine with Qnap QTS 5.1 on VMWare Hypervisor
Getting ready to create a virtual machine with Qnap QTS
Before you can install a virtual machine with Qnap QTS, you should make some preparations. Here are a few important steps you need to take:
- Make sure that your computer complies with the minimal requirements to run virtual machines. Usually it means having enough system memory and hard disk space, and a capable CPU on top.
- First of all, download and install a VMware or Porxmox hypervisor. After that, download a Qnap bootloader image. When these steps are complete, you are ready to create a virtual machine with Qnap QTS.
How to create a virtual machine with Qnap on VMWare
To create a virtual machine, download the archive containing a virtual disk image of the Qnap operating system – I’ll leave the link in the description.
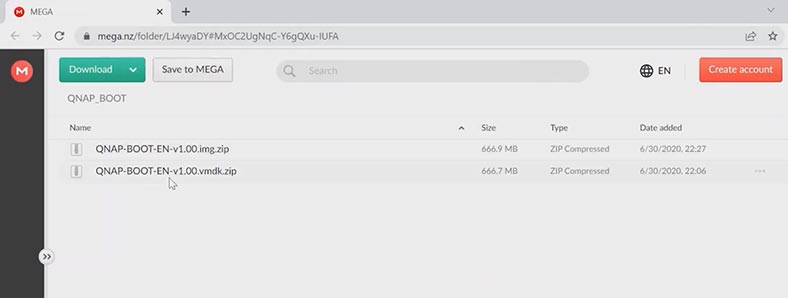
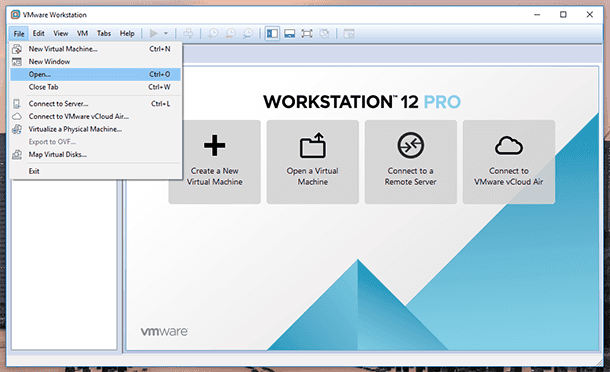
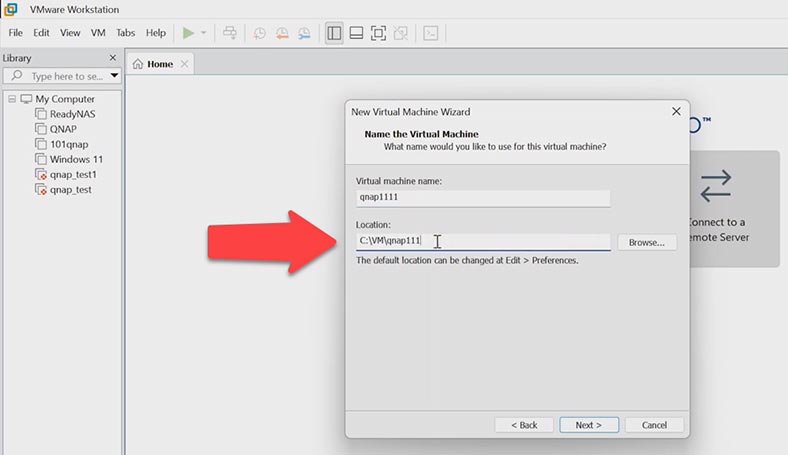
Extract the image to any convenient directory. Create a folder for the future virtual machine and copy the downloaded .vmdk file there. After that, start VMWare and click “Create a New Virtual Machine.” Leave every setting as it is, and choose a 64-bit Linux as an operating system. Assign a name and location, add the path to the folder containing the .vmdk file.
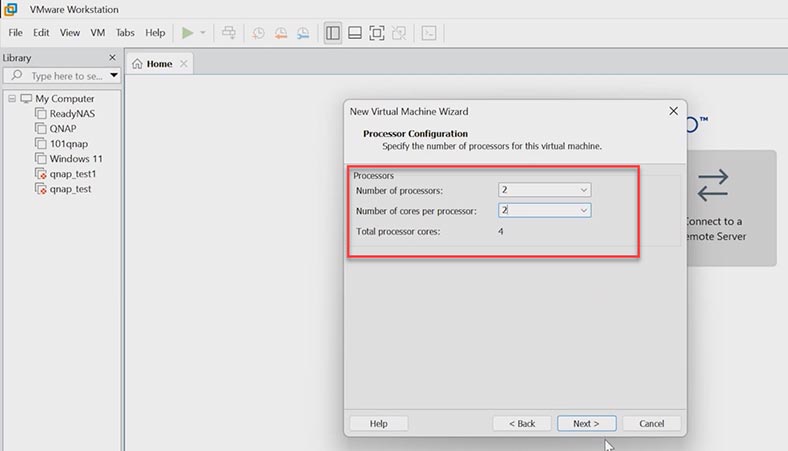
Let’s add a few more cores, and give this machine at least 6 GB of RAM.
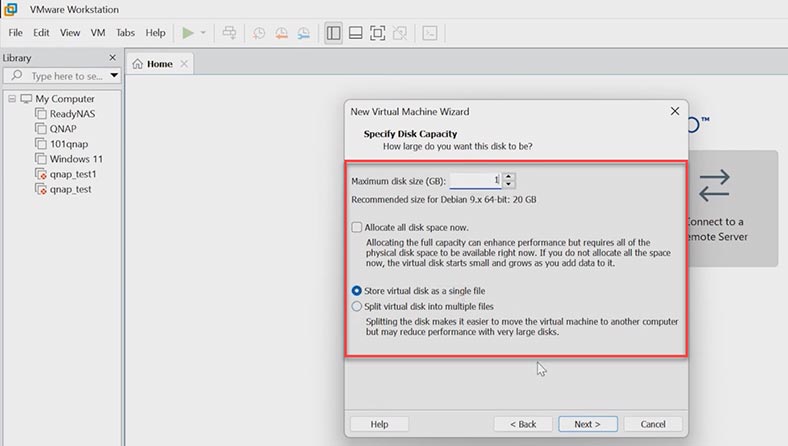
All other settings should remain unchanged. In the end, this disk will be removed, so you can leave its settings as they are. Now that the virtual machine is created, you need to make some changes to its settings.
Open the virtual machine settings, and remove the hard disk and the DVD drive.
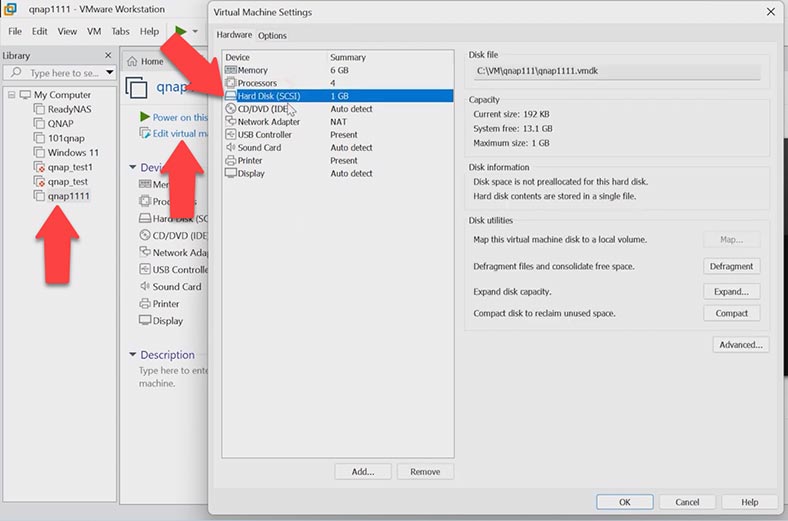
In the network settings, change the NAT connection to Bridged.
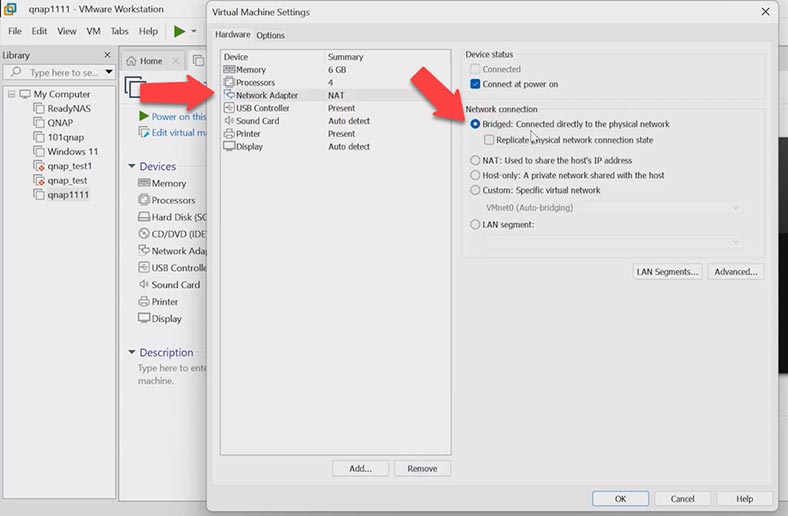
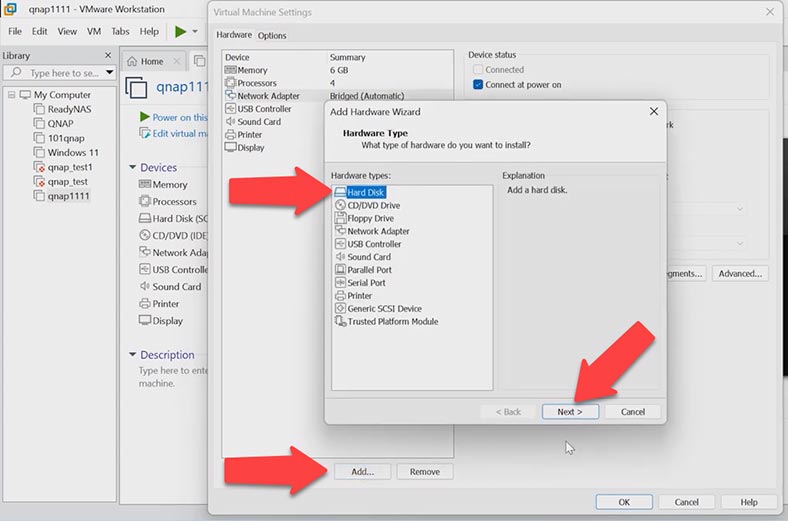
Now add the system disk by clicking Add, and then Hard Disk.
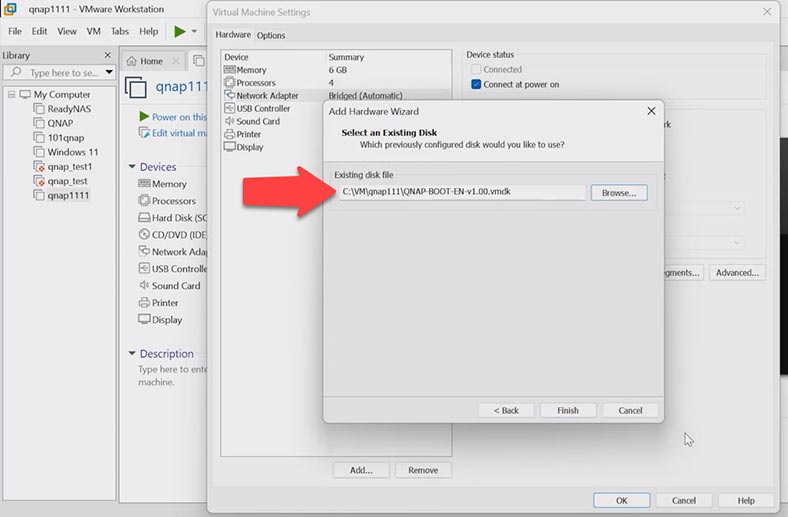
In the popup wizard window, choose IDE and Use an existing virtual disk, and give the path to the disk image file that you have downloaded before. Click Finish.
Then add the other new hard disks – you need 4 physical disks.
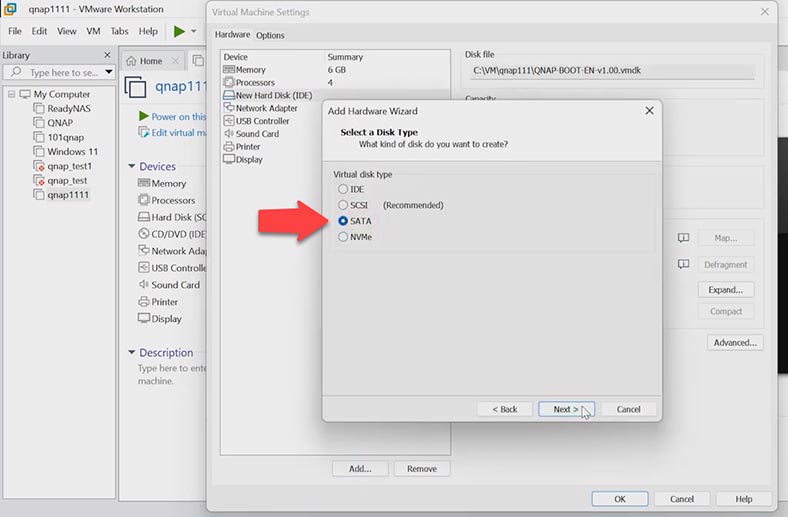
They must be of SATA type, otherwise the system may not recognize them during the installation process.
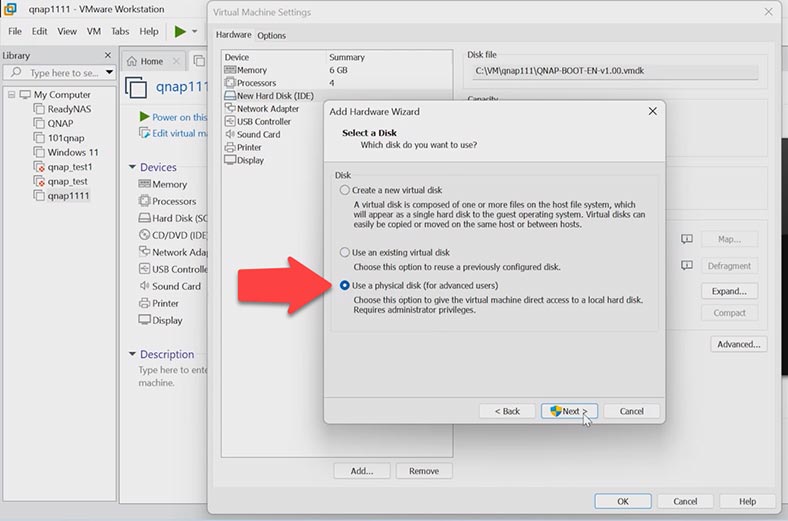
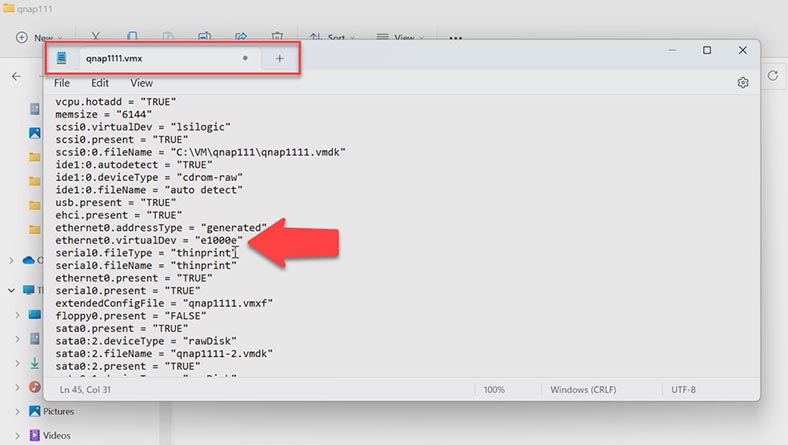
Now you should change some network adapter options in the settings file of the virtual machine. To do it, go to the folder where the machine is stored, and open the .vmx file with the Notepad app. In the line ethernet0.virtualDev change the value from e1000 to e1000e. Save and close the file.
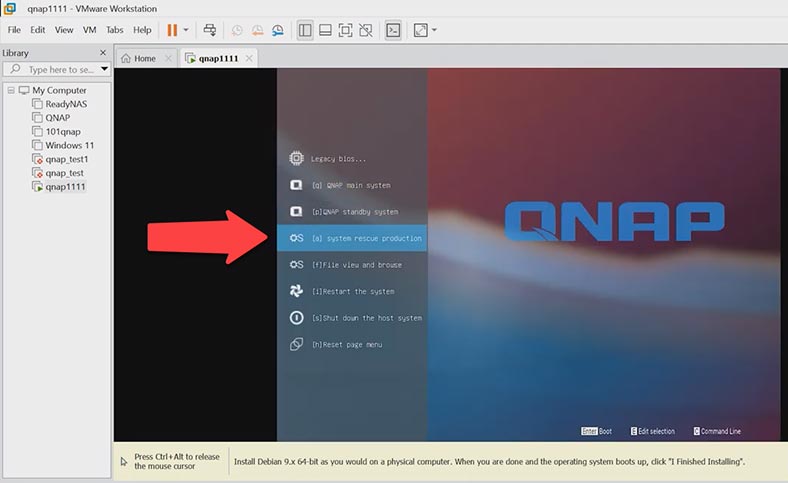
After that, go to VMWare and run the virtual machine. This is when you should be quick enough to press the Up or Down arrow button when this screen appears, so that you can boot your system in the System rescue production mode.
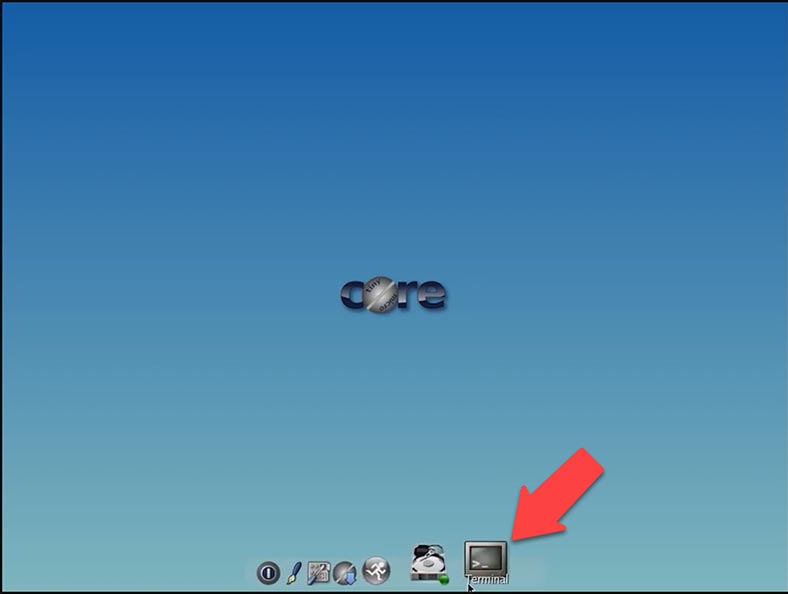
This will boot the TinyCore utility. You can use it to modify the bootloader settings. In the settings, you can choose the storage model and the operating system version. To do it, run the Terminal.
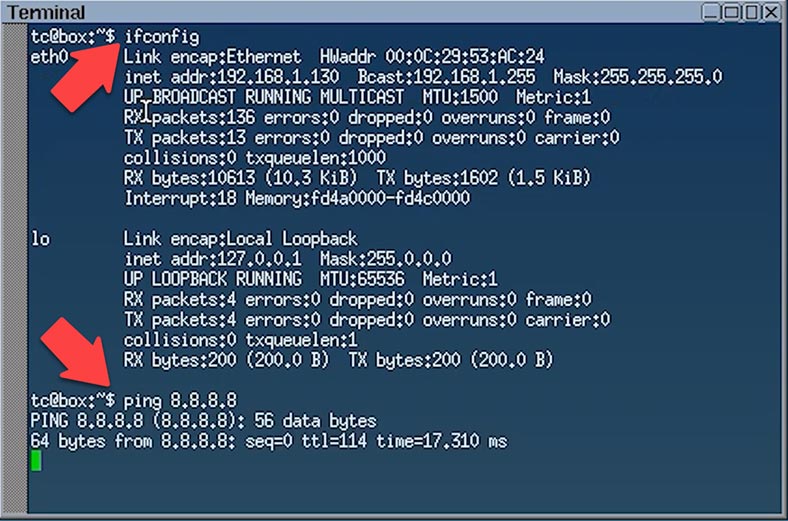
For starters, check if the device can recognize your network. Run the ifconfig command to display network adapters. After that, check if there is any Internet access by pinging the DNS server.
ifconfig
Ping 8.8.8.8
To change bootloader settings, type this command:
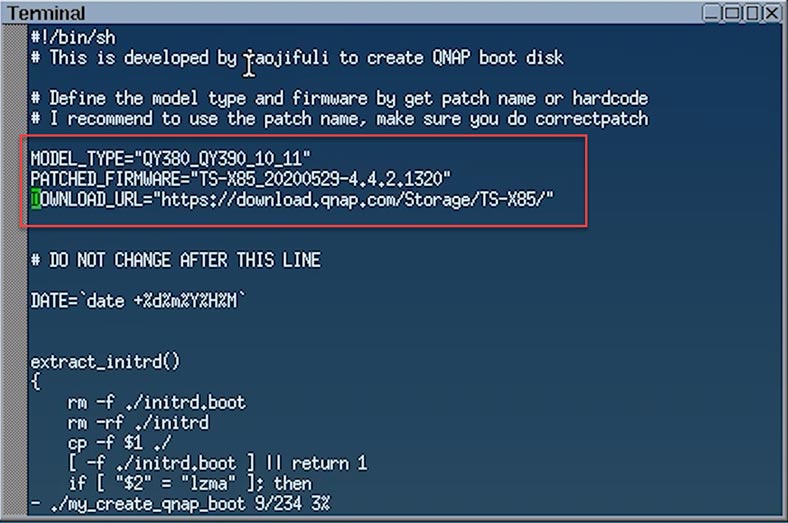
vi ./my_create_qnap_boot
There are three lines that can be modified:
MODEL_TYPE - model
PATCHED_FIRMWARE – firmware version
DOWNLOAD_URL – download address
It shows a well-tested model, so I won’t change it.
MODEL_TYPE="QY380_QY390_10_11"
You can find the latest firmware version on the official Qnap website.
Press i to edit the file.
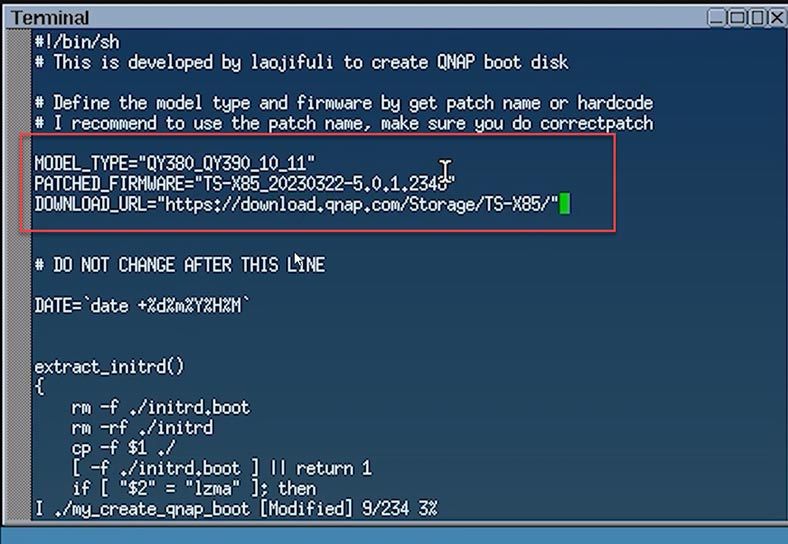
Now it can be changed. Let’s edit the firmware version. I’ll take one of the latest versions - TS-X85_20230322-5.0.1.2346.
I will leave the link without changes. https://download.qnap.com
To save your changes, click Esc, then type “:wq”.
Now that you have edited the bootloader file, you can run it. Here is the command to use:
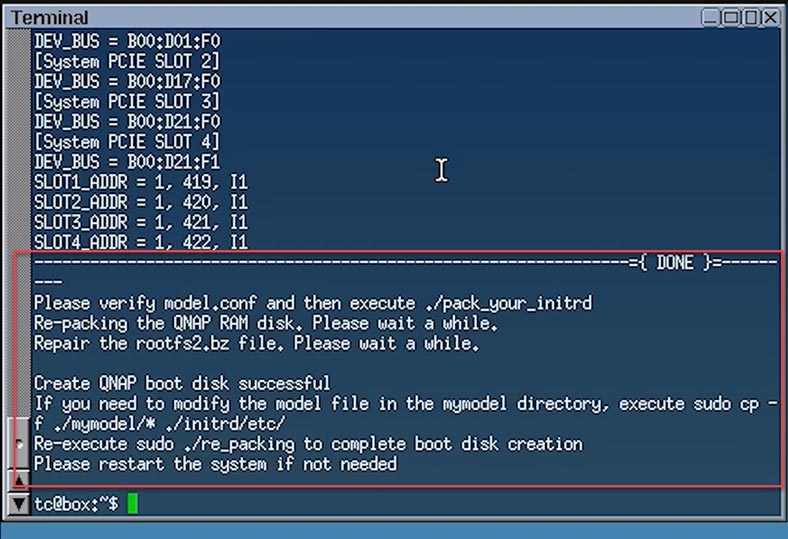
sudo ./my_create_qnap_boot
and wait for the booting to finish. If the boot was successful, you will see this report on your screen. Otherwise, the system will display an error message.
Now you should restart the system and wait until it boots. It takes from 10 to 15 minutes (or even longer) for the system to boot; everything depends on your computer’s hardware. If you did everything right, the system will boot and display the IP address of your storage device.
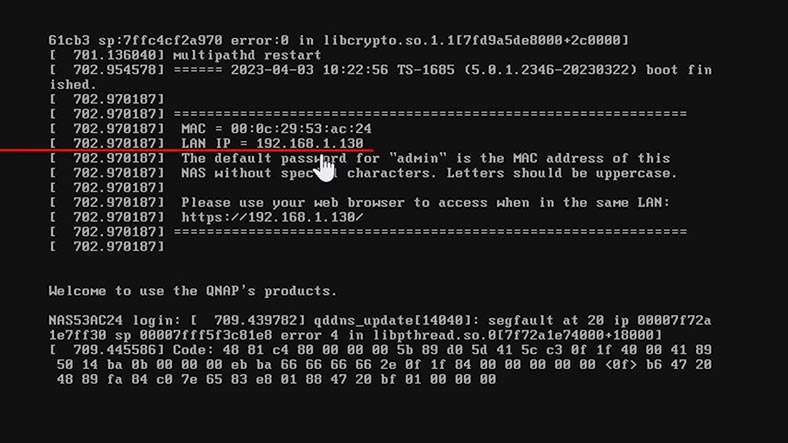
Open any browser you prefer and type the IP into the address bar. Also, you can find your network storage with the help of the Qfinder app. When in the browser window, you should finalize the installation of the operating system. In the window where you choose the system version, click Next. Set the username and password. After that, you can set up a static IP address. At the next stage, check the properties and click Apply.
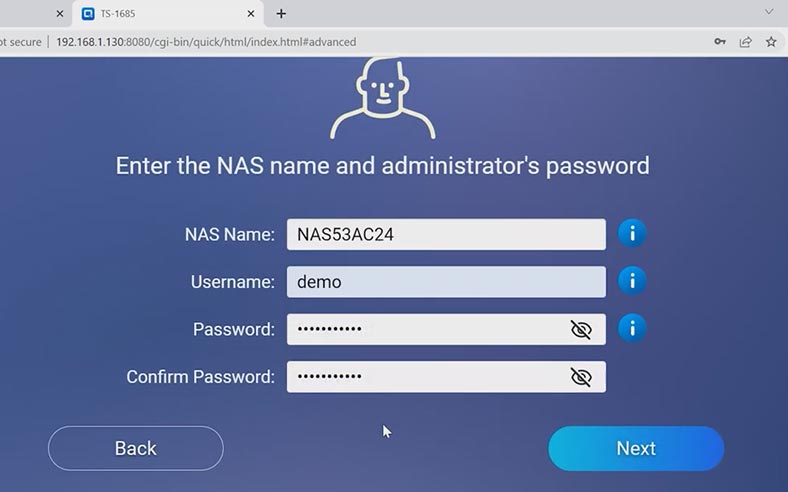
The system will warn you that all drives will be erased as a result of initialization. Click Initialize to continue. It begins the installation and the process of applying your settings. When it’s over, you’ll see a window congratulating you on successful installation.
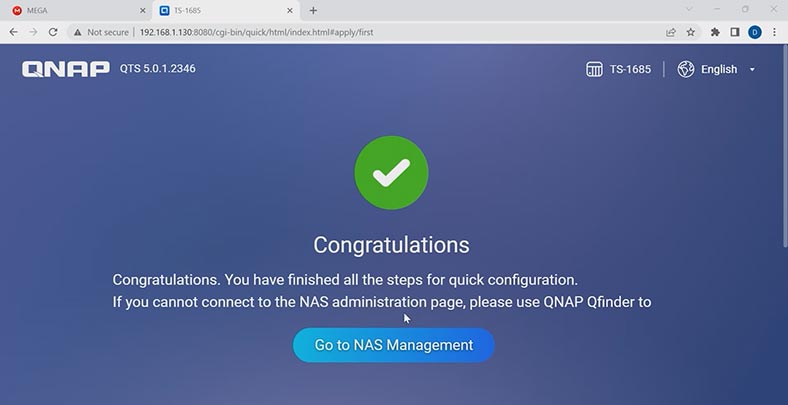
To access the NAS settings manager, click Go to NAS Management.
Now the installation is over, and you have a virtual machine running a latest QTS version. Your further steps include creating a volume, configuring access, and enjoying a properly working network-attached storage.
How to install Qnap QTS 5.0 on a PC
In the same way, you can turn an ordinary PC into a NAS storage with a Qnap operating system. The only tricky aspect is that you’ll need a suitable network adapter since the firmware only contains network drivers for a limited list of models. What you need is an adapter similar to Intel e1000e. Otherwise, your device won’t be recognized in the network.
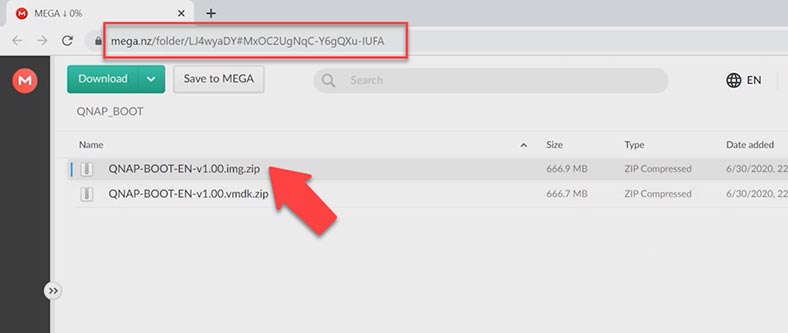
For installation on a computer, you need to download an .img file and record the image from the archive to a pen drive. For example, you can do it with an app called Win32 Disk Imager. After that, you should boot your computer with this pen drive and follow the steps I have described earlier.
How to create a RAID on Qnap TS-1685
In order to create a RAID on this specific device model, open Control Panel – Storage & Snapshots.
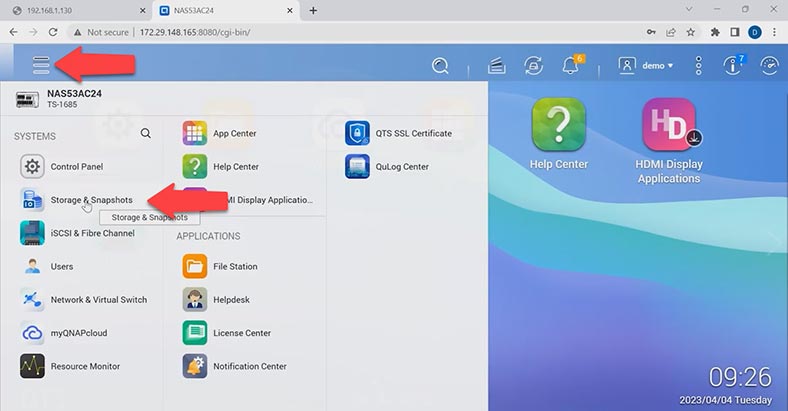
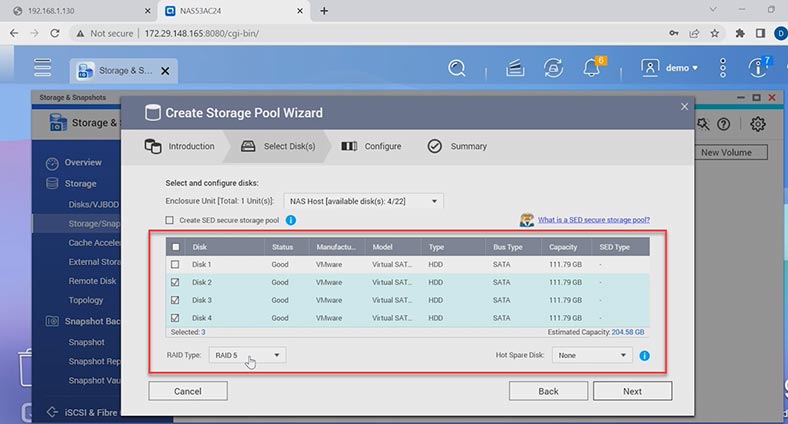
Click on New Volume, select the disks that the new array should include, choose the RAID type and click Next, then Create. The system will warn you that it clears all data on the selected hard disks. Click OK to confirm it. After that, the process of building the array, resyncing and formatting the disks begins.
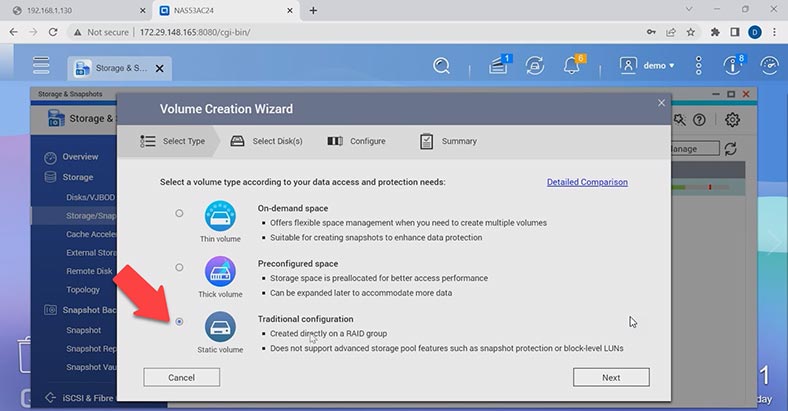
Now that the pool is created, the system will suggest creating a new volume. To do it, click New Volume, choose one of the three options and click OK. Now you can create a shared folder and upload some data to your network-attached storage.
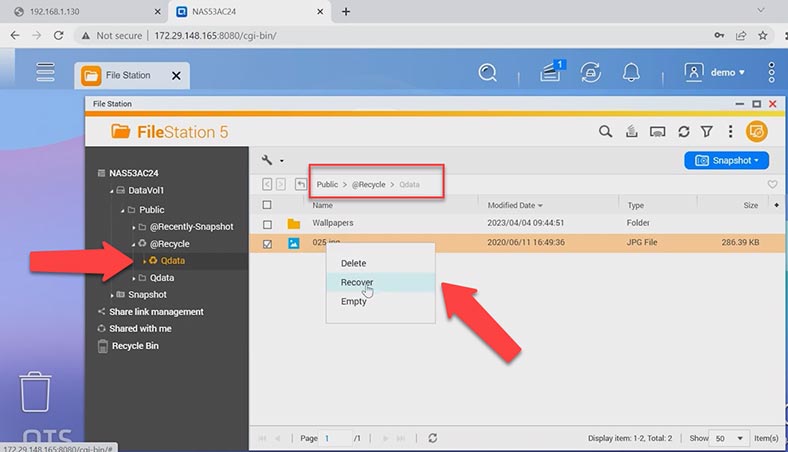
For each shared folder, the recycle bin feature is activated by default. If you accidentally deleted some important files, just open the recycle bin folder in File Station and restore them. Right-click on a file or folder and click Recover.
If the recycle bin feature is inactive or you deleted files without sending them to the recycle bin first, your lost files can be recovered with the help of a specialized recovery tool.
How to recover data from RAID on QNAP
Data can be lost because of many factors such as various errors when processing files, hardware failures, and specifically, hard disk and RAID controller issues. When a network storage device is down, your RAID will be destroyed, and in order to retrieve any data from there, you need a special software tool to rebuild the RAID and let access important files.
| Number | Program Name | Advantages | Disadvantages |
|---|---|---|---|
| 1 | Hetman RAID Recovery |
- Recovery of RAID arrays of various configurations - Support for Qnap QTS 5.1 and VMWare - Easy to use - High data recovery rate - Automatic RAID configuration detection |
- Trial version does not have a minimal data save option |
| 2 | R-Studio | - Supports many file systems - High recovery accuracy |
- Complex interface for beginners |
| 3 | DiskInternals VMFS Recovery | - Specializes in virtual machine recovery - Supports VMWare VMFS |
- Lacks support for some rare RAID configurations |
| 4 | UFS Explorer RAID Recovery | - Ability to recover from various storage systems - Support for virtual machines and RAID |
- High price for home users |
| 5 | EaseUS Data Recovery Wizard | - Easy to use - Supports various data carriers |
- Can be slow when scanning large amounts of data |
Such tool, Hetman RAID Recovery, supports most file systems and all popular RAID types. If you used physical disks, connect them to a Windows computer directly. Take the drives out of the storage device and connect them directly to the motherboard of a Windows computer.
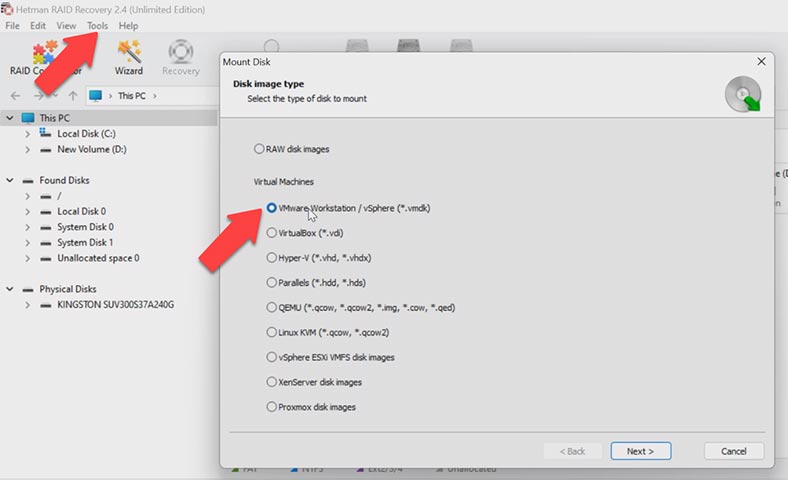
If you used virtual disks, upload their images to the recovery tool. To do it, open Tools - Mount Disk, select the virtual machine type from the list, and click Next.
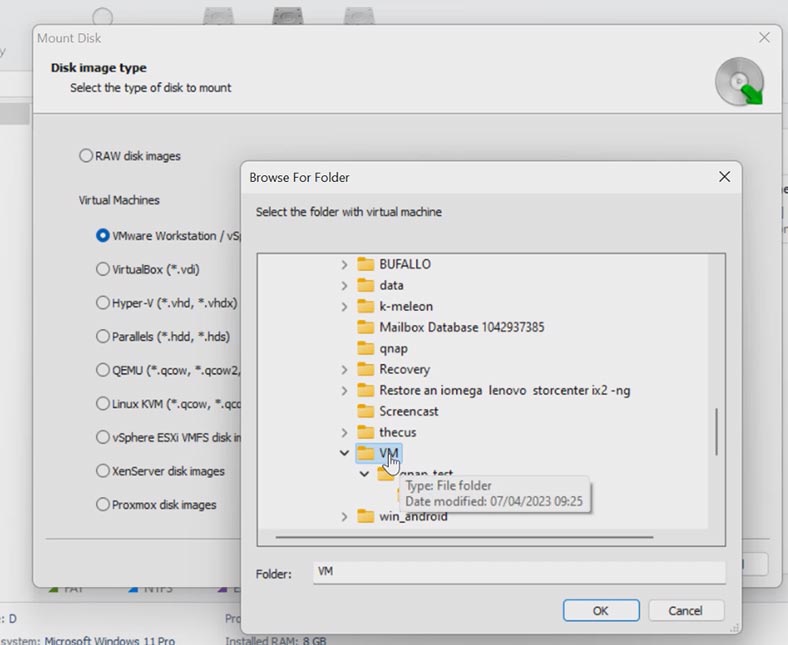
Specify the path to virtual disk files – OK, and click Next again. They will appear in the program’s window.
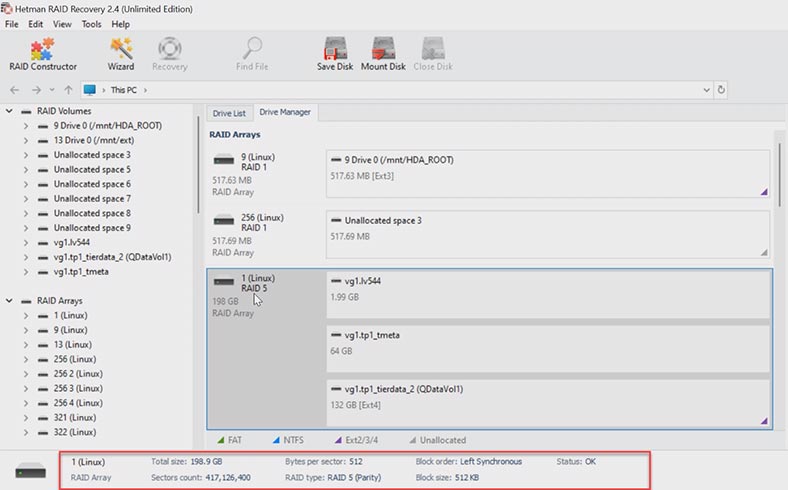
It will build a RAID system automatically, so you’ll be able to scan it and access the necessary files.
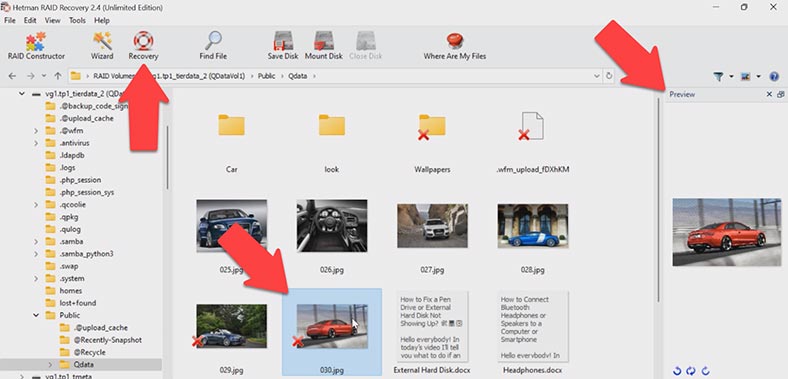
Right-click on the array and choose Open. Choose the search type, Fast scan or Full analysis. For Full analysis, you need to specify the file system type used for the hard disks. When the search if complete, open the folder where your files used to be stored. You can use the preview window to see their contents. Select the files you want to restore, and click the Recovery button.
Specify where to save the data (choose the disk and folder), and click Recovery again. When the recovery process is complete, you’ll see all the files in the specified directory.
Conclusion
Summing up, we can say that creating a virtual machine with QTS operating system may seem to be a complicated process, but it’s not that difficult if you make some preparations and follow the instructions. Dealing with data is not always smooth and seamless, and sometimes a part of information can be lost. Data recovery tools like Hetman RAID Recovery can become an irreplaceable tool to restore important information whenever it happens. No matter what, always remember to back up all important stuff regularly and keep it in a safe place.


