Proxmox Hypervisor Data Recovery: Essential Steps for Virtual Machine Data Retrieval
In this tutorial, we’ll guide you through the process of recovering data from a virtual machine on the Proxmox Virtual Environment Hypervisor. Whether you’ve encountered accidental deletion, disk corruption, or other data loss scenarios, we’ll show you step-by-step how to retrieve your valuable data with ease.
- Installing Proxmox virtual environment
- How to create a virtual machine
- How to take a snapshot of the virtual machine
- How to revert to a snapshot
- Backup
- Recovery from backup
- How to recover data from a virtual machine on Proxmox hypervisor
- Conclusion
- Questions and answers
- Comments
Proxmox VE is an open-source hypervisor for enterprise virtualization. This virtualization tool is based on Debian GNU/Linux. A modified Ubuntu kernel is used to run virtual machines on the server. Virtual machines can be deployed and managed with the command prompt and web console, thus providing a simple and quick access.

How to Recover Data of a Virtual Machine on Proxmox Virtual Environment Hypervisor
Installing Proxmox virtual environment
For starters, let’s find out how to install Proxmox VE onto our server. The first step is to download an ISO image of Proxmox and create a bootable USB drive. To do it, go to the official Proxmox downloads page.
https://www.proxmox.com/en/downloads
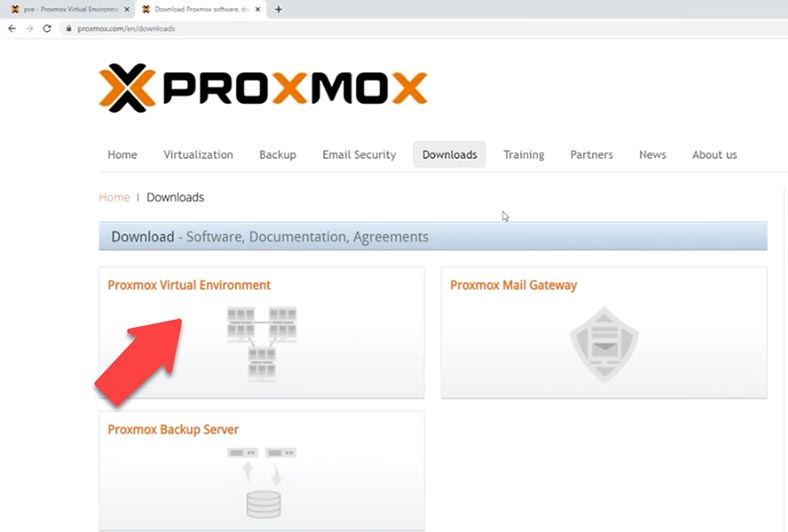
Here, select Proxmox (VE) Virtual Environment – ISO Images, and download the latest version of the hypervisor by clicking the Download button.
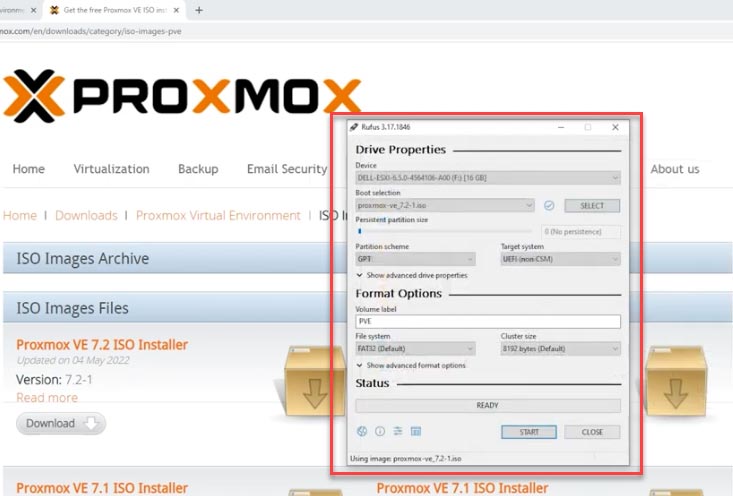
When it’s ready, start a utility to create a bootable drive – for example, Rufus or Etcher . Now that our USB drive is ready, connect it to the server and boot from it – after you have selected the proper boot device.
When it boots, the Proxmox VE menu appears. For standard configuration, select the option “Install Proxmox VE.”
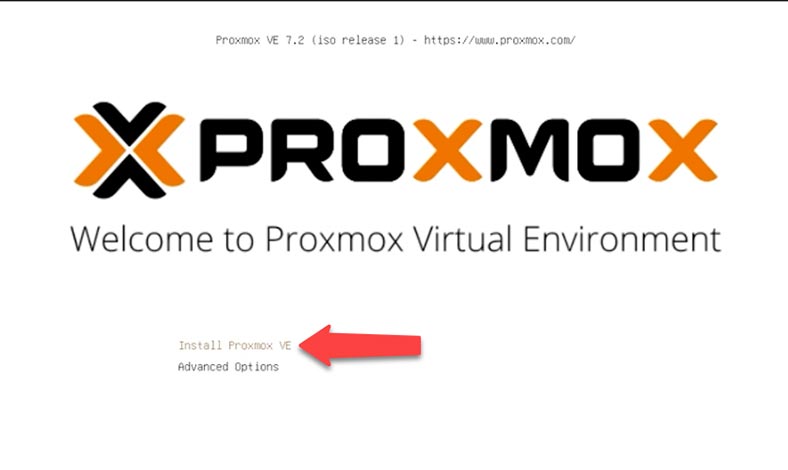
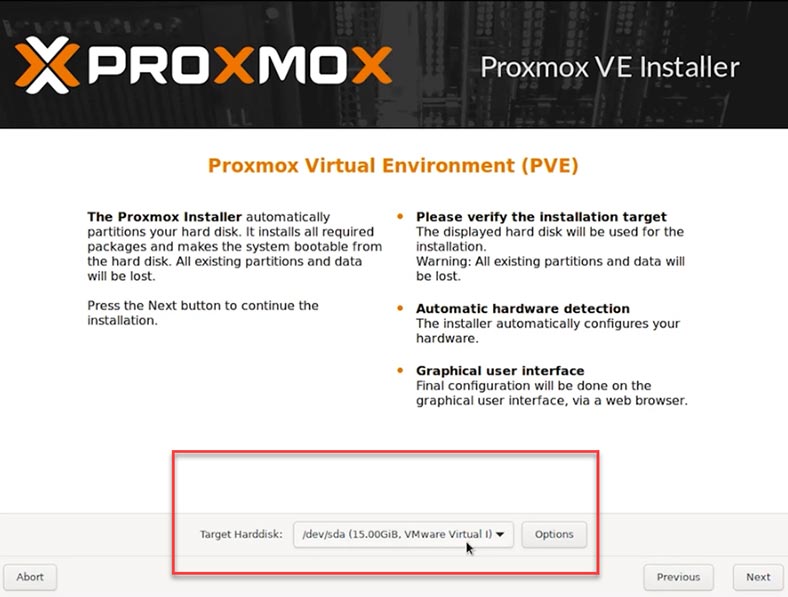
Accept the License Agreement, and select the disk where to install it. For advanced settings, open Options. This is where you can modify such things as file system, disk size and so on.
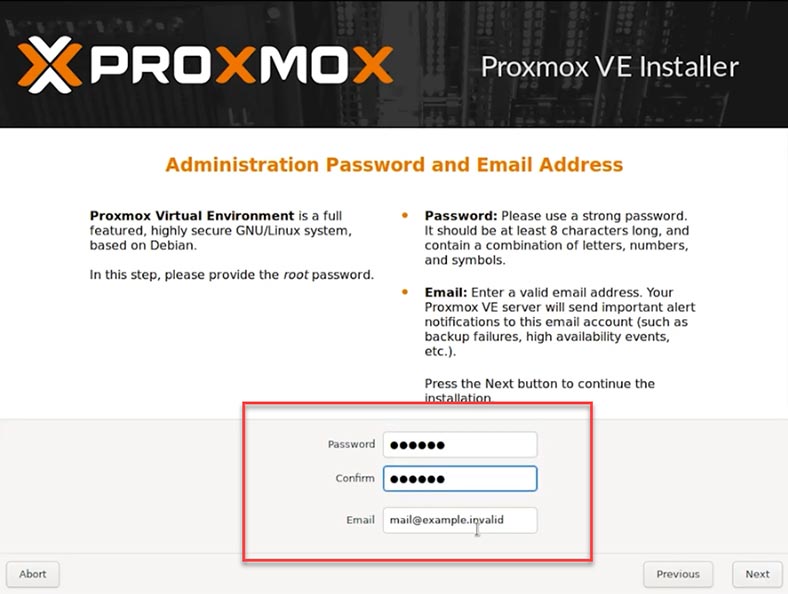
After that, set the country, time zone, and keyboard layout. Then set the administrator’s password and type it again to confirm. Give an email address for system notifications.
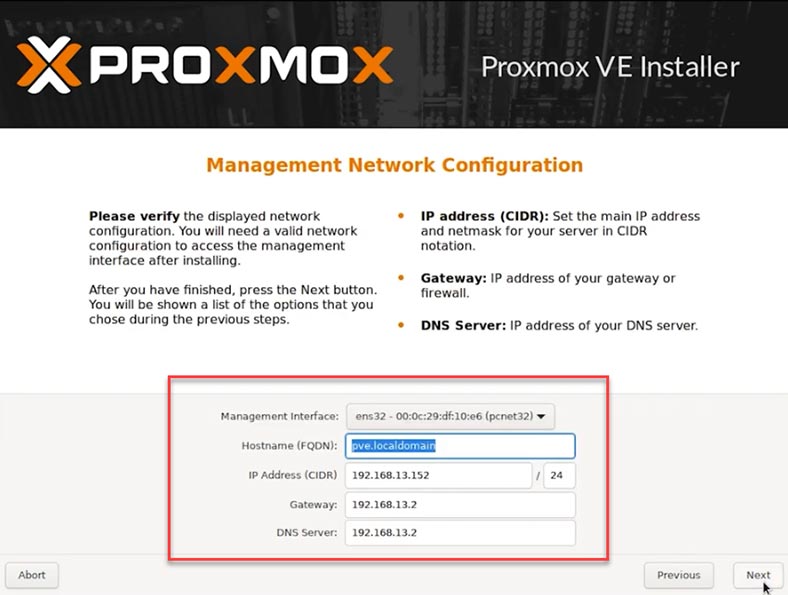
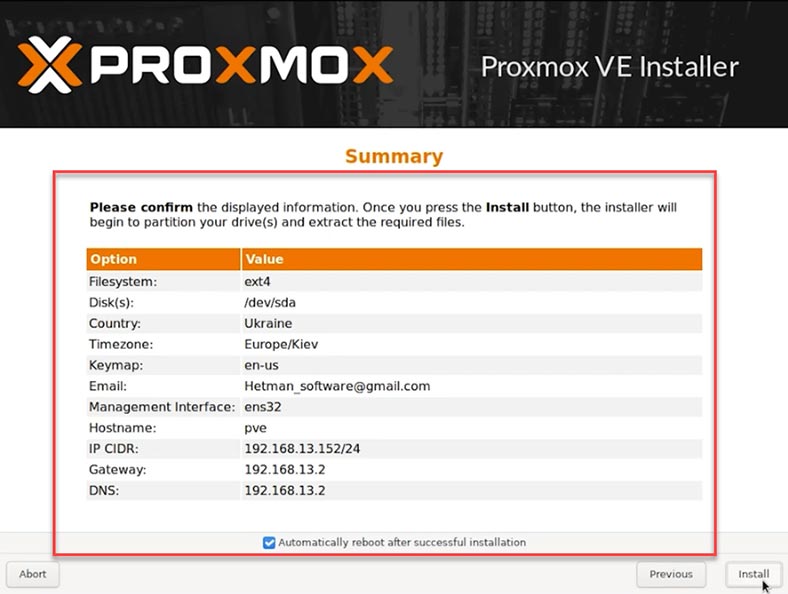
And the last step is to configure the network. Select the management interface, host name for the server, an available IP address, the main gateway and the DNS server.
The installer will display all the parameters you have chosen. When you think everything is OK, click the Install button.
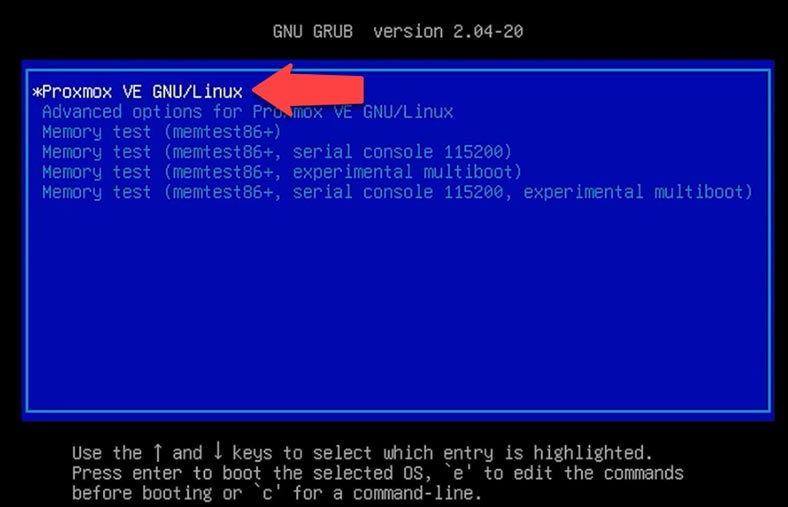
When the installation is over, eject the USB drive and reboot the system. In the end, you will see Proxmox GRUB menu. Select Proxmox GNU/Linux virtual environment from the list and press Enter.
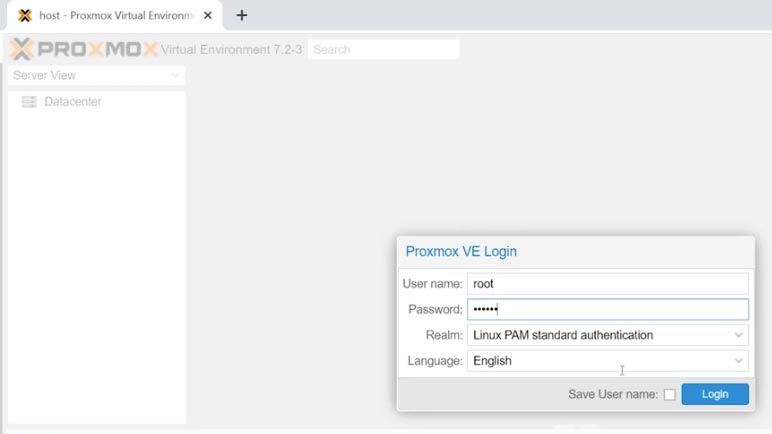
You will see Proxmox VE welcome screen. It includes IP address of the server where you can connect from the client machine through the management web interface. Enter this IP address in any browser that you have. You will see a warning that this page is not safe – it appears because Proxmox VE uses self-signed SSL certificates. Click Advanced – Proceed to.
Now you need to enter administrator’s login and password to access the management interface.
How to create a virtual machine
Now that you have accessed the server’s management interface, a virtual machine can be created. To install the operating system for this virtual machine you’ll need a corresponding ISO image.
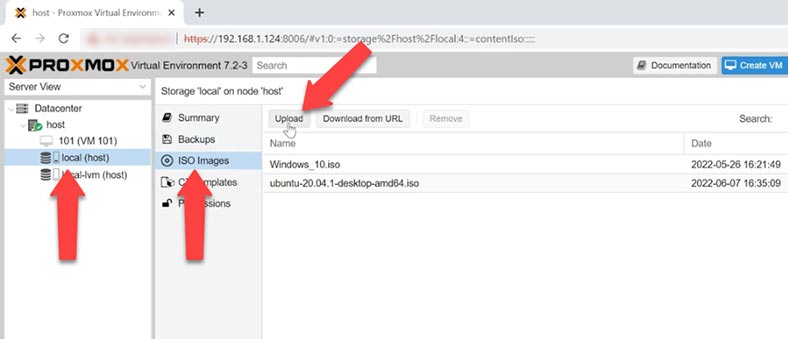
Then you have to upload it to the Proxmox server:
- Go to host – local host;
- Jump to the tab “ISO images”;
- Click “Upload” – “Select file”;
- Give the path to the ISO image – “Upload”.
When it’s uploaded, you can start creating a virtual machine. On the right, click “Create VM,” and jump to the OS tab. Select the operating system type and version, click on the field “ISO image” and choose the required ISO file from the list.
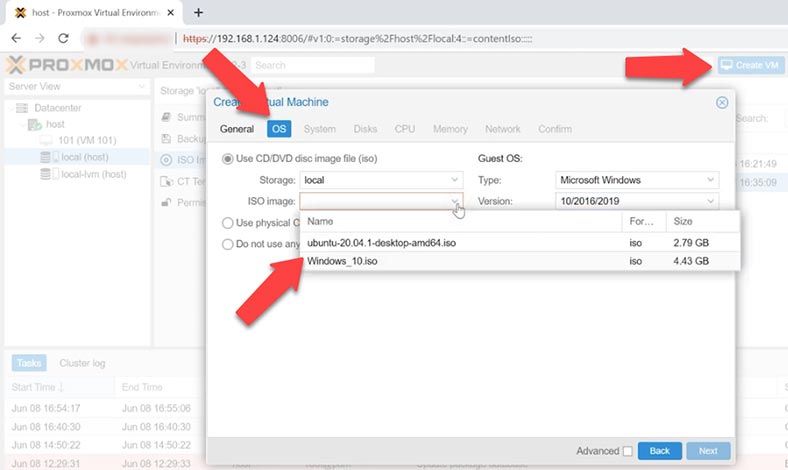
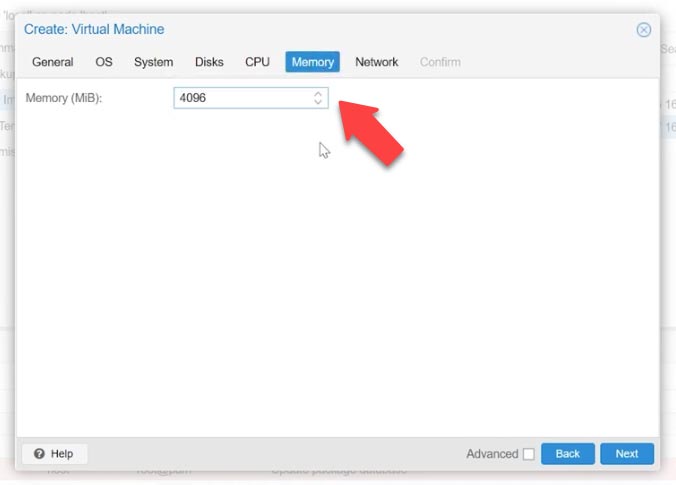
I will leave the system and disk parameters at their default values, but I need to add more CPU cores and virtual memory. As to the network settings, I’m not going to change them too. Jump to the tab “Confirm” to check all the settings, and then click “Finish.”
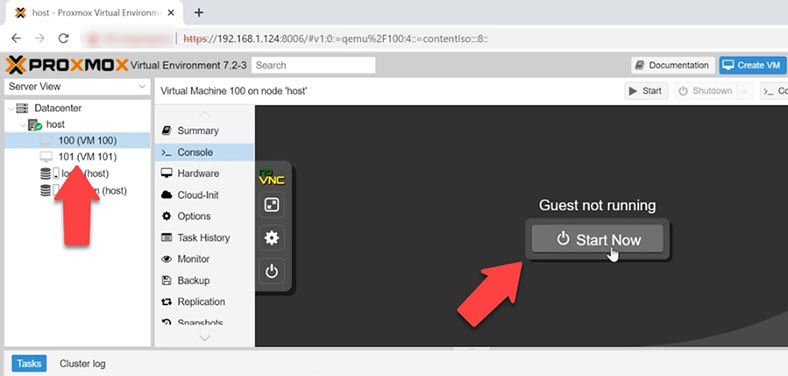
After that, the machine will appear on this list. Select it, open the console and run the machine by clicking “Start Now.” The virtual machine will start, and the installation of the operating system will begin. The process looks absolutely the same, as if you were installing Windows to a physical computer.
How to take a snapshot of the virtual machine
With Proxmox VE snapshots, you’ll be able to save the current state of your virtual machine. A snapshot includes its memory contents, its settings and the state of all of its virtual disks. When you revert the virtual machine to a snapshot, it will restore the memory, virtual disks, and all settings of this machine to the state in which it was at the time when the snapshot was taken.
Snapshots turn out to be an excellent method to save the current state of your virtual machine. It’s much quicker that running a full backup operation, as it doesn’t copy all the data. As a matter of fact, a snapshot is not a backup feature and it doesn’t back up your data in detail, but this is something you can use in intervals between your full backup copies.
To get a snapshot, click on the tab Snapshots – Take Snapshot. In the window that opens, type a name and click “Take Snapshot.”
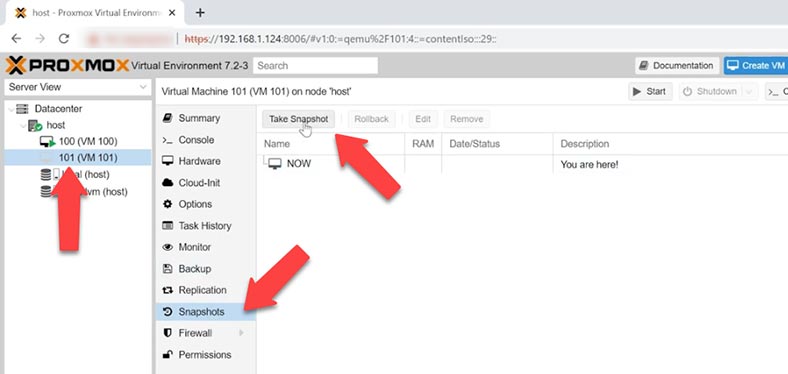
When it’s ready, you will see the line TASK OK, and the snapshot you have just taken will appear in the Snapshots tab.
How to revert to a snapshot
If there is an error while you were taking a snapshot or creating a backup copy, and the virtual machine gets blocked, you will see an error message.
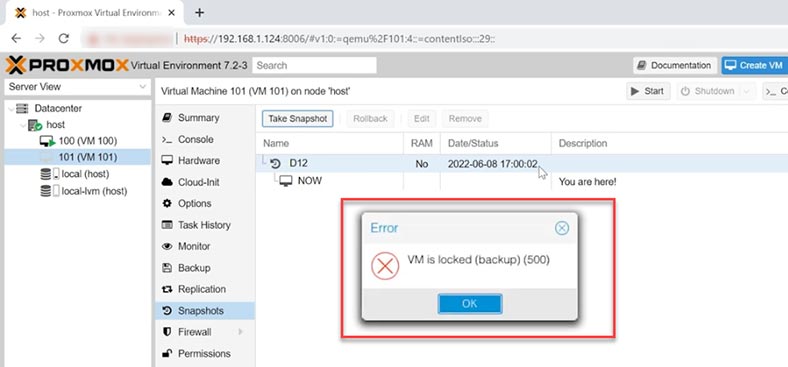
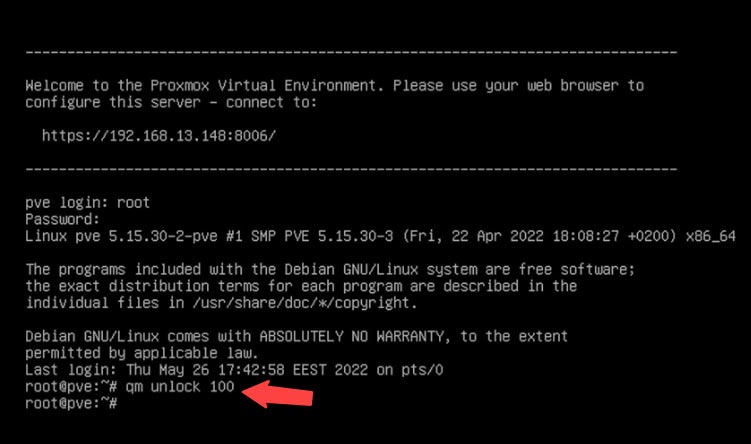
To unlock the machine, run this command on the server:
qm unlock 100
At the end of the command, the virtual machine ID is given. After that, you can start the virtual machine or remove it, delete a snapshot and so on.
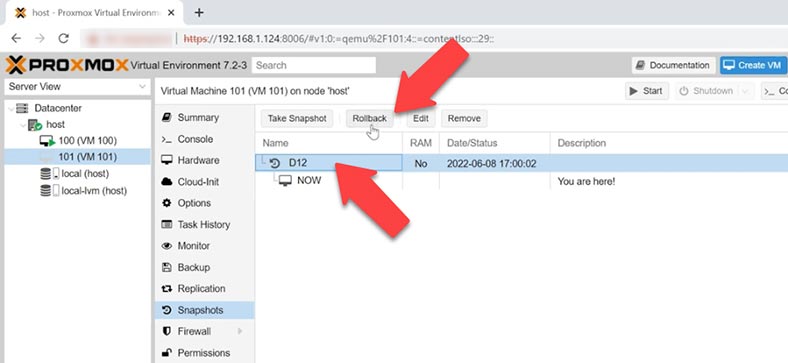
To revert to a snapshot, select the required virtual machine and go to the tab Snapshots. Click “Rollback” here, and when you see the notification saying that the current state of your virtual machine will be lost, click Yes to confirm. As you do that, the machine will be reverted to the state it was in at the time when the snapshot was taken.
Backup
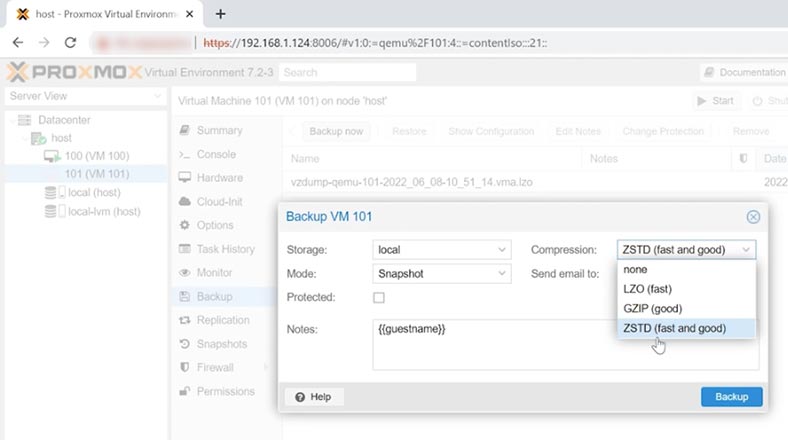
In addition to snapshots, Proxmox has pretty good integrated tools to back up its virtual machines. It lets you save all virtual machine data easily, it supports three compression mechanisms, and three methods of creating backup copies.
| № | Method | Description |
|---|---|---|
| 1 | LZO | A fast compression method providing high performance during backup but less efficient in terms of compression ratio. |
| 2 | GZIP | A method offering maximum compression, saving significant space but requiring more time for compression. |
| 3 | ZSTD | A modern compression method offering a good balance between speed and compression without losses. |
And there are backup modes:
| № | Mode | Description |
|---|---|---|
| 1 | Snapshot | Snapshot backup mode allows you to take an instant snapshot of the virtual machine's state without stopping its operation. This ensures minimal downtime. |
| 2 | Suspend | In this mode, the virtual machine is paused before the backup, and after the process is complete, it resumes operation. This reduces the risk of data corruption. |
| 3 | Stop | In Stop mode, the virtual machine is completely shut down before the backup, and after the backup is complete, it restarts. This ensures the highest data integrity. |
To create a backup copy, select the required virtual machine, choose “Backup,” and then click “Backup now.”
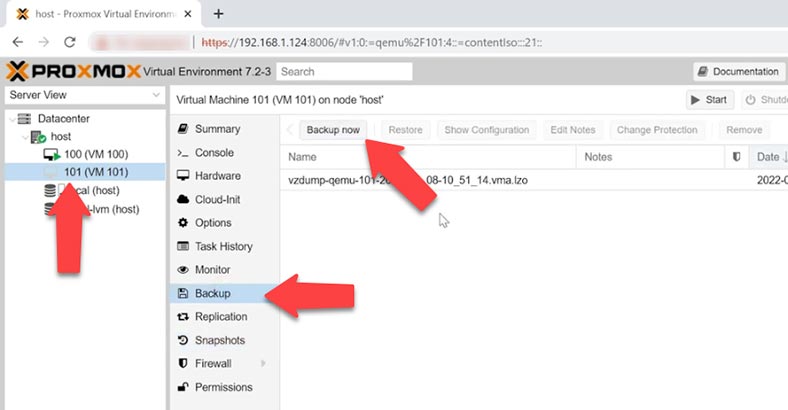
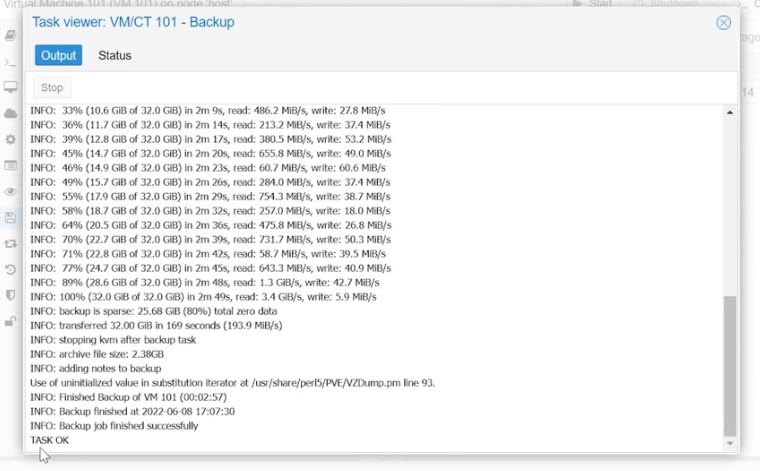
You will see a window where you can select options for your backup. When you’ve chosen all the settings, click “Backup” and wait until it is complete. When it’s ready, you will see the line TASK OK.
Recovery from backup
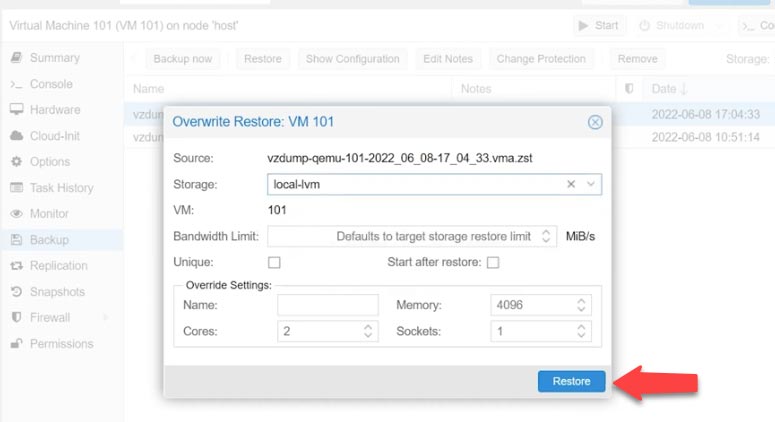
If something is deleted accidentally, you’ll be able to restore it from a backup. To do it, select a backup copy (you can easily distinguish backups by their dates) and click “Restore,” select Storage. Then click the Restore button. When there is a warning that the current virtual machine data will be erased, select Yes to confirm. When it’s finished, you will see the line TASK OK below.
How to recover data from a virtual machine on Proxmox hypervisor
If you don’t have a backup; if you failed to recover the machine from the available backup; if the virtual machine refuses to boot or displays an error that can’t be fixed; or if there is a server error - in any of these cases you can safely use Hetman Partition Recovery to bring your data back. This program supports recovery from virtual disks of various hypervisors including Proxmox VE.
| Category | Specification |
|---|---|
| List of Supported Virtual Machines | VMware Workstation, Microsoft Hyper-V, VirtualBox |
| List of Supported Hypervisors | VMware ESXi, Microsoft Hyper-V, KVM, Xen, Proxmox VE |
| List of Supported File Systems | NTFS, FAT32, exFAT, ReFS, Ext2/3/4, HFS+, APFS, Btrfs, XFS, ZFS |
| List of Supported Virtual Machine Formats | VMDK, VHD, VHDX, VDI, QCOW, QCOW2, OVA, OVF |
| List of Supported Systems | Windows, Linux, Mac OS, Unix |
By default, Proxmox VE uses LVM storage for its virtual machines. This storage method has quite a lot of advantages if compared with VHD files, but it may also create additional difficulties for the recovery process.
However, our program supports all popular file system formats and it can help you restore data from the majority of popular hypervisors. It can help you restore data after deleting, formatting, and hardware or software errors. Take the disks out of the server and connect them to a Windows computer.
When the physical disk containing virtual machine files is connected to the computer, Hetman Partition Recovery will display all the virtual machine disks, snapshot files, and backups. Use the virtual machine ID to understand which disk belongs to each virtual machine.
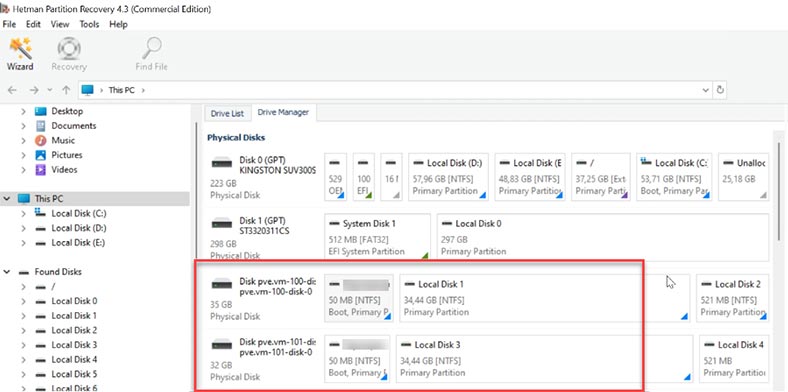
Right-click on the disk and choose “Open.” Select the scan type - for example, “Fast scan” will quickly search the disk and display the results. If the program failed to find the files you need, run “Full analysis.” To do it, right-click on the disk - “Analyze again” - specify the file system type - click Next.
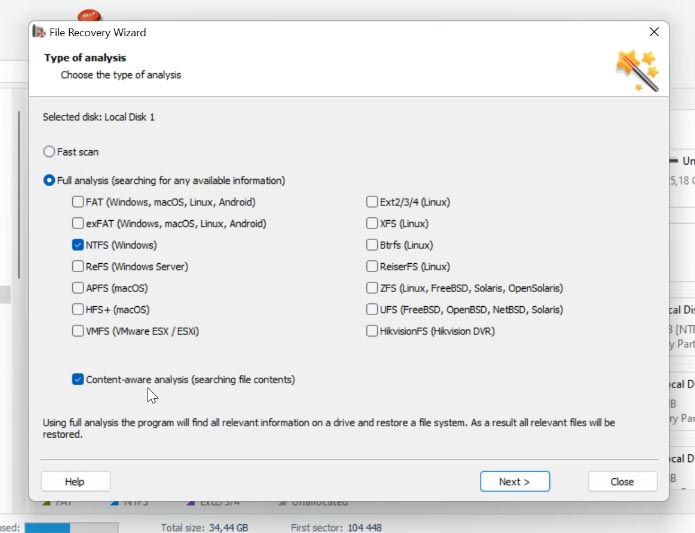
In the most complicated cases, you can search files by signatures: you can do it by checking the box next to “Content-aware analysis.” In my case, “Fast scan” will be enough.
Look for the folder where the required information used to be stored, select the files that you need to recover - and hit the Recovery button. Choose the path for saving the files and click Recovery again. You will find the recovered files in the folder you have chosen.
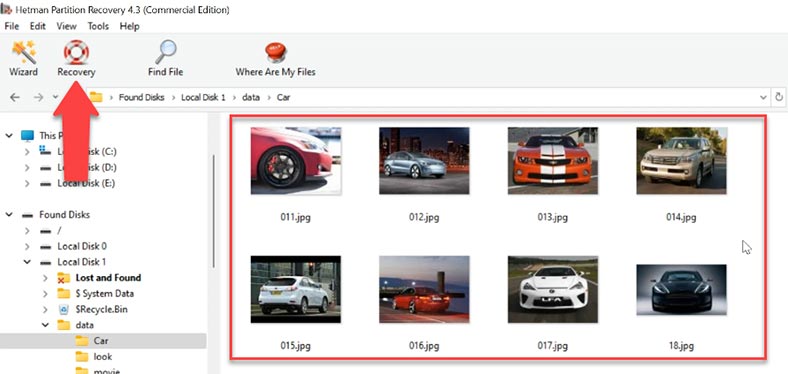
You can see that the program has no difficulty in finding the files that used to be stored on the virtual disk. For your convenience, there is an option to search for files by their names. And you can also check the file contents in the preview window.
Conclusion
Summing up, you have just seen the typical backup and recovery methods for virtual machines. Using them, you can save all your data and quickly recover it if something goes wrong, and do it without much effort.
However, you should always remember that backup and recovery operations put a heavy load on the disk system. That is why all such operations should be performed when your computer is not doing any other resource-intensive activities. This way, you can avoid lags and delays when input/output operations are carried out inside the virtual machine, and reduce the disk load - which helps your machine to work better and longer.


