Best Ways to Retrieve Data from Linux KVM Virtual Machines!
Are you struggling with data loss issues from your Linux KVM virtual machines and searching for solutions? In this video, we’ll provide you with essential tips, step-by-step methods, and best practices for recovering data from Linux KVM virtual machines. Read now to learn how to retrieve your valuable data effectively!

- How to check virtualization support
- Installing KVM on Ubuntu 20.04
- How to create a virtual machine in Ubuntu 20.04
- How to recover data from a virtual machine
- Conclusion
- Questions and answers
- Comments
KVM (Kernel-based Virtual Machine) is an open-source full virtualization solution for Linux systems. Similarly to VirtualBox and VMware Workstation, KVM is a Linux kernel virtualization tool that turns it into a hypervisor.
Such hypervisor lets users run isolated instances of other operating systems within the host system.
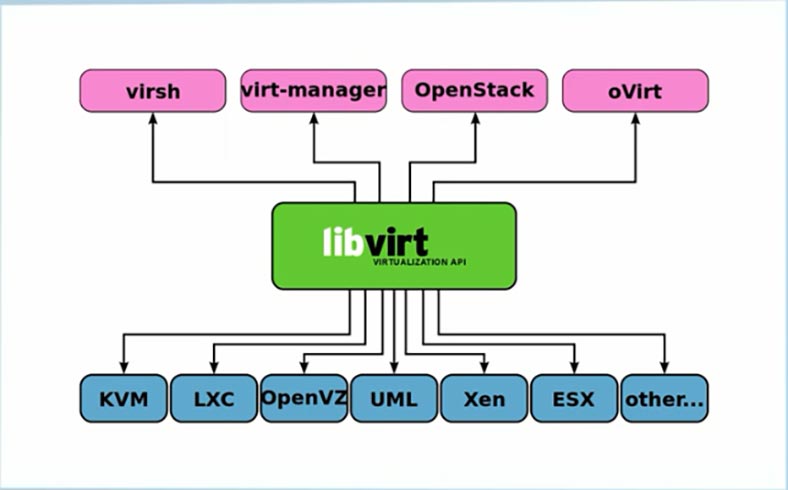
A virtual machine manager is a piece of software with graphical interface used to control virtual machines: with this manager, you can operate a virtual machine both locally and over the network, for example, via SSH protocol.
If there is a reason preventing you from installing VirtualBox or VMware on Linux, you can try KVM instead.
How to check virtualization support
Before you begin, it’s necessary to find out if your computer’s CPU supports KVM and hardware virtualization features.
egrep -c '(vmx|svm)' /proc/cpuinfo
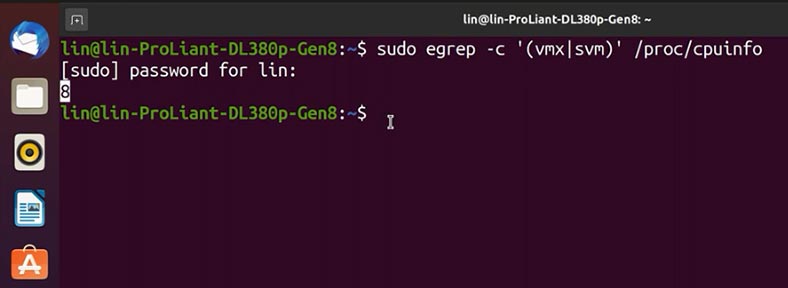
If this command returns the result “0” - your CPU doesn’t support virtualization. Luckily, everything is OK in my case, so we can continue with the installation.
The next step is to add one more tool to check compatibility: use this command
sudo apt install cpu-checker
After that, check if KVM can be used, with another command
sudo kvm-ok
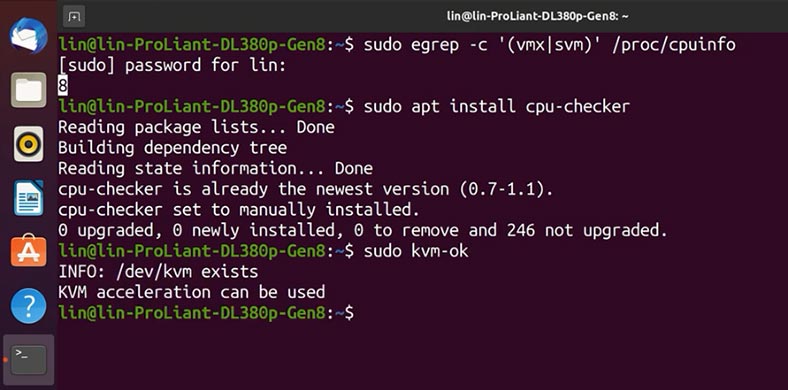
If KVM is supported, the operating system will inform you about your chances to use KVM acceleration:
KVM acceleration can be used
If your hardware is incompatible, you’ll see a notification saying KVM can’t be run:
INFO: Your CPU does not support KVM extensions
KVM acceleration can NOT be used
Installing KVM on Ubuntu 20.04
Before installation, update repositories with the command “apt update”
sudo apt update
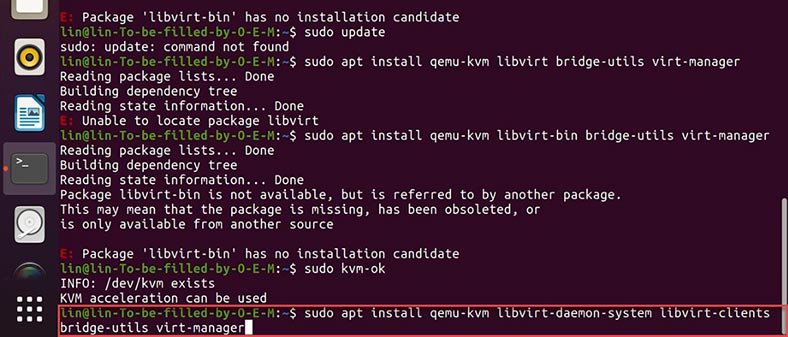
To add required KVM packages, run the command “Install” with the package names:
sudo apt install qemu-kvm libvirt-daemon-system libvirt-clients bridge-utils virtinst virt-manager
| Software | Description/Function |
|---|---|
| qemu-kvm | Software that provides hardware emulation for the KVM hypervisor. |
| libvirt-daemon-system | Configuration files for running libvirt as a system service. |
| libvirt-clients | Software for managing virtualization platforms through libvirt. |
| bridge-utils | Command-line tools for configuring Ethernet bridges. |
| virtinst | Command-line tools for creating virtual machines. |
| virt-manager | Graphical interface and command-line utilities for managing virtual machines via libvirt. |
When asked to agree or disagree, hit Yes, press Enter, and wait until the installation is complete.
After KVM packages are installed, run the commands to start and enable their booting with the operating system.
sudo systemctl start libvirtd
sudo systemctl enable libvirtd
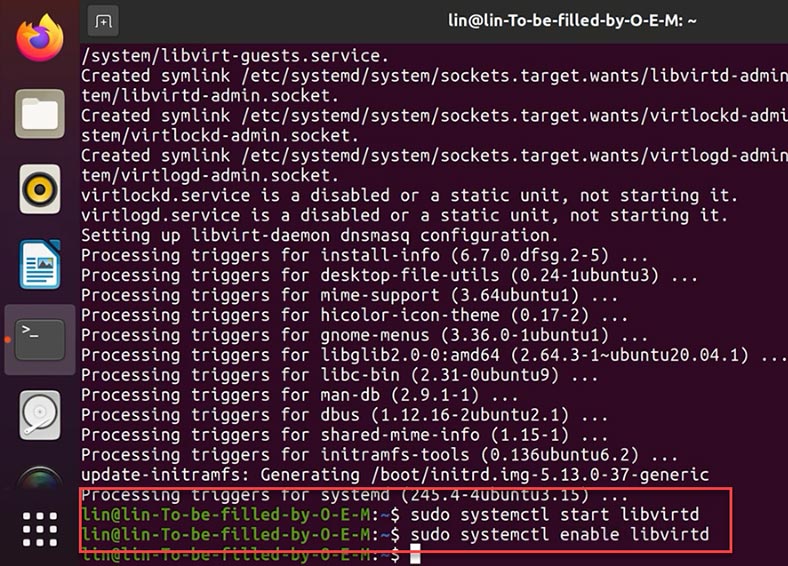
If the virtual machine manager displays an error message, restart the computer.
How to create a virtual machine in Ubuntu 20.04
Now that the server is configured, let’s run the virtual machine manager with this command:
sudo virt-manager
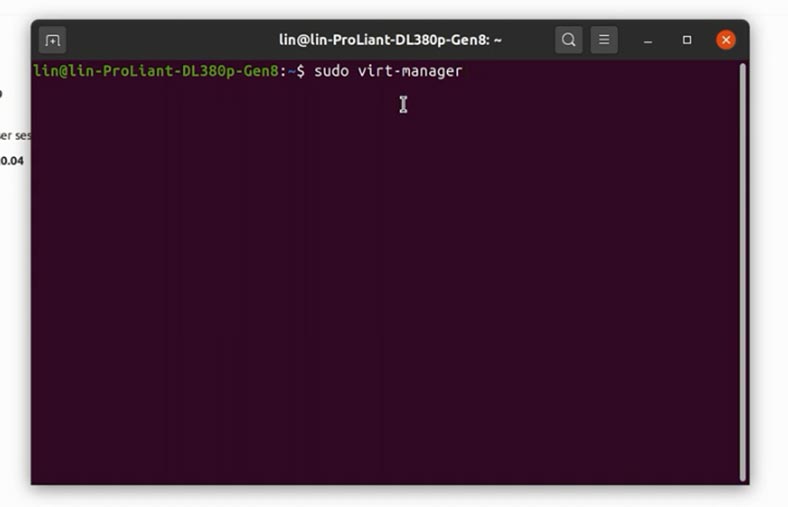
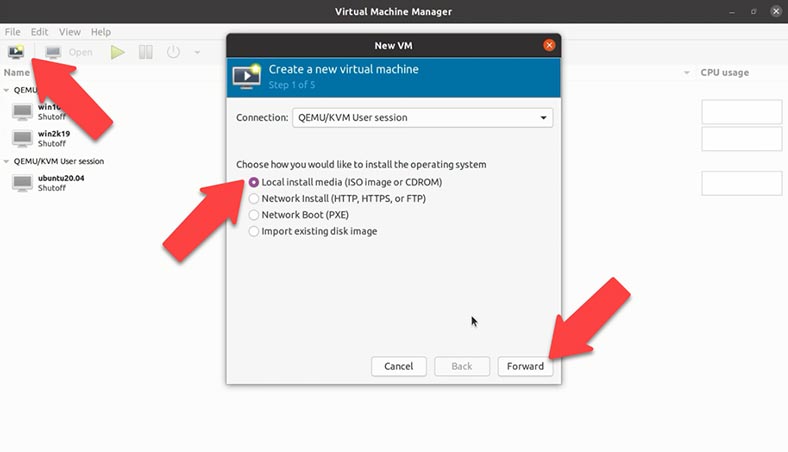
Or do it with the applications menu by clicking on the program’s shortcut. In order to create a virtual machine, click on the computer icon in the top left corner. In the window that opens, choose how to install a virtual machine - with the help of ISO image, and click “Forward”.
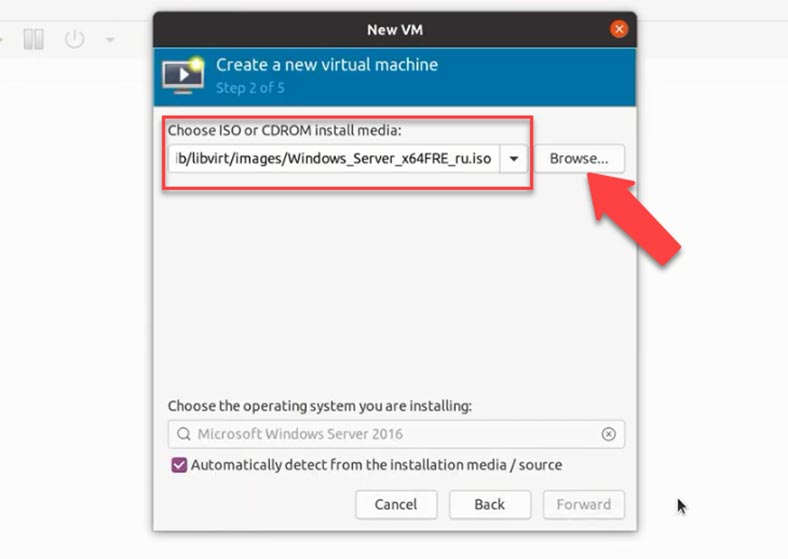
In the next window, specify the path to the previously downloaded ISO image of the operating system by clicking the Browse button. Select it, click “Choose volume” and then “Forward”.
After that, specify the amount of system memory and number of processors you’d like to allocate for this virtual machine. Finally, give the name for this machine, and click “Finish”.
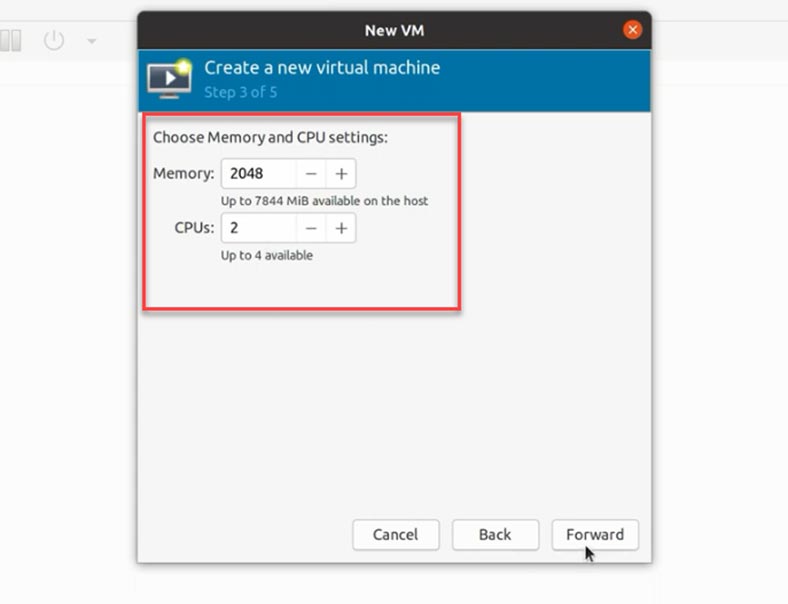
When you do it, the virtual machine will boot automatically, and the installation of the operating system from the image will begin.
How to recover data from a virtual machine

How to recover data from Linux KVM virtual machines. How to install KVM and configure a VM
As we know, losing data is something inevitable that every user has to face, sooner or later.
Here is a list of things that typically cause loss of data from a virtual machine:
- Accidentally removed files;
- Disk formatting;
- Failure to mount a virtual file
- Damage to index files
- Unexpected power failure
- Hypervisor issues, etc.
To restore virtual machine files, you need specialized software to find the missing information - a data recovery tool.
For starters, let’s explore where to look for virtual machine files and how to recover them if the machine cannot be opened, its operating system refuses to boot, or if some files were accidentally removed or damaged.
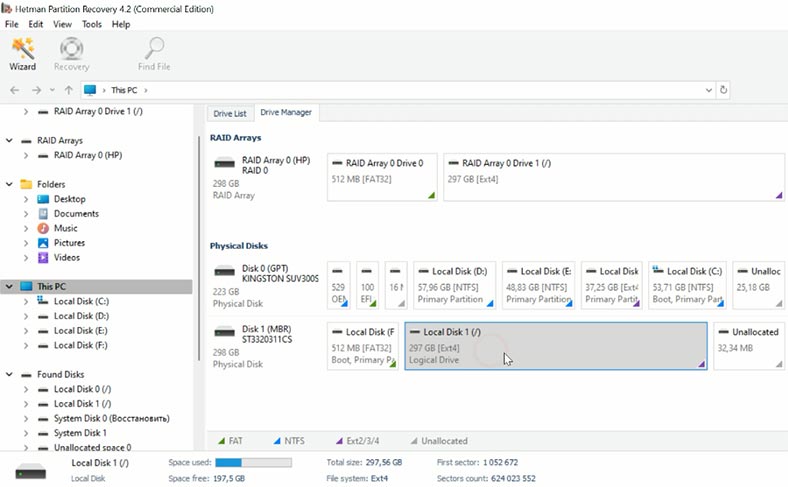
To extract virtual machine files from the disk, use Hetman Partition Recovery.
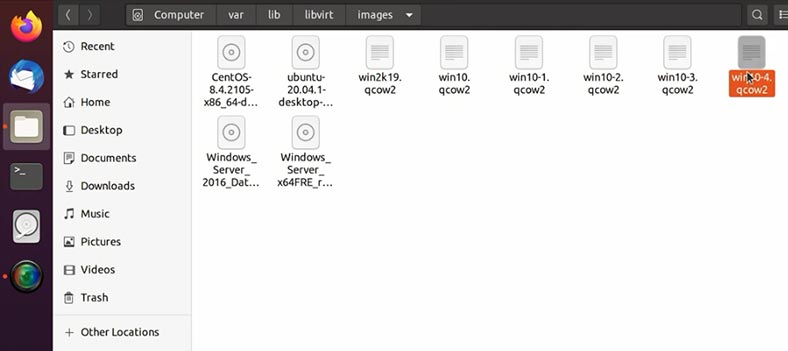
It supports all popular file system formats and it can help you restore data after deleting, formatting, and hardware or software errors. Connect the hard disk to a Windows computer and start the scan. You can find KVM virtual machine files by following this path:
Home\lin\.local\share\libvirt\images
/var/lib/libvirtimages
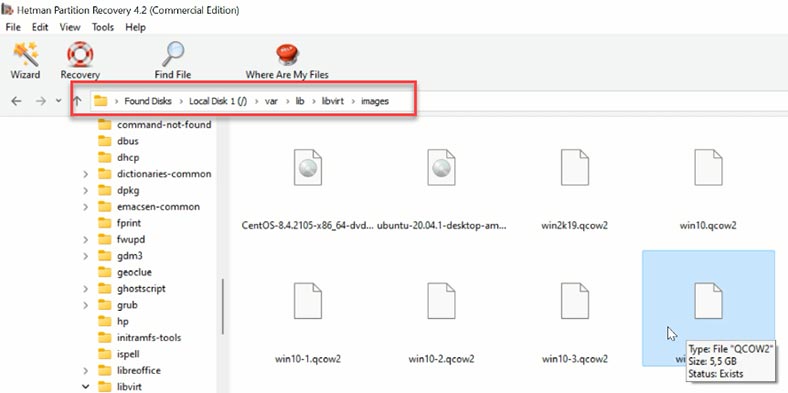
The file name corresponds to the virtual machine name, and this is a file with the extension .qcow2. Recover it to any available location.
If you have a Linux computer, you can try to access the files even without using specialized tools. Upload the virtual machine file into the manager, start the machine, and get the information you are looking for.
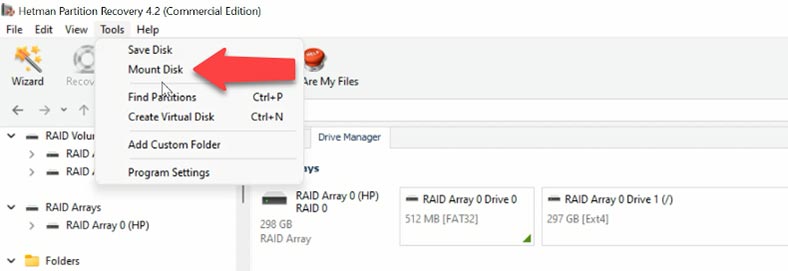
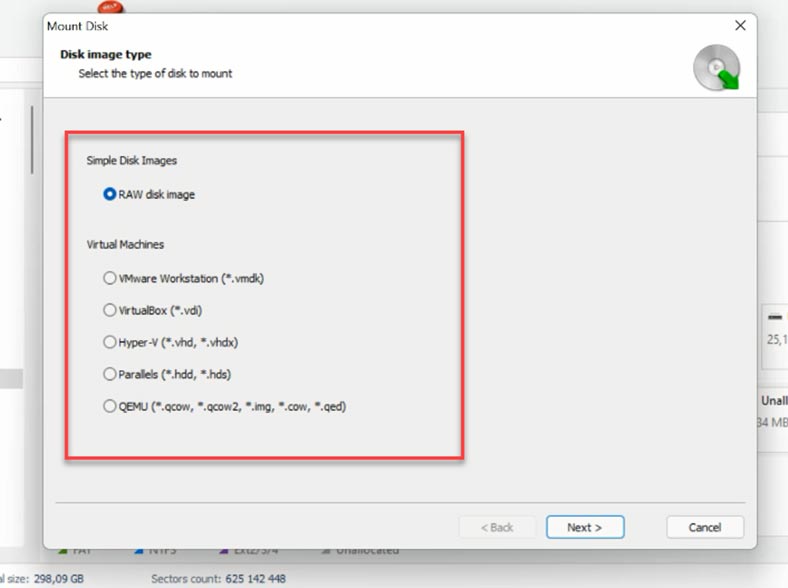
If you failed to boot a virtual machine after system repair operations, or if there is an error when you try to start it, don’t give up: use our program to open that file and recover all of its data. To do it, find the Tools tab - click “Mount Disk”; in the window that opens, you will choose the disk image type, then check the list for your virtual machine name, or choose the corresponding file extension, and click “Next”.
Give the path to the folder containing the files by clicking on “Select Folder”. The program will display all virtual machine files which exist in such folder, and you can uncheck the boxes for the ones you don’t need now.
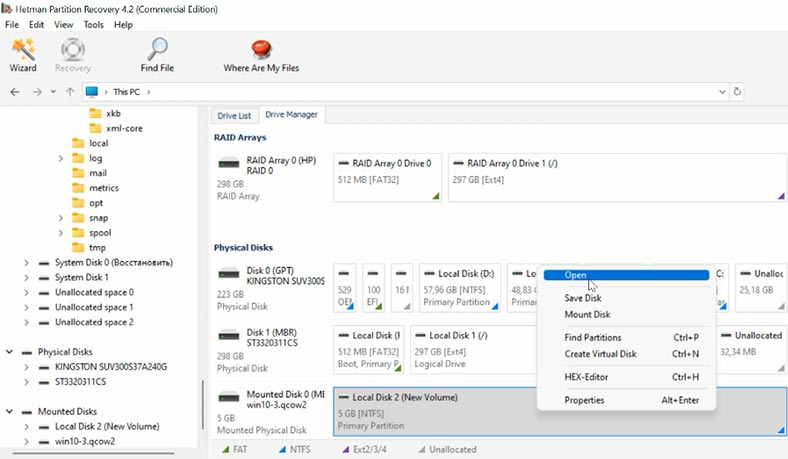
To begin searching for data, right-click on the disk and choose “Open”. Then choose the analysis type. We recommend starting with “Fast scan”.
The program can find all files remaining on the disk without difficulty. The red cross indicates the ones which have been deleted. Click on a file to see its contents in the preview window. To quickly find a specific file, there is a search-by-name feature.
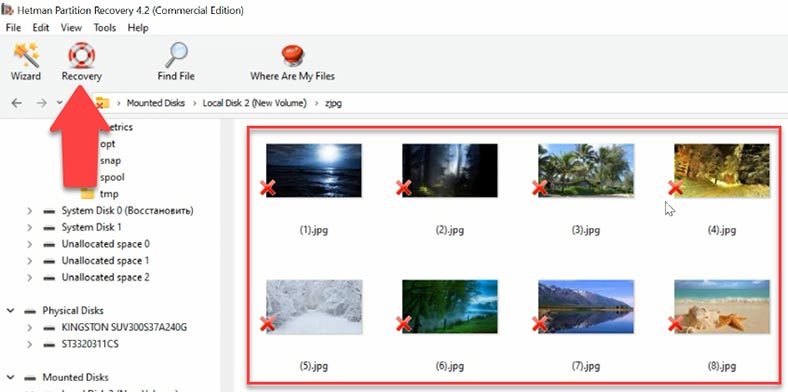
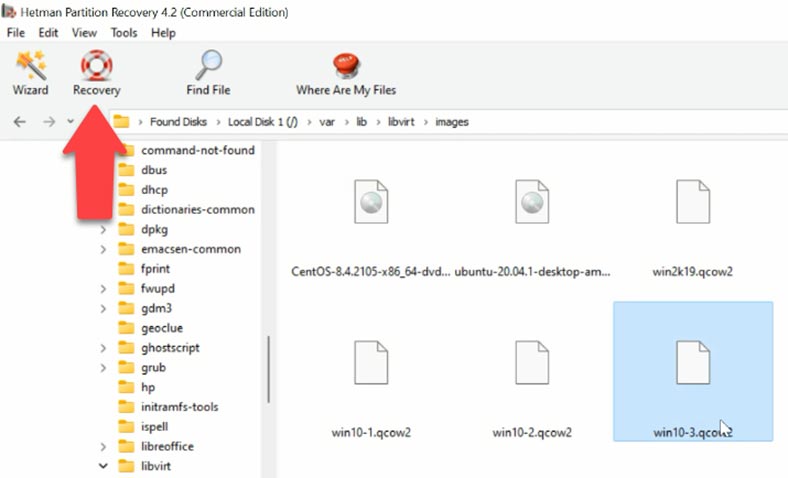
Select the files you need to restore and click “Recovery”, specify the disk where to save the files and click “Recovery” again.
Conclusion
As we know, virtual machines offer a good protection against data loss. However, even with all their advantages, such machines cannot guarantee full protection. While working with them, you may encounter various issues such as software errors, crashes, human errors like accidentally removing files or formatting the hard disk and so on. If you ever lose data from a virtual machine, we recommend using a powerful data recovery tool, Hetman Partition Recovery. It supports most virtual disk file formats such as: .vmdk, .vdi, .vhd, .vhdx, .hdd, .hds, .qcow, qcow2, .img, .cow, .qed.
With a trial version, you can evaluate the program’s effectiveness before actually paying for the license: you only need the full version to save the files.


Shutdown the guest machine first: shutdown -P now
Check if it is not in the active list: virsh list
Edit the configuration:
virsh edit F17 or nano /etc/libvirt/qemu/F17.xml
(F17 is the name of the guest machine in this case)
Add a line at the end of the section:
In this case the whole root of the host machine is shared.
Enable guest machine: start F17
On the guest machine you are going to mount:
mkdir /mnt/root/
mount -t 9p -o trans=virtio,version=9p2000.L root /mnt/root/
If you get the message "mount: unknown filesystem type '9p'" you have to check the configuration:
modprobe -l | grep 9p
lsmod | grep 9p
grep CONFIG_9P_FS /boot/config-$(uname -r)
cat /etc/redhat-release