Efficient Data Retrieval from VMWare vSphere ESXi with VMFS: Proven Methods
In this tutorial, we’ll demonstrate how to recover virtual machine data from VMWare vSphere ESXi Hypervisor with VMFS file system. Whether you’ve experienced accidental deletion, disk corruption, or other data loss scenarios, we’ll guide you through the process of retrieving your valuable data efficiently and securely.
- How to create a virtual machine
- How to take a snapshot in vSphere web client
- How to revert to a snapshot in vSphere web client
- How to remove a snapshot
- How to recover virtual machine files from vSphere hypervisor
- How to import files, and restore operability of the virtual machine
- How to recover data from a virtual disk (VHD) file
- Questions and answers
- Comments
We will explore how to create a Windows virtual machine on ESXi Server, how to manage snapshots, how to recover virtual machine files from the disk of a non-operable server, how to restore operability of a virtual machine, and how to recover information from .vmdk files.
VMWare ESXi is a hypervisor that can be installed onto a physical server and lets you run several operating systems on a single host computer. These operating systems work separately from each other but they may interact with other computers over the network.

How to Recover Virtual Machine Data from VMWare vSphere ESXi Hypervisor with VMFS File System
How to create a virtual machine
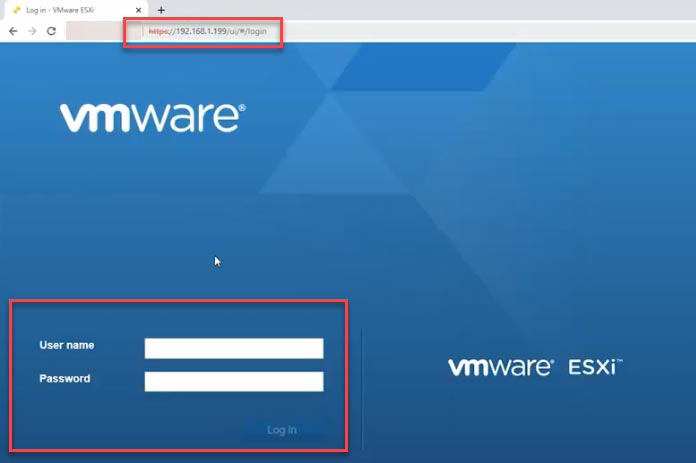
For starters, let’s explore how to create a virtual machine. On the client machine, open a browser and type the server’s IP address. In the login page, enter the administrator’s login and password.
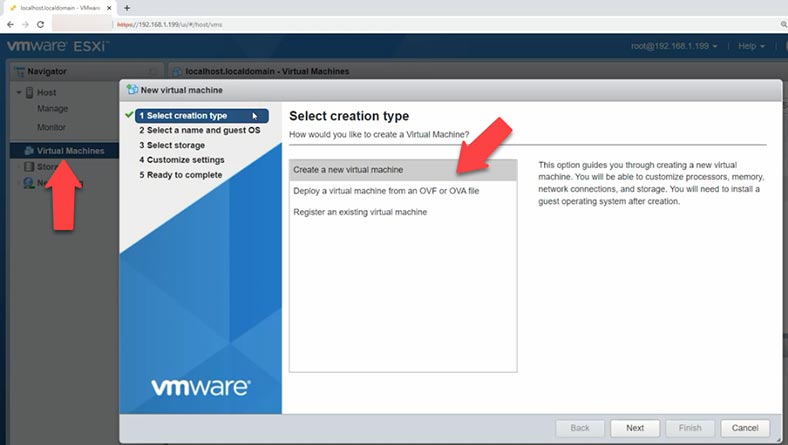
Open the Navigator and go to the tab “Virtual Machines.” In the window on the right, click “Create/Register VM.” In the window that opens, choose “Create a new virtual machine.”
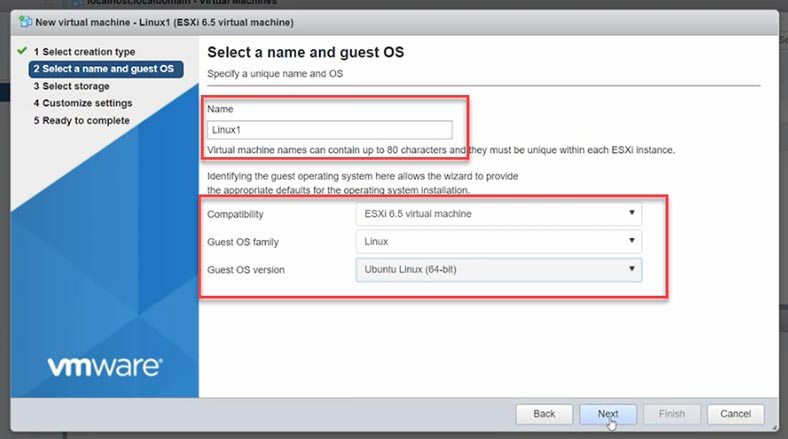
Then give the name of the virtual machine, and specify its operating system family and version.
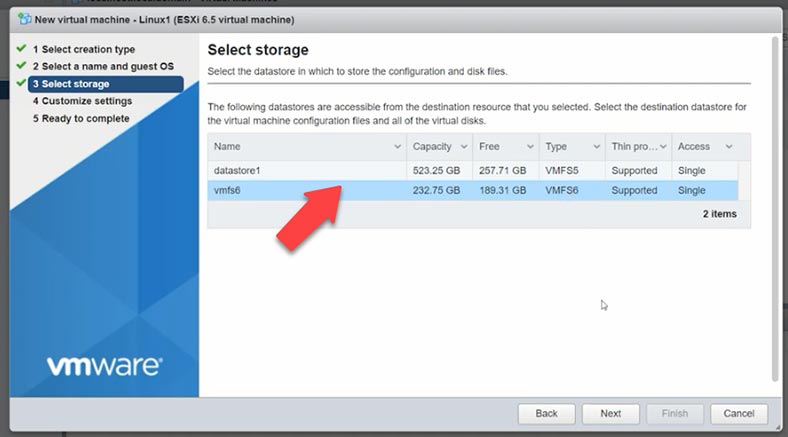
After that, choose the storage for the virtual machine files.
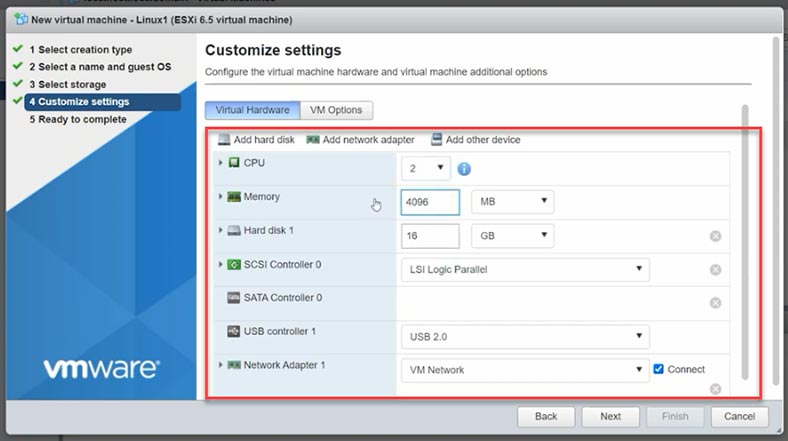
While configuring the parameters, select the number of processors and the amount of RAM to be allocated for the virtual machine. Also, don’t forget to allocate some disk space.
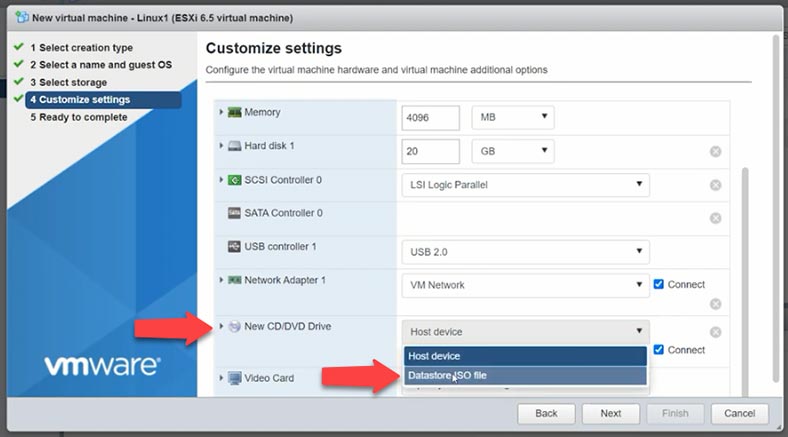
Click “Add other device” and select CD / DVD Drive. Select the disk type for it – Datastore ISO File, and give the path to the ISO file of the operating system.
If there is no such image on your server, then at the top of the window that opens, click “Upload” and give the path to the previously downloaded ISO image of the operating system that is stored on the client machine, then click “Open” and wait for the upload to be completed. After that, highlight it and click “Select” – “Next” – and then “Finish.”
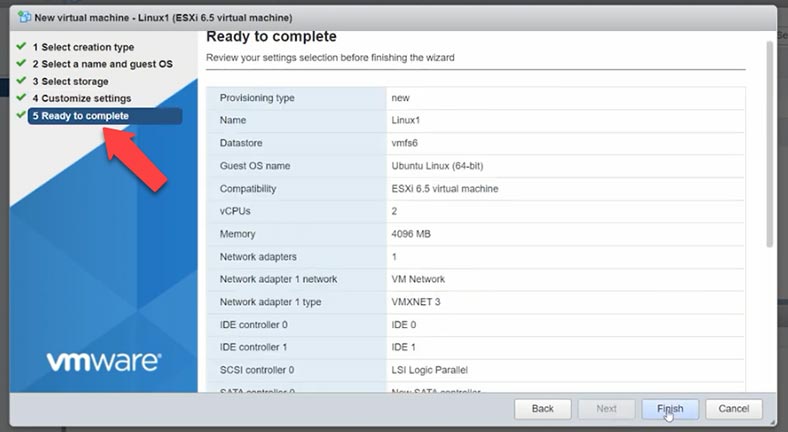
The only thing left to do is to start it and install the operating system. Select the virtual machine and click “Power on.” The actual process of installing an operating system to a virtual machine is the same as if you were installing it to your computer, so just follow the installer directions.
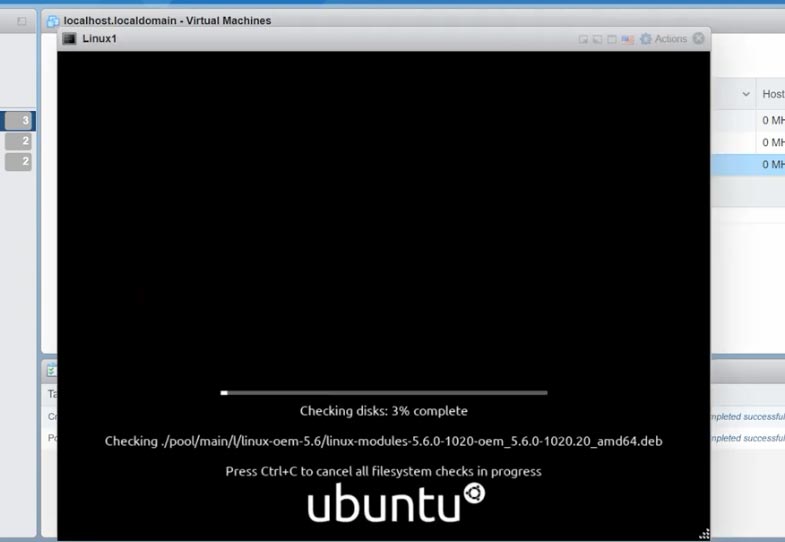
When the installation process is over, the virtual machine will be ready to use.
How to take a snapshot in vSphere web client
The vSphere hypervisor lets you take snapshots of your virtual machine. A snapshot captures the state and data of a virtual machine at the specific time when the snapshot was taken. Snapshots can helps you revert the operating system when files are deleted accidentally, or when you want to return to previous settings.
To take a snapshot, select a virtual machine that is powered off, select “Snapshot” – “Take snapshot.” Specify a name and click “Take Snapshot.”
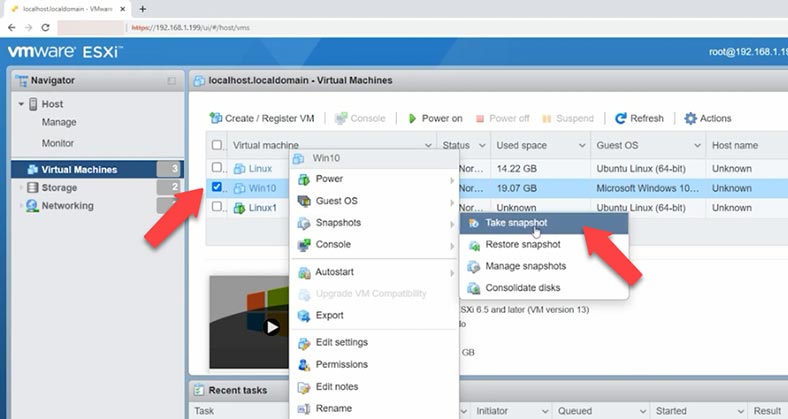
Now that you have the snapshot, you can revert the operating system to that snapshot at any time.
How to revert to a snapshot in vSphere web client
When you go back to a snapshot, all settings, changes, or disks added after the snapshot was taken will be restored to their previous state.
If you need to do it, right-click on the virtual machine – “Snapshot” – “Restore snapshot.”
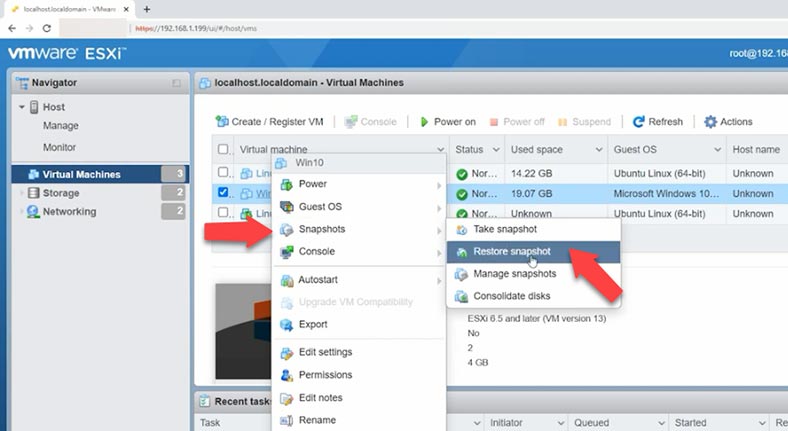
You will see a warning saying the current state of the virtual machine will be lost unless you save it in a snapshot. Click “Restore” to confirm your decision.
How to remove a snapshot
In the snapshot manager, you can always remove any snapshot you have taken before. Select the snapshot you want to delete, click “Delete snapshot” and then click “Remove” to confirm.
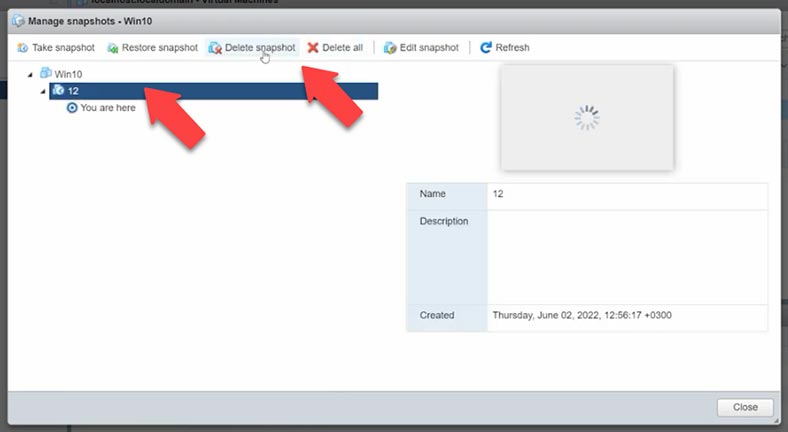
In the manager, you can choose to remove a single snapshot, or all of them by clicking “Delete all snapshots.”
How to recover virtual machine files from vSphere hypervisor
If you have accidentally removed a wrong snapshot or virtual machine files, if your server broke down or if you lost access to your virtual machine – don’t worry, but use the specialized data recovery tool – Hetman Partition Recovery.
As we know, files of virtual machines managed by ESXi hypervisor are stored on the disk, in volumes having the VMFS file system. The biggest problem is that when an ESXi host breaks down, there is no way to retrieve the information stored on its disks – unless you use some specialized software. The matter is that classic Windows and Linux operating systems cannot recognize volumes or partitions with the VMFS file system. However, Hetman Partition Recovery offers complete support for VMFS file system including its latest version, and it supports SEsparse snapshot files as well.
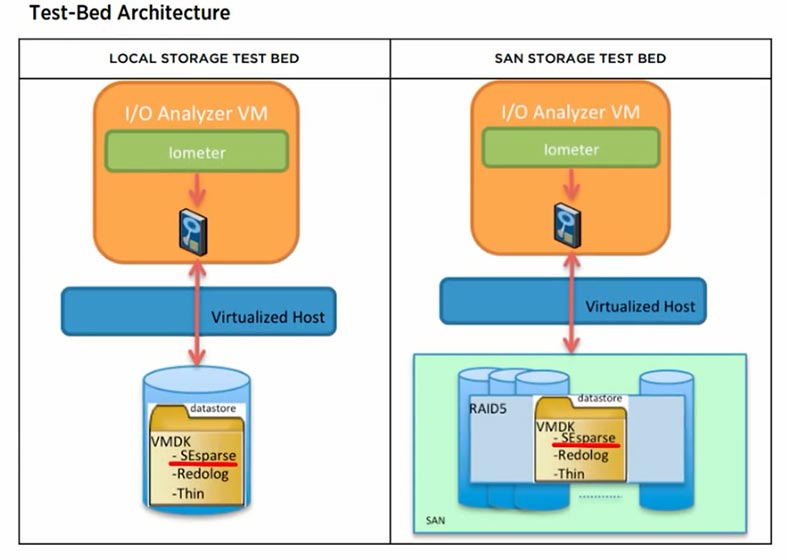
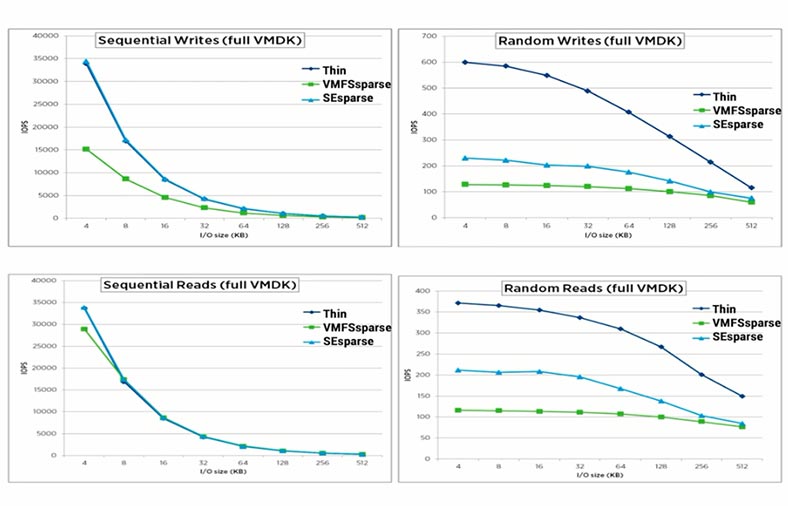
SEsparse is a new virtual disk format similar to VMFSsparse, but with some improvements and new features. One of the differences between SEsparse and VMFSsparse is that SEsparse uses 4 KB blocks in contrast with 512-byte blocks in VMFSsparse. In the end, it supports files up to 2 TB thanks to having a 64-bit structure.
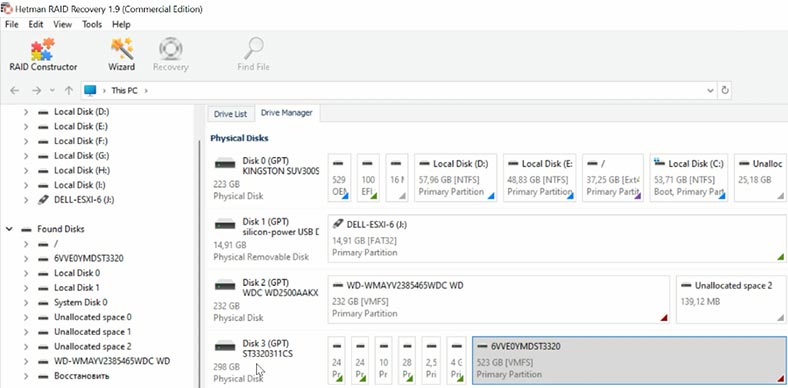
Most often, virtual machines are stored on a RAID system, and even with the well-known reliability of disk arrays, we cannot exclude the chances of their breaking down. To rebuild a damaged RAID system inside the broken server and recover the virtual machine files, use Hetman RAID Recovery.
Take the disks out of the server and connect them to a Windows computer. Download, install and run the program. Hetman RAID Recovery will automatically rebuild the damaged RAID system with the available disks. All you need to do is to scan it and restore the files you need. In my case, the virtual machines are stored on one disk without RAID.
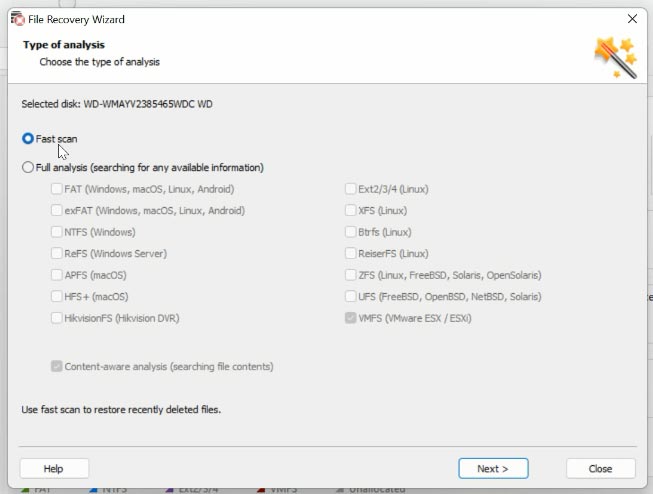
Right-click on the disk and choose the scan type to start searching for files. “Fast scan” will check it in a few seconds and display the files. If the program failed to find the lost files with “Fast scan,” go for “Full analysis,” specify the file system and start the search. In more complicated situations, you can find files by their signatures; to have the program do it, check the box for content-aware analysis. In my case, “Fast scan” will be enough.
After that, go to the directory where virtual hard disk files were stored. By default, they are located here: Volume name \ virtual machine name
Look for the files with the name of your virtual machine and the extension .vmdk; snapshot files will have the extension sesparse.vmdk, and configuration files can be distinguished by the extension .vmx. To avoid any issues with importing files in the future, it is better to completely recover the virtual machine folder.
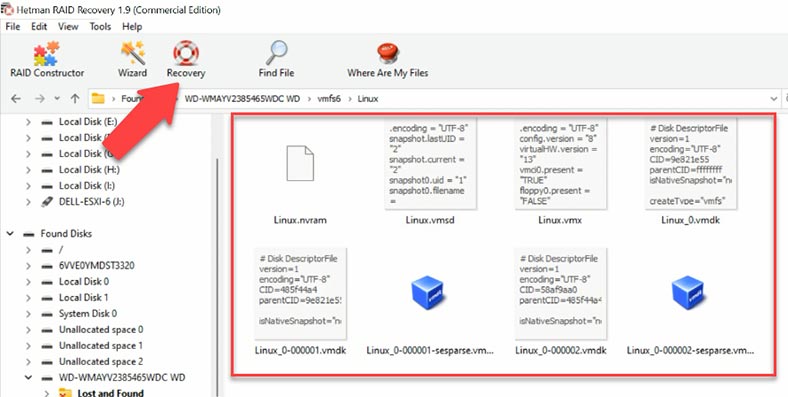
Select the files you want to recover, click “Recovery,” select where you want to save them, and click “Recovery” again. When the entire process is over, you will find the recovered files in the folder you have chosen.
How to import files, and restore operability of the virtual machine
Now, if you need to restore operability of the virtual machine, the recovered files should be uploaded to the server and registered with the vSphere web client.
Method 1. Method one
To do that, enable SSH access to the server and connect to it by SFTP. Copy the virtual machine files to the server – and into this specific folder:
/vmfs/volumes/628193bd-b8c5e55a-48d0-3cd92b5c9306
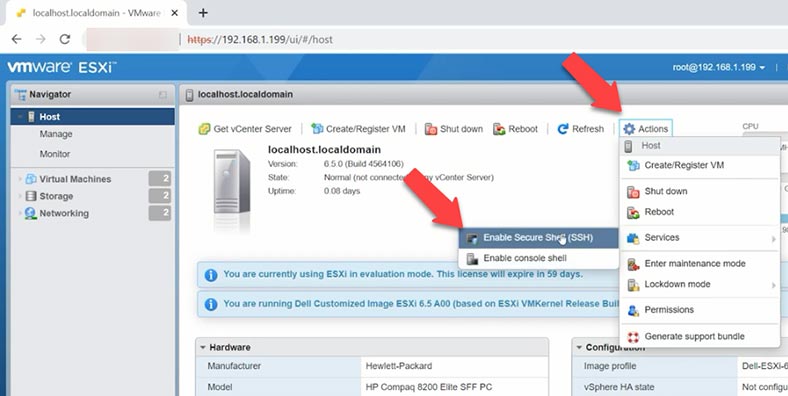
Then open the web client, click “Host” - “Create or register a virtual machine,” open the last option – “Register an existing virtual machine.”
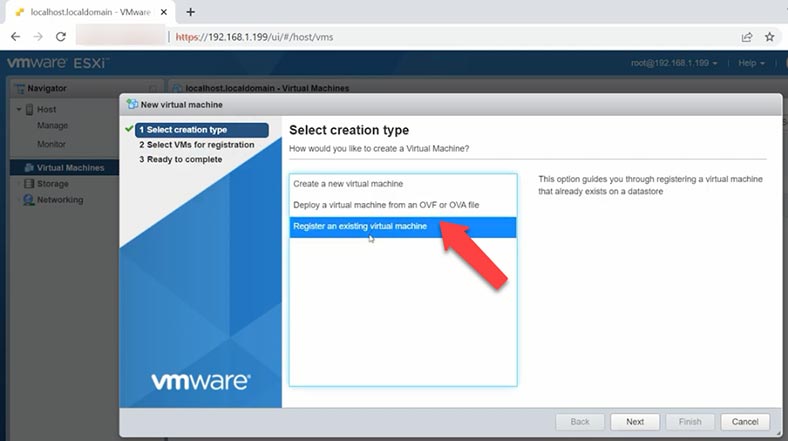
After that, specify the folder containing the recovered virtual machine files by choosing “Select one or more virtual machines, a datastore or a directory.” Select – Next – Finish.
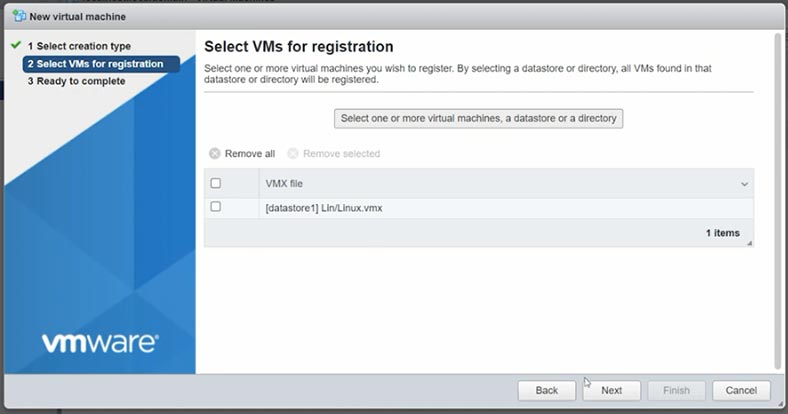
The program will upload the files and the virtual machine will appear on this list. Now you can start it and access the files you need.
Method 2. Method two
If you tried the first method, and the virtual machine starts with an error, then try another method instead. Create a new virtual machine, and while configuring its hardware, remove the hard disk. After that, click “Add hard disk,” choose the second option “Existing hard disk.”
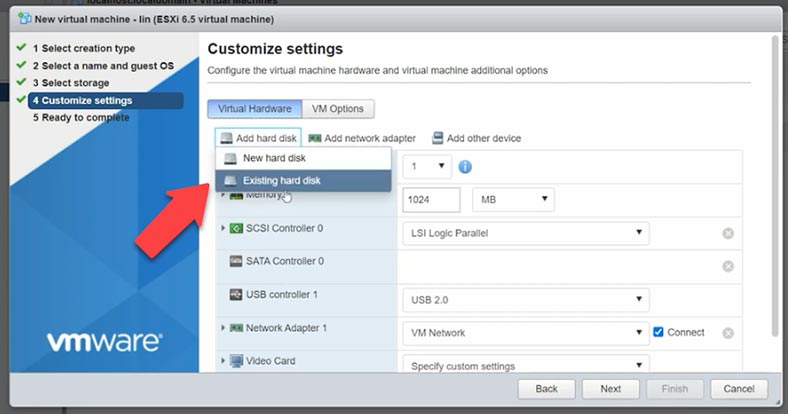
Give the path to the folder containing virtual machine files - .vmdk – Select, Next and Finish.
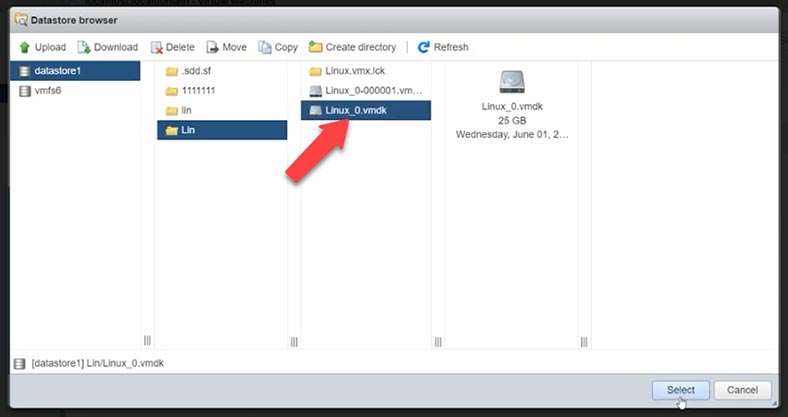
Now try to boot the virtual machine and see if there are any errors. Sometimes this method helps to fix the boot problem.
How to recover data from a virtual disk (VHD) file
If you try to boot a virtual machine and encounter an error because the files were damaged, or if you accidentally removed some information while working with the virtual machine - don’t worry: with Hetman Partition Recovery, all the lost data will be back.
Our program supports data recovery from dynamic and fixed-size virtual hard disks, restore points and operating system snapshots.
Hetman Partition Recovery lets you restore both virtual machine files - VMDK - and any data removed from VMDK disks. Also, it can recover data files from formatted virtual hard disks, and it doesn’t matter if the disk used to be a dynamic or a fixed-size one.
| Supported Hetman Partition Recovery Disk Format | Description |
|---|---|
| VDI | Oracle VirtualBox Disk Format |
| VMDK | VMware Player/Workstation Disk Format |
| VHD, VHDX | Microsoft Hyper-V Disk Format |
| HDD | Parallels Desktop Disk Format |
| QED | Format for QEMU/KVM |
| QCOW | Format for QEMU |
| Also supports disks of the following hypervisors | VMware ESXi, OpenStack, KVM, LCX, Proxmox VE, Red Hat Enterprise Virtualization (RHEV), Hyper-V, XEN, Citrix Hypervisor |
After you have recovered .VMDK files or copied them to the computer, you need to upload them to our program.
In the main window, open the Tools tab and choose “Mount disk.” There are two ways to mount it: choose a RAW disk image if necessary, or choose Virtual Machines. The second item displays the list of files and tools that our program supports.
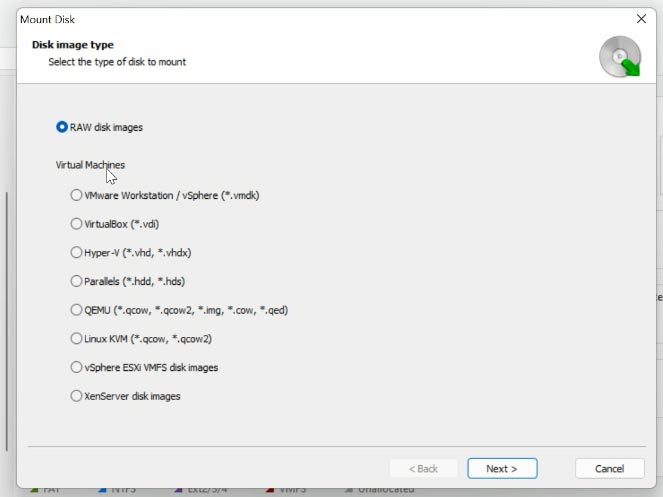
Check the required image type, give the path to the folder containing virtual hard disk files, and click “Open.” The program will upload and display all virtual disk and snapshot files which exist in such folder. In addition to the main disks there are also restore point files, and snapshots of the virtual machine. The virtual disk file which is currently in use by the virtual machine will be marked as “Active.” Other files are snapshots and restore points, and using the date of their creation, you can decide which one you need to recover.
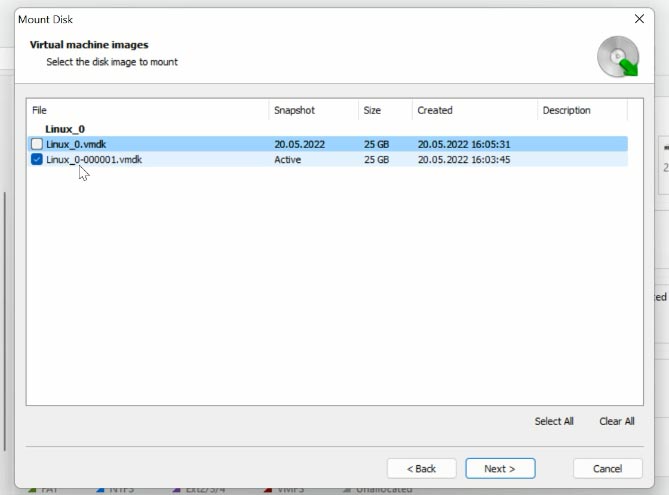
Check the box next to the disk you are interested in, and click Next. It will appear in the Drive Manager immediately. Right-click on the disk and choose “Open.” Select the scan type, and choose “Fast scan” for starters. If the “Fast scan” can’t find the required files, then go for “Full analysis.” Right-click on the disk - “Analyse again” - “Full analysis” - and specify the file system for this disk.
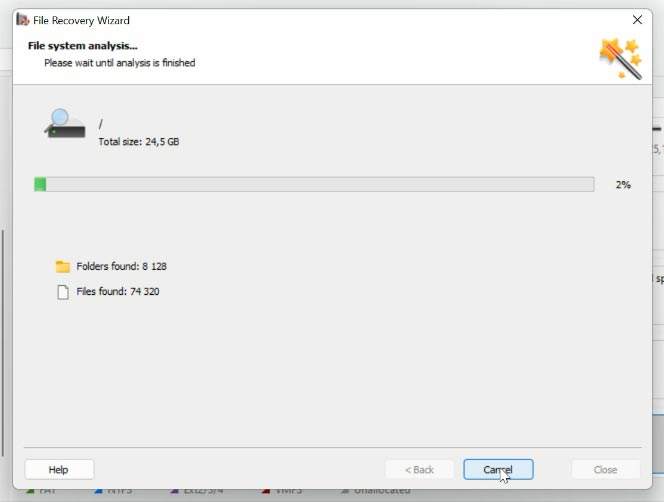
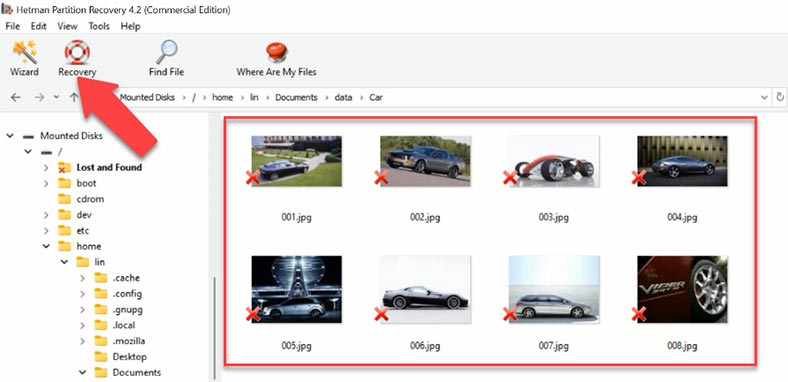
Then go to the folder where the files used to be stored, and look for the ones you need to restore, select them and click “Recovery,” select the disk and folder where to save them, and click “Recovery” again.

⬆️ Top Tools to Recover Data from VMFS, ESXi, vSphere Hypervisor Virtual Disks


The reason for this behavior may be more than just a lack of free nodes.
The first thing to do is to check that the problem is really not with them. This is done with the command: stat -f / Or you can also use the command df -i. If all is well with the iinodes, the problem may lie in the so called "small file blocks" (SFB) and "large file blocks" (LFB), which are created on VMFS for the needs of the file system for different file types.
The point of the problem is that sometimes they run out of SFBs and VMFS starts the mechanism of converting LFBs to SFBs, but the resulting SFBs are not immediately available.