GVINUM RAID Data Recovery on FreeBSD: Step-by-Step Guide
In this tutorial, we’ll walk you through the process of recovering data from a GVINUM RAID setup on FreeBSD. Whether you’ve experienced disk failures, data corruption, or other issues with your GVINUM RAID array, we’ll guide you step-by-step through the data recovery process.
- How to install FreeBSD
- Installing Gnome graphic interface
- How to create a RAID 5
- FreeBSD GVINUM Data Recovery
- Questions and answers
- Comments
Gvinum is a control utility of a logical volume manager and how the Vinum volume manager is implemented in GEOM. It underwent many changes since the initial import in FreeBSD version 5.0. However, as of early 2020, gvinum has been deprecated. At this time, it is seen as mostly unmaintained, and inferior to ZFS for most purposes. Yet some people do use it to organize their data storage systems.
| № | Characteristic | Description |
|---|---|---|
| 1 | Type | Logical volume manager for FreeBSD |
| 2 | Volume Types | Supports concatenation, striping, mirroring, and RAID |
| 3 | Redundancy | Allows for RAID-like configurations to ensure data redundancy |
| 4 | Dynamic Volume Resizing | Volumes can be resized dynamically without unmounting |
| 5 | Snapshots | Supports taking snapshots of volumes for backup and recovery |
| 6 | Integration | Integrates with the FreeBSD filesystem and tools |
| 7 | Performance | Offers performance benefits through striping |
| 8 | User Management | Provides tools for managing and monitoring volumes |

How to Recover Data from GVINUM RAID on FreeBsd
How to install FreeBSD
For starters, let’s explore how to install FreeBSD. Just as for any other operating system, you need to download an installation image. On its official website, you can find different versions, both 32-bit and 64-bit. Download the version which suits you best depending on the amount of system memory. At the moment, the latest FreeBSD version available is 13.
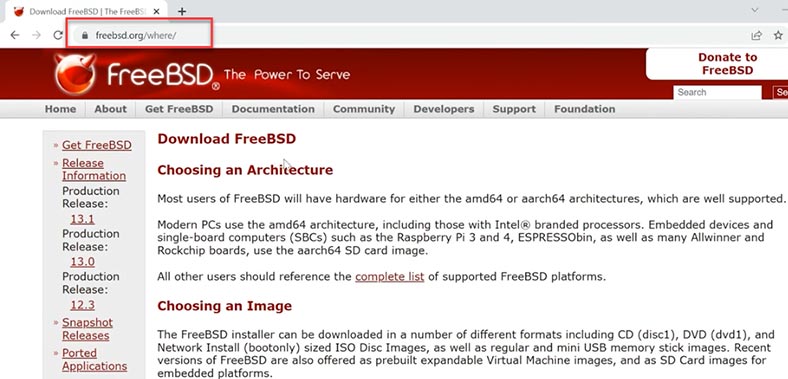
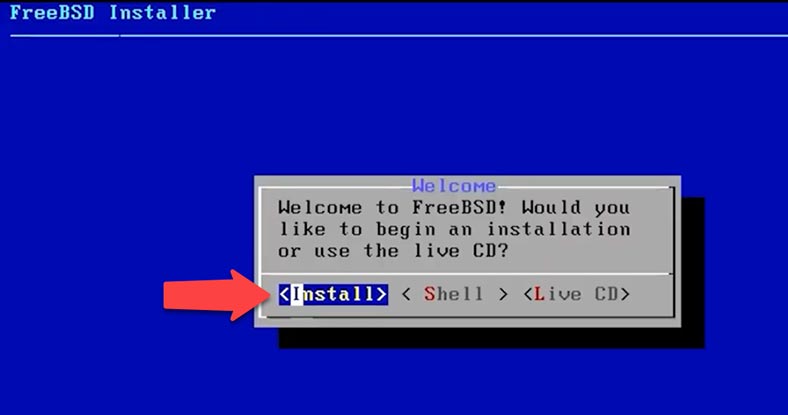
Create a boot USB drive with a specialized utility – for example, Rufus or Etcher. Connect it to the computer where you want to install this operating system, and boot from the USB drive. When the computer starts booting, press Enter to select the first item on the list – the installer. When you see the installer window, choose Install and press Enter.
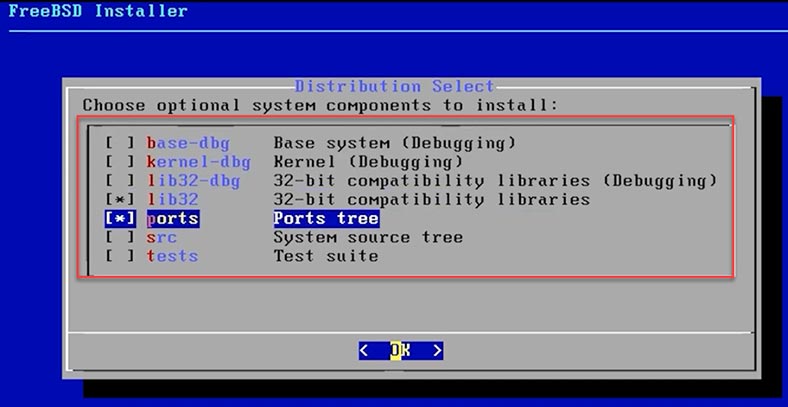
At the next stage, you can choose a keyboard layout; I’ll keep the default option, and press Select. Specify the host name for the server. When choosing system components, these two items will suffice for a typical server build – lib32 and ports. To select an item, press Space and OK to continue.
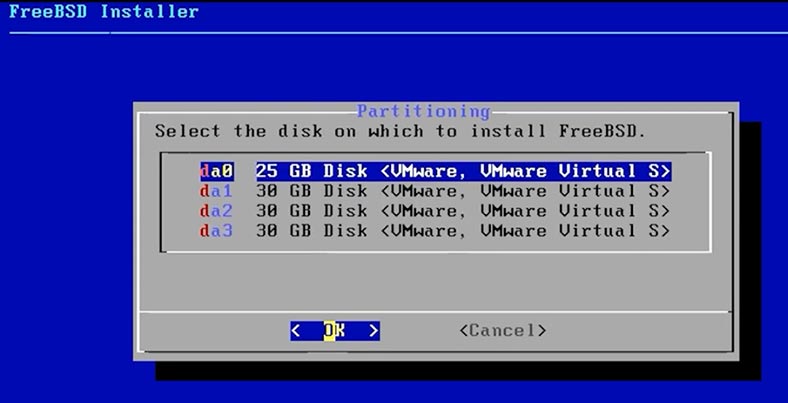
The next step is disk partitioning: I choose automatic UFS – OK. Since I have allocated a separate hard disk for the operating system, I choose the option Entire Disk.
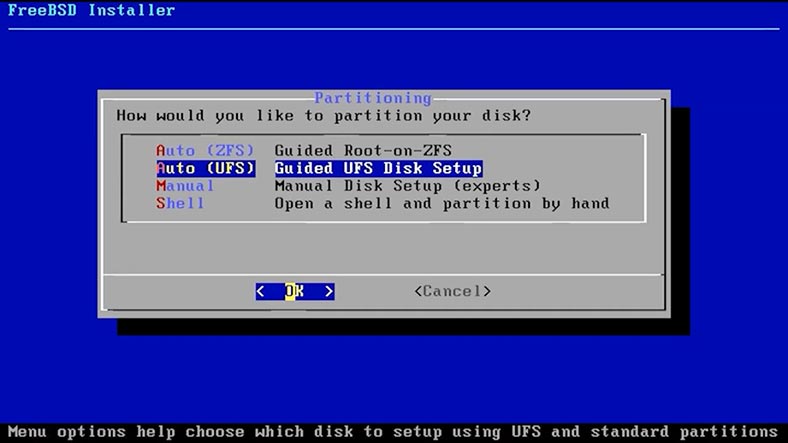
If you need to create a separate partition, choose Partition. Select a partition scheme from the list, check the future disk setup, and click Finish. Agree to overwrite the disk. This will erase all data. After that, the operating system will be installed without any user actions, so just wait until it is complete.
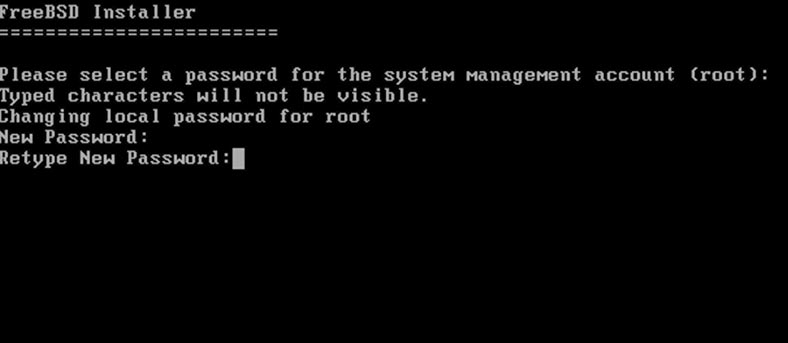
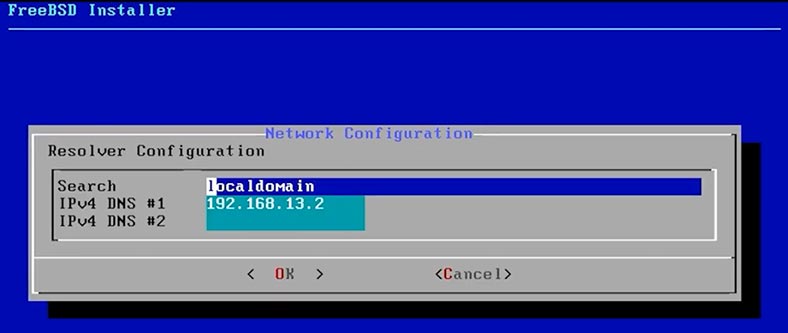
Give the superuser password – root, and type it again to confirm. In the network settings, choose the network interface you need, and click ОK.
Now you should set network options IPv4 – Yes, use DHCP – Yes, IPv6 – No. Choose a region, country, set up date and time, Skip.
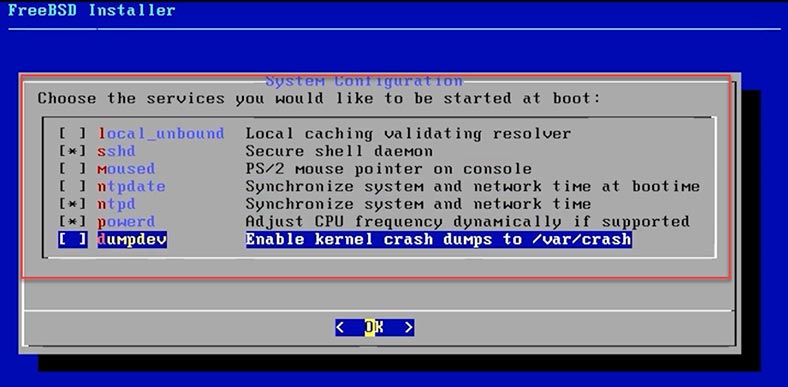
Now you should select the services which run at boot: sshd, ntpd, powerd.
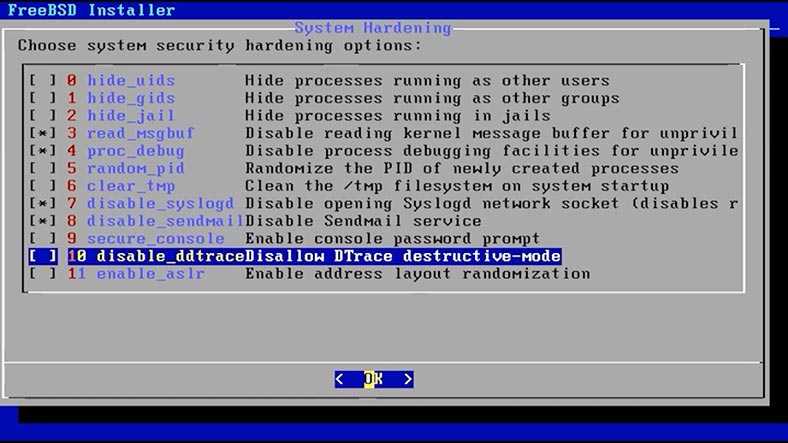
Select security options – 3,4,7,8. To add a new user at this stage, press Yes/No
When FreeBSD reboots and starts, you will see the command line. Since too few people enjoy working with it, I will also show you how to install GNOME, the graphic interface.
Installing Gnome graphic interface
Gnome is a free open-source desktop for Unix-type operating systems. However, you also need to install Xorg to make the graphic interface work.
Xorg is a free and open-source implementation of the X Window System display server that allows users to organize graphic working environment.
To install Xorg, type this command:
pkg install xorg
and hit Yes to confirm.
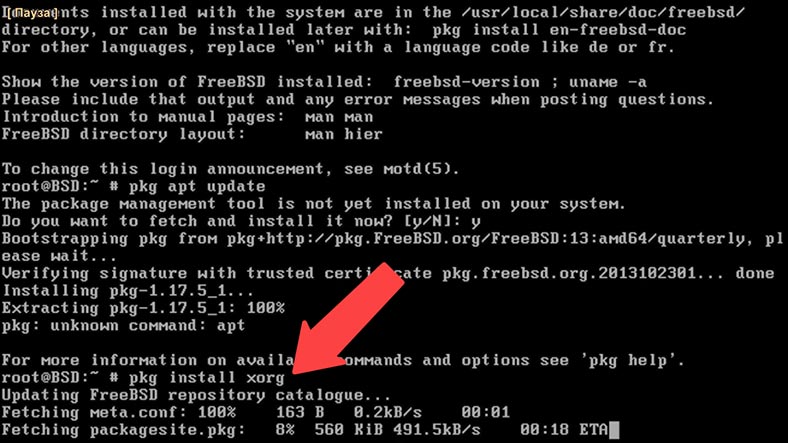
It starts the installation process. After Xorg is installed, you can move on to installing Gnome.
Type the following command:
pkg install gnome
Then hit Yes to confirm.
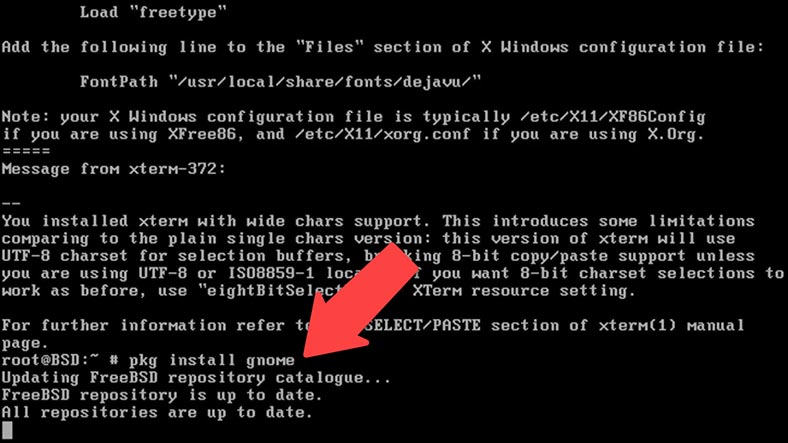
The graphic interface will not boot automatically after you have installed the components. To have it booted automatically at startup, you need to change some settings.
Type this command in the console:
ee /etc/rc.conf
It will open the configuration file where you should add a line like this:
gnome_enable=”YES”
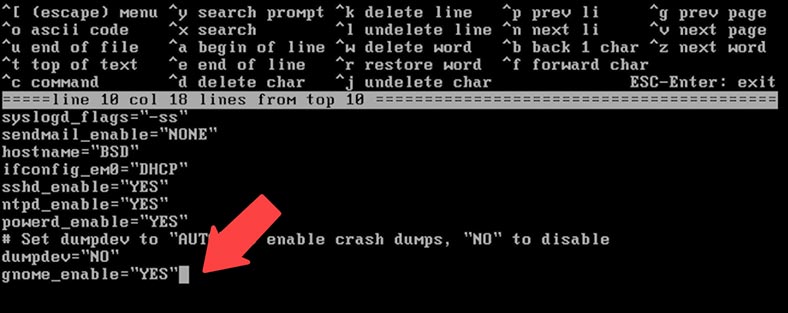
After that press Esc, and in teh window that opens, choose leave editor and press Enter.
Then choose Save changes and press Enter again.
And type this to restart:
Reboot
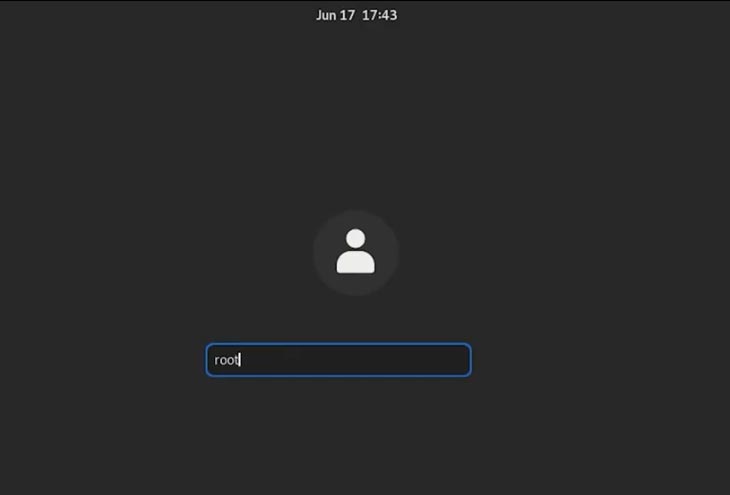
After the restart, you will no longer see the console but a graphic interface. Now type the login and password that you have given before. After the password is provided, the Gnome desktop will boot. At this stage, the installation of FreeBSD and GNOME interface is complete.
How to create a RAID 5
All right, we have installed the operating system and added a graphic interface for convenience. Now let’s explore how to build a software RAID 5 with the three hard disks connected to this PC, and organize a storage for important files.
To begin with, you need to identify the names of connected disks and determine which of them will be used to build the RAID system.
Type the command:
sysctl kern.disks
As a result, here’s what you see:
kern.disks: da3 da2 da1 da0 cd0
cd0 is the disk drive
da0 – the system drive
And da3, da2 and da1 are the disks that we will use to build RAID5; in the current system, they are located in the folder /dev/da1; /dev/da2; and /dev/da3
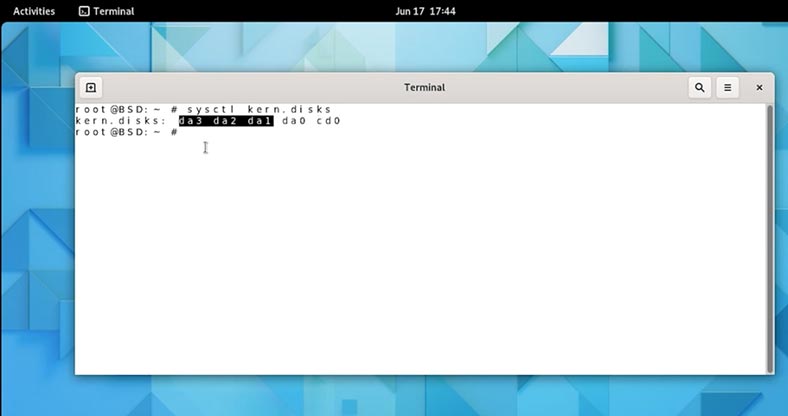
If you are in doubt, you can check the disk size and do it with this command:
fdisk da1
As a result, you will see this information: we will need it later, because this is the disk size.
start 63, size 62910477 (30718 Meg), flag 80 (active)
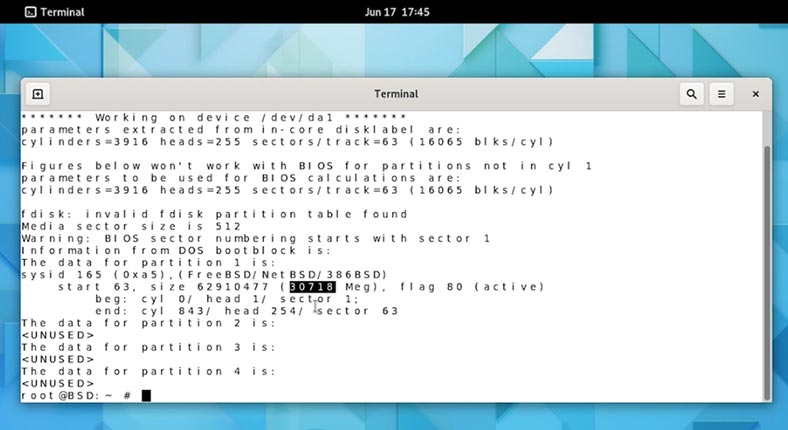
Now you should create a directory, where the RAID is going to be mounted; let’s give it this name - server.
mkdir /server
After that, create a configuration file for the RAID system by typing this command:
ee /etc/gvinum.conf
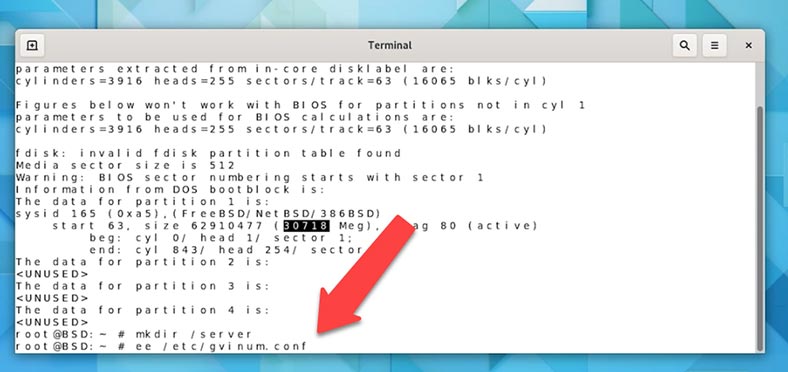
Fill in the required information: disk names, RAID configuration, and size for every disk.
drive raid51 device /dev/da1
drive raid52 device /dev/da2
drive raid53 device /dev/da3
volume raid5
plex org raid5 256k
sd len 30718m drive raid51
sd len 30718m drive raid52
sd len 30718m drive raid53
drive raid51 is the name for the physical disk (but you can use any name you like)
/dev/da1 – the disk itself in this system
volume raid5 is the name of the virtual disk which is going to make up our RAID 5.
plex is the set that provides the entire address space. Since we are going to build RAID5, type the following: org raid5, and the stripe size will be 256k (as recommended by the manual).
sd are subdisks. We will use 3 disks, 30 GB each, but we’ll specify the size as follows: 20473m. (the figure I have highlighted before)
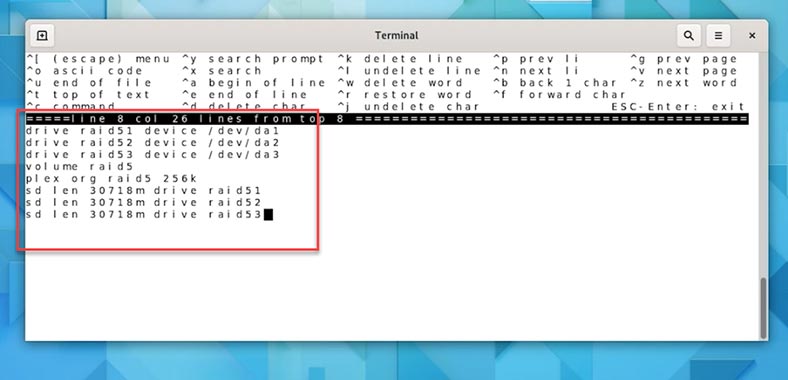
Press Esc to save the file changes.
Now, you can create the RAID 5 system itself.
gvinum create /etc/gvinum.conf
As a result, a new device will be created - /dev/gvinum/raid5.
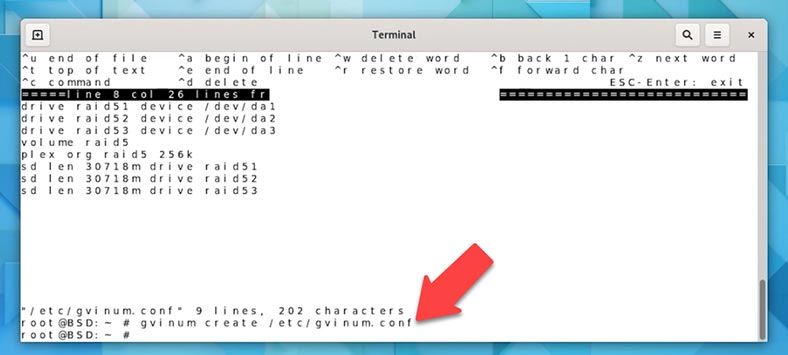
Now you should create a file system for it:
# newfs /dev/gvinum/raid5
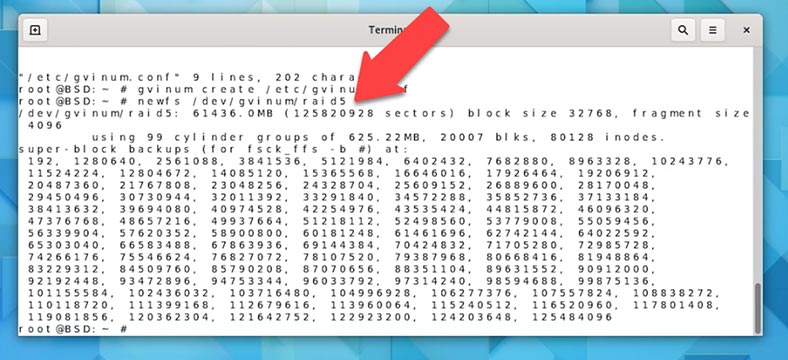
After that, let’s make the vinum module boot automatically
# echo geom_vinum_load=»YES» >> /boot/loader.conf
At the next stage, the array should be mounted. As the mount point, we will the folder /server which you have created at the beginning.
# echo /dev/gvinum/raid5 /server ufs rw 2 2 >> /etc/fstab
Finally, restart the computer
# reboot
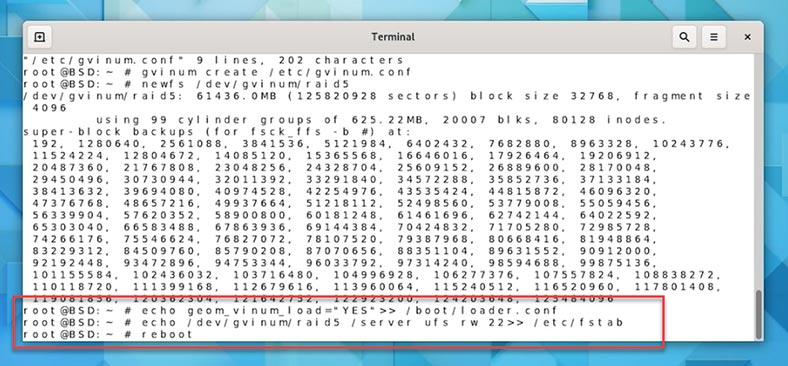
That’s all, we have built RAID 5, let’s use another command to check it:
# gvinum l
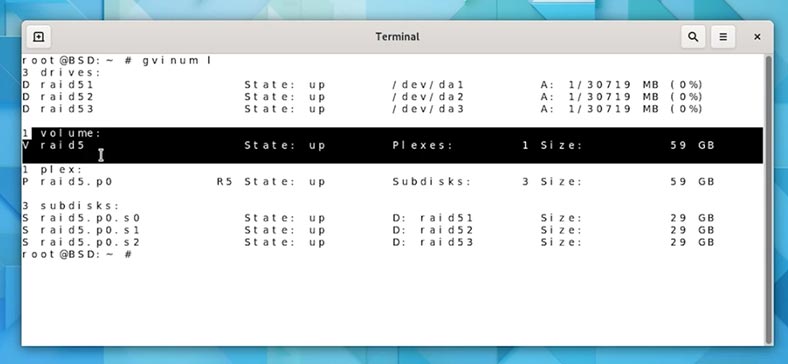
You can see the three disks and the new volume of the corresponding size.
FreeBSD GVINUM Data Recovery
How to recover data from a RAID5 FreeBSD GVINUM
RAID 5 is quite a reliable solution in terms of safely keeping important data, but just like any other storage, it is not perfect. As a result of many factors, its operation may be interrupted, and some information may be lost.
If your server is down, or one or several disks in the array are no longer functional, and as a result of that you have lost access to some critical data - use a specialized data recovery tool - Hetman RAID Recovery.
This program supports most popular file systems and RAID types. It will read all the necessary information on the fly and rebuild the damaged RAID automatically. All you need to do is to scan it and restore the files you need.
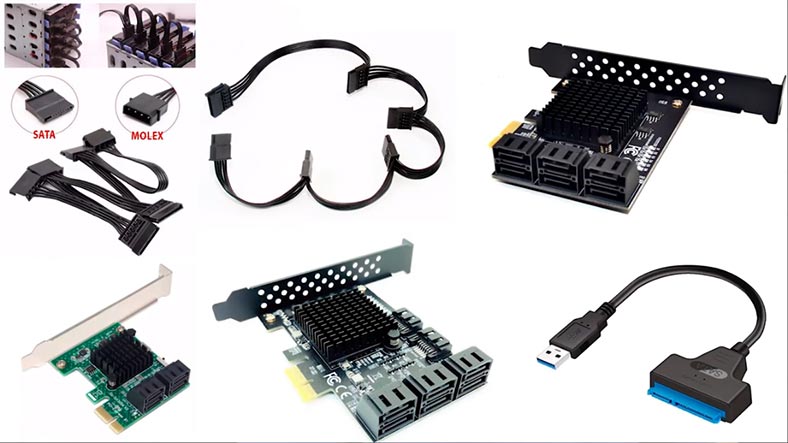
Take the disks out of the server where the RAID was built and connect them to a Windows computer. If your motherboard does not let you connect all of them at once, use special adapters and expansion cards.
As you can see, the program has rebuilt the RAID without effort and now it displays all the data inside it. Here is our RAID 5 with the UFS file system.
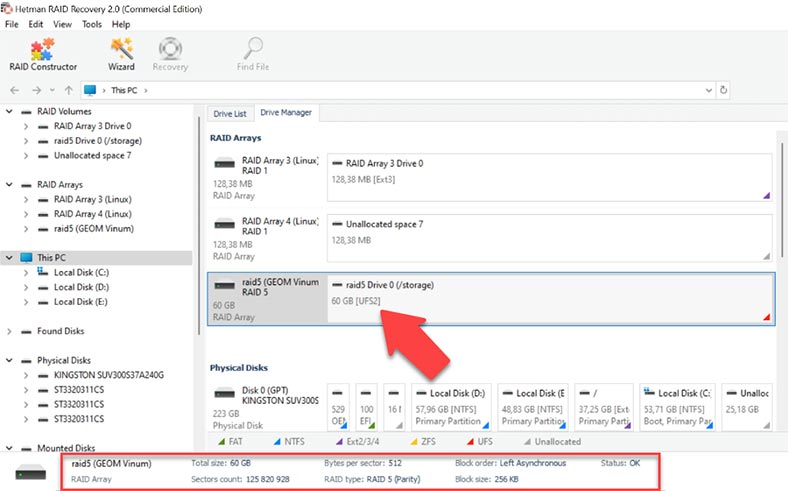
Right-click on the disk and select Open. Select the scan type - for example, “Fast scan” will quickly search the disk and display all the information it has found. If the Fast scan can’t find the necessary files, then go for Full analysis.
Go back to the Drive Manager, right-click on the disk and choose Analyze again. Choose Full analysis, file system – Next. In most complicated cases, we recommend searching files by their signatures, by checking the box next to Content-Aware analysis.
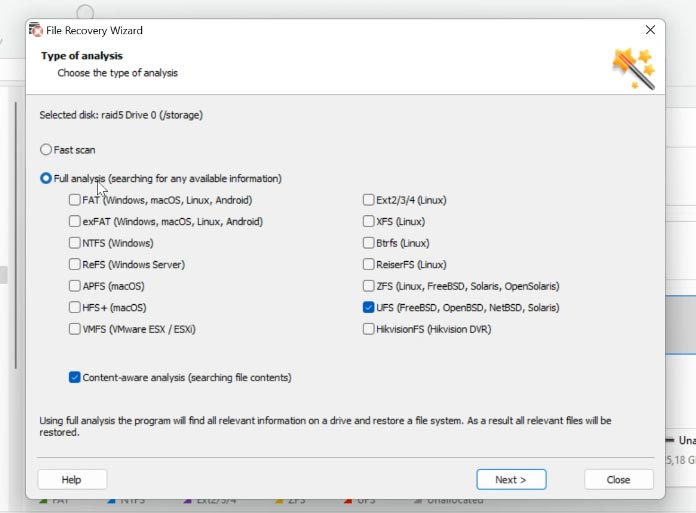
As a result, the program will display the files and folders which are still on the disks. Select the files you want to recover, click Recovery, and select where you want to save them. Before you save anything, you need to make sure that you have as much disk space as the amount of data you are planning to recover.
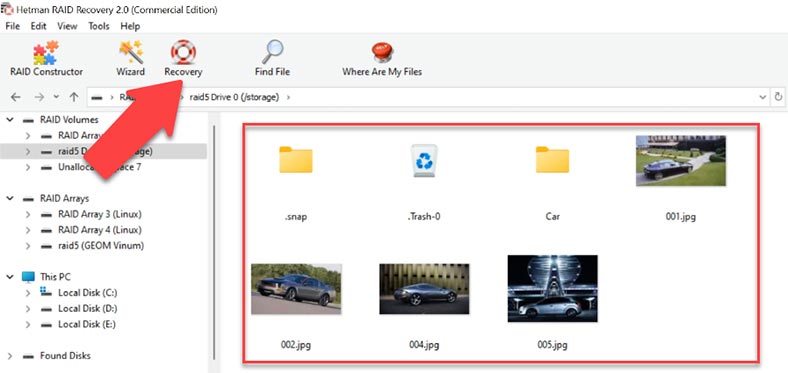
Having chosen the directory, hit Recovery. In the end, you will find the recovered files in the folder you have chosen.
How to build a RAID manually
In very complicated cases, when critical service data was erased from the disks, the program may fail to rebuild the RAID automatically. Luckily, for such cases this program features a manual way for rebuilding the RAID in a special constructor mode.
To use this mode, you need to know all the information about the damaged array.
Open RAID Constructor, select Manual mode, click Next and fill in the array data. RAID type, block order, block size, add the disks included into the array and specify their order. As a result, it should appear in this window; if you got all the properties right, you will see the directory tree If you see none, it means the properties are incorrect, or this information is insufficient to identify the RAID. You may have to specify the offset which tells you where the beginning of the disk is located. You can find this information with the help of HEX Editor.
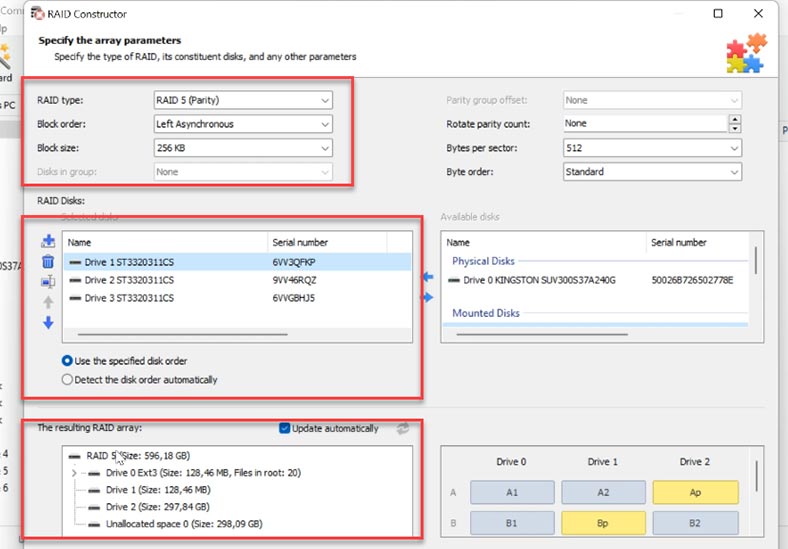
When all the properties are ready, click Add. After that, the array will appear in the Drive Manager. Scan it using Fast scan or Full analysis, and recover the files you need to restore.


