How to Recover Files Lost After Ctrl+Z in Windows
Read this article to learn how to find or recover files lost after using the Ctrl + Z key shortcut in a Windows operating system. We will explore a few methods to restore important files which were lost because of using Ctrl + Z.
- Why are files deleted after using Ctrl + Z
- Method 1. Repeat action with Ctrl + Y
- Method 2. Use the Bin
- Method 3. Manual file search in the Explorer
- Method 4. File History
- Method 5. Third-party data recovery tools
- Conclusion
- Questions and answers
- Comments
The key shortcut Ctrl + Z is used to cancel the last action. This function works in most applications as well as in any operating system within the Windows family. We all use it to quickly correct a mistake and get the system or app back to their previous state.
It’s a useful function, but sometimes it can play tricks, especially when it comes to deleting or moving files. As a result, you may find that an important file is missing. What shall we do, then? Can we bring back the files lost after applying this key shortcut?

How to Recover Files Lost After Ctrl+Z in Windows – Quick Fix!
Why are files deleted after using Ctrl + Z
There are various situations, when Ctrl + Z happens to make files disappear:
- In fact, in may occur when certain operations are performed. The thing is, it’s quite difficult to follow every single action you take. As a result, when you are trying to cancel one action, it actually cancels another action, and in the end, a file gets deleted.
- Also, files can be lost when you move them from one directory to another. When you cut them from one folder and insert into another, the files are no longer shown in the source folder. And if you use Ctrl + Z, they might be deleted.
- Another possible cause is interrupted connection between the computer and the drive. The cancelling operation might get interrupted, and it leaves the file in question to be damaged and inaccessible.
Method 1. Repeat action with Ctrl + Y
The first method to cancel the Ctrl + Z command is to use the redo command – Ctrl + Y.
If you press these keys in time, you’ll be able to cancel the action caused by Ctrl + Z. To do it, open the folder where the file was lost and press Ctrl + Y to repeat the last cancelled action.
This method is only good if you are quick to notice a file is missing, and you haven’t performed any other actions that might affect the whole system.
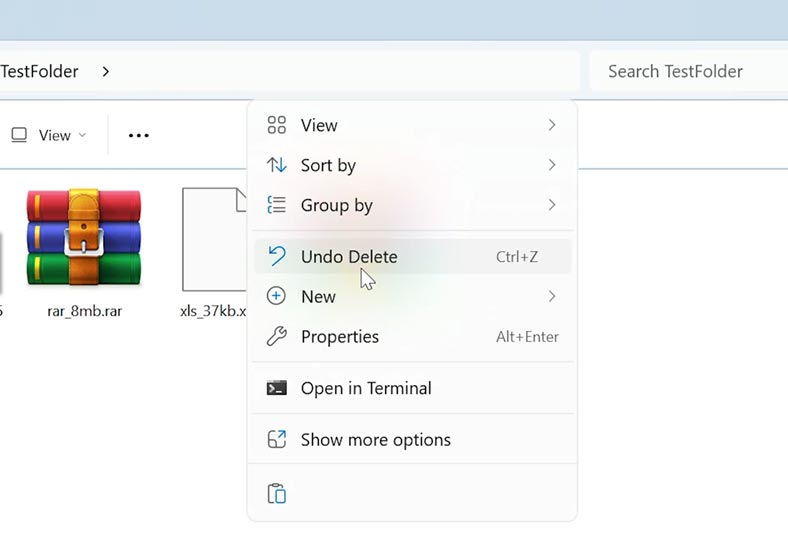
If a file was deleted by mistake, you can restore it by cancelling the delete operation. Do it by opening the folder where the deleted file used to exist, right-click on a free area and choose Undo Delete.
This method will only work if you deleted a file a short time ago.
Method 2. Use the Bin
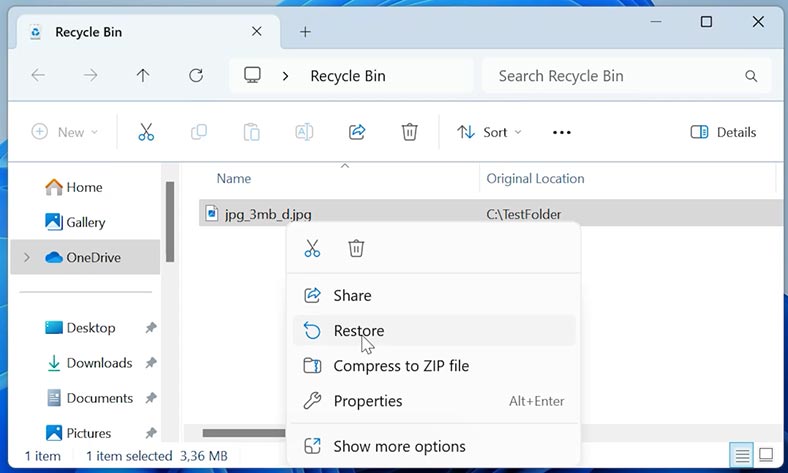
If the previous method doesn’t help, your next step should be to check the Recycle Bin. In most cases, files are moved to the Bin when you delete them.
Search the desktop for the Bin and open it.
Now find the deleted files or folders that you need to restore, right-click on an item and choose Restore. As you do that, the files will be sent to their original location – that is, to the folder from which they have been removed.
Method 3. Manual file search in the Explorer
In some cases, files may get moved to a different folder. If that’s your case, try to search for files in the Explorer.
Open the Explorer, go to the disk where you stored the files which you need to restore. In the upper right corner of the Explorer window, you will see the search field. Type the file name there and press Enter.

By opening Search Options, you can access extra settings to make your search more effective. This could be useful to sort files by date modified or by kind.
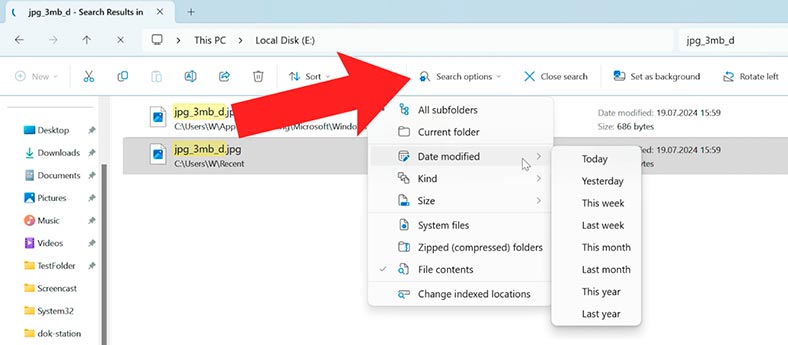
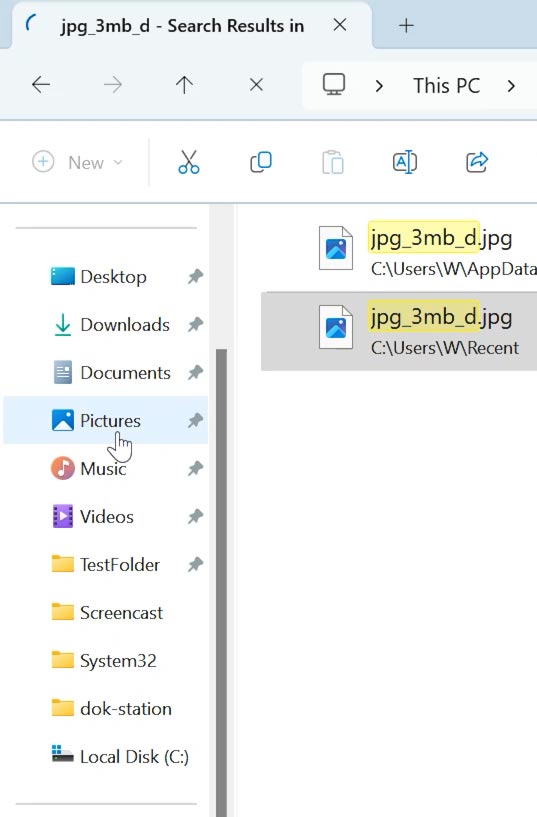
If you don’t know where to look for necessary files, we recommend starting with common folders such as Downloads, Documents, and Pictures.
Also, it makes sense to check the folders you have opened recently. They can be found in the left-side panel, below the quick access folders.
Method 4. File History
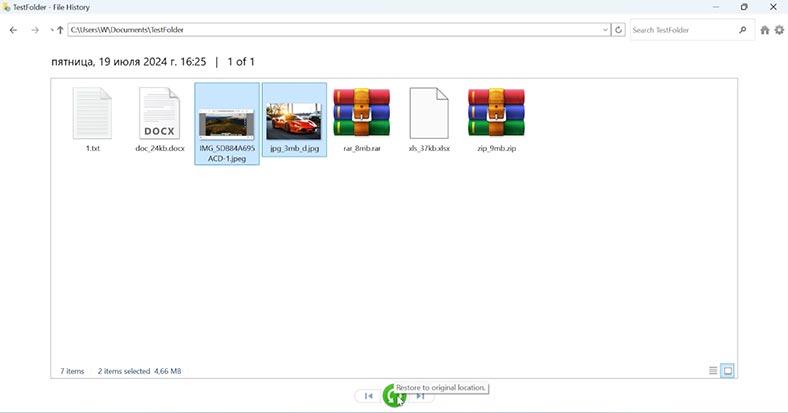
File History is an integrated Windows feature that keeps previous versions of files. With this feature activated, you’ll be able to recover your lost data easily.
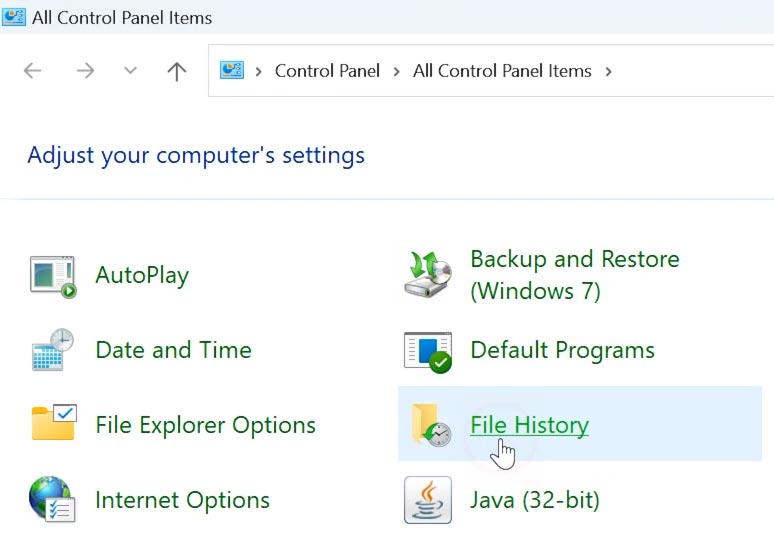
Open Control Panel and access File History.
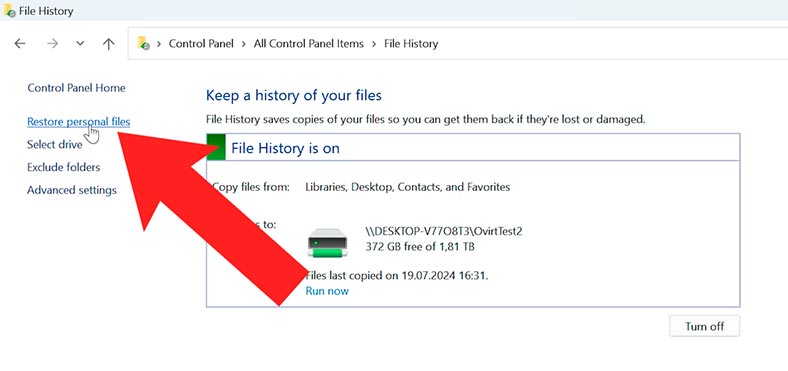
Find the folder or file you’d like to recover. Select the required file version and hit Restore. After that, it should reappear in the source folder.
Method 5. Third-party data recovery tools
If all previous methods involving integrated tools have failed, use a specialized data recovery tool – Hetman Partition Recovery. This tool will scan the hard disk and display its contents, including previously deleted files.
It will help you recover files lost as a result of accidental removal or disk formatting. This utility comprises a set of algorithms recovering file names, attributes and contents along with the original structure of all directories on a disk. It supports all popular file systems and disk types.
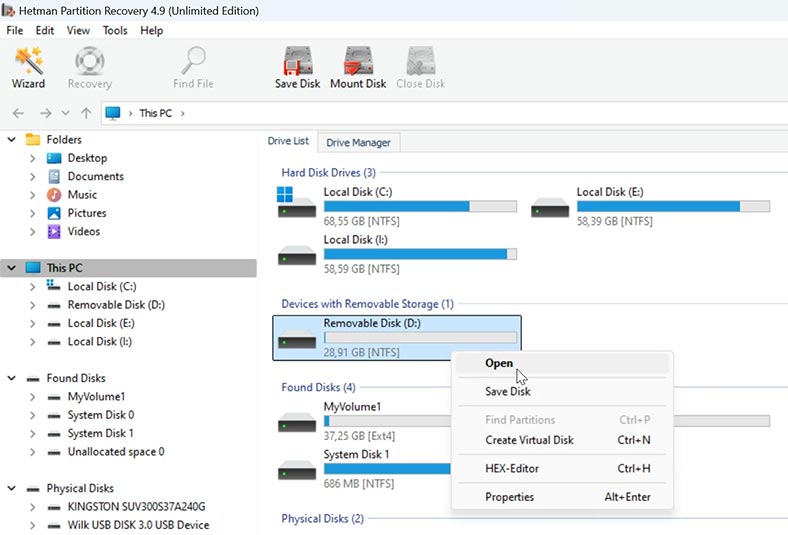
Download, install and run the utility. It will display all disks connected to this computer. Select the disk from which files were deleted, right-click on it and choose Open.
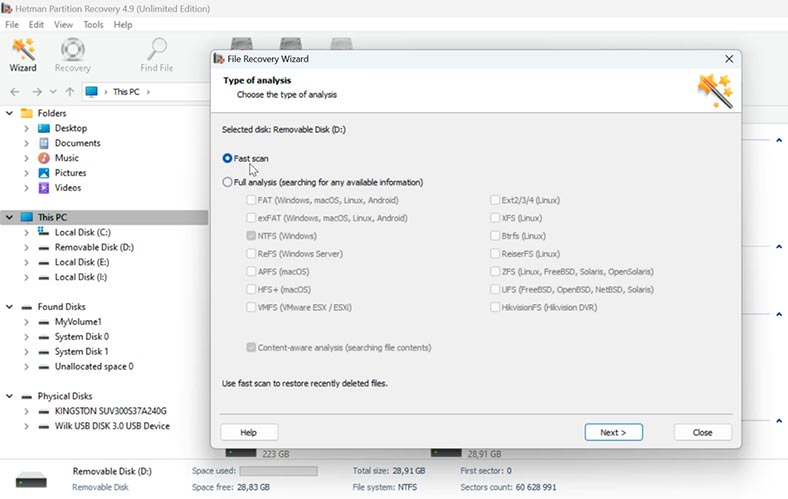
Choose the scan type – Fast scan or Full analysis.
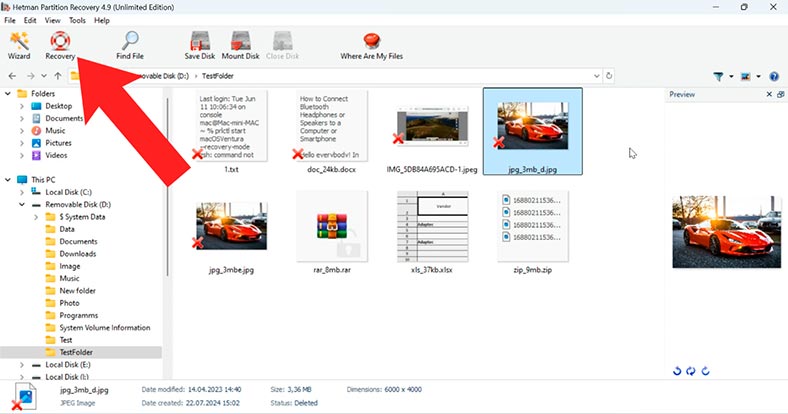
For starters, we recommend running a Fast scan The utility will scan the disk instantly and display all the files it can find. Previously deleted files will have a corresponding marking.
Select all the files you want to restore, and click Recovery.
Specify where to save the files (choose the disk and folder), and click Recovery again.
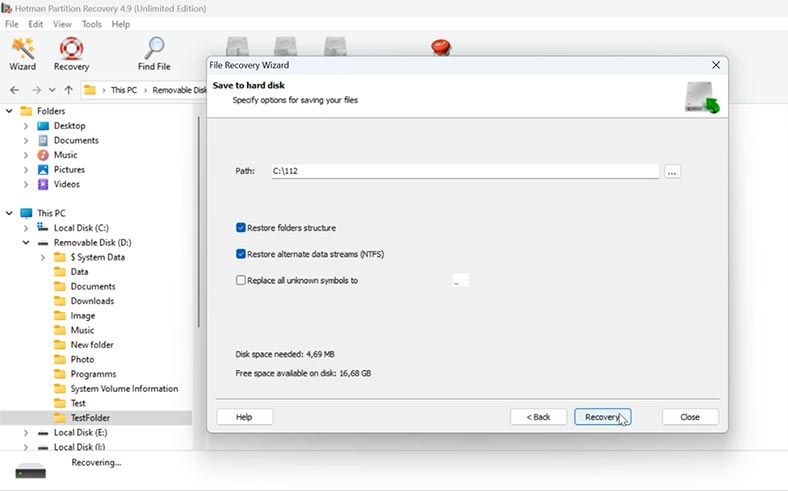
As a result, you will find the recovered files in the folder you have chosen.
If the Fast scan doesn’t help to find the files you need, then go for Full analysis. To do it, return to the main menu, right-click on the disk and choose Analyze again – Full analysis.
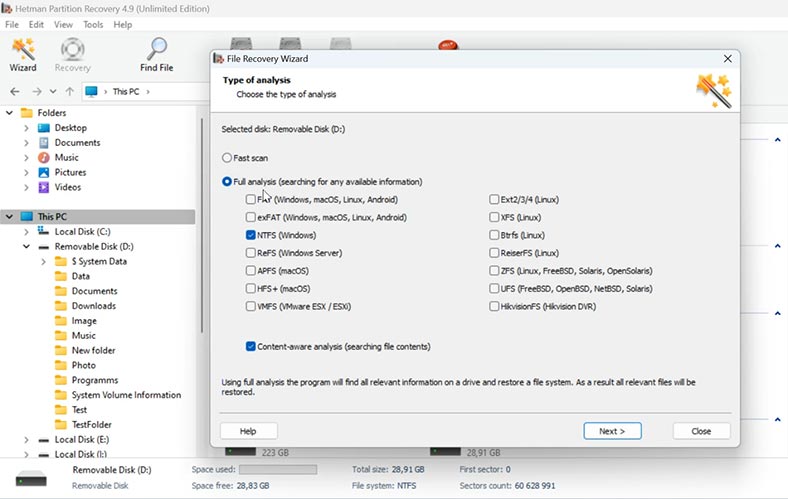
The search is going to take some time, depending on the disk size.
When the scan is over, open the folder where the lost files used to be, select the necessary items and recover them.
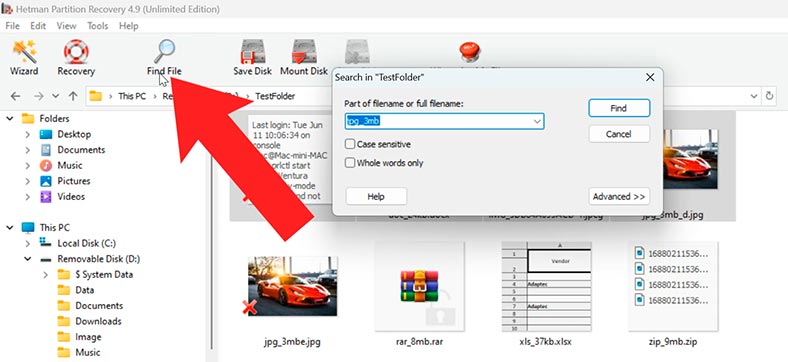
For convenience, there is a search feature. You can type the file name or type here and make the search easier.
Conclusion
Summing up, we have explored several methods to help you recover files lost after using the key shortcut Ctrl + Z in Windows. For starters, we recommend using integrated system tools. If they don’t help, restore your files with the help of Hetman Partition Recovery.
Whatever happens, though, always remember that backing up important files will help you avoid such situations.
| Characteristic | Hetman Partition Recovery | Hetman Uneraser |
|---|---|---|
| File recovery after using Ctrl + Z | Supports. | Supports. |
| Purpose | Data recovery from damaged, deleted, or formatted disk partitions. | Quick recovery of deleted files from existing and undamaged disk partitions. |
| Supported file systems | FAT/exFAT, NTFS/ReFS, APFS/HFS+, Ext2/3/4/ReiserFS, XFS/UFS/ZFS/, Btrfs, VMFS, HikvisionFS. | FAT/exFAT, NTFS/ReFS, APFS/HFS+, Ext2/3/4/ReiserFS, XFS/UFS. |
| Task complexity | Suitable for complex cases such as partition deletion or file system damage. | Optimal for simple tasks like deleted files from the recycle bin. |
| Deep scan | Available for signature-based data search. | Supported to a limited extent, suitable for quick scanning. |
| Supported media | Hard drives, SSDs, USB drives, memory cards. | Hard drives, USB drives, memory cards. |
| Interface | Detailed, with advanced settings. | Simple, focused on speed and convenience. |
| Operating systems | Windows, Linux, macOS. | Windows, Linux, macOS. |


