Synology DS415+ Data Recovery Secrets Revealed: Unlocking Techniques
Need to recover data from a Synology DS415+ RAID NAS? Our comprehensive guide has got you covered! Learn step-by-step instructions and expert tips for successfully salvaging your data from the DS415+ system. Say goodbye to data loss worries and hello to recovered files!
- Way 1. How to recover data from the NAS Recycle Bin
- Way 2. How to recover data when the Recycle Bin is disabled
- Way 3. How to recover data when the NAS network drive is inaccessible
- Way 4. How to recover data from a Hybrid Synology RAID
- Way 5. RAID Constructor
- Questions and answers
- Comments
A NAS (which stands for “network-attached storage”) is a server that allows you to organize storing your information and interacting with it over the network. NAS-based RAID systems are quite popular, as this type of network storage is a practical, reliable, efficient and affordable solution used to store data by individuals and small businesses alike.
However, they are vulnerable to various errors and of course, the human factor – just as any other device meant to organize data storage and configure RAID arrays. An accidental removal, software and hardware failures, mistakes in configuration and so on – all of them may result in losing important information, no matter what RAID level your storage is using.
As a result of an error, the NAS will no longer provide you with access to the file storage. Therefore, you’ll need specialized software tools to extract your data from the failed NAS.
In case of accidental removal, you can try and recover files from the Network Recycle Bin.

⚙️How to Recover Data from RAID Synology NAS DS415+⚙️
Way 1. How to recover data from the NAS Recycle Bin
Let’s first explore the situation with accidental removal.
If your NAS works all right and the network drive can be accessed, but you accidentally deleted some data from the disk, you can try to recover it from the Recycle Bin. First of all, check if this option is enabled on your device for the folder from which the data was removed.
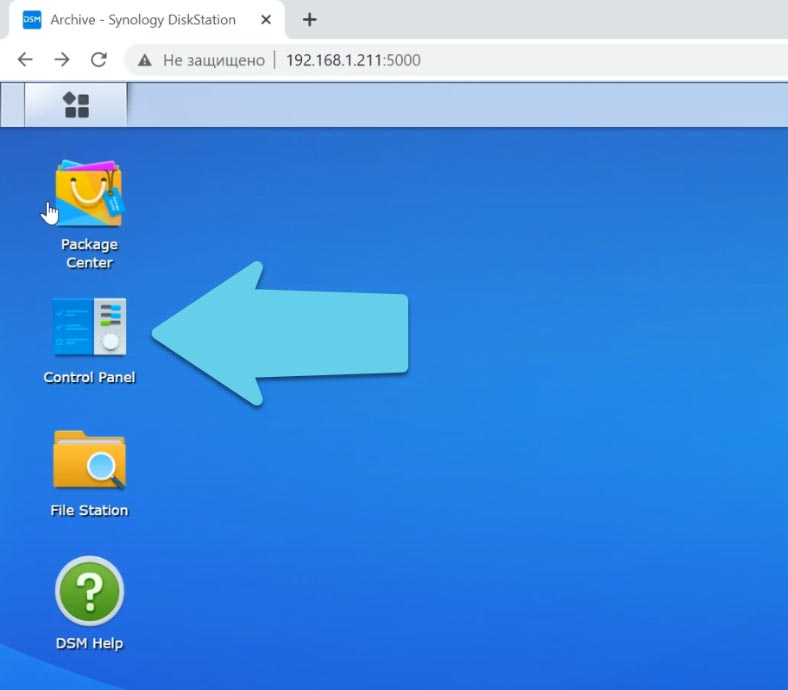
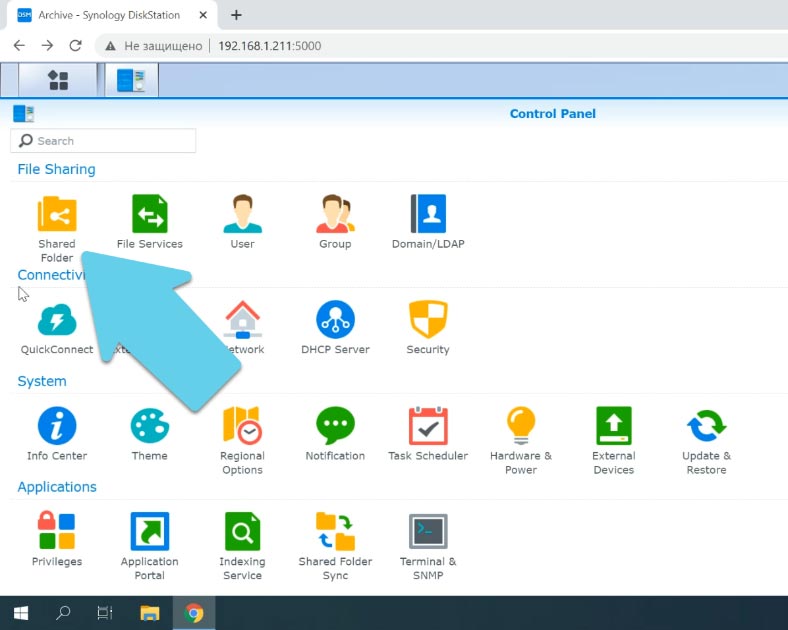
To check it, open “Control Panel” – “Shared Folder”.
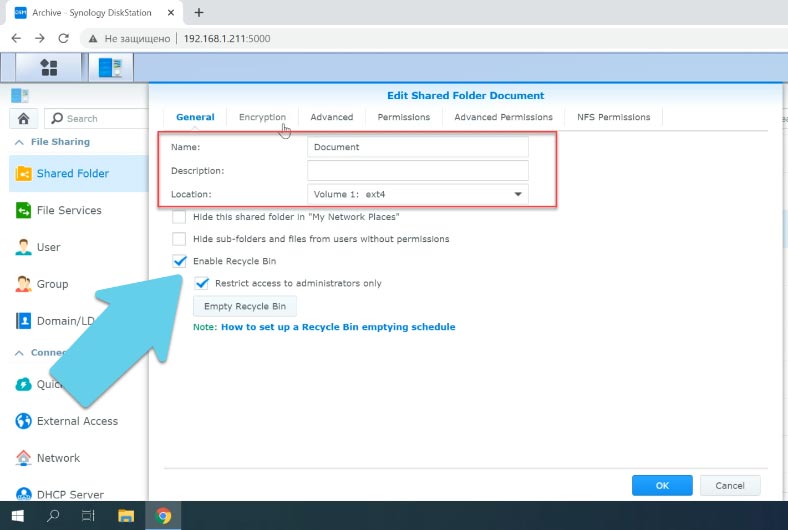
When you find the required folder, select it and click “Edit”: the option “Enable Recycle Bin” must be checked.
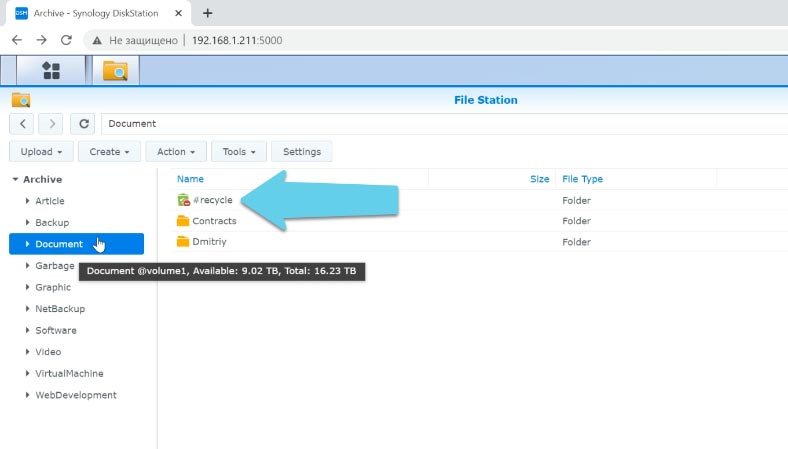
If this option is enabled, open the File Station app for your NAS device, go to the Recycle folder, and find the files you have removed accidentally.
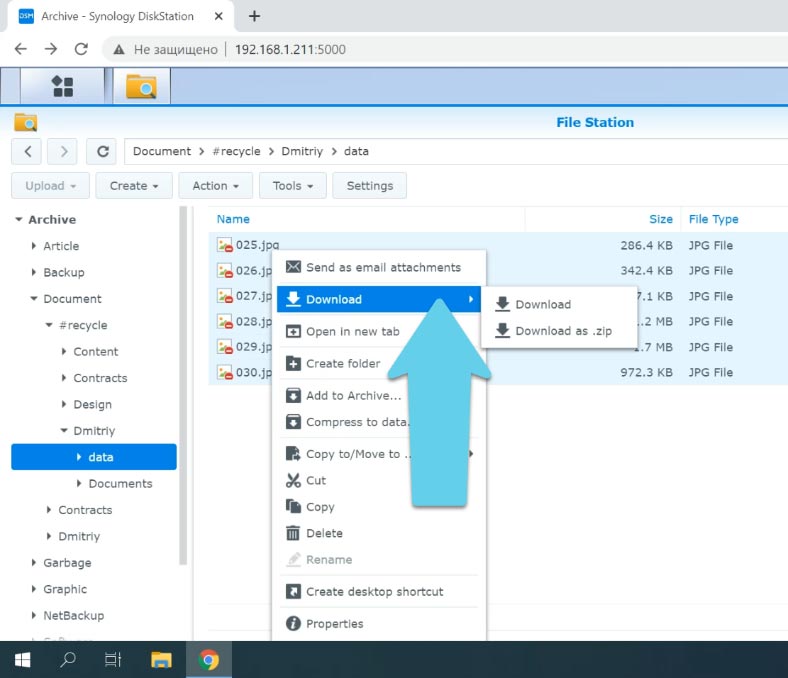
Right-click on them and then choose “Download” or “Copy to /Move to” and then specify the directory for saving them, then click OK. After that, go to this folder and check if the files are there.
Way 2. How to recover data when the Recycle Bin is disabled
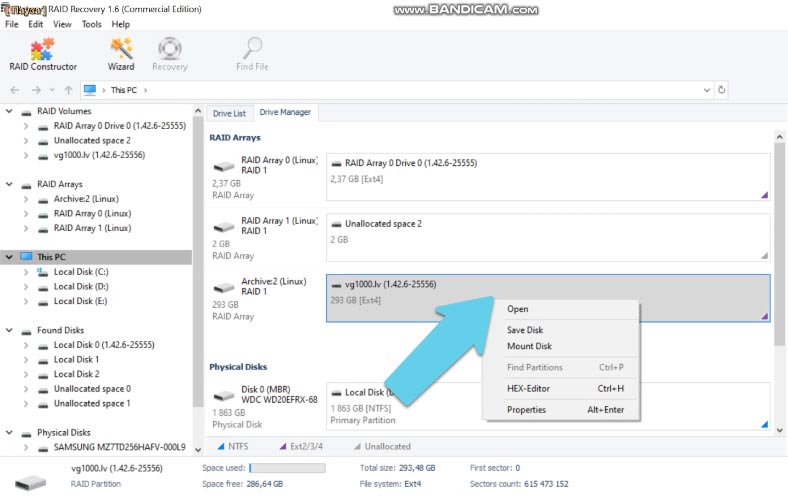
If this Recycle Bin option was disabled for this folder at the time when the data was removed, you’ll have to use specialized software for your recovery needs. Hetman RAID Recovery will help you fix the problem. Take the drives out of the NAS device and connect them to a Windows computer. Start the program, right-click on the disk from which the data was removed and click “Open”.
Select the scan type and wait until it’s over. Open the detected partition, and find the deleted files by this special marking – a red cross.
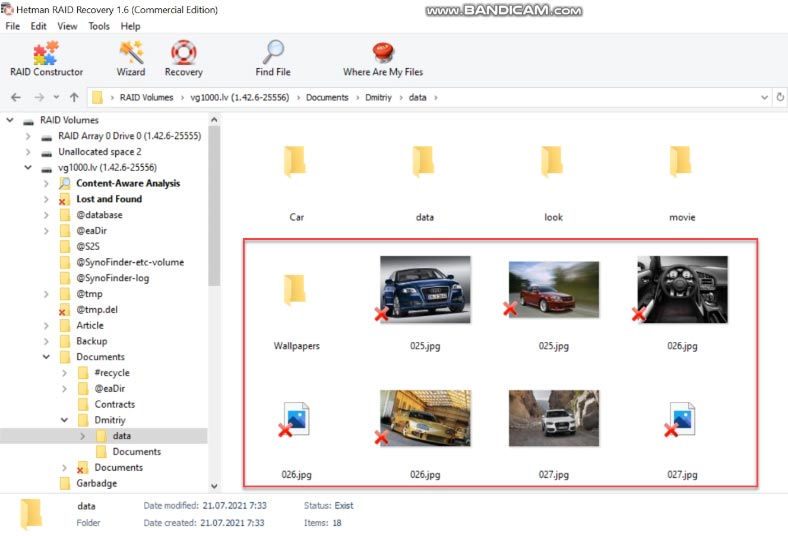
Go to the folder from which the information was removed, find the files you want to recover, select them, click “Recovery”.
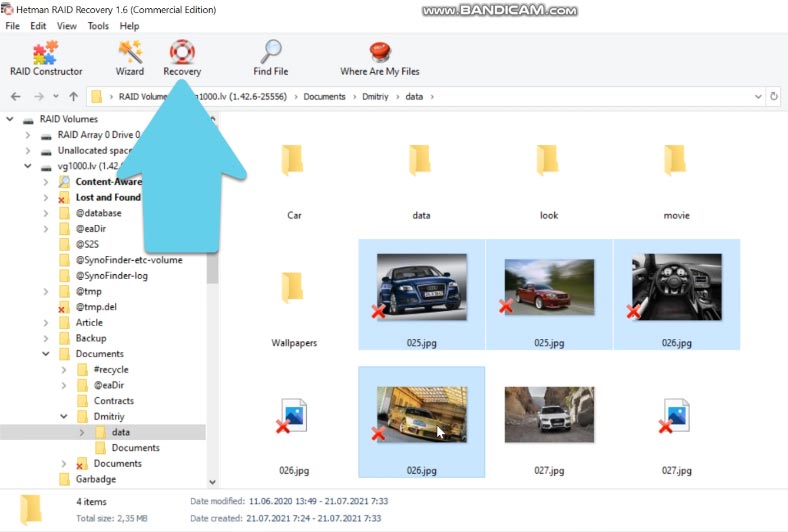
Choose the path where to save them and click “Recovery” again. This is actually the final step in recovering files.
Way 3. How to recover data when the NAS network drive is inaccessible
In case of a hardware or software error, the wrong configuration of the NAS storage, a failed attempt to transfer data or other situations which result in loss of access to the network drive or damage to its RAID system, the first step is the same: to take out the disks and connect them to a Windows computer. When launched, the program will automatically rebuild the damaged array using the available drives.
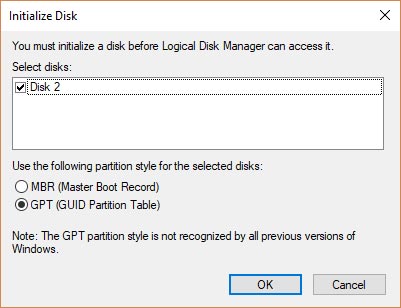
If you are suggested to initialize the disks, don’t agree – this can erase the remaining data.
Hetman RAID Recovery is a comprehensive solution for NAS data recovery to help you restore your files in a number of different scenarios. This program supports the most popular file systems including those used in NAS devices. It will information find the information needed for recovery such as RAID first sector number, block size, number and order of disks. Our utility features an advanced mechanism of automatic scanning designed to identify and recover NAS data in various scenarios of data loss.
| Feature | Description |
|---|---|
| Program Name | Hetman RAID Recovery |
| Main Functions | Data recovery from RAID arrays, recovery of lost files and partitions |
| Supported File Systems | FAT, ExFAT, NTFS, ReFS, APFS, HFS+, Ext, ReiserFS, XFS, UFS, ZFS |
| RAID Types | JBOD, RAID 0, RAID 1, RAID 2, RAID 3, RAID 4, RAID 10, RAID 1E, RAID 5, RAID 5E, RAID 5EE, RAID 50, RAID 6, RAID 60, SHR, SHR-2, RAID-z, RAID-z2, RAID-z3 |
| Operating Systems | Windows, macOS, Linux |
| Additional Features | Support for various types of RAID controllers, automatic array detection |
| Interface | User-friendly graphical interface |
| Language Support | Multiple languages including English, German, Russian, and others |
Thanks to its automatic scan feature, the utility will analyze the disks, read their service information and rebuild the damaged system. The RAID information is displayed below: check if the program has read it correctly.
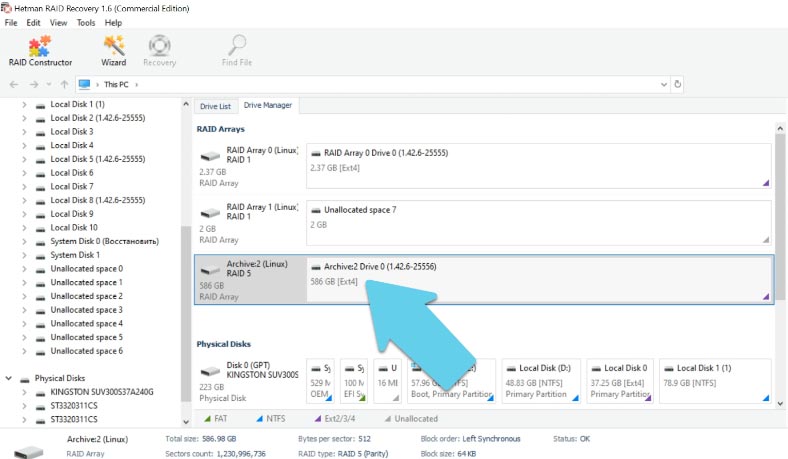
Right-click on the array and choose “Open”. Select the scan type and start the analysis. The program will analyze the disks and display their contents when the operation is complete. Now it has found all the data stored on the disks.
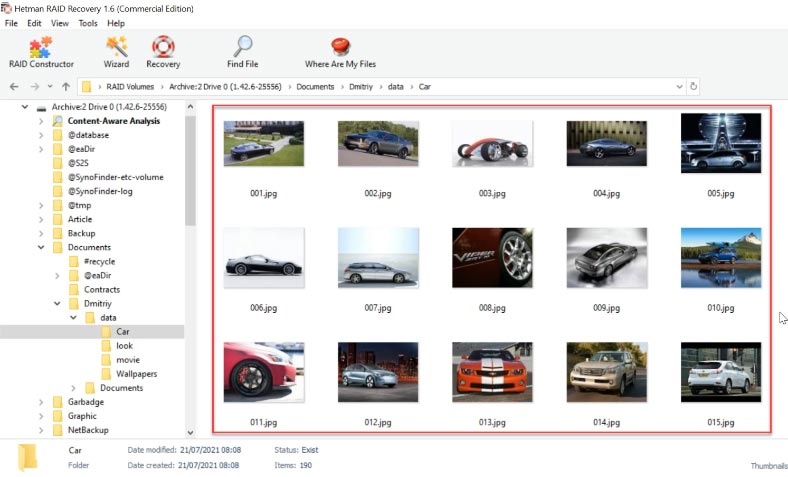
Select the files you want to recover and click “Recovery”, select where you want to save them. When the recovery process is over, you’ll find all of the files in the folder you have chosen.
Way 4. How to recover data from a Hybrid Synology RAID
Now let’s explore how to recover data from a Synology Hybrid RAID.
Synology Hybrid RAID (or SHR for short) is an automated RAID management system developed to simplify data storage management and satisfy the needs of users who are new to the vast variety of RAID systems.
| Feature | Description |
|---|---|
| Name | Synology Hybrid RAID (SHR) |
| RAID Type | Hybrid RAID |
| Flexibility | Automatically optimizes disk space usage with different disk sizes |
| Data Protection | Provides protection against single or dual drive failure (depending on configuration) |
| Ease of Setup | Easily configured through the Synology DiskStation Manager (DSM) interface |
| Scalability | Allows adding new drives without data loss |
| Compatibility | Works with a wide range of Synology NAS models |
| Advantages | Optimizes disk space, ease of management and setup |
| Disadvantages | May have lower performance compared to other RAID configurations when using large drives |
The SHR can combine disks of different sizes to create a volume with the required capacity and performance, while using less disk space, and achieving more storage flexibility. With a sufficient number of disks, this RAID type ensures redundancy for one or two disks, which means that the logical volume of such array remains operable, with its information intact, even if one or two physical disks fail.
This type also has a peculiar data storage structure that is supported by only a handful of recovery tools. Fortunately, Hetman RAID Recovery knows how to handle it.
To start the recovery, take the drives out of the NAS device and connect them to the motherboard of a Windows computer.
As soon as the program starts, you will see it has automatically detected the hybrid array type and now displays the correct information about this disk array.
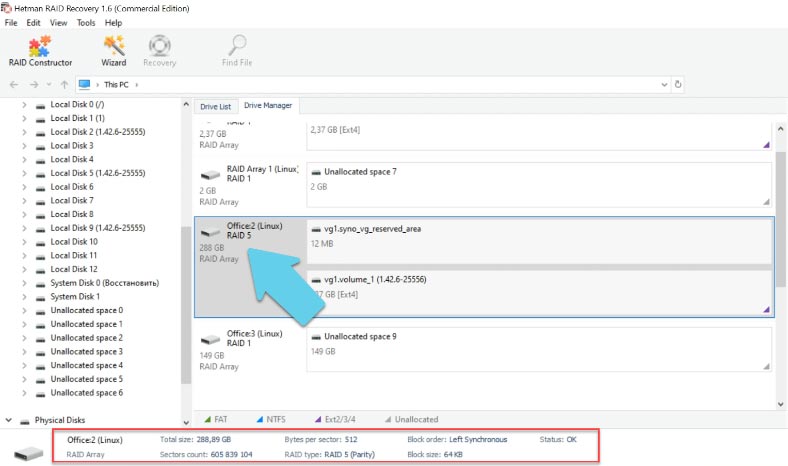
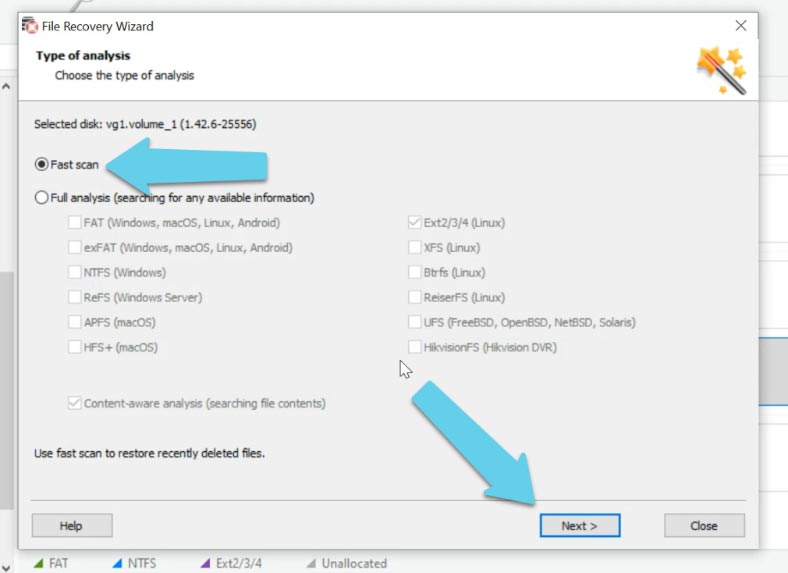
Right-click on the array to open it, select the scan type, start it and wait until it’s over.
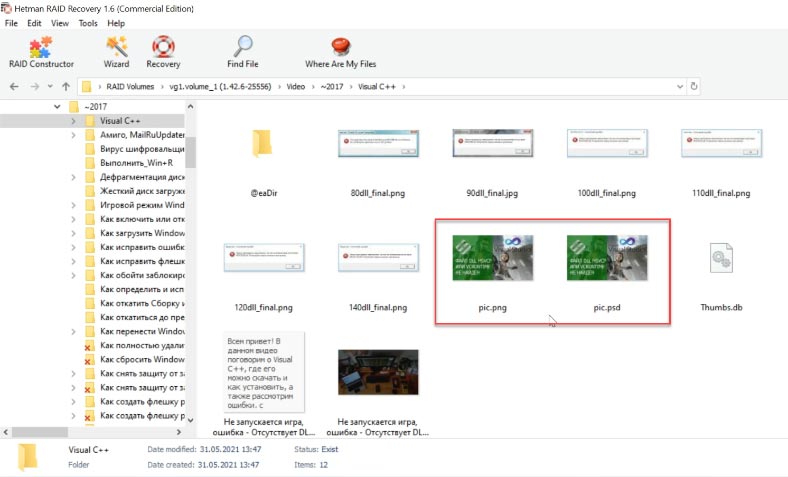
All the information remaining on the disk is available for recovery. The program even managed to find deleted files, and they are marked with a cross. With the preview feature, it is very convenient to look for specific photos, videos or documents.
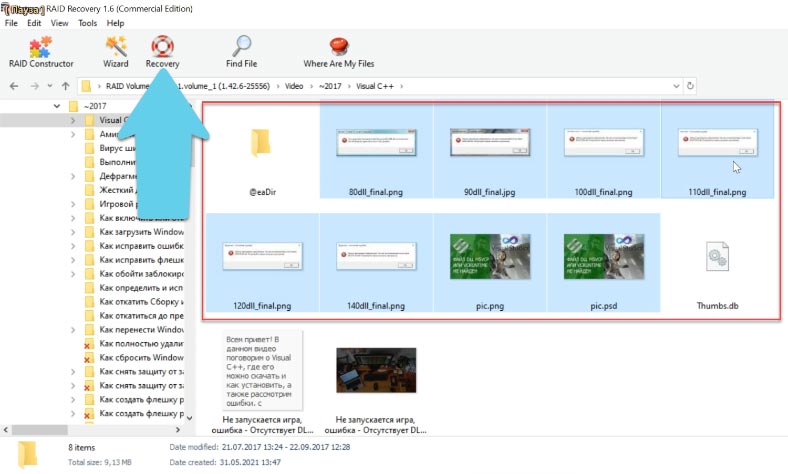
Select the files you want to recover and click “Recovery”, then choose where you want to save them.
Depending on the array type, the program can recover RAID data even if one or several disks are missing.
In NAS devices, RAID systems are divided into several types, including arrays containing the operating system and arrays containing the data:
In the case of a RAID with the operating system, this operating system is installed to the array in order to manage NAS data.
In the case of a RAID containing data, the array only stores information, and the operating system is installed to a separate drive.
Hetman RAID Recovery supports both array types, and in the end, you will see one disk with the operating system of the storage device, and the other disk containing the data.
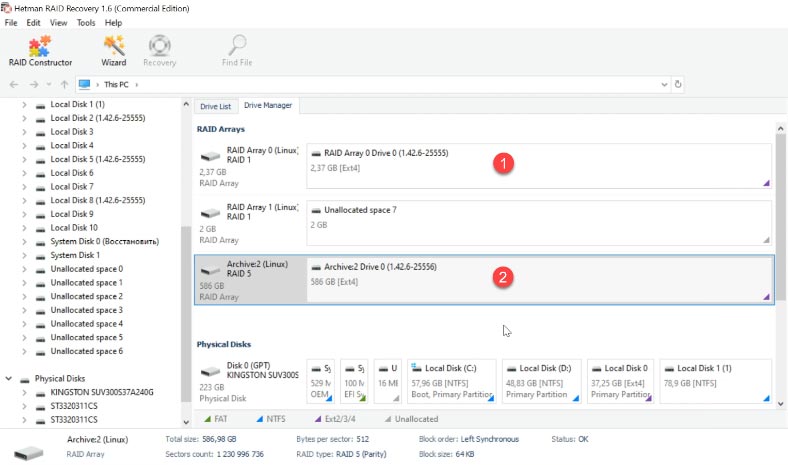
Way 5. RAID Constructor
When a disk is damaged or service information is erased, the program may have difficulties with rebuilding the RAID automatically; however, you can do it manually with the RAID Constructor if you know the properties of this damaged array.
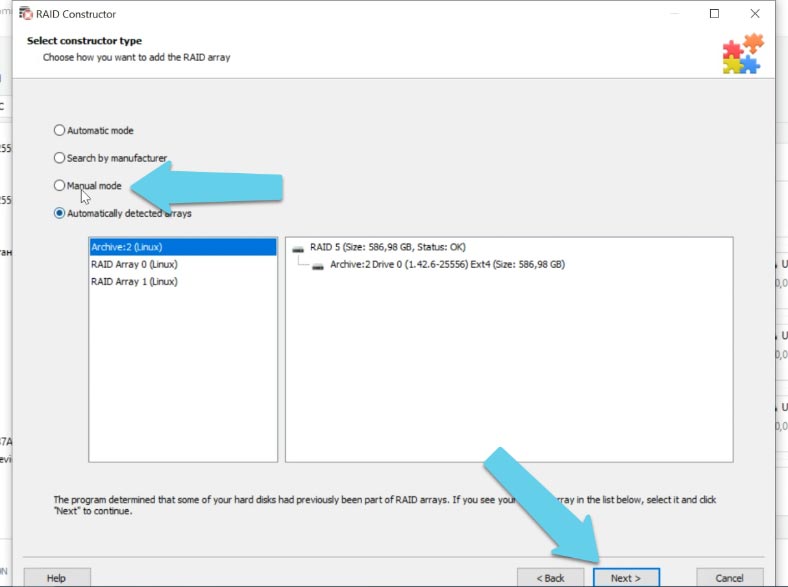
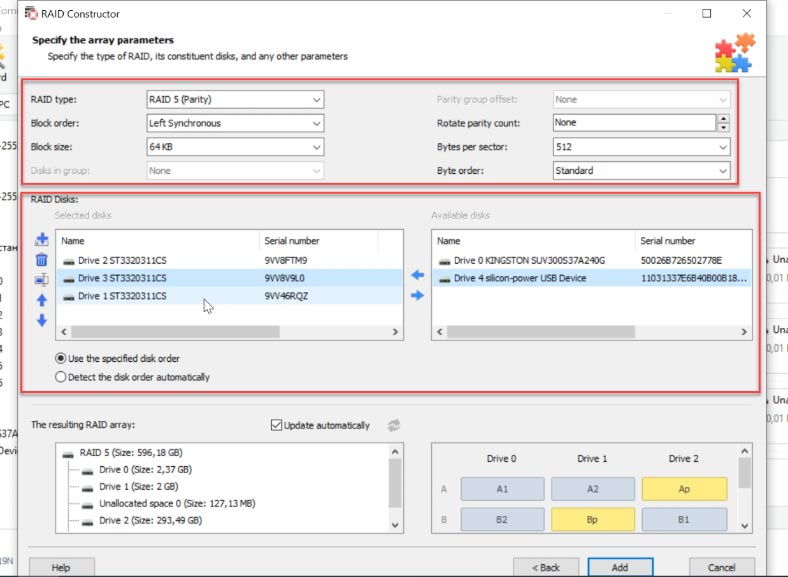
Open the Constructor and select Manual mode, then fill in all the information you know: the type, block order and size, add the disks it used to include, use the arrows to specify their order, and replace the missing disks with empty drives by clicking the “plus” button.
Usually, a properly built RAID system has at least one partition. Expand it to check for the folders that you need. If you see files displayed in the folders, it means the RAID system was built properly.
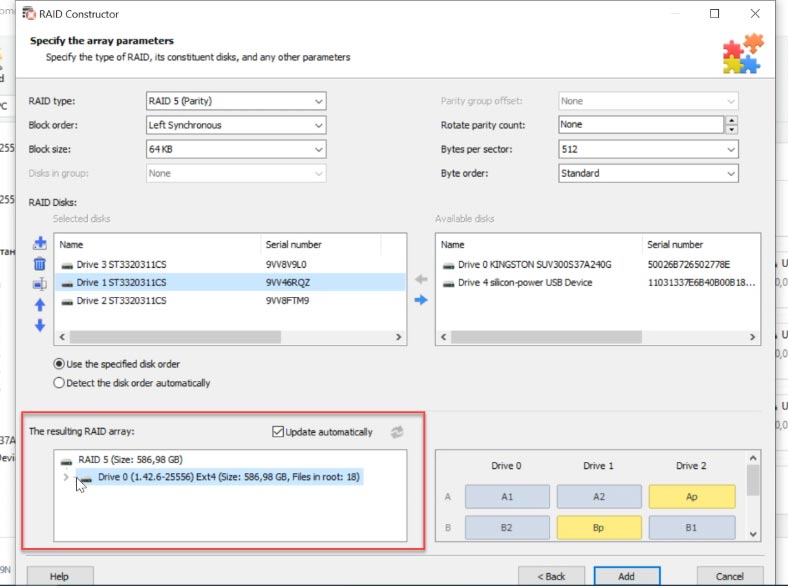
When you filled in every field, click “Add” and the array will appear in the Drive Manager.
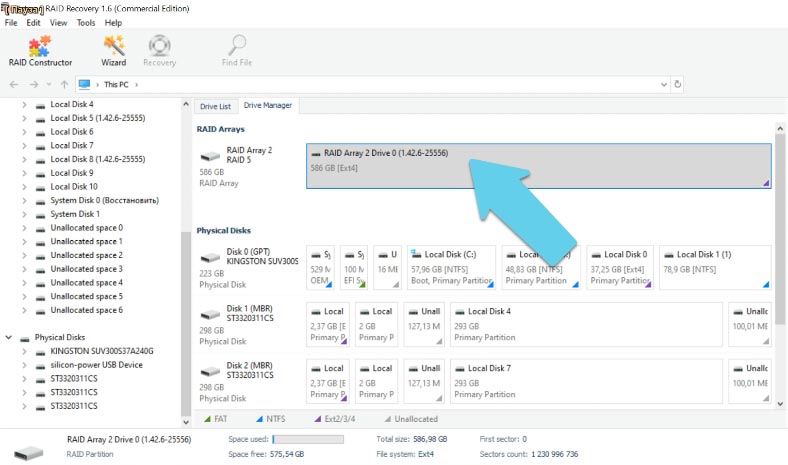
For recovery, scan the array you have just added, look for the files you need, select and recover them.


It is not a good idea to plug them in one at a time.
The system may not accept the second or third and so on without cleaning and formatting.
Only the wind was reinstalled during this time. What should I do to make the computer to see the disks in NAS? Cords plugged in, got it. Create folders on the partitions (although rather they should already be), create a user in NAS with a name and password, as in Windows (for convenience and simplicity), give this user rights to folders.
On Windows, find the NAS in the network environment or enter its name in the explorer (as \name). A window with a list of folders will open. If necessary, you can assign them letters (mount them) using the context menu or via Synology Assistant.
Disable the default administrator account
Use a strong password
Always update the system and enable alerts
Turn on two factor authentication
Change default ports
It is not clear from the description what was done and how exactly.
I would suggest resetting the settings (with a button or via the Web, if available. see the model documentation) and start over.
The available capacity may show for a folder that is on a volume that is on a pool.
So you need to set up all these steps correctly.
Probably it will be more convenient in DSM setup wizard to refuse automatic configuration of disks and do it then in manual mode, because the wizard uses only one configuration option (SHR) and for two disks of different volume it will do everything by the smaller one.
1. Yes. Just turn it off from the WebGUI
2. Yes.