How to Fix Dynamic Disk Invalid Error in Windows
Read this article to find out what to do if Dynamic disk is shown in Windows Disk Management as invalid, and how to recover data from such a disk.
- Why a disk becomes invalid
- Chances to recover data from an invalid dynamic disk?
- Fix things in Disk Management
- Data recovery software
- How to convert a dynamic disk into basic
- Additional recovery methods
- Conclusion
- Questions and answers
- Comments
The main difference that distinguishes dynamic disks from basic disks is that they support additional volume management features such as merging several volumes into one, spanning striped volumes, and mirroring. They can become the foundation for failure-resistant volumes like RAID5 or mirrored volumes. All of these can be created as long as you have several physical disks.
Although dynamic disks offer a number of advantages, their increased versatility comes at the cost of some considerable downsides:
- Data recovery from dynamic hard disks of a certain type can become practically impossible.
- Also, they can be incompatible with other operating systems and old PCs.
Let’s find out what to do if a previously created volume is inaccessible, and your Disk Management window shows you a dynamic disk marked as invalid. We’ll explore several ways of fixing this problem and restoring access to important data.

How to Fix Dynamic Disk Invalid Error in Windows – The Only Fix You Need!
Why a disk becomes invalid
This error may occur as a result of:
- metadata issues;
- damaged partition table;
- wrong configuration;
- multiple bad blocks on the disk;
- interrupted disk writing operations;
- sudden power outages;
- incorrectly installed updates etc.
Chances to recover data from an invalid dynamic disk?
Now let’s have a look at the chances of data recovery from an invalid dynamic disk depending on its configuration. Various RAID setup types can affect data recovery prospects differently.
This chart will help you understand your data recovery chances when you deal with a RAID that doesn’t work anymore:
| Volume setup | Recovery chances | Array details |
|---|---|---|
| Simple | Very high | Only small differences from how a basic disk works. |
| Spanned | High | Extends the storage from one disk to several others. Files are stored in a linear way as on basic volumes. |
| Mirrored | Very high | Clones data to the other disk. In fact, it’s a kind of a Spanned Volume with a backup. |
| Striped | Very low | Data is spread across several disks to boost speed. There are low chances of recovery since every disk contains only a part of each file. |
| RAID-5 | Medium | Data is spread across several disks, while storing parity data on them to improve data safety. Medium to good chances of recovery since this array type has a dedicated parity disk. |
Fix things in Disk Management
The first method to solve the problem is to use the built-in Disk Management tool. To launch it, right-click on the Start menu and select Disk Management.
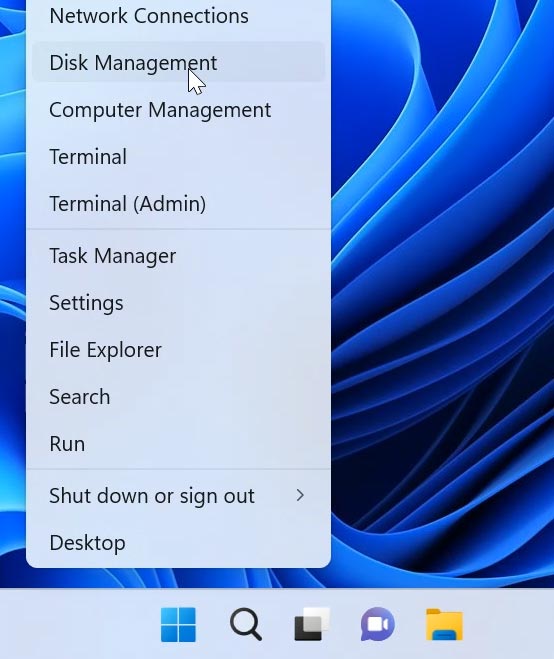
Find the disk marked as Invalid. Right-click on it and choose Online if such option is active.
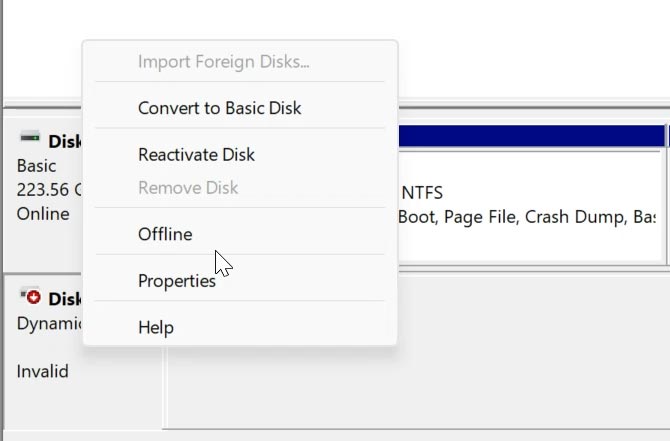
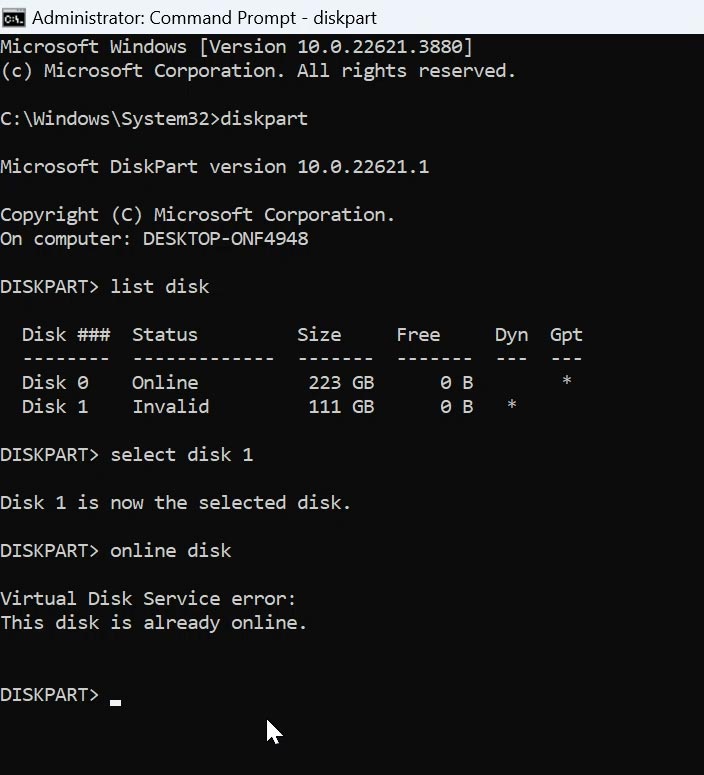
If it doesn’t help, try doing it again but this time with the help of Command Prompt and its diskpart tool:
-
Open the command prompt as administrator.
-
Run the command diskpart.
diskpart -
Follow it with list disk to view all disks.
list disk -
Then type select disk, and give the number of the invalid disk.
select disk -
Finally, type online disk. When you’ve done all that, check if the disk is OK now.
online disk
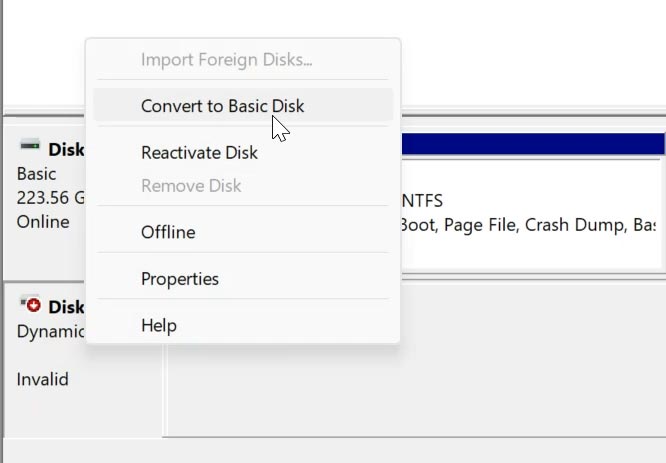
Also, Disk Management lets you convert a dynamic disk into a basic one, but the conversion process will erase all of its data. Such conversion will have the same effect as formatting the disk.
Data recovery software
To prevent data loss when converting a disk, use the specialized recovery tool, Hetman RAID Recovery.
Hetman RAID Recovery will be your best choice to bring back the data from an invalid dynamic disk. This tool supports all popular file systems and RAID types, and it can help you recover lost data from all kinds of disks.
With this software, you’ll be able to recover data after accidental removal, disk formatting, and RAID crashes. It is also capable of rebuilding a crashed RAID and extracting its files.
With this tool, you’ll be able to scan an invalid dynamic disk, recover its data and save it to another disk. This way, you can convert it into a basic disk without losing data.
Download, install and run the program. It will scan your computer automatically and display all connected hard disks.
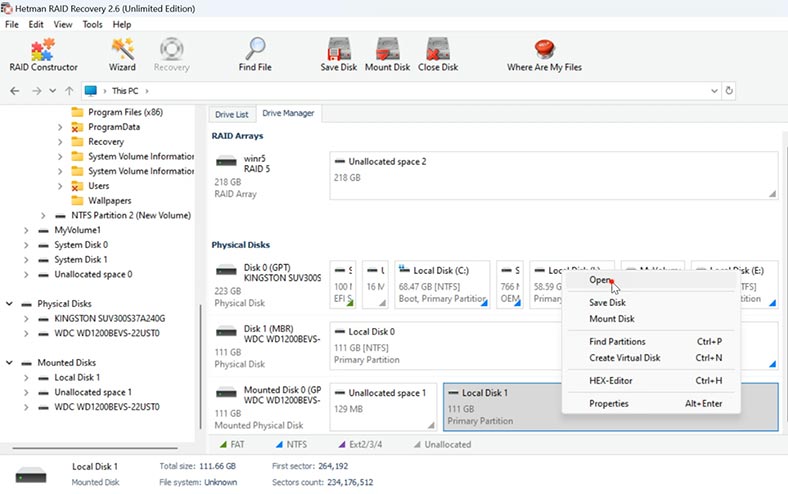
Select the disk you need. If it’s a RAID, it will be shown above the physical disks. Right-click on the volume and choose Open.
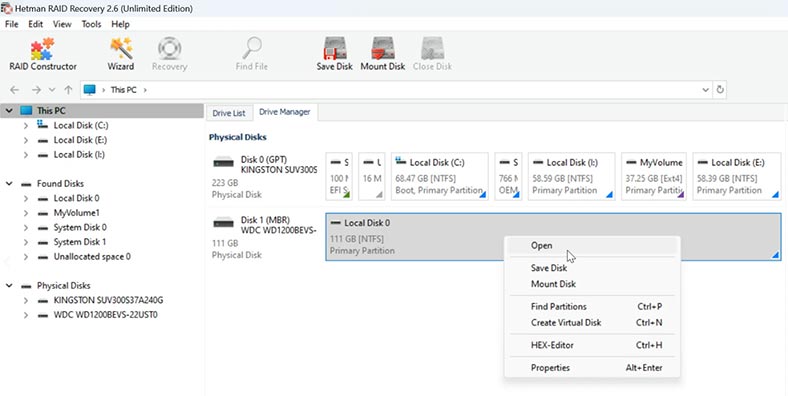
Choose the scan type - Fast scan or Full analysis. For starters, we recommend running a Fast scan first if this option is active. Otherwise, go for Full analysis.
Choose the file system and click Next. This process takes some time, depending on the disk size.
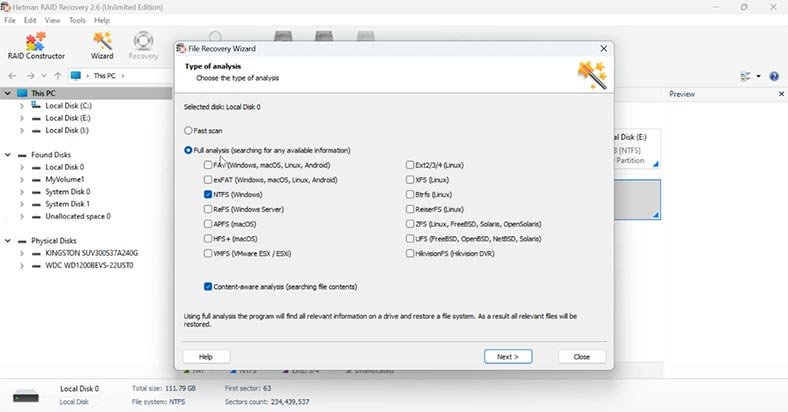
When it’s over, find the files you need. Now select the files and folders you want to restore and hit Recovery.
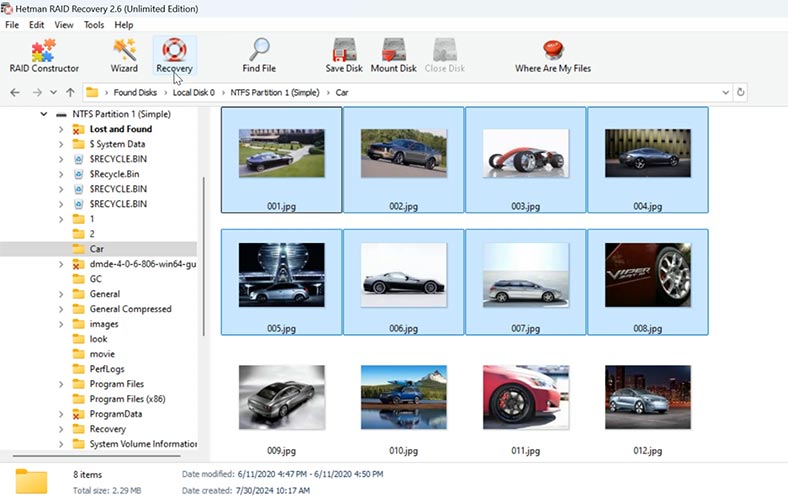
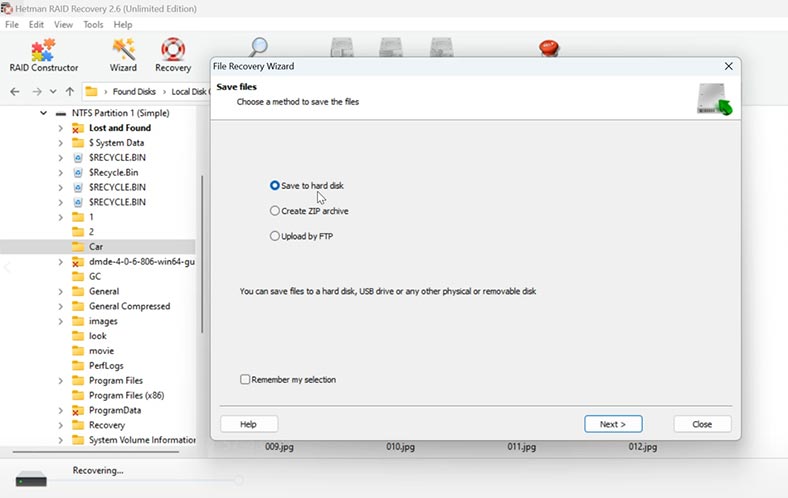
Specify where to save them (choose the disk and folder), and click Recovery again. You will find the recovered files in the folder you have chosen.
Also, this tool can help you create a disk image and then recover files or perform other operations from such image. To do it, select the required disk and click on Save Disk.
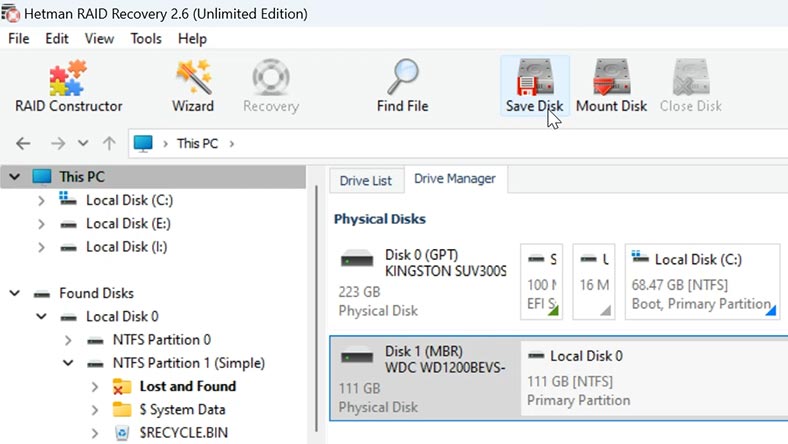
Now choose the directory to save it to. Remember that the disk where you want to save the image should have enough free space for this mission.
To upload the disk image into the recovery tool, click Mount Disk, and give the path to the disk image.
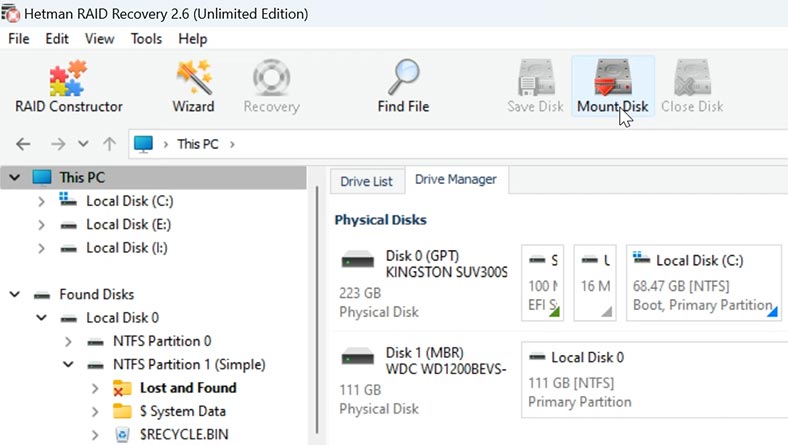
The item will appear on this list, and in the Drive Manager. After that, you can start scanning the image in the same way as a physical disk.
If you haven’t built a RAID with a bunch of dynamic disks, then Hetman Partition Recovery will also suit your needs. In this case, just find a required disk, scan it and recover the necessary files which the program has found.
How to convert a dynamic disk into basic
After recovering the necessary files you’ll be able to convert the dynamic disk into basic, or format and partition it. Also, such solution will help to avoid dynamic disk issues, which will reduce volume management options, in its turn.
To do it, start Disk Management. Right-click on the dynamic disk and choose Convert to Basic Disk.
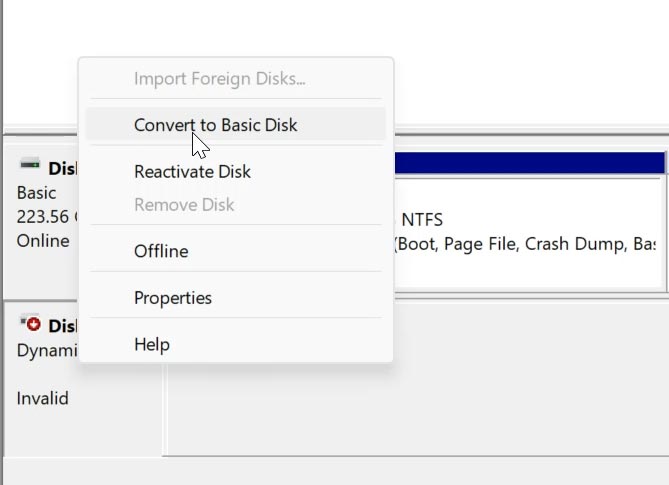
Always remember that this process will erase all available data on such disk. First of all, make sure you have backed up any important data you have there.
Additional recovery methods
1. Check disk connection
Sometimes it’s quite difficult to fix the invalid dynamic disk problem in Windows, and sometimes it’s so easy.
Very often, disk errors occur just because of poor connection. All you have to do is to reconnect the disk, and the error will be gone. Make sure that the cables firmly sit in the corresponding sockets and that the disk gets the required power. It won’t hurt if you just disconnect the disk and reconnect it again, or use well-tested cables for connection.
2. Repeat disk activation
One more easy solution that can help you is to reactivate the disk..
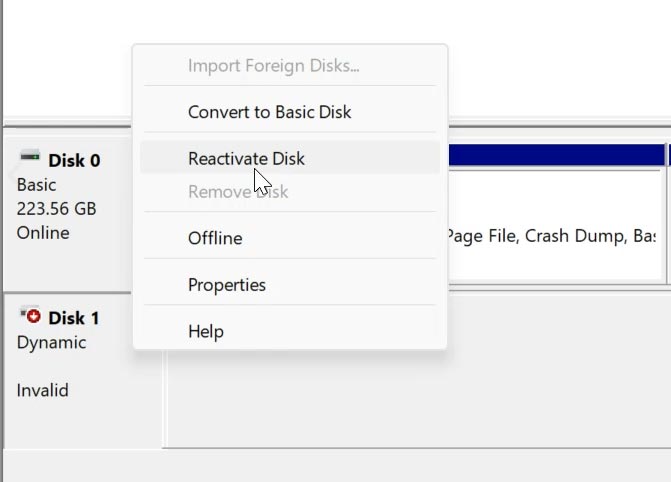
Open Disk Management, right-click on the invalid dynamic disk and choose Reactivate Disk. If this option is active, it may help to fix the disk issue.
3. The chkdsk tool
One more way to get rid of this problem is to run the built-in chkdsk utility. It will check the disk for errors and repair the identified file system errors.
Launch the command prompt as administrator and run this command:
Chkdsk D:
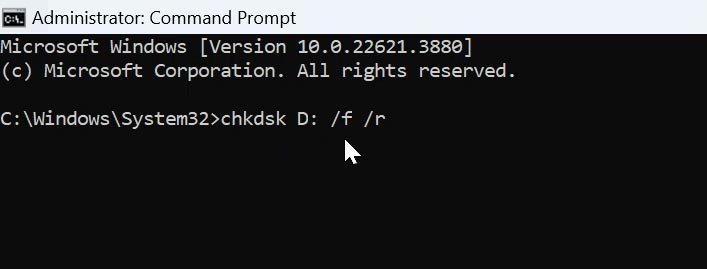
Here, give the letter of the disk that needs to be checked.
Be careful with additional parameters, since they can damage the data stored on such disk:
- Parameter /f – repairs errors on the disk,
- Parameter /r – finds and restores damaged sectors.
4. Manual conversion from dynamic to basic without losing data (HEX-editor)
One more way to fix the dynamic disk issue to do it manually with the help of a HEX editor..
Using a hexadecimal editor to change the disk type from dynamic to basic is a complicated process that requires great care. A single mistake in editing can cause loss of data. In this specific case, you should understand what you’re doing so that you don’t lose everything you’ve got on that disk.
For starters, you need to back up the disk (for example, by creating a disk image).
After that, open a HEX editor (for example, WinHex). Since you need to gain access to a physical disk, run this editor as administrator.
Open the physical disk you need to modify.
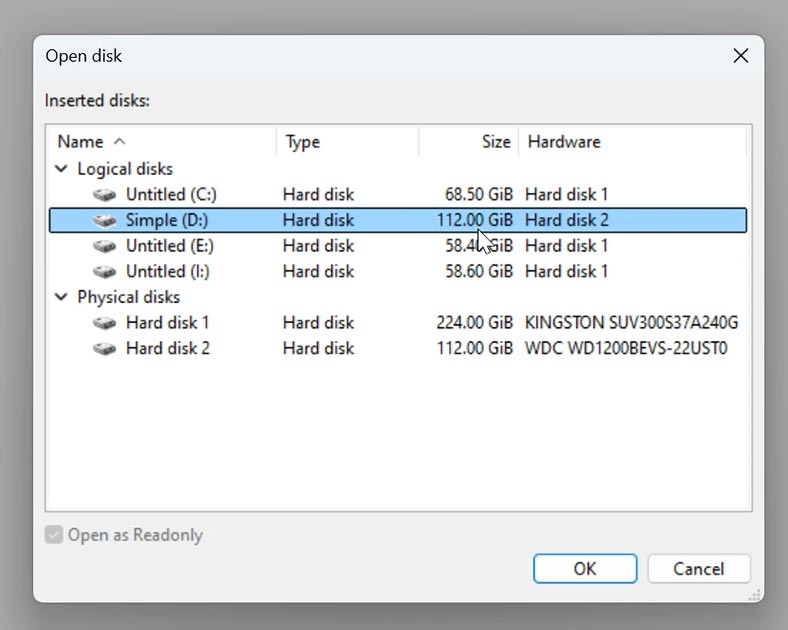
Depending on the actual partition style (MBR or GPT), you have to find the right sector.
If it’s MBR - find sector 0 and look at the bytes that describe volumes.
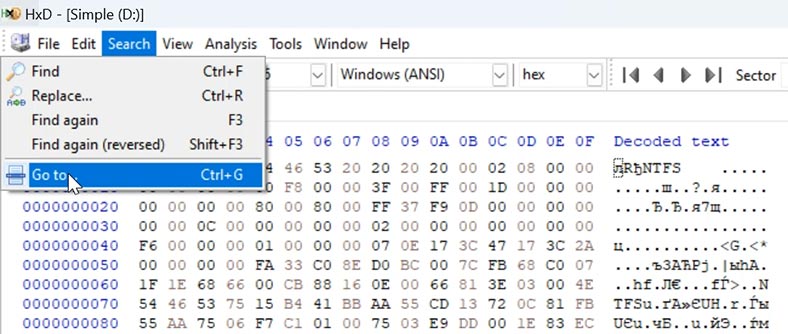
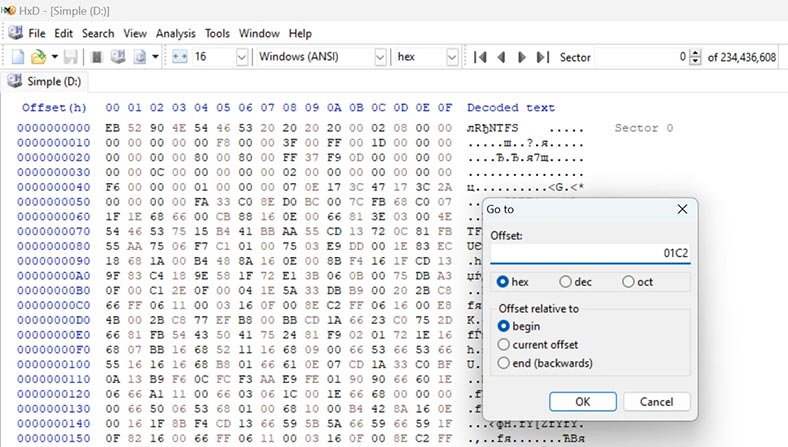
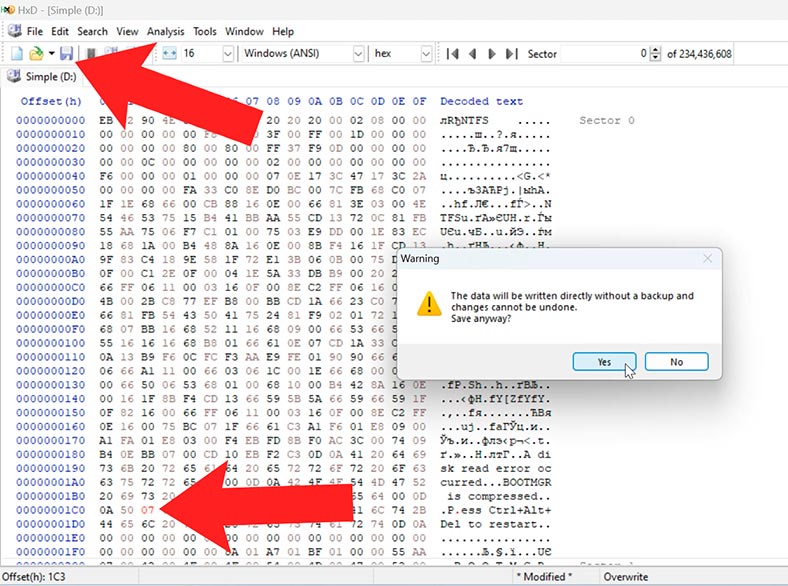
In MBR - find the byte determining the volume type. For a dynamic disk, it will be 42.
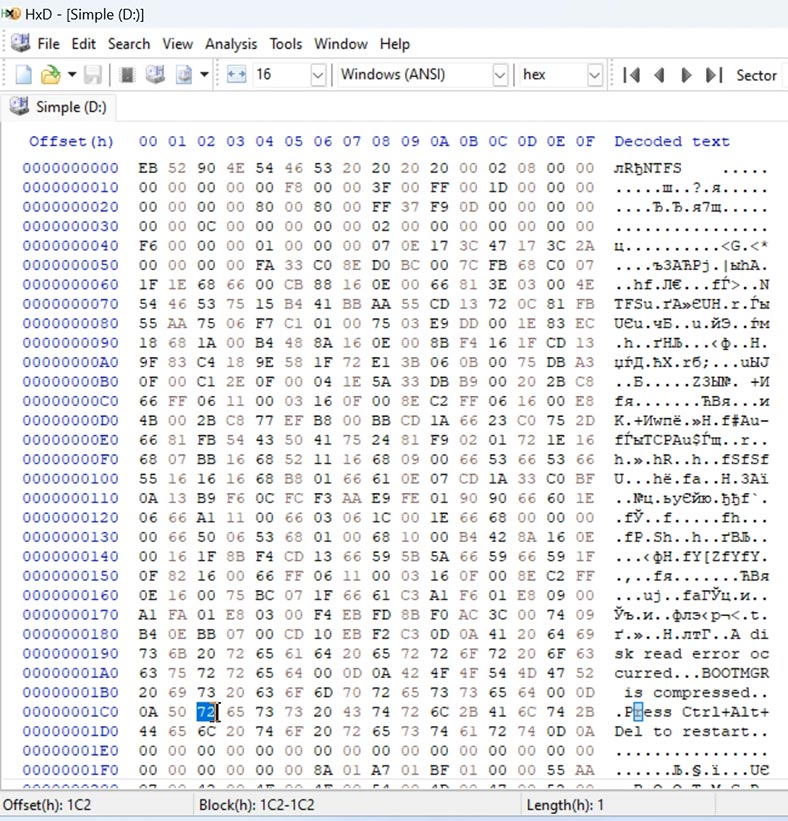
Change its value to the one related to a basic disk. For NTFS is should be 07.
If it’s GPT - find the GPT heading which is usually located in sector 1. Now you need to find volume records that usually begin from the second sector.
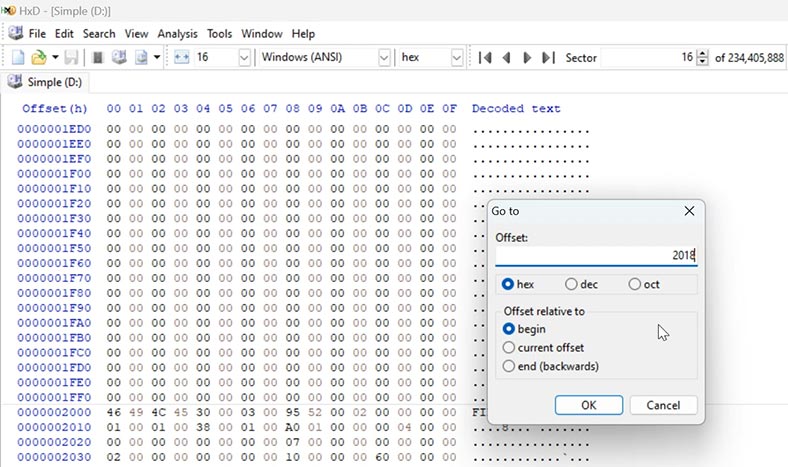
Find the record that corresponds with the volume which is marked as dynamic. In GPT partition table, such volume will have a unique identifier (GUID).
Find 8 bytes of attributes. Change the bytes from 00 00 00 00 01 00 00 00 to 00 00 00 00 00 00 00 00 (replace 01 with 00).
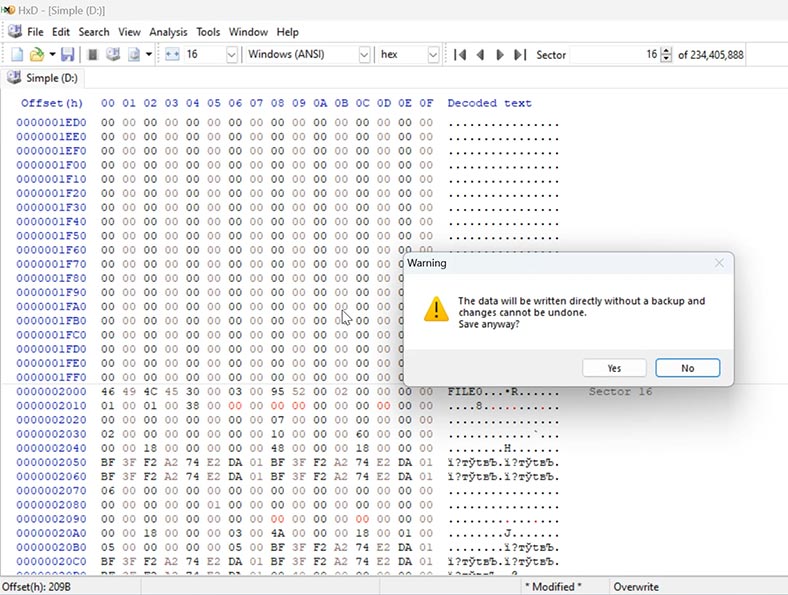
After you make this change, save the file and close the editor. Restart the computer and the check if the disk is recognized as basic.
The process of changing attributes requires profound knowledge of disk structure and hexadecimal editing. If you modify disk data carelessly, it may cause disk damage or data loss. If you’re not sure what you’re doing, we don’t recommend changing such things. It’s safer to use specialized data recovery tools.
Conclusion
Summing up, we’ve explored several methods to help you fix the problem with invalid dynamic disk. If you tried all of them but failed to restore operability of your disk array, you can still use a data recovery tool.
Always remember that some of the methods we have described today may cause loss of data. Before you start, make sure you have backed up all important files.


