Guide: How to Retrieve Data from a Virtual Machine on Parallels Hypervisor?
Have you ever lost important data from your virtual machine on Parallels Hypervisor and wondered how to recover it? In this video, we’ll show you simple and effective methods for recovering lost data from your virtual machine on Parallels Hypervisor. Read now to learn more!
- Step 1. How to create a virtual machine in Parallels
- Step 2. How to configure a machine
- Step 3. How to recover data
- Step 4. How to configure a network connection to Mac
- Step 5. Restoring data with Hetman Partition Recovery
- Conclusion
- Questions and answers
- Comments
Parallels Desktop for Mac is a virtualization tool for MacOS operating system. This virtualization software lets you run various operating systems inside MacOS, as well as specific programs designed for such operating systems.
This way, you can run Windows or Linux as an app. Parallels Desktop creates a virtual disk image inside MacOS operating system. During the work, these files may get damaged so it becomes impossible to run the virtual machine. If that’s the case, there’s a question to answer: how to recover data from *.hdd and *.hds files?
We’re going to find out how to create a virtual machine, using a Windows machine as an example, and then we’ll explore which software tool is the best to recover data from *.hdd and *.hds virtual machine files.

⏸ How to Recover Data from a Virtual Machine of Parallels Hypervisor
Step 1. How to create a virtual machine in Parallels
If you have never worked with Parallels Desktop before, you need to download it first. It is available in AppStore or from the official website.
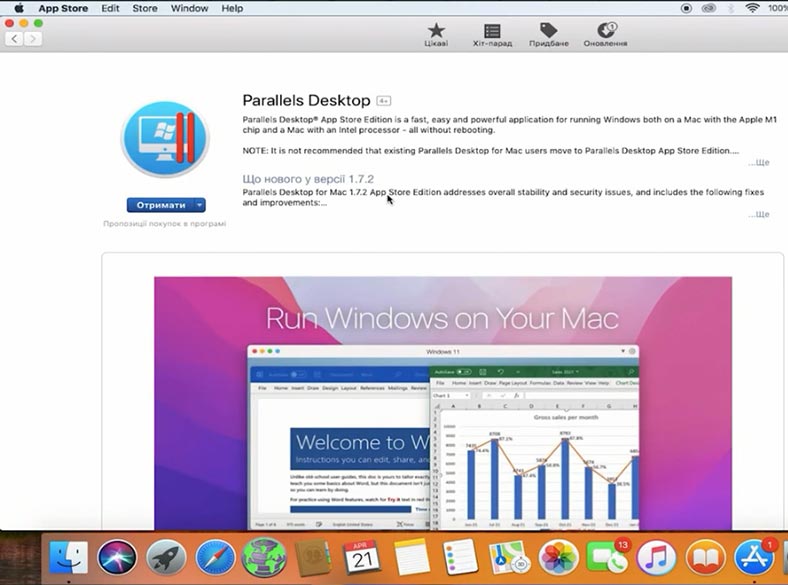
After that, you need to download Windows: this can be done from the program itself, or by downloading an original ISO image from the Microsoft website and creating a bootable USB drive.
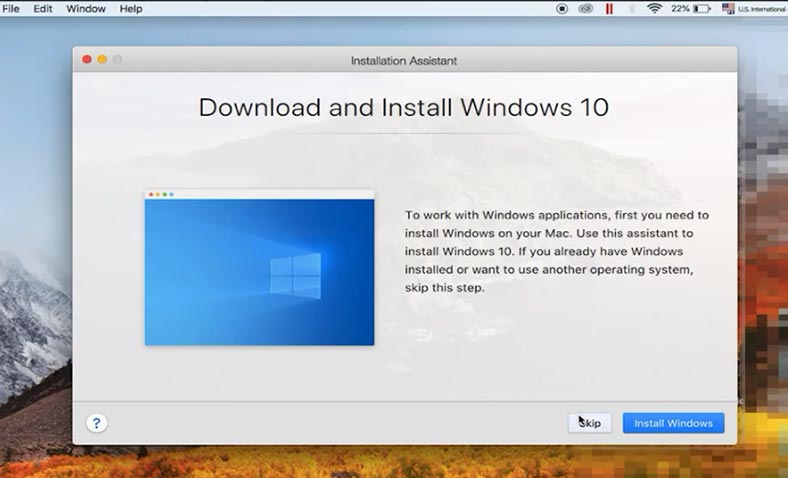
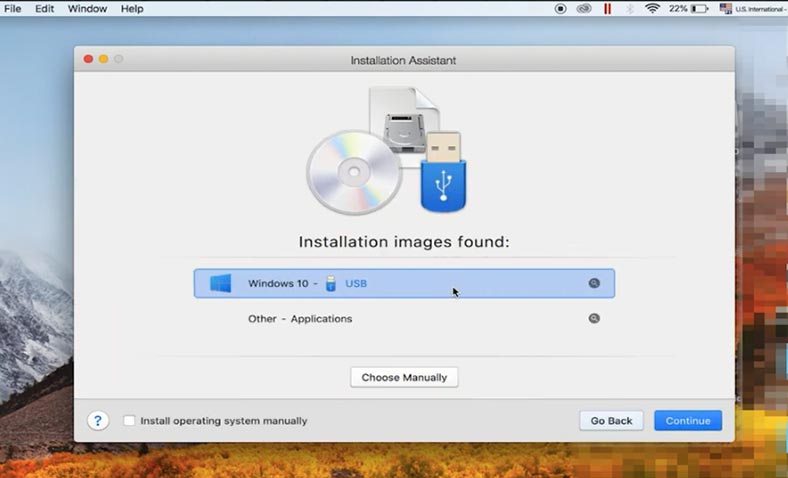
Start the program, and choose the installation method: get Windows from Microsoft, install the operating system from a disk or USB stick, or transfer Windows from another computer – and then click “Continue”.
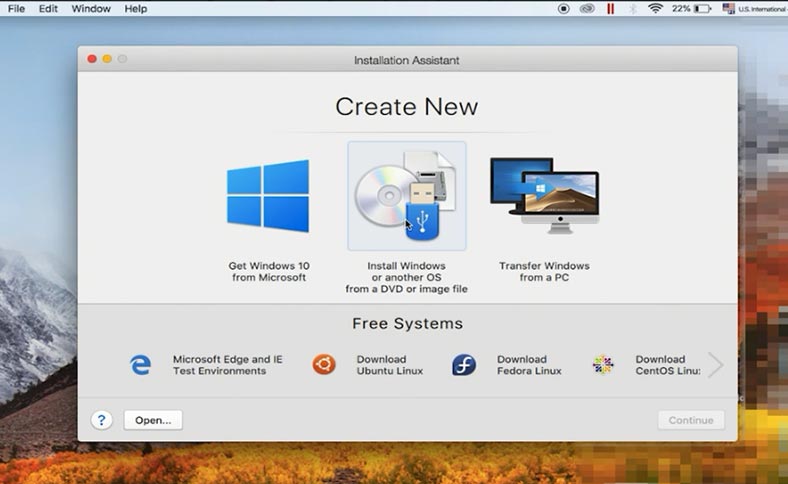
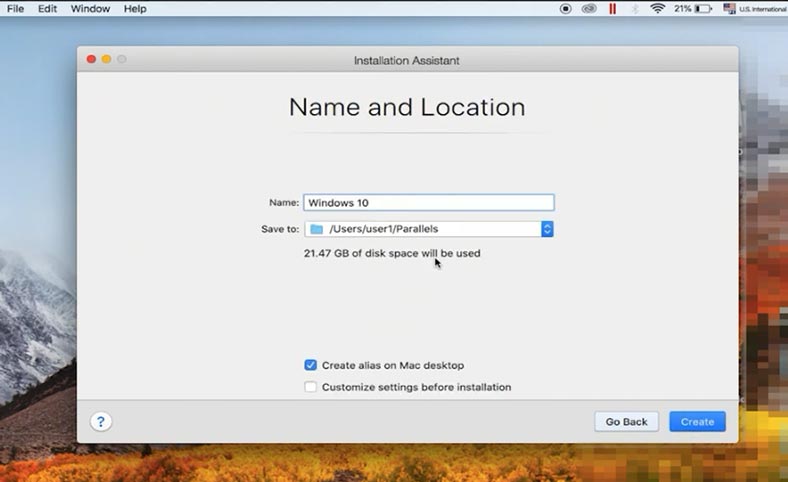
Then select a corresponding image, uncheck the option for entering the license key, choose the edition, give the name of the virtual machine and the path where to save its files – then click “Create”.
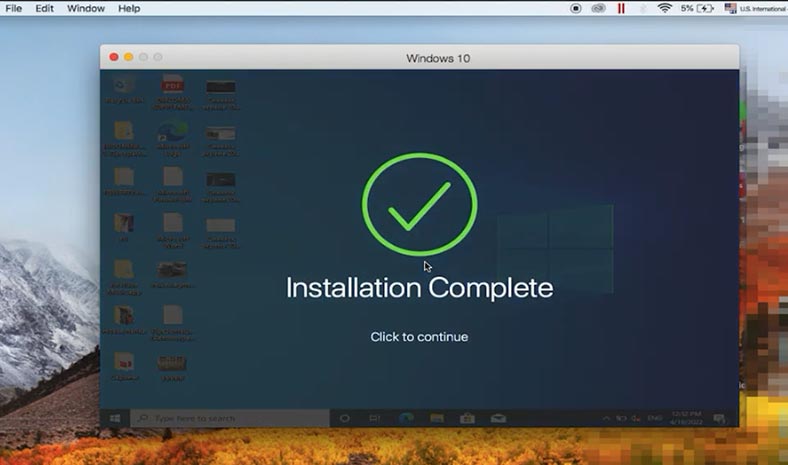
After that, the download will start and the operating system will be installed. Just follow the wizard directions – it’s the same as if you were installing Windows on a computer.
Visit our channel for a detailed video tutorial about installing an operating system:

⚙️ Clean Installation of Windows 11 On a Computer or Laptop from a Bootable Flash Drive or Disk

How to Install Windows 10 on a Computer or Laptop From a USB Drive or DVD in 2019 💽💻🛠️
When this process is over, the machine will reboot, and it’s ready to use.
Step 2. How to configure a machine
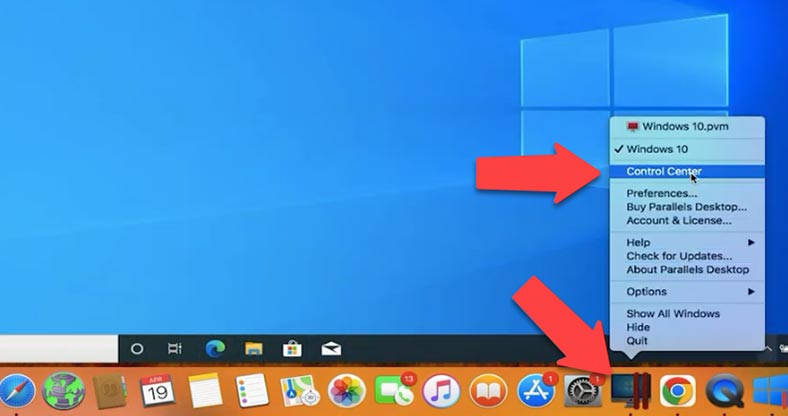
To access advanced settings, click on the gearwheel in the Parallels Control Center.
In Hardware settings, you can change the hard disk size, create a new one, change its type, enable or disable the TRIM feature.
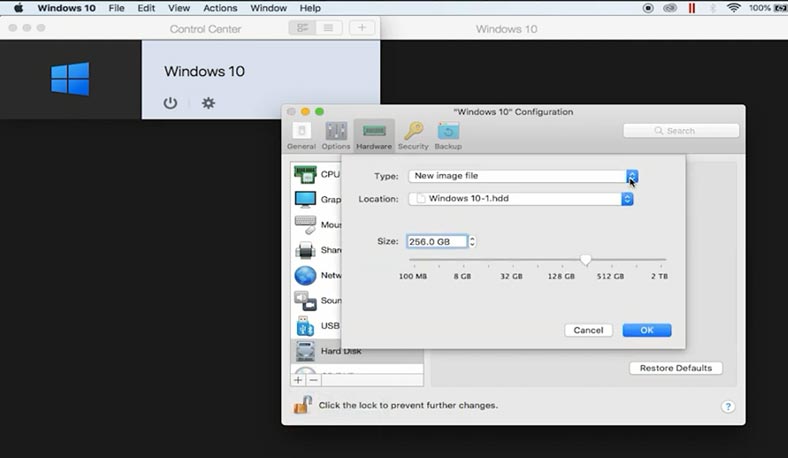
Use the Backup tab to configure snapshot settings.
A snapshot is a fixed state of the guest operating system saved in a certain point of time. Snapshots can be taken manually or automatically while the virtual machine is running.
To take a snapshot, open the Actions tab – Take Snapshot. In the window that opens, give the snapshot name and click OK.
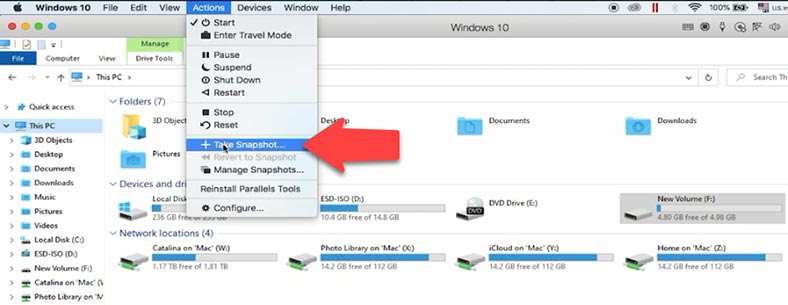
When the snapshot is taken, you can continue working with the virtual machine, and go back to the state saved in this snapshot at any time.
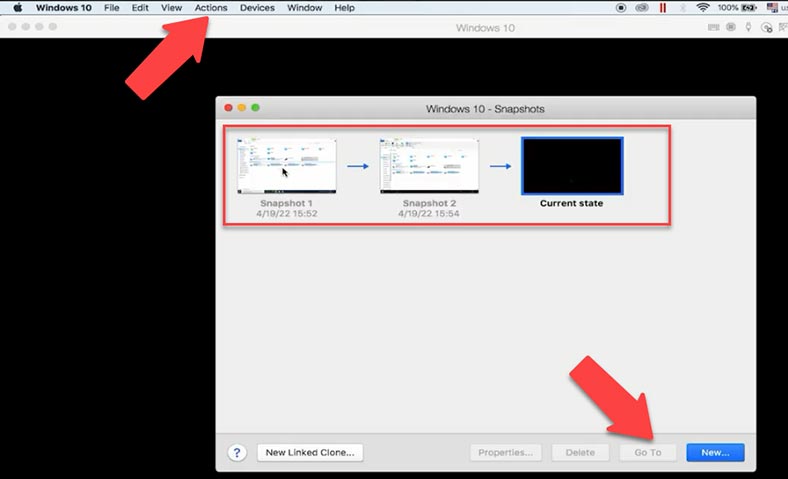
To go back, open the Actions tab and click “Revert to Snapshot”. Here, you can choose if you want to take another snapshot to save the current state of the virtual machine, or go back to the previous snapshot without saving.
Step 3. How to recover data
By reverting to a snapshot, you can restore your machine to the state it was in at the time when the snapshot was taken.
This way, you can recover any files accidentally removed from the virtual machine, or cancel the settings after which the machine refused to boot properly.
If these steps don’t help and the virtual machine displays errors when trying to boot, and all your data is inaccessible, you can still restore your lost files with a special tool – Hetman Partition Recovery.
It supports all popular file system formats and it can help you restore data after deleting, formatting, and hardware or software errors, and in m any other situations that involve loss of data.
| Format | Description |
|---|---|
| Virtual Machines | The software supports data recovery from virtual disks in the following formats:
|
| File Systems | Hetman Partition Recovery supports data recovery from the following file systems:
|
| Storage Types | Supported are hard drives, SSDs, USB flash drives, memory cards, and external drives connected via USB or other interfaces. |
| Partition Types | The software works with primary, logical, and dynamic partitions. |
| Extensions | Supports working with damaged, formatted, or deleted partitions. |
In order to recover data, you need to find where the virtual machine files are stored, copy them to a Windows computer, and then install and run the program. After that, upload the files to the program and scan the virtual hard disk.
By default, this is the path to the virtual machine files:
Disk/Users/User name/Parallels
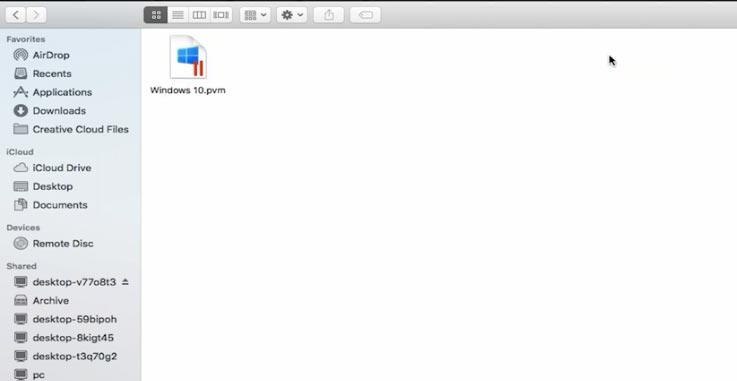
The virtual machine files are in the Parallels folder. If you can’t find them in the default directory, right-click on the machine and select “Show Finder”. This is how you can locate the folder containing the virtual machine files.
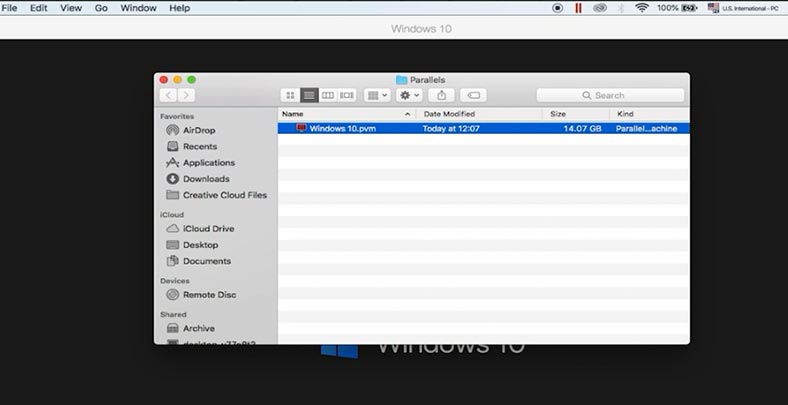
Step 4. How to configure a network connection to Mac
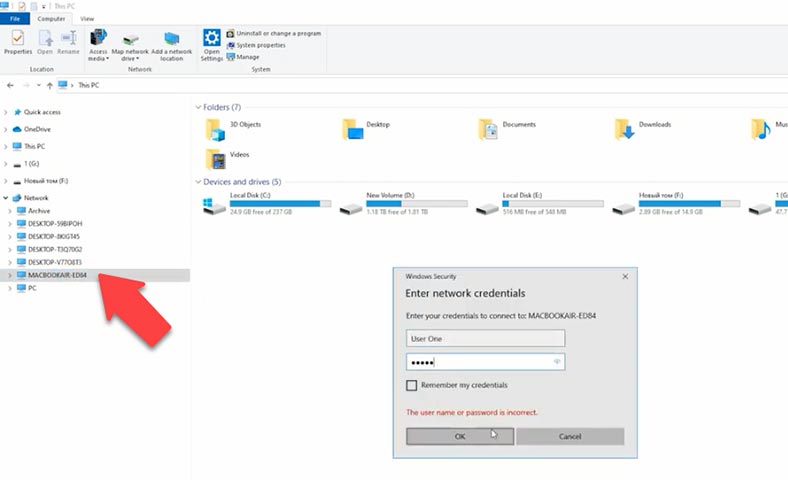
After that, you need to transfer the files to a Windows computer - for example, this can be done over the network. To let a Windows PC access a Mac, you should change some network settings.
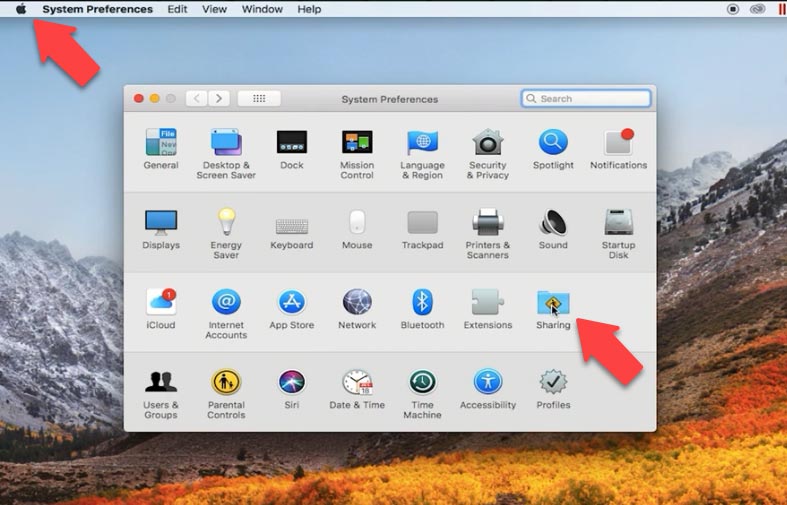
Click on the apple icon and open “System Preferences”. Now let’s jump to the Sharing tab.
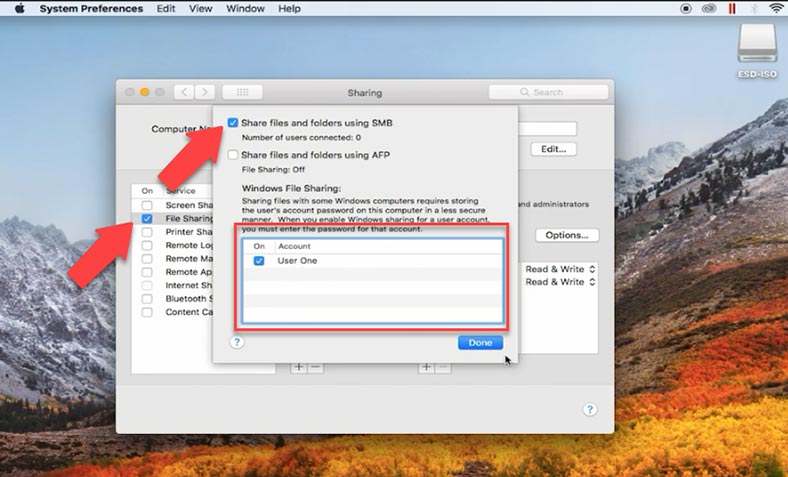
Check the box next to “File Sharing”, open “Options”, choose the SMB option and the required user.
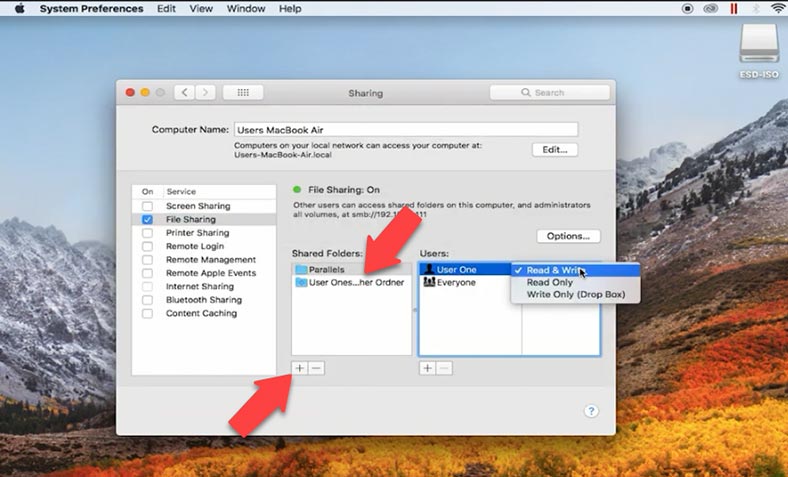
Then, add the folder containing virtual machine files to your shared folders. Click on the plus button, show the path to the folder, click “Add” and then set permissions for the user you need.
Now you can connect to the Mac from a Windows computer over the network and copy the virtual machine files.
Step 5. Restoring data with Hetman Partition Recovery
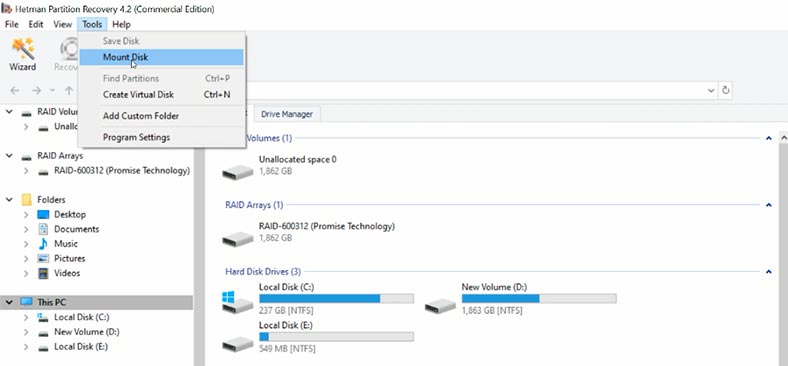
Run Hetman Partition Recovery and begin recovery operations. First of all, you need to mount virtual hard disks. In the program’s window, open the Tools tab and choose “Mount disk”.
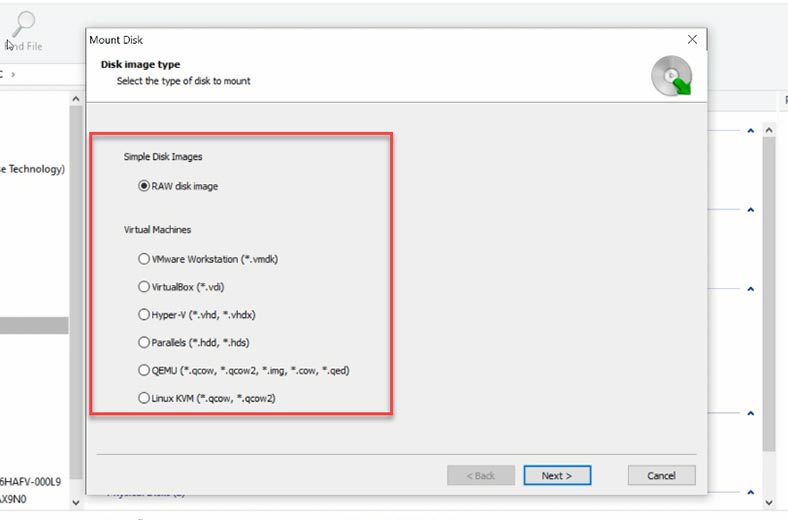
There are two ways to mount it: choose a RAW disk image if necessary, or choose Virtual Machines. After choosing the second option, you can see the list of files and tools that our program supports. Check the required image type - in my case, this is Parallels files - give the path to the folder containing virtual hard disk files that you have copied from the Mac, and click “Select Folder”.
Also, you can mount disks right over the network, without copying them to the computer’s hard disk. To do it, just give the network path to the files on the Mac device and then click “Select Folder”.
The program will display all virtual machine files which exist in such folder. The disk file which is currently in use by the virtual machine will be marked as active. Snapshot files are marked as snapshot1 and snapshot2. If the virtual machine has several disks, the second disk will have its own name, an active disk file, and its own snapshot files.
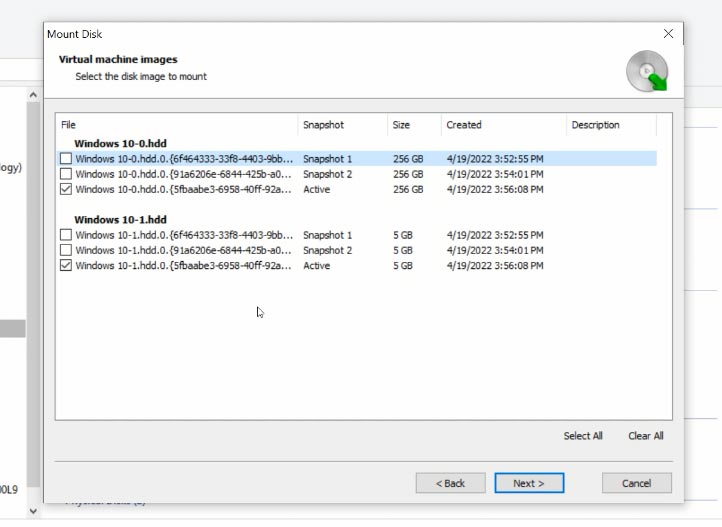
Check the boxes for the disks from which you would like to recover data and click here to continue. Then they will appear in the program’s window.
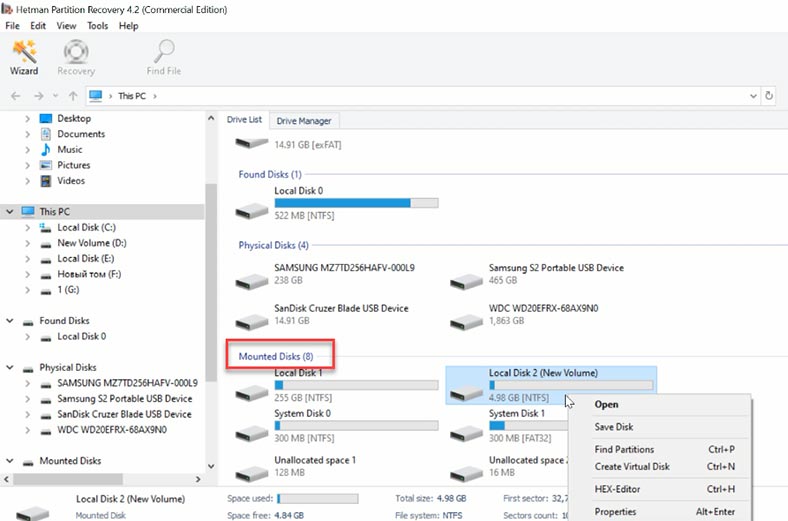
To begin searching for data, right-click on the disk and choose “Open”. Then choose analysis type. We recommend starting with “Fast scan”. If the program can’t find the missing files, then go for “Full analysis”.
The program now displays all the files it has found on this disk. The red cross indicates the ones which have been deleted. Click on a file to see its contents in the preview window. If you know the names of the files you are looking for, use the quick search feature to locate them in a second.
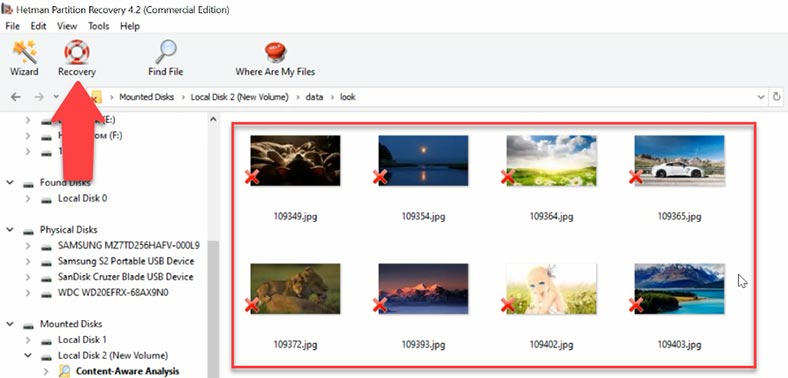
Now select the files you want to restore, click “Recovery”, specify the disk where you’d like to save the files, and click “Recovery” again.
Conclusion
With Hetman Partition Recovery, you will also be able to restore virtual hard disk files - .pvm, .hdd, .hds, if they were damaged or accidentally removed.
Also, you could watch a special video about recovering data from MacOS:

🍏 How to Recover Data from iMac, MacBook, Mac Pro, USB Drives and Memory Cards in 2021 ⚕️


Look at the IP addresses on macOS interfaces before and after Windows boot with the ifconfig -a command
Also, look at the routing table on macOS before and after Windows boot with netstat -rnv