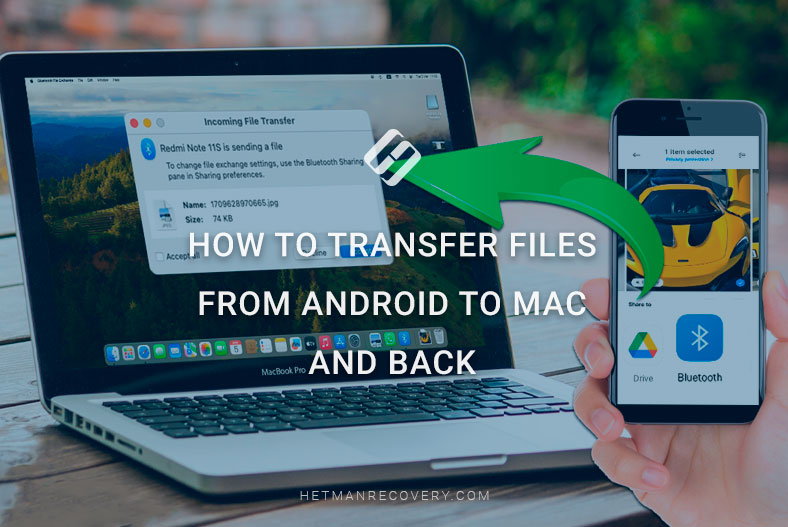
How to Transfer Files from Android to Mac and Back
Read this article to find out how to transfer files from Android devices to Mac computers. How to take photos, videos, music or documents from Android to Mac.
- Method 1. Transferring files by USB cable
- Method 2. Using a cloud storage or messengers to transfer files
- Method 3. Transferring files via Bluetooth
- Method 4. Transferring data by Wi-Fi
- Conclusion
- Questions and answers
- Comments
Exchanging files between devices is a commonplace task that we face almost every day. However, it can be a little challenging if you are new to using Android and Mac devices. Today we’ll explore a few easy yet effective ways to transfer files from an Android device to a computer with macOs.
| Method | Description |
|---|---|
| File Transfer via USB Cable | Connect Android to Mac using a USB cable. Use the “Android File Transfer” app on Mac to view and transfer files. |
| Using Cloud Storage or Messengers | Use services like Google Drive, Dropbox, or messengers (WhatsApp, Telegram) to transfer files between devices. |
| File Transfer via Bluetooth | Enable Bluetooth on both devices. Find the Mac on Android and transfer files through the file sharing menu. |
| Data Transfer via WiFi | Use services like AirDroid or Pushbullet for wireless file transfer between Android and Mac over the local WiFi network. |

The Best Way to Transfer Files from Android to Mac and Back Fast
Method 1. Transferring files by USB cable
The first method is to use a USB cable for file transfer. For example, when connecting an Android smartphone to a Mac with a USB cable, the computer will not recognize the connected device, so it’s impossible to transfer files without third-party software.
To make it possible, download a special application to help macOS “see” the connected device. In Appstore, you can find a few utilities for this purpose, but I recommend using this specific utility, Android File Transfer.
It’s a free tool that lets you exchange files between a macOS computer and various Android devices in a comfortable and effective way. You can download the utility from the official website. From your Mac computer, open a browser and go to the official website of Android File Transfer.
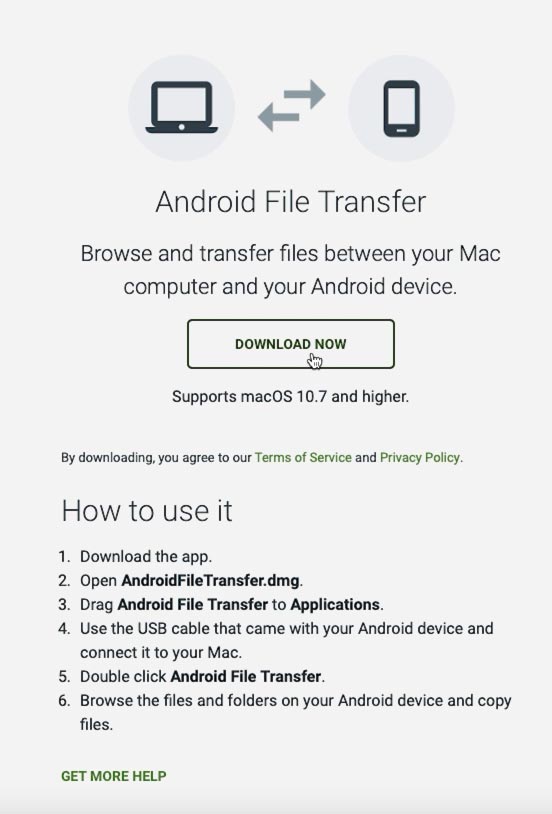
Find the Downloads tab and get the application. When the download is complete, open the file and install the application by following instructions on the screen.
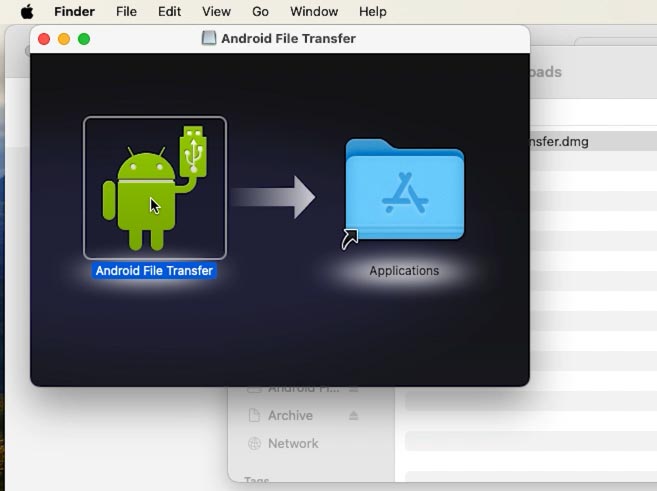
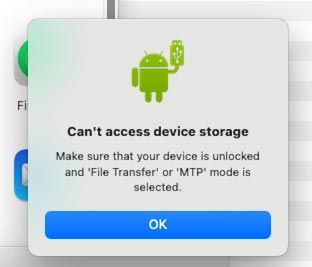
To enable file transfer, connect your Android device to the Mac computer. If you’re dealing with a smartphone, select the corresponding data transfer option.
Swipe down the notifications panel to access quick settings. Tap on the connection icon and select the file transfer type.
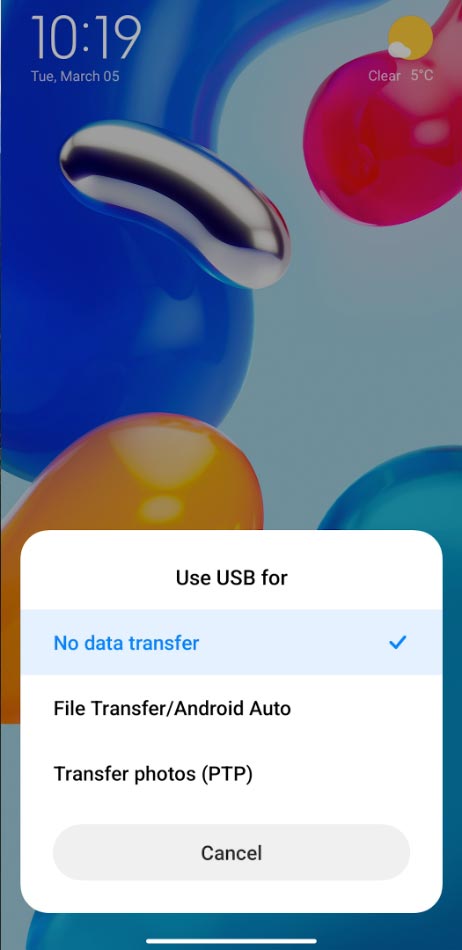
When you complete these steps, your Android device is ready to transfer files.
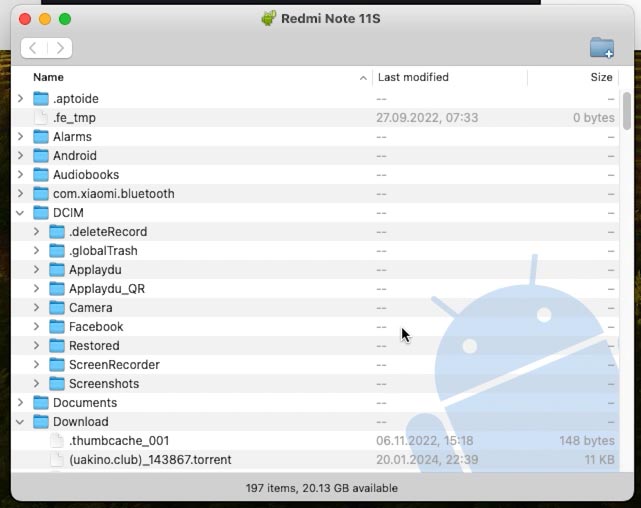
A new device will appear on the Mac screen, which can also be seen in Finder.
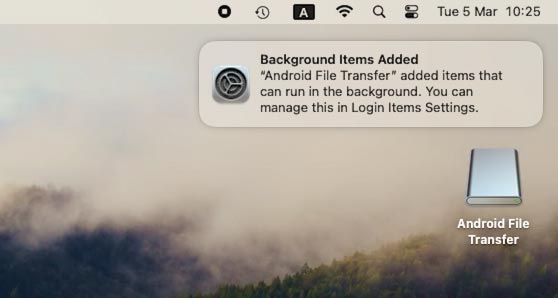
Now just copy the necessary files from Android to Mac.
Method 2. Using a cloud storage or messengers to transfer files
The second method to transfer files from Android to Mac involves using cloud servers or messengers. To use this method, download and install a cloud storage app to your Android device. This could be Google Drive, Dropbox or OneDrive. I will show it with the example of Google Drive.
| Feature | Dropbox | Google Drive | Microsoft OneDrive |
|---|---|---|---|
| Integration with macOS | Good integration, Finder support | Built-in support through Backup and Sync or Drive File Stream app | Good integration, Finder support |
| Free storage space | 2 GB | 15 GB | 5 GB |
| File synchronization | Easy sync with automatic updates | Easy sync with automatic updates | Easy sync with automatic updates |
| Additional storage space | From $9.99/month for 2 TB | From $1.99/month for 100 GB | From $1.99/month for 100 GB |
| File sharing | Easy sharing via links or shared folders | Easy sharing via links or shared folders | Easy sharing via links or shared folders |
| Integration with office applications | Limited (integration with Paper) | Deep integration with Google Docs, Sheets, Slides | Full integration with Microsoft Office |
| Security and encryption | AES-256 encryption on the server side | AES-256 encryption on the server side | AES-256 encryption on the server side |
| Price for additional storage | From $9.99/month for 2 TB | From $1.99/month for 100 GB | From $1.99/month for 100 GB |
| Team collaboration support | Built-in tools for collaboration and commenting | Deep integration with G Suite for team collaboration | Integration with Microsoft 365 for team collaboration |
| Additional features | File versioning, offline access | Automatic backup with Google Photos, offline access | Integration with Windows, offline access |
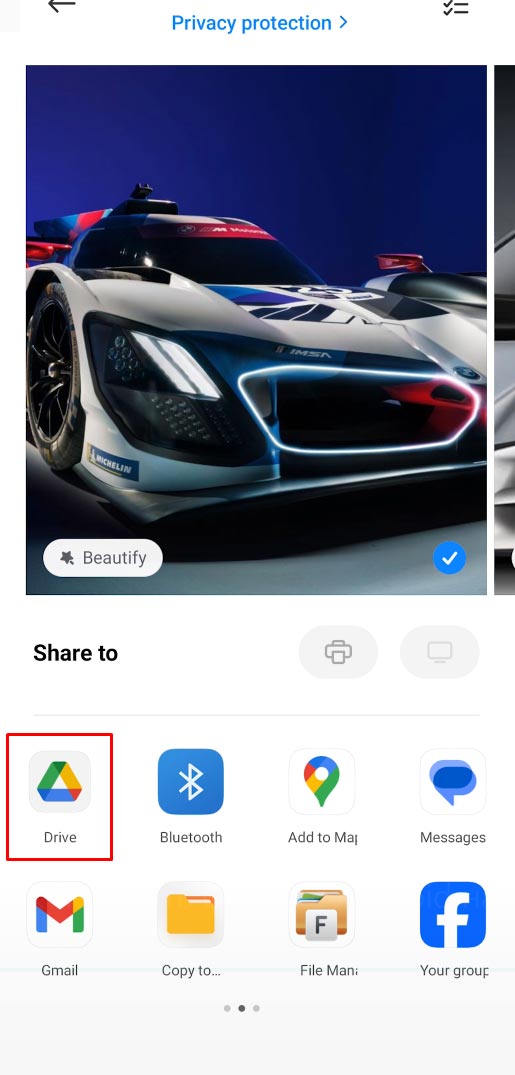
After it is installed, all you have to do is to upload to Google Drive the file which you need to transfer. Select a file, tap Send, and choose Google Drive as the destination.
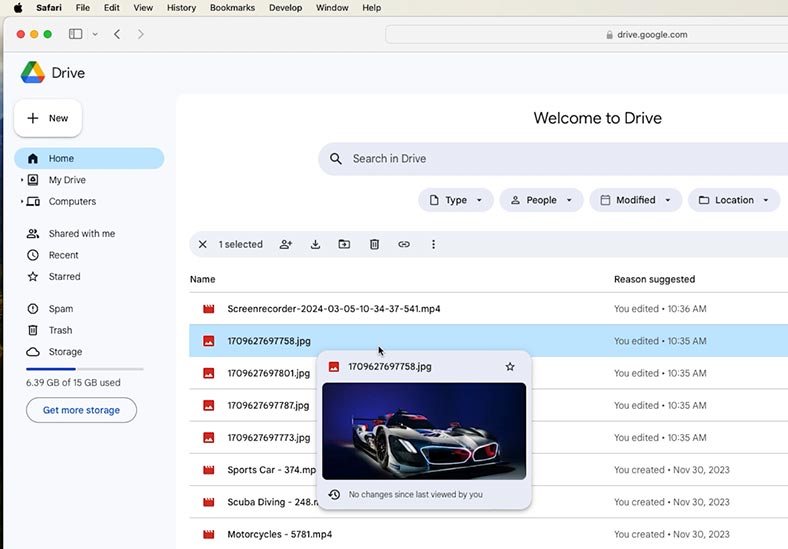
Go to your Mac, open the browser and go to the cloud storage website. Sign in to your account and download files from Google Drive to your computer.
In addition to cloud storage services, you can use messengers for the same purpose. Many messenger apps such as WhatsApp, Telegram, Facebook Messenger and others allow users to transfer files between devices. So you can send a file from your Android device with a messenger, and then download it to Mac by using a web version of such messenger or other available methods.
| Messenger | Maximum File Size | Maximum Cloud Storage Volume | Supported File Types |
|---|---|---|---|
| 100 MB | No cloud storage; files are stored on device | Photos, videos, documents, audio | |
| Telegram | 2 GB | Unlimited cloud storage | Photos, videos, documents, audio, files of any type |
| Facebook Messenger | 25 MB | No cloud storage; files are stored on Facebook | Photos, videos, documents |
| Viber | 200 MB | No cloud storage; files are stored on device | Photos, videos, documents, audio |
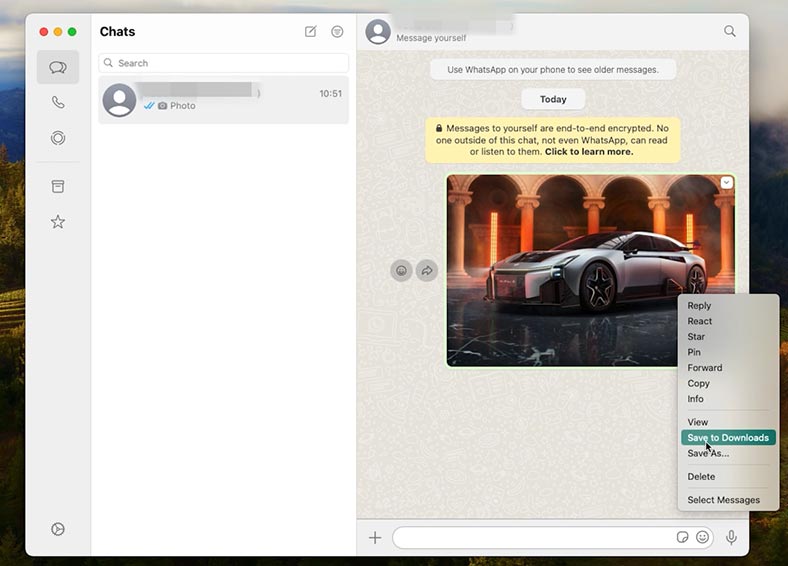
Using a cloud storage or messengers is a convenient way to exchange files between Android and Mac devices, without any hassle of messing around with cables or installing extra apps. This method is particularly good for sending small files and for people who prefer to keep their stuff in a cloud.
Method 3. Transferring files via Bluetooth
In this case, you don’t need to install anything. The only thing you do is to set up your Mac.
On MacBook, go to System Settings – General – Sharing.
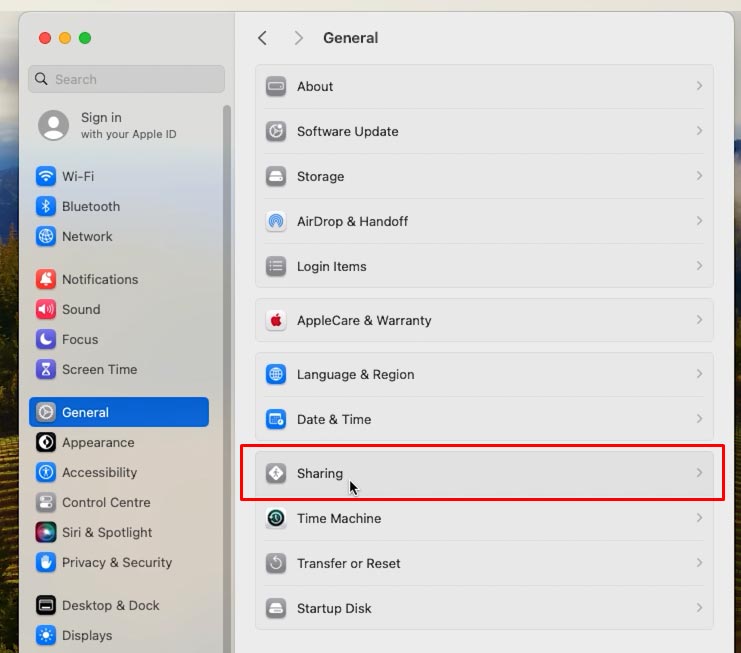
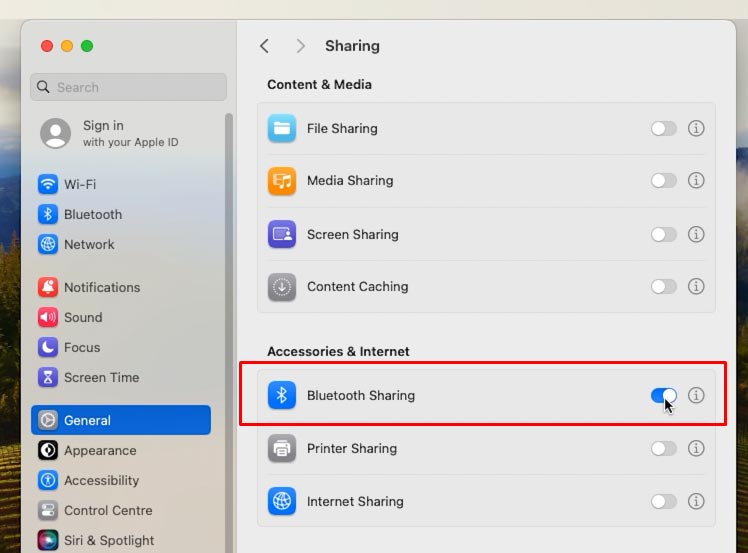
Scroll down the menu and drag the slider to enable Bluetooth Sharing.
.
Click on the “i” symbol next to this option and change the action for “When receiving items” to “Ask What to Do”. This is necessary so that no one can connect to your Mac by Bluetooth without your permission.
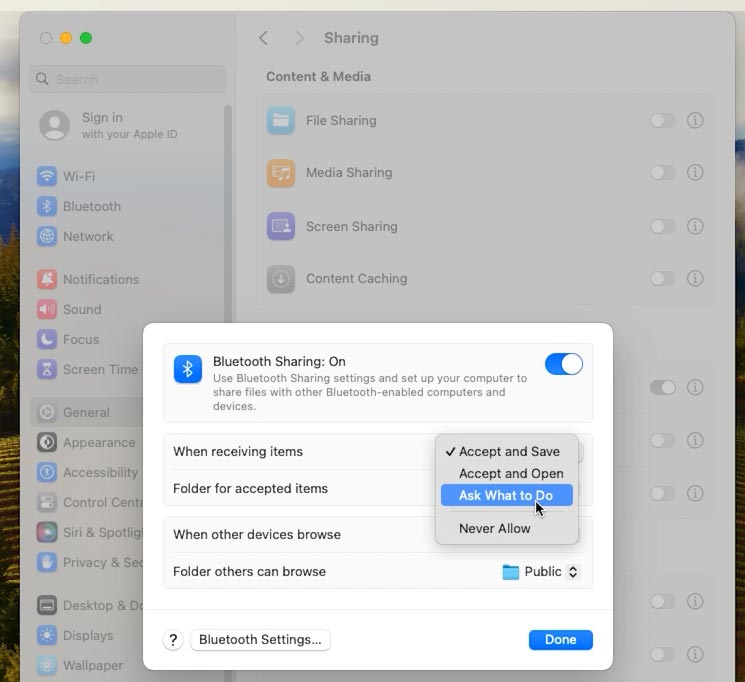
Now any Android device will be able to “see” your Mac without any issues.
To transfer files, select “Share to Bluetooth” and choose Mac as the device that will receive them.
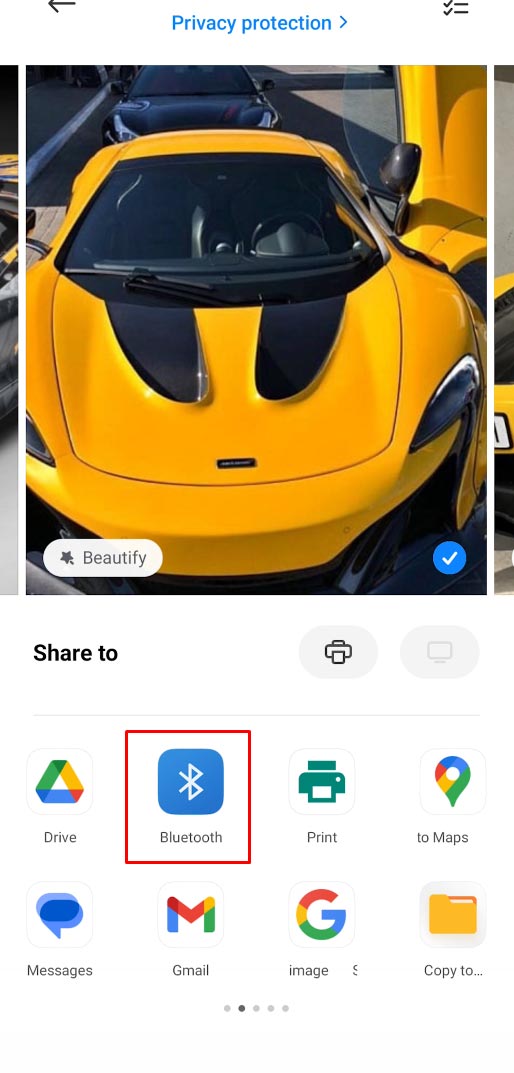
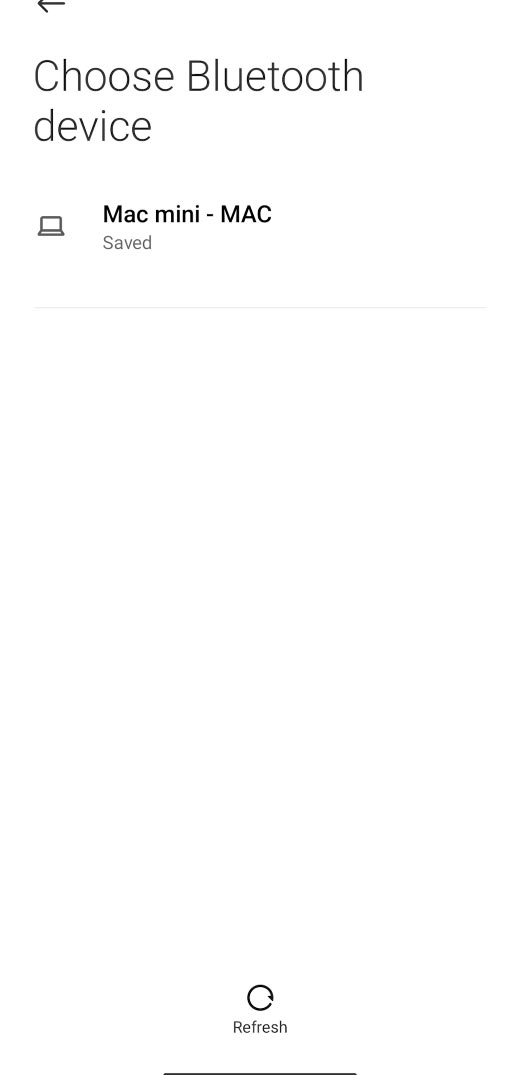
The transfer speed may not be as high as in the case with Wi-Fi or AirDrop. However, if you need to send data from Android to Mac right here and right now, this method will do, without messing around with extra apps and cables.
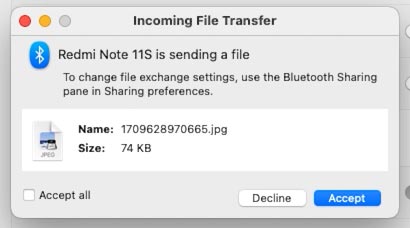
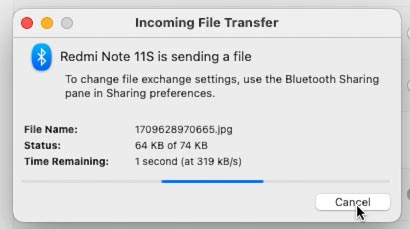
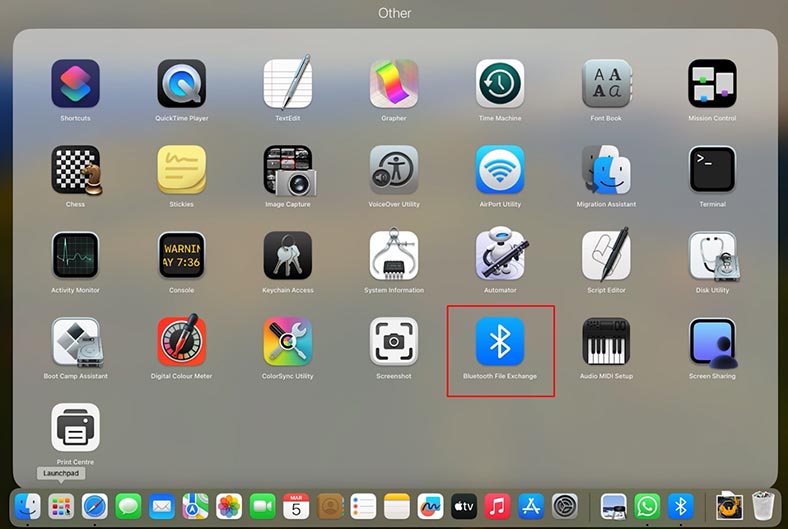
This method also allows you to show the phone on the screen of your Mac and transfer files in both directions. To send files to your phone, go to Launchpad – Other – Bluetooth File Exchange.
Choose a file for transfer and select the specific phone in the menu that appears.
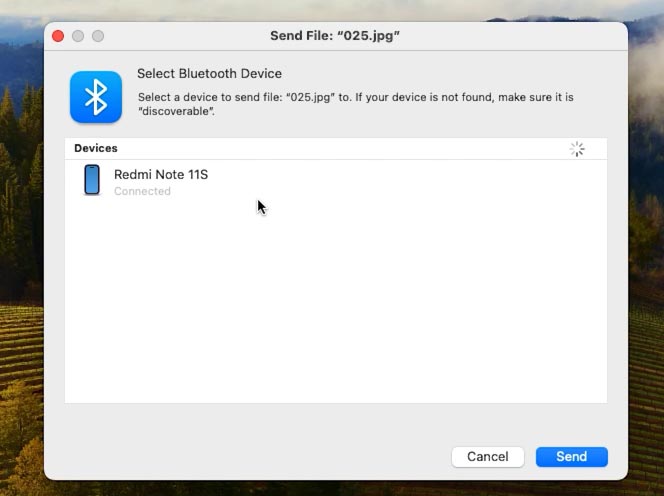
You only have to enable this setting once and then never go back to that again. From now on, your phone appears on your Mac and you can exchange files via Bluetooth in any place and environment, even if there is no Internet connection.
Method 4. Transferring data by Wi-Fi
You can send files from an Android device to Mac by Wi-Fi with an app called ShareMe.
ShareMe is a default application for Xiaomi smartphones previously known as MiDrop. Nowadays, it can be installed to any Android phone, regardless of its actual manufacturer. If you don’t have this app yet, download it from Google Play.
Then open the app, go to its side menu, select Webshare – Share.
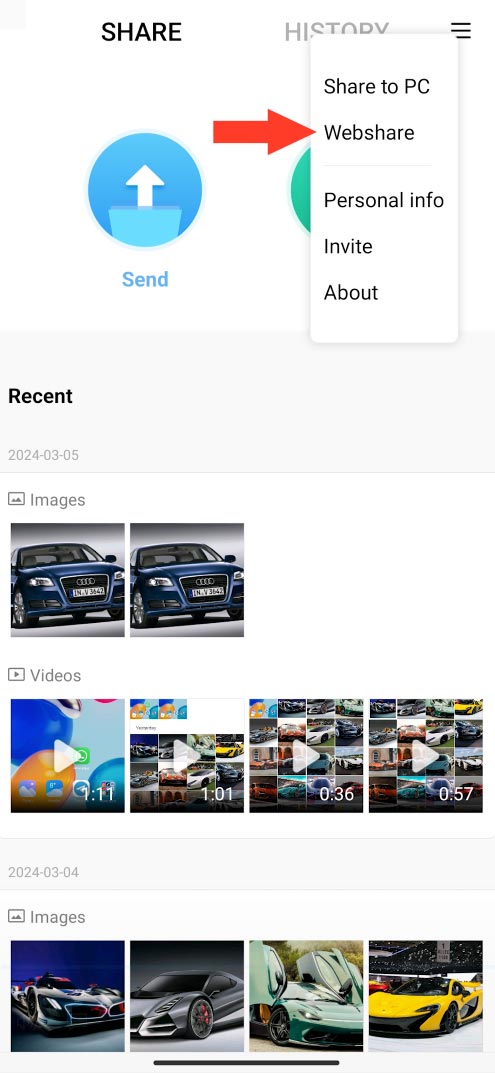
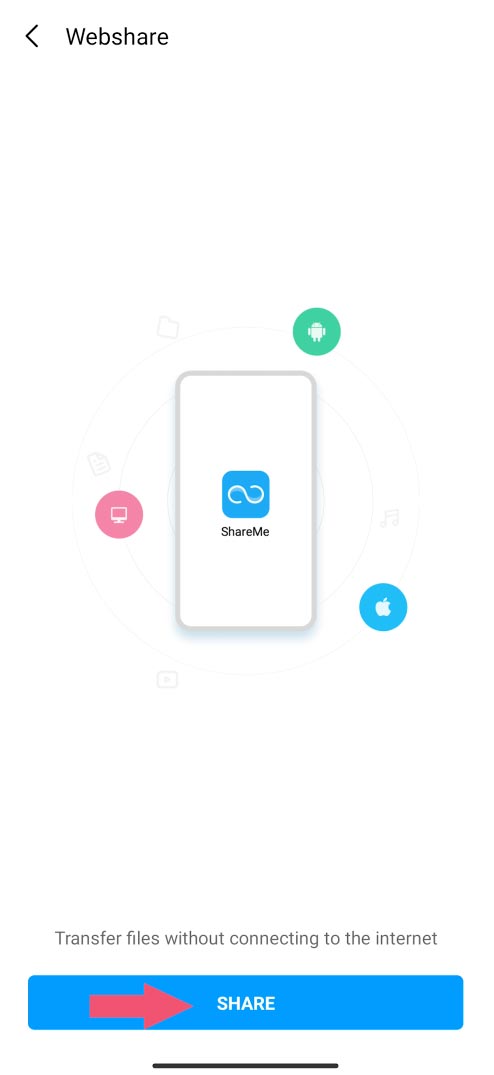
Select the file you want to transfer, and click Send.
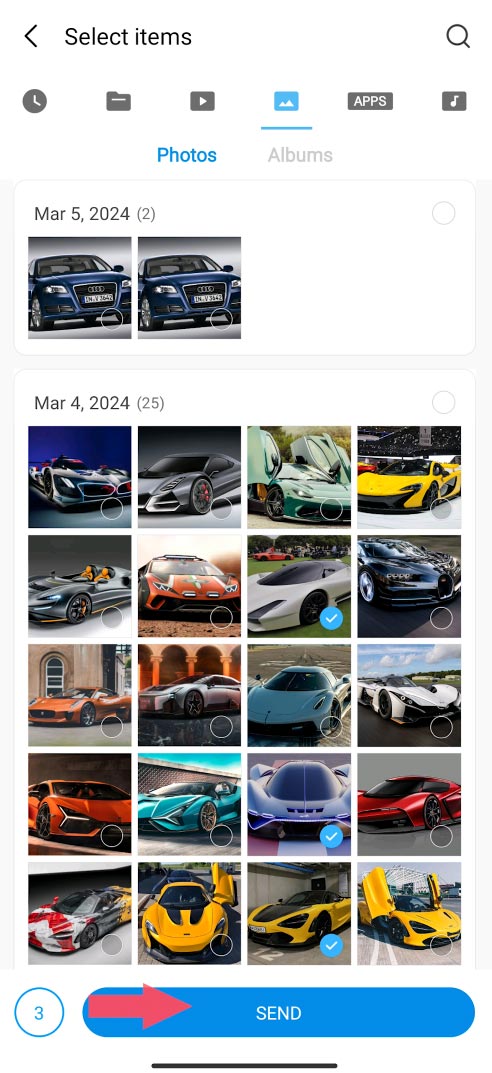
A mobile hotspot will appear on the screen.
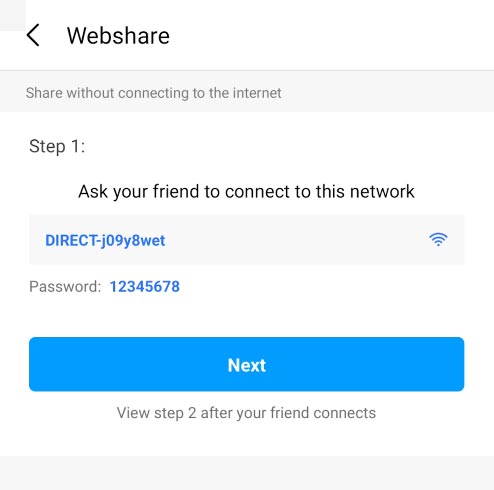
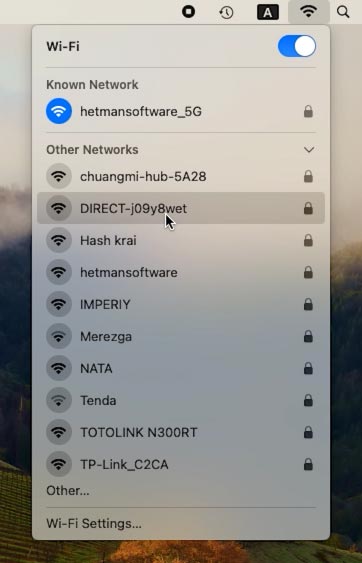
Go to your Mac and connect to this hotspot by Wi-Fi. The access password can be seen on the screen of your phone.
When connected, type the address that you see on your phone into the address bar of your Safari browser.
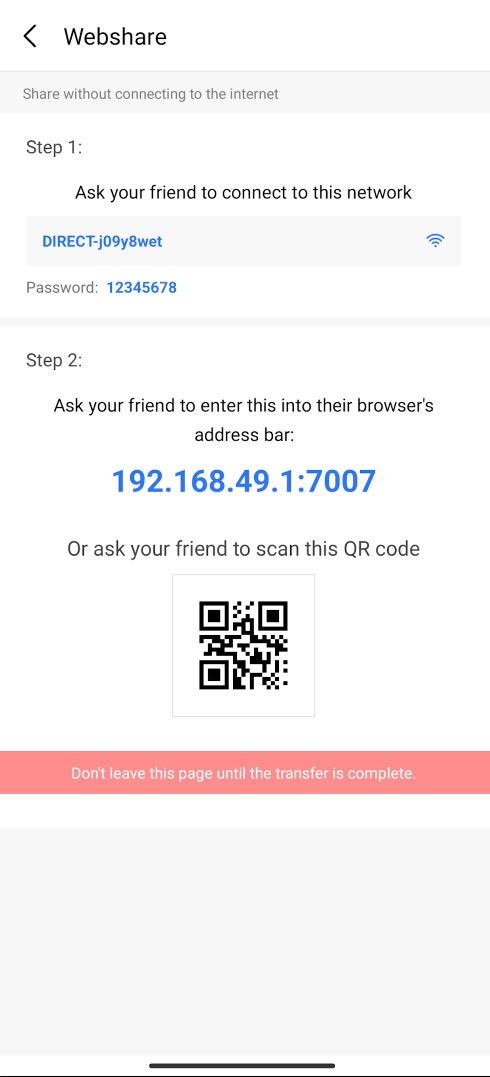
After the connection is established, the transferred files will appear in your browser. Next to each file, you can see the download button. Click Download, and they will be downloaded to your Mac.

This is how you can send any file from your Android phone to a computer with macOS.
Conclusion
Summing up, now you know several methods to transfer files from an Android device to a macOS computer, so you can choose the most convenient and effective way for your particular situation.

🍏 Recovering Data after Mac OS Update, Reinstall or Disk Format 🍏


