Recovering Data from Oracle VM VirtualBox: Essential Tips and Tricks!
Have you ever lost important data from your Oracle VM VirtualBox virtual machine and wondered how to recover it? In this video, we’ll show you simple and effective methods for recovering lost data from your Oracle VM VirtualBox VM. Read now to learn more!
- How to create a Windows virtual machine in VirtualBox
- How to take a virtual machine snapshot
- How to restore a virtual machine to its previous state
- How to recover virtual disk files (VDI)
- How to add an existing disk to the virtual machine
- How to recover data if the virtual machine won’t boot
- Conclusion
- Questions and answers
- Comments
VirtualBox offers you a free and easy way to create a virtual machine and run Windows, Linux or any other operating system along with your main OS without having to use any extra hardware or equipment. I’ll explain how to create such a virtual machine in Windows, how to take snapshots, and how to restore its previous state if something goes wrong. Also, you’ll learn how to recover data if restoring the operating system didn’t go as planned, or if the virtual machine refuses to boot. You will be able to recover accidentally deleted virtual disk files (VDI) or snapshot files.
A VDI (VirtualBox Disk Image) file works just as if it was a physical hard disk, and it can store your data just as well. When several operating systems are installed on a single PC, the program will create a VDI file for each virtual machine as well as additional files, when snapshots are taken, or when additional virtual disks are connected. This aspect should be taken into account in case of recovery.
| Characteristic | Description |
|---|---|
| File Format | VDI (Virtual Disk Image) – a proprietary format for virtual disks used by VirtualBox, designed to store the state of the virtual machine’s hard disk. |
| Maximum Size | Supports up to 2 TB for each virtual disk. |
| Dynamic Growth Mode | The disk can grow in size during use, from an initially set minimum to the maximum volume, while physically occupying only the required space on the physical storage. |
| Fixed Size | The disk occupies the entire specified volume on the physical disk immediately after creation. |
| Connection Type | Supports various interfaces for disk connection, including SATA, IDE, SCSI, NVMe. |
| Compatibility | VDI disks can be converted to other virtual disk formats such as VMDK (VMware) or VHD (Microsoft Hyper-V). |
| Snapshots | Allows creating disk snapshots, enabling you to save the virtual machine’s state at a specific point in time and revert to it if needed. |
| Encryption | VirtualBox supports encryption of virtual disks using AES-256, protecting data on the disk from unauthorized access. |
| Performance | Dynamic disks may have lower performance compared to fixed ones, as the size changes during operation. Fixed disks provide better access speed. |
| Backup | VDI files can easily be copied for backup or transferred to other systems. |
| Host Integration | VirtualBox allows the use of host features to optimize performance, such as input-output caching, which can speed up virtual machine operation. |

💻 How to Create an Oracle VirtualBox Virtual Machine and Recover Data from a VDI Disk in 2021 ⚕️
How to create a Windows virtual machine in VirtualBox
To create a virtual machine, you need to install VirtualBox, and find an ISO image of the operating system which you are going to use.
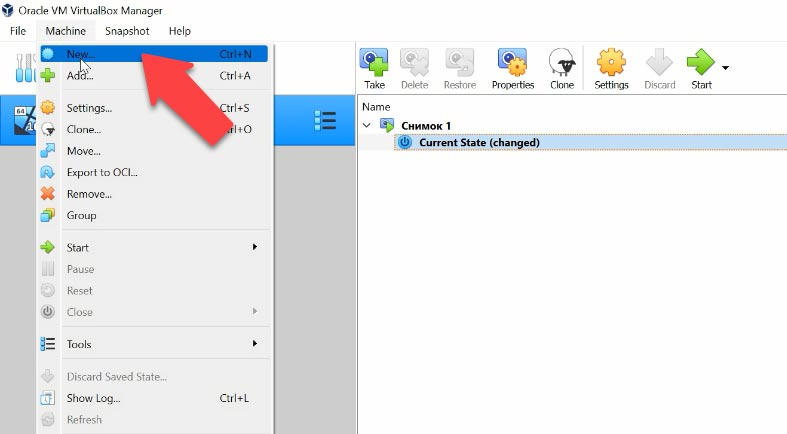
Open VirtualBox, and click Machine – New in the program’s window.
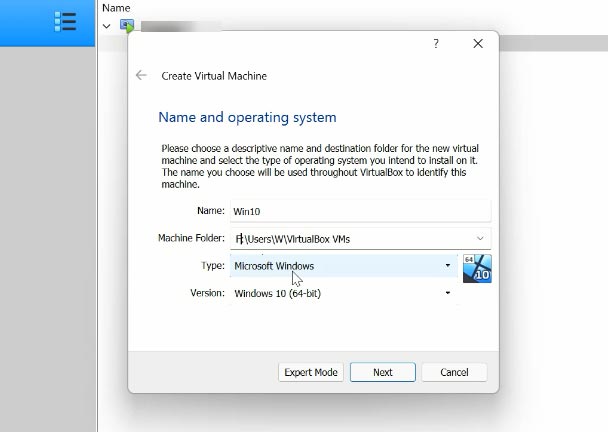
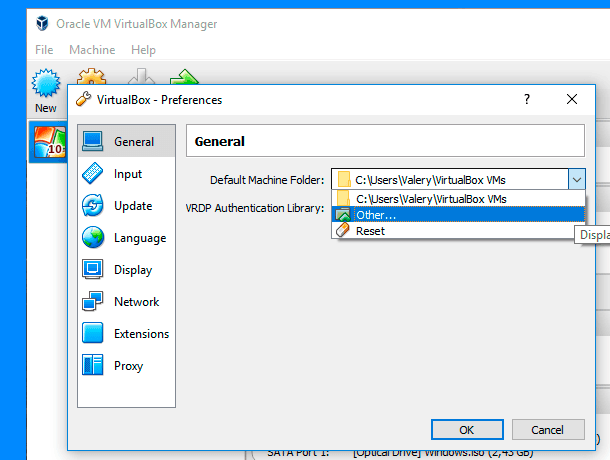
In the next window, specify the virtual machine name and operating system type; if necessary, you can modify the folder where the virtual machine should be stored – Next.
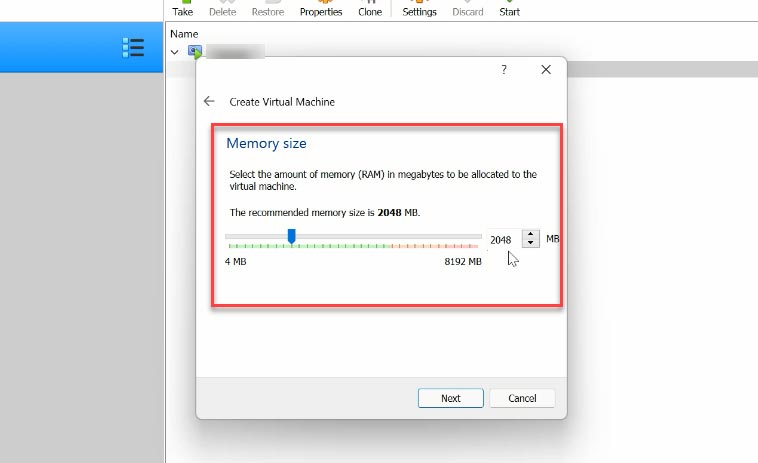
Now choose the amount of RAM – it should be at least half of the system memory installed on this computer – Next.
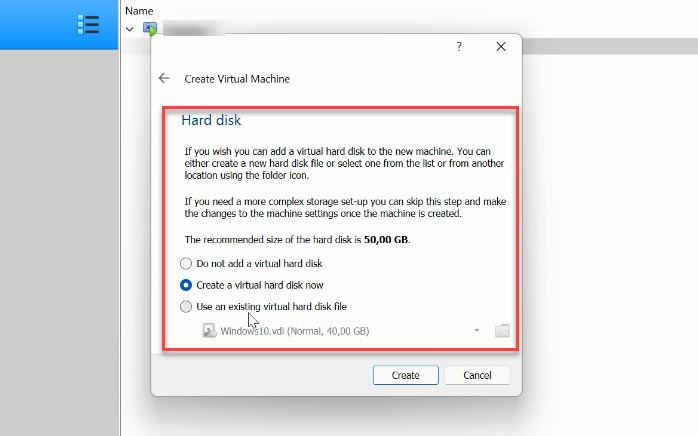
In the following window, choose the option to create a virtual hard disk and click Create. If you’d like to open a virtual disk that already exists, choose the last option.
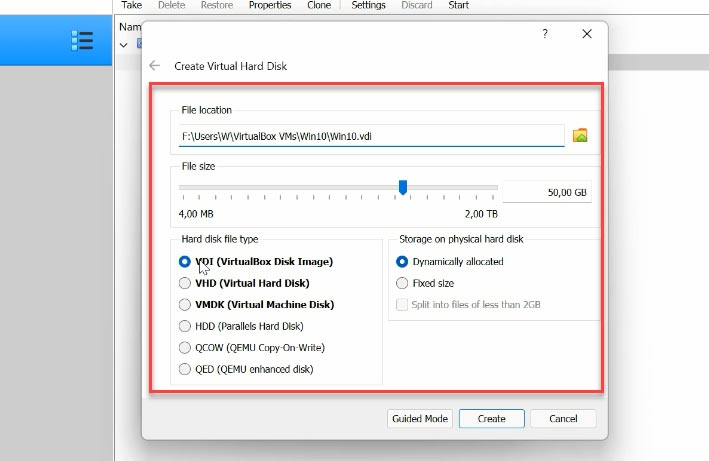
Now specify the disk type – VDI, VHD, VMDK; if you don’t need to use the disk with other virtualization software, leave this setting without changes and click Next. If you access the Expert Mode, more disk types appear – HDD, QCOW, QED.
At the next stage, choose the storage type – dynamically allocated or fixed size. Set the size of the virtual disk and click Create.
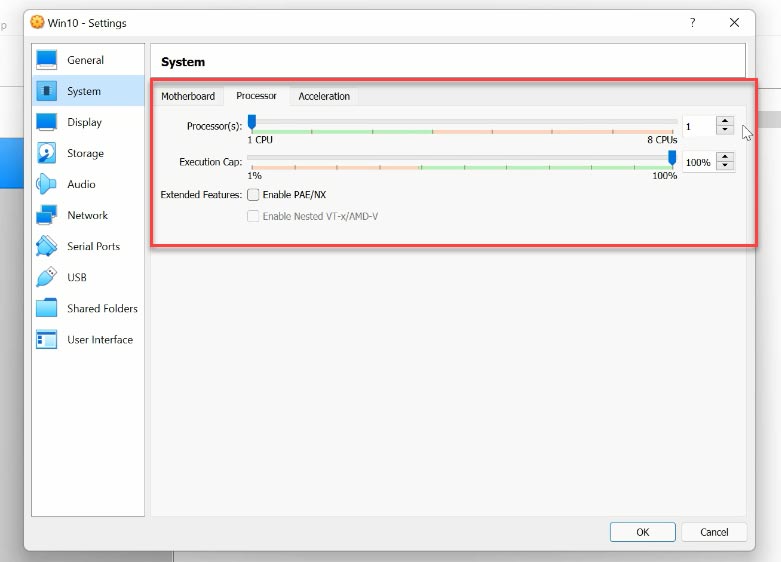
After that, you will see the program’s main window. Right-click on the machine and open its Settings. Jump to the System tab – Processor, and increase the number of allocated cores.
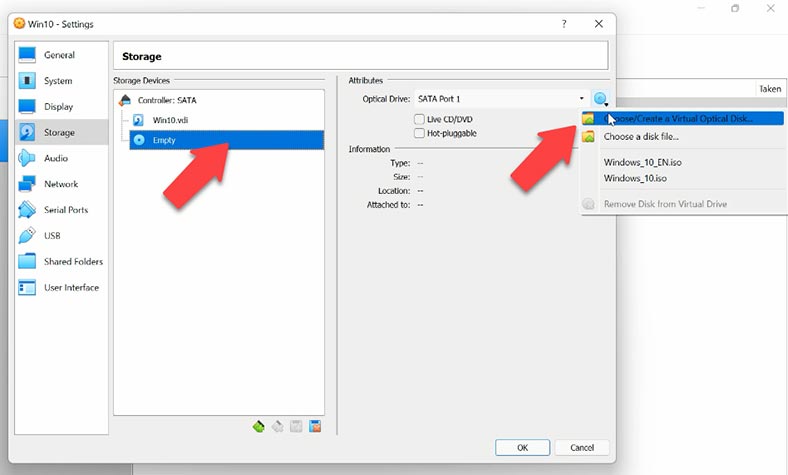
Then open Storage, click on the disk icon, go to the Attributes tab and select the option “Choose a disk file”. Give the path to the ISO image of Windows 10 – OK.
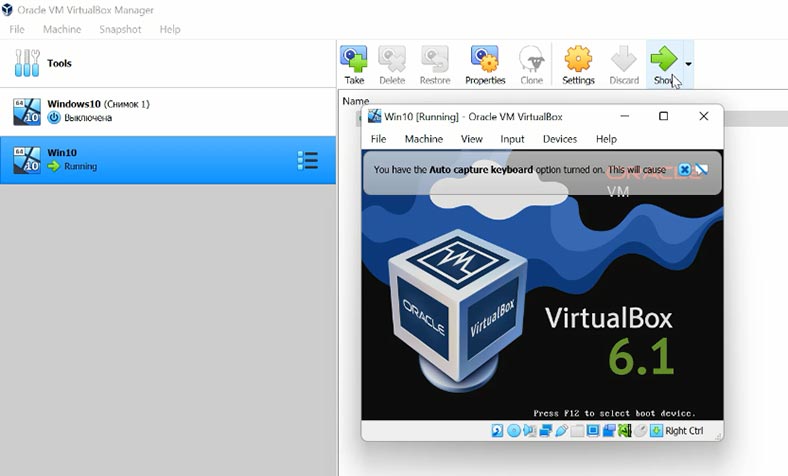
After that, run the virtual machine by clicking on the green arrow-shaped Start button. When it starts, the installation of the operating system begins just as if it was a conventional PC. When it’s over, you’ll be able to use the virtual machine.
How to take a virtual machine snapshot
VirtualBox lets you take snapshots of your virtual machine. To take a snapshot on a currently running virtual machine, fin the menu at the top of the program’s window and open the tab Machine, then choose Take Snapshot.
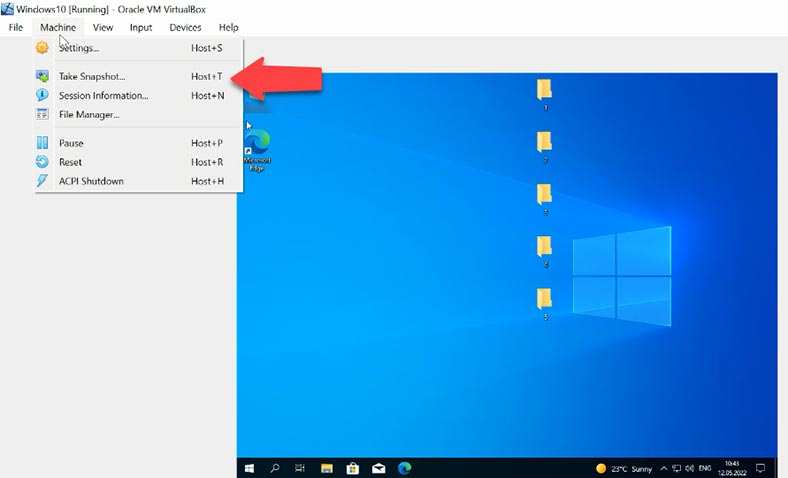
Give it a name, add a description if necessary, and then click OK to save it. Now you have a snapshot of this machine representing its state on a certain date and time, for recovery in case of a failure or accidental removal. You will be able to restore your machine to its state at the time when the snapshot was taken.
How to restore a virtual machine to its previous state
To roll the virtual machine back to its state fixed in a snapshot, go to the tab Machine – Tools – Snapshots.
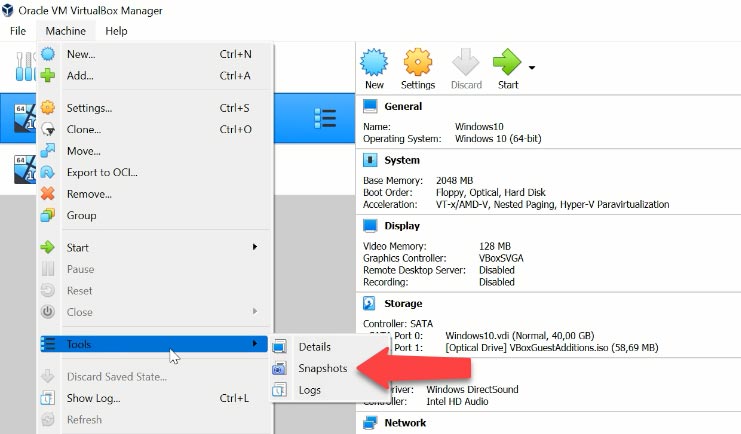
Select the snapshot from the list (you can look at the name and date to understand which one you need) and click Restore. Decide if you want a snapshot of the current state of the virtual machine, and check this box below, then click Restore.

Then run the virtual machine and check it for the files that have been lost.
How to recover virtual disk files (VDI)
If you have accidentally removed a snapshot or a virtual disk file (VDI), you can bring them back with the specialized data recovery tool – Hetman Partition Recovery.
If the machine was removed without deleting files, it’s very easy to restore it by clicking Machine – Add. However, if you deleted the files, it takes a special utility to bring them back again.
Download, install and run the utility. Right-click on the disk where virtual hard disk files were stored and start the scan. Try Fast scan first.
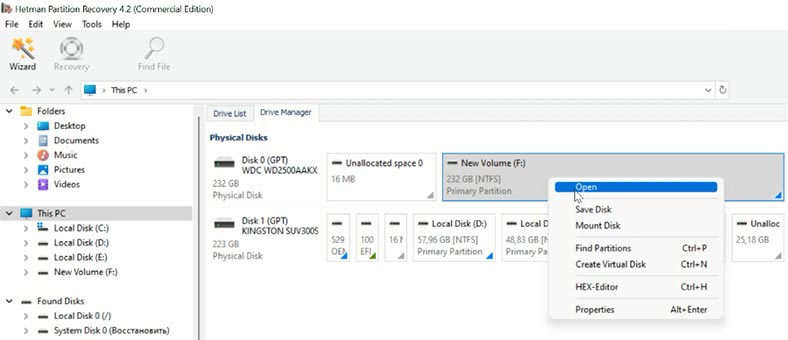
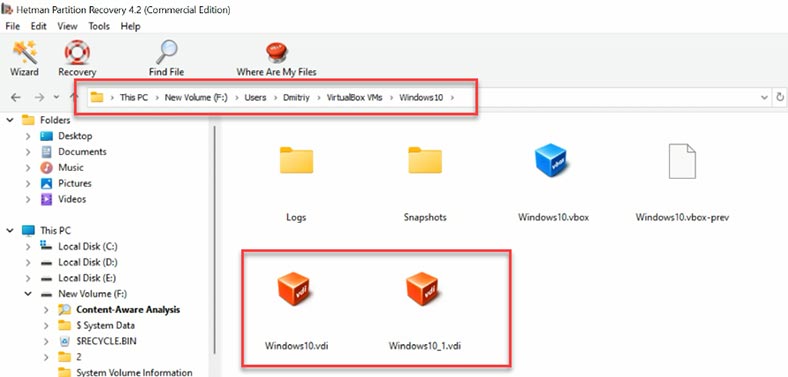
Open the folder which used to contain virtual hard disks and check if the files you are looking for are now there. By default, VDI files are stored here:
C:\Users\User name\VirtualBox VMs\Virtual machine name
Snapshot files are stored in the folder with the same name - Snapshots.
If the Fast scan can’t find the necessary files, then go for Full analysis:
- Right-click on the disk - Analyze again - choose Full analysis.
- Specify file system type - Next and Finish.
- Select the files you want to restore and click Recovery.
- Choose the disk where to save them and click Recovery again.
- In the end, you will find the recovered files in the folder you have chosen.
Now you should add the disk to the virtual machine, start it and access the files you were looking for.
How to add an existing disk to the virtual machine
To add a disk to the virtual machine, choose the option “Use an existing virtual hard disk file” when creating a machine, give the path to the file and click Create. When the machine is ready to use, click on the Start button.
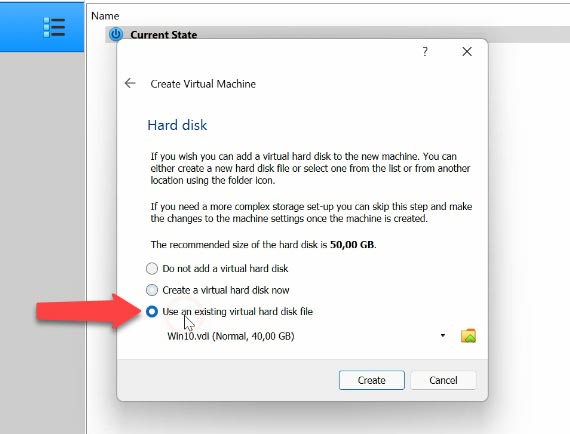
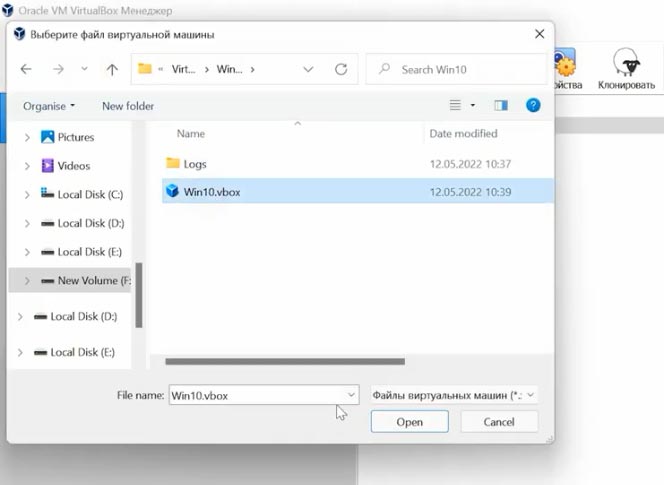
If you also managed to restore a .vbox file containing virtual machine settings, to add a virtual machine you should click – Machine – Add, give the path to the file – Open, and then it will appear on the program’s list.
How to recover data if the virtual machine won’t boot
If the virtual machine refuses to boot, or displays an error at startup that cannot be fixed, remember that our program supports data recovery from virtual hard disks of various hypervisors.
The list includes such file extensions as VDI, VHD, VHDX, vmdk, .hdd, *.qed, *.qcow and others. In my case, virtual hard disk files are kept in a NAS system (network-attached storage). That’s why I’ll explain how to recover data from virtual disks (VDI) over the network.
Start the program, click Tools – Mount Disk. There are two ways to mount it: choose a RAW disk image if necessary, or choose Virtual Machines. After choosing the second option, you can see the list of files and tools that our program supports.
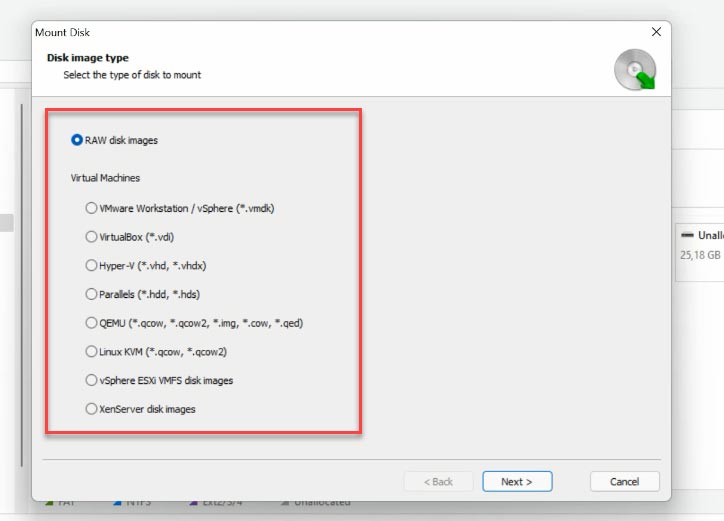
Check the corresponding image type; in our case, this is VirtualBox, the file extension – VDI, and give the network path to the folder where virtual hard disk files are stored. Network – Archive – VirtualMachine – VirtualBox. When you have given the path to the required directory, click to select the folder.
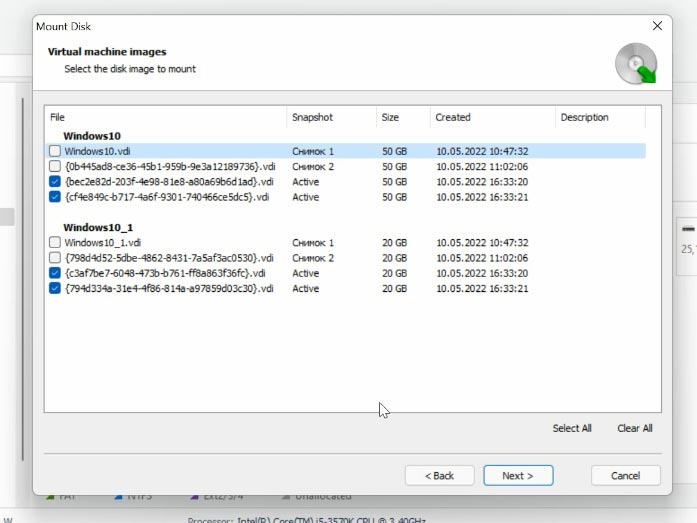
The program will display all virtual machine files which exist in such folder. As you can see, there are disk files and snapshots, i.e. copies of the virtual machine state on a specific date. The disk file which is currently in use by the virtual machine will be marked as active. Check the box next to the disk you are interested in, and click Next. If you need to recover data of a snapshot, check the box next to it - you can easily find this file by its name and date.
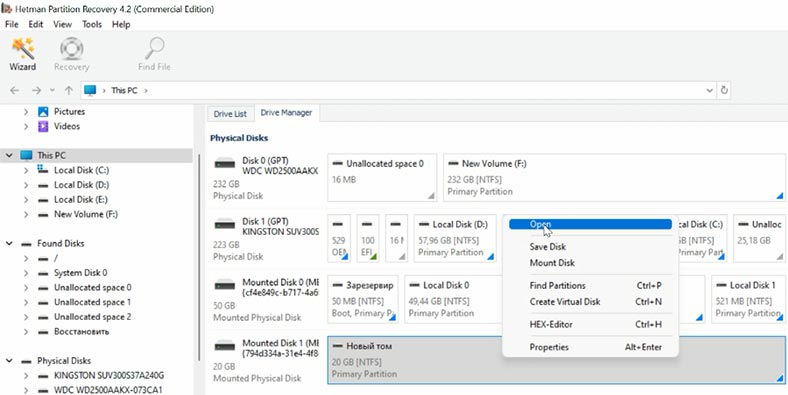
After you have selected the folder, the mounted disk will appear in the Drive Manager immediately. Right-click on it - Open. Select the scan type, and choose “Fast scan” for starters. If the “Fast scan” can’t find the required files, then go for “Full analysis”. Right-click on the disk - “Analyze again” - “Full analysis” - and specify the file system for this disk.
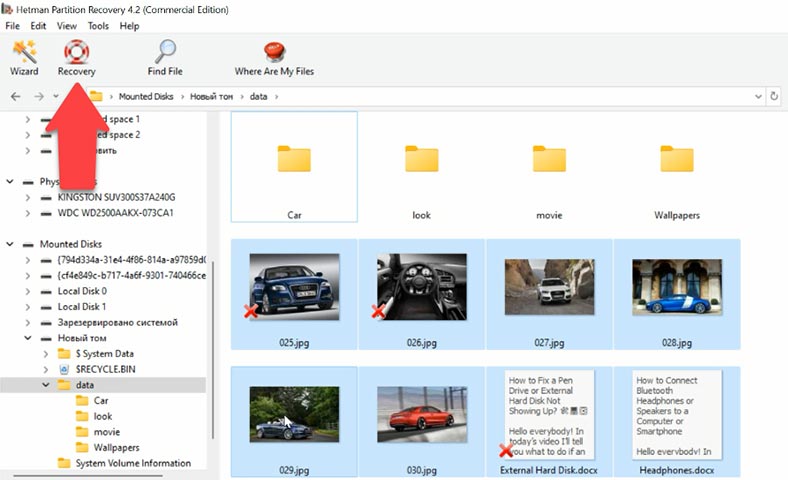
Then go to the folder where the lost data used to be stored, and look for the ones you need to restore. Select them and click “Recovery”, choose the disk and folder, and click “Recovery” again.
Conclusion
To make users’ lives easier, our program features the option to search for files by their names. Also, you’ll be able to preview the file contents to make sure that this is the one you need.
The program’s ability to operate over the network simplifies the recovery process, as you don’t need to arrange additional disks for copying VDI files to your computer, and this way you can save both time and resources. Just mount the disk files over the network and start the scan. The only serious disadvantage is that if your network connection is interrupted, you will have to run the scan again when the connection is restored.

🔷 How to Recover Data of an Oracle VM VirtualBox Virtual Machine 🔷


1]Run VirtualBox as an administrator
2]Install VirtualBox as an administrator
3]Disable antivirus.
4]Restore access rights to the access control list (ACL)
5]Move the .Virtualbox folder to another location.