Creating Software RAID in Windows Server: Step-by-Step Guide
Interested in creating a software RAID in Windows Server but not sure where to start? You’re in the right place! In this article, we’ll provide you with an essential guide to creating software RAID in Windows Server. From understanding RAID levels to configuring RAID arrays using Disk Management, we’ll walk you through the process step by step. Whether you’re looking to enhance data redundancy or improve disk performance, creating a software RAID can help you achieve your storage goals.
- Method 1. Creating a RAID array in Windows Server
- Method 2. How to create a RAID system with the help of Intel Rapid Storage Technology
- Questions and answers
- Comments
In one of our previous articles, we explored what is RAID, how to build a computer for RAID systems, and how to create such a system using the BIOS features integrated into your motherboard. In today’s article, you will read how to create a RAID system within the operating system Windows Server with a graphical interface.

🗄️ How to Configure Data Backup, Create a Backup Copy and Restore Windows Server 🗄️
Method 1. Creating a RAID array in Windows Server
It is very easy to create a software RAID array in Windows Server. First of all, you should decide what RAID type you want and make sure you have the sufficient number of disks to use with that type. Once you’ve settled this issue, start configuring the RAID system.
I’ll show you how to create a RAID 5 array, but setting up other RAID types is very similar except for certain architectural differences, so this example is quite versatile.
Open Disk Management by right-clicking on the Strat button and choosing this line from the list.

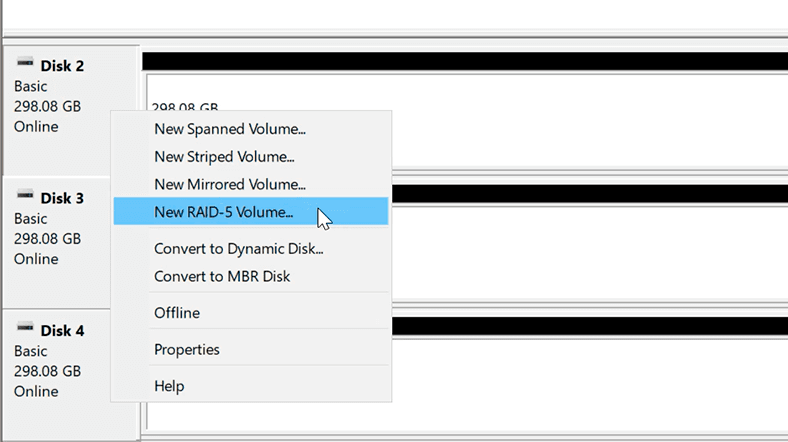
With built-in operating system tools, you can create a RAID 0 (striped volume), RAID 1 (mirrored volume), RAID 5 and JBOD (spanned volume) array. To create the RAID type you want in Disk Management, right-click on one of the unallocated disks and choose the type you prefer.
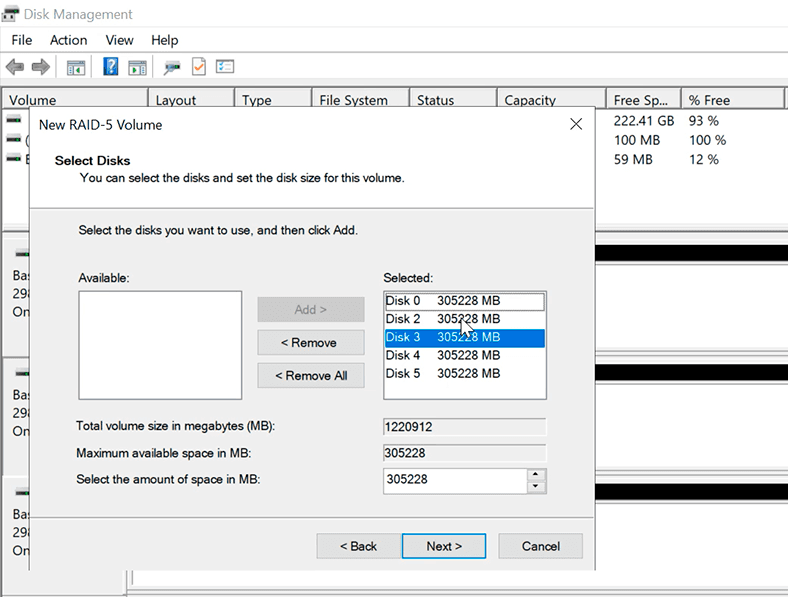
Add all necessary disks and click Next.
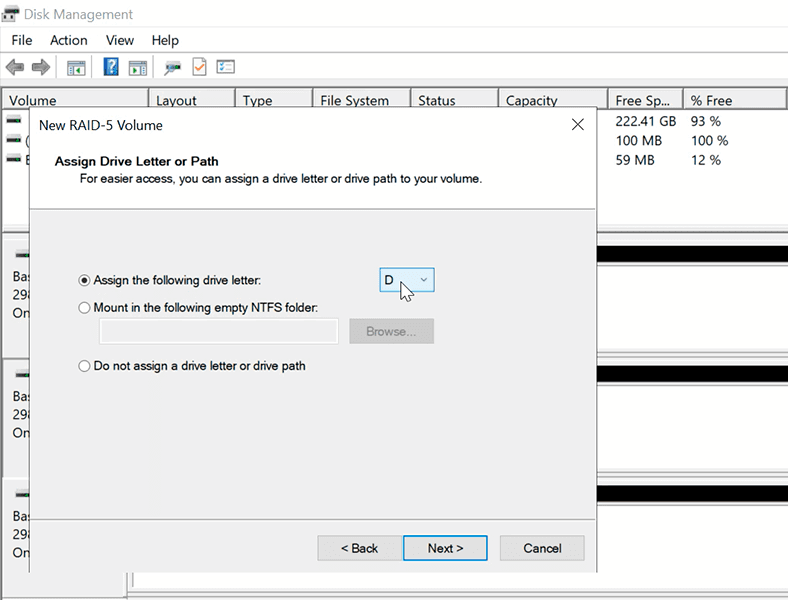
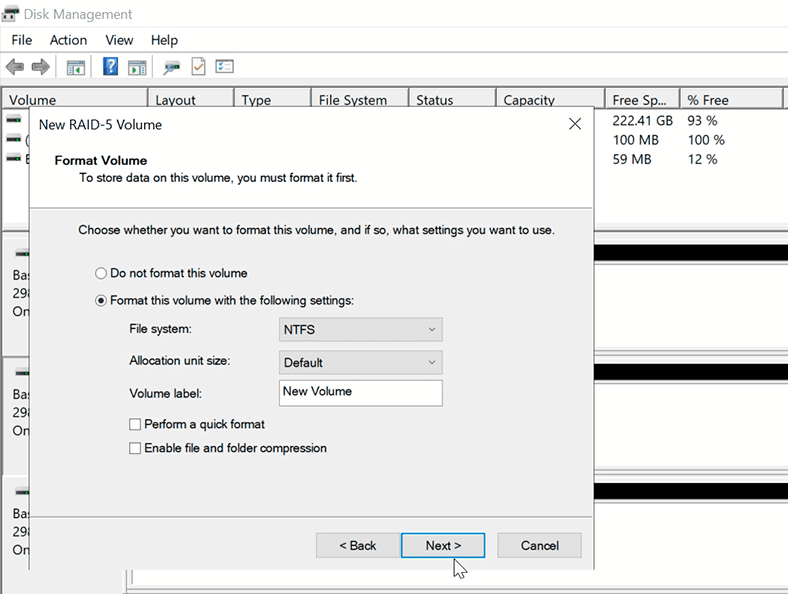
Assign a drive letter to the new volume and format it.
When the New Volume wizard closes, there will be a message saying that disks need to be converted, which will erase all data irreversibly. As the disks used in our example are empty, click «Yes».
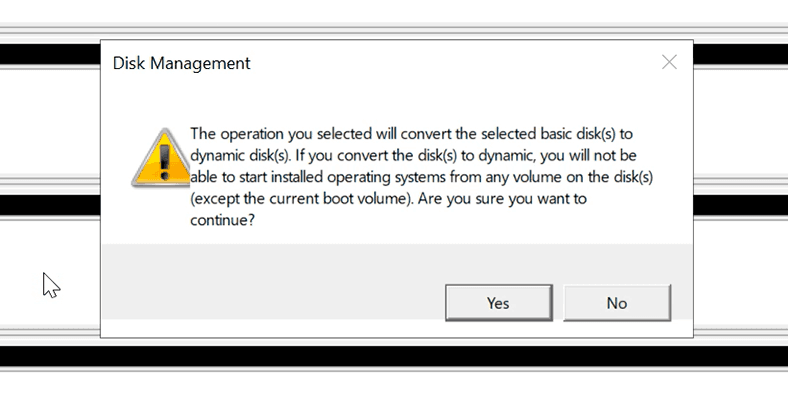
If you have any important or necessary data on your disks, save it elsewhere before you proceed.
After the disks are converted and RAID 5 is created, the resynching process starts. It can be quite long and the actual time needed to complete all operations depends largely on disk capacity.
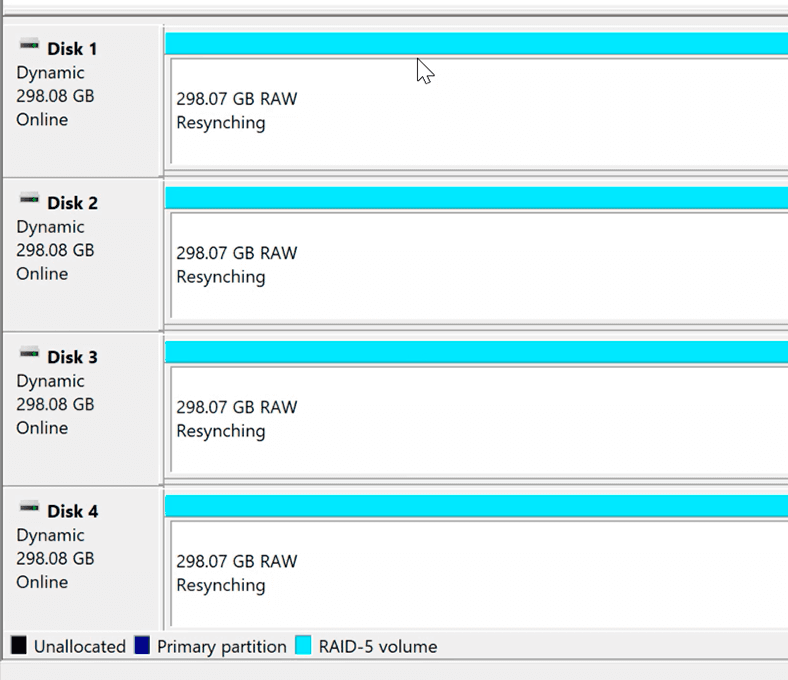
When resynching is finally over, your RAID system is ready to use.
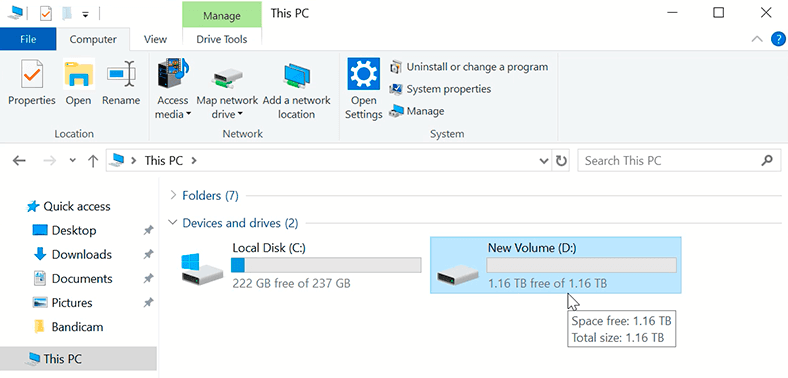
Such method for creating a RAID array is also available in Windows 10, and an alternative solution could be using the option «Manage Storage Spaces».
Check another article in our blog to read more about creating a software RAID system in Windows 10.

Method 2. How to create a RAID system with the help of Intel Rapid Storage Technology
Also, there are special utilities to help you create and maintain a RAID array. For example, Intel Rapid Storage Technology.
| Feature | Description |
|---|---|
| Supported RAID Versions | RAID 0, 1, 5, 10 |
| Caching | Support for intelligent caching to improve data access speed |
| TRIM | TRIM support for solid-state drives (SSD) |
| AHCI (Advanced Host Controller Interface) | Support for AHCI standard for better performance and SSD compatibility |
| Disk Optimization | Dynamic power management to extend disk lifespan |
| Monitoring and Alerts | Ability to monitor disk status and receive error notifications |
| Intel Smart Response Technology | Integration of SSD with hard drives for overall performance boost |
| eSATA Mode | Support for external SATA drives |
| NVMe Support | Support for modern NVMe-based drives for higher transfer speeds |
| Large Disk Support | Works with disks larger than 2 TB |
| Data Encryption | Support for controller-level data encryption |
Download, install and start the application.
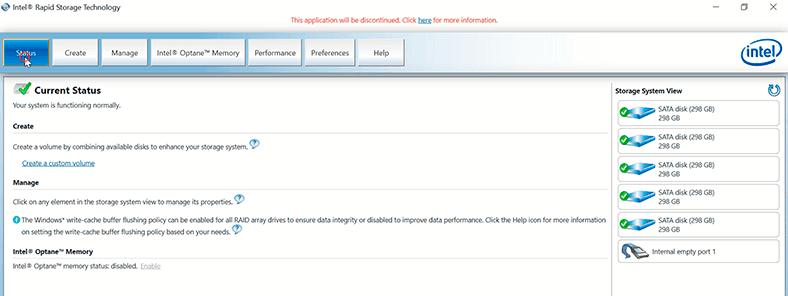
The «Status» menu displays the condition of the system and your disks.
The «Create» menu lets you set up a RAID system consisting of your disks.
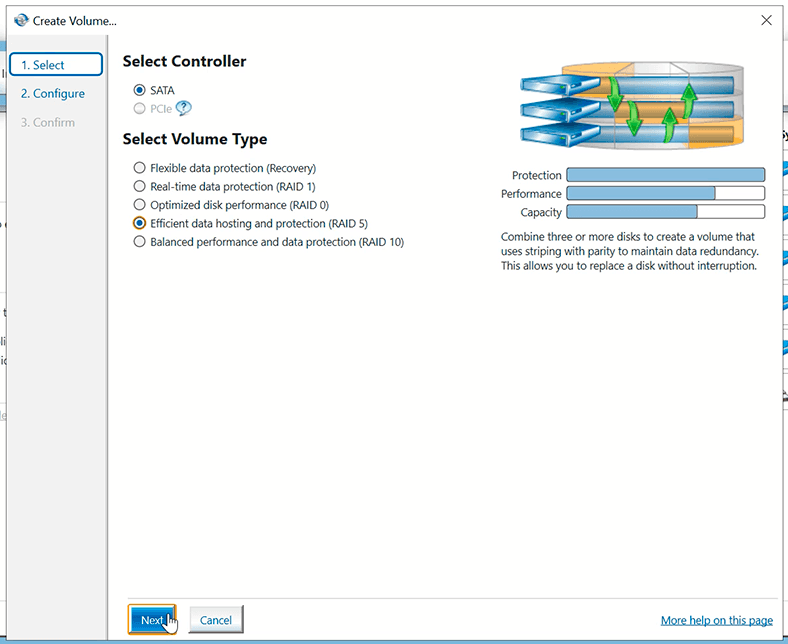
Click “Create” and select your RAID type. You are free to choose between flexible data protection, RAID 1, 0, 5 and 10. There is a brief description for every type. Select the one you prefer and click Next.
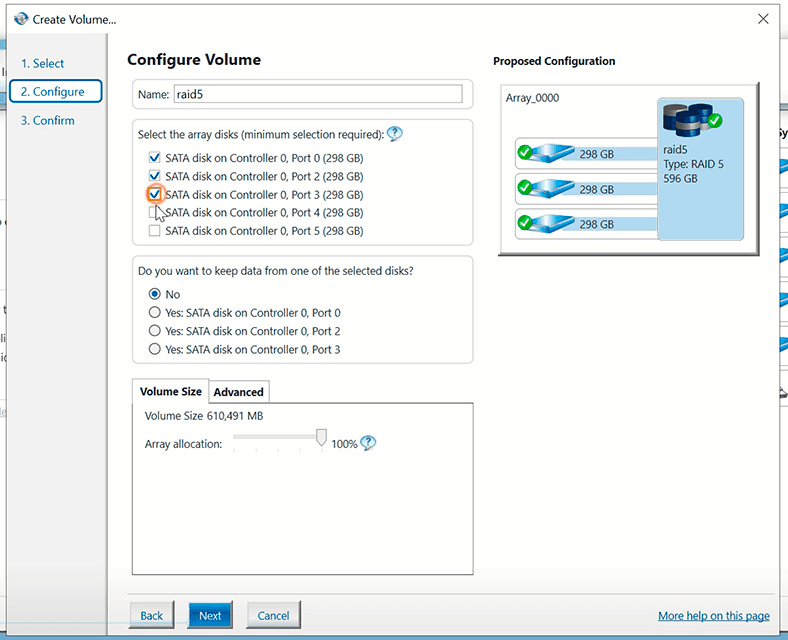
Give the volume name and select the disks that will make up your RAID. Check the disks and settings you need and click Next again. Configure advanced settings if necessary. I leave «default settings» for Volume Size and Array allocation.
You will see the warning that «This action will permanently delete existing data on the following disks…». If you have any important data there, save it to another location before you move on.
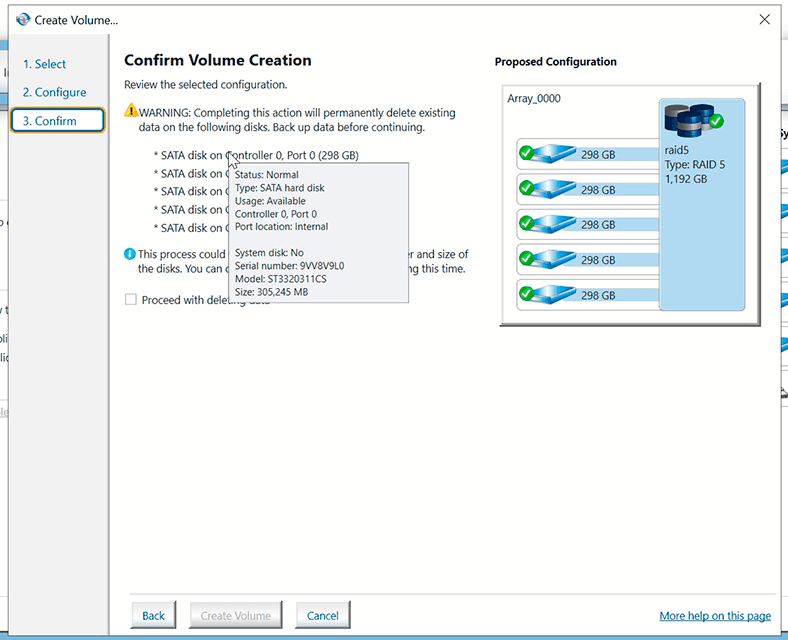
Check the option «Proceed with deleting data» and click Create Volume.
The volume is created. However, the utility informs you that it’s necessary to partition the new volume with Disk management before adding any data there.

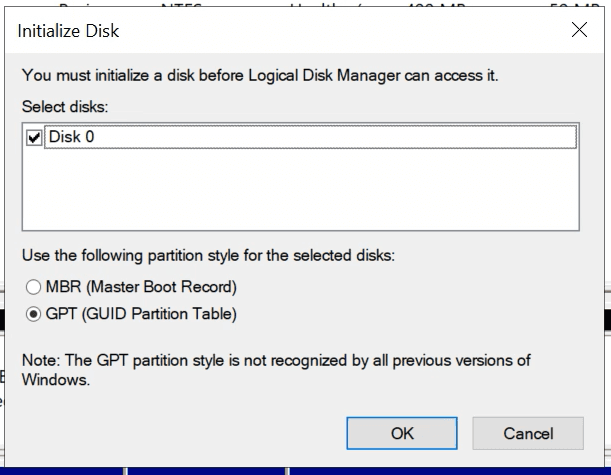
That is why you need to open Disk Management. Immediately, you are informed that the disk must be initialized for Logical Disk Manager to access it. Select partition style and click «OK».
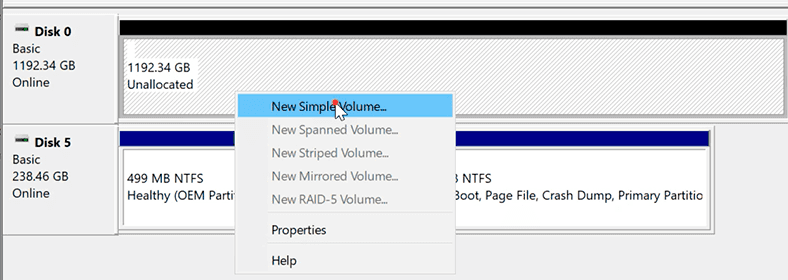
Right-click on the disk and select «New Simple Volume». Follow the wizard directions.
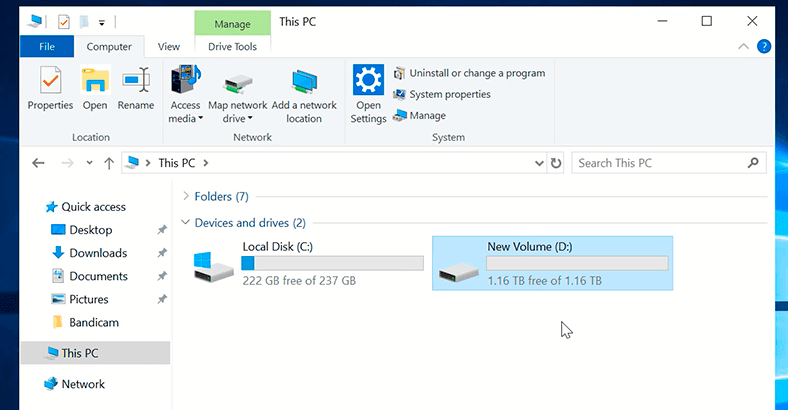
Now your RAID system is ready to use.

When you open Windows Explorer, you can see the new disk.
The utility shows that the disk is still being initialized – the duration of this process depends on disk capacity.
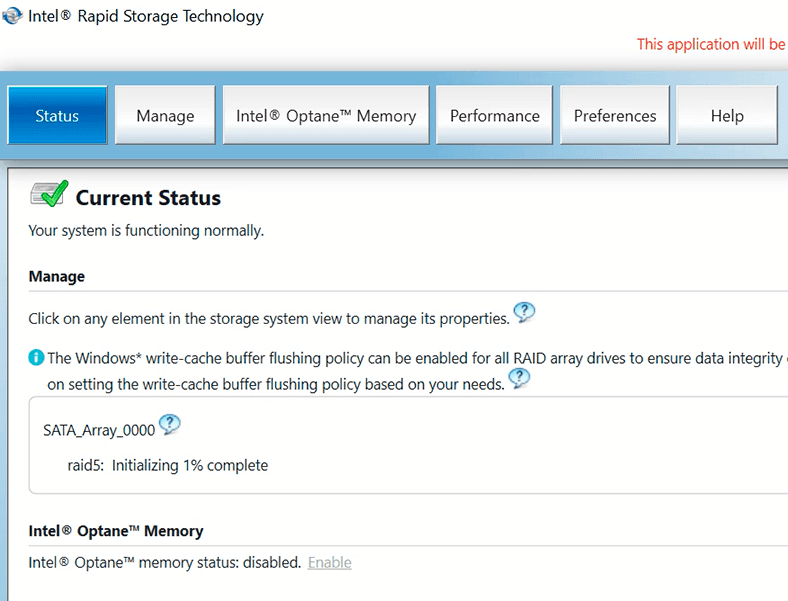
Using this tool makes it much easier to monitor your RAID status, And should any of the disks within this system fail, you will notice it at once. This utility lets you see which particular disk has failed by using its serial number. On every disk, there is a sticker with that number.
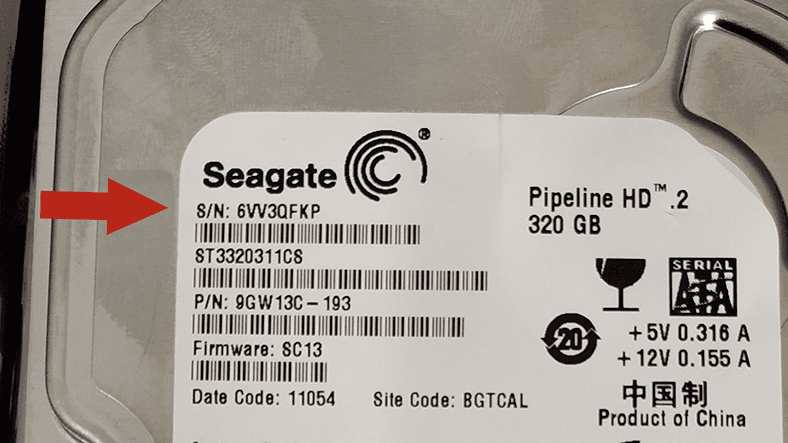
In the «Settings» tab, you can configure notifications in case of any problems and even specify an email address to send notifications automatically,
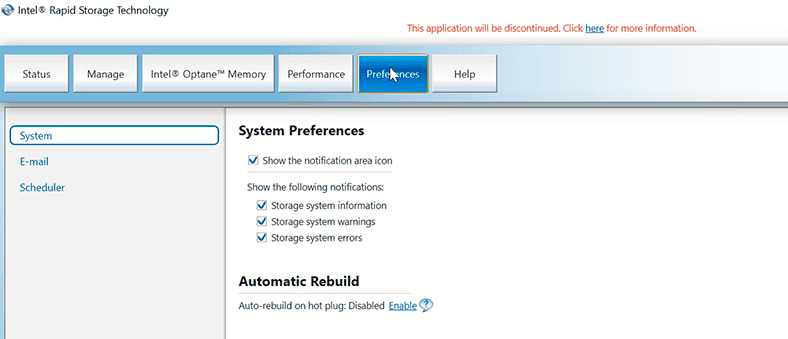
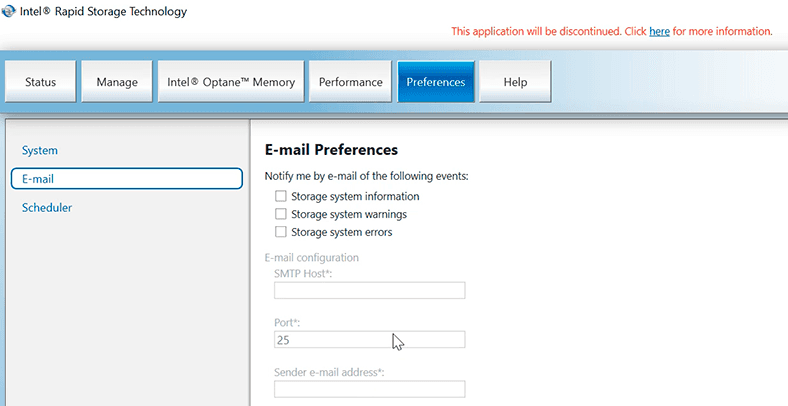
and set up automatic rebuild for cases when you need to replace a faulty disk, or schedule automatic verify and repair operations.

Other settings let you decide on cleaning cache and use of caching options, verifying and checking any data inconsistencies, and more.
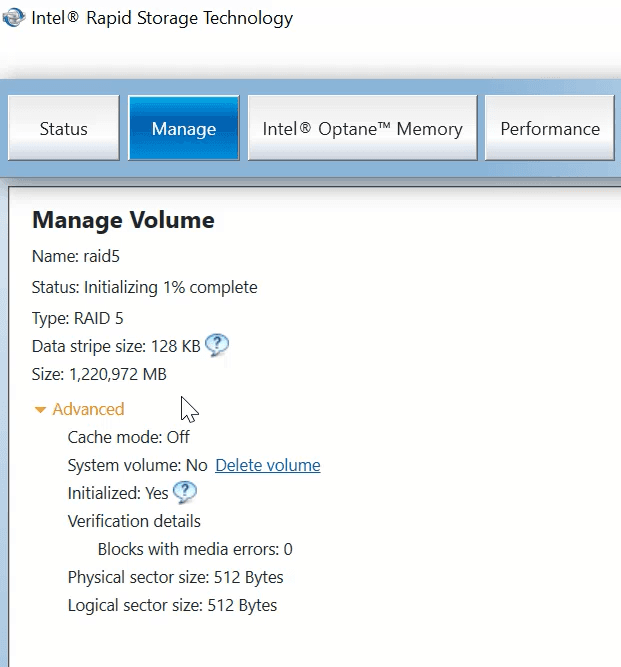
This is how you can create any of the available software RAID types in Windows Server operating system, in an easy and effortless way.


