Recording Your Screen in Windows 11: Three Easy Methods Explained
Discover three effective methods to record your screen in Windows 11 with this ultimate guide. Whether you’re a content creator, educator, or business professional, screen recording is essential for capturing tutorials, presentations, and gameplay. In this tutorial, we’ll explore three different methods for screen recording in Windows 11, providing step-by-step instructions and expert tips for each. From built-in features to third-party software solutions, we’ll help you choose the right method for your needs. Don’t miss out on the opportunity to enhance your productivity and create engaging content – read now and start recording your screen in Windows 11 today!
- Method 1. XBOX GAME BAR
- Method 2. Third-party apps for screen recording in Windows 11
- Questions and answers
- Comments
Recording your screen could be useful in many situations. For example, you may need to record a short video from a game, or create a video tutorial. This way or another, such feature could become very useful and effective no matter what you do.

🎬 Three Ways to Record Your Screen in Windows 11 🎬
Method 1. XBOX GAME BAR
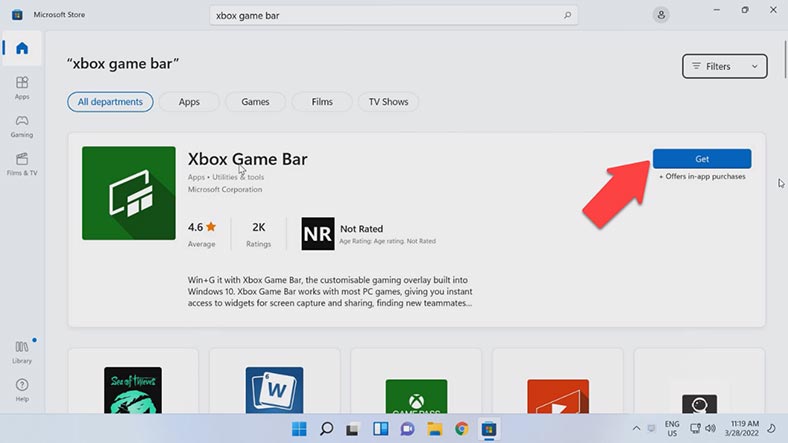
We’ll begin with the official utility by Microsoft – Xbox Game Bar. Some builds of Windows 11 come with this app pre-installed. But even if your Windows lacks it, you can always install Game Bar from Microsoft Store.
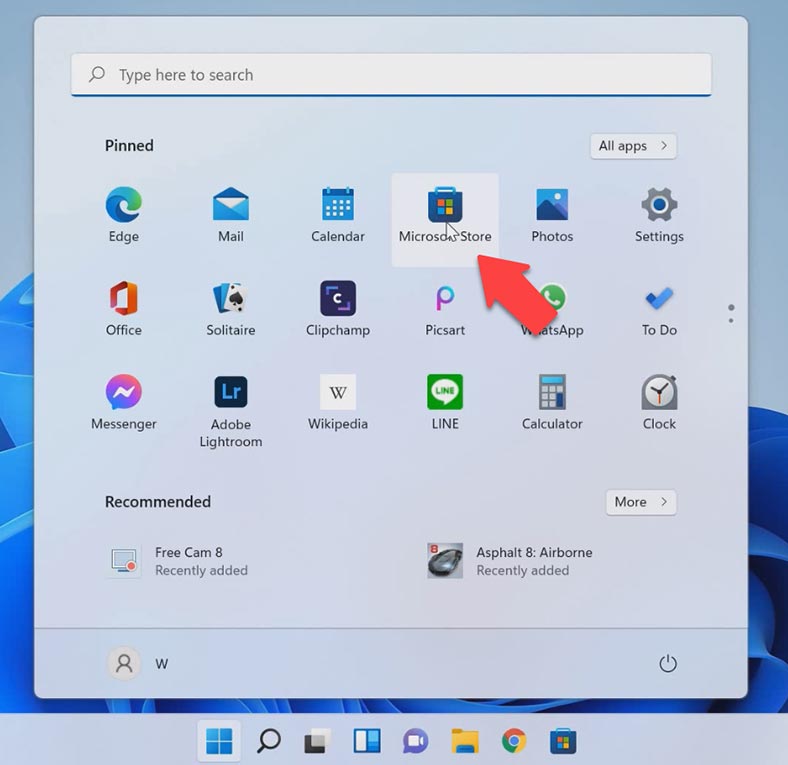
Go to the Start menu, open Microsoft Store, sign in, type Xbox Game Bar in the search field, and click Get in the window that opens.
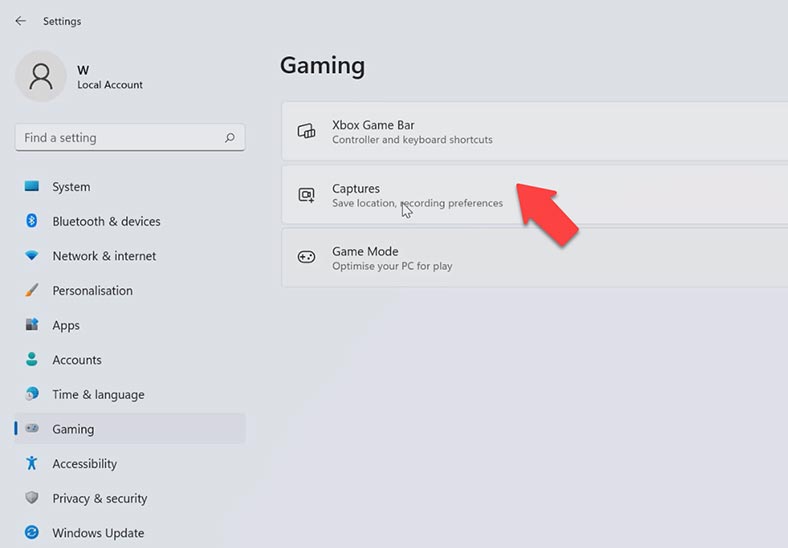
Now Xbox Game Bar needs to be configured. Click on the Start menu, jump to Settings, open the Gaming tab, and find Captures.
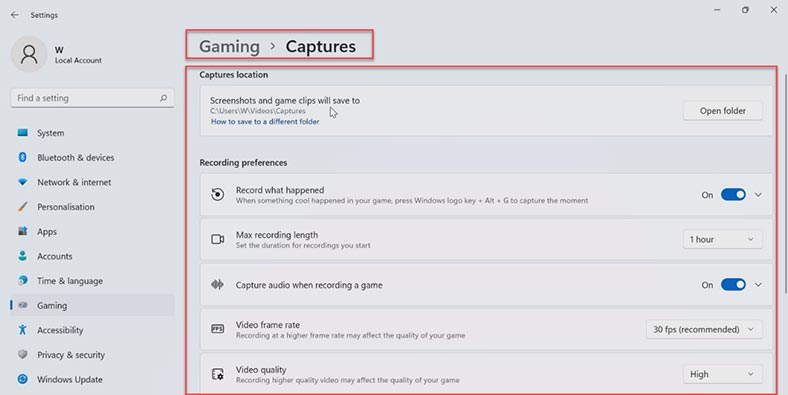
Choose where to save your records; also, you can change video record settings: set maximum recording length, decide if you want sound recorded along with the video, set video frame rate, choose video quality, and decide if youwant to see the mouse cursor in your record.
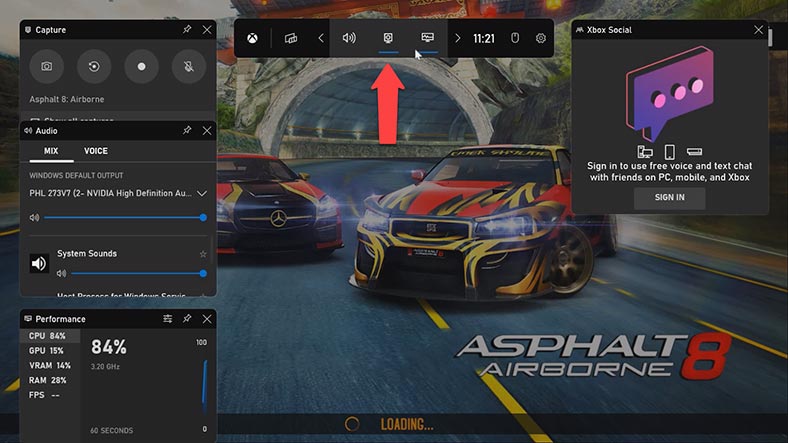
Now launch any game or app you want to record: start Game Bar by pressing the key shortcut Win + G, and then look up to find the option Capture.
On the left, the panel will appear with such options: take a screenshot, record last 30 seconds, start recording, take the mike on or off.
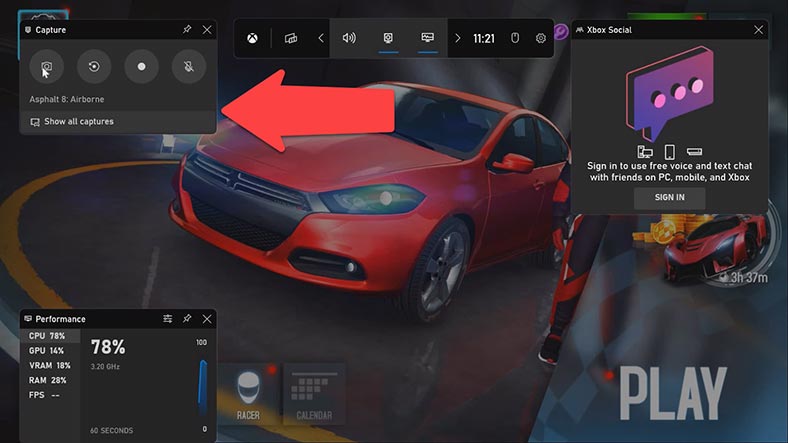
Also, you can enable every setting with the help of a corresponding key shortcut. To learn the shortcut, hover the cursor over the specific icon. When you start screen recording, click on a free area to hide the Xbox panel, and the recording status will be shown in the top right corner of the screen.
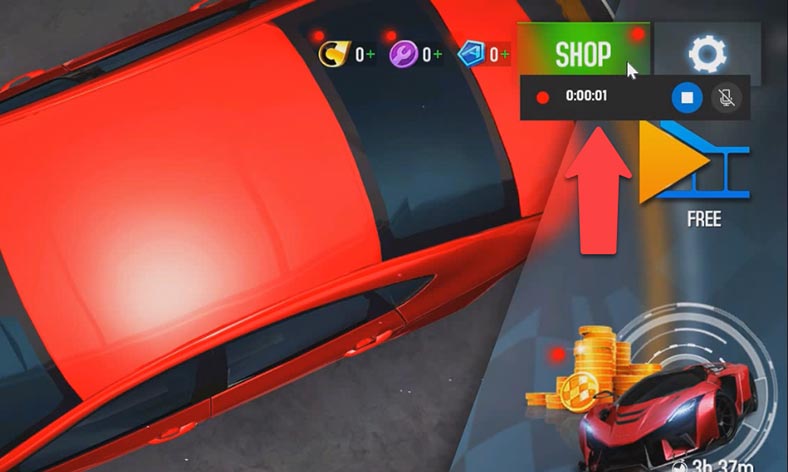
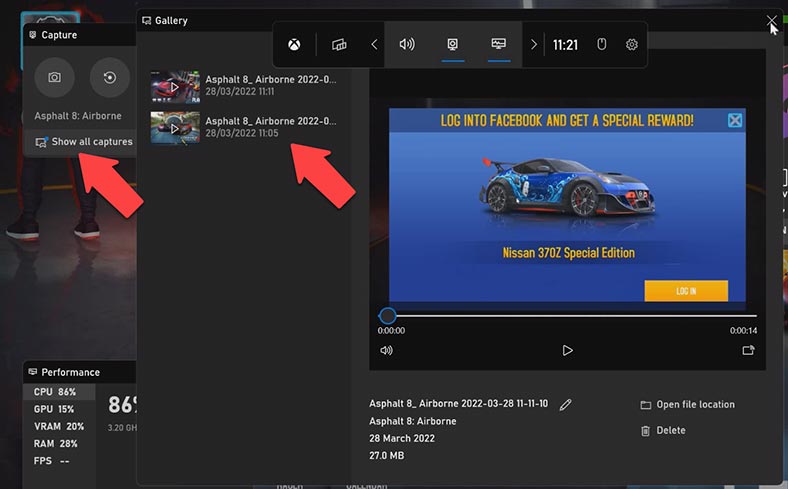
To stop recording, click on the Record button again or press the key shortcut Win + Alt + R. Go to Game Bar by pressing the key shortcut Win + G. Open the list of all records and jump to the tab Show all captures. This is where you can preview the captures, change the recording name, or open the file in its folder.
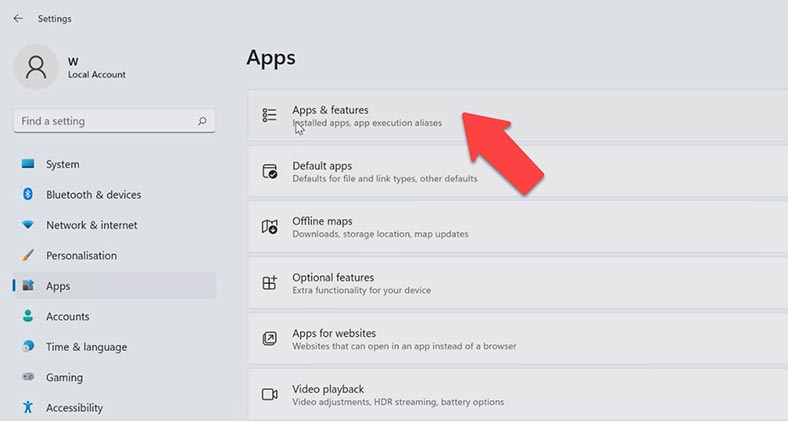
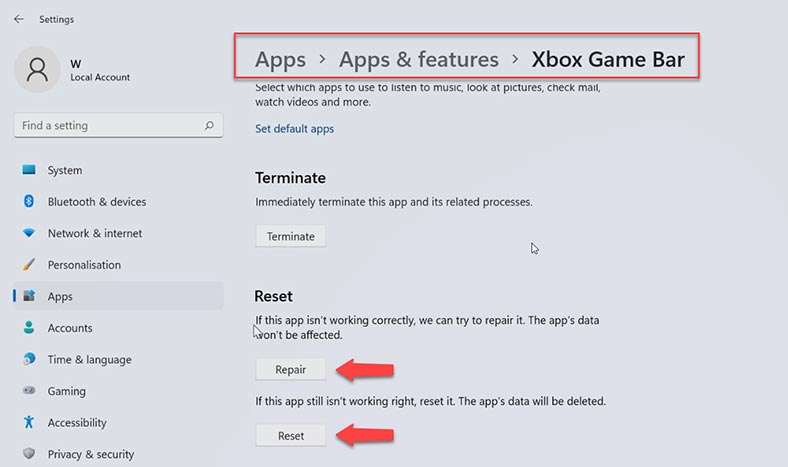
Sometimes Xbox Game Bar may refuse to open, or it can turn off by itself all the time, but this can be fixed: go to the Start menu – Settings – Apps, and finally, Apps & features.
Find the application and click on the three-dots button on the right to access advanced options.
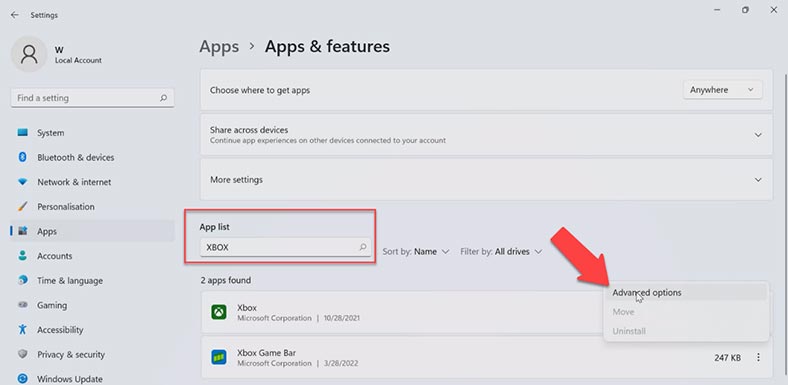
Click on Repair and start app repairing, which will take some time. In the end, the progress bar will change into the tick. In the same way, you can reset the app.
Method 2. Third-party apps for screen recording in Windows 11
To my mind, Xbox Game Bar is an excellent integrated tool for screen recording in Windows 11. However, it is restricted to being able to record only one running app at a time, and that’s why I can’t put it on top of my personal rating. Meanwhile, there are numerous tools out there to let you make screen recordings in various versions of Windows. Naturally, we will never have time and resources sufficient to describe every app that can do it, so we’ll cover the best tools available.
| Feature | Xbox Game Bar | Free-cam | OBS Studio |
|---|---|---|---|
| Purpose | Built-in utility for gaming | Simple screen recording tool | Powerful tool for streaming and recording |
| Cost | Free | Free | Free |
| Compatibility | Windows 10/11 | Windows 7/8/10/11 | Windows 7/8/10/11, macOS, Linux |
| Interface | Intuitive, integrated | Simple, easy to use | Feature-rich, may be complex for beginners |
| Recording Quality | High, limited settings | Good, limited functionality | High, unrestricted, with advanced settings |
| Features | Game recording, screenshots | Video recording, basic settings | Recording, streaming, scripting, audio and video settings |
| Settings Options | Limited, basic settings | Limited, basic settings | Advanced, detailed settings for video and audio |
| Plugin Support | No | No | Yes, many plugins available |
| System Resources | Low resource consumption | Low resource consumption | Can consume a lot of resources, depends on settings |
| Audio Recording | Yes, with basic settings | Yes, with basic settings | Yes, with advanced features |
| Streaming Convenience | Limited, mainly for recording | No streaming features | High, supports various platforms |
Free-cam
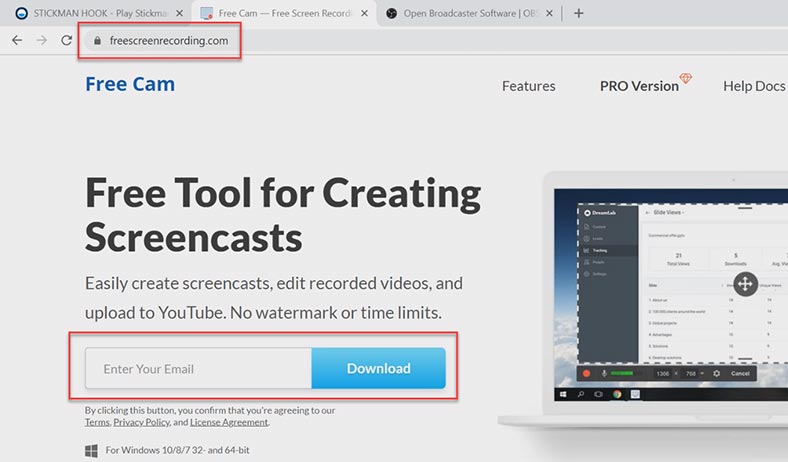
We will begin with an app called Free-cam – it’s a free utility which is easy to use but very effective: go to the official website https://www.ispring.ru/ispring-free-cam, give your email address and click Download.
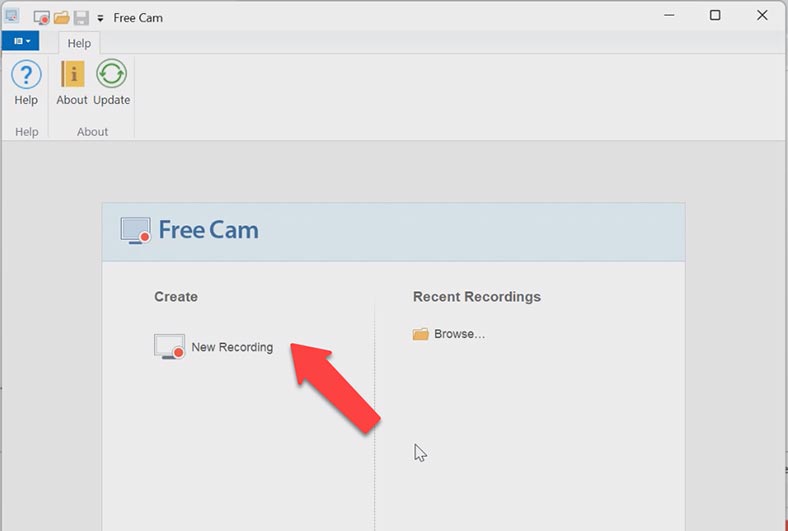
After that, run the installer and after the installation, start Free-cam. When the program window opens, click New Recording.
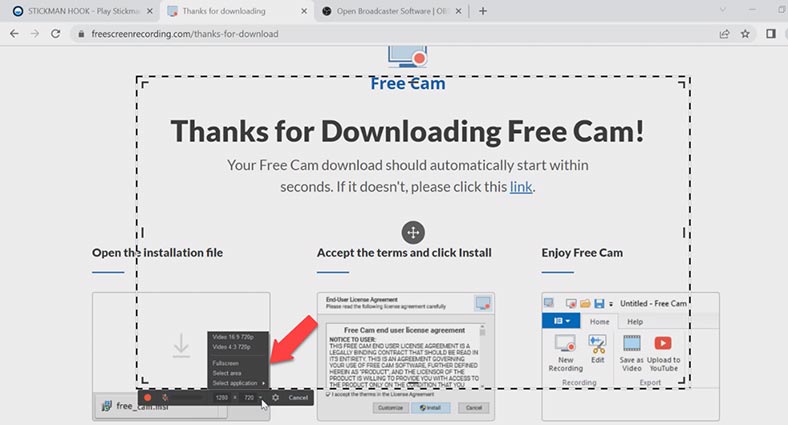
Now you need to change the screen capture area. Go to Capture Size and switch it to Fullscreen by clicking on this option. Also, you can choose a specific app window or a specific screen area. Click on the Record button.
After that, you will see a countdown (3 seconds) before Free-cam starts the recording. To stop recording, press the Esc key. After that, the window to preview your record opens.
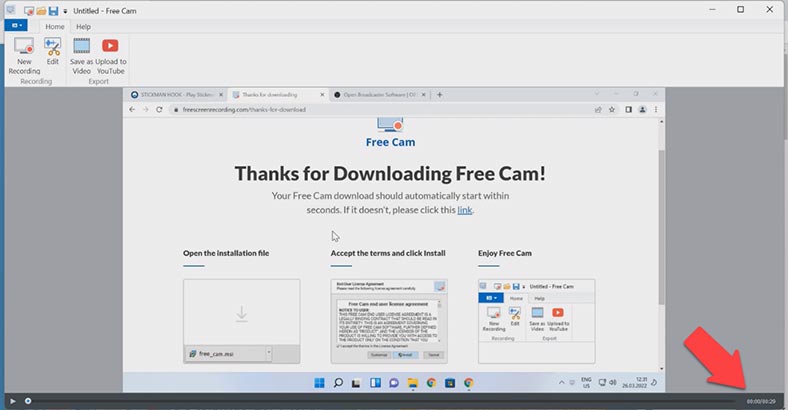
In the preview panel, you can edit the video if necessary. If you don’t need to, you can upload the video to YouTube immediately, or just save it somewhere on your computer. With the integrated editor, you can remove noise, adjust the volume, trim the video, and add some fade in and fade out elements. To remove sound or some frames, select a part of the video to edit.
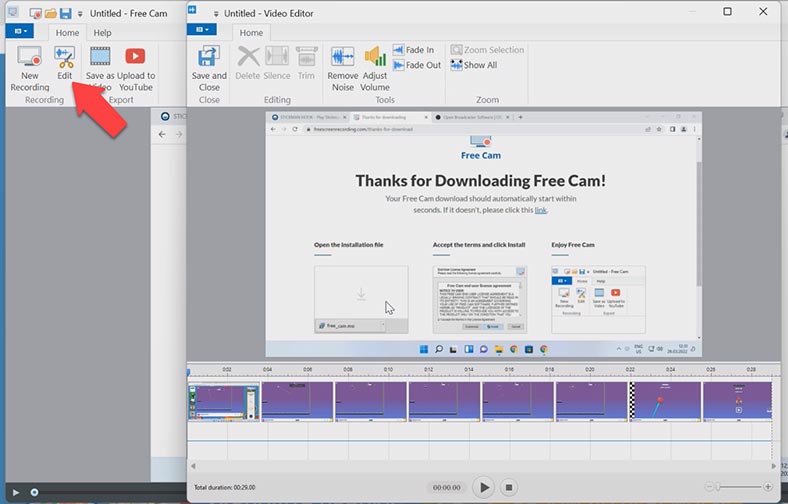
Then right-click and choose Silence Selection or Delete from the menu. After that, click Save and Close to go back to the previous window.
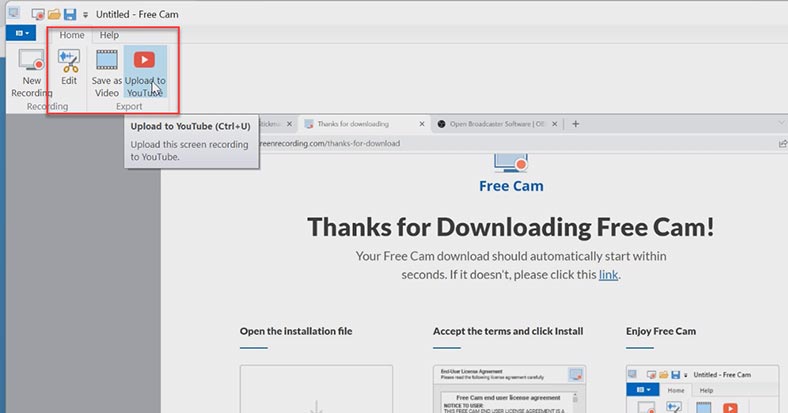
When you’re finished with editing. click Save as Video. Also, you can download the video to YouTube. Free-Cam is pretty easy to use, and it offers a great range of functions for an ordinary user, but not enough for professionals.
OBS – Open Broadcaster Software
There are also more complicated software tools – for example, OBS (Open Broadcaster Software)
It’s a popular application used by thousands of streamers on various platforms. It can also record simple screen captures and is probably one of the best free tools for the job.
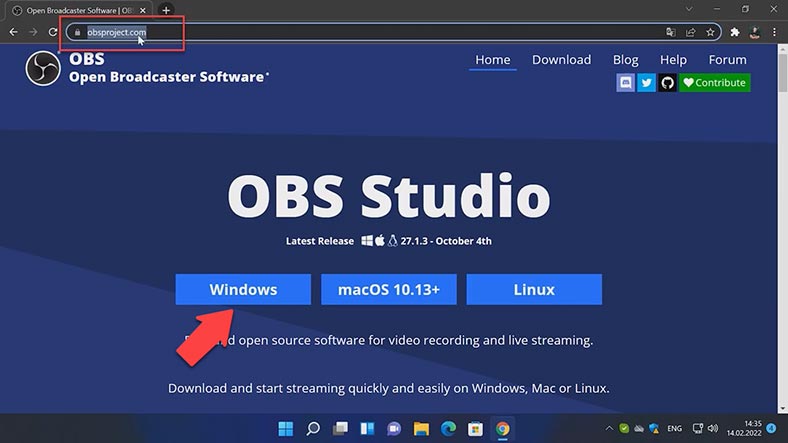
To download OBS, follow the link to its official website https://obsproject.com, and choose your platform; in my case, it is Windows. After that, run the installer and after the installation, start the program
.
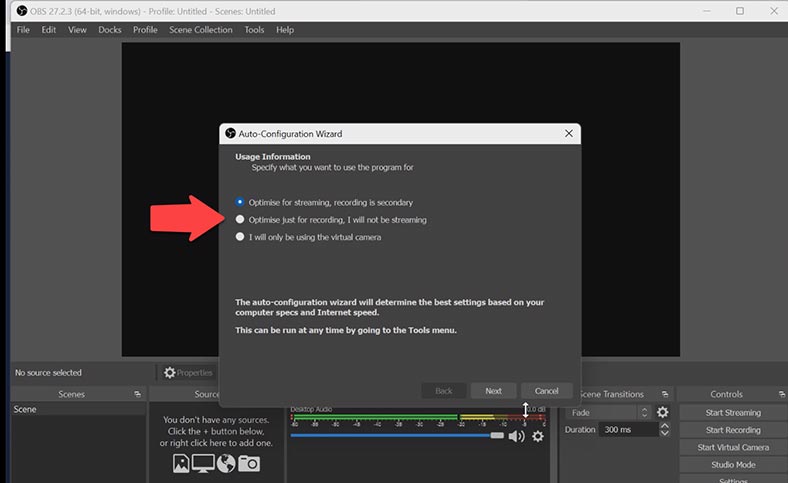
After that, the Auto-Configuration Wizard opens. Click on the tab Optimise just for recording and click Next.
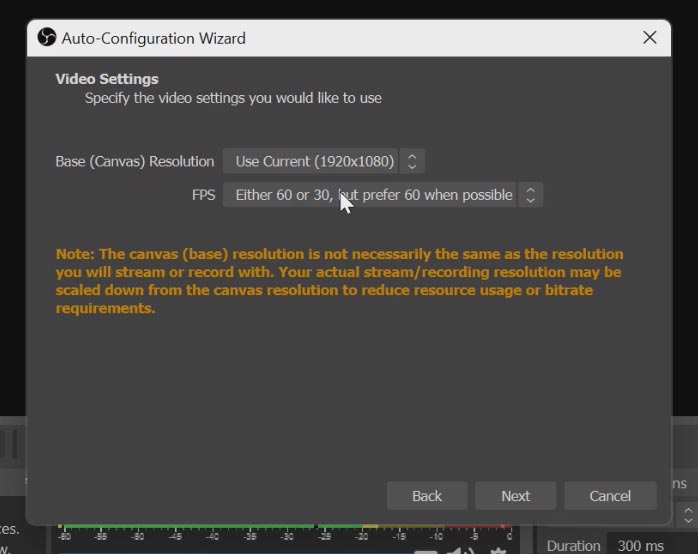
Select resolution and framerate, click Next and Apply Settings.
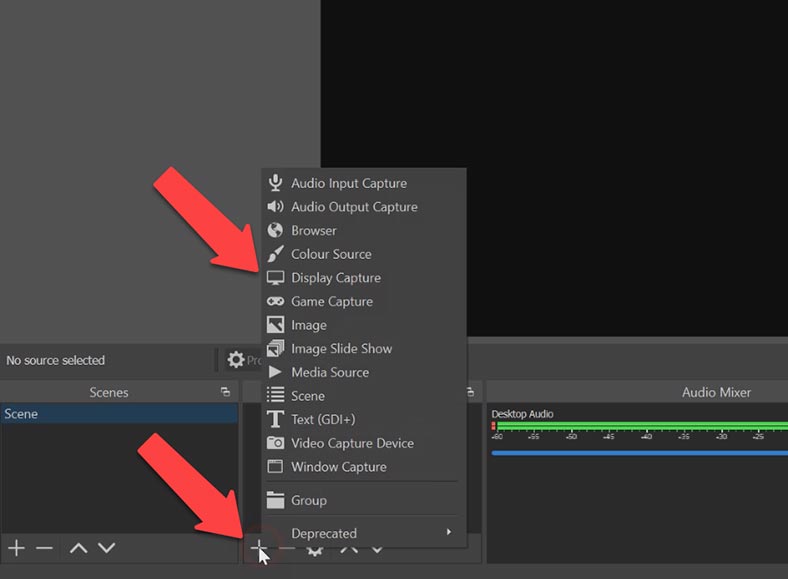
Jump to the tab Sources and add Display Capture, then click OK / Next where necessary. Also, you can add new sources. For example, a logo text or the Game Capture feature, where various settings are available.
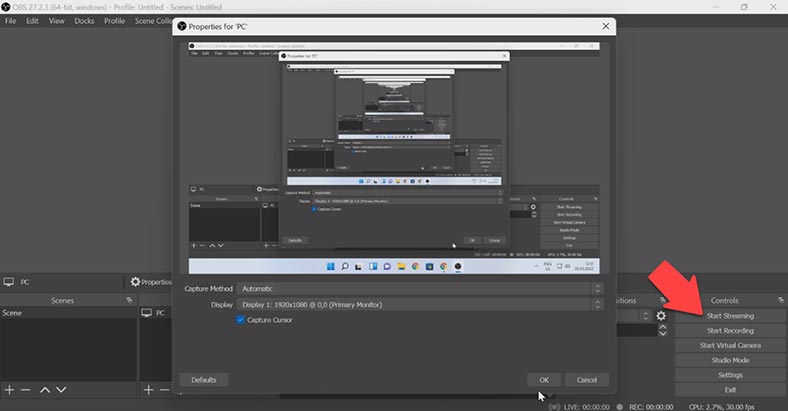
Go to the Controls tab and click on Start Recording. To stop or pause the recording, go back to the OBS window and click on the Stop Recording button or the Pause button.
When the recording is stopped, you’ll see the path to the saved file in the lower left corner of the app window.
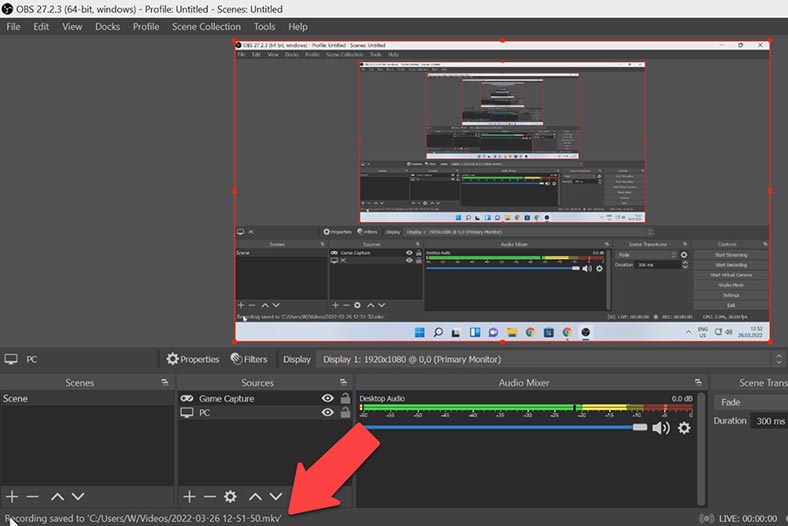
In my opinion, this is the best tool to choose if you’re looking for a free tool to record your screen, with good functionality, high performance and ease of use – even for beginners.


