Buffalo NAS LS-WXL236 RAID Data Recovery: Proven Techniques
Discover effective methods to recover data from RAID based on Buffalo NAS LS-WXL236 in this comprehensive guide. Whether you’re encountering data loss due to RAID failure or seeking proactive measures, this tutorial provides expert insights and practical solutions. From diagnosing issues to implementing recovery strategies, we’ll equip you with the knowledge and tools necessary to retrieve your valuable data and mitigate downtime effectively.
- 1. How to create a RAID on Buffalo NAS LS-WXL236
- 2. How to add a shared folder and enable Recycle Bin feature
- 3. How to recover data from a non-operable Buffalo LS-WXL236 NAS
- 4. Conclusion
- Questions and answers
- Comments
As we know, RAID systems allow users to improve the safety of storing their data and secure it against loss if one or several hard disks fail. However, even while using RAID, hard disk failures can still result in losing access to your storage device and that precious data you keep there. Also, we cannot exclude the cases when the NAS itself breaks down, and once again, you lose access to your files.
In today’s article, we’ll show you how to use a specialized data recovery tool to restore access to all information stored on a damaged RAID. We’ll also explore how to rebuild a crashed RAID and recover all of its data.
| Program | Buffalo NAS Support | Platforms | Features |
|---|---|---|---|
| Hetman RAID Recovery | Yes | Windows | Data recovery from RAID arrays on Buffalo NAS; Support for various RAID types; Support for file systems: NTFS, FAT, exFAT, ReFS, HFS+, Ext2/3/4, Btrfs, XFS; Automatic RAID configuration detection; Recovery of damaged or formatted arrays |
| R-Studio | Yes | Windows, Mac, Linux | Buffalo NAS support; Data recovery from various RAID types; Support for file systems; Disk imaging |
| UFS Explorer RAID Recovery | Yes | Windows, Mac, Linux | Buffalo NAS support; Data recovery from various RAID types; Recovery of damaged arrays; Support for Ext, HFS, Btrfs file systems |
| DiskInternals RAID Recovery | Yes | Windows | Data recovery from RAID arrays on Buffalo NAS; Support for various file systems; Recovery without RAID controller |
| Stellar Data Recovery Technician | Yes | Windows, Mac | Buffalo NAS support; Data recovery from RAID arrays; File preview before recovery; Support for various file systems |

How to Recover Data from RAID Based on Buffalo NAS LS-WXL236
1. How to create a RAID on Buffalo NAS LS-WXL236
For better understanding of how a disk array is built, let’s explore the process of creating a RAID system on a Buffalo NAS device. This model (Buffalo LS-WXL236) supports several RAID levels: RAID 0, RAID 1 and JBOD.
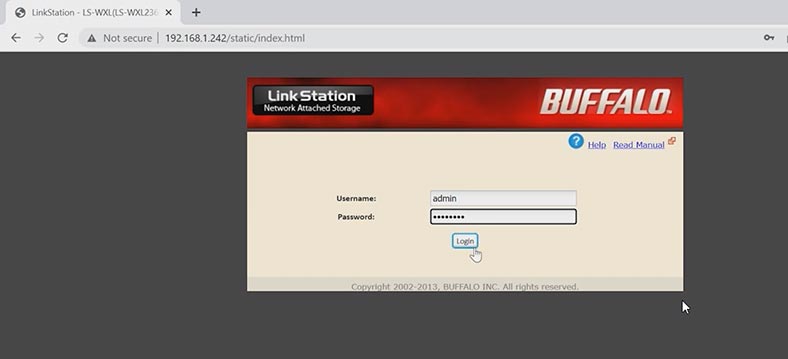
To create a RAID, open the web interface of your device by typing its IP address in a browser. Otherwise, open the settings in the app called Buffalo NAS Navigator.
In the NAS manager window, open the tab System – Storage.
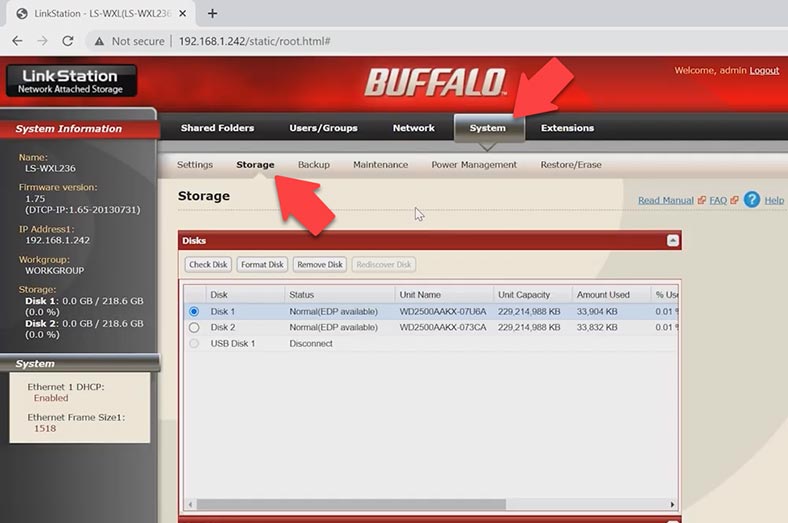
Scroll down to RAID Array and open the settings. Choose the level of your future array, select the disks it is going to include, and click Create RAID Array.
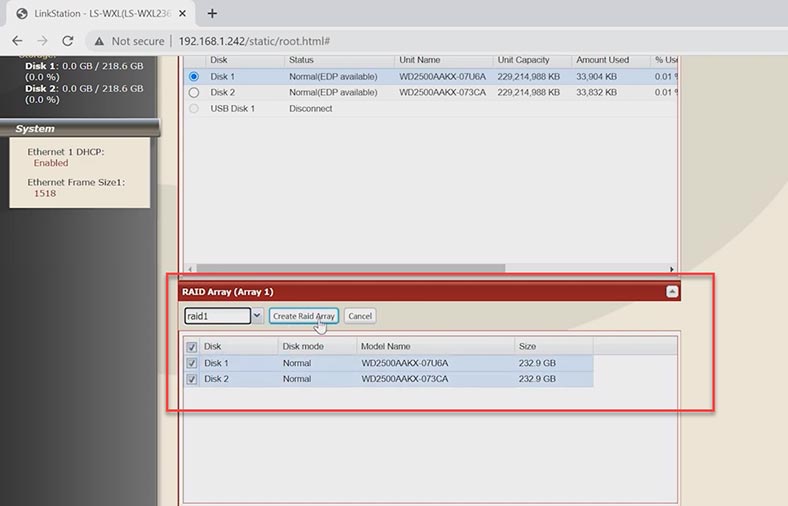
The system will warn you that all data will be erased from the selected disks. Click Apply to confirm it. Enter the code and click Apply again. It starts the process of building the RAID, so you’ll have to wait a little until it’s over.
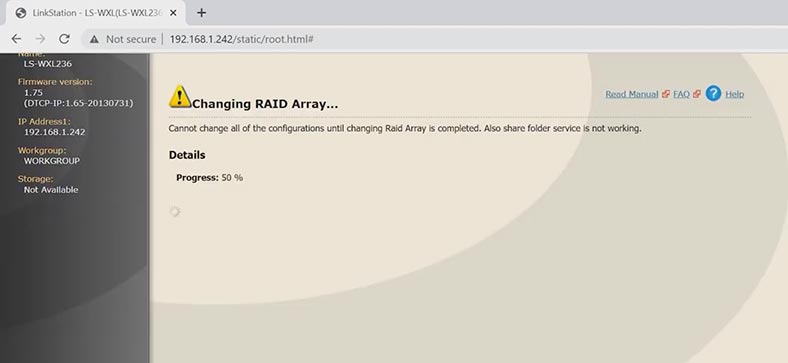
After that, you’ll be able to create a shared folder.
2. How to add a shared folder and enable Recycle Bin feature
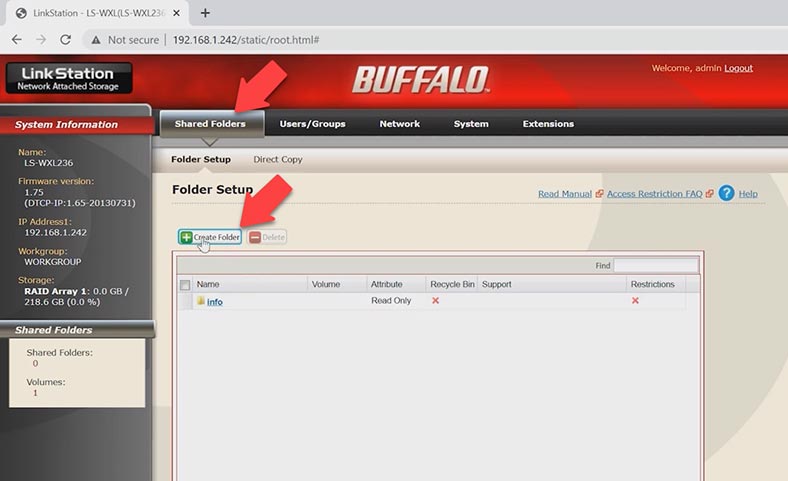
You can use such folder to share files with other devices on your network. In the section Shared Folders, click Create folder.
Give the folder name, select a volume, set permissions, and enable required network protocols.
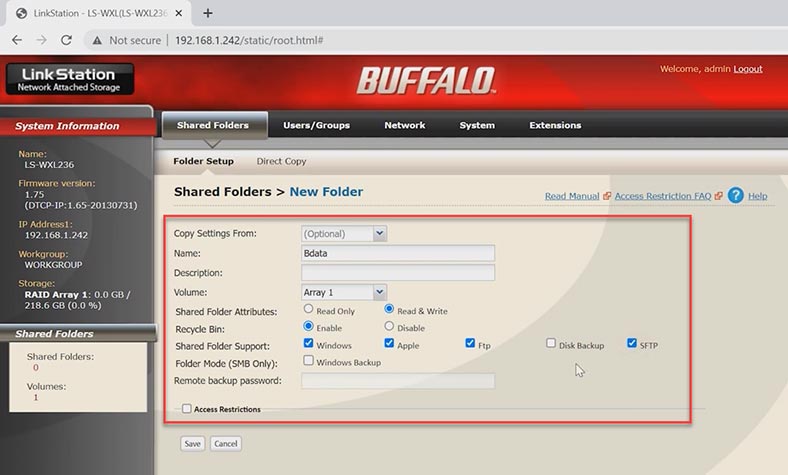
Also, you can enable the Recycle Bin feature for this directory. This option will enable you to restore accidentally deleted files. When all parameters of the shared folder are given, click Save.
After all the steps I have described are complete, you can use your new shared folder to exchange files with other devices connected to your network. Keep in mind that you might need to configure additional security options to ensure sufficient protection for your information – for example, by setting a password or restricting access permissions for certain users.
When the Recycle Bin feature is enabled for the shared folder, you will be able to restore accidentally removed files from that folder. If you failed to recover files from the Bin, or you lost access to your data because the network-attached storage broke down and its RAID system crashed, only a special data recovery tool for RAID systems can help you.
3. How to recover data from a non-operable Buffalo LS-WXL236 NAS
Recovering data from a non-operable NAS can be difficult and tiresome, but there are a few methods to help you get your files back. In this article, we’ll be exploring how to recover data from a Buffalo NAS which doesn’t work anymore.
Your first step should be to prepare for data recovery. You need to stop using the NAS to prevent further loss of data. If the NAS doesn’t start, you should find out why it happens.
This could be either a hardware or software issue. If the NAS is down because of a hardware problem, the faulty component should be replaced. If this is a software issue, you can either try to fix it on your own or contact professionals.
If you failed to restore operability of your NAS and the disk array cannot be accessed, don’t give up. With Hetman RAID Recovery, a specialized data recovery tool, you’ll be able to rebuild the crashed RAID and retrieve important files from there. It supports most popular file systems and RAID types, which makes it a perfect choice for data recovery after controller failures and other hardware issues.
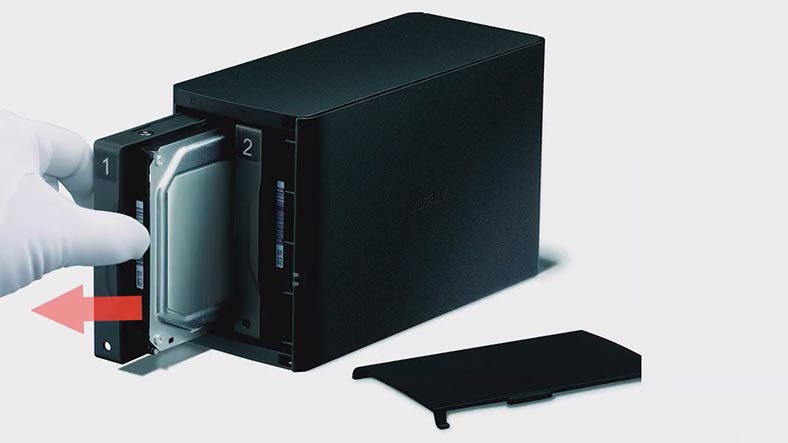
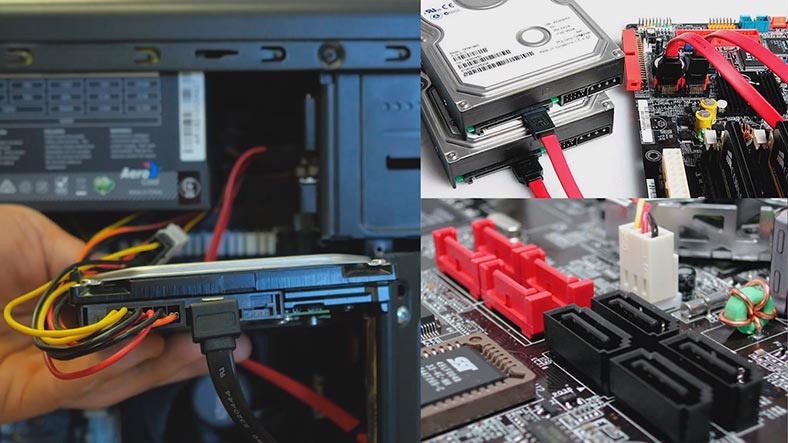
To get access to the hard disks, you should take them out of the NAS device and connect them directly to a Windows computer. If your computer’s operating system suggests initializing or formatting the disks after they are connected, don’t do it: this will erase the data completely, and recovery will become a much more challenging process.
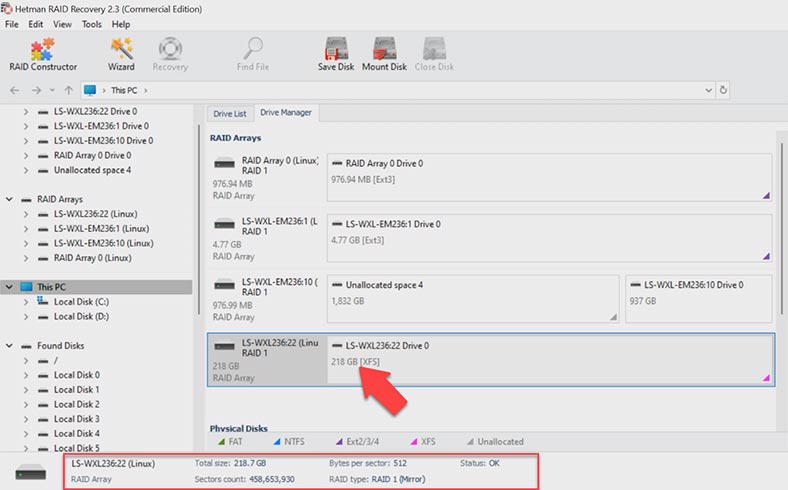
For starters, download, install and run Hetman RAID Recovery. At startup, the tool will automatically scan the disks connected to this computer and rebuild the crashed RAID. In the main window, you will see the RAID rebuilt with the available hard disks.
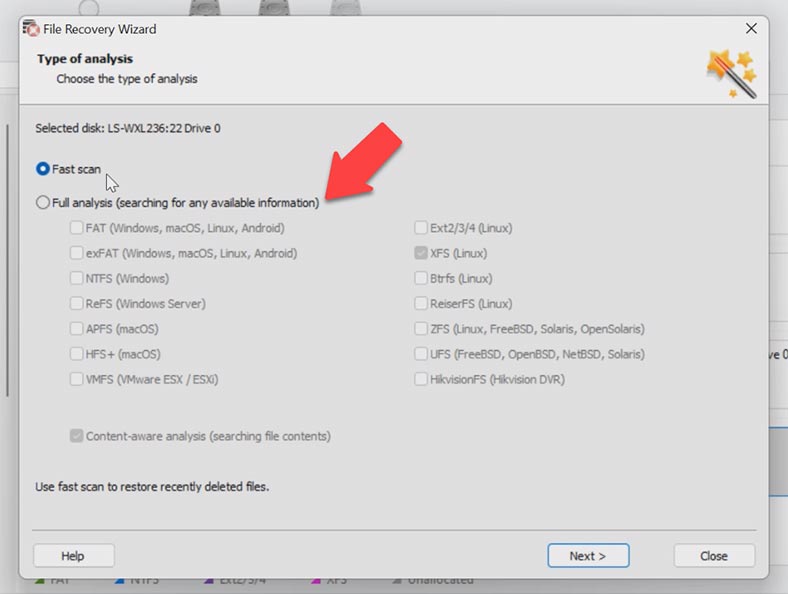
To find necessary files, right-click on the volume and click Open. After that, choose the scan type – Fast scan or Full analysis. For most simple scenarios, Fast scan will suffice: this operation takes less time. If it can’t find the required files, then go for Full analysis. Go back to the main window, right-click on the disk – Analyze again – Full analysis – specify the file system for this disk – you can uncheck the option to search by file contents to speed up the scan – and click Next.
When the scan is over, the results will be displayed on the screen. You can use the preview window to see the contents of all files. Select the files you want to restore, and click the Recovery button. Specify where to save the data (choose the disk and folder).
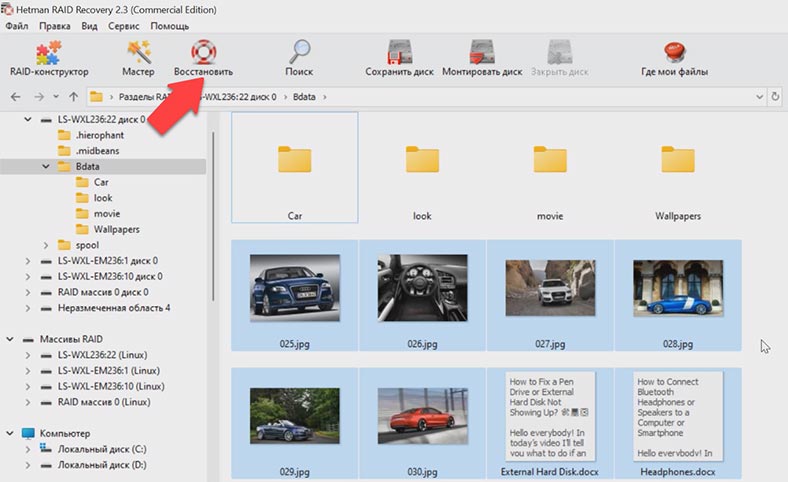
When the recovery process is over, you will find the recovered files in the directory you have chosen.
4. Conclusion
Summing up, we can say that when a storage device breaks down, you may lose access to the disk array, but with a proper data recovery tool, you can restore the information stored on the hard disks inside the NAS. When connecting the disks to the computer, be careful not to initialize them, because it will make recovery more difficult. Also, it is important to understand that choosing the right tool and sequence of actions can make the recovery process much easier and help you avoid unnecessary data loss.


