Buffalo WS 6V12TL NAS RAID Troubleshooting: Data Recovery Guide
Discover effective methods to recover data from a RAID system on Buffalo NAS WS-6V12TL/R5 in this comprehensive guide. Whether you’re encountering data loss due to RAID failure or seeking proactive measures, this tutorial provides expert insights and practical solutions. From diagnosing issues to implementing recovery strategies, we’ll equip you with the knowledge and tools necessary to retrieve your valuable data and mitigate downtime effectively.
- How to set up Windows Storage Server 2012 and build a RAID
- iSCSI storage settings in Windows Server 2012
- Recovering data from Buffalo NAS
- Questions and answers
- Comments
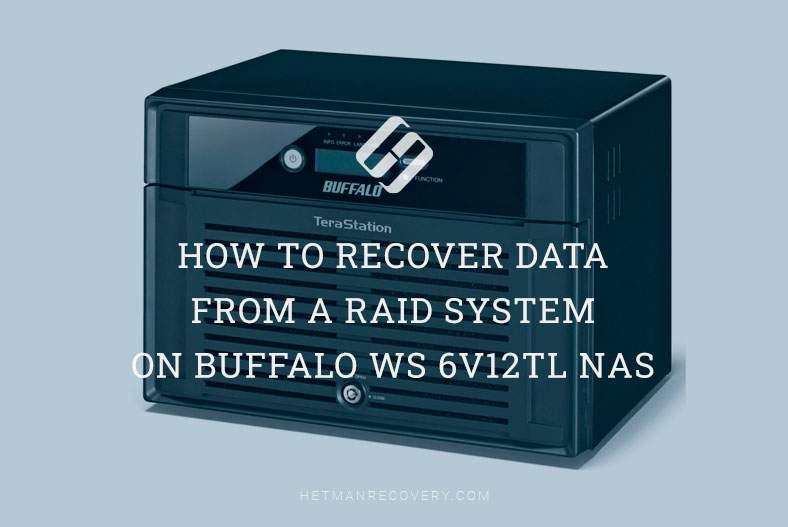
Currently I have an old Buffalo NAS – model WS-6VL for 6 hard disks. The USB drive containing its operating system was lost a long time ago, so I decided to install Windows Storage Server 2012 instead. By default, this device came with WSS system dating back to 2008.

How to Recover Data from a RAID System on Buffalo WS6V12TL NAS
Since the disk with the operating system is missing, and I’m reluctant to fiddle about with searching the driver, I thought I could give my NAS a newer system. The operating system for older devices can be found on this website – archive.org. It offers disk images for early versions of that Windows operating system. Also, such device can work under other operating systems like Xpenology, Openmediavault or Truenas.
After the image is downloaded, create a bootable drive with Windows Storage Server 2012. I don’t think we should focus on the installation process itself since it’s very similar to installing any other Windows operating system. The only thing which is important for this specific model is that the bootable drive should be plugged in a USB 2.0 port.
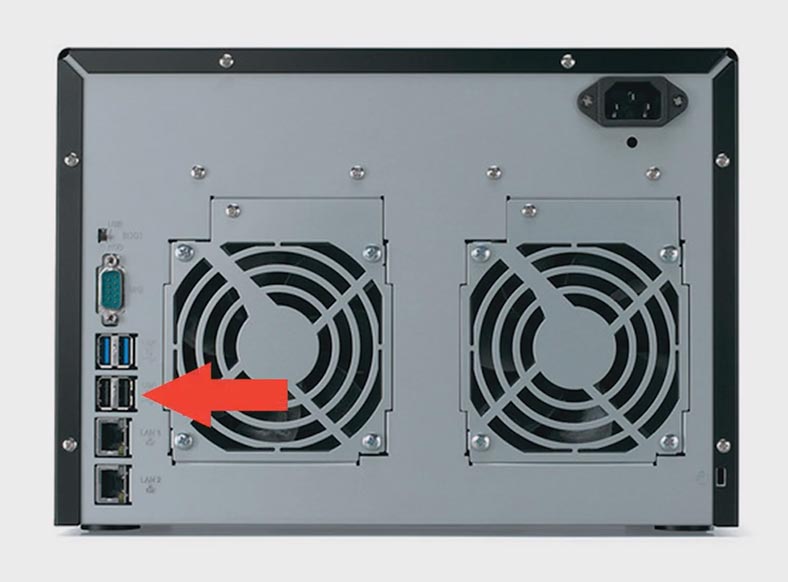
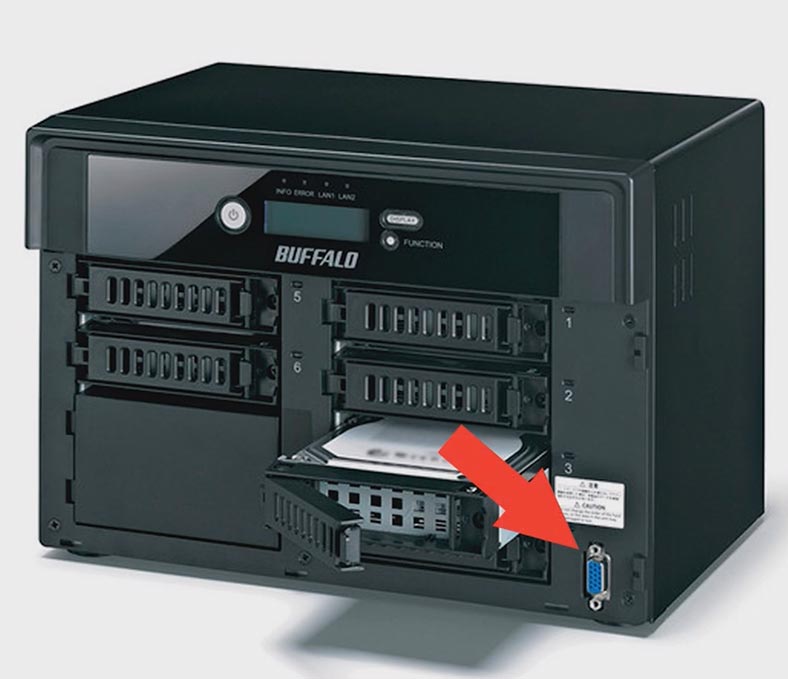
A keyboard should be plugged into the other port, respectively. Also, this NAS storage has a VGA video port for a monitor which allows you to install an OS different from the default one.
How to set up Windows Storage Server 2012 and build a RAID
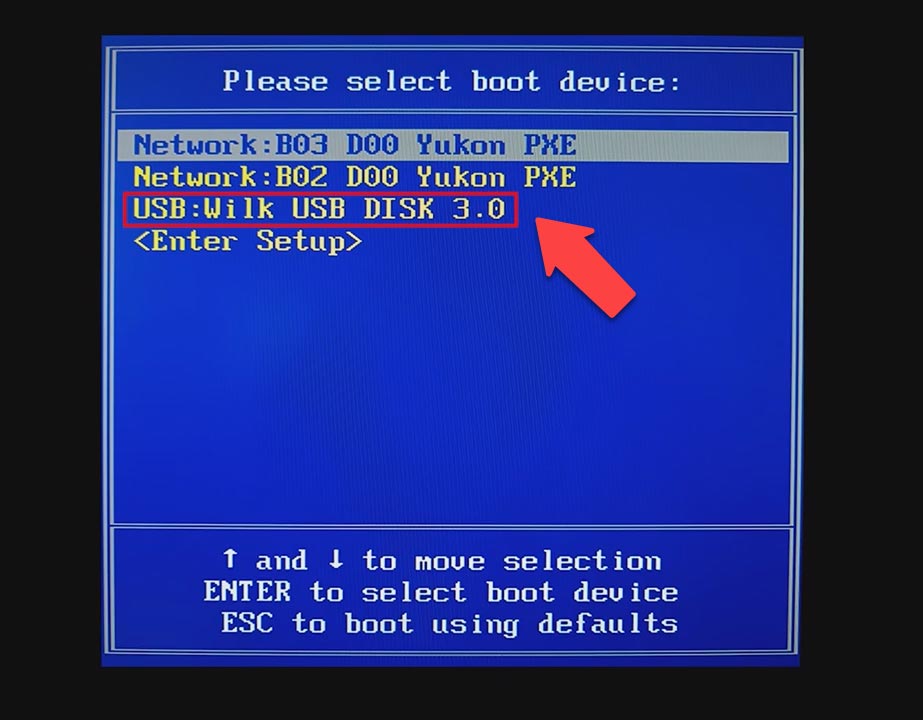
All right, everything is connected and ready for installation of the operating system. To select a boot device when starting the NAS, press the F12 key, then choose the USB drive to boot from and start the installation.
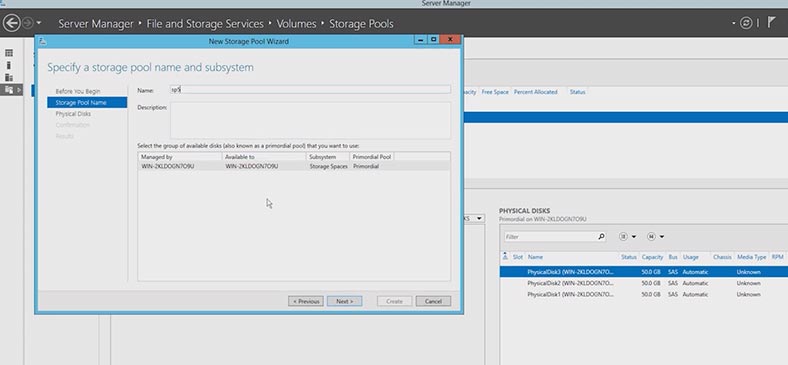
After the operating system is ready, I built a RAID 5 with three hard disks using the utility called Windows Storage Pool. It’s quite easy: create a storage pool made up of three disks, and then use that pool to create a virtual disk with RAID 5.
After that, I shared it on the network to arrange remote network access to the storage. Now I can work with it by connecting it as a network drive to another PC.
iSCSI storage settings in Windows Server 2012
One more way to configure access to the server is by establishing an iSCSI connection. To install the iSCSI role on the server, open Server Manager, go to File and Storage Services – choose iSCSI.
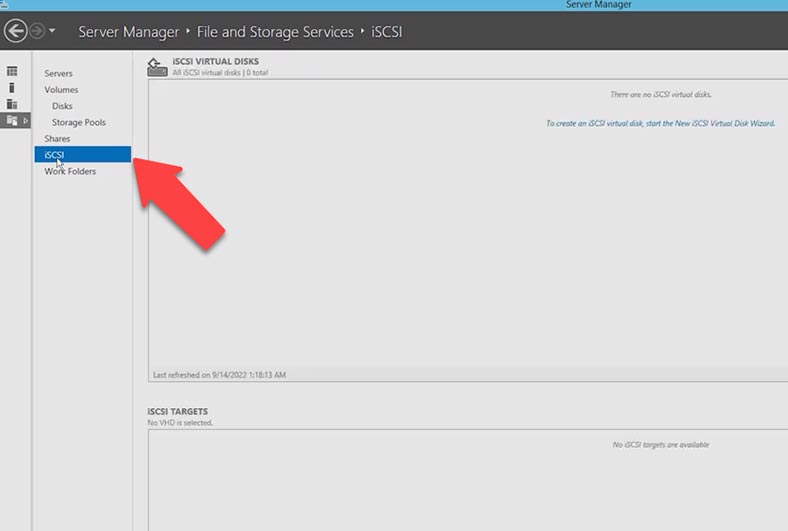
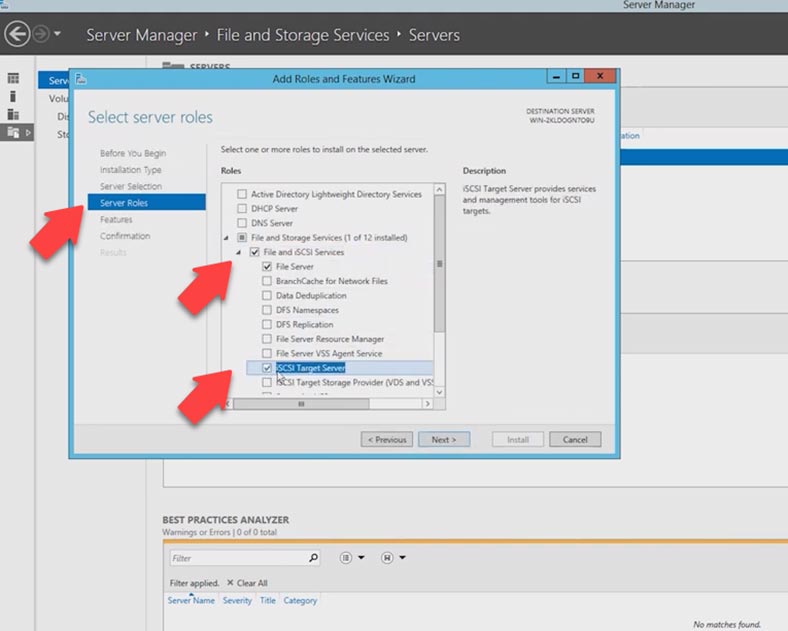
If this service is not installed yet, click Manage – Add Roles and Features – Server Roles – File and Storage Services – File and iSCSI Services, now select File Server and iSCSI Target Server, then Next and Install.
It’s not necessary to restart the computer after the installation, so you can move on to configure the target server. To do it, go back to the Server Manager window and open File and Storage Services – iSCSI. To create a new virtual disk, click on this link or open Tasks – New iSCSI Virtual Disk.
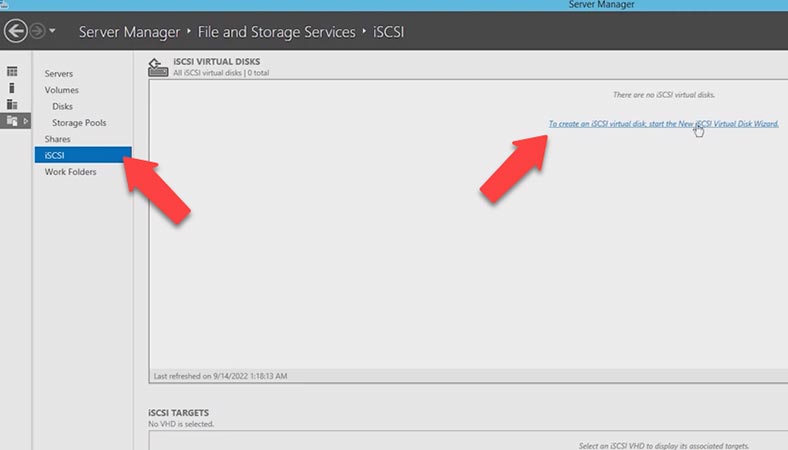
In the new window that opens, select the disk (in my case, it is the previously created RAID) and click Next. At the next step, give a name to the virtual disk – Next, give its size and type – Next. New Target iSCSI – Next. Give a name for this target.
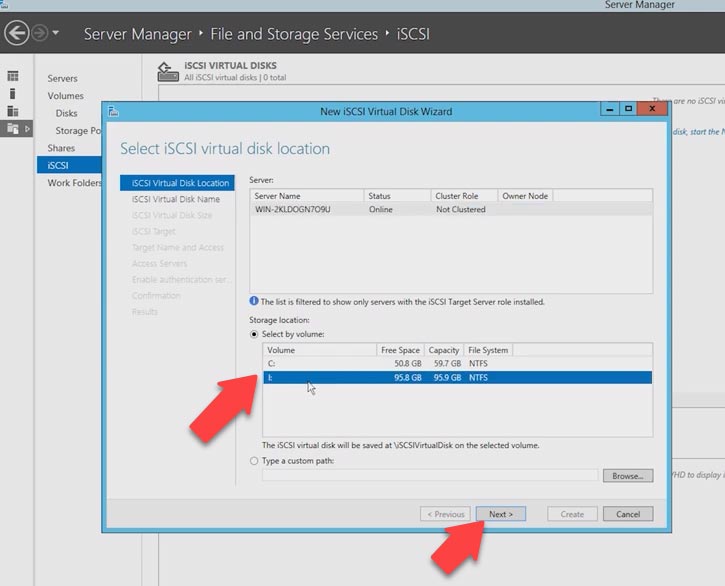
At the next step, you can add initiators; select the servers that can get access to the disk.
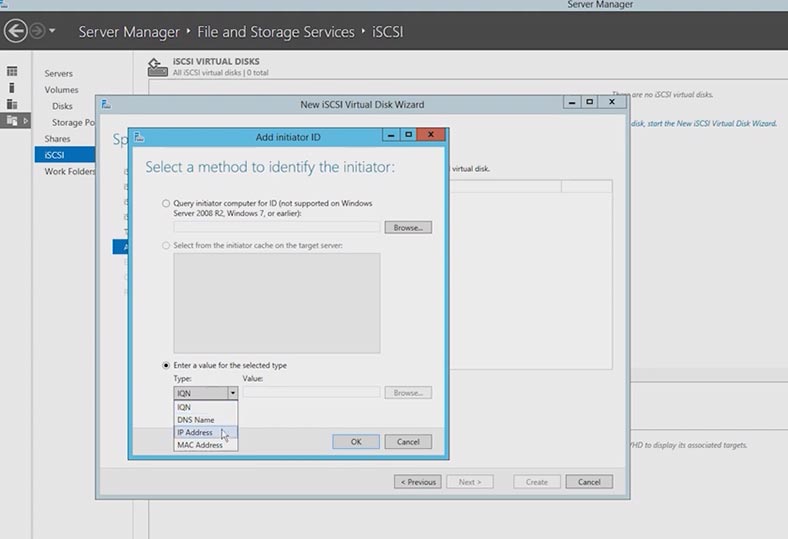
In this new page, you can set up authentication between servers by CHAP protocol. CHAP (Challenge Handshake Authentication Protocol) is an identity checking protocol that periodically re-authenticates the user during an online session, using a shared password. For iSCSI you can use either direct and reverse CHAP authentication – Next.
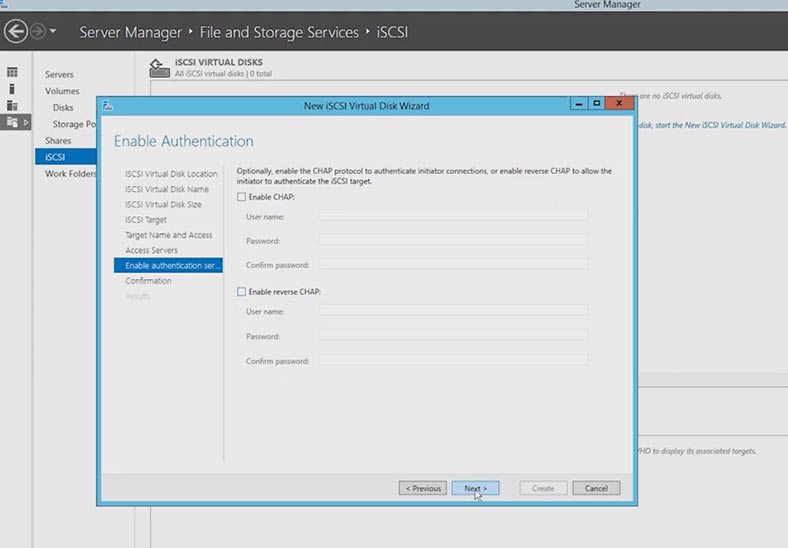
Make sure that the settings are correct and start disk creation by clicking Create and then – Close, when the process is over.
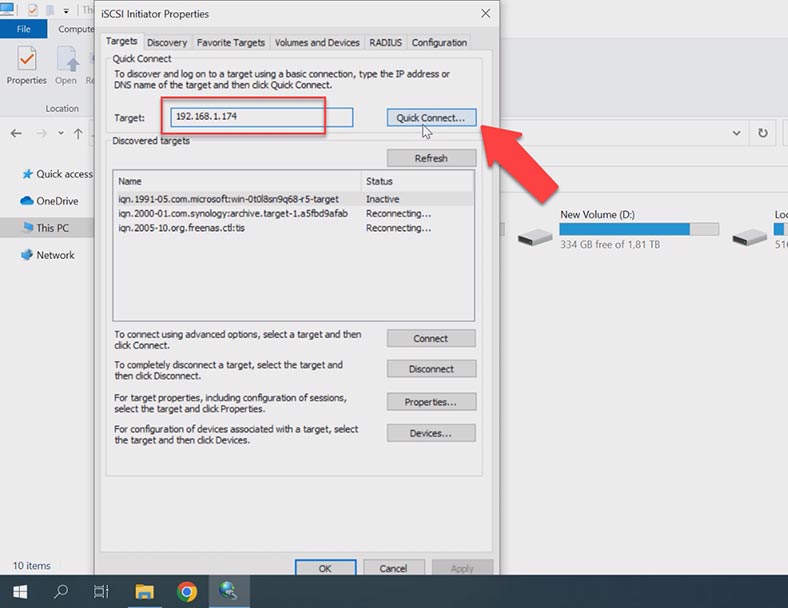
After that, go to the computer where you need to connect the virtual disk, start iSCSI initiator and get connected. Type the IP address in this field and click Quick Connect, choose the server and click Finish.
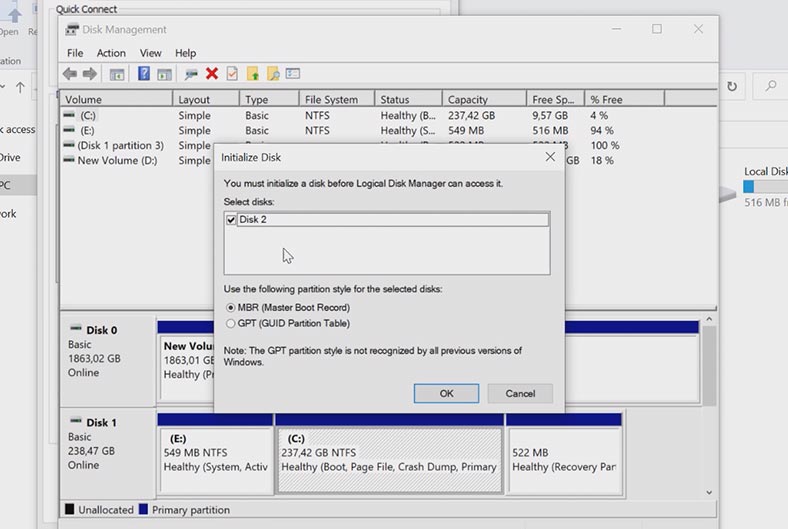
The last step is to open Disk Management and partition the virtual disk. In the operating system, it will be displayed as a physical disk. Later this disk will appear in the File Explorer.
Recovering data from Buffalo NAS
Since this device is quite old and the operational life for such products is about 5 years, it’s worth considering the options to avoid loss of important data in the future.
If this device breaks down, the RAID will be destroyed, and all information will become inaccessible. To retrieve the data from hard disks, you need a specialized data recovery tool. Hetman RAID Recovery will help you rebuild the destroyed RAID and get the important information back.
Buffalo NAS products ensure reliable and centralized storage of your data for both personal and business needs. However, in spite of modern hardware and top-class backup and restore utilities used in Buffalo products, they can also break down just as any other storage system: even with their enhanced reliability, they are still vulnerable to errors and data loss.
Buffalo NAS devices often show error codes on their LED panels to notify users of possible issues. A series of blinking indicators tells you that data recovery may be required. For example, an E15 message means that one or several hard disks are out of order. For best recovery chances, turn off the machine immediately and replace the faulty disk.
| Number | Step | Description |
|---|---|---|
| 1 | Troubleshoot the Issue | Check the status of the NAS Buffalo: whether the disks are visible in the system and if they can be accessed through the management interface. |
| 2 | Check RAID Configuration | Determine the type of RAID used (RAID 0, 1, 5, 6, or others) and check the status of each disk in the array. |
| 3 | Connect Disks to PC | Disconnect the hard drives from the NAS and connect them to a PC using adapters or docking stations to scan the disks directly. |
| 4 | Use Data Recovery Software | Apply data recovery software (e.g., Hetman RAID Recovery) to access data on the failed RAID array. |
| 5 | Recover Data | Use the data recovery software to scan the disks, select the lost files, and save them to another storage medium. |
| 6 | Verify Recovered Files | After recovery, ensure that all files open correctly and there is no corrupted data. |
Method 1. How to recover data from a non-operable Buffalo WS-6vl with Windows Storage Server 2012
If your NAS is down, or one or several disks in the array are no longer functional, and as a result of that you have lost access to some data which still remains on its disks, then a specialized data recovery tool designed to work with RAIDs will help you bring your files back. This program supports all popular RAID types and most file systems. You can use it to recover data from Buffalo NAS systems as well as from devices by other manufacturers including Synology, QNAP, Promise, Asustor etc.
It can also help you rebuild a damaged RAID if the NAS or its controller is broken and do it even if one or several disks within the array are out of order. You’ll be able to restore critical information, which is still on the disks, and achieve it even without actually using the NAS.
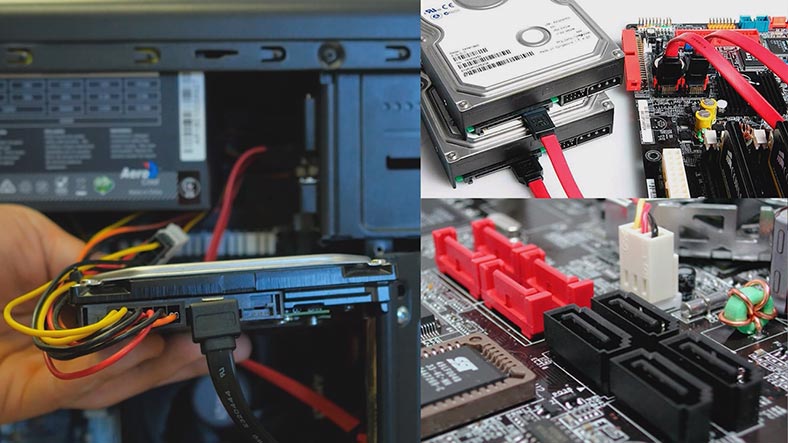
Take the disks out of the NAS device and connect them to the motherboard of a Windows computer.
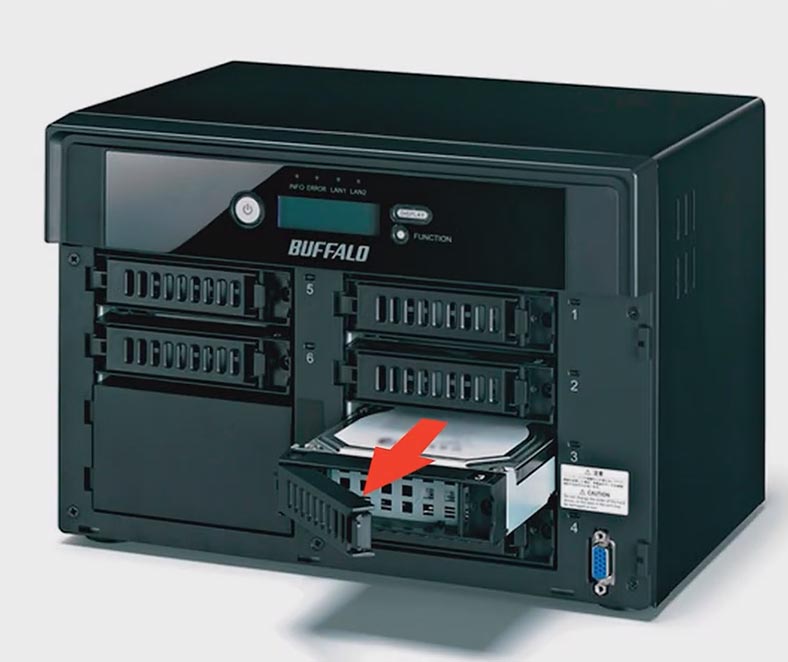
Don’t forget to label the disks with numbers according to how they were positioned in the storage system.
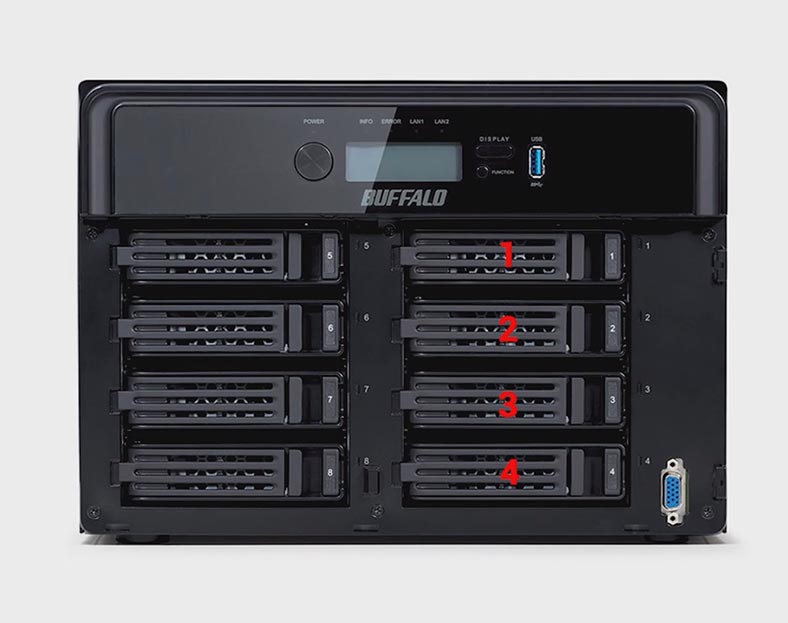
If your motherboard lacks SATA ports to connect all the disks, or you have a similar problem involving power connectors, you can solve the problem by using special expansion cards and adapters. When the disks are connected, run the data recovery tool.
It will automatically rebuild the damaged RAID system with the available disks, and display it in the program’s window. As you can see, the program managed to identify all RAID settings correctly.
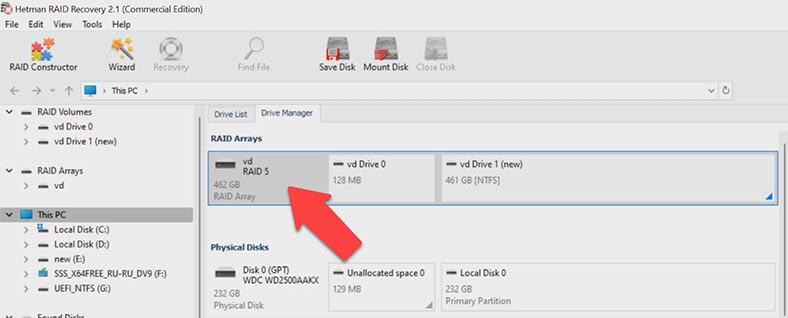
To recover data, right-click on the disk and choose Open. After that, choose the file search type – Fast scan or Full analysis. For starters, we recommend a Fast scan – the utility will promptly analyze the disks and display all the files it can find. If this scan type can’t find the required files, then go for Full analysis.
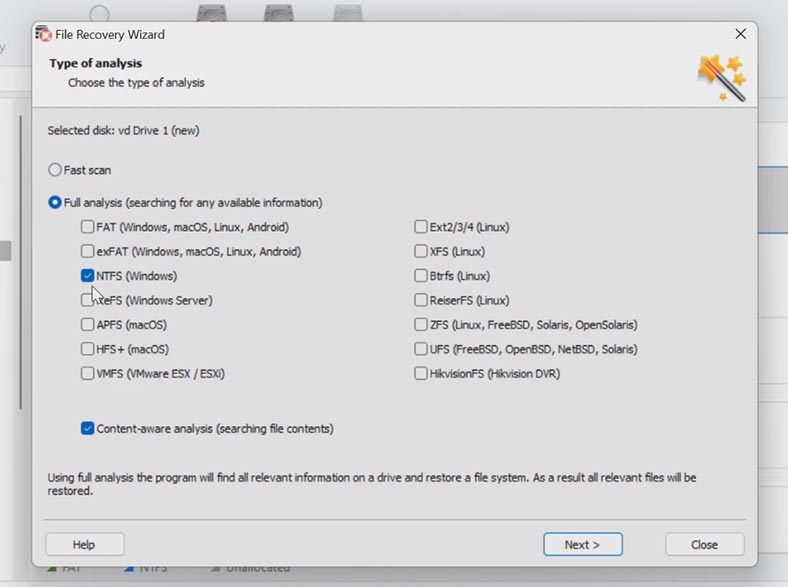
To do that, go back to the program’s main window, right-click on the disk and choose Analyze again – Full analysis – specify the file system for this disk and click Next. In most complicated cases, we recommend searching files by their signatures, by checking the box next to Content-Aware analysis.
The program has built the destroyed RAID automatically and found all the files which were stored on this disk array including the deleted ones – these are marked with a red cross.
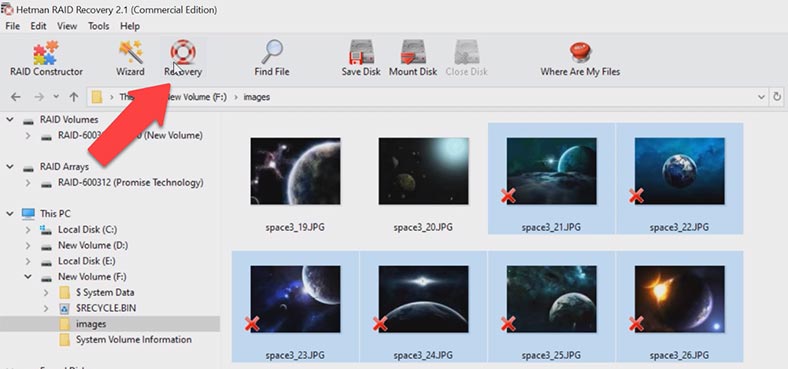
You can check file contents with the preview option. Find the ones you need to restore, select them and click the Recovery button. Choose the folder where you’d like to save the files and click Recovery again. When the recovery process is complete, you’ll see all the data in the specified directory.
To quickly find a specific file, there is a search-by-name feature. Also, this utility lets you save a copy of the entire disk, and then work on it instead of addressing the actual disk all the time. Such feature allows you to protect the disk data from being overwritten, from an accidental disk failure, or from other mistakes that users could make.
Method 2. How to recover data from an iSCSI volume
In case of an iSCSI disk and a properly working NAS storage, you’ll be able to scan the disk right from the client system. Just start the program and scan the network drive, find the files which were accidentally deleted, and recover them.
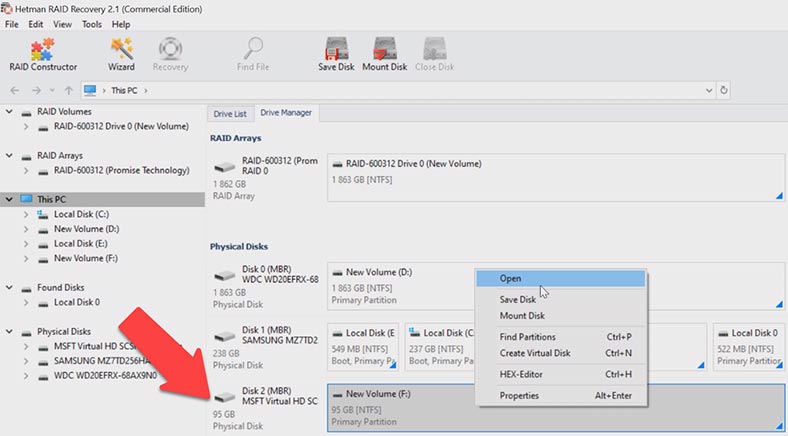
This method can help you if some files were removed from the storage by accident. In this case, you don’t need to take the disks out of the storage case. Set up an iSCSI connection and try scanning the drive from where the files were removed. We have explored how to configure such connection a bit earlier in this video.
Method 3. How to build a RAID manually
In very complicated cases, when critical service data was erased from the disks, the program may fail to rebuild the RAID automatically. Luckily, for such cases this program has a feature to manually rebuild the RAID in a special constructor mode. To use this mode, you need to know all the information about the damaged array.
Open RAID Constructor, select Manual mode, click Next and fill in the array data. RAID type, block order, block size, add the disks included into the array and specify their order. As a result, it should appear in this window; if you got all the properties right, you will see the directory tree If you see none, it means the properties are incorrect, or this information is insufficient to identify the RAID.
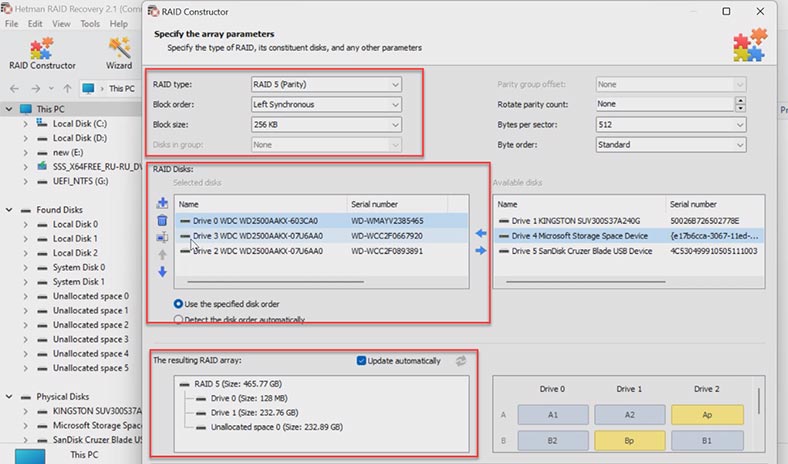
You may have to specify the offset which tells you where the beginning of the disk is located. You can find this information with the help of HEX Editor.
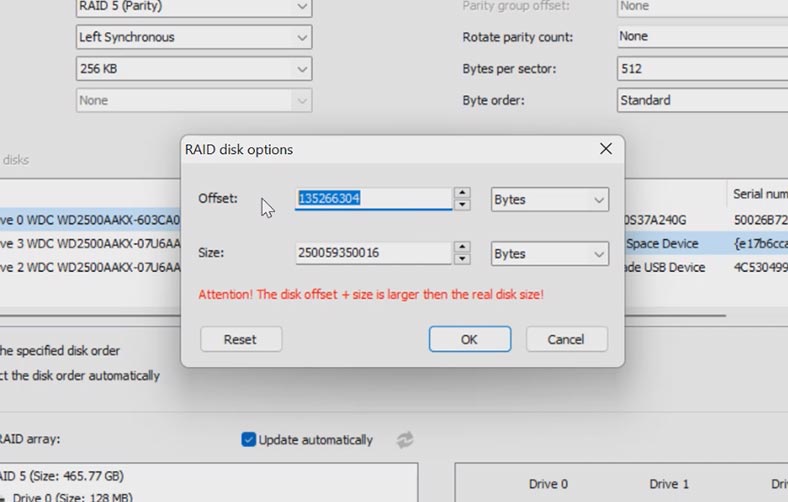
When all the properties are ready, click Add. After that, the array will appear in the Drive Manager. Now the last step is to scan it using Fast scan or Full analysis, and recover the files you need to restore.


