Turn PC into NAS with OpenMediaVault: RAID Recovery!
Want to transform your PC into a NAS using OpenMediaVault? Our comprehensive guide has got you covered! Learn step-by-step instructions and expert tips for setting up OpenMediaVault on your PC to create a NAS. Say hello to centralized storage and data accessibility!
- Step 1. How to install OpenMediaVault operating system
- Step 2. How to create a RAID on OpenMediaVault NAS
- Step 3. How to create a shared folder
- Step 4. How to enable an FTP server
- Recovering data from OpenMediaVault
- Questions and answers
- Comments
OpenMediaVault (OMV) is a kind of a software-based NAS, an open scalable system for management of network storage devices, which is based on Debian Linux. This system includes the opportunity to create a software-based RAID, a mail client, a media server, a BitTorrent client, and other services such as: (SSH, (S) FTP, CIFS (Samba), NFS, DAAP, RSYNC). Its functionality can be expanded with plug-ins available at the repository.
| Feature | Description |
|---|---|
| Base System | OpenMediaVault is built on Debian Linux |
| Supported Formats | Supports EXT4, XFS, Btrfs |
| Interface | Intuitive web interface |
| Network Support | Supports SMB/CIFS, FTP, NFS |
| System Requirements | AMD64 or Intel x86_64, minimum 1 GB of RAM |
| Modules and Plugins | Extendable via plugins for additional features |
| Backup | Supports data backup via Rsync, FTP |
| Security | Includes encryption, user management |
| System Monitoring | Tools for monitoring resource usage |
One of the main advantages in OpenMediaVault is that it can be completely configured and managed through the web administrator’s interface, which makes it a ready-made solution most suitable for novice users and people who are taking their first steps in Linux, and generally quite a simple system to use.
As long as you have an old computer and at least three hard disks, it can become a decent low-cost alternative to a NAS storage system, and if you add a RAID on top, you’ll get a good option to keep your information secure.
Usually, network storage systems with OpenMediaVault include second-hand hardware, which may cause a storage system to break down, and make users lose important information.
When a NAS system fails, you can’t retrieve the information from the hard disks that used to make up the RAID array. Getting access to that data requires specialized software tools.
| Name | Features |
|---|---|
| Hetman RAID Recovery | Supports all RAID levels, recovery of damaged array configurations, ability to work with NAS devices from various manufacturers. |
| UFS Explorer | Powerful tool for RAID recovery, supports a wide range of file systems, automatic configuration recognition. |
| ReclaiMe | Easy to use, specializes in RAID array recovery, recovery without complex settings. |
| R-Studio | Supports advanced RAID recovery, ability to analyze and recover data even from heavily damaged arrays. |
| Wondershare Recoverit | User-friendly interface, NAS recovery support over the network, optimized for home users. |
| Disk Drill | Intuitive interface, data recovery from various RAID types and NAS devices. |

How to Turn a Computer into a NAS Storage Device. How to Recover Data from OpenMediaVault RAID
Step 1. How to install OpenMediaVault operating system
For starters, let’s explore how to install OpenMediaVault on an ordinary computer. Before you start the installation, you will need an ISO image of the OpenMediaVault boot disk.
OpenMediaVault ISO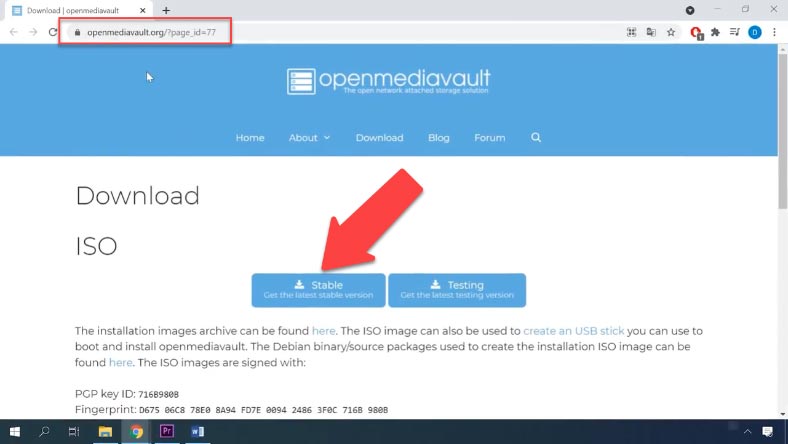
If you’re planning to build a RAID, you will also need at least three hard disks, one of them for the operating system. When the ISO image of the OMV operating system is downloaded, you should create a bootable USB drive. Use any available utility to write the image to the USB pen drive.
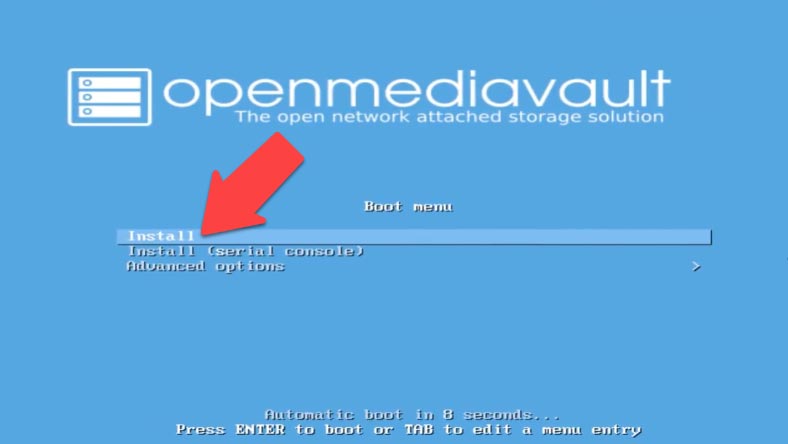
Connect it to the computer where the operating system should be installed, restart it, and boot the computer from the USB drive. The OpenMediaVault installation screen will appear. From the boot menu, select “Install” and press the Enter button.
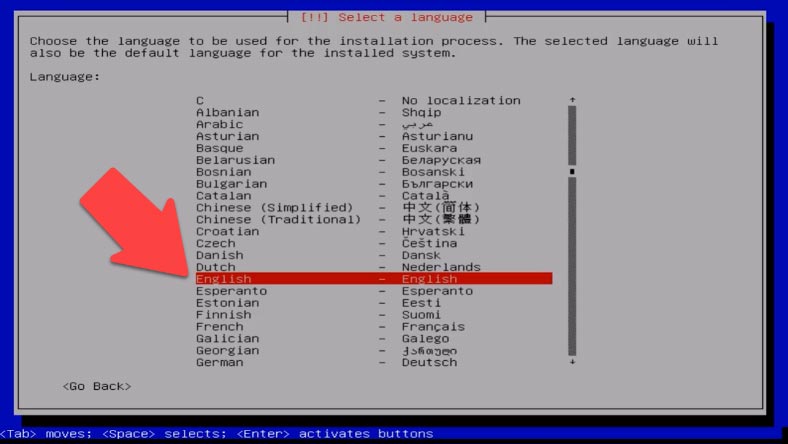
In the next screen, select the language to be used during the installation, and in the ready operating system, and press Enter.
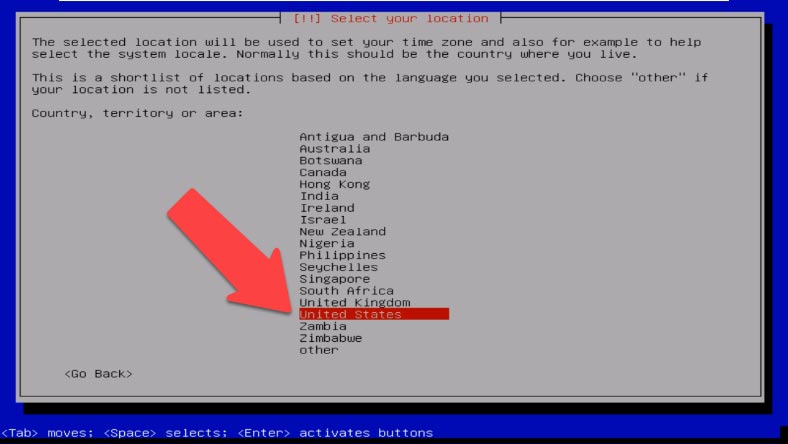
Specify your location and press Enter again. In the next window, choose the keyboard layout.
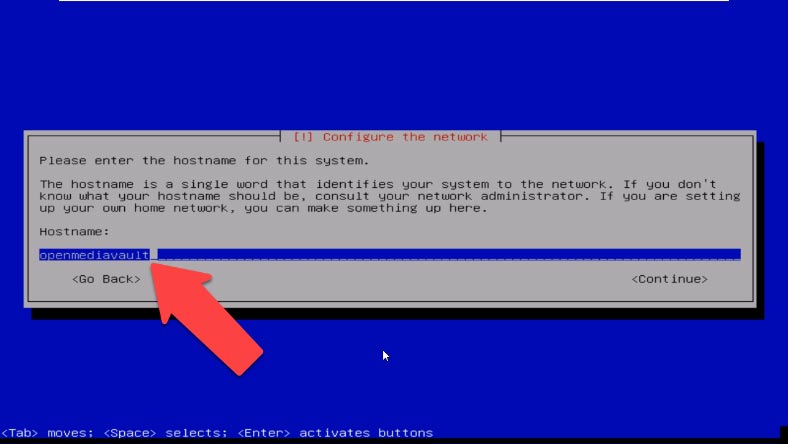
After that, type the host name, and the domain name. Set the password for your root (or system administrative account), and type the password again.
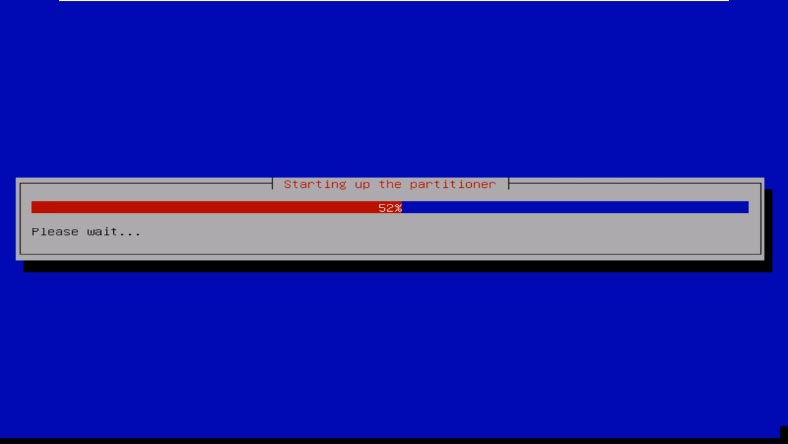
Also, specify the time zone. After that, the installation process begins.
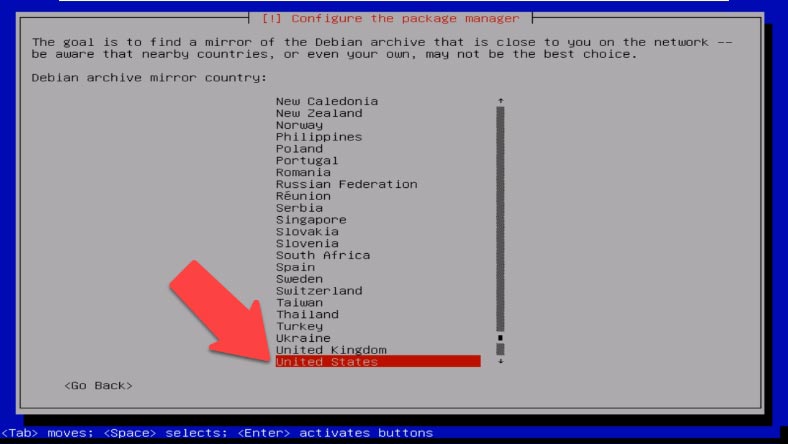
After that, in the package manager window you should specify the country for a mirror of the Debian archive. Choose a country from the list and remember that the nearby locations may not be the best choice – “Continue”.
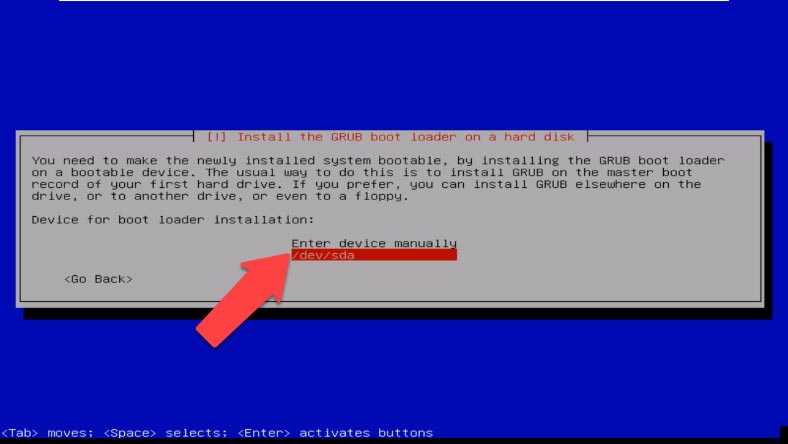
In the next window, the wizard will ask you to specify the device for the system loader – press Enter to confirm. The installation is over. Remove the installation disk and click “Continue” to finalize the process and restart the computer.
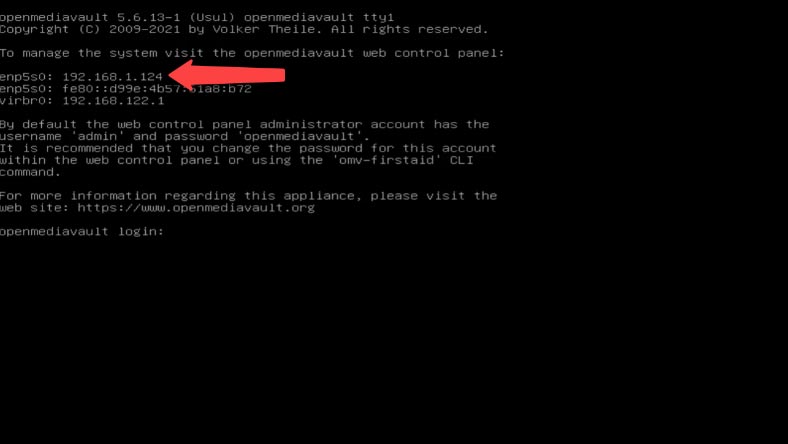
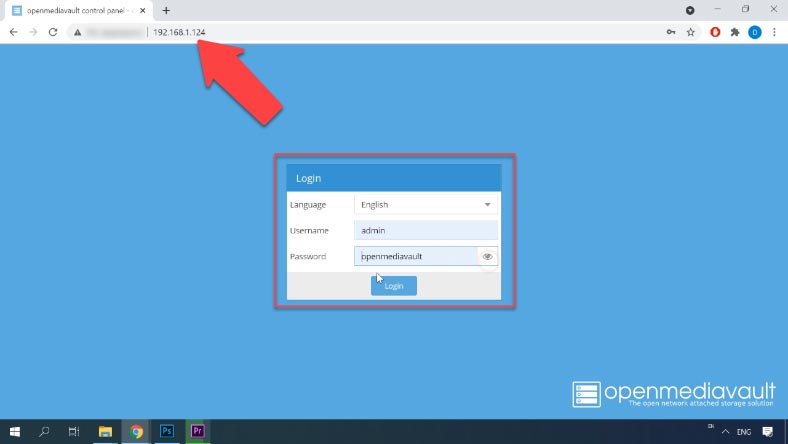
Now OpenMediaVault NAS is installed on your computer. After the operating system restarts, the IP address of the OMV device will be displayed on the screen. To start managing it, open a browser on another computer, type the IP address into the address bar, and press Enter.
To access the administrator’s web panel, type your login and password. By default, the name is “admin” and the password is “openmediavault”.
Step 2. How to create a RAID on OpenMediaVault NAS
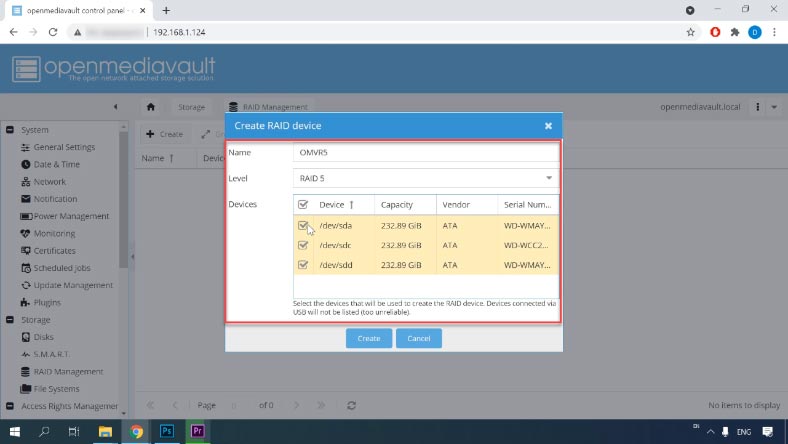
Now let’s find out how to create a RAID system on this network storage device we have just created. When you enter the OMV web control panel, jump to Storage, and then – to RAID Management. Click “Create” to build a new array.
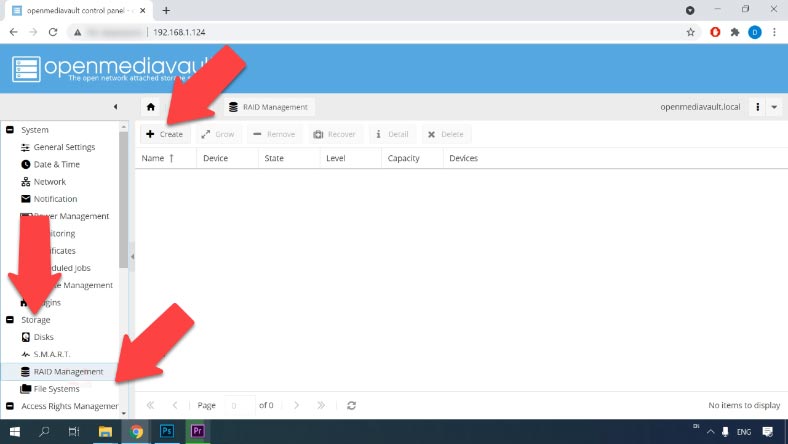
Assign a name, chose the RAID type, select the disks that your RAID will consist of, and click “Create”, then “Yes”. The notification appears to inform you that you have to wait until the initialization is complete before a file system can be created – OK. At the top of the screen, click “Apply” for the changes to take effect – then click “Yes” to confirm.
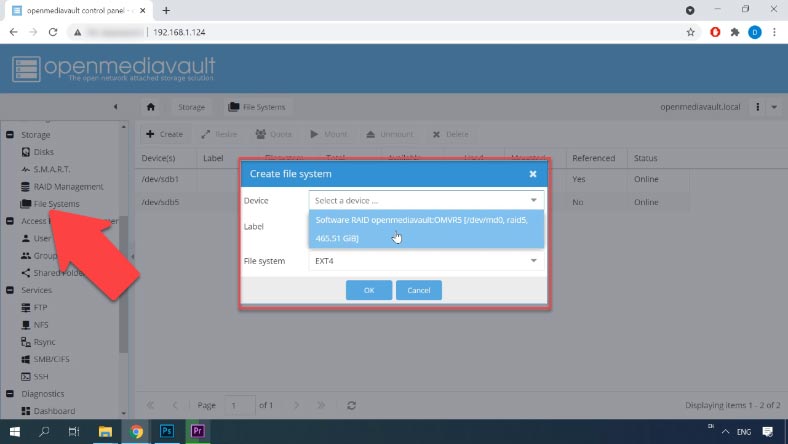
After the RAID becomes active, go to the Storage tab – find “File Systems”, then click “Create”, choose a file system type for the array, and click OK.
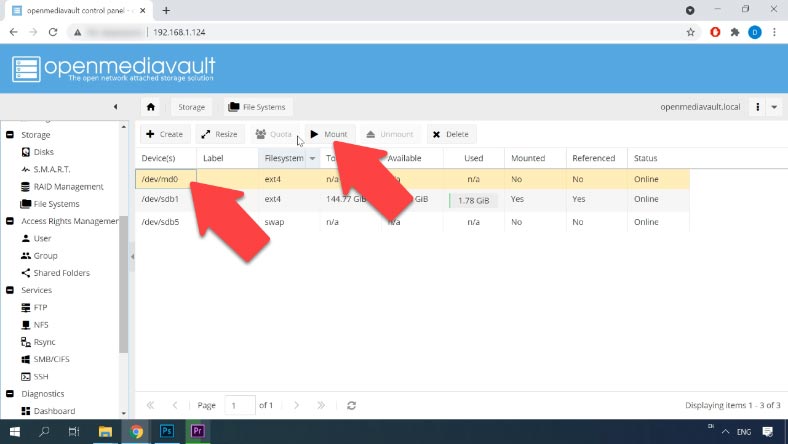
When the file system is created, select the array from the list and find the “Mount” button above: click on it to make the storage accessible for the operating system. Just as before, click “Apply” at the top of the screen to save the changes.
After the RAID has been created, you can go on to add a new user account, create a shared folder and configure its permissions by navigating to the access permission menu.
Step 3. How to create a shared folder
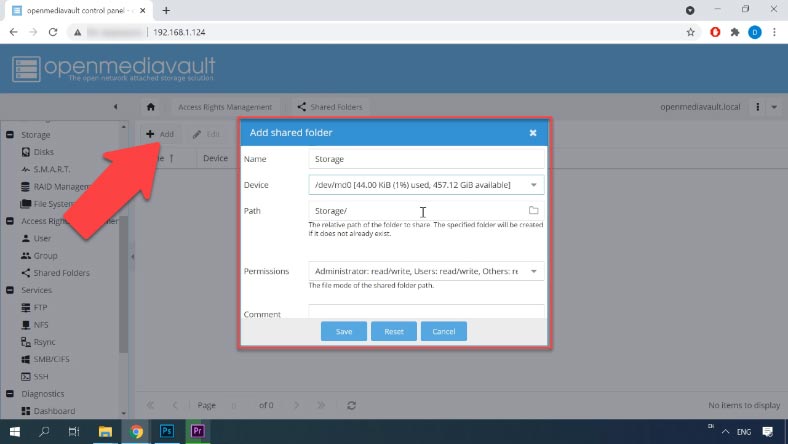
To add a folder that will be available for everyone, go to the tab “Access Rights Management” and open “Shared Folders”.
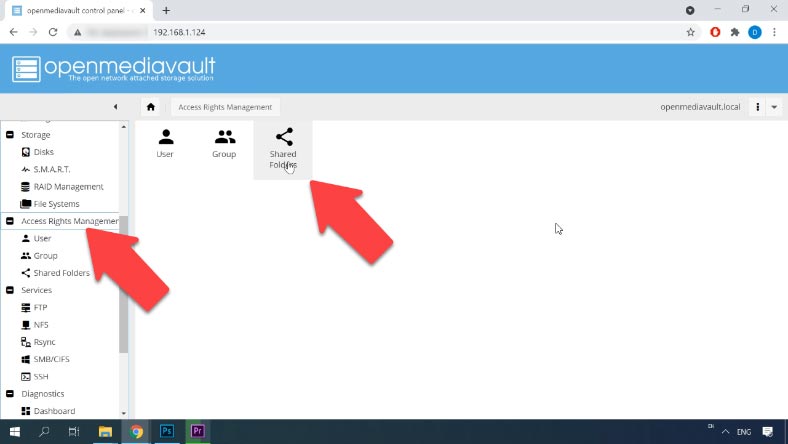
Click on the “Add” button here, give the name for your folder, select the disk where it should be located, set access, read and write permissions, and then click “Save”. Now this folder is available on the network. To access it, you need to set up network protocols.
Step 4. How to enable an FTP server
To configure an FTP server, you should enable it first, and then select shared folders to which you would like to grant access. Go to “Services” – “FTP”, and turn this protocol on. After that, set up advanced settings.
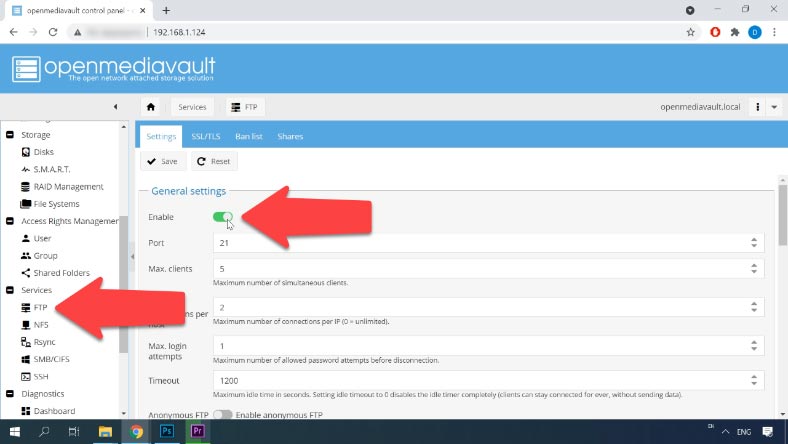
It is better to disable the option “Require valid shell”, and to enable the option “Resume”. Enable “Anonymous FTP” to connect clients without limitations. Now any user can connect to the storage through FTP.
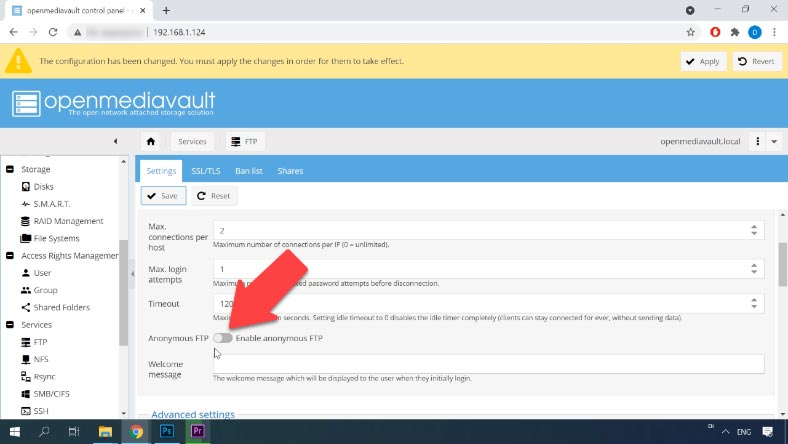
However, you shouldn’t turn it on if you’re going to grant FTP access to your storage from the Internet. The meaning of other settings should be clear from their names. Now you can connect to the network drive and write your data there.
Recovering data from OpenMediaVault
How to recover data from a RAID based on OpenMediaVault
A network-attached storage with OMV is typically a low-budget solution often assembled with second-hand computer parts, so the chances for such system to break down are somewhat higher.
If files are removed accidentally from a hard disk inside a NAS system, a hard disk is formatted, the disk array is misconfigured, or in other scenarios involving loss of data, loss of access to the network drive, or damage to the RAID volume, a specialized data recovery tool is what you need to restore your information.
Most NAS devices are running on Linux-based operating systems, and their hard disks are formatted for Ext file systems, while RAID arrays are typically built with the use of mdadm or LVM technology, and it becomes impossible to read their contents when such disk arrays are connected to a Windows computer directly.
To read the disks and retrieve any information from there, use the tried and well-tested data recovery tool for NAS solutions – Hetman RAID Recovery. It supports most popular file systems, technologies and RAID types, and in most cases it will be able to rebuild the damaged RAID automatically.
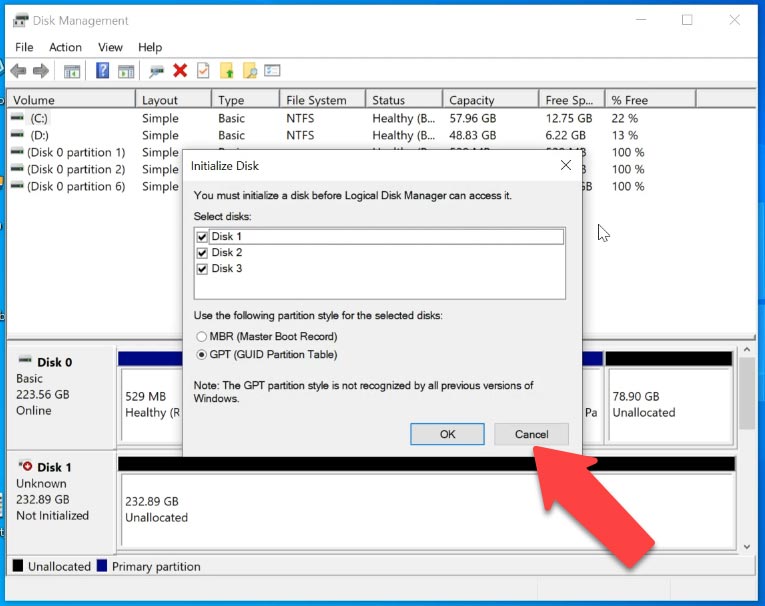
Take the disks out of the network storage device and connect them to a Windows computer. When the operating system has booted, open Disk Management and check if the added disks are recognized. Windows may suggest to initialize or format the drives to be able to access them. Remember to never agree to either operation, because it can erase the remaining information completely.
Download, install and start the data recovery tool. Hetman RAID Recovery will identify the disks automatically, read their service information and rebuild the damaged RAID system. Now the program has rebuilt the RAID volume on the fly and shows it at the top of the Drive Manager window.
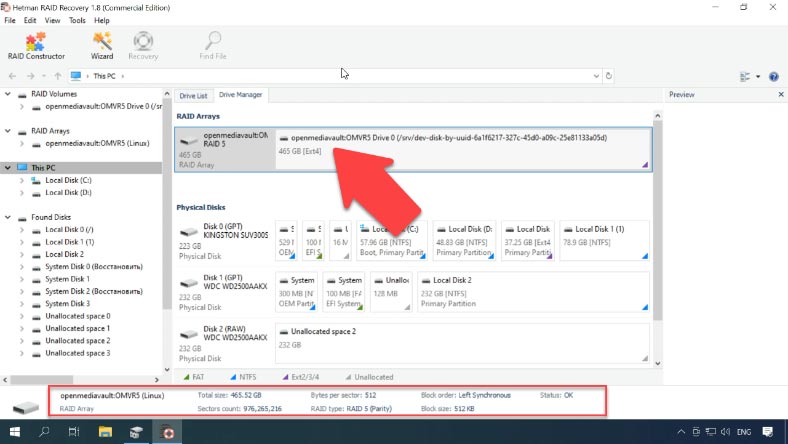
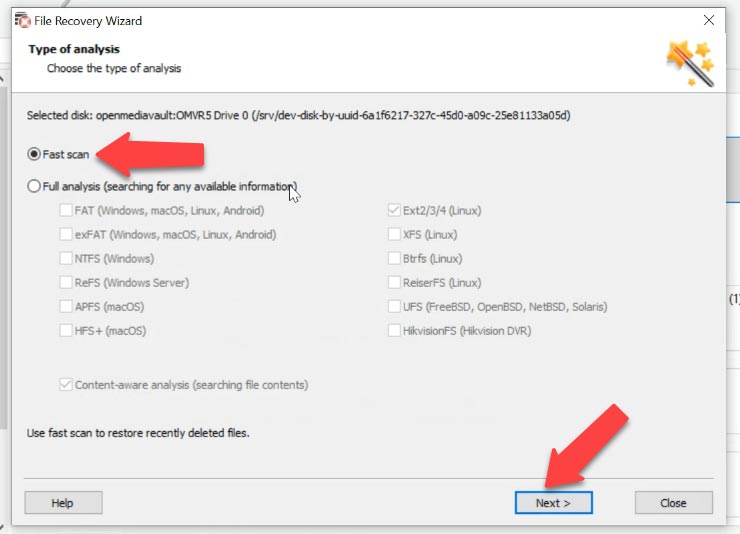
To have the disk contents displayed, scan it. Right-click on the disk and choose “Open”. Choose the scan type to run, and click “Next” to start searching for lost files. Wait for the process to be over, and then switch to search results by clicking “Finish”.
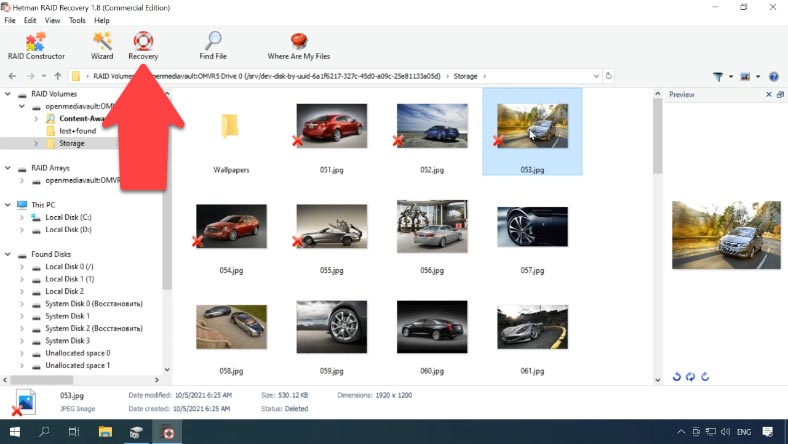
The program has found all the files that have been written to the disk, even those that have been removed before; such files are marked with a red cross. You can use the preview window to see their contents. Select the files you want to recover and click “Recovery”, choose the disk where to save them and specify the directory, then click “Recovery” and “Finish”.
After that, follow the path you have chosen and check if the recovered files are there.
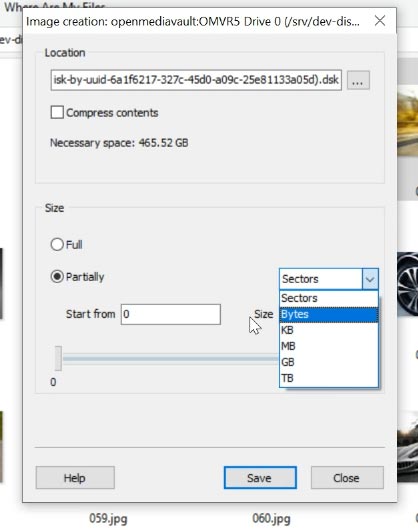
Hetman RAID Recovery offers extra features to improve effectiveness of working with RAID disks that have hardware issues. It lets you create disk images and then analyze these images instead of the actual hard disks in order to reduce disk usage and prevent them from breaking down at the most inappropriate moment.
How to recover data manually, with the RAID Constructor
When a disk is damaged or service information is erased, the program may have difficulties with rebuilding the RAID automatically; however, you can do it manually with the RAID Constructor if you know the properties of this damaged array.
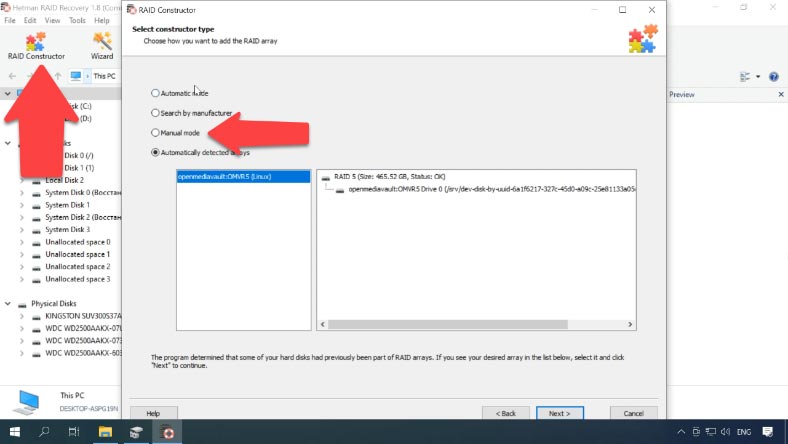
Open the Constructor, select “Manual mode”, and fill in all the information you know about this disk array: the RAID type, block order and size.
Add the disks it used to include, use the arrows to specify their order, and replace the missing disks with empty drives by clicking the “plus” button. Also, you can specify the offset that helps to locate the beginning of the disk. Sometimes, the program may have difficulty in identifying it automatically, so you’ll have to enter the offset value manually.
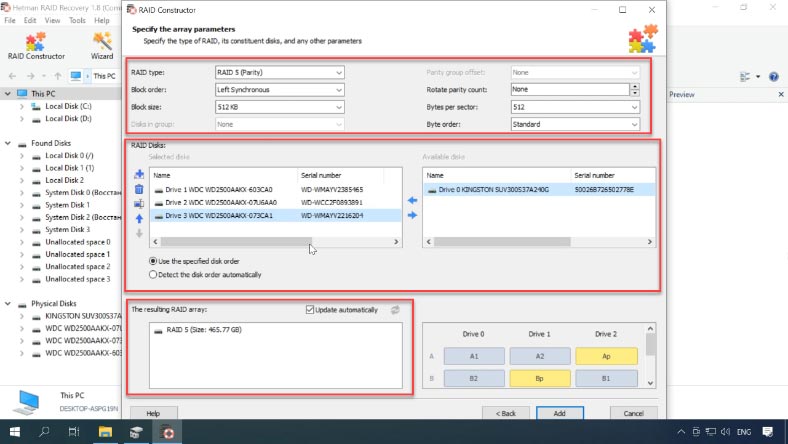
Usually, if you give correct properties, the newly built RAID system has at least one partition. Expand it to check for the folders that you need. If the folders you are looking for are displayed, then you have built this RAID properly. When you specify all the properties you know, click “Add”, and the array will appear in the Drive Manager. To have the array recovered, the last step is to scan it, find the files you want to restore, select them, and recover to the folder you choose.


Any architecture/platform supported by Debian.
256MB RAM
2 GB hard disk or USB mass storage device, for a monolithic OS (if installed over Debian, the mass storage device can be used for user data).
1 hard disk for user data.