Iomega IX4-200D RAID Data Recovery: Step-by-Step Guide!
Need to recover data from an Iomega IX4-200D RAID? Our comprehensive guide has got you covered! Learn step-by-step instructions and expert tips for successfully salvaging your data from the IX4-200D RAID system. Say goodbye to data loss worries and hello to recovered files!
- Why NAS devices fail
- How to change RAID level for Iomega IX4-200D
- How to add a shared folder
- How to configure network access and enable FTP
- How to configure an iSCSI connection
- How to recover data from a non-operable NAS
- Questions and answers
- Comments
Iomega – a company that currently belongs to Lenovo EMC – manufactures a popular series of NAS devices designed for storing large amounts of information.
A network-attached storage (or NAS for short) is a data storage server connected to a network that allows its users to access the information stored in such server.
Quite often, storing data in such devices is based on the RAID technology. A RAID-type network-attached storage is a reliable solution to keep your files safe, but there are also factors that influence data integrity regardless of how you store it. As any other device, NAS systems by Iomega/Lenovo have a certain operating life. It means that after a few years in active use all storage devices tend to fail, sooner or later. Generally, most NAS systems remain usable for three to five years on average. When a NAS finally breaks down, its users lose access to the data written to the disk array inside the storage system.

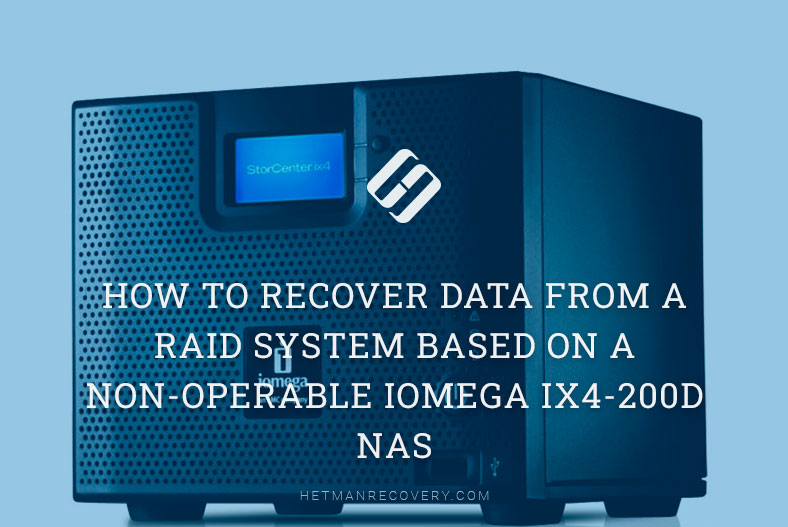
💿 How to Recover Data from a RAID System Based on a Non-Operable Iomega IX4-200D NAS 💿
Why NAS devices fail
A network-attached storage may break down after a power failure, voltage surges, overheating, accidental formatting, reinstalling an operating system, damaging the file system (usually it affects the journal or the superblock), and as a result of mechanical issues with the hard disks or the RAID controller. Very often, data can be lost from NAS devices when users decide to update their firmware. To get your files back, you’ll need a specialized data recovery tool.
| Reason | Description |
|---|---|
| Hard Drive Wear | Constant use of the NAS leads to gradual wear of the hard drives, which may cause their failure. |
| Overheating | Insufficient ventilation or high ambient temperature can lead to the overheating of device components. |
| Power Issues | Voltage fluctuations or sudden power outages can damage NAS hardware components. |
| Software Errors | Firmware or software failures in the NAS can cause instability and data access loss. |
| RAID Array Failures | Failure of one or more disks in a RAID array can result in data loss or device malfunction. |
| Mechanical Damage | Physical shocks or damage may cause the failure of NAS components like boards or disks. |
| Malware Attacks | Cybercriminals may exploit NAS vulnerabilities for attacks, leading to data loss or device blockage. |
| Insufficient Maintenance | Irregular maintenance, such as dust cleaning and software updates, can shorten the NAS lifespan. |
The manufacturer offers a dedicated piece of software named LenovoEMC to help you restore operability of the hard disks. Yet the problem is that the main function of this tool is to format those disks. When you do that, you just lose all the information they contain, and it’s going to be difficult to restore it.
How to change RAID level for Iomega IX4-200D
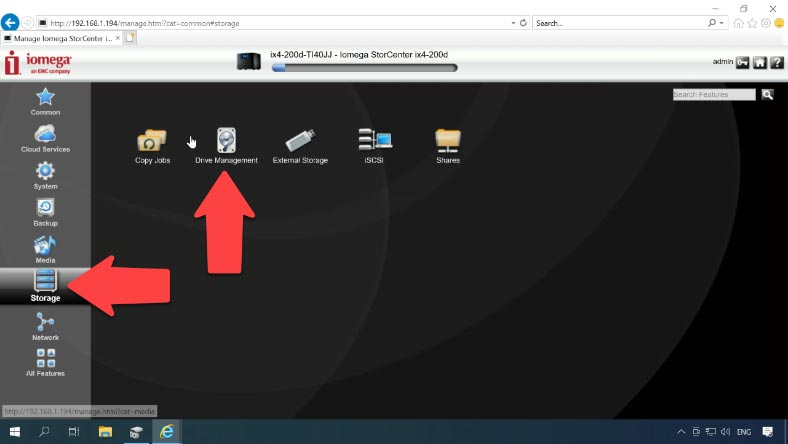
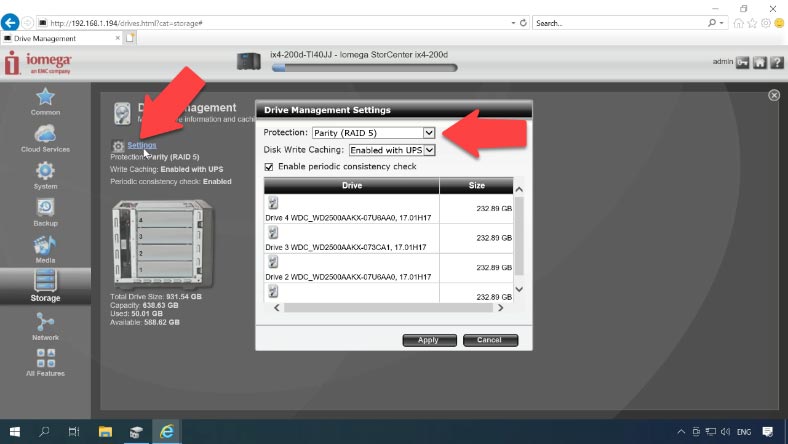
This NAS model builds a RAID automatically during initial configuration. To change RAID settings, open the NAS management utility, go to the “Storage” tab – “Drive Management”, and then open “Settings”.
Choose the RAID level you need, and configure other settings, then click “Apply”. The rebuild process begins, and it takes quite a long time to complete.
While the array is being rebuilt, let’s move on to configure the storage, add a shared folder, and enable network protocols.
How to add a shared folder
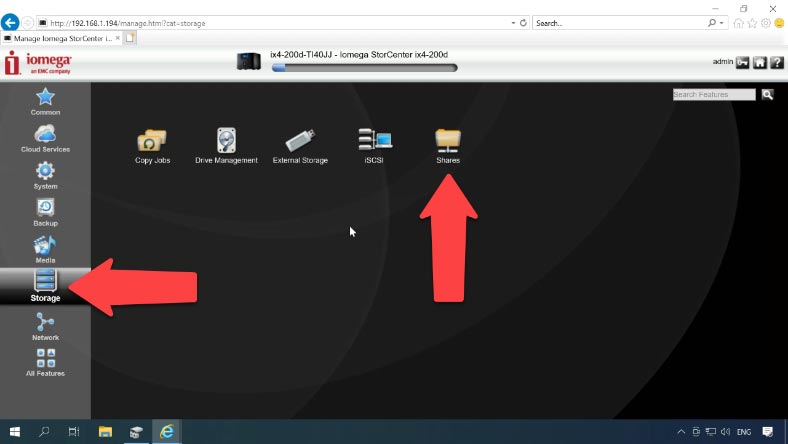
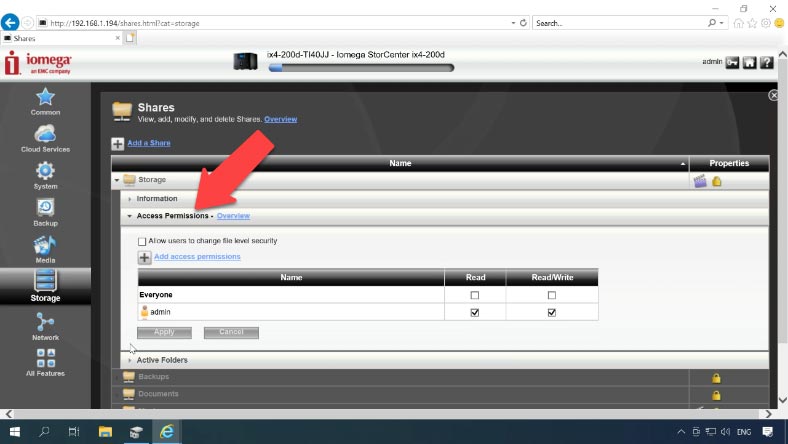
To add a new folder, open the “Storage” tab – “Shares”.
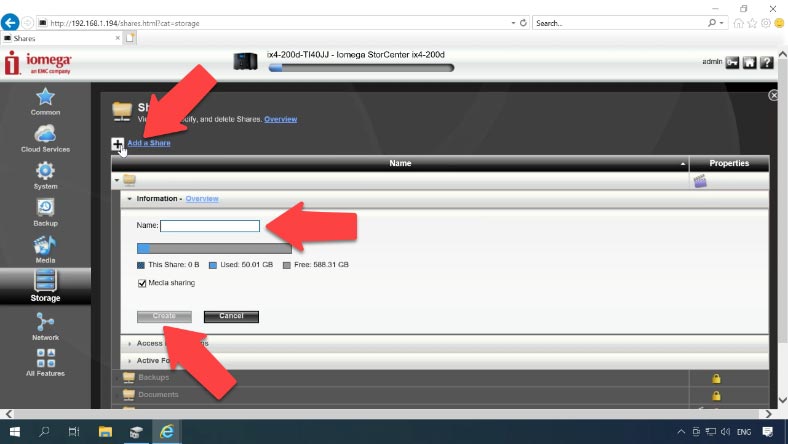
“Add a Share”. Type a name for the folder and click “Create”.
To configure permissions, expand the tab “Access Permissions”. Set permissions for everyone, or add a specific user by clicking on the “plus” button – “Add access permissions” and click “Apply”.
How to configure network access and enable FTP
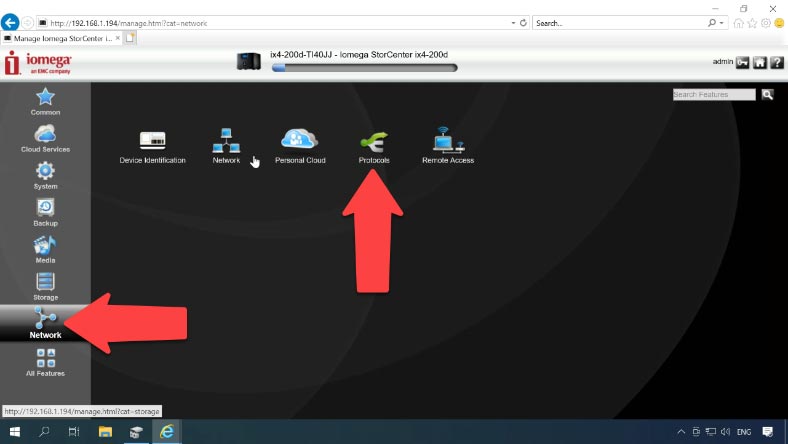
Now we need to enable network protocols to provide access to the network drive. Jump to the “Network” tab – “Protocols”.
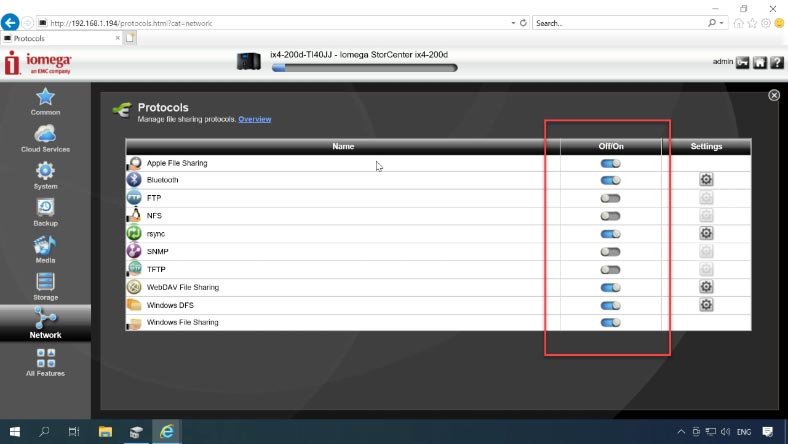
Enable the protocols you need by dragging the sliders to corresponding positions; for additional settings, click on the gearwheel icon next to the protocol.
How to configure an iSCSI connection
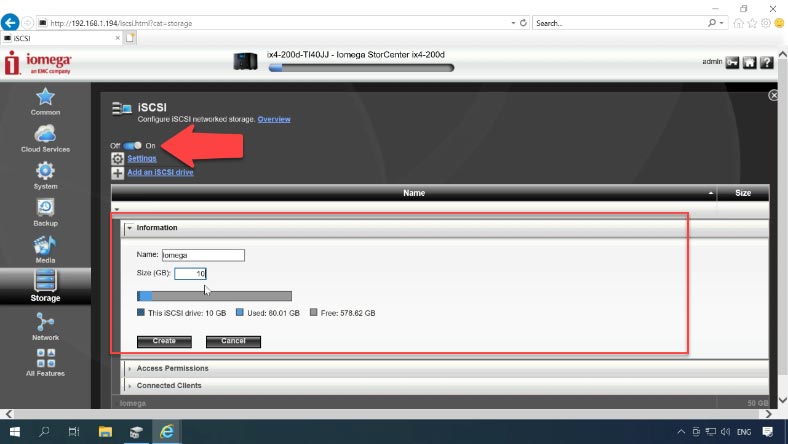
To configure an iSCSI connection, jump to the “Storage” tab – iSCSI.
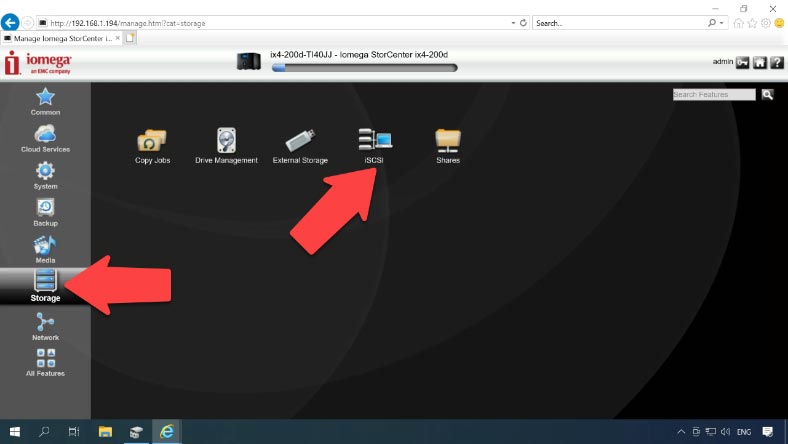
Enable it and then hit the button “Add an iSCSI drive”. Type a name, set the size, and then click “Create”. For more options, open “Settings”. In the first tab below, you can configure drive access permissions.
Now the final step is to connect it on a computer. Run iSCSI Initiator, type the IP address of the server into the “Target” field, and click “Quick Connect”.
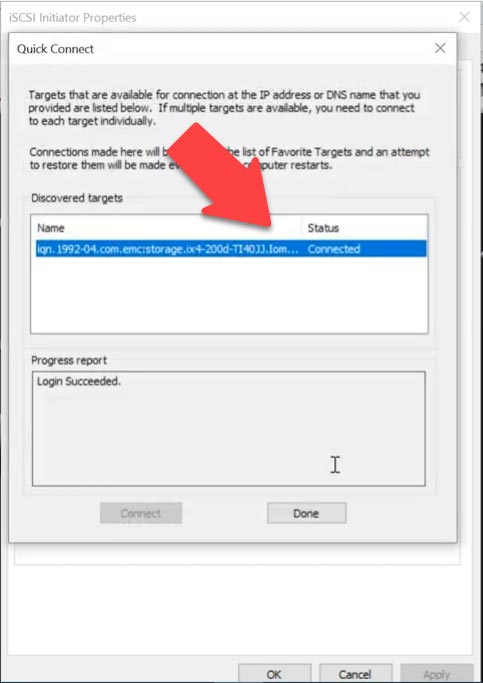
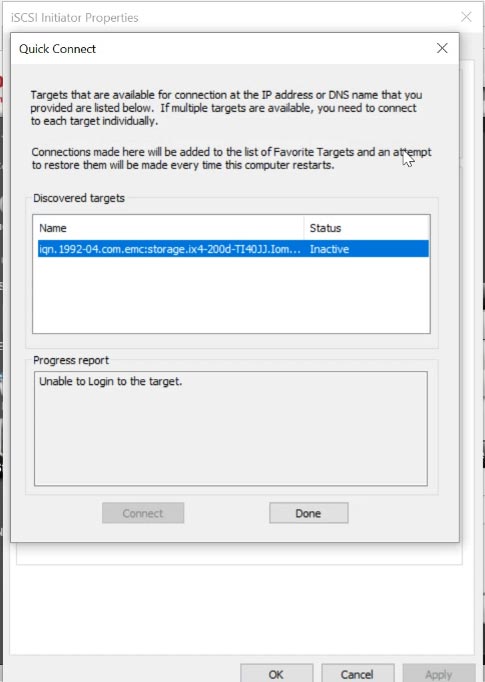
The final step is to initialize and format it in “Disk Management”, and then it will appear in Windows Explorer.
How to recover data from a non-operable NAS
If the network-attached storage breaks down, you can try to use Linux features. For most NAS servers, Linux is their natural environment as they are formatted in Linux file systems.
However, if you know little about this operating system, we don’t recommend trying this method: a single mistake in commands may erase all information on the hard disks.
The best solution would be to use a specialized tool for recovering data from network-attached storage systems.
As most NAS devices are running on Linux-based operating systems, and their hard disks are formatted for EXT, XFS and BTRFS file systems, while RAID arrays are typically built with the use of mdadm or LVM technology, it becomes impossible to read their contents when such disk arrays are connected to a Windows computer directly.
| Name | Features |
|---|---|
| Hetman RAID Recovery | Supports all RAID levels, recovery of damaged array configurations, ability to work with NAS devices from various manufacturers. |
| UFS Explorer | Powerful tool for RAID recovery, supports a wide range of file systems, automatic configuration recognition. |
| ReclaiMe | Easy to use, specializes in RAID array recovery, recovery without complex settings. |
| R-Studio | Supports advanced RAID recovery, ability to analyze and recover data even from heavily damaged arrays. |
| Wondershare Recoverit | User-friendly interface, NAS recovery support over the network, optimized for home users. |
| Disk Drill | Intuitive interface, data recovery from various RAID types and NAS devices. |
To read the disks and retrieve any information from there, use the tried and well-tested data recovery tool for NAS solutions – Hetman RAID Recovery. It supports most popular file systems, technologies and RAID types, and in most cases it will be able to rebuild the damaged RAID automatically.
Before you start, make sure you have enough data and power cables to connect all your hard disks. It’s better to use a bunch of SATA cables to connect the disks directly to the motherboard of your computer, but if you have only a few free SATA ports, you can use USB-to-SATA adapters when necessary. Also, you will need an additional storage device to copy the retrieved data to; it can be an external hard drive, another network-attached storage, or some other device with sufficient capacity.
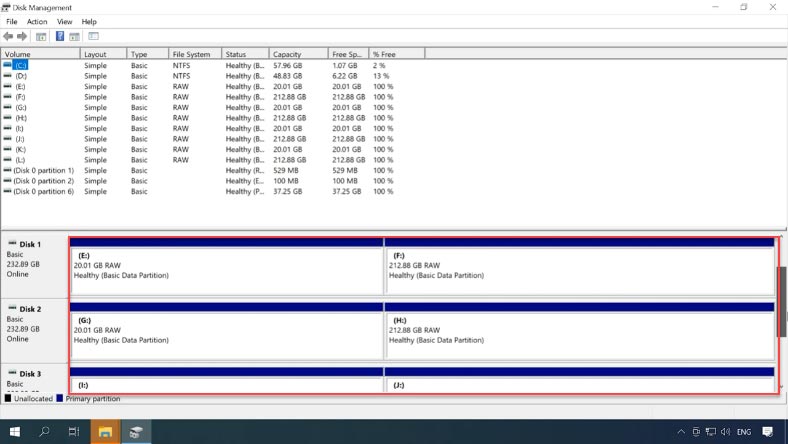
Take the disks out of the NAS device and connect them to a Windows computer. When the operating system has booted, open Disk Management and check if the added disks are recognized. Windows may suggest to initialize or format the drives to be able to access them. Remember to never agree to either operation, because it can erase the remaining information completely.
Download, install and start the data recovery tool. Hetman RAID Recovery will identify the disks automatically, read their service information and rebuild the damaged RAID system.
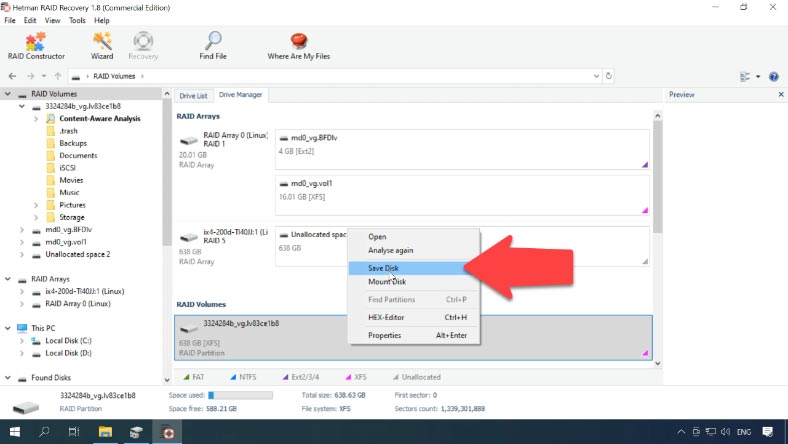
As this device is based on Linux LVM technology, the disk array is displayed in the separate field with the title “RAID Volumes”.
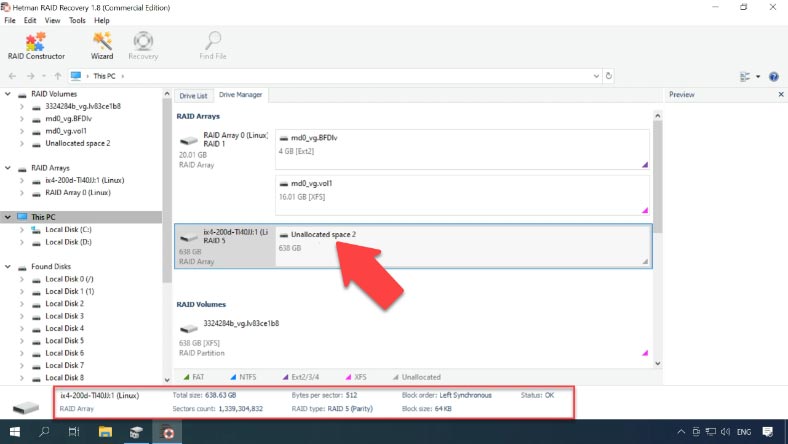
This volume is based on XFS file system. To access the volume contents, you need to scan it first. Right-click on it and choose “Open”.
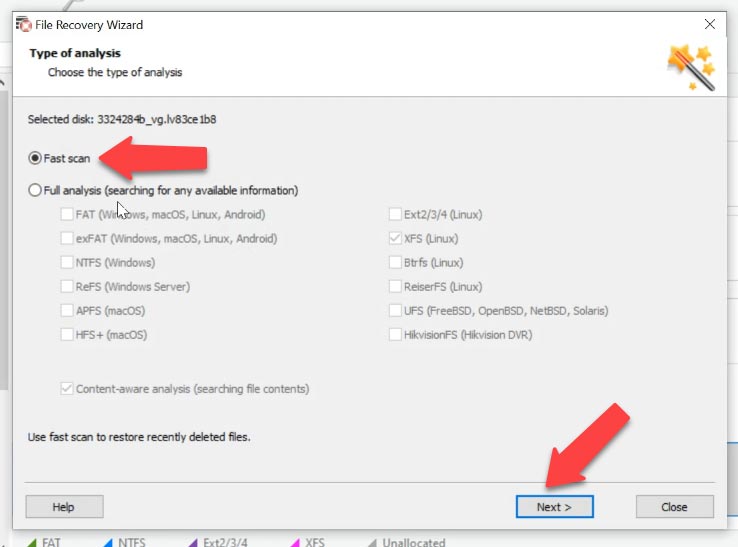
Choose the scan type to run, and click “Next” to start searching for lost files. Wait for the process to be over, and then switch to search results by clicking “Finish”.
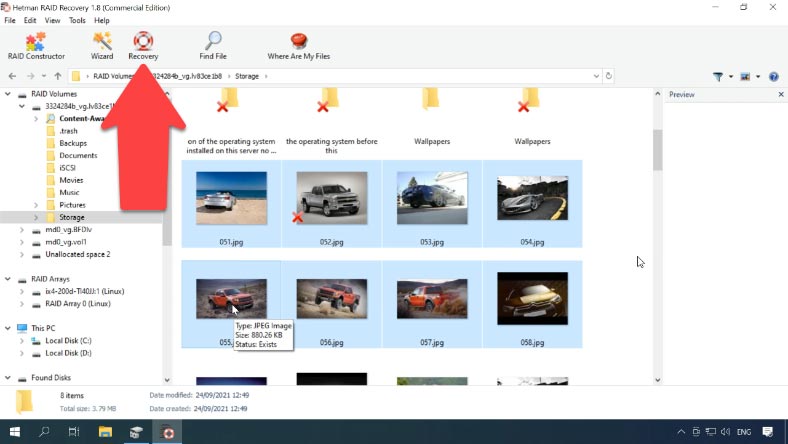
The program has found all the files that have been written to the disk. Select the files you want to recover and click “Recovery”, choose the disk where to save them and specify the directory, then click “Recovery” and “Finish”. After that, follow the path you have chosen and check if the recovered files are there.
Hetman RAID Recovery offers extra features to improve effectiveness of working with RAID disks that have hardware issues. It lets you create disk images and then analyze these images instead of the actual hard disks in order to reduce disk usage and prevent them from breaking down at the most inappropriate moment.
