Best Ways to Retrieve Data from a RAID System on Seagate NAS – BlackArmor 440-420!
Encountering data loss issues with your Seagate NAS – BlackArmor 440-420 RAID system and seeking solutions? In this video, we’ll provide you with essential tips, step-by-step methods, and best practices for recovering data from a RAID system on Seagate NAS – BlackArmor 440-420. Read now to learn how to retrieve your valuable data effectively!
- How to create a RAID 5
- How to enable FTP network protocol
- How to create a shared folder
- Configure iSCSI connections
- Data Recovery from Seagate NAS BlackArmor 440-420
- Questions and answers
- Comments
Although NAS devices are a reliable type of storage, even they can get out or order sooner or later. If you can’t access the data stored inside your NAS, you can try and extract the files with the help of specialized data recovery software. Usually, recovering data from NAS means you take the hard disks out of the storage device, connect them to another computer and then look for files with some data recovery tools. If files were deleted accidentally, you may find them in the Recycle Bin of the shared folder.

How to Recover Data from a RAID System on Seagate NAS - BlackArmor 440-420
How to create a RAID 5
For starters, let’s explore how to build a RAID system on this specific NAS device. To create or modify the RAID type, open the “Storage” tab; if there are any foreign disks, initialize them.
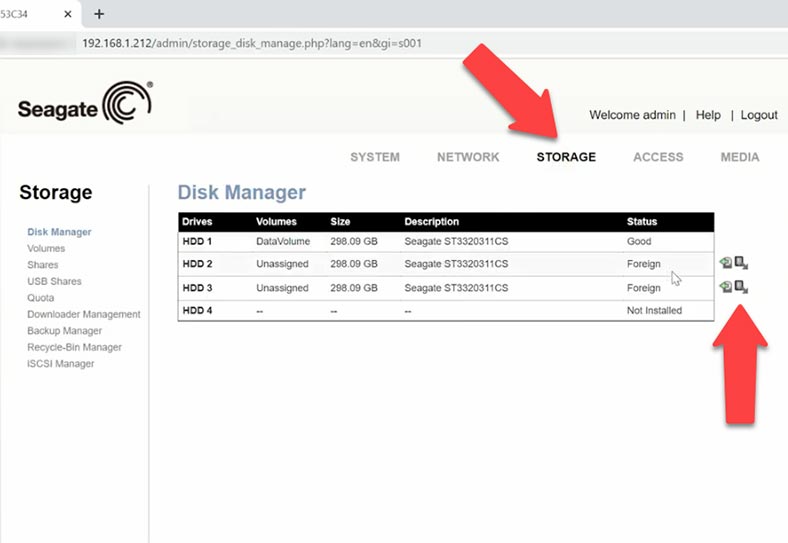
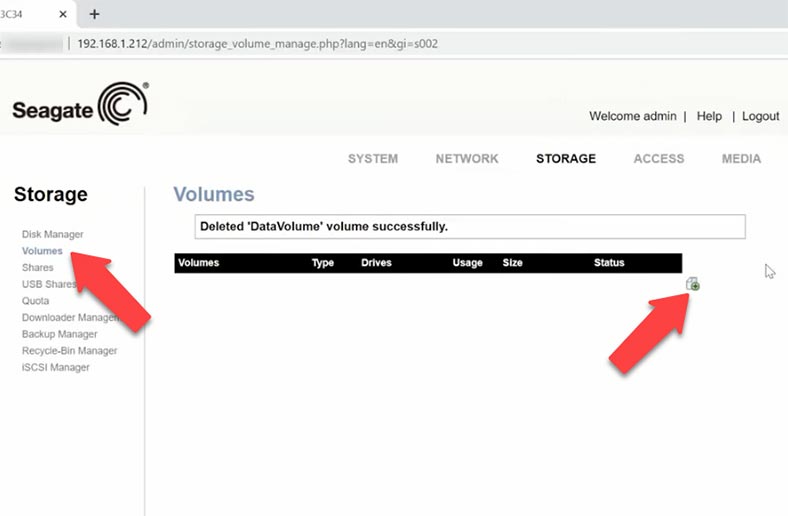
Now jump to the Volumes tab. After that, click the Add button with a plus icon.
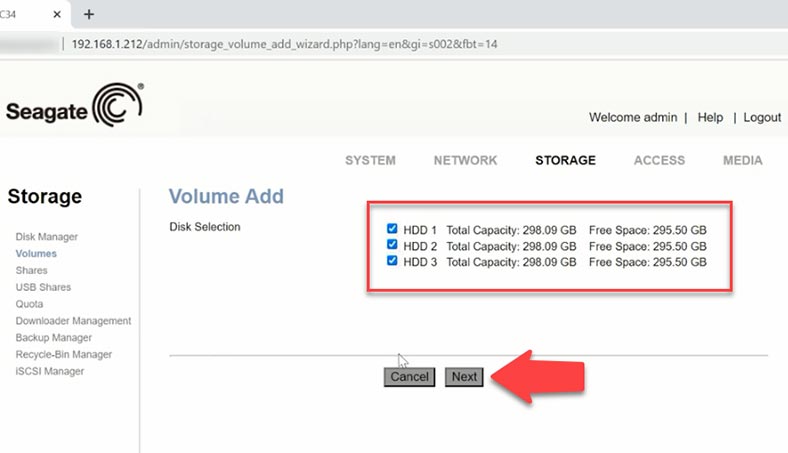
Select the disks you want to have in your disk array and click Next; choose the RAID type, click Next.
Give the name and set the size, then click Next and Finish to complete the process.
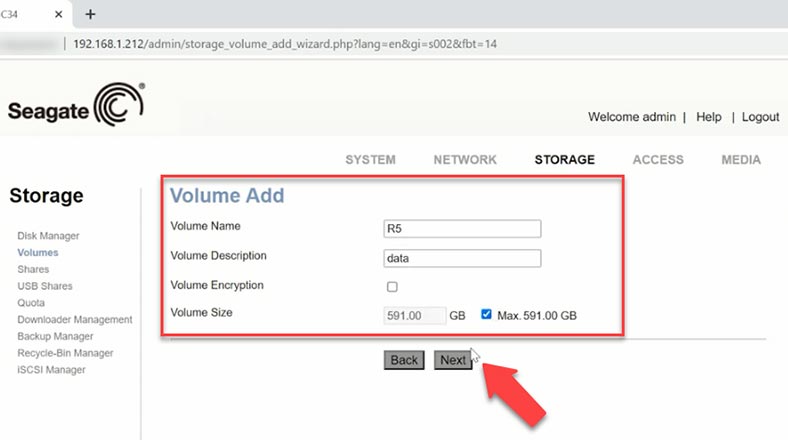
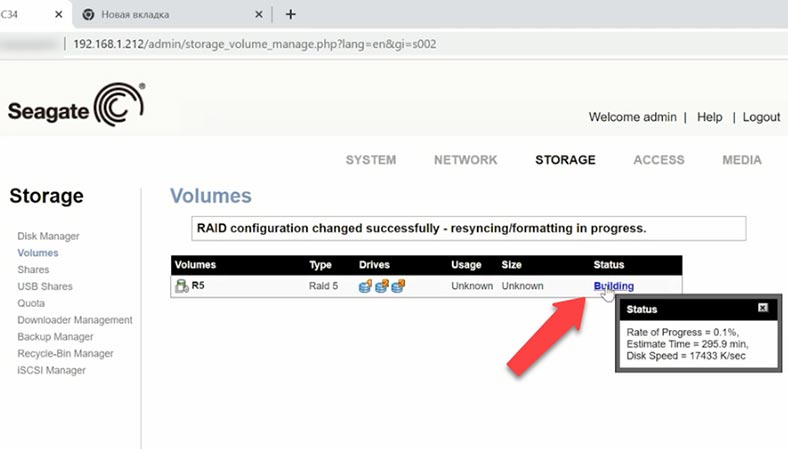
Disk formatting and resyncing begins, and it’s quite a long process; if you want to get an estimated time required to complete it and check the progress, click on its status.
How to enable FTP network protocol
To create a shared folder, you need to wait until the array building process is complete. Meanwhile, let’s enable FTP network protocol to access the network drive.
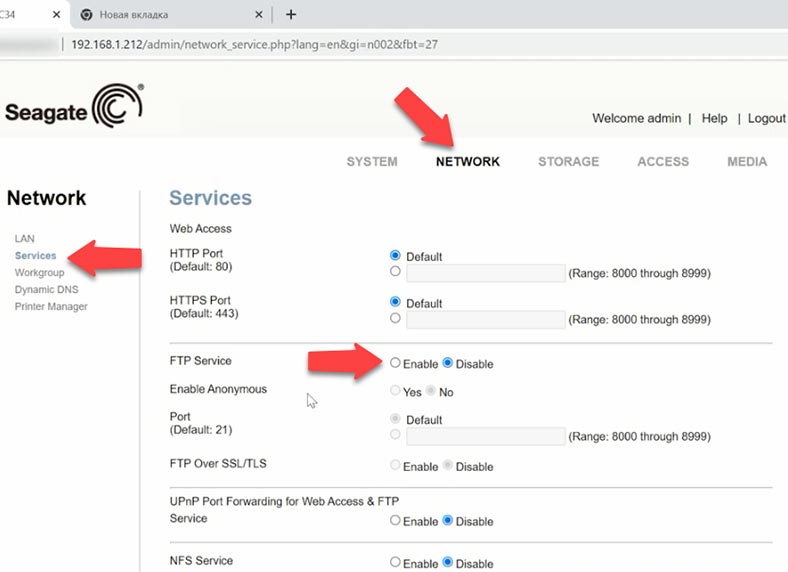
To do it, open the Network tab – Services. To enable FTP, select the corresponding option and click Submit.
How to create a shared folder
Now go back to the Storage tab – click Shares. Click on the plus button here to add elements, give the name of a shared folder and its description, choose required network protocols, enable Recycle Bin for this shared folder, and click Submit in the end.
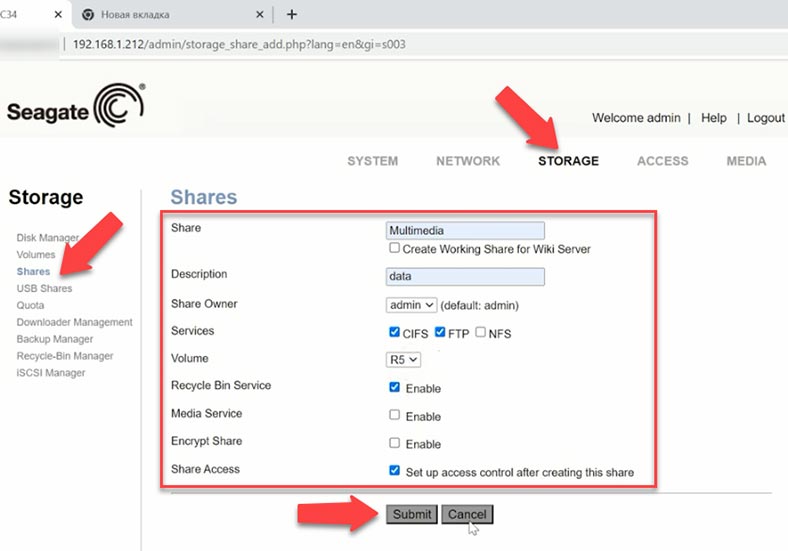
The next stage is turning public access on to this folder – to enable it, check the corresponding box and click Submit.
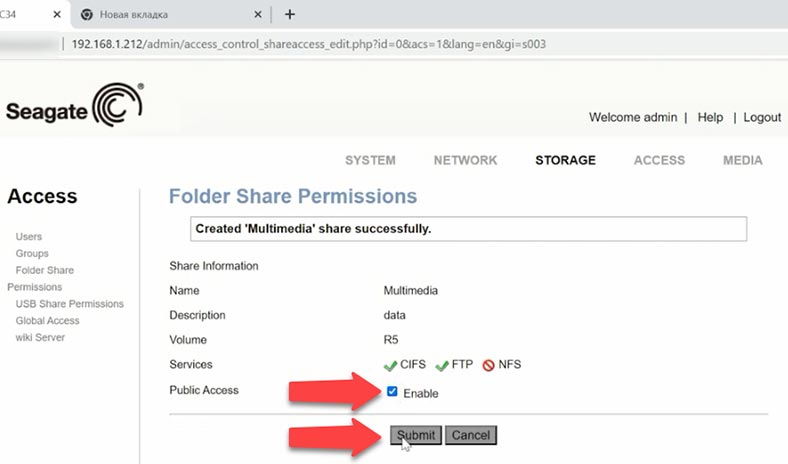
Now access control for this folder has been updated.
Configure iSCSI connections
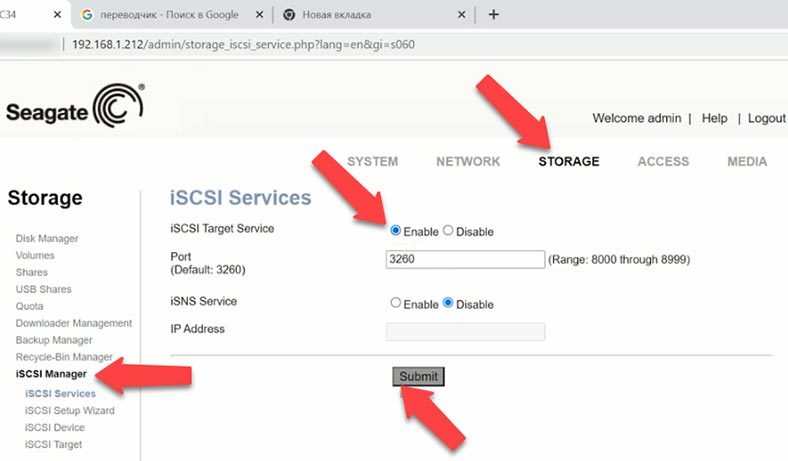
To configure an iSCSI connection, open the Storage tab, and enable the connection by checking the corresponding option – Enable, then click Submit.
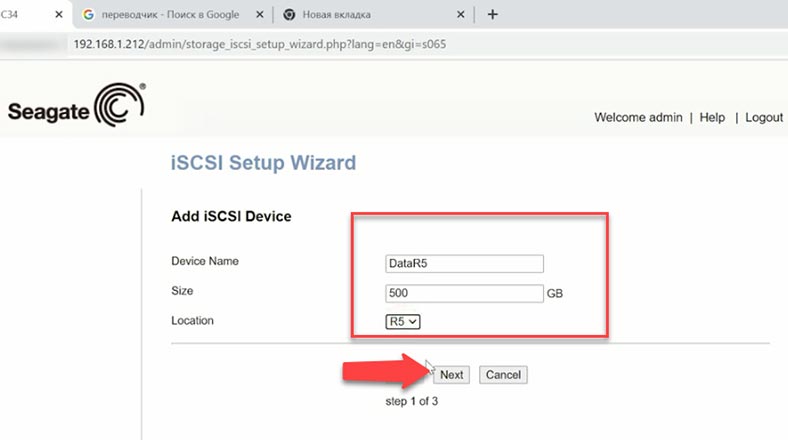
Give the device name, its size, and select the volume to use. Set IQN and submit it.
Now iSCSI target is enabled. After that, connect to the device by FTP or iSCSI and write your data.
Data Recovery from Seagate NAS BlackArmor 440-420
Method 1. How to recover deleted files from the Recycle Bin
If your NAS works all right and the network drive can be accessed, but you accidentally deleted some data from the disk, you can try and recover it from the Recycle Bin. Start by opening the Storage Tab – Recycle Bin Manager. Browse to the folder from where the files were deleted, and recover the ones you need.
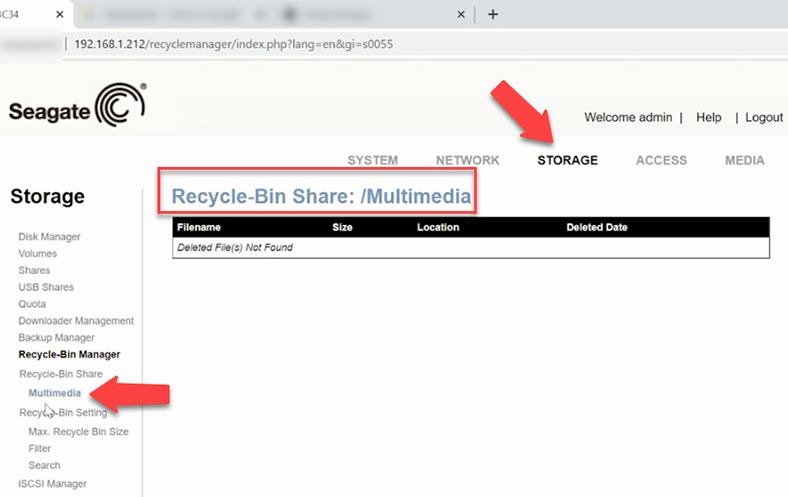
If the Recycle Bin is disabled for this directory, you’ll have to use a data recovery tool.
How to enable the Recycle Bin feature for a shared folder
Open the Storage tab, jump to Shares, click on the Modify icon next to the shared folder, and enable the Recycle Bin service. Now all deleted files will be placed in the Recycle Bin, and you’ll be able to recover them if they get removed accidentally.
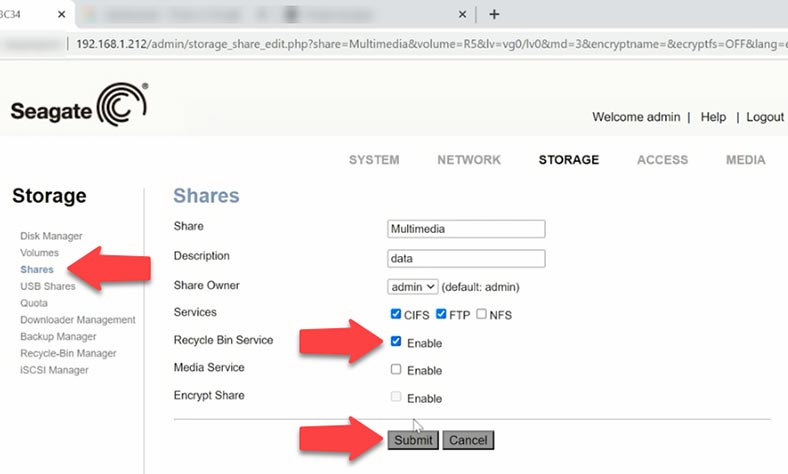
As the Recycle Bin was disabled in my case, it is impossible to recover data this way. For such scenarios, all you need is a reliable data recovery tool.
Method 2. How to recover data from a NAS RAID array
If data is removed by accident, a hard disk is formatted, the disk array is misconfigured, or in other scenarios involving loss of data, loss of access to the network drive, or damage to a RAID system, Hetman RAID Recovery is always there to help you restore important information.
Most NAS devices are running on Linux-based operating systems. All those various proprietary RAID management systems are based on two Linux RAID technologies, mdadm and LVM2. These systems provide more convenient interfaces to manage hard disks, while the main technology remains as close to Linux as possible. Hetman RAID Recovery supports both of them, and in most cases it can rebuild such RAID arrays automatically.
This is a comprehensive solution for NAS data recovery to help you restore your files in a number of different scenarios. This program supports most popular file systems including those used in NAS devices.
| Feature | Description |
|---|---|
| RAID Array Support | The program supports various RAID array types, including RAID 0, RAID 1, RAID 5, RAID 10, and custom configurations. |
| Automatic Parameter Detection | Automatically detects array parameters such as block size, disk order, and other key characteristics. |
| Data Recovery | Ability to recover data from damaged or deleted RAID arrays, as well as recovery after configuration errors or failures. |
| File Preview | Allows previewing files before recovery to evaluate quality and verify data. |
| File System Support | Supports file systems like FAT, NTFS, ReFS, HFS+, Ext2/3/4, XFS, and others. |
| User-Friendly Interface | Easy-to-use interface with a step-by-step wizard for data recovery. |
Take the disks out of the NAS device and connect them to a Windows computer. Don’t forget to power your NAS off when reconnecting or disconnecting hard disks. When you take the disks out of the storage device, mark them to remember which disk slot each of them should go to. These markings will help you during the recovery process, and you’ll be able to put your storage system together properly, when everything is ready. If the operating system of the computer to which you have connected the disks asks you to initialize or format them, don’t do that because it will make recovery a lot more complicated.
Our utility features an advanced mechanism of automatic scanning designed to identify and recover NAS data in various scenarios of data loss. It will analyze the disks, read their service information and rebuild the damaged RAID system. The RAID information is displayed below: check if the program has read it correctly.
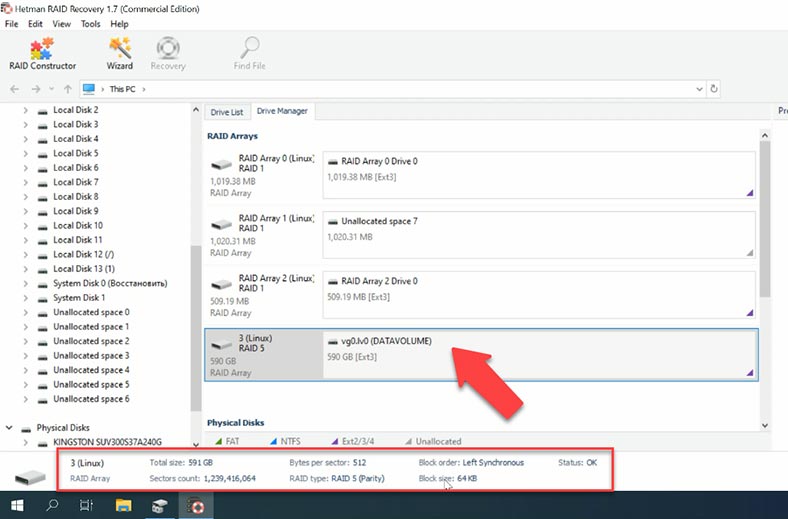
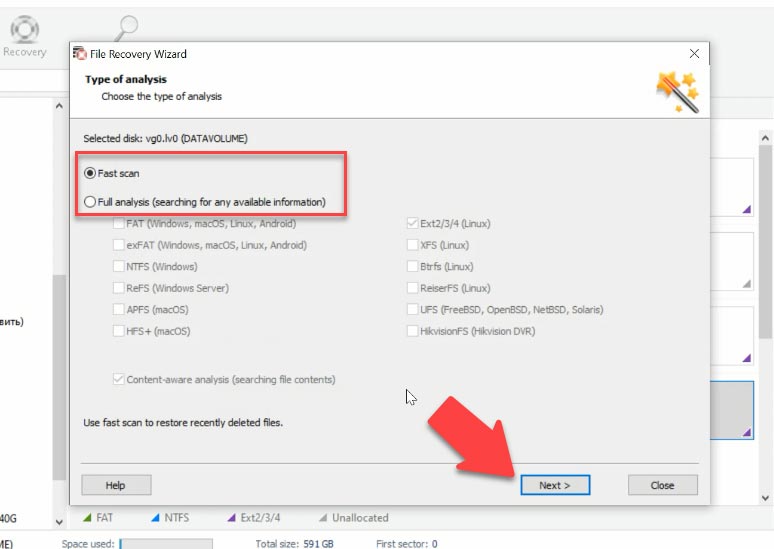
Right-click on the drive and choose Open. Select the scan type and start it. After the scan is over, disk contents will be displayed in the right part of the window.
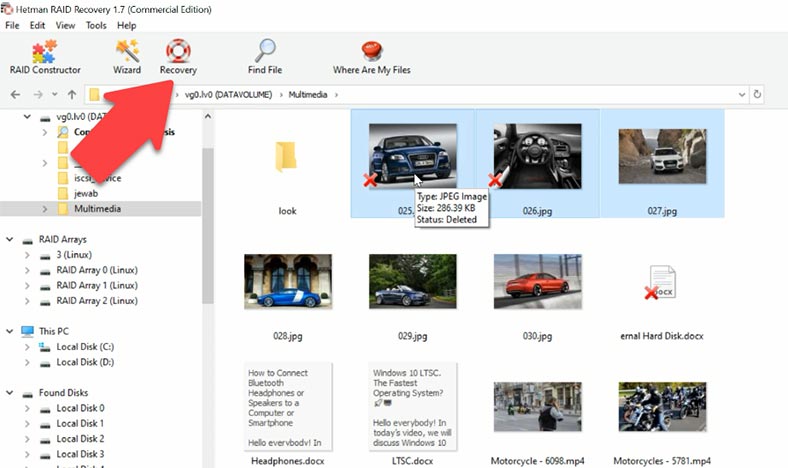
The program has found all the files that have been written to the array. If you are looking for files that have been removed, you can identify them by red crosses. Select all the items you want to recover, click Recovery, and select where you want to save them. When the recovery process is over, you’ll find all of the files in the folder you have chosen.
When scanning a RAID which had an operating system, the program shows you several disk arrays: a mirror RAID containing the operating system, and a RAID 5 containing the data. If you want to recover information from the system folder, scan the mirror RAID which stores system files.
Method 3. How to recover data from an iSCSI disk
To recover files accidentally removed from an iSCSI disk, run our data recovery tool. Hetman RAID Recovery identifies this disk as a physical one, and it means you can easily scan it and recover the lost data.
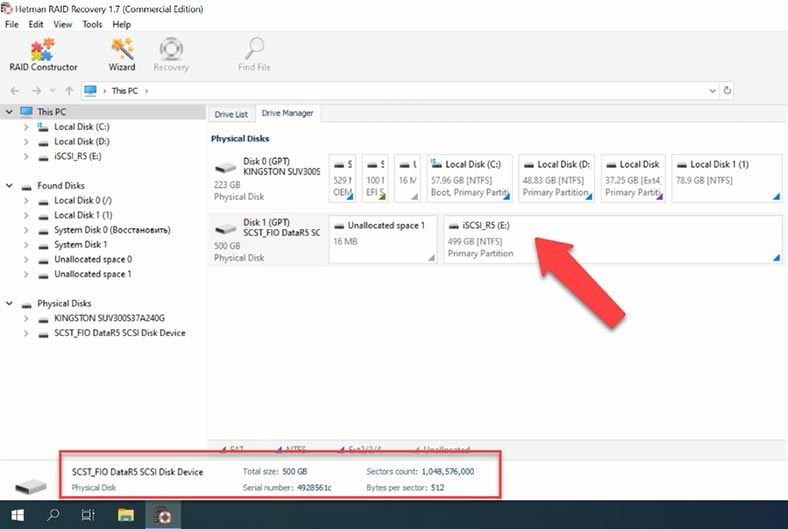
Right-click on the drive – Open, select the scan type and wait until it’s over. The utility has found all the files: both those that have been on the disk, and the ones that have been deleted. Now select the ones you want to restore, and click Recovery.
Method 4. How to recover data manually, with the RAID Constructor
If the required information is available on the disk, Hetman RAID Recovery will collect damaged RAID arrays automatically. However, when a disk is damaged or service information is erased, the program may have difficulties with rebuilding the RAID automatically; then, you can do it manually with the RAID Constructor if you know the properties of this damaged array.
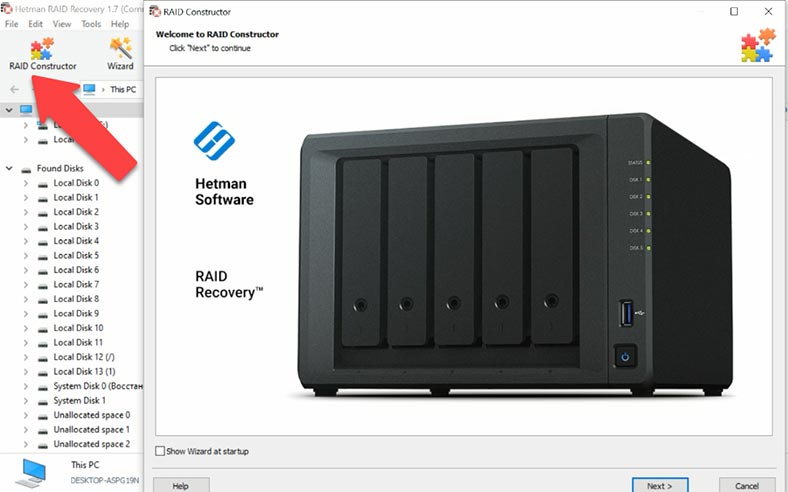
Open the Constructor, select “Manual mode”, and fill in all the information you know about this disk array: the RAID type, block order and size.
Add the disks it used to include, use the arrows to specify their order, and replace the missing disks with empty drives by clicking the plus button.
Usually, if you give correct properties, the newly built RAID system has at least one partition. Expand it to check for the folders that you need. If the folders you are looking for are displayed, then you have built this RAID properly.
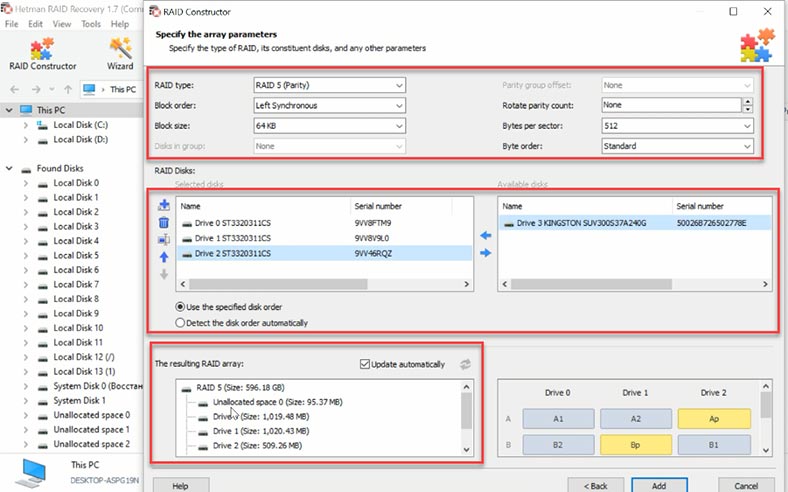
When you specify all the properties you know, click Add, and the array will appear in the Drive Manager.
To have the data recovered, the last step is to scan the array, find the files you want to restore, select them, and recover to the folder you choose.


Symptoms of a failed RAID array include:
These symptoms can be identified by monitoring the system for any unexpected behavior, such as system crashes or error messages, or by checking the RAID controller’s configuration utility for any disks that are marked as “offline” or “missing”.