Problem Solved: Successfully Recovering Data from NETGEAR ReadyNAS
Need to recover data from a NETGEAR ReadyNAS? Our comprehensive guide has got you covered! Learn step-by-step instructions and expert tips for successfully salvaging your data from the ReadyNAS system. Say goodbye to data loss worries and hello to recovered files!
- What is X-RAID
- How to enable FTP network protocol for ReadyNAS
- How to add a shared folder
- How to recover data from X-RAID NETGEAR
- Questions and answers
- Comments
In this NetGear device known as ReadyNAS, the disks which are connected to it and used to store data are automatically combined into an X-RAID disk array. This technology can automatically take all the disk capacity which is not currently in use and make it redundant regardless of the size and type of disks combined this way.
All server functionality is managed by a Linux-based operating system, known as NAS OS for NETGEAR.
All NETGEAR devices can be classified into two groups:
- The first group comprises devices produced before 2013 and managed by NAS OS version 5 or lower. In these devices, the data storage scheme is organized like this: disks are divided into partitions which are then combined into a RAID system with the md technology, and then md arrays are combined into a unified LVM volume. As to the file system, such configurations tend to use EXT.
- The second group includes devices using NAS OS 6 and produced in 2013 or later. Modern NETGEAR storage systems treat data in a different way. Their hard disks are still combined into a RAID system with the md technology, but the next level is BTRFS file system instead of LVM.

🔬 How to Recover Data from X-RAID NETGEAR ReadyNAS 🔬
Just as any other storage device, such systems may suffer from breakdowns, hardware and software failures. That is why when choosing a data recovery tool to restore data from disk arrays based on ReadyNAS, you should know if that tool supports the file system used with the specific network drive, depending on the type of the storage device.
Any changes you make to the RAID level of your ReadyNAS volume will erase all data. This is why, before changing the RAID level or modifying other settings – which may potentially erase the disks – it is crucial to have a backup copy of important information and keep it on another hard disk to prevent data loss. If some information was accidentally deleted, hard disks were formatted, or the storage device was damaged, you’ll need a specialized software product to recover your data.
What is X-RAID
For starters, let’s explore this X-RAID technology to get a basic understanding of how it works before we choose a recovery tool and start using it.
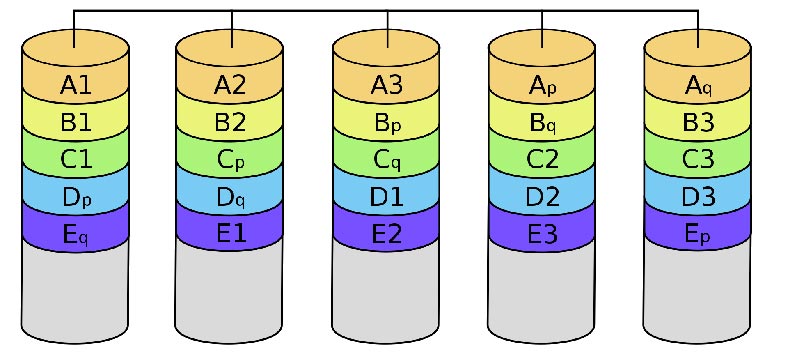
X-RAID is an auto-expandable RAID technology that is available only on ReadyNAS systems. With X-RAID, you do not need to know intricate details about RAID to administer your system. X-RAID allows you to add storage space without reformatting your drives or moving your data to another location. As the expansion happens online, you can continue to use your ReadyNAS system while the volume capacity increases.
| Characteristic | Description |
|---|---|
| RAID Type | X-RAID is a proprietary technology by Netgear for automatic RAID array management. |
| Hot Swap Disk Support | Supported. You can add new disks or replace faulty ones without stopping the system. |
| Automatic Volume Expansion | The array’s volume expands automatically when adding new disks or replacing them with larger ones. |
| Data Protection | The array ensures data protection through mirroring or parity, depending on the configuration. |
| Ease of Setup | The system automatically manages data placement and RAID configuration, simplifying user management. |
| Minimum Number of Disks | 2 disks for the initial X-RAID configuration. |
| Compatibility | Primarily used in Netgear ReadyNAS devices. |
X-RAID being a single-volume architecture, if you configure your hard disk drives to use X-RAID, your storage system will have only one volume that is made up of all installed hard disk drives. Such single-volume architecture has two major advantages: easy system management and auto-expansion.
If you replace existing disks of larger capacity, X-RAID will expand automatically.
With X-RAID, you can configure the system with one hard disk, add a second disk for data protection, and add more disks later for additional storage capacity.
Keep in mind, though, that X-RAID requires a minimum of two hard disks to provide protection against disk failure.
This RAID type uses the capacity of one disk for data storage and reserves the capacity of a second disk for data protection, which allows the volume to recreate data if a disk fails. In general, the total capacity of your storage system equals the capacity of all your disks minus the capacity of one disk.
The first disk that you install is used for initial (unprotected) storage space.
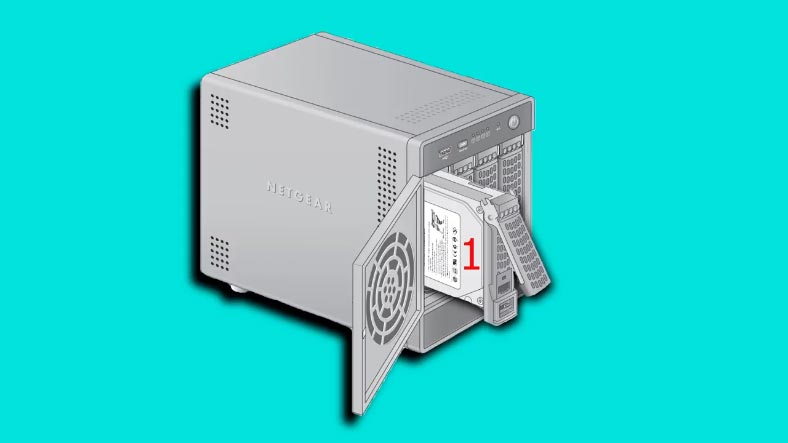
The second disk that you install is reserved for data protection (parity information).
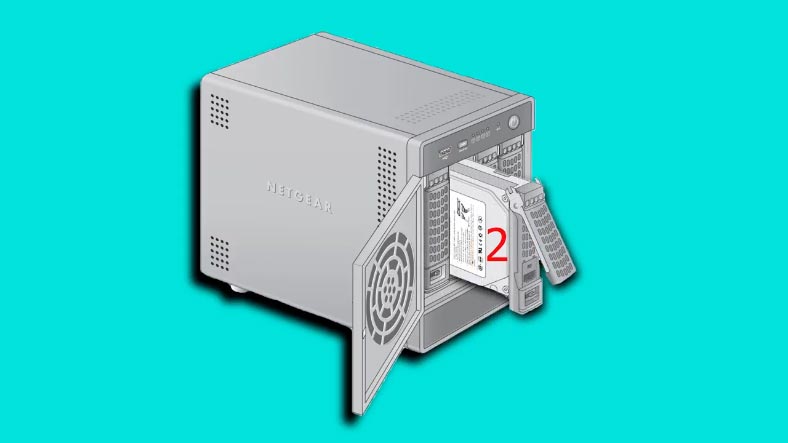
Installing additional disks increases your storage space.
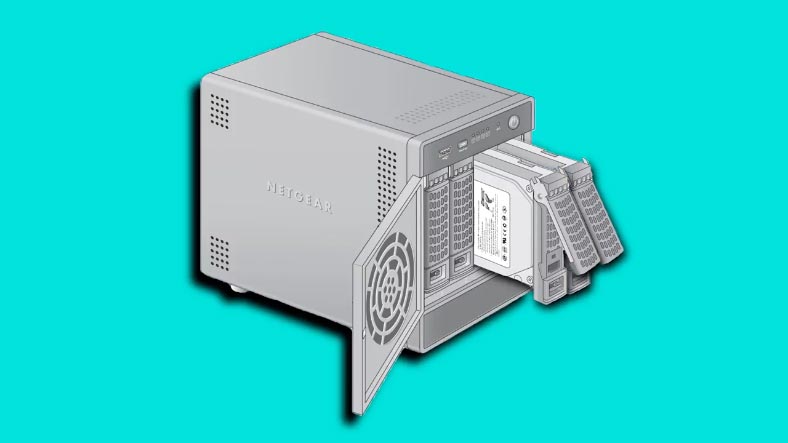
Although you can reuse the physical disk from another system to add capacity, any existing data on the disk must be removed before the disk can be added to the X-RAID volume. If there is any important data on that disk, remember to copy it to another storage device before proceeding.
How to enable FTP network protocol for ReadyNAS
Now that we know what X-RAID is and the disk array has been built automatically, we can go on to find out how to configure network access to the drive. Start by opening the Services tab – Standard file protocols.
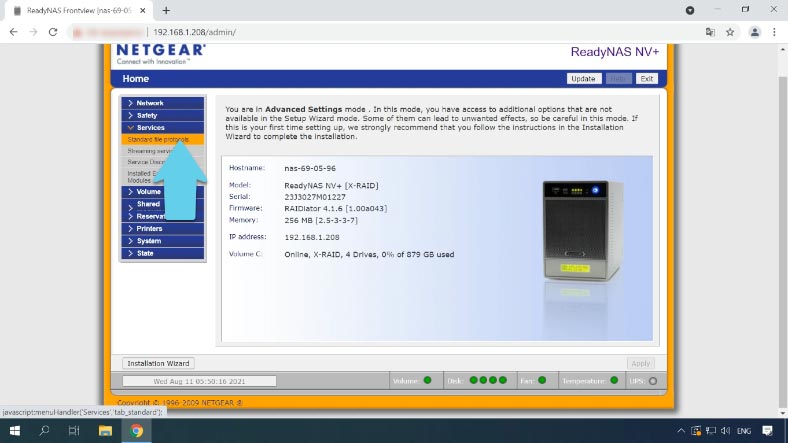
To enable FTP protocol, check the box next to the option and click to apply it.
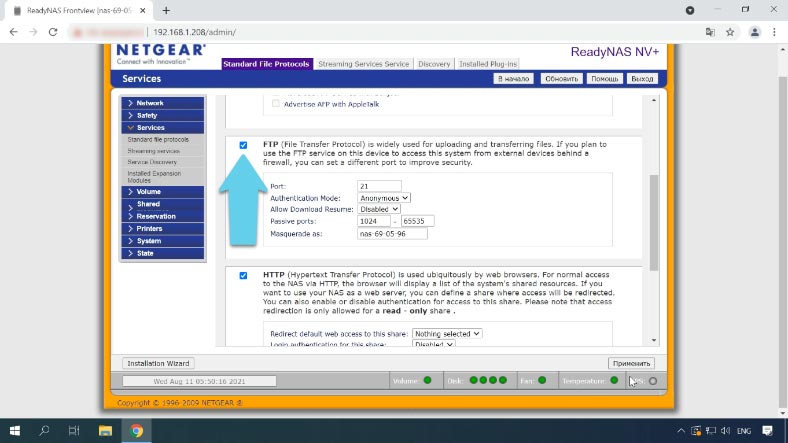
Now that FTP is active, we can connect to the server, add a shared folder and configure network access to it.
How to add a shared folder
To add a new shared folder, choose the “Shared” tab – click “Add shared resources”.
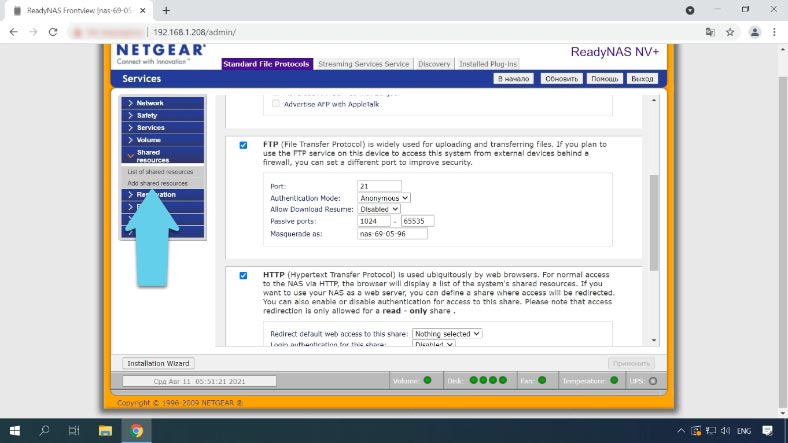
Give the folder name, add description and password if necessary, then click to apply the changes. Now that this new shared folder is ready, let’s configure network access to this directory.
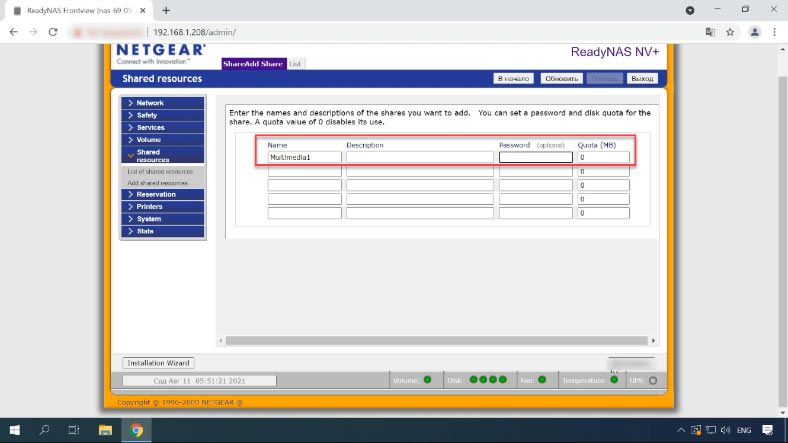
The directory is added with default access. To configure access to a shared resource, go to the page “List of shared resources”. Next to the new folder, click on the network protocol that needs to enabled.
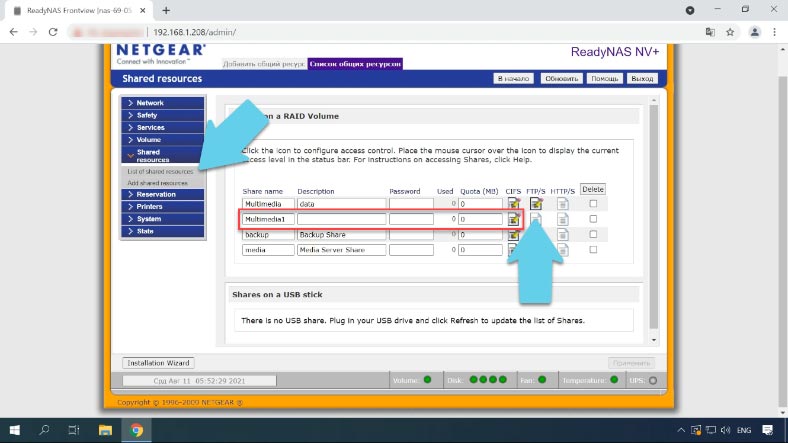
After that, modify the default access type – Read Only, or Read / Write – and click Apply.
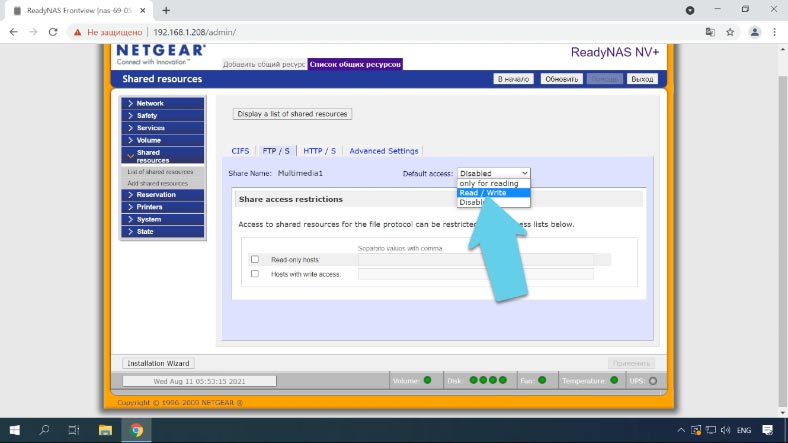
Network access is active, so now you can connect to the server by FTP and write some information to the disk.
Unfortunately, this NAS device doesn’t have a recycle bin feature for shared folders, so if something gets removed accidentally, there is no easy way to restore it. To bring back any accidentally deleted information, use Hetman RAID Recovery
How to recover data from X-RAID NETGEAR
Hardware and software failures, wrong configuration, accidental removal or formatting may cause a major data loss from the disk storage inside your NAS device. In any of these situations, you’ll need a reliable tool to get your information back.
Not all recovery software products support this RAID type, so you have to keep this aspect in mind when choosing which tool to use. Also, most programs supporting X-RAID are designed in such a way that they don’t find much data if one of the disks in the array was damaged.
| Name | X-RAID Support | Features |
|---|---|---|
| Hetman RAID Recovery | Yes | Intuitive interface, support for various RAID levels, deep scanning. |
| R-Studio | Yes | Powerful tool supporting many file systems, recovery from network drives. |
| DiskInternals RAID Recovery | Yes | Data recovery from various RAID levels, ability to create RAID array for recovery. |
| UFS Explorer RAID Recovery | Yes | Flexible RAID configuration, support for various file systems, preview capability. |
| Raise Data Recovery | Yes | Easy to use, effective data recovery from RAID arrays, support for various file systems. |
Hetman RAID Recovery is a comprehensive solution for NAS data recovery designed to help you restore your files in a number of different scenarios:
- hardware and software failures;
- errors in configuration and settings;
- accidentally removed files;
- disk formatting;
This program supports most popular file systems including those used in NAS devices, and all popular RAID types including X-RAID.
The scan is performed in such a way that the program can later build an X-RAID system even if one disk is missing and it still lets you recover all the data you need.
Bear in mind that before starting data recovery operations, you should prepare some free disk space with the capacity equal to the amount of data you’re planning to recover from your disk array.
Take the disks out of the NAS device and connect them to a Windows computer. Make sure that all disks are recognized by the Windows-integrated Disk Management utility. To launch it, right-click on the Start menu and select Disk Management.
If you are suggested to initialize the disks, don’t agree – this can erase the remaining data.
If you are trying to recover data from a disk array, and the motherboard of the computer where you want to connect the disks to doesn’t have enough SATA ports for all those hard disks, you can connect all but one disk. X-RAID type remains operable even if one of the disks is missing; as we remember, one of the disks is used to store parity information for others.
Install and run Hetman RAID Recovery.
As we mentioned above, here is how information is distributed across the disks.
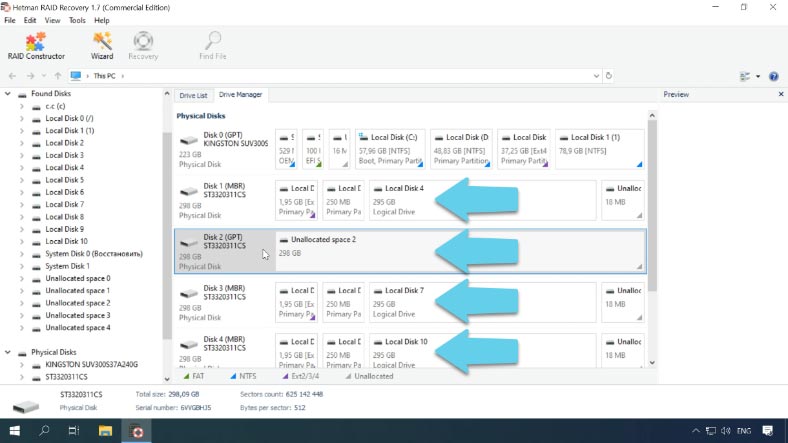
The first disk contains the operating system and data, the second one is a parity disk, and all other disks will expand the storage space for the first disk. At the beginning of the disk, you have service data, then the data partition, and these partitions are combined into a spanned JBOD volume which is displayed in this program as a local hard disk.
Each disk begins with dedicated space for service data, followed by data partitions, and some reserved free space. Here is the second disk containing parity data, and two additional hard disks. And below, there is our network drive, a spanned volume consisting of four disks.
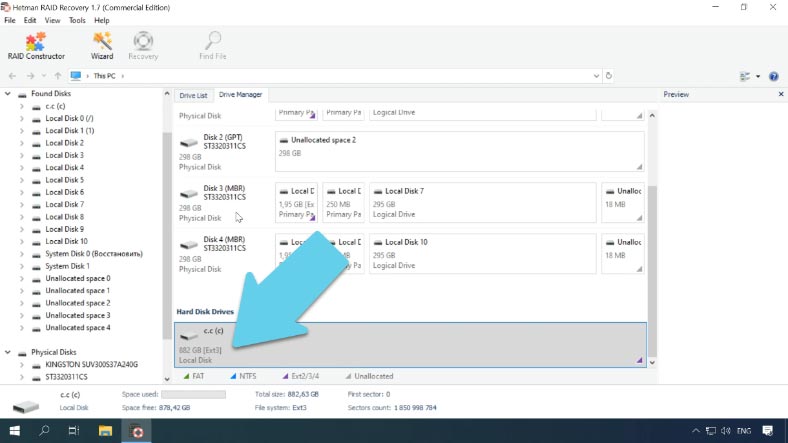
If the program manages to identify it correctly, you will see its capacity and file system type displayed here.
To illustrate how the program works, I deliberately excluded the first disk, as this RAID type is based on JBOD, so all information is primarily written to the first disk until it’s full, and only then to other disks you have in this array.
In the case of a missing disk, the program is supposed to read the parity disk, and then build and display the restored disk array.
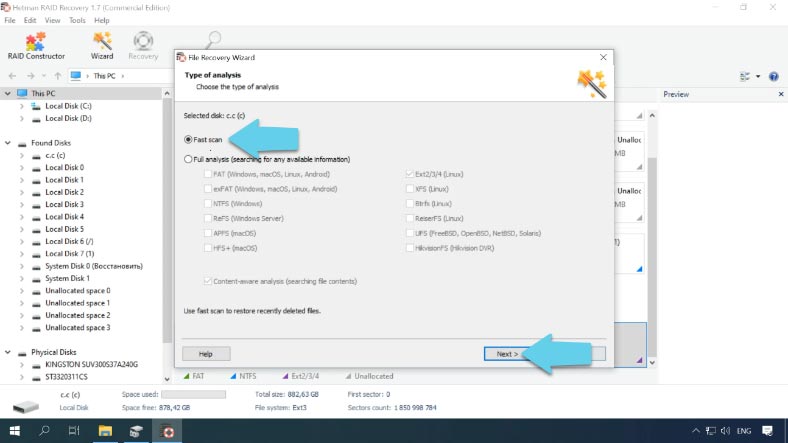
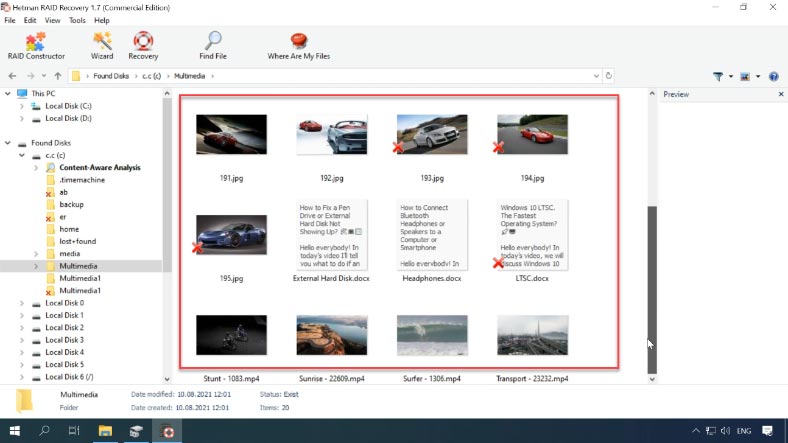
To search for information, right-click on the disk – “Open”. Select the scan type and start the analysis. The program will analyze the disks and display their contents when the operation is complete. In the case with X-RAID11 the data is intact even though one disk is missing. If you are looking for files that have been removed, you can identify them by red crosses.
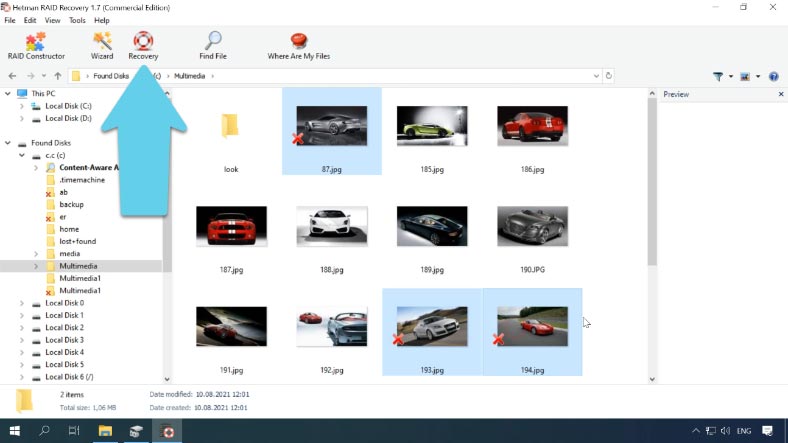
Select the files you want to recover, click Recovery, select where you want to save them, and click Recovery again. When the recovery process is over, you’ll find all of the files in the folder you have chosen.
It is important to remember, however, that if such disk array suffers damage to two disks, most files will either be damaged or unavailable for preview and recovery.


Good afternoon!
This program supports . You can scan your files with the free version of Hetman Raid Recovery. It will show you the files that it can find for recovery. The preview window will show you whether your files are damaged or not.
If all is well, you can register and restore your files
It is advisable to keep the most critical data on raid 1 or raid 10 or on raid 5 with an obligatory policy of creating backups to external disks that are not part of the array.
Strips should be used for allocated disk space in swap files on graphic stations, it is known that Photoshop likes to pump swaps back and forth and when working with large images it can seriously affect system performance.