Recover Microsoft Hyper-V VM Data: Easy Steps
Learn how to recover data of a Microsoft Hyper-V virtual machine with ease in this comprehensive guide. Discover step-by-step instructions and essential tips to seamlessly recover your valuable virtual machine data. Dive deep into data recovery techniques for Microsoft Hyper-V virtual machines and explore insider strategies to maximize your chances of successful data restoration.
There are many third-party virtualization programs, but the most popular with the users are VMware Workstation and Oracle VirtualBox. To enable virtualization of its own operating systems, Microsoft also developed a similar tool, Windows Virtual PC. However, Windows 10 features a new generation of virtualization software, Hyper-V Manager.
- Hyper-V
- System Files Of Hyper-V Virtual Machine
- How To Recover a Deleted Hyper-V Virtual Machine
- How to Recover The Hard Disk Contents Of a Hyper-V Virtual Machine
- How To Recover The Disk File Of a Hyper-V Virtual Machine From The Virtual Machine Itself
- Questions and answers
- Comments

How to Create a Microsoft Hyper V Virtual Machine and Recover Data from a VHDX Disk 💻📦⚕️
Hyper-V
Hyper-V Manager is a convenient tool, but the one disadvantage is that it can create virtual machines only with Windows operating systems.
Virtual machine support with Hyper-V is available in Windows 10 Pro and Enterprise. By default, it is disabled, and in order to use it you have to enable this tool and turn it on.
To do it:
-
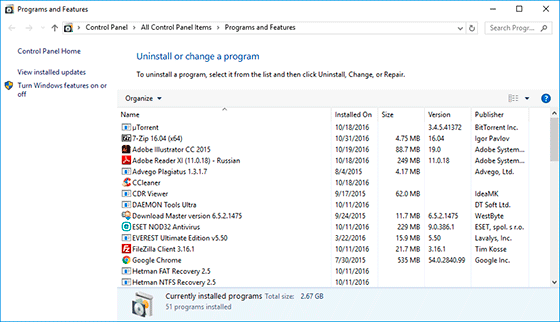
Go to Control Panel / Programs and Features / Turn Windows features on or off
-
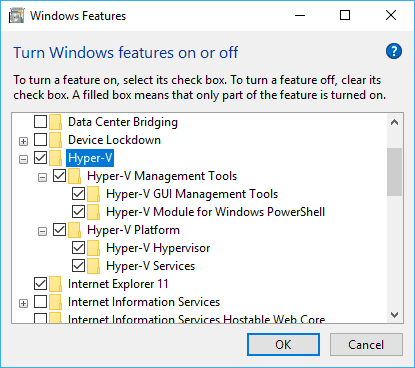
In the opening Windows Features window, find Hyper-V, check all of its boxes and click OK
-
Restart the computer
-
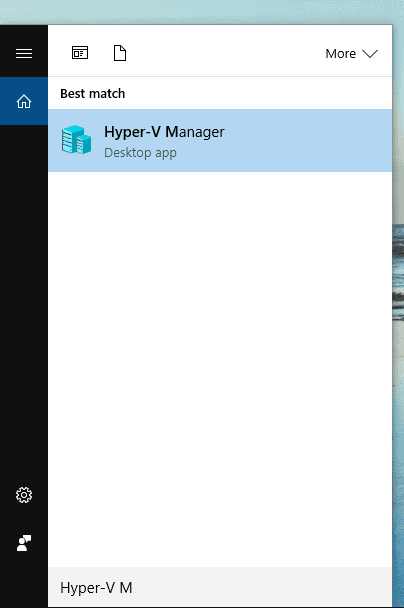
To start Hyper-V, enter «Hyper-V» in Windows search field and choose «Hyper-V Manager»
System Files Of Hyper-V Virtual Machine
Unlike other virtual machine managers, by default Hyper-V never saves all virtual machine files (system files and virtual disk file) into one folder. They are stored in various locations:
-
Hyper-V virtual disk file is saved to the folder:
C:\Users\Public\Documents\Hyper-V\Virtual hard disks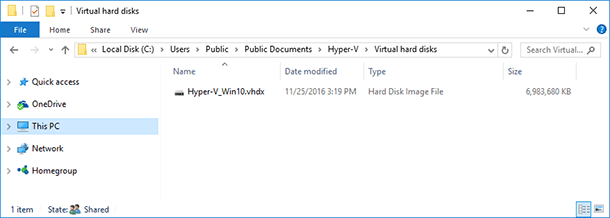
-
Other virtual machine files including configuration files and snapshots, are saved to this folder:
C:\ProgramData\Microsoft\Windows\Hyper-V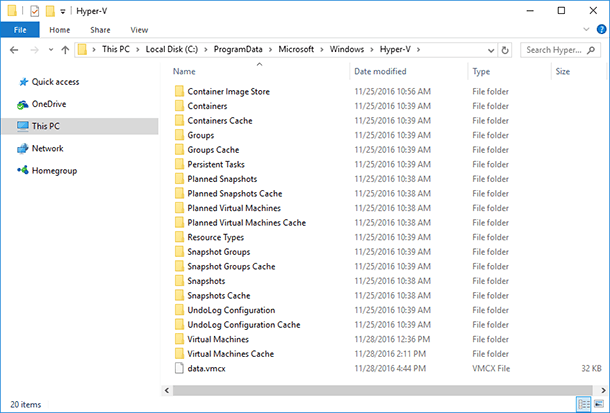
These folders are set by default, but their location can be modified if necessary.
It should be noted, that the main files in charge of virtual machine configuration and data (that is, of the machine’s operability) are the following:
- *.vhdx – the virtual machine disk file. It has the name given to the virtual machine when it was created. Its default location is:
C:\Users\Public\Documents\Hyper-V\Virtual hard disks - *.vmcx – the file containing virtual machine configuration settings. Its default location is:
C:\ProgramData\Microsoft\Windows\Hyper-V\Virtual Machines
If these files are recovered, then you can also recover a virtual machine to a normal condition, including all files from its disk.

How to Create an Oracle VirtualBox Virtual Machine and Recover Data from a VDI Disk 💻📦⚕️

How to Create a VMWare Virtual Machine: Recover Data from a VMDK Disk 💻📦⚕️
How To Recover a Deleted Hyper-V Virtual Machine
Method 1. The Export/Import Function of a Virtual Machine
For cases, when Hyper-V virtual machine is used to work with important data or it is valuable to the user for other reasons, Microsoft provided the opportunity to create a virtual machine backup. For this purpose, there are virtual machine export and import functions that use Hyper-V Manager.
To Export a Virtual Machine:
-
Right-click on a virtual machine and select Export in the menu, and then specify the path to export data

-
A folder with an exported virtual machine copy will look like this.
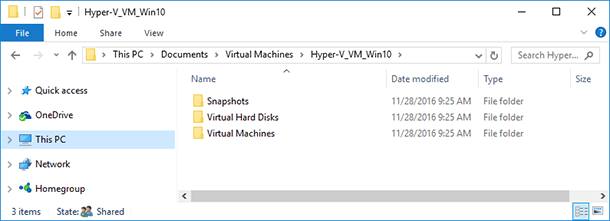
These Elements Are The Following:
-
Snapshots – the folder containing virtual machine snapshots (if such snapshots were created);
-
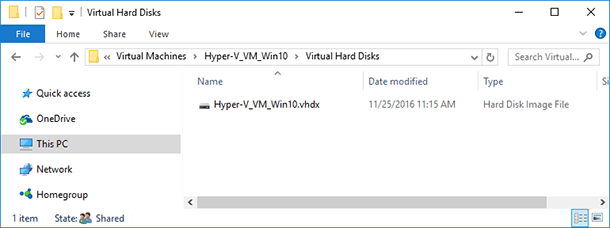
Virtual Hard Disks – the folder containing virtual machine disk files;
-
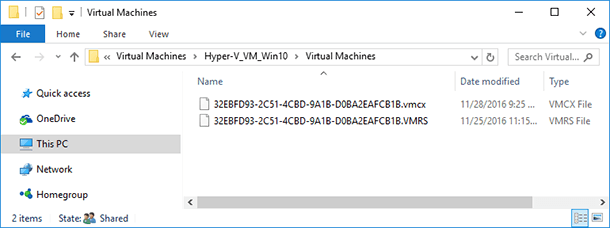
Virtual Machines – the folder containing virtual machine configuration files.
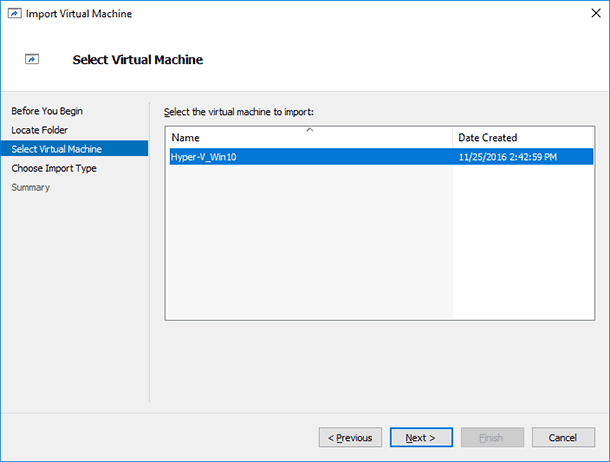
To Import a Virtual Machine:
-
Choose «Import Virtual Machine» from the menu of Hyper-V Manager

-
Import the virtual machine by following wizard instructionsа
Method 2. Restoring a Virtual Machine With Hetman Partition Recovery
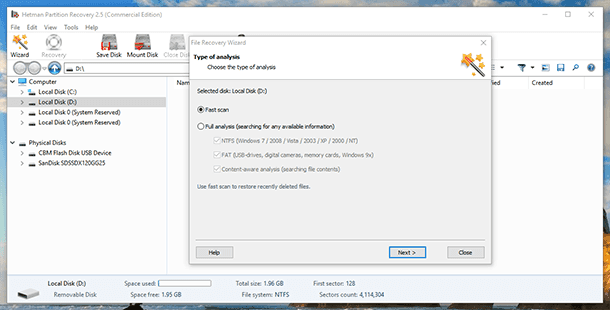
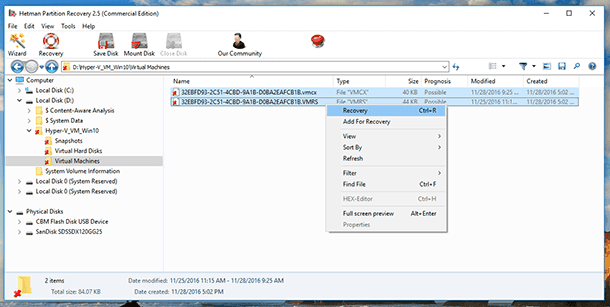
If a virtual machine was deleted or lost from the user’s computer or another media for some reason, and you need to recover it, you can do it by recovering virtual machine disk files and configuration files; after that, you should import them into Hyper-V by using the Import function for virtual machines.
To do it:
-
Run Hetman Partition Recovery and scan the disk where virtual machine files were stored
-
With the help of the program, go to the folders where virtual machine disk files and configuration files are stored and recover them
-
Import the virtual machine, which you have just recovered, with Hyper-V and start it.
How to Recover The Hard Disk Contents Of a Hyper-V Virtual Machine
As we have already said, all files stored in virtual machine disks are located in .vhdx files of the virtual disk. Hetman Partition Recovery, the program for hard diskdata recovery, has the function of mounting virtual disks and recovering data from such disks.

If for some reason your virtual machine is no longer working, and there are important files on its disks, this data can be recovered. To do it:
-
Run Hetman Partition Recovery and mount the virtual machine disk (if there are several of them, you can mount them all).
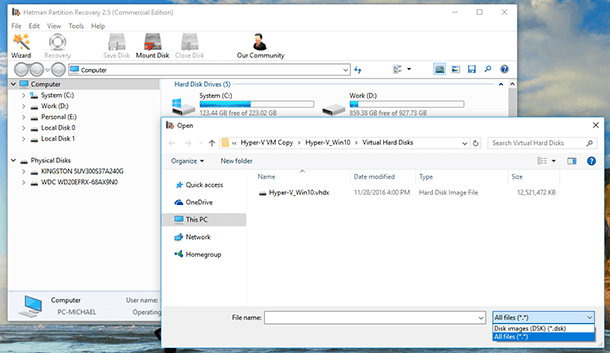
Note. To mount a virtual disk with the help of Hetman Partition Recovery, click on Mount Disk in the quick access menu of the program. As a result, the window of choosing a virtual disk will open. In the right lower corner, specify the file type as «All files (*.*)», go to the folder containing the virtual machine and choose the required .vhdx file.
-
As you do that, the section «Mounted Disks» containing the list of mounted virtual disks will appear in the window, where all disks found by the application are shown. If you mount several disks, you will see the entire disk list there.
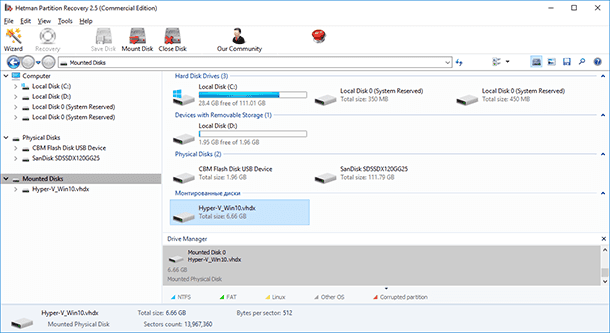
-
Scan the disk with the application by clicking on the disk in the disk manager
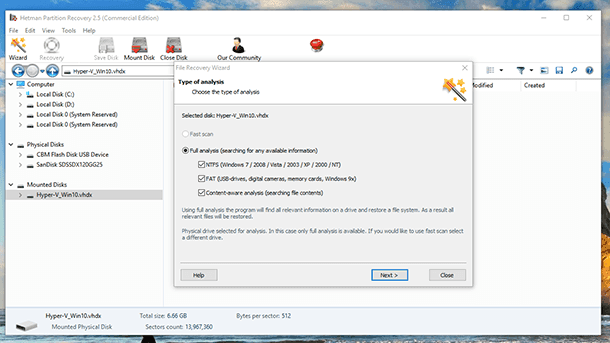
-
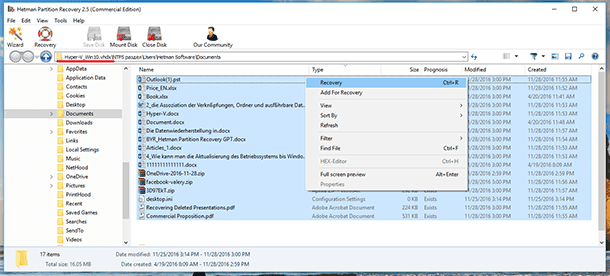
After the analysis, the application will show the directory tree of the scanned disk. Find and recover the required files.
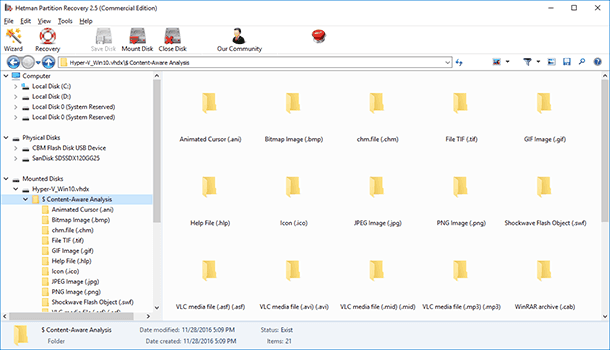
If you looked through the directory tree and you still don’t see the files which you need to recover, or if such files are recovered but they open with errors, then go to the folder Content-Aware Analysis shown by Hetman Partition Recovery and find your files there.
How To Recover The Disk File Of a Hyper-V Virtual Machine From The Virtual Machine Itself
In a series of experiments, we have established that files deleted or lost inside the virtual machine cannot be recovered.
