How to Recover Files Removed by CHKDSK Command
Read this article to find out how to recover files removed by CHKDSK command. In today’s article, we’ll explore how this system utility works, how to avoid loss of data, and how to recover files lost after using the CHKDSK utility in Windows.
- CHKDSK
- Why CHKDSK deletes data
- Chances to recover files removed by CHKDSK
- Method 1. How to recover files removed by CHKDSK: Hetman Partition Recovery
- Method 2. File History
- Method 3. Recovery from system folder found.000
- Conclusion
- Questions and answers
- Comments
Typically, the CHKDSK utility is used to repair errors on various storage devices. However, sometimes this utility can cause loss of data. As a result of it trying to repair disk errors, a part of the information may be erased, so some files will either get damaged or disappear at all.

🆘 Windows 11 Error: You Need to Format the Disk in Drive Before You Can Use It. How to Fix It?
CHKDSK
CHKDSK is an integrated system utility in Windows which is designed to check the file system and hard disks, and then repair any errors it has found. It is meant to detect and fix problems related to files, folders and bad sectors.
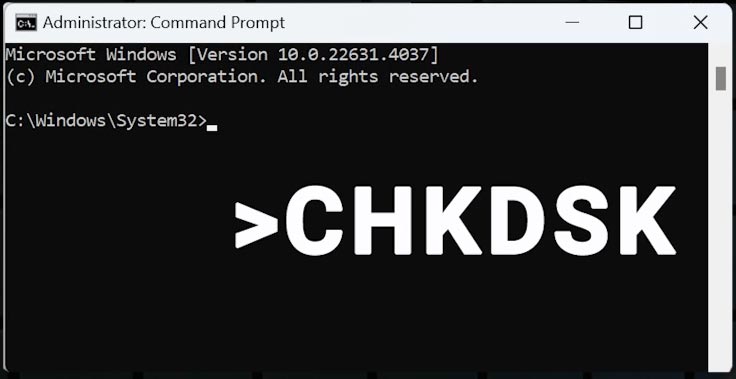
CHKDSK scans the file system and physical sectors of the disk for any errors such as damaged files or file system failures, and it can recover damaged or folders, as well as repair errors in the file system structure. It can recover damaged system files or folders, as well as repair errors in the file system structure.
CHKDSK can identify damaged sectors on the disk and mark them as unfit for further use, so that the operating system will not use them to store data.
If CHKDSK operations deleted important files on your computer, there are a few ways to restore them.
Always remember: the sooner you try to bring your files back, the higher are your chances for success. When a file is deleted, the area on the storage device where it was stored is marked as available for overwriting, so this part of the disk can be completely overwritten soon.
Why CHKDSK deletes data
Using the chkdsk utility may result in loss of data in such cases as:
- Interrupted chkdsk processes. Data can be lost if the computer is powered off or restarted just in the middle of an operation performed by chkdsk.
- Running CHKDSK on a damaged or faulty hard disk. If CHKDSK finds damaged sectors, it marks them as bad. As a result, the operating system will not use them to save data or read data from such sectors. If there is any data there, it can be lost forever.
To reduce the risk of data loss while using chkdsk, follow these tips:
| Tip | Description |
|---|---|
| Back up important data regularly | Make sure important files are stored on external disks or in cloud storage to prevent data loss in case of disk issues. |
| Do not turn off your computer while CHKDSK is running | While CHKDSK is running, do not turn off your computer as it can cause incomplete or incorrect scan and subsequent loss of data. |
| Check the parameters and commands you use to run CHKDSK | Make sure that correct parameters are applied to run CHKDSK, so that you can avoid unwanted changes or damage to data. |
| Use data recovery tools | If you noticed a loss of data after running CHKDSK, use specialized data recovery software. For example: Hetman Partition Recovery |
Chances to recover files removed by CHKDSK
Can we recover data from a storage device if some files were removed by CHKDSK?
Yes, recovery is possible even if the problem is caused by bad sectors. Thanks to its sophisticated file search algorithms, our specialized data recovery tool – Hetman Partition Recovery – will help you to restore files even if they are removed at the system level as a result of using the chkdsk command.
However, if your data was removed from an SSD, there is one peculiarity to be mentioned. SSD storage devices use a technology called TRIM. Unless it is disabled, the operating system tells the drive which data blocks are no longer used, and within a short time, all data will be erased from such blocks. As a result, recovery will become impossible.
If you identify any issues in the work of your SSD with the TRIM feature enabled, hurry up to create a disk image, because such disk can fail at any moment. As soon as you have the disk image, you can use it for all recovery operations.
Download, install and start the program. In the main window, select the faulty drive, and click Save Disk in the menu above. (Make sure that your computer has enough free disk space to save the image).
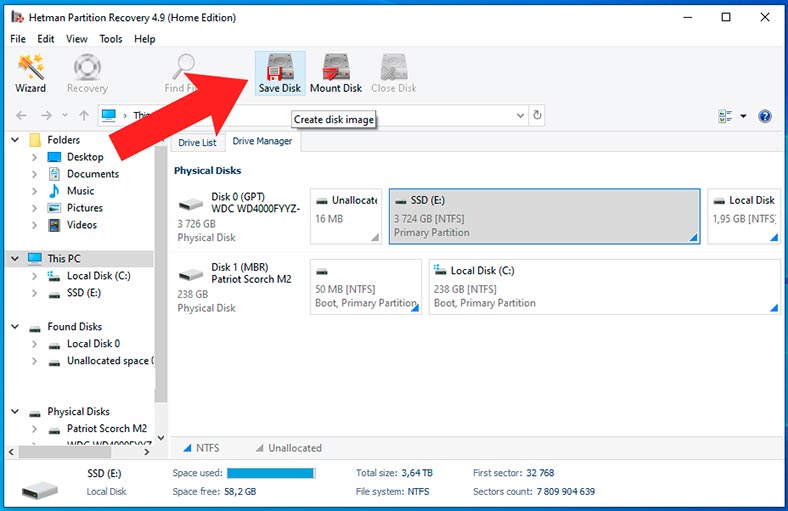
Then choose where to save it and wait until the operation is complete.
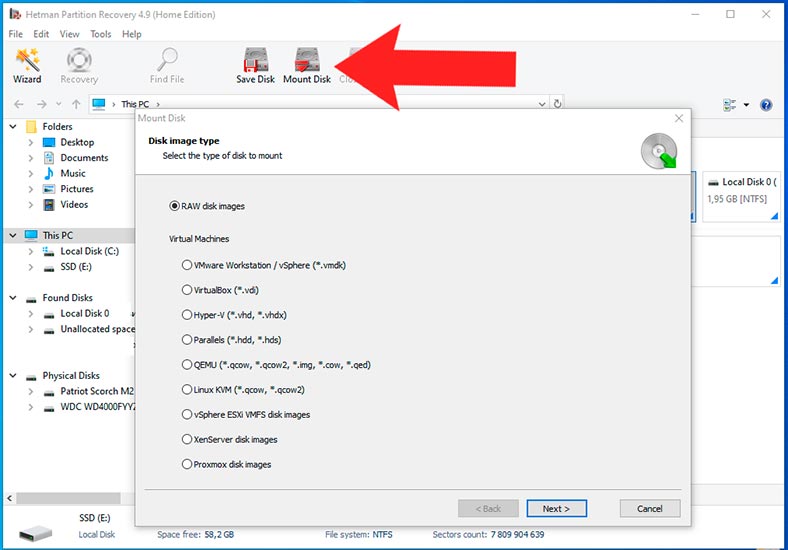
After that, you’ll be able to upload the image into the recovery tool and scan the image. To do it, click Mount Disk – RAW – and give the path to the image.
Method 1. How to recover files removed by CHKDSK: Hetman Partition Recovery
As I said before, files are not erased from the disk as soon as you delete them. If the disk is not used actively, they can still be recovered.
Hetman Partition Recovery will help you recover files lost as a result of accidental removal or disk formatting. This tool can recover files in various data loss scenarios, including removal as a result of CHKDSK activities.
To do it, start the program, right-click on the disk from which the data was removed and click Open.
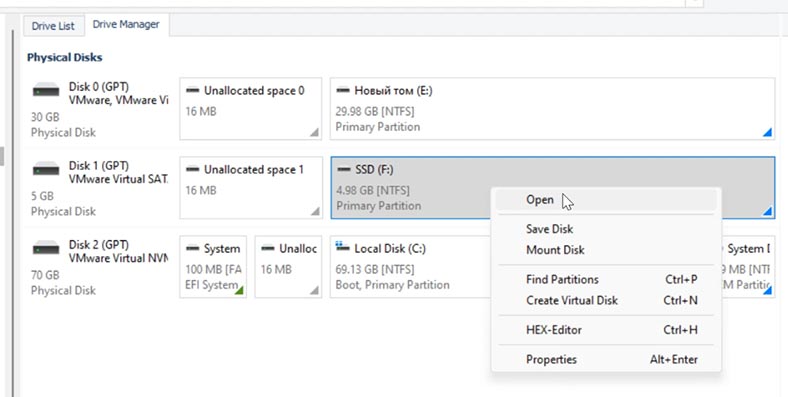
Choose the scan type – Fast scan or Full analysis.
For most simple cases, Fast scan will do. As a result, the tool will instantly scan the disk and display all detected files.
If the program failed to find the necessary files, then run Full analysis. To do it, return to the main menu, right-click on the disk and choose Analyze again – Full analysis, and choose the file system type.
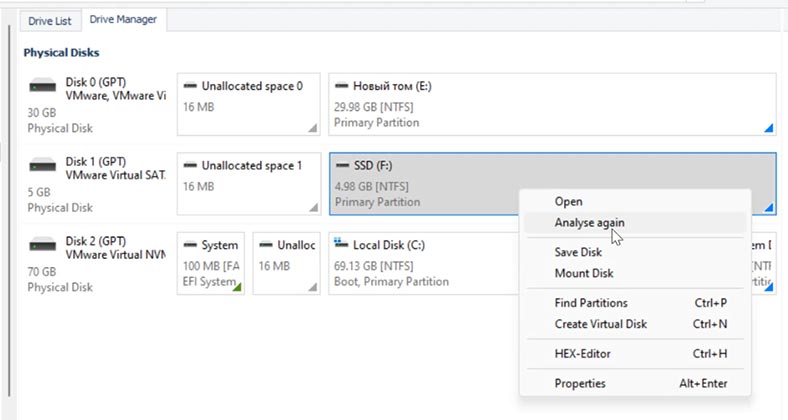
This process is quite long and its duration depends on the scanned disk size.
When the scan is over, open the folder where the lost files used to be. Now you can see that deleted files are marked in a corresponding way. Select all the items you want to recover and hit the Recovery button.
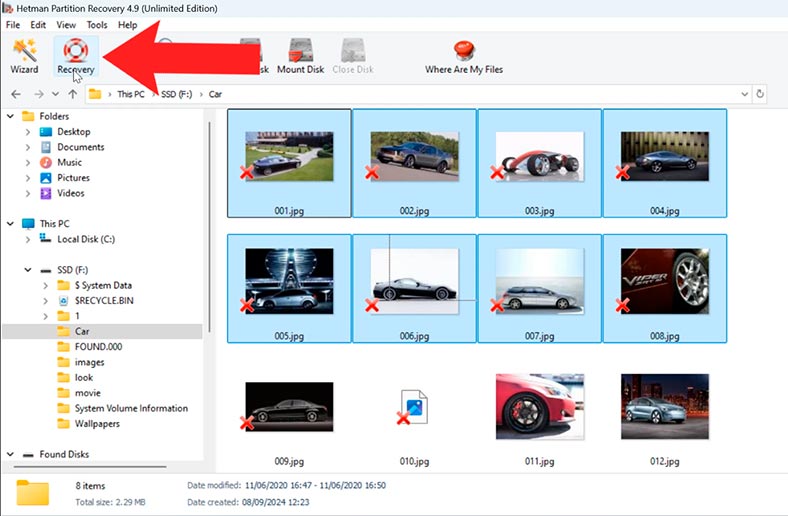
Choose where to save them (the disk and folder) and hit Recovery again.
In the end, you will find the recovered files in the folder you have chosen. This is how we managed to recover files after they were deleted by the chkdsk command.
.Method 2. File History
One more way to recover files removed by chkdsk is to use the File History feature.
If it was configured properly before the files were removed, you’ll be able to bring them back. But if it wasn’t enabled, then you can’t use this method.
To run the utility, type in the search field – File History. Otherwise, open Control Panel – File History.
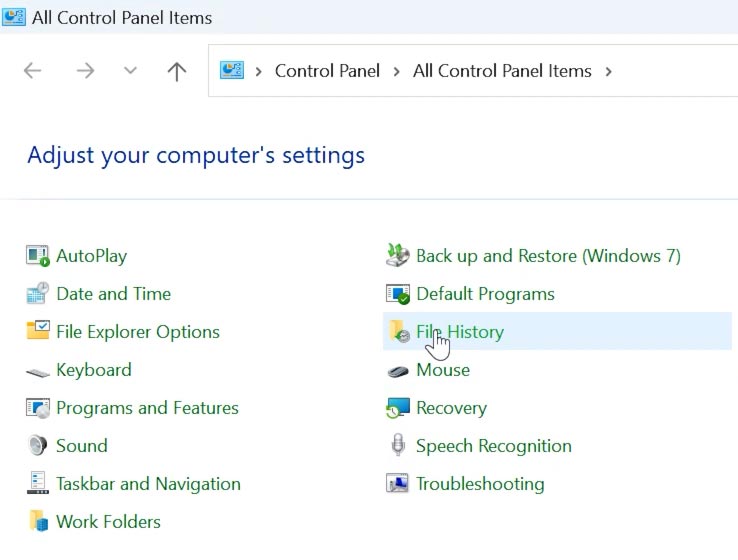
Find the folder where the lost files used to be stored. In the new window that opens, go to the folder that contains your deleted files. You can use the left and right arrow buttons to navigate between file copies.
Select the files to recover. Then hit the green Restore button.
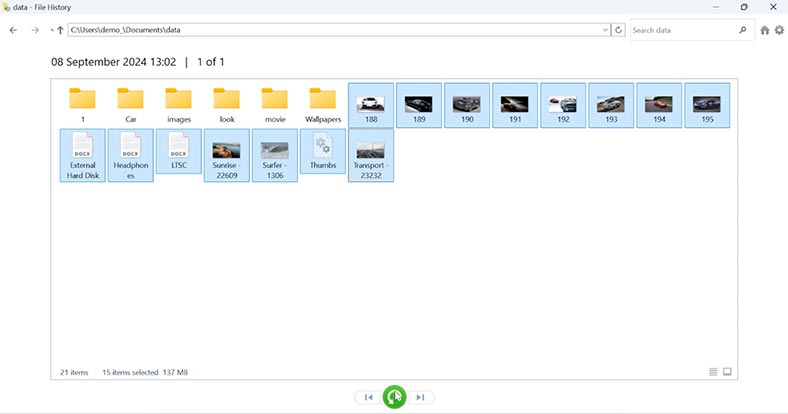
Method 3. Recovery from system folder found.000
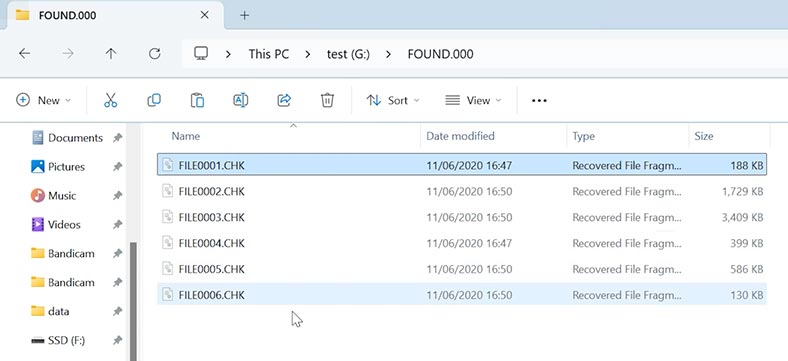
Another method to recover files deleted by the chkdsk command is to check and recover .chk files from the folder found.000. This is the folder that CHKDSK creates to store damaged files.
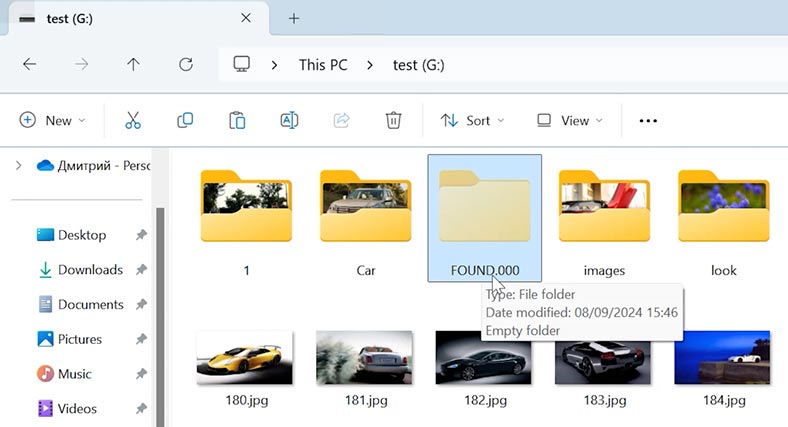
Open Windows Explorer. In the upper panel, select View and check the option Show – Hidden items.
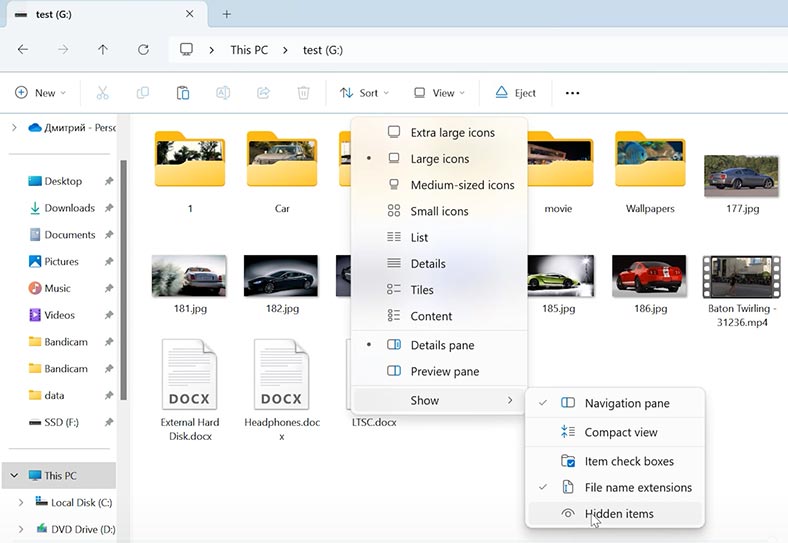
Open the disk where you have run CHKDSK, and find out if there is a folder with the name FOUND.000. Open it, and you will see some files with the extension .CHK.
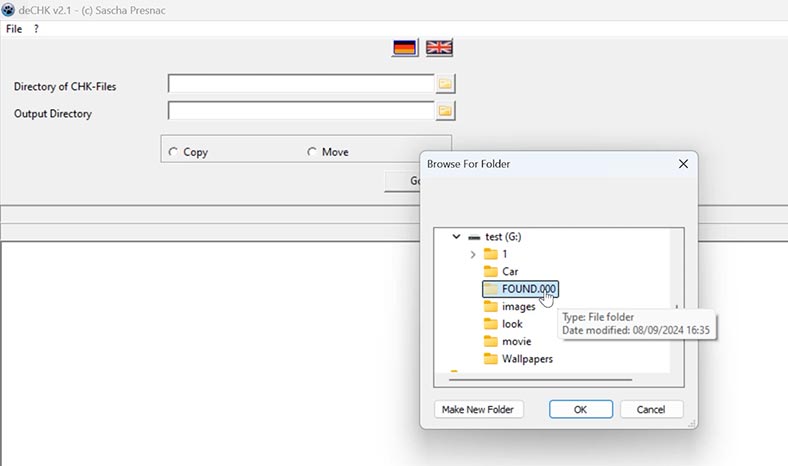
To have such files converted back to their previous format, there are several free solutions. For example, such utilities as DeCHK will help you recognize the contents of files and transform them into their original format.
Run the utility and select the folder FOUND.000 as the directory to search for files.
Click on the Start button and it will try to recover your data.
If the original files are too damaged, they can’t be converted by DeCHK.
If there is no folder or it’s empty, or you failed to recover your files with this method, use a specialized recovery tool – Hetman Partition Recovery – which will definitely get your data back.
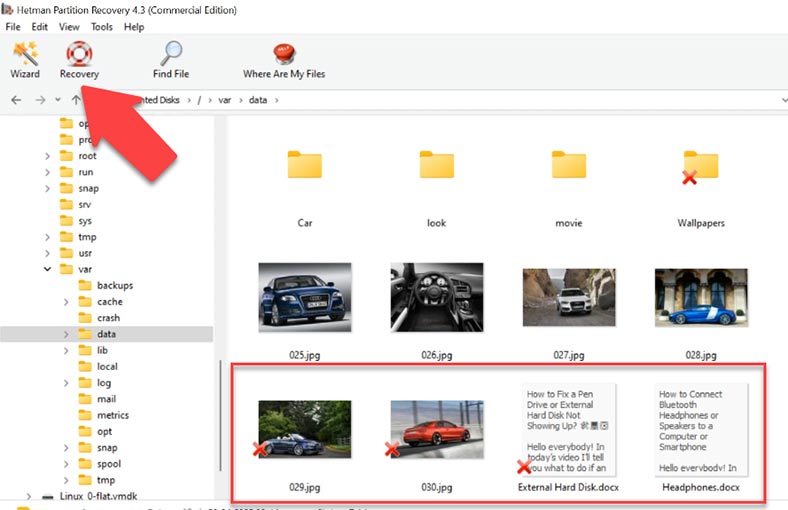
Use it to recover files previously deleted from the folder found.000, or recover files from the source folder where they used to be stored.
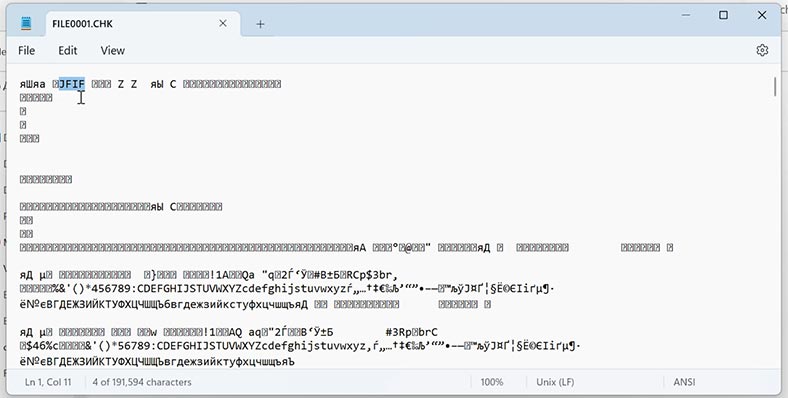
Also, such files can be modified manually. To identify a file extension, open the file with Notepad. In my case, JFIF is a .jpg file. That is why, we should change CHK to JPG..
Conclusion
Summing up, we can say that CHKDSK is a useful utility, but in certain circumstances it may cause a data loss.
The methods we have described today should help you resolve the issue with lost files after using the chkdsk command.
Always remember – your best solution to recover lost files is to have a relevant backup, so make sure you back up important files regularly.


