Virtual Machine Data Recovery from Mirrored RAID1 on XCP-ng Hypervisor
In this tutorial, we’ll walk you through the process of recovering virtual machine data from a mirrored RAID1 configuration on the XCP-ng Hypervisor. Whether you’ve encountered disk failures, data corruption, or other issues with your virtual machine data, we’ll guide you step-by-step through the recovery process.

🚀 How to Recover Virtual Machine Data from a Mirrored RAID1 on XCP-ng Hypervisor
- Installing XCP-ng
- How to create a virtual machine
- How to recover data from a virtual machine
- Questions and answers
- Comments
XCP-ng is a Linux distribution with a pre-configured Xen hypervisor and a ready-to-use Xen API project. XCP-ng stands for Xen Cloud Platform — next gen.
The main goal of this project is to provide a simple way to deploy infrastructure based on virtual machines using Xen as a hypervisor and a powerful XenAPI to offer ready-made solutions. XCP-ng is compatible with most servers and that is why it enjoys great popularity. However, just like with any other hypervisor, there may be factors that cause loss of access to the virtual machine – both as a result of a system error, or a server breakdown.
As a result, you won’t be able to restore access to the virtual machine data without resorting to third-party software tools.
| Characteristic | Description |
|---|---|
| Product Type | An open-source virtualization solution based on Xen that supports full hypervisor features. |
| Developer | Vates company (supported by the community). |
| License | Open-source software (GPLv2). |
| Platforms | Supports server operating systems based on Linux and Windows. |
| Architecture | Runs on the Xen hypervisor, providing VM management through API or GUI. |
| Main Features | Server virtualization, VM support, VM migration, backup, and recovery. |
| Hardware Support | Wide support for server hardware with Intel and AMD processors. |
| Integration | Integration with management solutions like Xen Orchestra for centralized control is possible. |
| Scalability | Support for clustering and managing large virtualized infrastructures. |
| Benefits | Free of charge, scalable, active community, support for modern security standards. |
| Usage | Used for cloud infrastructure, corporate virtualization, testing environments. |
Installing XCP-ng
As a ready-made Xen distribution, the easiest way to deploy XCP-ng is to use an ISO image, available on the project’s website.
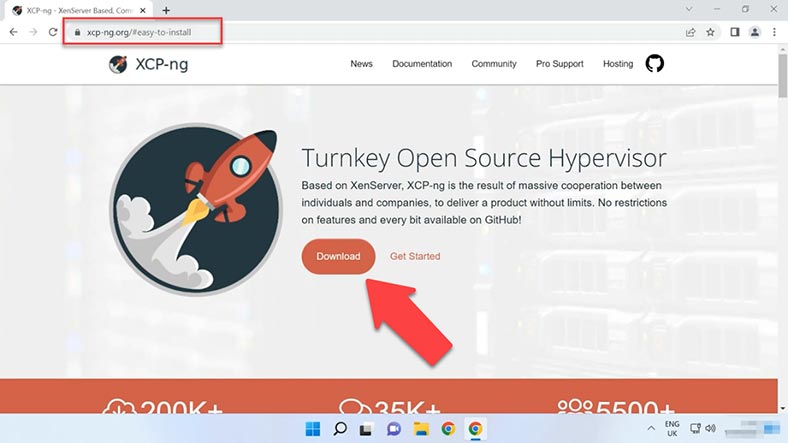
The installation of XCP isn’t much different from the installation of Xen hypervisor.
In our channel, we have a very detailed video about installing XEN Hypervisor.
The only difference is that I’m going to install the system onto a mirrored RAID. During the installation, you need to specify the disks and use them to build an array.
How to create a virtual machine
As to creating virtual machines, it is also very similar to how we do it with XEN Hypervisor. To manage virtual machines, we will use XCP Center. The program has an interface similar to XEN Center.
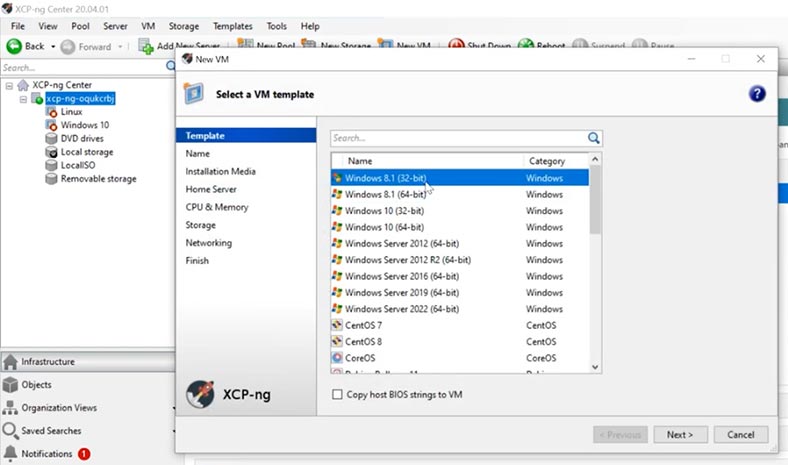
You can learn more about creating a virtual machine by watching a video about XEN Hypervisor. Since this process is absolutely identical, I’m not going to focus on that, but switch to the recovery aspects instead.
On this hypervisor, I have configured two virtual machines, one with Windows 10 and another with Linux Ubuntu. I’ll show you how to extract data from each of them.
How to recover data from a virtual machine
If nothing happens when booting a virtual machine, if it displays an error that cannot be fixed, or if there is a hardware failure or system error in the work of your server – whatever the reason, but you can’t boot the virtual machine. Use a specialized data recovery tool, Hetman RAID Recovery: it supports recovery from all popular RAID types and from virtual disks of various hypervisors, including XCP.
By default, XCP-ng uses LVM storage for its virtual machines. This storage method has quite a lot of advantages if compared with VHD files, but sometimes you need to use the file-based storage mode like in VMware ESX, and it may also create additional difficulties for the recovery process.
In my case, this system is based on a mirrored RAID, which makes recovery even more complicated.
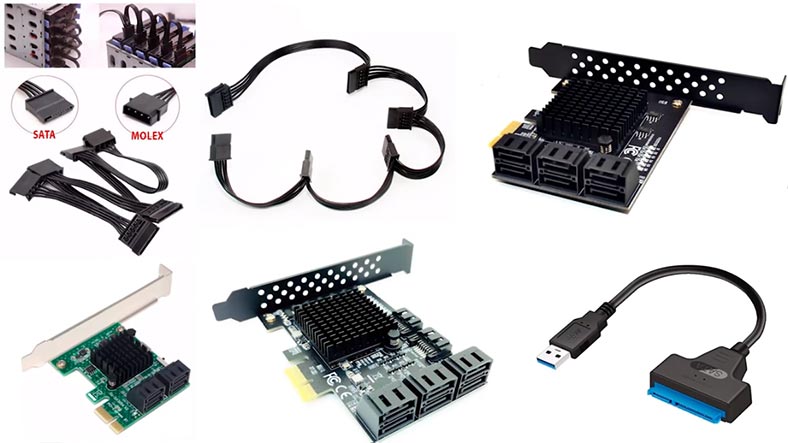
To begin the recovery process, you should take the disks out of the server and connect them to the motherboard of a Windows computer. If your motherboard lacks SATA ports or power connectors to use all the disks you need, you can add adapters or expansions cards to solve the issue.
When you connect the physical disks which used to make up the RAID where virtual machine files are stored, Hetman RAID Recovery will immediately display virtual machine disks and their size.
| № | Step | Description |
|---|---|---|
| 1 | Turn off the hypervisor | Safely turn off the XCP-ng hypervisor to avoid further data damage. |
| 2 | Disconnect the disks | Shut down and disconnect the disks that were part of the mirrored RAID1. |
| 3 | Connect the disks to the PC | Connect the disks to a Windows computer using SATA or USB adapters. |
| 4 | Install Hetman RAID Recovery | Download and install Hetman RAID Recovery on the Windows PC. |
| 5 | Run the program | Open Hetman RAID Recovery and allow the program to automatically detect the RAID1 configuration. |
| 6 | Data scanning | Select the detected RAID1 array and perform a full scan to find lost data. |
| 7 | Review and recover | Review the found files and select the ones you want to recover. Save them to another drive. |
| 8 | Recover the virtual machine | Transfer the recovered data back to the XCP-ng hypervisor or restore it to a new virtual machine. |
How to find virtual machine disks
If you stored a lot of virtual machines on your hypervisor and it’s difficult to distinguish between them, there are a few commands to help you. You can do it as long as the server is operable.
To see which virtual disks belong to a specific virtual machine, you should run some commands on the server to find the UUID (Universal Unique Identifier) of the virtual machine, the UUID of its disk, and the UUID SR (Universal Unique Identifier of the Storage Repository).
To do that, connect to the server by SSH and type the first command:
xe vm-list
As a result, you’ve found the virtual machine UUID;
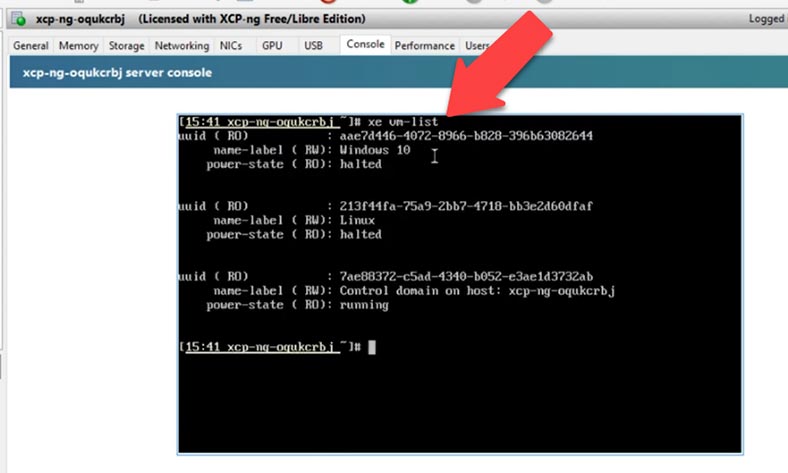
Let’s determine the identifier of the virtual machine with Windows 10 and Linux.
Now you can use this identifier to view the connected disks, with the help of this command:
xe vm-disk-list uuid= aae7d446-4072-8966-b828-396b63082644
The last element is the virtual machine UUID.
As a result, you get the virtual disk UUID, which, in its turn, can be used to find the storage repository UUID.
xe sr-list name-label=Local\ storage
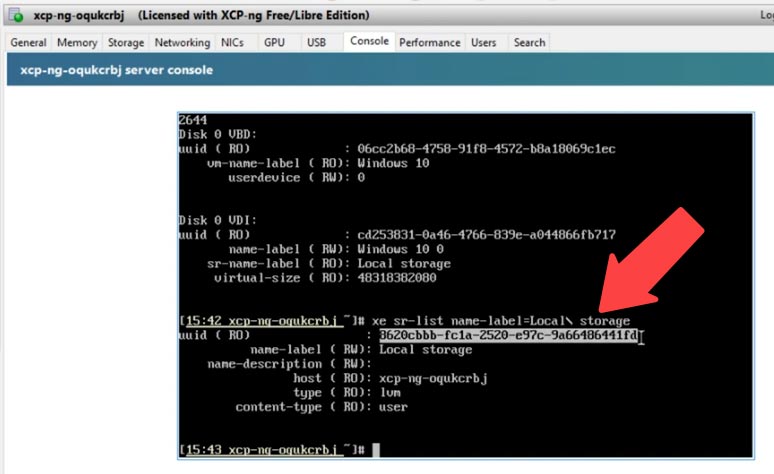
Now that we have the repository identifier, it’s easy to understand to which virtual machine specific disks belong, and you’ll be able to identify those disks in the data recovery utility.
This is the name of the disk that we need -
8620cbbb-fc1a-2520-e97c-9a66486441fd.VHD
Scanning a Windows virtual machine disk
All right, now we have taken the disks out of the server and connected them to a Windows computer. Download, install and start Hetman RAID Recovery.
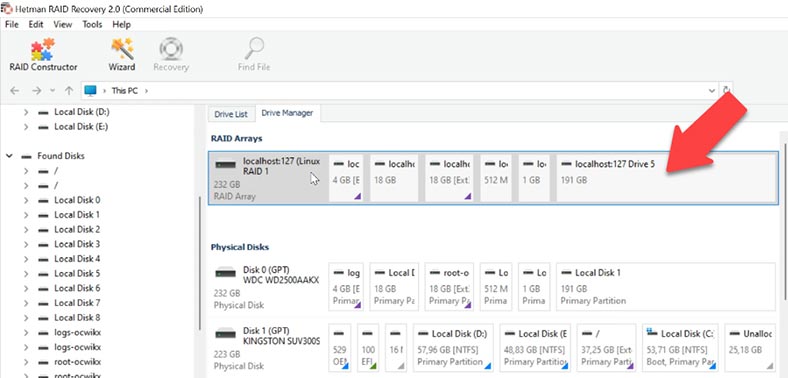
The program has built the RAID system where virtual machine files are stored; below, you can see the information it managed to identify. A little lower, under the RAID, all virtual machine disks are displayed; if it’s difficult to understand which of them you need, find it by the identifier. In my case, there are only two virtual machines. For starters, let’s scan the Windows virtual machine disk.
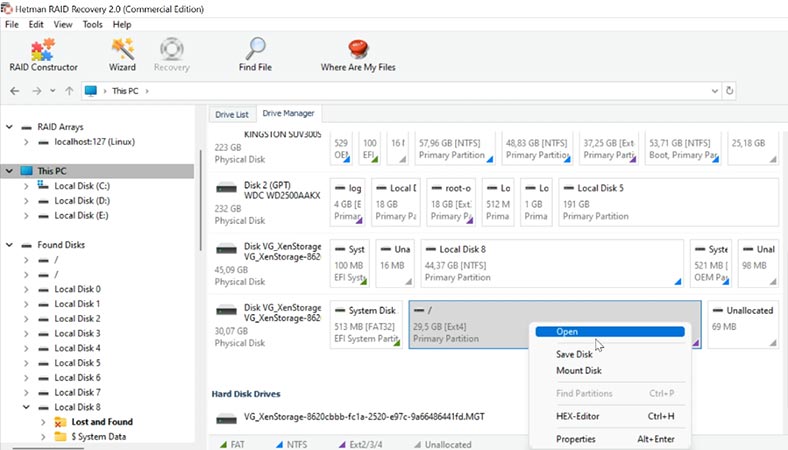
Right-click on the disk and select Open.
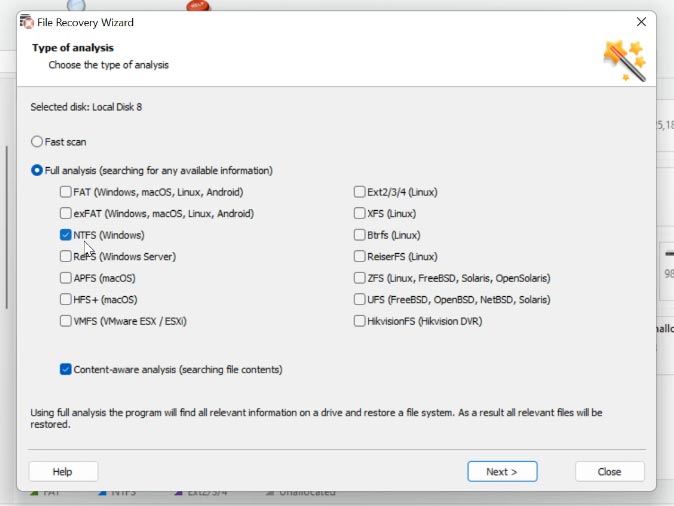
Select the scan type; start with “Fast scan.” If the “Fast scan” can’t find the required files, then go for “Full analysis”. To do it, return to the main menu, right-click on the disk and choose “Analyze again.” You also need to select a file system: choose NTFS, as this is a virtual machine with Windows 10, and start the scan.
Then navigate to the folder where the files were stored, select the files you want to restore, click Recovery, specify the disk and folder where you’d like to save the files, and click Recovery again.
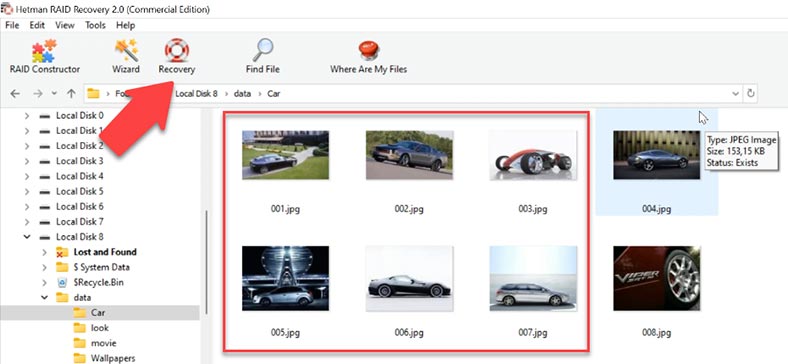
When the entire process is over, you will find the recovered files in the folder you have chosen.
You can see that the program has no difficulty in finding the files that used to be stored on the virtual disk. To make the search easier, all our programs feature the option to search by file names. Also, you’ll be able to preview the file contents to make sure that this is the one you need.
Scanning a Linux virtual machine disk
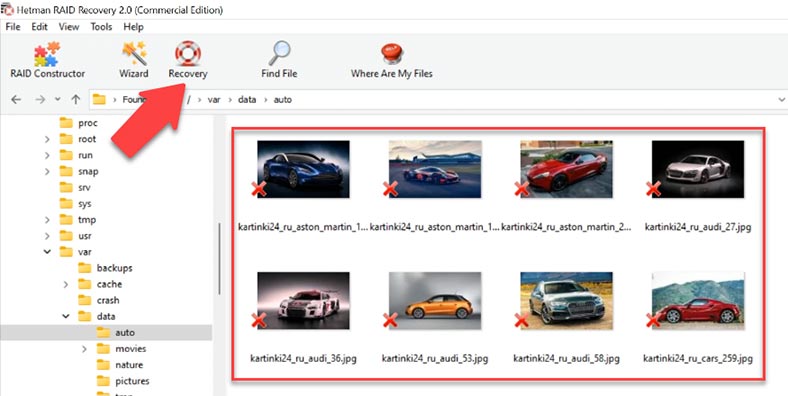
Now let’s see how good is this program at recovering files from a Linux virtual machine. Open the disk, and choose Fast scan to begin with. As you can see, it has found the files - all the data which was stored on the virtual machine disk.
As a result, the program even managed to find the deleted files, and all you have to do is to restore them. Hetman RAID Recovery supports all popular file systems, RAID types, and the majority of hypervisors. If the RAID system in question is damaged, the program will rebuild it automatically, and let you retrieve the critical data you’re looking for.
How to recover data manually, with the RAID Constructor
When a disk is damaged or service information is erased, the program may have difficulties with rebuilding the RAID automatically; however, you can do it manually with the RAID Constructor if you know the properties of this damaged array.
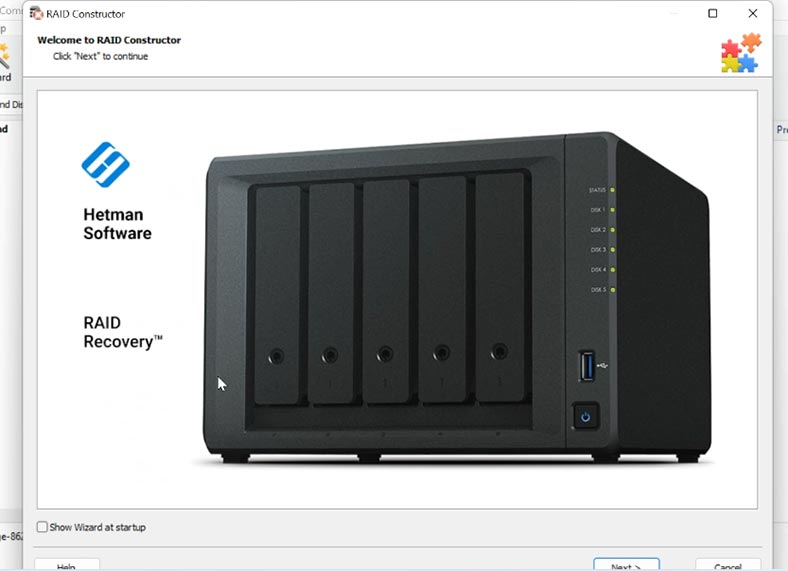
Open the Constructor, select “Manual mode,” and fill in all the information you know about this disk array: the RAID type, block order and size.
Add the disks it used to include, use the arrows to specify their order, and replace the missing disks with empty drives by clicking the “plus” button. Also, you can specify the offset that helps to locate the beginning of the disk. Sometimes, the program may have difficulty in identifying it automatically, so you’ll have to enter the offset value manually.
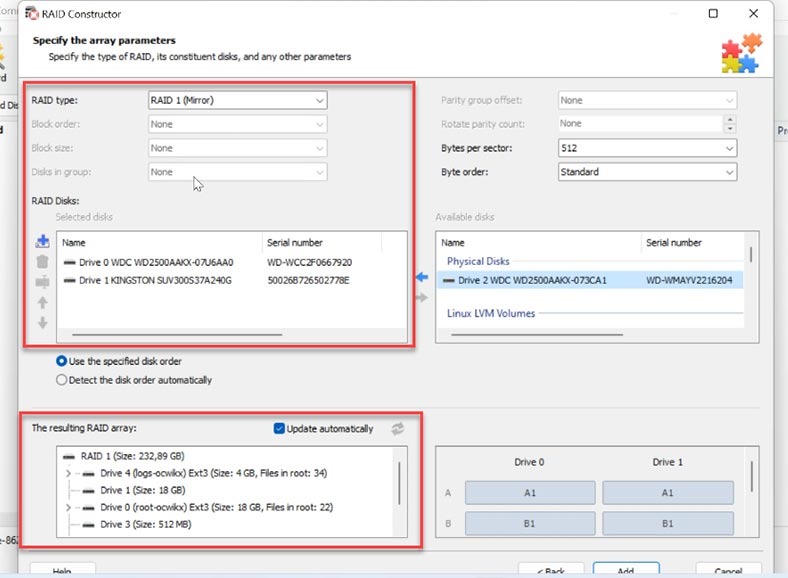
Usually, if you give correct properties, the newly built RAID system has at least one partition. Expand it to check for the folders that you need. If the folders you are looking for are displayed, then you have built this RAID properly.
When you specify all the properties you know, click “Add,” and the array will appear in the Drive Manager.
To have the data recovered, the last step is to scan the array, find the files you want to restore, select them, and recover to the folder you choose.


Advantages:
Disadvantages:
Advantages:
Disadvantages: