Clean Disk: Remove Junk Files in Windows 11!
Want to clean the disk from junk files using Windows 11 integrated utilities? You’re in luck! Our comprehensive guide will walk you through expert strategies and techniques to successfully remove junk files and optimize disk space with Windows 11 utilities. Say goodbye to clutter and enjoy a smoother computing experience!
- Method 1. Clean junk files from Windows 11 settings
- Method 2. Remove unnecessary files with Disk Cleanup utility
- Method 3. Clean old drivers manually
- Questions and answers
- Comments
When your computer runs out of free disk space, it affects its performance almost inevitably. The less free space your hard disk has, the higher are the chances that some programs will take more time to start, and others will even refuse to open. As a rule, these days most computers tend to have their Windows installed onto an SSD of a moderate capacity, and sooner or later, its free disk space begins to dwindle to dangerous limits.
There are lots of third-party tools created to clean your hard disks from unnecessary files, but the integrated utilities can still handle this task pretty well, too. Similarly to previous versions of this operating system, Windows 11 features a bunch of integrated disk cleaning utilities.
| No | Method | Brief Description |
|---|---|---|
| 1 | Cleaning up unnecessary files in Windows 11 settings | Go to “Settings” → “System” → “Storage”, enable the “Storage Sense” feature, which automatically deletes temporary files and other unnecessary data. |
| 2 | Deleting unnecessary files using the “Disk Cleanup” utility | Run the “Disk Cleanup” utility, select the disk for cleaning, choose the types of files to delete, such as temporary files, recycle bin files, etc., and click “OK” to clean. |
| 3 | Manual removal of old drivers | Find the folder with outdated drivers in Windows using “Device Manager”, remove the old versions of drivers that are no longer in use. |

🧹 How to Clean the Disk from Junk Files with Windows 11 Integrated Utilities 🧹
Method 1. Clean junk files from Windows 11 settings
You can access the first method of disk cleaning in Windows 11 through the Settings app.
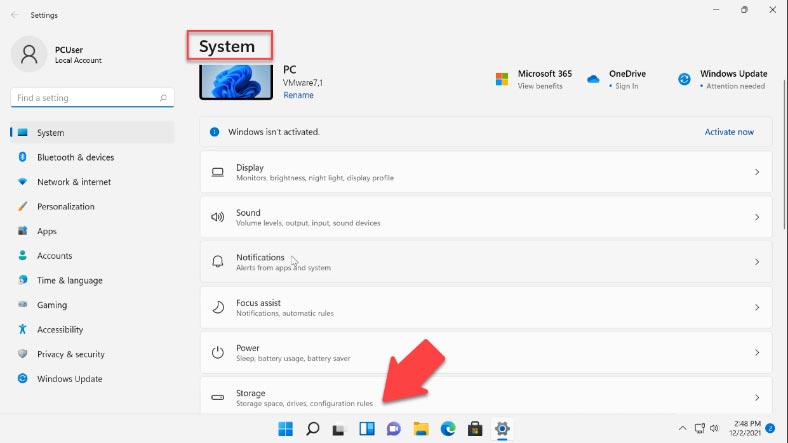
To open it, click on Start – Settings – Storage.
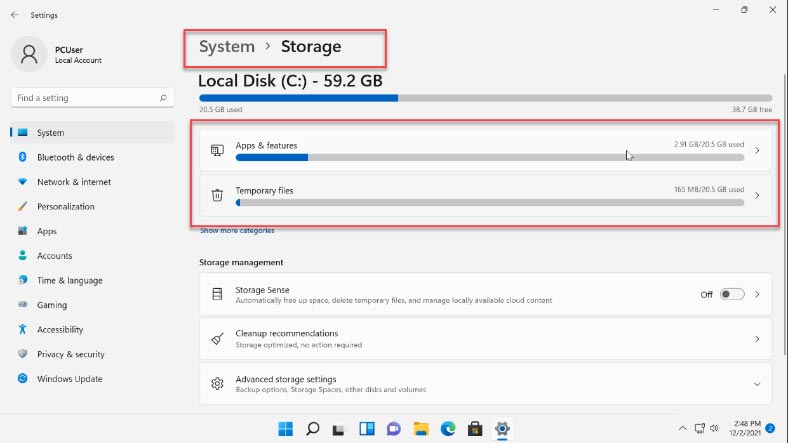
In the window that opens, look to the right to see the information on the amount of free and used space. Below, you will see the list of categories that use your disk space.
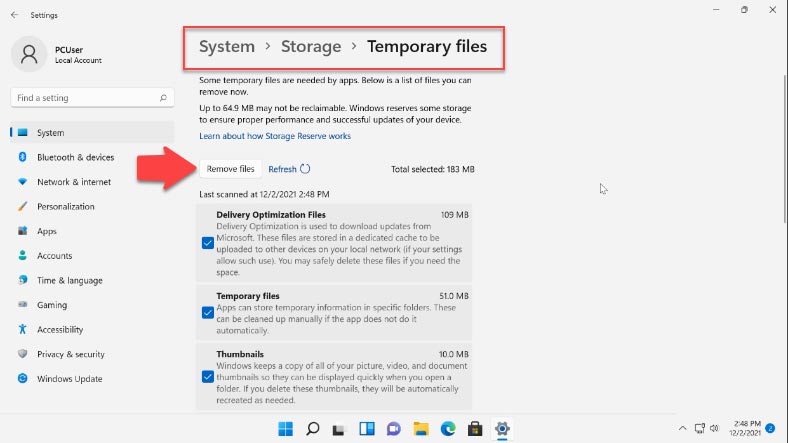
When you expand a category by clicking on it – for example, “Temporary files” – you will see what exactly is included into this category and how much disk space it occupies. In this category, files can be removed. To view the complete list of all categories, click on “Show more categories”.
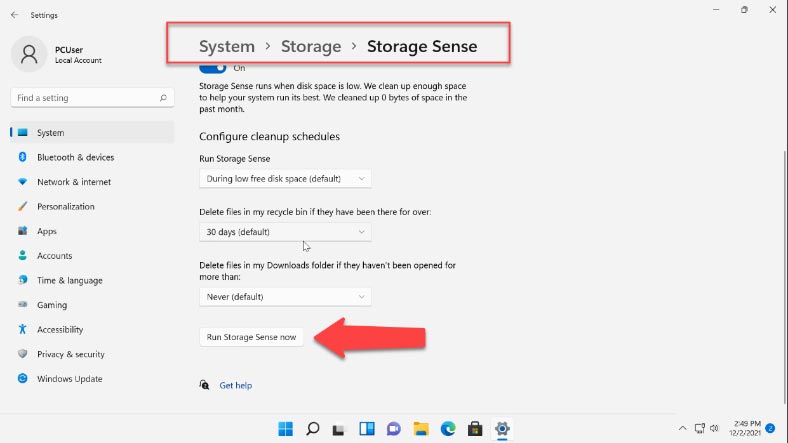
In the “Storage management” section below, you can run disk cleanup operations. The Storage Sense feature lets you configure automatic disk cleanup, remove temporary files and so on. When you open this section, you can schedule when files are deleted from certain folders. At the bottom of the page, you can find the button “Run Storage Sense now”.
In the previous window, you can also check “Cleanup recommendations”. It contains information about files in your Downloads folder, Recycle Bin folder, temporary files, large or unused files, unused apps and files that you have synced to the cloud services. Select the files that need to be removed and click the “Clean up” button below.
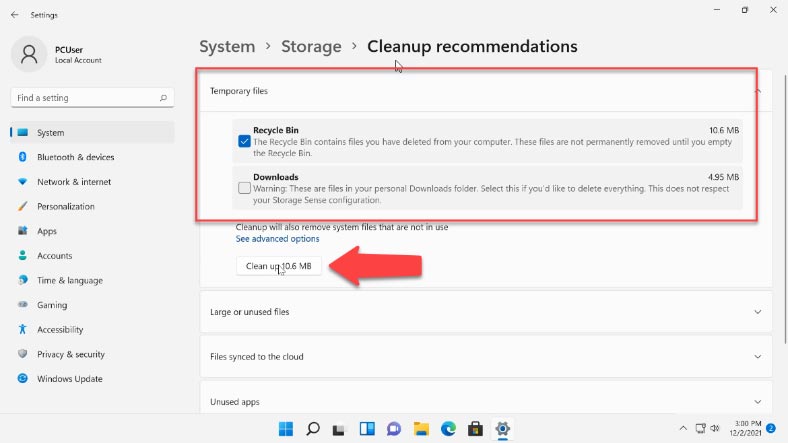
The features listed in Windows 11 storage settings are pretty basic but really useful, especially for beginners.
In addition, there is a considerable advantage in comparison with third-party disk cleanup software: there is no way that you could harm the operating system, as it is absolutely safe to delete the files suggested for removal. The only possible exception is the contents of your Downloads folder – if you keep something important there.
Method 2. Remove unnecessary files with Disk Cleanup utility
Along with the new storage cleaning options, Windows 11 also inherited the integrated disk cleanup utility from its previous versions. This tool will help you clean much more junk files than you would remove with the Storage features in the Settings.
Open the Start menu and search for Disk Cleanup. In the window that opens, select the drive to be cleaned and click OK.
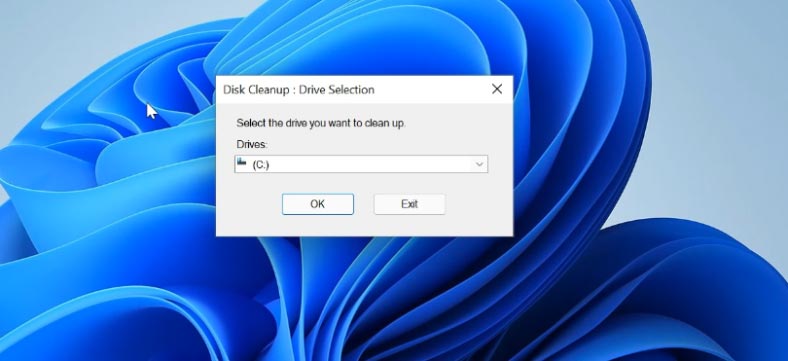
In the next window, you will see the list of files that can be removed: usually, they don’t take up much space. But if you click on the option below – “Clean up system files” – the Drive Selection window appears again, and another round of scanning begins: this time, the list of files and the amount of data that can be removed will be bigger.
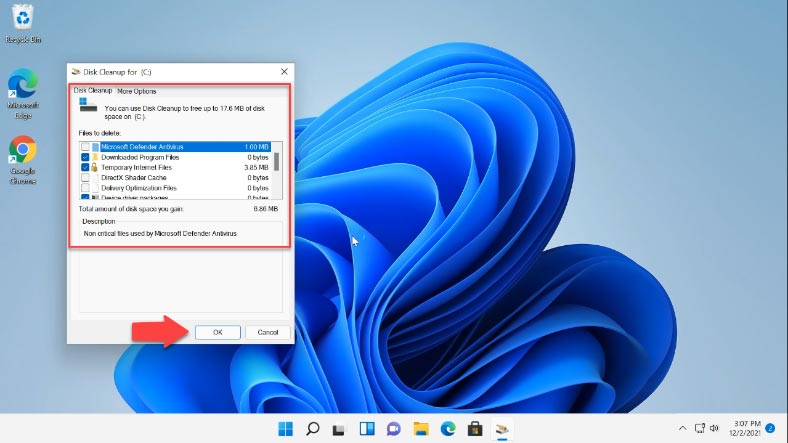
Check the boxes for file types you want to clean and click OK. Wait until the cleanup process is complete.
In the tab “More Options” you will be able to free up more disk space by removing unnecessary programs or system restore points (except for the latest one) – and do it by clicking on the Cleanup button next to the corresponding category.
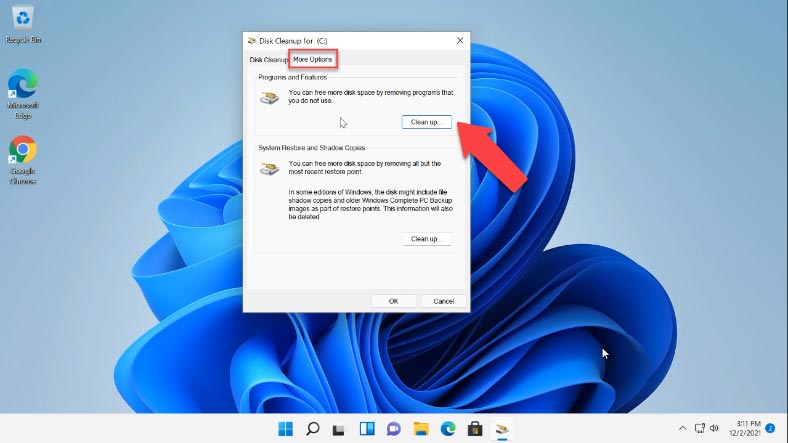
The Disk Cleanup feature is similar to Storage Sense, and it is as safe as that; it never suggests to delete files that are required for normal work of your operating system. Also, you can run this utility in an advanced mode which allows to run a deeper cleanup and remove even more files.
To start the utility in this mode, open the Run window and type the following command:
%systemroot%\system32\cmd.exe /c cleanmgr /sageset:65535 & cleanmgr /sagerun:65535
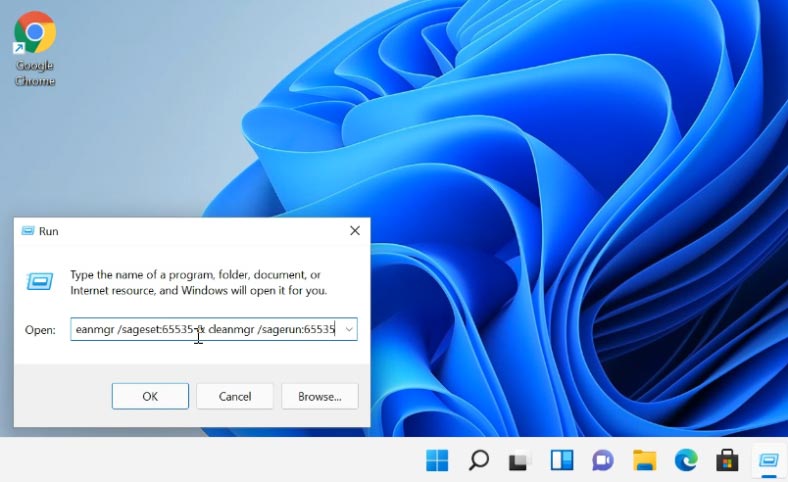
If this method doesn’t work, run this command from the Command Prompt as administrator. This will show you the extended file cleanup list.
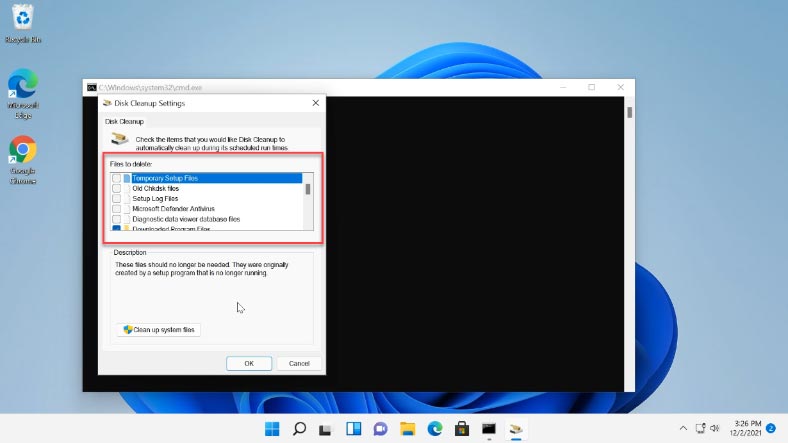
The only disadvantage is that you can’t see how much space is taken up by files in every category. Also, such items as “Device Driver Packages” and “Delivery Optimization Files” are missing, although they are displayed when you run cleanup in the basic mode.
Method 3. Clean old drivers manually
If your hard disk is very low on space, you can try to free up a few gigabytes manually - by cleaning the folder “FileRepository” where device drivers are stored. Integrated utilities don’t remove old or unused drivers from this folder. If the total folder size is more than 2 GB, it seems a good idea to delete some drivers.
Here is the path to the folder:
C:\Windows\System32\DriverStore\FileRepository
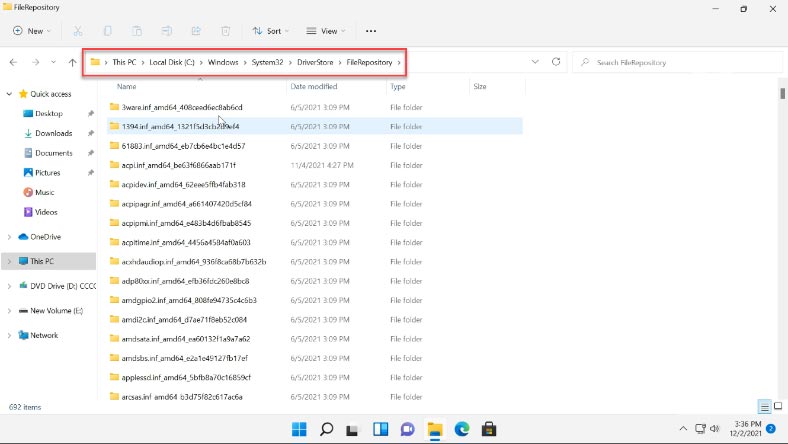
It contains copies of device driver packages that are ready for installation.
When the operating system updates device drivers automatically, or when you do it manually, older versions of drivers are kept in this folder just in case you want to roll back if new drivers cause any issues. That is convenient - but it also takes up your disk space. In theory, you can remove everything from the FileRepository folder, but in reality, this may cause problems and it’s not so safe as you may think.
To clean up some drivers without regretting that, you have to understand what things can be removed safely. For starters, let’s list the drivers that are stored in this folder.
Launch the Command prompt as Administrator and type the following command:
pnputil.exe /e > c:\drivers.txt
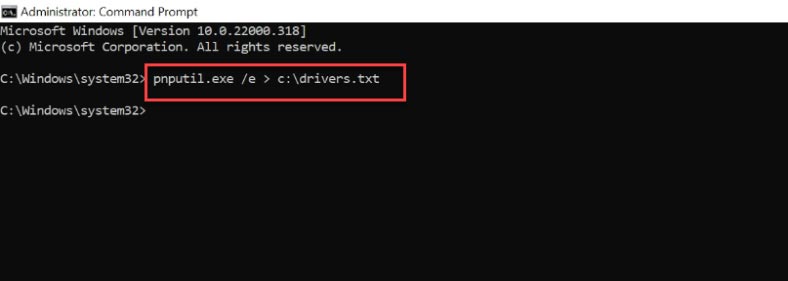
This command will create a file on Disk C with a list of driver packages.
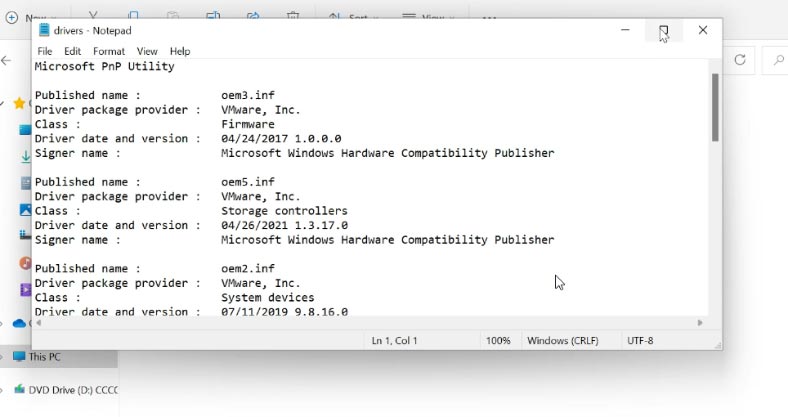
After you check that list, you can remove unnecessary drivers with this command:
pnputil.exe /d oemNN.inf
where NN is the number of the driver file as listed in the document drivers.txt
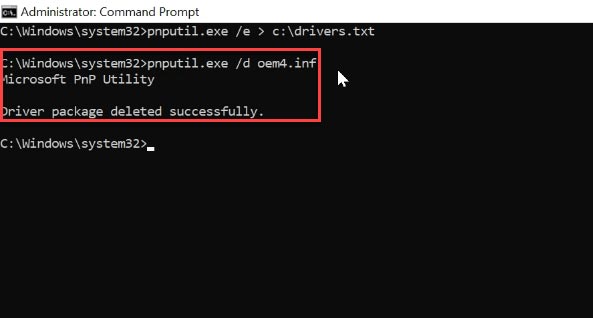
When you try to remove a driver which is currently in use, you will see this message saying that the delete operation has failed. So the best approach is to start your cleanup operations by removing old graphics drivers, and old drivers for your peripheral devices. If necessary, you can always check the current driver version in the Device Manager window by clicking “Properties” and then “Driver”.


