Connect Desktop Hard Drive to Laptop or Computer
In this detailed guide, we’ll walk you through the process of connecting a desktop hard drive to a laptop or another computer step by step. Whether you’re upgrading your system, salvaging data from an old computer, or simply transferring files between devices, knowing how to connect a desktop hard drive can be incredibly useful. From choosing the right adapter or enclosure to safely accessing and transferring data, we’ll cover everything you need to know to successfully connect your desktop hard drive to a laptop or another computer.
In either case you will need to connect the HDD to a laptop or another computer. This is what this article is about. We are going to study one of the simplest and all-purpose variants to use.
- How to take the HDD out of the computer (IDE and SATA)
- Another important detail
- Connecting the disk to a laptop
- If your computer fails to recognize the disk
- Connecting the HDD to another computer
- Questions and answers
- Comments

Windows 10 Can't See a Hard Disk - How to Connect One? 💻⚙️🗄️
How to take the HDD out of the computer (IDE and SATA)
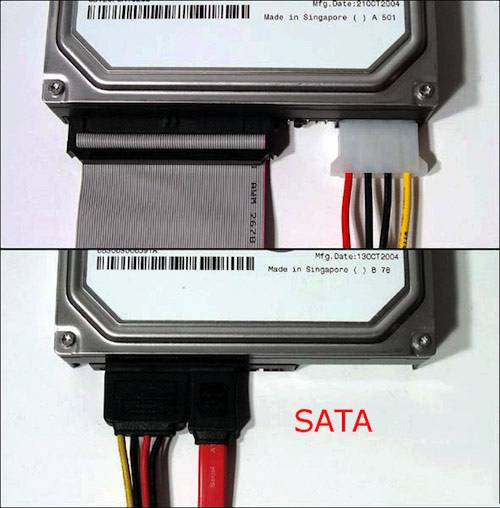
It seems logical that before connecting a disk to another device it has to be taken out of the system unit. The matter is that depending on the interface through which your disk is connected (IDE or SATA) different boxes will be needed to make connection possible.
| Feature | IDE (Integrated Drive Electronics) | SATA (Serial ATA) |
|---|---|---|
| Full Name | Integrated Drive Electronics | Serial Advanced Technology Attachment |
| Data Transfer Rate | Up to 133 MB/s | Up to 600 MB/s (SATA III) |
| Connection Type | Parallel data transfer with 40 or 80-pin ribbon cable | Serial data transfer with a smaller 7-pin cable |
| Cable Length | Up to 18 inches (46 cm) | Up to 1 meter (100 cm) |
| Maximum Drives per Channel | 2 (master and slave) | 1 |
| Power Consumption | Higher | Lower |
| Hot Swapping | Not supported | Supported |
| Connector Size | Large (40-pin or 80-pin ribbon cables) | Small (7-pin data cable, 15-pin power cable) |
| Compatibility | Older drives and motherboards | Modern drives and motherboards |
| Usage | Older systems | Current systems, widely used |
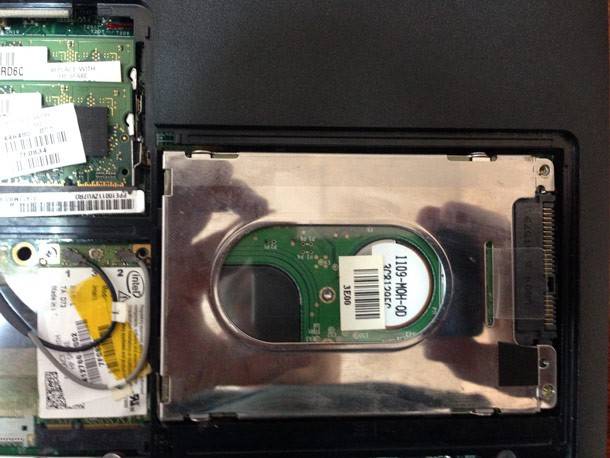
That is why instead of guessing what kind of interface your disk has it is best when you first take it out of the system unit and have a look at the interface.
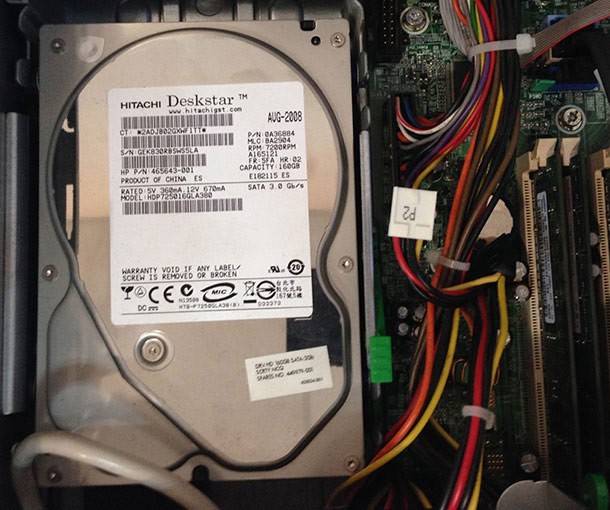
As a rule, there is not much trouble in taking an HDD out:
- First, you turn off the computer, and unplug its power cable from the socket;
- Open the side panel of your system unit;
- Take out of the HDD all connectors;
- Unscrew fastening screws and take out the disk (usually it slips along two sliding bars).
The procedure itself is quick and easy. Then have a careful look at the disk interface. Nowadays most hard disks are connected via SATA (a modern interface with the high-speed data transfer). If your disk is old, it can have an IDE interface.
Another important detail
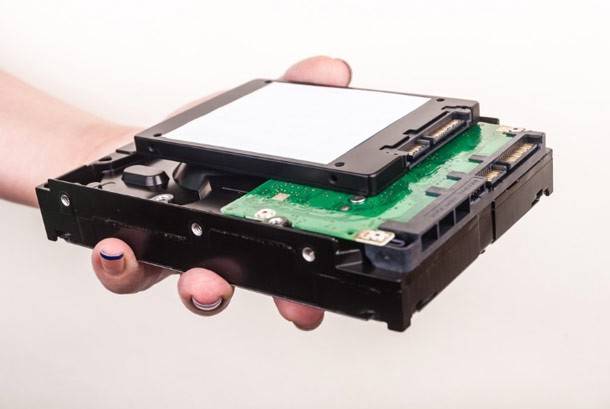
Computers usually have “big” 3.5-inch disks, while laptops have smaller ones of 2.5 inches (1 inch is 2.54 cm). The digits 2.5 and 3.5 are used to denote form factors and actually show the width of an HDD body when measured in inches.
The height of all modern 3.5” HDDs is 25 mm; it is known as “half-height” in comparison to older models. Manufacturers use this height to fit inside from one to five platters.
In 2.5” HDDs things are different as their original height of 12.5 mm was replaced by the 9.5 mm one which can contain up to three platters (nowadays there are also thinner disks than that). The height of 9.5 has actually became a standard for most laptops but some companies still produce 12.5 mm hard disks based on three platters.
Connecting the disk to a laptop
Let us suppose we have sorted the things that concern the interface. For actual connection we will need a special BOX. They can be of various types:
- 3.5 IDE -> USB 2.0 – this box is designed for a 3.5-inch disk (which is what an average PC uses) with IDE interface to help connect it to a USB 2.0 port (actual transfer speed under 20-35 MB/s);
- 3.5 IDE -> USB 3.0 – the same but the transfer speed is higher;
- 3.5 SATA -> USB 2.0 (similar, the only difference is the interface);
- 3.5 SATA -> USB 3.0 and so on.
This box is actually a rectangular container a bit larger than the disk itself. Usually this box opens at the rear side and an HDD is put inside.
In fact, after you have done all that you need to connect a power supply (adapter) to this box and use a USB cable to connect the box to another PC or a laptop.
TIf the disk and the box are all right, in This PC you will see one more disk which you can use as an ordinary HDD (format, copy, delete etc.)
If your computer fails to recognize the disk
In this case, you may need two steps.
-
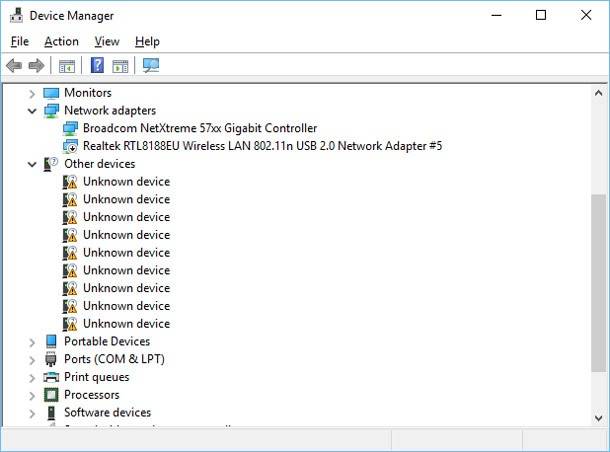
Check if you have drivers for your box. Usually Windows installs them itself, but if your box is non-standard, there may be problems.
To begin with, launch Device Manager and see if there are drivers for your device and make sure there are no yellow exclamatory marks.
-
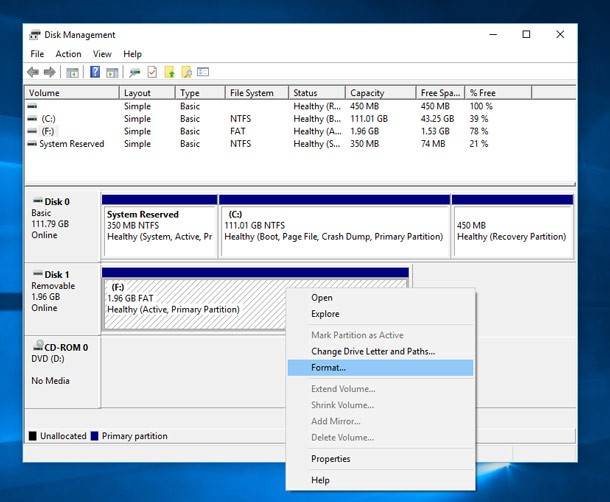
Go to Disk Management in Windows (in order to go there in Windows 10 right-click on START button) and check if you can see the connected HDD there. If it is there, the most probable way of getting it right will be changing the drive letter and formatting it.
There is a dedicated article on this topic in our blog.
Go to view
Windows 10 Can't See a Hard Disk - How to Connect One? 💻⚙️🗄️
Connecting the HDD to another computer
In a modern system unit, a CD/DVD drive and HDD should be connected via SATA interface. That is, instead of a CD/DVD drive you can connect an HDD from another computer.
In fact, the only thing left to do is to disconnect cables from the disk drive and connect them to the other HDD. Then you just turn on the computer and copy all necessary information or scan it with the help of data recovery software.
The new hard disk will be represented in This PC i.e. you can work with it as an ordinary local disk.
If you want to just have this HDD permanently connected to your PC, the only thing you have to do is to fix it properly.
Basically, that’s all. If you want to transfer many files from a PC to a laptop (and you’re not planning to use a desktop HDD with the laptop all the time), then you may like the other way: connect the PC and the laptop to a local network and just copy the files you need. For that purpose what you need is just one cable… (provided that there are network interface cards in both the laptop and the desktop computer).

How to Move Windows From One Computer to Another, or From HDD to SSD 💻 ➡️ 💻



You are doing this the hard way. Plus, some of us were not put on the earth to be handy with tools/ connecting internal things in computers. Myself for instance, I tried and I failed big! This is what I did.
I got a Cooler Master case which comes with (2) hot swappable front docks. Picture taking your internal hard drive out of the computer and putting it in a case, then connecting the case to a port on the back of your computer, either usb or sata. But that's lame, so let's do something better. What if we could take the DVD recorder out of our computer and instead put the case with our hard drive where the DVD was? But all we have done is to move the hard drive from inside to the front of the computer case, still need to have a way to take the drive out from it's case if we ever need to.
Now what if the case we put our hard drive in, has an opening on the front? And a lever/button? Now you're talking! So we put the case where the DVD writer was. It stays there in the front of the computer case. Now we can pop hard drives in and out directly from the front of the computer - just like changing disks on DVD writers.
And this, is what a hot-swappable dock is. Cooler Master HAF case has 2 of them. Which means I can copy from one hard drive to another. This case also has two drive bays. I found a unit that can hold (3) hard drives in the space of two drive bays. That's 5 hard drives I can copy to and from.
Why do this? I have several drives for data storage, and a couple for operating systems that I have already installed. If windows ever crashes or doesn't run well I just pop that hard drive out then in the time it takes to slip in another drive with the operating system I am up and going again. Why fight your computer to fix Windows when you don't have to? And why hold your breath while installing images? (They have been known to fail) And why risk installing Windows on the wrong drive? (Been known to happen) I just pop out the other hard drives while I am installing Windows on the drive I want.
What if the computer case doesn't have room for all this? Well, it is true you do need sata ports for each drive, but there are addin cards with more ports. But space may be a problem in some computers, there just isn't enough room for all these drives. Laptop drives to the rescue! I found a unit that fits (4) laptop drives in the space of a DVD writer. There are also gadgets called toasters (because they look and act like one). So I can take a hard drive out of my unit (and remove it from the tray) then pop it in my toaster to copy files as the toaster connects by usb or sata. I also have an external unit that can hold (4) 3.5 hard drives but I am a little leery of that without using a fan on it. So I don't keep it powered on all the time. Otherwise it works great and I can even boot from it.
"Harder"?