Mac User’s Recovery Guide: How to Retrieve Data After OS Update or Disk Format
Master the Art of Data Recovery on Your Mac! Have you recently updated, reinstalled, or formatted your Mac OS and discovered that some important files are missing? Fear not! This aerticle provides a detailed guide on how to recover your lost data after a Mac OS update, reinstall, or disk format. We’ll walk you through every step, from initial assessment to successful data retrieval using trusted tools and methods. Whether you’re a seasoned Mac user or a newbie, our instructions will help you regain access to your valuable data quickly and safely.
- Introduction
- How to recover files after reinstalling macOS
- Backing up and reinstalling the operating system without losing data
- Conclusion
- Questions and answers
- Comments
The need to reinstall the operating system may arise after a system error, when the computer works too slowly, or when you need to erase all personal data.
From this article, you will learn how to recover data after reinstalling macOS or formatting the hard disk. Below, you will also find a complete guide to help you reinstall MacOS safely without losing any data at all.

🍏 How to Recover Data from iMac, MacBook, Mac Pro, USB Drives and Memory Cards in 2021 ⚕️
Introduction
If you decided to reinstall the operating system and format the hard disk in the process, you should backup important data in advance to save yourself the trouble of trying to recover it somehow. This would be the best way to secure your data against possible loss.
However, sometimes having a backup copy is not enough to recover lost or removed files, as there could always be some unpredictable things.
During the reinstall, the operating system performs a quick erase operation on the corresponding volume. As a result, it removes the file catalog but doesn’t write anything to the hard disk, so that the original data doesn’t get overwritten.
This peculiarity lets you recover files after reinstalling the Mac operating system – if you start recovery operations immediately.
Remember to stop using the hard disk where the important information used to be stored, otherwise it will be lost after overwriting.
How to recover files after reinstalling macOS
Without using additional software tools data recovery after reinstalling the operating system is only possible if you have created a backup in advance.
There are several ways to recover lost data. Choose one depending on your circumstances.

🍏 Recovering Data after Mac OS Update, Reinstall or Disk Format 🍏
Method 1. Recovery from a Time Machine backup stored on an external drive
The first method to bring back the lost files after reinstalling the operating system is to restore a backup from Time Machine. If you have already created a backup on an external hard disk, you can handle the lost data issue easily.
This way, you have almost 100% guaranteed chance for recovery.
Here is what you should do:
Step 1. Make sure that the external hard disk with a Time Machine backup is connected to your Mac device.

Step 2. Open Launchpad, click Other. Find the Time Machine icon and click on it.
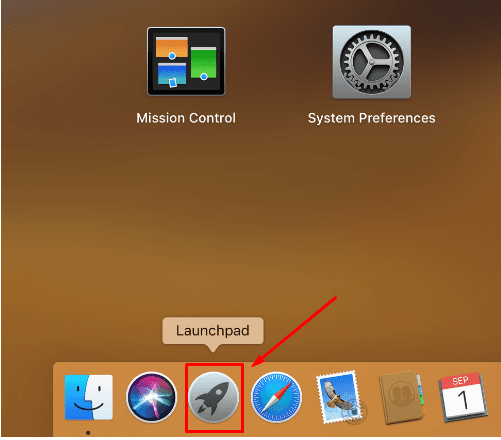
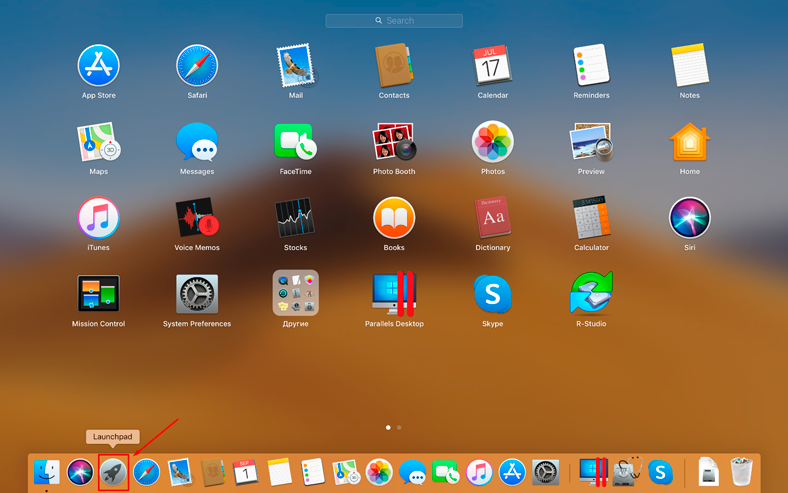
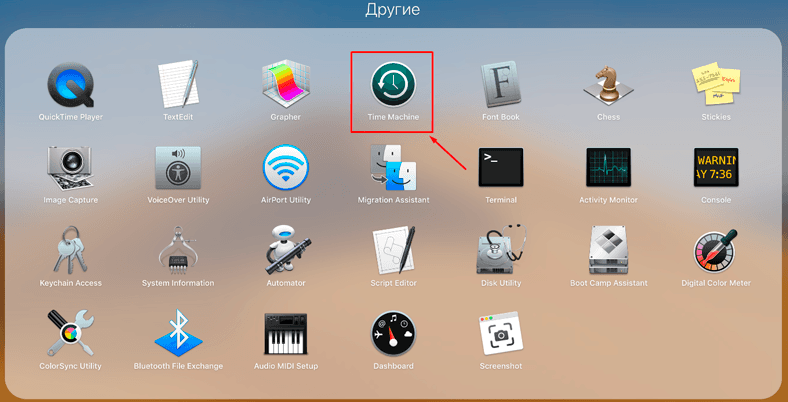
Step 3. Use up and down arrow keys to move the timeline and view backups containing the lost files.
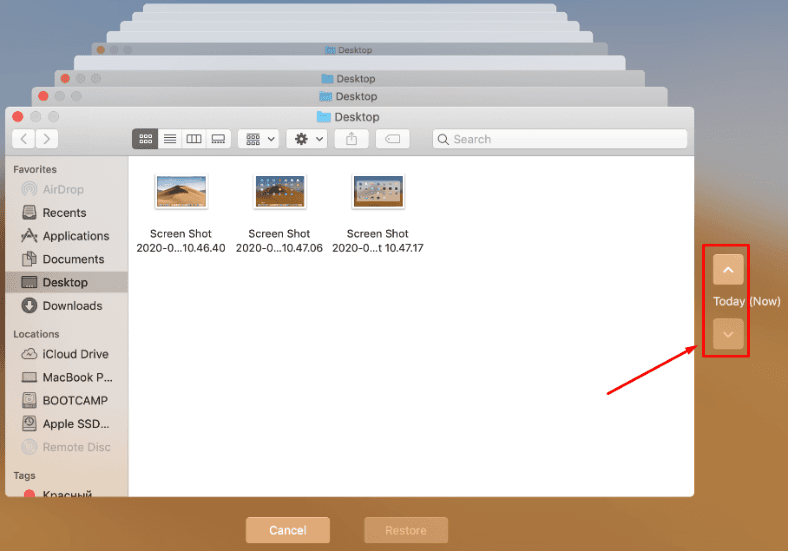
Step 4. Find the lost data that you need to bring back and click Restore.
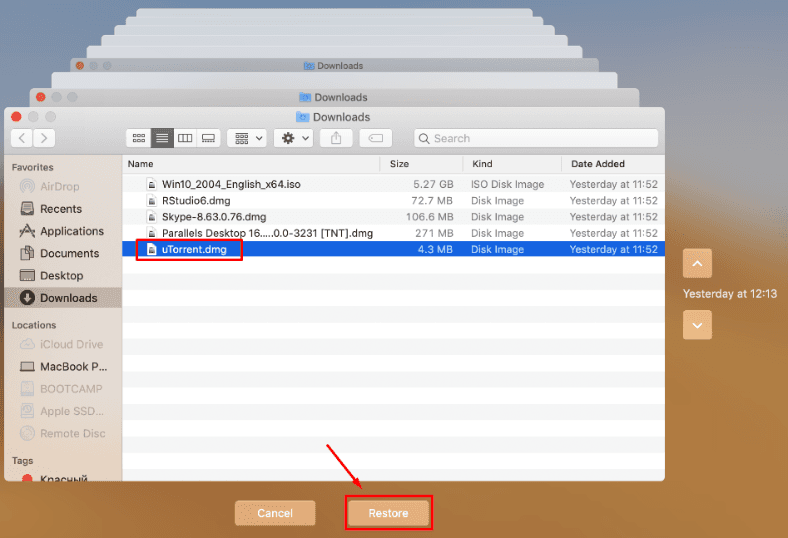
It starts the recovery process.
After that, you may have to restart the computer, and then the files should appear on the disk and become available for viewing.
Method 2. Recovering files from an iCloud backup after OS reinstallation or after disk formatting
Another method of data recovery after reinstalling the operating system is by using an iCloud backup.
This method is applicable if you uploaded a copy of important data to iCloud before reinstalling the operating system.
If that’s the case, restoring the information is very easy.
Do the following to recover data from an iCloud backup:
Step 1. Open the browser and go to iCloud.com, use your Apple ID to sign in.
Step 2. Open the settings and go to Advanced and click Restore files.
To restore contacts, bookmarks and reminders from the calendar, click on the corresponding settings in Advanced.
Step 3. Select the necessary backup or click to Select All, if you need to have all the files back. After that, click Restore.
When the process is over, all the files you have uploaded to iCloud before they were lost while reinstalling macOS will appear on your computer again.
Method 3. File recovery with third-party tools after reinstalling MacOS or disk formatting
This method requires using a computer with Windows operating system. If you haven’t created a backup in Time Machine before reinstalling macOS, you will need to download a special utility to help you recover your data.
With virtually tons of data recovery tools offered on the Internet, we recommend using our product, Hetman Partition Recovery. When it comes to recovering files after reinstalling an operating system, you can rest assured that Hetman Partition Recovery will do the job perfectly.
It will scan the hard disk or external storage device, find the lost data and help you recover it in a simple and efficient way.
Here is what you do to get your data back:
Step 1. Connect your disk to another computer with a Windows operating system, download and install Hetman Partition Recovery.
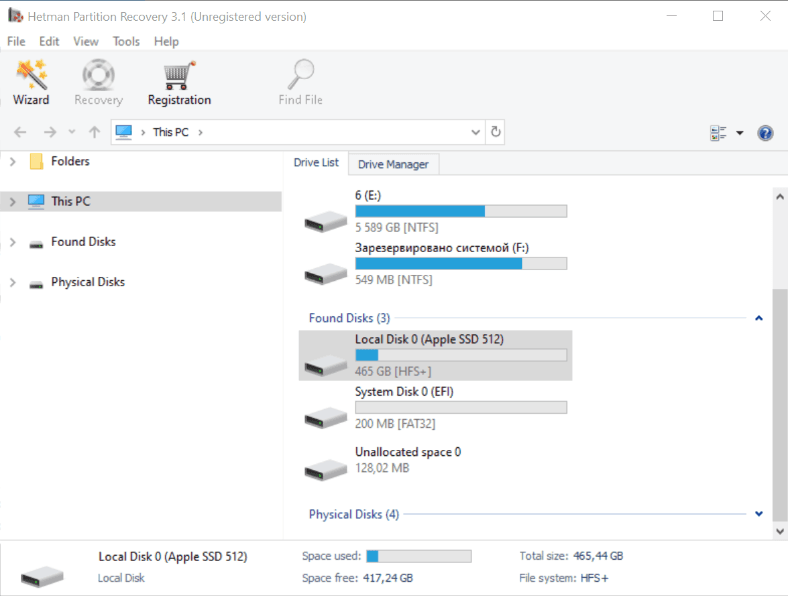
As I said before, during the reinstalling process, the operating system performs a quick wiping operation on the corresponding volume. As a result, it removes the file catalog but doesn’t write anything to the hard disk, so that the original data doesn’t get overwritten. However, remember to stop using the hard disk where the important information used to be stored, otherwise it will be lost after overwriting.
Step 2. In the Drive Manager, select the storage device, right-click on it and choose Open. Try a fast scan first – it will take less time. If the fast scan doesn’t help to find the deleted data, then go for Full analysis.
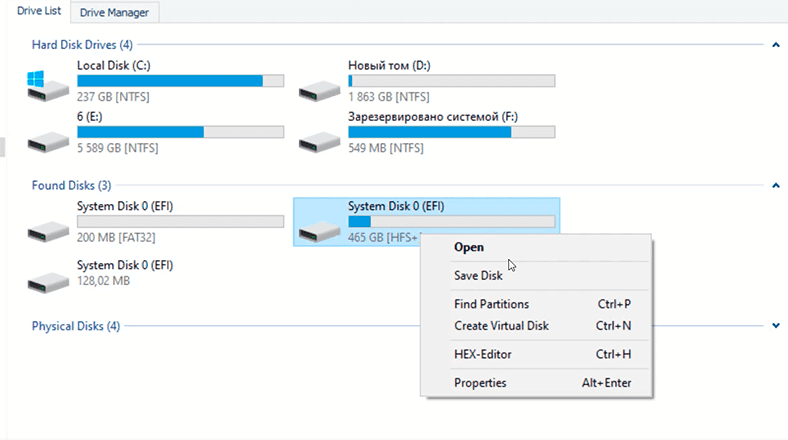
Step 3. The file recovery wizard will scan the selected volume immediately and display the scan results in the right side of the program’s window.
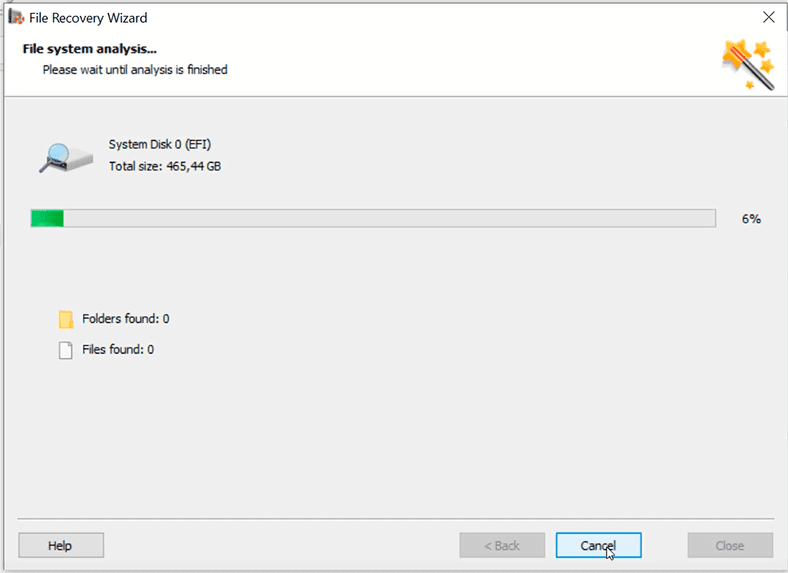
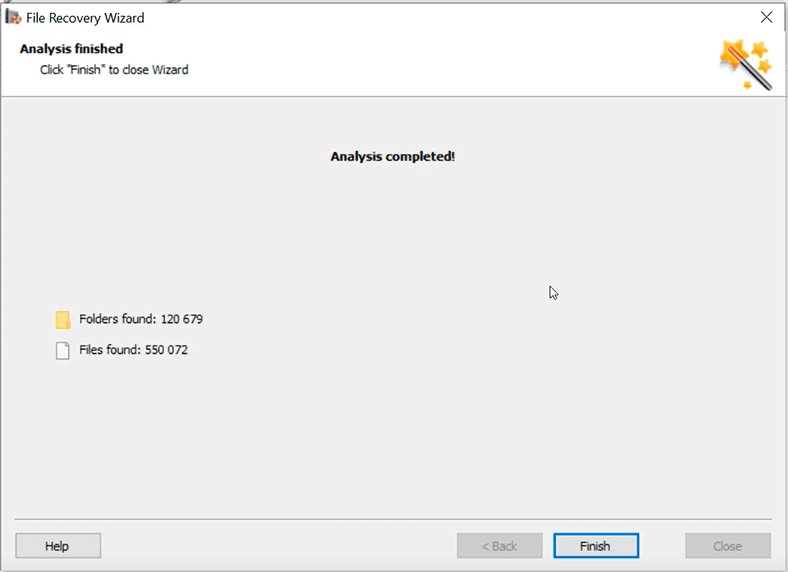
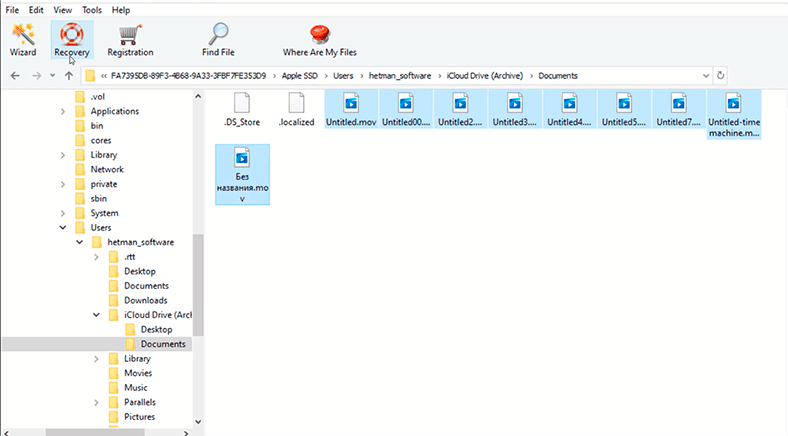
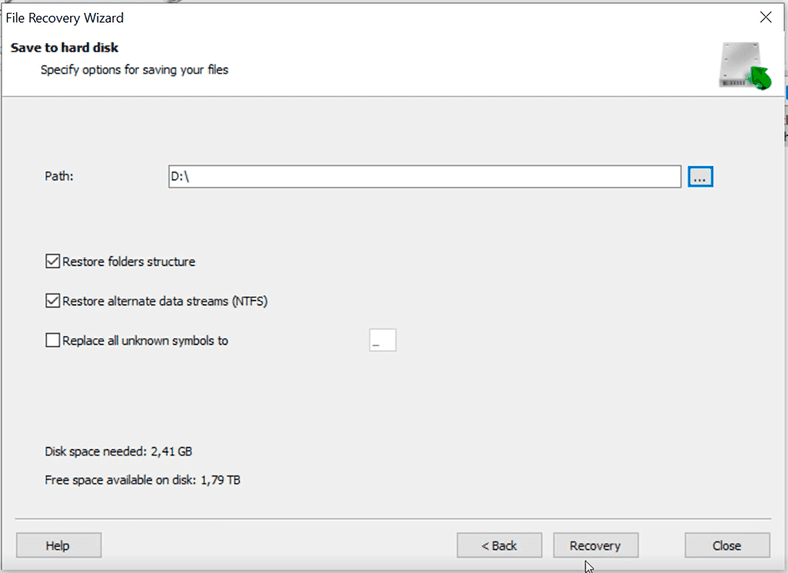
Step 4. When the scan is over, all you need to do is to select the deleted files you want to restore and then click Recovery. Specify where to save the data and click the same button again to start recovering.
Also, this program can create a disk image and the conduct all recovery operations with this image which increases your chances to restore the deleted information successfully, because multiple rounds of scanning may result in data overwriting.
Hetman Partition Recovery is a powerful, safe and easy-to-use data recovery tool, and that’s why we recommend using this specific product. Before trying it, you are welcome to watch a video where we compare various tools of the kind and our product shows one of the best results.
Video: Testing top recovery tools.
You can use this program for data recovery in any of the following cases:
- To recover files lost after removing or formatting partitions, system errors, virus attacks and other scenarios that involve loss of data.
- To recover data from internal and external hard disks, USB storage devices, SD memory cards, cameras and other devices used to store information.
- To recover lost photos, videos, music, documents and other file types.
Backing up and reinstalling the operating system without losing data
All in all, it’s always a good idea to back up the valuable information you store on the hard disk before reinstalling the operating system. In the end, it helps to never lose important data and avoid unnecessary trouble. Even though it may seem a bit difficult and is sure to take some time, you won’t have to spend lots of time and effort later when you realize the data has to be recovered somehow.
For example, copy your important files to a removable drive.
To save your time, use the built-in Time Machine feature, or upload the information to iCloud.
When it’s done, you can start the reinstallation process without worries.
To reinstall the operating system:
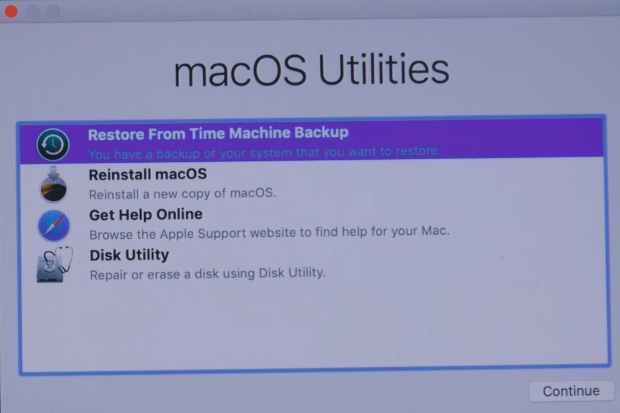
Step 1. Restart the computer into the recovery mode.
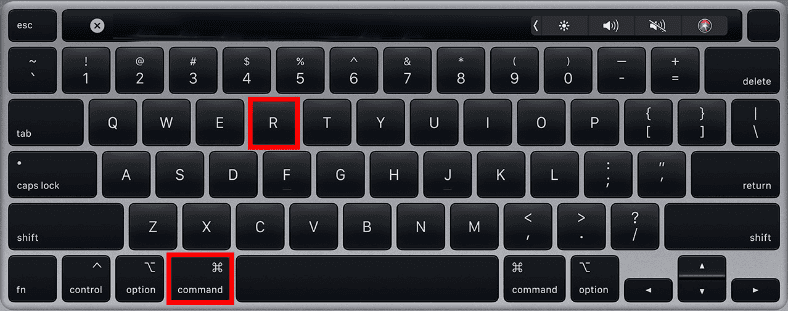
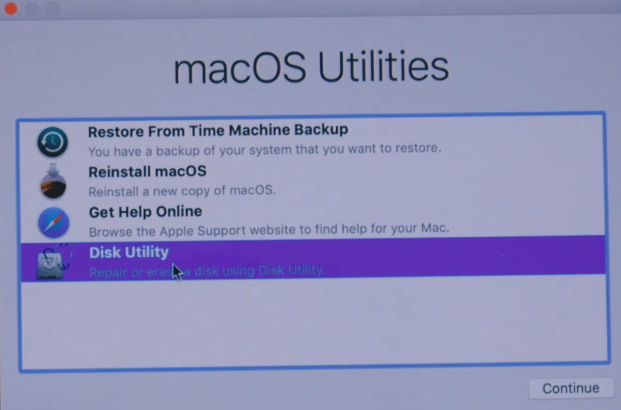
Step 2. Clean the hard disk
To do it, open Disk Utility and click Continue
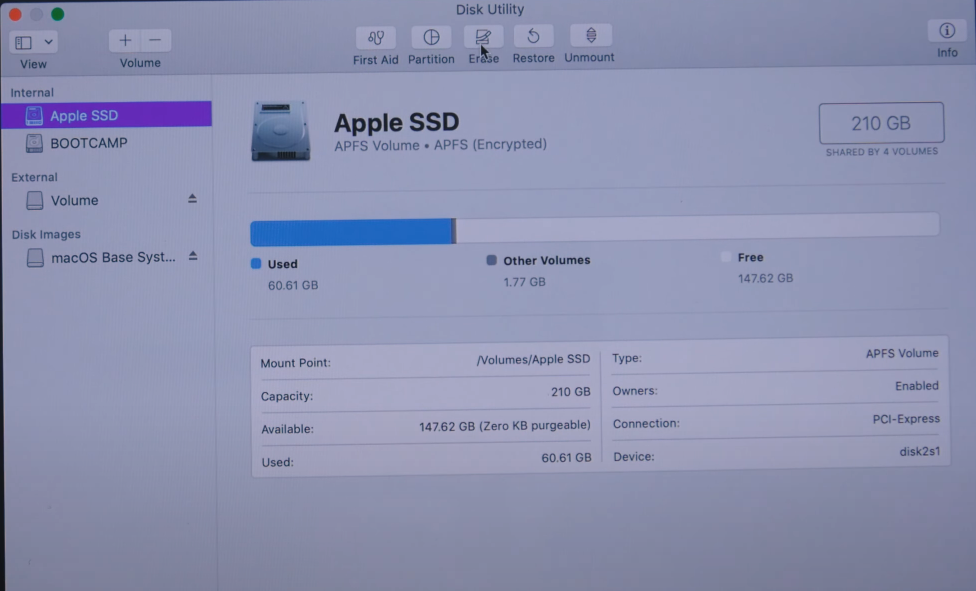
Select the boot drive and click Erase, Select Mac OS Extended or APFS and click Erase.
Step 3. Repeat Step 1 to open macOS utilities. Click Reinstall macOS, then Continue to start the process. Follow wizard directions to complete it.
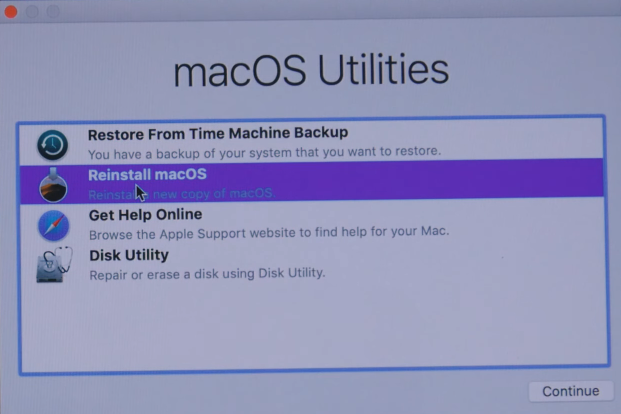
In the end, your computer gets a clean installation of the operating system.
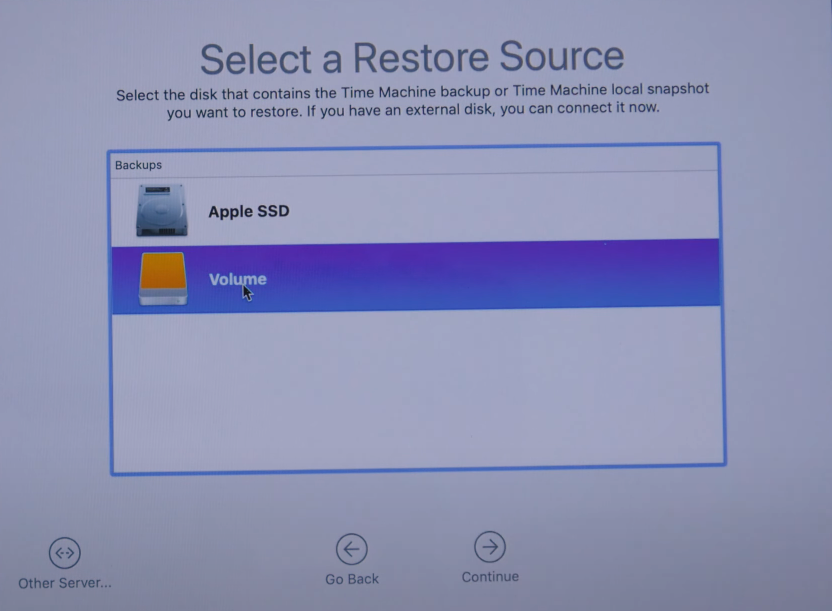
Step 4. To recover data, open Time Machine and restore the information from the backup file.
Conclusion
Now you know how to recover lost data after you reinstalled your MacOS or formatted the hard disk. If you don’t have a system backup, use a third-party data recovery tool – Hetman Partition Recovery, and the program will scan the disk, find and display the deleted data, so you will only have to decide where to save it.
| Feature | Description |
|---|---|
| Compatibility with MacOS | Supports data recovery from HFS+, APFS file systems |
| File Systems | NTFS, FAT, FAT32, exFAT, ReFS, HFS+, APFS, Ext2/3/4, XFS, ZFS |
| Device Types | Hard drives, SSD, USB drives, external hard drives, NAS devices |
| Recovery Capabilities | Recovery of deleted files, damaged and formatted partitions, data from damaged media |
| User Interface | Intuitive graphical interface with step-by-step recovery wizard |
| File Preview | Ability to preview file contents before recovery |
| Additional Features | Disk imaging, saving to external media, volume structure recovery |

💾 How to Recover Data After Formatting a Hard Disk, USB Drive or a Memory Card 💾



"The recommended file system for macOS is the Apple File System (APFS). APFS is a modern, high-performance file system that was introduced in macOS High Sierra (10.13) and is now the default file system for all Macs with solid-state drives (SSDs) and Fusion drives.
APFS offers several advantages over the older Hierarchical File System (HFS+), including improved data integrity and security, better performance on SSDs, and support for features like snapshots, cloning, and encryption. APFS also uses space more efficiently than HFS+, which can be particularly important if you're working with large files.
However, if you're working with older Macs or external hard drives that need to be compatible with other operating systems, you may need to use a different file system. In these cases, you may want to consider using the older HFS+ or the ExFAT file system, which is compatible with both macOS and Windows.
Ultimately, the best file system for your needs will depend on your specific use case and hardware configuration. For most modern Macs with SSDs, APFS is the recommended file system. If you're not sure which file system to use, it's a good idea to consult Apple's documentation or seek advice from a professional."
"To completely format a disk on a Mac, you can use the built-in Disk Utility app. Here are the steps to format a disk on a Mac:
Open Disk Utility: You can open Disk Utility by going to the Applications folder, then to the Utilities folder, and selecting Disk Utility.
Select the disk: In the left-hand sidebar of Disk Utility, select the disk you want to format.
Erase the disk: Click on the ""Erase"" button at the top of the Disk Utility window. This will open the Erase dialog box.
Choose the format: In the Erase dialog box, select the format you want to use for the disk. The recommended format for macOS is ""APFS"". You can also choose ""Mac OS Extended (Journaled)"" or ""ExFAT"" if you need to use the disk with other operating systems.
Choose a name: Give your disk a name that will help you identify it.
Start the erasing process: Click the ""Erase"" button in the Erase dialog box to begin the formatting process. This will erase all data on the disk.
Wait for the process to complete: Depending on the size of the disk and the format you have chosen, the erasing process may take some time. Once it is complete, you can use the disk for your desired purpose.
It's important to note that formatting a disk will erase all data on it. Make sure you have backed up any important data before proceeding with this process."
"Yes, it is generally safe to keep an external hard drive connected to your Mac for extended periods of time. External hard drives are designed to be connected to computers for long periods of time without any issues.
However, there are a few things to keep in mind when using an external hard drive:
Power management: Some external hard drives may have power management features that cause the drive to spin down or sleep after a period of inactivity. This can be useful for saving power, but it can also cause the drive to be unresponsive when you first try to access it. To avoid this, you may need to adjust the power management settings for your external hard drive.
Backing up: It's always a good idea to have a backup of your data, even if you're storing it on an external hard drive. If the drive fails or becomes corrupted, you could lose your data. Make sure to regularly back up your important files to another location, such as a cloud storage service or another external hard drive.
Ejecting the drive: Before physically disconnecting an external hard drive from your Mac, you should always eject the drive to ensure that any cached data is written to the disk and that the file system is properly unmounted. This can help prevent data loss or corruption.
Overall, keeping an external hard drive connected to your Mac is generally safe, as long as you take appropriate precautions to protect your data and ensure that the drive is properly ejected before disconnecting it."
"When formatting a disk for use with macOS, the recommended format is the Apple File System (APFS). This file system was specifically designed for use on macOS devices and offers several advantages over older file systems like HFS+.
Some of the benefits of APFS include:
Improved performance: APFS provides better performance than older file systems like HFS+. This is because APFS is optimized for use with SSDs and flash storage.
Better encryption: APFS provides improved encryption of files and folders on a Mac. This can help protect your data from unauthorized access.
Space-saving: APFS provides better space utilization than older file systems. This means you can store more data on your hard drive without running out of space.
Flexibility: APFS is a flexible file system that allows you to create multiple volumes on a single disk and format them in different ways.
While APFS is the recommended file system for use with macOS, it may not be available on older Mac models. In these cases, you can use HFS+ or the exFAT file system if you need to use the disk on Windows computers as well."
"Partitioning a disk on a Mac is not always necessary, but it can be useful in certain situations. Partitioning allows you to divide a single physical disk into multiple logical volumes, each of which can be formatted and used independently.
Some reasons why you might want to partition a disk on your Mac include:
Organizing data: Partitioning can be a good way to organize data on your Mac. For example, you could create a separate partition for your documents, music, or photos, making it easier to find and manage your files.
Running multiple operating systems: If you want to run multiple operating systems on your Mac, such as macOS and Windows, you'll need to partition your disk to create separate volumes for each operating system.
Backup and recovery: Partitioning can be useful for backup and recovery purposes. You could create a separate partition for your Time Machine backup, for example, to ensure that your backup files are stored separately from your other data.
Performance: In some cases, partitioning a disk can improve performance. For example, if you have a large disk with lots of data, creating multiple partitions can reduce the time it takes to search for files.
Keep in mind that partitioning a disk will erase all existing data on the disk, so be sure to back up any important files before you begin. Also, be aware that partitioning a disk can be a complex process, so you should follow the instructions carefully and consider seeking help if you're not sure what you're doing."