Understanding BIOS: What It Is and When to Use It
Unlock the Mysteries of BIOS on Your PC! BIOS, or Basic Input/Output System, is a critical software that powers up your computer before the operating system kicks in. In this article, we dive deep into what BIOS is and discuss specific scenarios where accessing and configuring BIOS is essential. Whether you’re troubleshooting hardware issues, optimizing system performance, or updating security settings, understanding how to interact with BIOS can significantly enhance your computing experience. Join us as we break down everything from entering BIOS settings to making crucial adjustments that affect your system’s core functionality.
- BIOS and UEFI: Find the difference
- How to access BIOS or UEFI settings
- How to modify BIOS or UEFI settings
- Questions and answers
- Comments
BIOS and UEFI: Find the difference
BIOS is the abbreviation for Basic Input/Output System and is a piece of microcode stored in a special chip on the motherboard. When you turn on the computer and before the operating system starts booting, BIOS checks all computer’s hardware for operability before proceeding to start Windows.
UEFI is the abbreviation for Unified Extensible Firmware Interface that was developed to replace the conventional BIOS. The new interface supports boot partitions over 2 TB, more than four partitions on a single hard disk, works faster and has modern options and features. For example, only UEFI systems support Secure Boot, the feature that prevents hacking and unauthorized use of the operating system, and protects the boot process from rootkits.
For everyday use, it doesn’t matter if your computer has BIOS or UEFI. Both firmware types manage low-level hardware features and are launched at startup, and are meant to ensure proper initialization of hardware when the computer is booting. Both have interfaces that allow you to change most system settings. For example, set boot priority, configure overclocking settings, protect the PC with a boot password, enable hardware virtualization support, and deal with other low-level features.
| Parameter | BIOS | UEFI |
|---|---|---|
| Full Name | Basic Input/Output System | Unified Extensible Firmware Interface |
| Year of Creation | 1975 | 2005 |
| Interface | Text-based, basic | Graphical, mouse support |
| Boot Table | MBR (Master Boot Record) | GPT (GUID Partition Table) |
| Supported Disk Size | Up to 2 TB | More than 2 TB |
| Boot Speed | Slower | Faster |
| Compatibility | Supports legacy systems | Supports modern technologies |
| Security | Limited capabilities | Secure Boot support |
| Update Process | Rare, complicated | Simple updates via interface |
| Scalability | Limited | Flexible, supports network connectivity |
How to access BIOS or UEFI settings
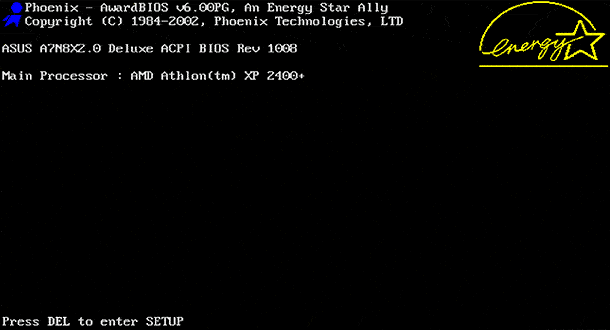
The way to access BIOS or UEFI may differ, depending on a specific computer you are using, But the step you need to take in either case is to restart the computer. To get into the BIOS menu, you have to press a certain button while the computer is booting. Usually there is a hint in the boot screen: Press F2 to access BIOS, Press DEL to enter setup, and so on. Here are the keys traditionally used for opening BIOS: DEL, F1, F2, F10 or Esc.
Quite often, opening the UEFI menu means pressing the same keys as you would use for BIOS, But the best way to find out is to read the manual that comes supplied with your computer or motherboard.
For computers with Windows 8 or 10, you may need to open the boot menu to access UEFI. To do it, choose Restart in the Start menu of your PC while holding down the Shift key.

The computer will restart to a special boot menu where you need to select Troubleshoot / Advanced options / UEFI Firmware Settings.


How to Enter BIOS or UEFI in a Computer or Laptop and Boot from a Flash Drive or a CD, DVD 💽🛠️💻
How to modify BIOS or UEFI settings
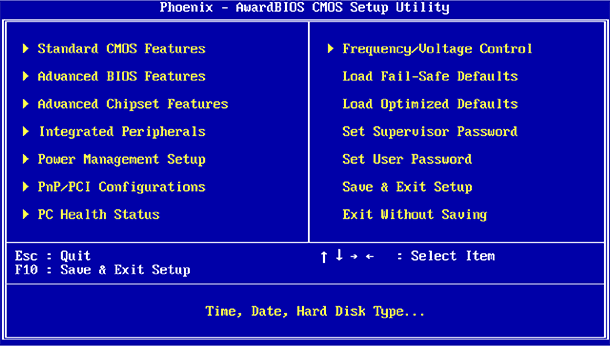
As we have just mentioned, the appearance of BIOS or UEFI may differ depending on a specific computer you are using. BIOS has a character-based interface which can only be navigated with the arrow keys, and any choices you make involve pressing the Enter key. Other keys that can be used in the current menu are shown at the bottom of the screen or on the right (the actual position depends on the firmware configuration).
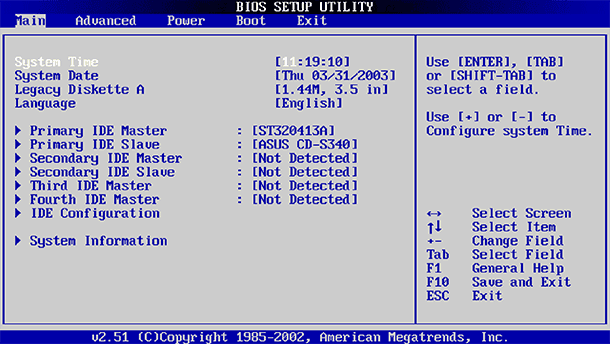
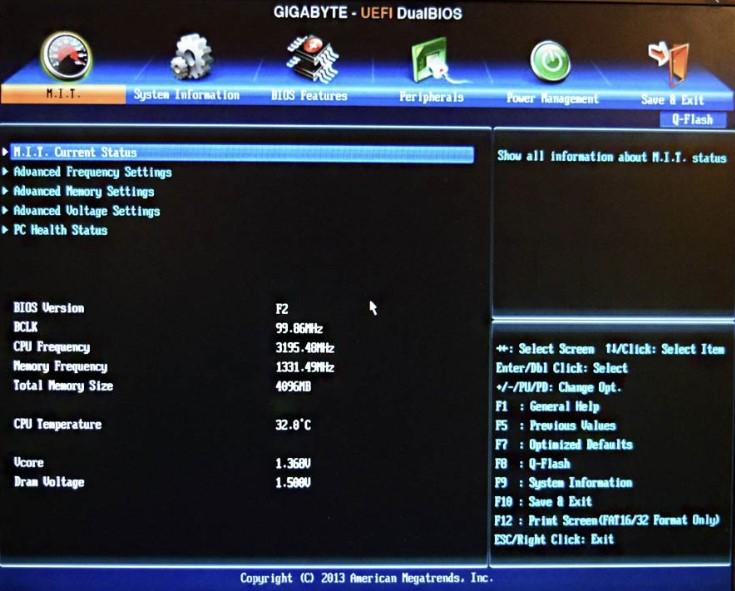
On the contrary, UEFI has a graphical interface that you can navigate with the mouse and/or the keyboard. However, there are quite a number of computers that still use text-based firmware, even if it’s already UEFI-type.
Whatever the menu – BIOS or UEFI – you are working in, be very attentive and only modify the settings when you are confident you know what you are doing and why. Meddling with certain settings (especially those related to overclocking) you can make the computer’s work unstable or even damage its hardware.
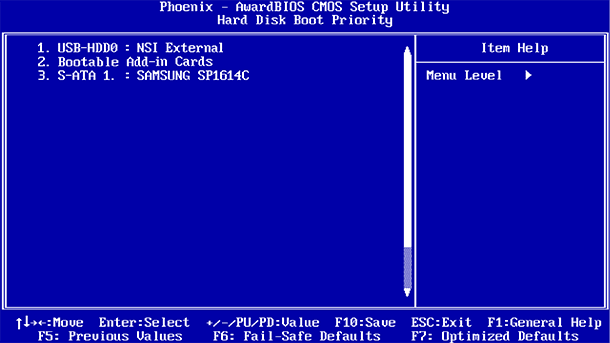
Other settings are less dangerous, user-wise. For example, changing the order of booting (Boot Order or Boot Device Priority) is less risky but still may result in certain difficulties. If you change the boot order and remove the hard disk from the list of boot devices, Windows won’t be able to start on this computer until a normal bot order is restored.
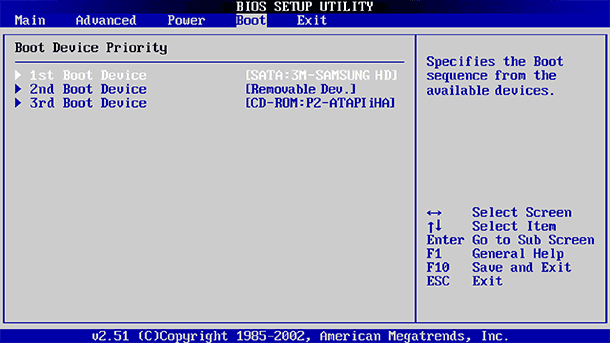
Even if you know well what you are looking for, certain menus may be found in absolutely different locations, which depends greatly on the specific PC, BIOS and UEFI versions more than you could imagine. That is why reading additional info fro each menu is very helpful, as it explains what this or another menu is for.
For example, the menu Enable Intel’s VT-x virtualization technology is usually located somewhere in the Chipset section, But some computers have it elsewhere, for instance, in System Configuration. This menu is usually entitled as Virtualization Technology, but its other names include Intel Virtualization Technology, Intel VT-x, Virtualization Extensions, or even Vanderpool and so on.
If you have difficulties finding a specific menu in BIOS, have a look into the manual you have for your computer or motherboard, or visit the manufacturer’s website.
After you have made al the necessary changes, select Save Changes to make the PC remember them and restart the computer. Also, you can select Discard Changes to restart without saving the changes.
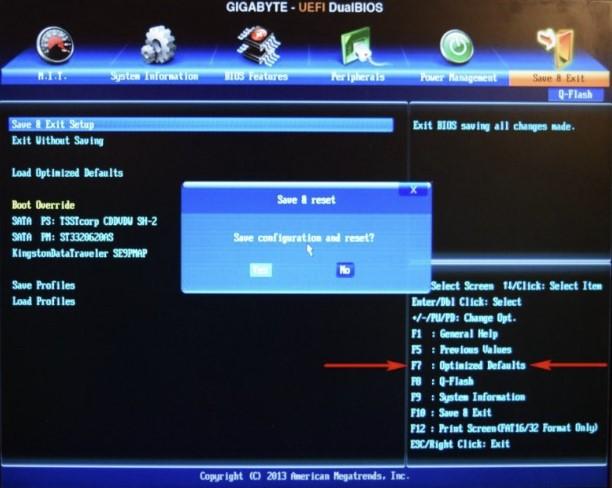
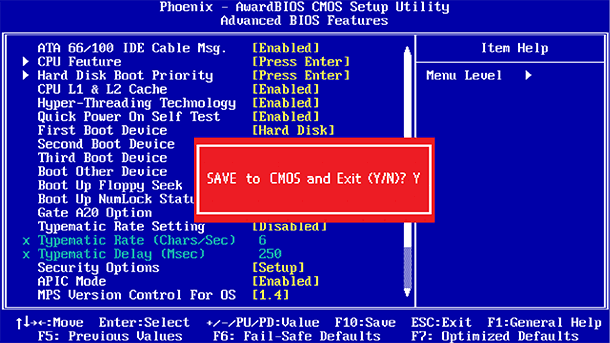
If some issues appeared after you changed the settings, open BIOS or UEFI again and look for a line that says Reset to Default Settings or Load Setup Defaults. This way, you can reset BIOS/UEFI settings to factory defaults and fix all the wrong steps you could have taken.

🔂How to Flash BIOS With Third-Party Firmware, or Modify BIOS 👨🏿💻

⚙️ How to Reset BIOS, Remove a Password 🔐 on a Desktop PC or Laptop 💻

How to Update BIOS For ASUS, HP, Lenovo, MSI, Acer, Samsung, Gigabyte, Asrock, AMI, Phenix Award 💽💻🤔




Common problems with BIOS and UEFI include: