How to Transfer Files from iPhone to Mac
Read this article to find out how to transfer files from iPhone to a macOS computer. We’ll explore all methods to transfer files: via (Lightning), by AirDrop, with iCloud, and by using third-party cloud storage services.
- Getting your iPhone ready to transfer files to Mac
- Method 1. Sending files via Lightning cable
- Method 2. Transferring files via AirDrop
- Method 3. Transferring files with iCloud
- Method 4. Using third-party cloud storage services
- Conclusion
- Questions and answers
- Comments
Sending data between devices can become a necessity in various situations, be it data backup for important files, moving photos or videos between directories, or just freeing up some disk space on your device. We will explore several methods to transfer files, so you can choose the most convenient and effective way for your particular situation.
| Transfer Method | Description | How to Perform | Advantages |
|---|---|---|---|
| File Transfer via Cable (Lightning) | Connecting iPhone to Mac via Lightning cable for file transfer using Finder or iTunes. | Connect the iPhone to Mac, open Finder or iTunes, and select the files you want to transfer. | Fast file transfer, does not depend on internet connection. |
| File Transfer via AirDrop | Using AirDrop technology for wireless file transfer between iPhone and Mac. | Enable AirDrop on iPhone and Mac, select files on iPhone, and transfer them to Mac. | Convenient and fast method, does not require cables or internet connection. |
| File Transfer via iCloud | File synchronization via iCloud, allowing access to them on any Apple device. | Enable iCloud on iPhone and Mac, move files to iCloud Drive on iPhone to access them on Mac. | Access to files from any location with an internet connection. |
| Using Third-Party Cloud Storage (Dropbox, Google Drive, Microsoft OneDrive) | Uploading files from iPhone to third-party cloud storage and accessing them on Mac through the corresponding app or web browser. | Use the corresponding app on iPhone to upload files to the cloud, then open them on Mac. | Access from any device, convenience in working with large files. |

Fast Ways to Transfer Files from iPhone to Mac
Getting your iPhone ready to transfer files to Mac
For starters, let’s get your iPhone ready to transfer files to a Mac computer. To do it, take the following steps:
-
First of all, make sure that iPhone and Mac are connected to the same Wi-Fi network. This is necessary to enable wireless data transfer.


-
After that, make sure the iPhone has enough charge left for data transfer operations.
-
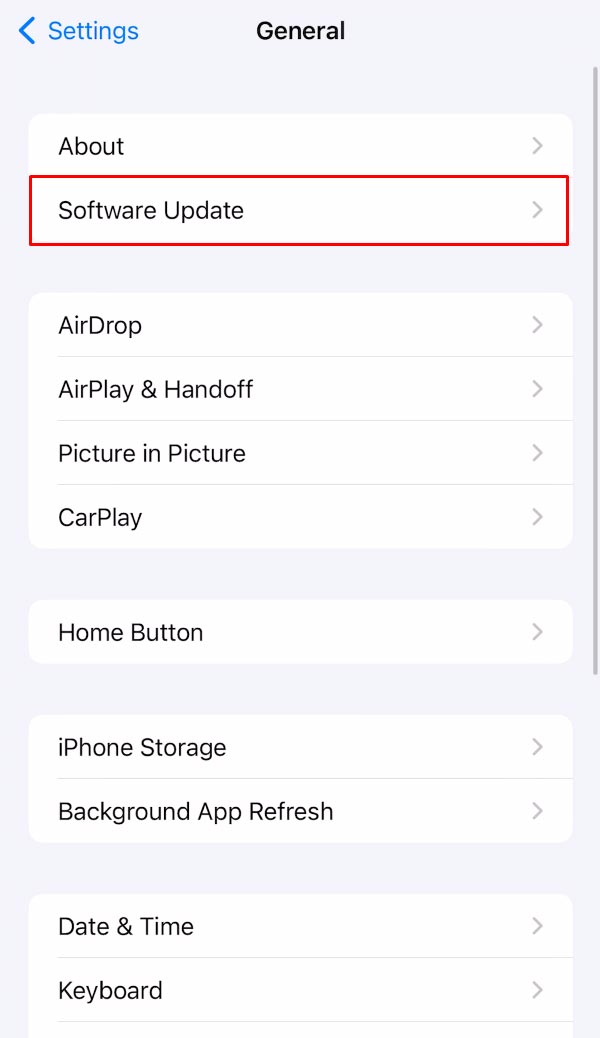
Check if you have the latest operating system update installed on your iPhone. To do it, go to Settings and choose General – Software Update, and install all available updates.
-
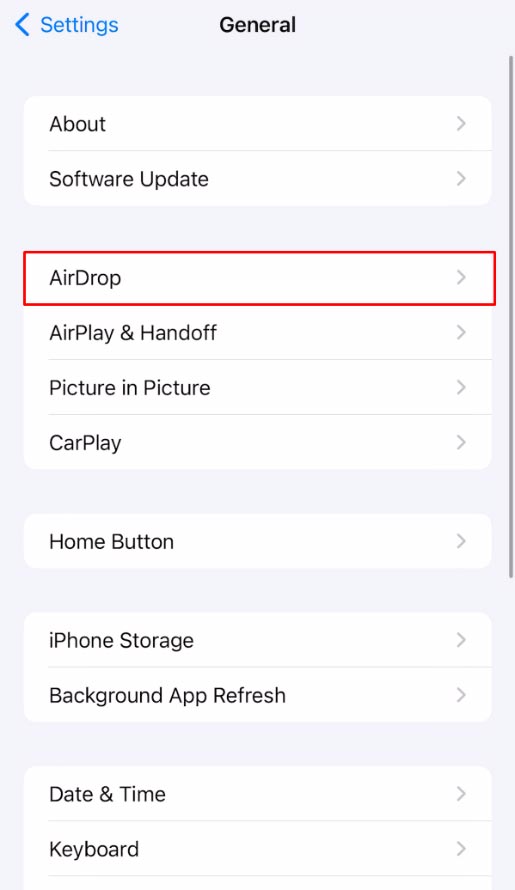
After that, check if the AirDrop feature is enabled for iPhone. This will let you send files easily between iPhone and Mac by Wi-Fi.
To do it, open Settings – General – AirDrop. Choose either Everyone or Contact only.

When you have taken these steps, your iPhone is ready to transfer files to a Mac computer.
Method 1. Sending files via Lightning cable
All right, now the phone is ready. Let’s explore several ways of transferring data. The first method to transfer files from iPhone to Mac is to use a Lightning cable.
Connect your phone to the computer with the cable (Lightning-USB). Make sure that both ends of the cable are reliably connected to respective devices.
After connection, iPhone should automatically open the Photos app on your Mac computer and start importing photos and videos from your mobile device. If the Photos app doesn’t start automatically, open it manually.
Start the Photos app. You can find it on Launchpad or in the quick start menu of the desktop.
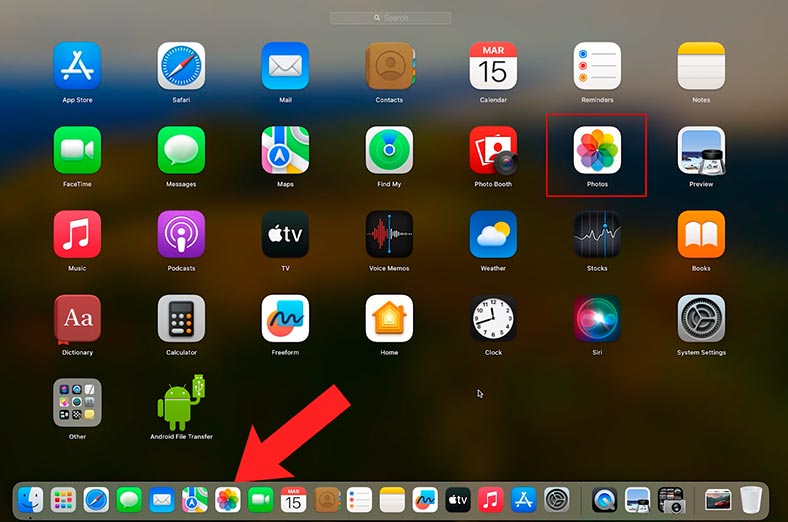
In the Devices tab you will see your iPhone. Select it.
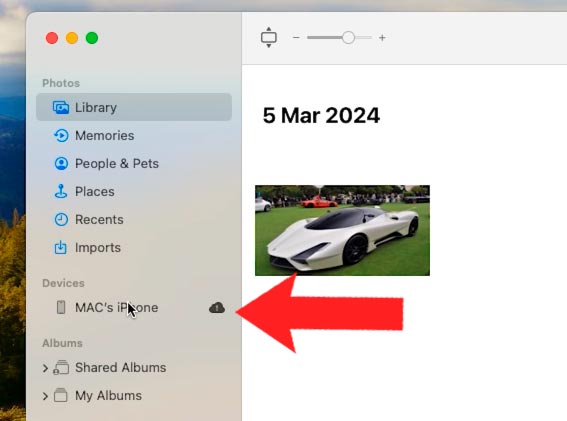
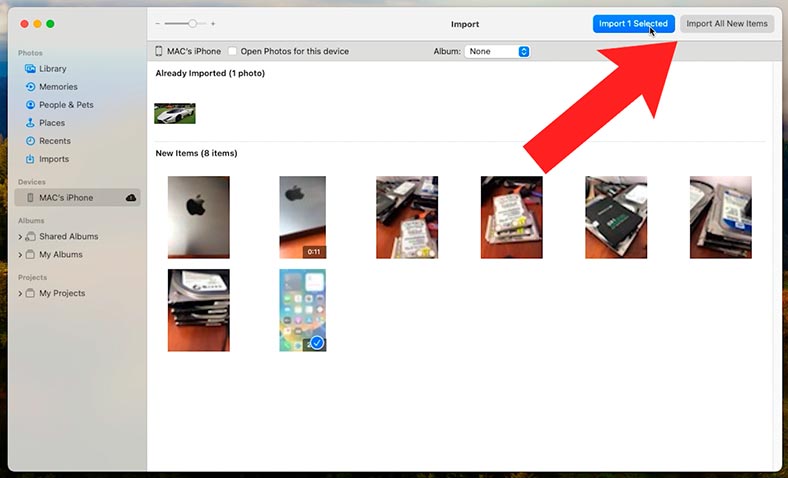
When the device is selected, you will see the list of all photos and videos available for import. Select the necessary files or click Import All New Items to download all the contents.
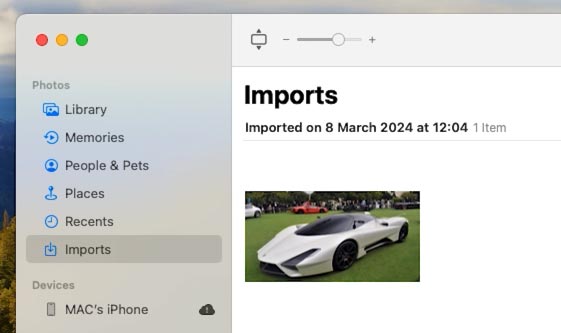
When the import operation is complete, files will be placed into the Imports folder.
If you need to send both photos / videos and other files as well, you can use the Image Capture app on your Mac computer. This is a standard application designed to import files from connected devices.
Open the Image Capture app on your Mac computer. View the list of devices on the left and select your iPhone. When it is selected, you will see the list of all files and folders on this device.
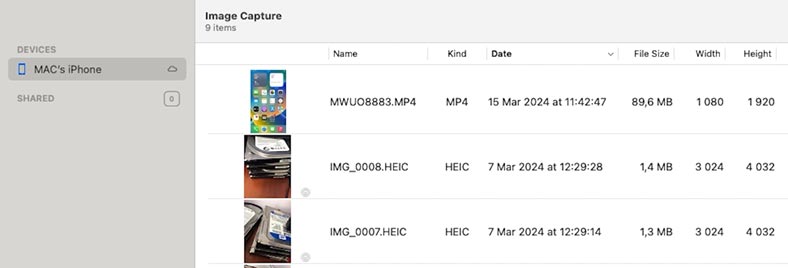
Choose the files you’d like to download to the computer and click Download or Download all, if you need to get all the files.

When the download is over, the files will be available for viewing and editing.
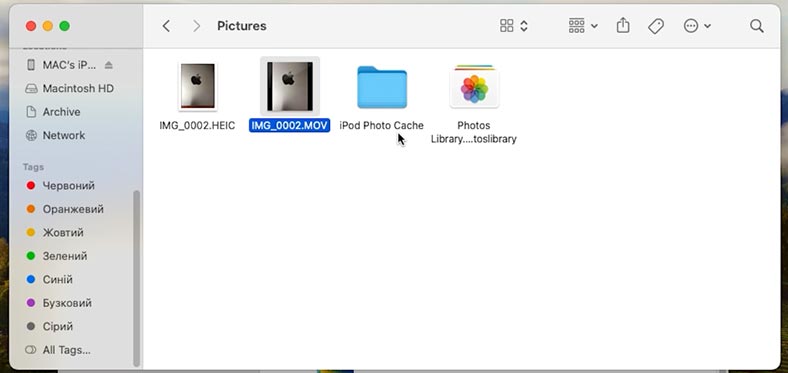
Such transfer operation is also supported by a utility called Preview. You can find it with the Spotlight search or by viewing the list of programs in Finder.
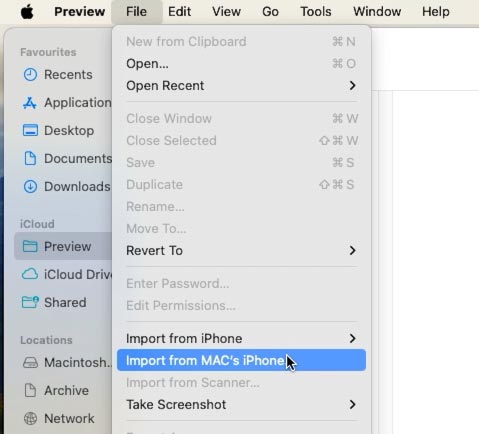
In the Preview app, open the menu File – Import from MAC’s iPhone.
As a result, the import window will open, and you will see all photos and videos stored on your iPhone.
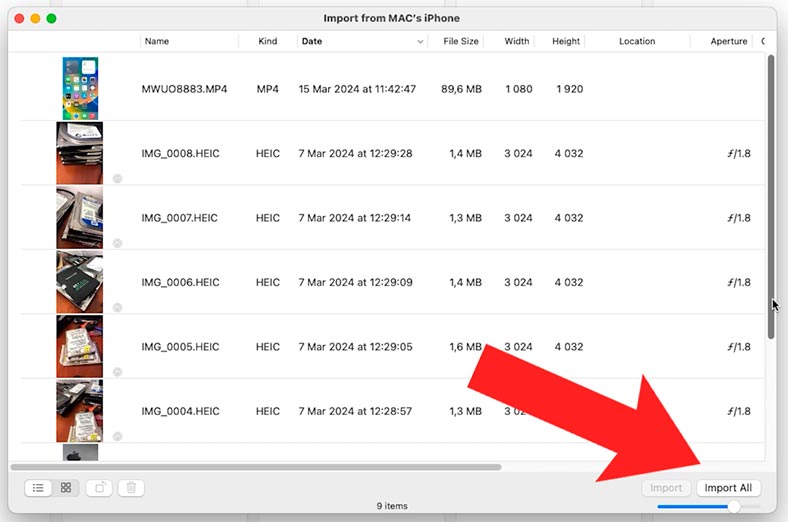
Here, you can choose either specific photos to import, or import all files by clicking on a corresponding button. After that, select the folder where to import them and wait until the operation is complete.
This is how you can import photos and videos from your iPhone and to Mac computers quickly and easily with the help of such apps asPreview and Image Capture, or with the Photos app using a Lightning cable.
Method 2. Transferring files via AirDrop
The second method to transfer files from iPhone to Mac is to use AirDrop.
AirDrop is a convenient feature in macOS that allows you to transfer files between various Apple devices, such as iPhone, iPad or Mac without having to use any cables or cloud services.
Before sending files, make sure that Bluetooth and Wi-Fi are enabled on both your iPhone and your Mac. If data should be sent over Wi-Fi, the phone and computer have to be connected to the same network.
If you start sending files by AirDrop and then go beyond the coverage area of y our Bluetooth or Wi-Fi connection, the file transfer will continue via an Internet connection.
Make sure that the recipient of your files is next to you and within your Bluetooth coverage.
On your iPhone, open the file you’d like to send by AirDrop. Click on the Share icon.
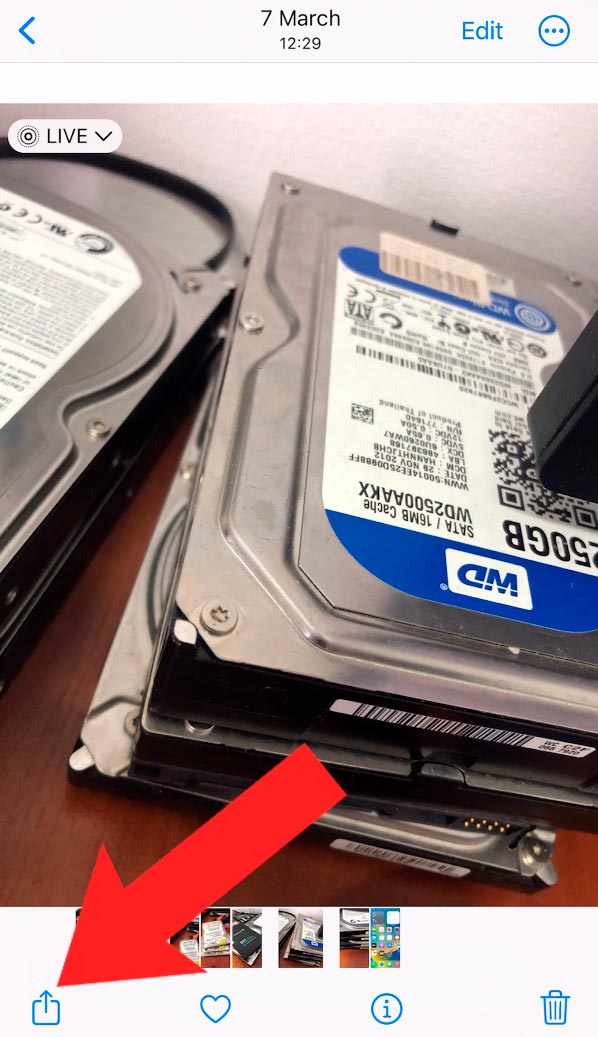
In the Share menu choose AirDrop.
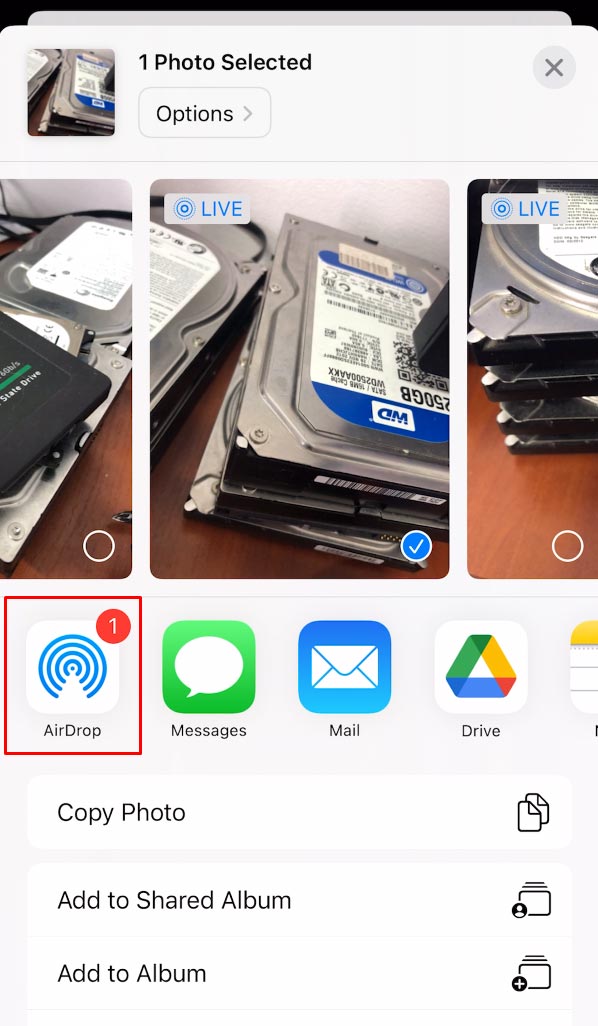
Select your Mac computer from the list of available devices. Usually its name or model are shown.

On your Mac, you will see a request to accept files from your iPhone via AirDrop. Click Accept or Save, to receive the files.
When the transfer is over, the files will be saved to your Mac – into the Downloads folder or to another directory you have chosen.

This is how you can successfully send files from your iPhone to a Mac computer with the help of AirDrop feature. This method lets you transfer files without using any cables, which makes the whole process quick and easy.
You can choose this method to send large files (for example, videos) since the transfer speed is quite high.
Method 3. Transferring files with iCloud
Another method to transfer files from iPhone to Mac is to use iCloud. Here are the steps you should take:
-
Make sure you have an iCloud account and it is activated both on your iPhone and Mac.
-
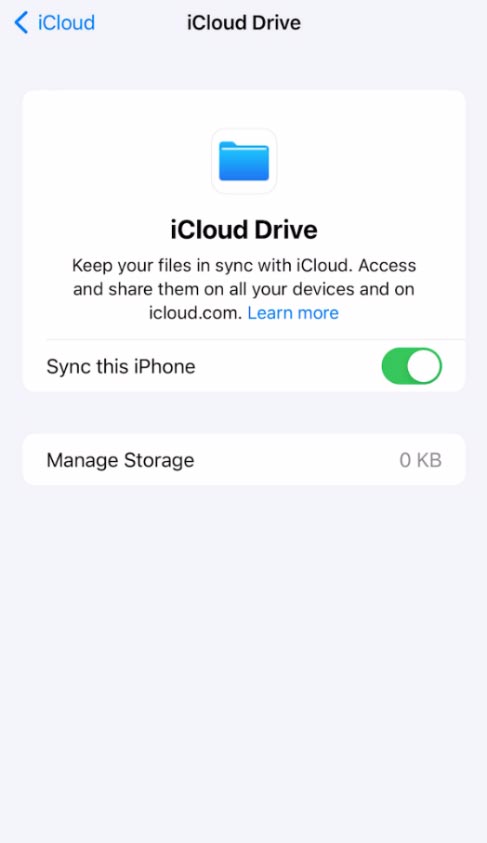
On your iPhone, open Settings and tap on your name in the upper part of the screen.
-
In the iCloud menu, make sure that the iCloud Drive option is enabled.
-
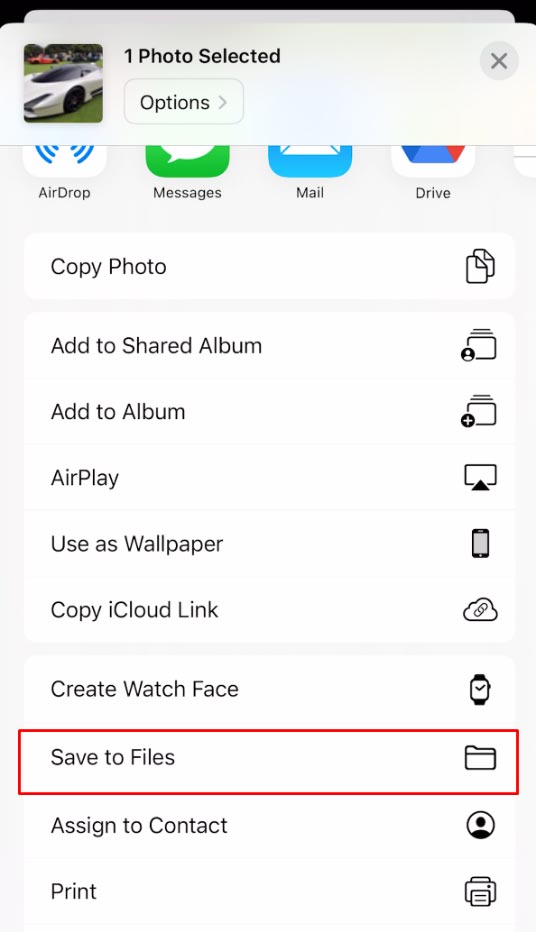
Go to the app which uses the file you’d like to send to your Mac, and save this file to iCloud Drive.

-
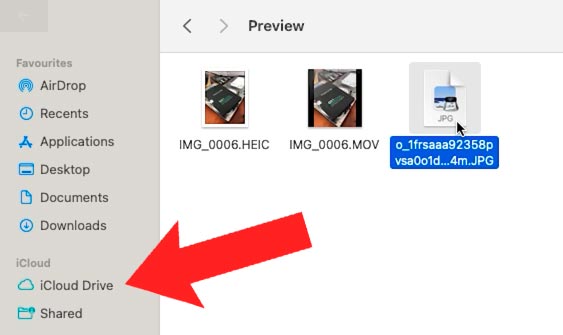
On your Mac, open Finder and go to iCloud Drive tab on the side panel.
-
Find the file you have downloaded from iPhone and copy it to a convenient directory on your Mac.
This is how you can transfer files from iPhone to a Mac computer with the help of iCloud. This method lets you sync files between Apple devices and provides a convenient way to access them from any location.
With the help of iCloud you can also save a backup of your iPhone. For that, access its Settings and tap on the name, then choose iCloud.
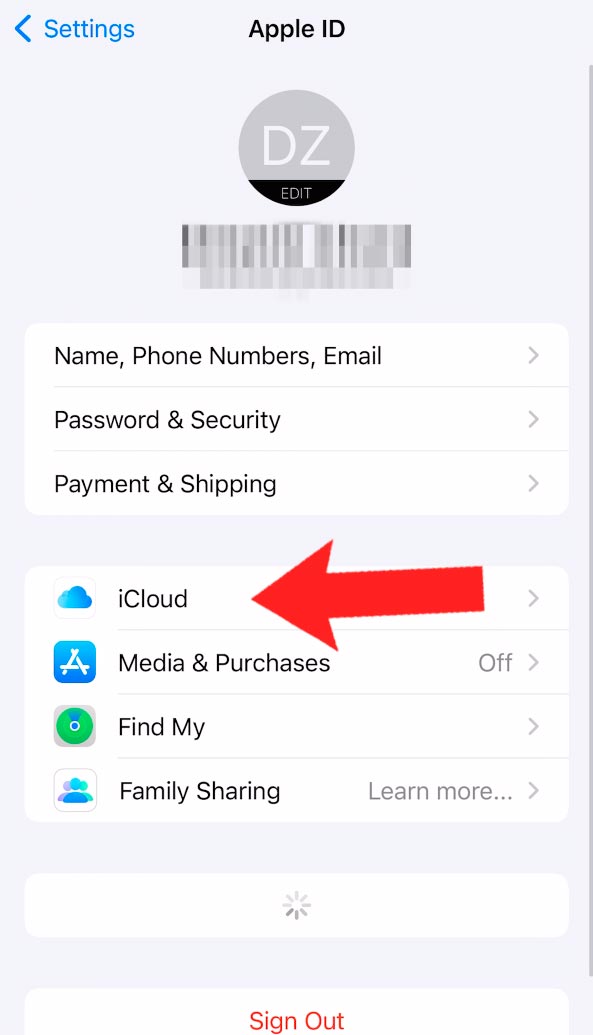
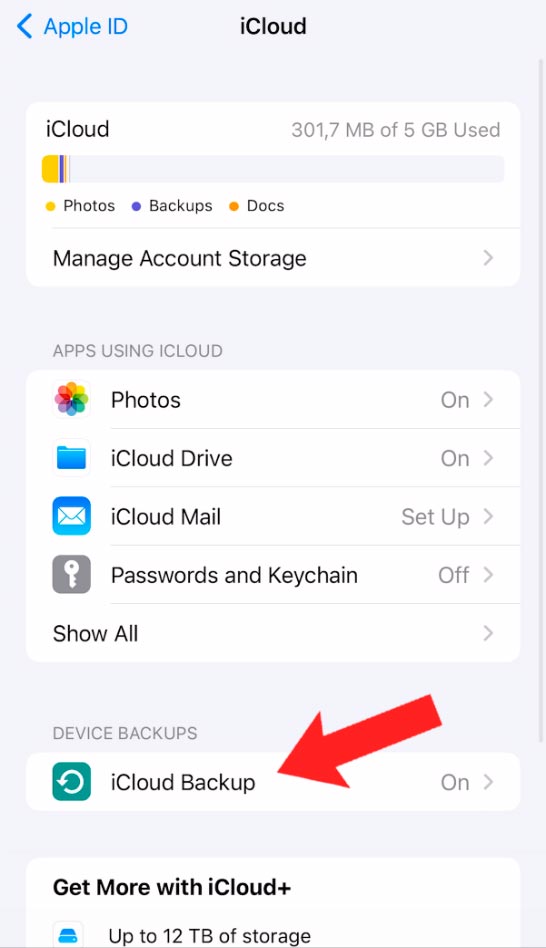
Tap on Backup, and then enable iCloud Backup. This lets iCloud automatically back up certain data while your phone is charging, locked and connected to Wi-Fi.
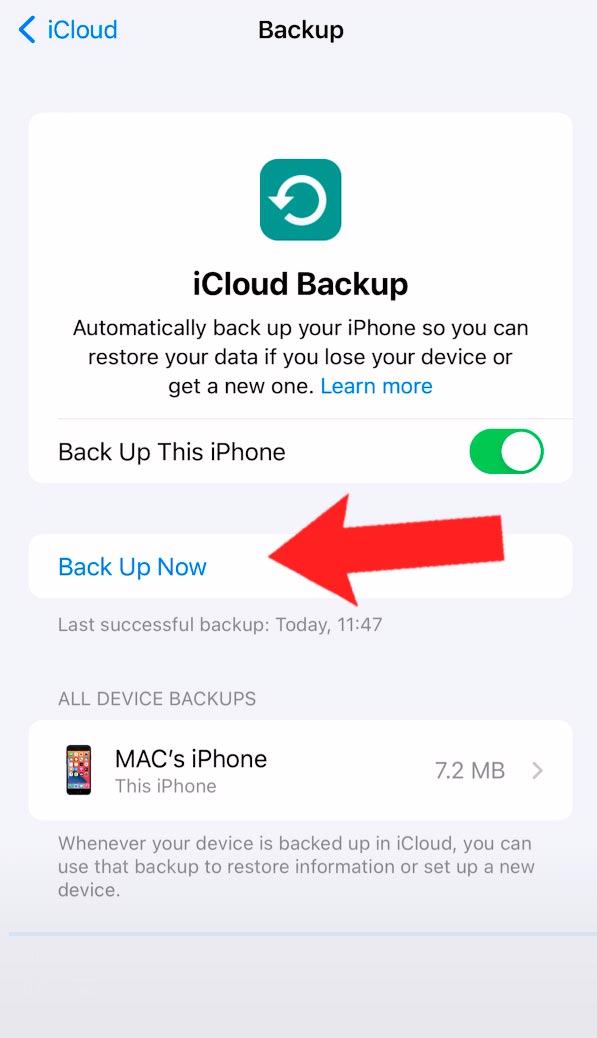
On the same page, tap on Back Up Now.
When iPhone data is backed up, some things are not copied. However, if you manually upload your files to Dropbox, you’ll be able to manage everything, even your downloaded music which is not included into iPhone backups.
Method 4. Using third-party cloud storage services
One more method to transfer files from iPhone to Mac is to use third-party cloud servers.
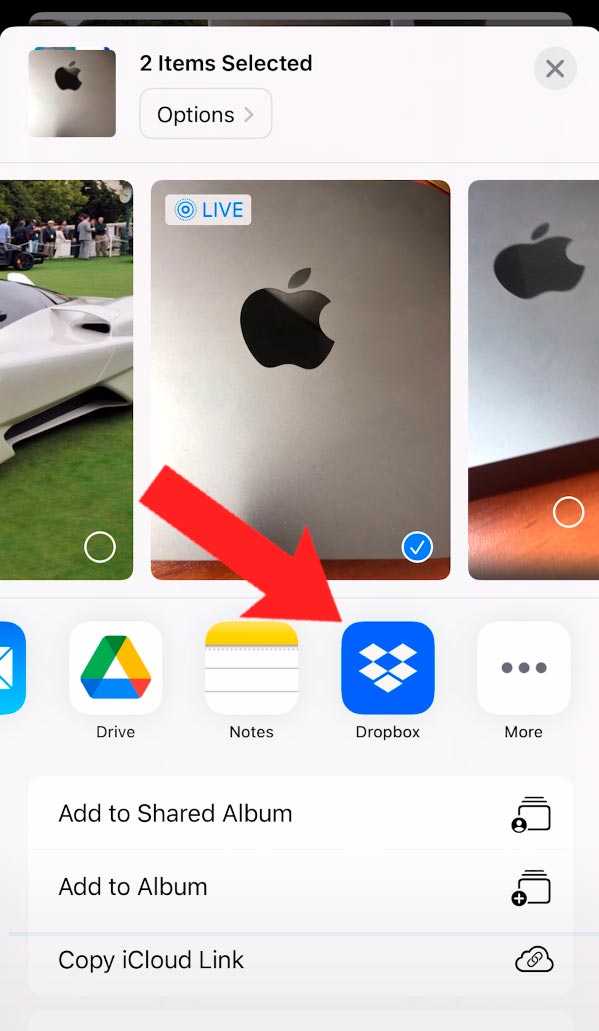
Go to App Store on your iPhone and find an app that allows to send files to Mac computers. Some of the popular titles in this category include Dropbox, Google Drive, Microsoft OneDrive and others.
| Feature | Dropbox | Google Drive | Microsoft OneDrive |
|---|---|---|---|
| Integration with macOS | Good integration, Finder support | Built-in support through Backup and Sync or Drive File Stream app | Good integration, Finder support |
| Free storage space | 2 GB | 15 GB | 5 GB |
| File synchronization | Easy sync with automatic updates | Easy sync with automatic updates | Easy sync with automatic updates |
| Additional storage space | From $9.99/month for 2 TB | From $1.99/month for 100 GB | From $1.99/month for 100 GB |
| File sharing | Easy sharing via links or shared folders | Easy sharing via links or shared folders | Easy sharing via links or shared folders |
| Integration with office applications | Limited (integration with Paper) | Deep integration with Google Docs, Sheets, Slides | Full integration with Microsoft Office |
| Security and encryption | AES-256 encryption on the server side | AES-256 encryption on the server side | AES-256 encryption on the server side |
| Price for additional storage | From $9.99/month for 2 TB | From $1.99/month for 100 GB | From $1.99/month for 100 GB |
| Team collaboration support | Built-in tools for collaboration and commenting | Deep integration with G Suite for team collaboration | Integration with Microsoft 365 for team collaboration |
| Additional features | File versioning, offline access | Automatic backup with Google Photos, offline access | Integration with Windows, offline access |
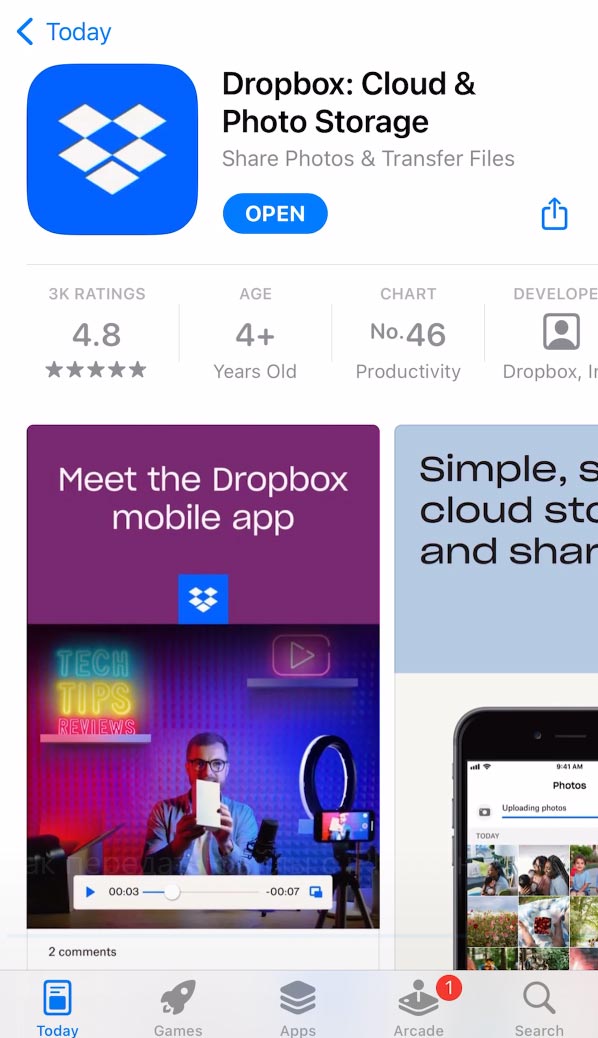
Install the selected app on your iPhone and link it to your account if necessary.
Upload the files you want to send to your Mac into the selected app – for example, Dropbox.
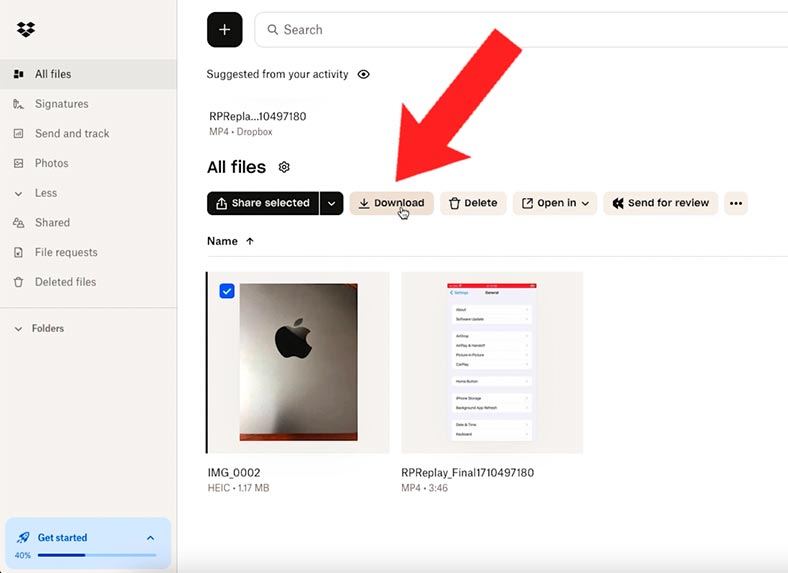
On your Mac, open a web browser and go to the cloud storage website, or use the desktop version of such storage app. Log in to your account and find the downloaded files. Download the files to the computer using corresponding download options.
This is how you can successfully send files from your iPhone to a Mac computer with third-party apps. This method can be used when you have no cables available or if you prefer to use cloud services to transfer files.
Conclusion
Now you know several ways of sending files from your iPhone to a Mac computer. You can use a Lightning cable, or choose AirDrop for wireless file transfer, upload files to iCloud, or try third-party apps.
Each of these methods has its own pros and cons, so choose the one that you find most convenient. Don’t forget about the safety of your data and remember to update your software in time, and then your files will always be sent in a most effective way.


