Exploring Sparse Files Across Windows, Linux, MacOS, and File Systems
In today’s article, we delve deep into the world of sparse files across Windows, Linux, MacOS, and various file systems. Join us as we uncover the secrets behind sparse files, offering insights, tips, and tricks for understanding and utilizing them effectively. Whether you’re a novice or an experienced user, this article will provide valuable knowledge to enhance your understanding of sparse files and their implications across different operating systems.
- The difference between compression and sparse files
- Pros and cons
- Creating a sparse file in Windows
- How to create a sparse file in Linux
- How to expand a file
- Sparse files in ApFS
- How to recover data from this file type
- Conclusion
- Questions and answers
- Comments
Sparse files are special files that use the file system more efficiently and keep the file system from taking up free disk space when it is not filled with actual data. That is, “free disk space” will only be used when necessary. The “empty” data in the form of zeroes will be stored in the metadata block of the file system. That is why sparse files originally take up less space than their real size is.
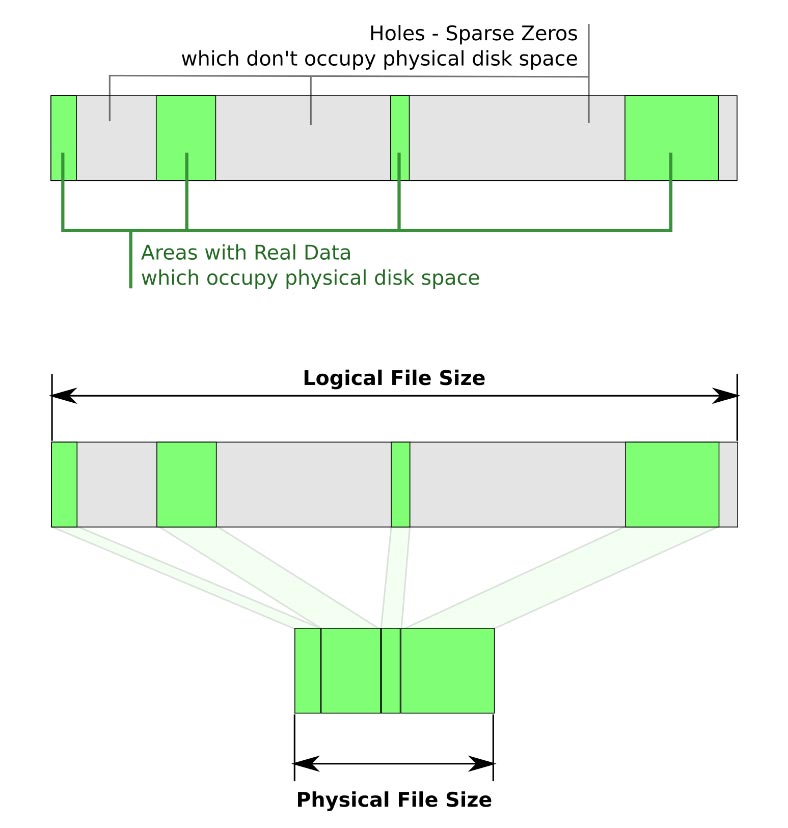
This file type is supported by most file systems: BTRFS, NILFS, ZFS, NTFS[2], ext2, ext3, ext4, XFS, JFS, ReiserFS, Reiser4, UFS, Rock Ridge, UDF, ReFS, APFS, F2FS.
All these file systems support this type completely, but at the same time, they don’t provide any direct access to their functions through the standard interface. You can manage their properties with the command prompt only.
The difference between compression and sparse files
All file systems I have mentioned before also support the standard feature of compression. Both tools give you the advantage of saving disk space, but they achieve this goal in different ways. The main downside of using file compression is that affects system performance when reading or writing such files because the system needs extra resources to compress or decompress the data. However, some software products don’t support compression.

🐧🍏 Sparse Files in Windows, Linux and MacOS, File Systems NTFS, REFS, Ext3, Ext4, BTRFS and APFS 🐧🍏
Pros and cons
The biggest advantage of sparse files is that users can create very large files which take very little disk space. The space for storing data is allocated automatically as more and more information is written. Large sparse files are created relatively quickly because the file system doesn’t have to pre-allocate disk space for writing zeros.
However, the advantages of sparse files are limited to the applications that support them. If a certain program cannot recognize or use such files, it will save a sparse file in its original – uncompressed – form, and there’s no advantage to talk about. Users have to be careful when dealing with such files: a sparse file of a few megabytes may suddenly turn into a several-gigabyte monster when an application that doesn’t support this file type copies it into a directory.
One more disadvantage is that you can’t copy or create a sparse file if its nominal size exceeds the amount of available free space (or quota restrictions applied to user accounts within the operating system). For example, if the original size of a sparse file (with all of its zero bytes) is 500 MB, and the quota limit for the user account where this sparse file is created is only 400 MB, such situation generates an error, even if the actual disk space occupied by this sparse file is only 50 MB.
As to the hard disks where such data is stored, they are also subject to fragmentation, because the file system will write data to sparse files as and when necessary. Over time, it may result in reduced performance. Besides, some disk management utilities may have issues with displaying free disk space. When the file system containing files of this specific type is low on space, it may lead to unpredictable situations. For example, it may generate disk overfill issues when data is copied over the existing part of the file which is marked as sparse.
| Advantages | Disadvantages |
|---|---|
| Efficient use of disk space as files occupy only actually used blocks | Potential data loss if the disk becomes full, as the file may be partially written |
| Increased speed of creating large files | Not all file systems support sparse files |
| Space savings when working with backups and large files | Using sparse files can lead to data fragmentation on the disk |
| Ability to quickly create and allocate large amounts of disk space | Monitoring real disk space usage can be more complicated |
| Supported by many operating systems and virtualization platforms | Requires more careful disk space management to avoid issues |
Creating a sparse file in Windows
In Windows, we’ll be using the command prompt for this purpose. Type “cmd” in the search field and run it as Administrator.
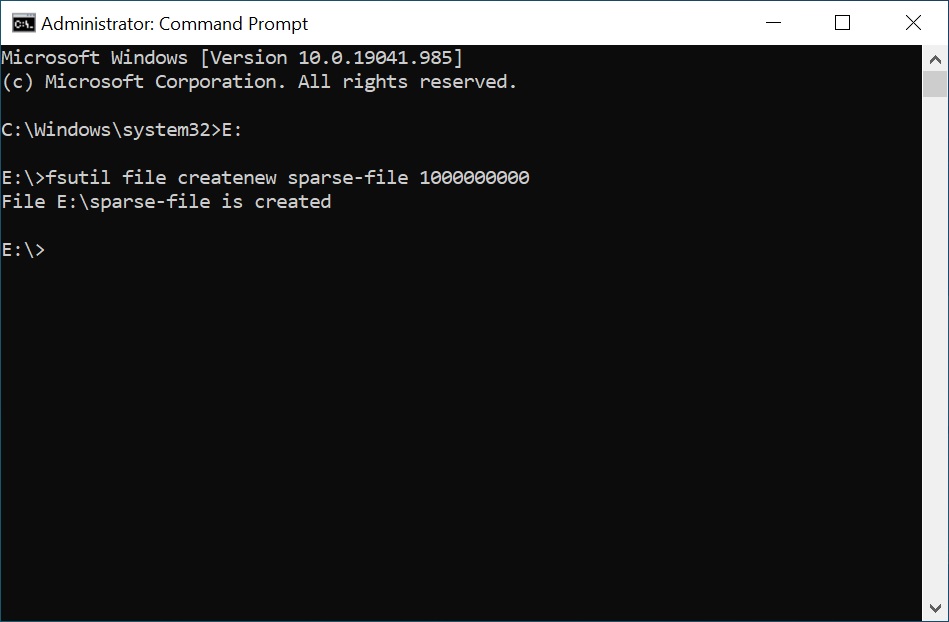
In Windows, sparse files are managed with the help of fsutil tool (a file system utility). When the command create is performed, by default it creates a file that is not a sparse one. Go to the folder where you need to create a file and type the following:
fsutil file createnew sparse-file 1000000000
Where sparse-file is the file name, and the number at the end is the file size in bytes.
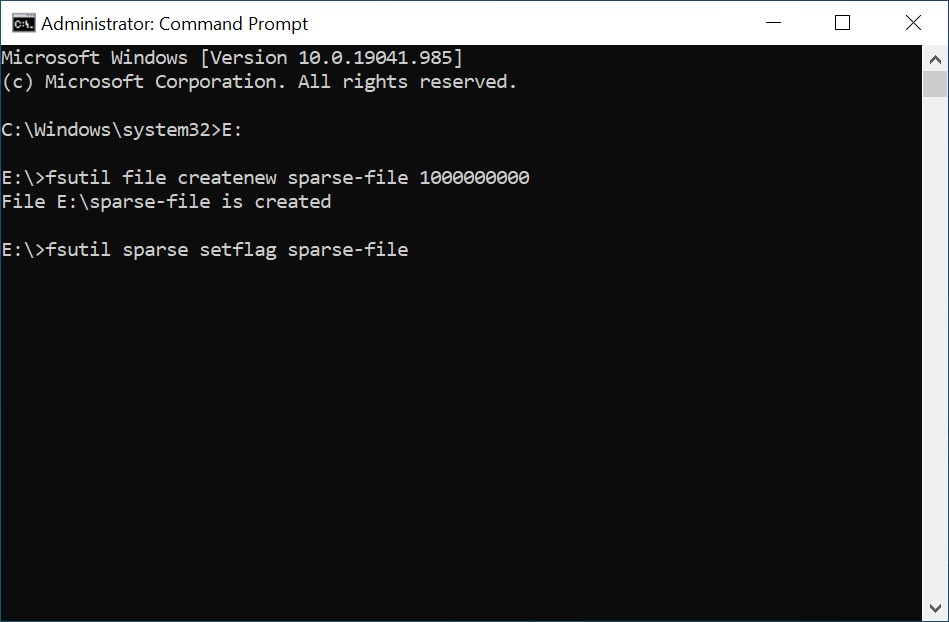
To assign the “sparse” attribute to the file, use this command:
fsutil sparse setflag sparse-file
Here is the command to remove this attribute:
fsutil sparse setflag sparse-file 0
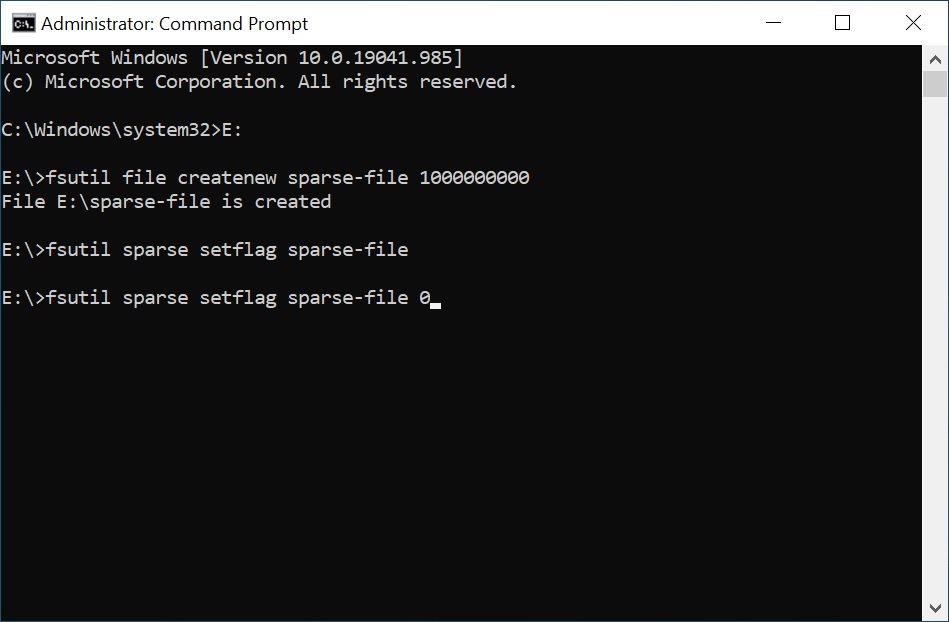
And here’s another one if you want that attribute back:
fsutil sparse setflag sparse-file
Let’s check it:
fsutil sparse queryflag sparse-file
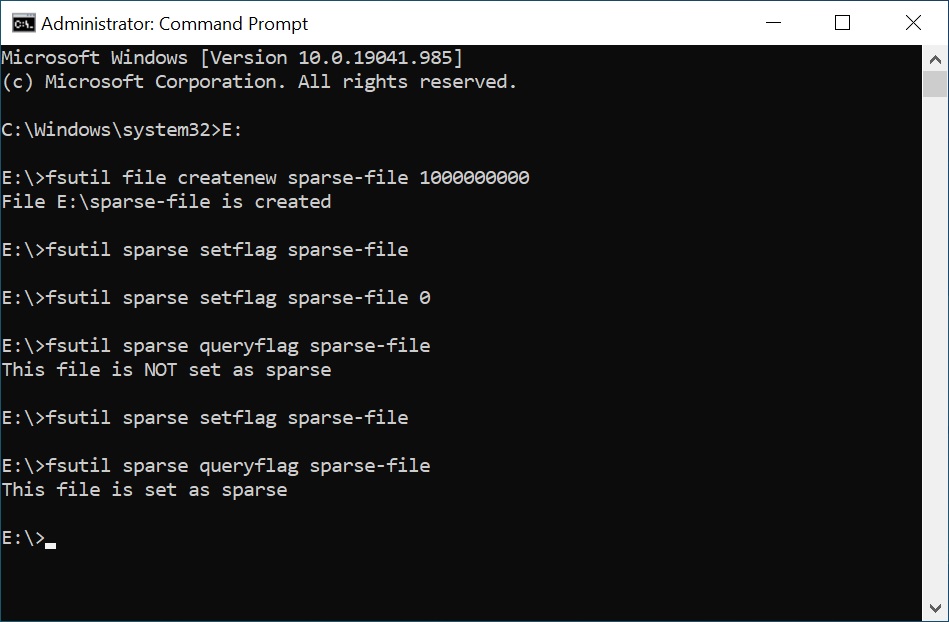
The attribute by itself doesn’t let you start saving disk space. To make it happen, you need to set the empty space which should be freed inside the file.
Type this to set the empty space:
fsutil sparse setrange sparse-file 0 1000000000
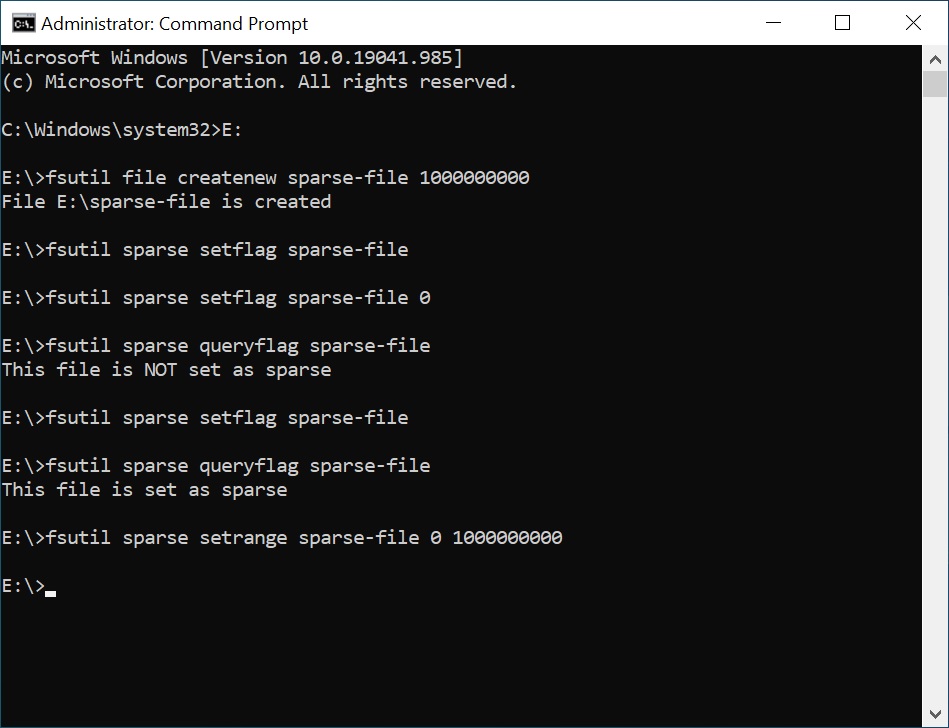
At the end of the command, the offset and length are given in bytes. In my case, this is the range from zero to 1 GB.
To set a fully sparse file, specify the whole capacity. You can expand the file if necessary by typing a larger value.
To make sure the file has been assigned this attribute, run the command layout
fsutil file layout sparse-file
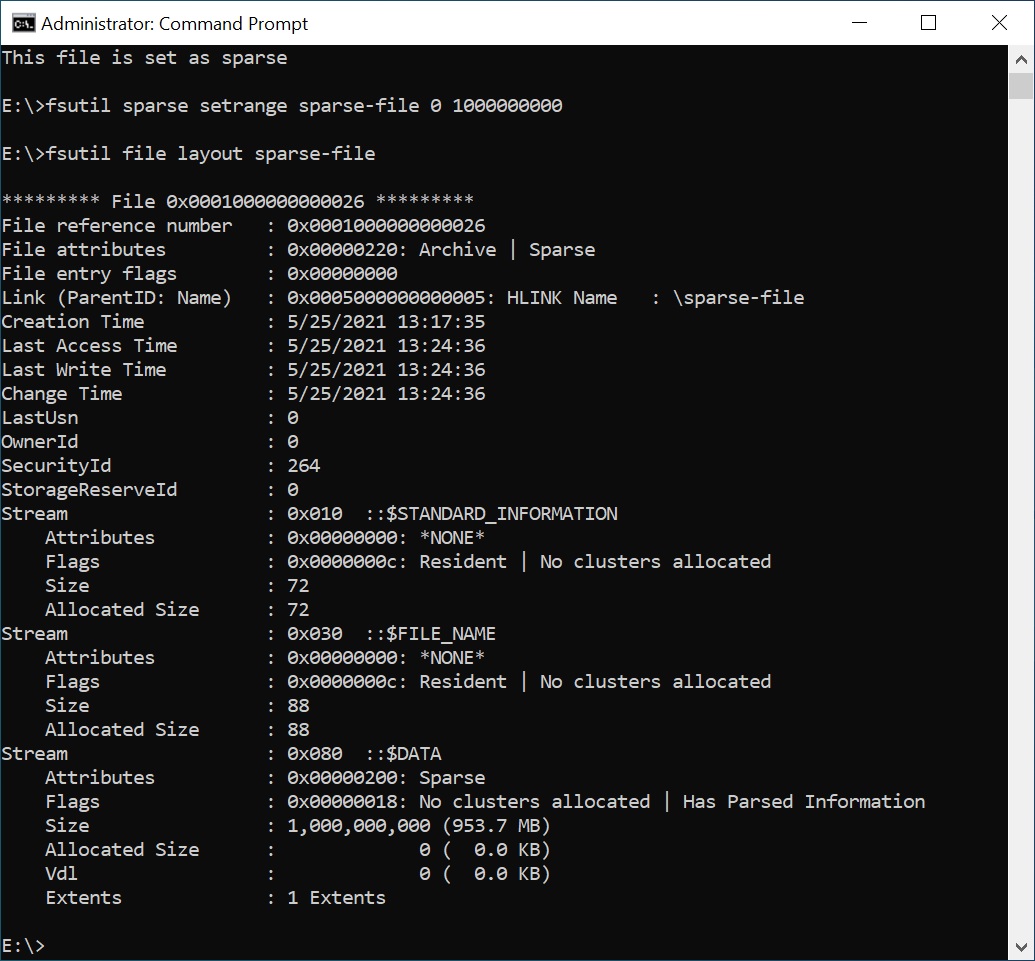
The sparse attribute can be assigned to any file by just running this command with the corresponding file’s name.
In the properties of the file we have created earlier, you can see that with the size of 1 GB this file occupies 0 bytes on disk.
This set of commands works with all Windows file systems that support sparse files (NTFS, ReFS, and so on).
How to create a sparse file in Linux
In Linux, the process of creating such data types is a bit easier, because there are several commands to create them. They work fine with all Linux file systems.
Here, you can use either command: dd, or truncate.
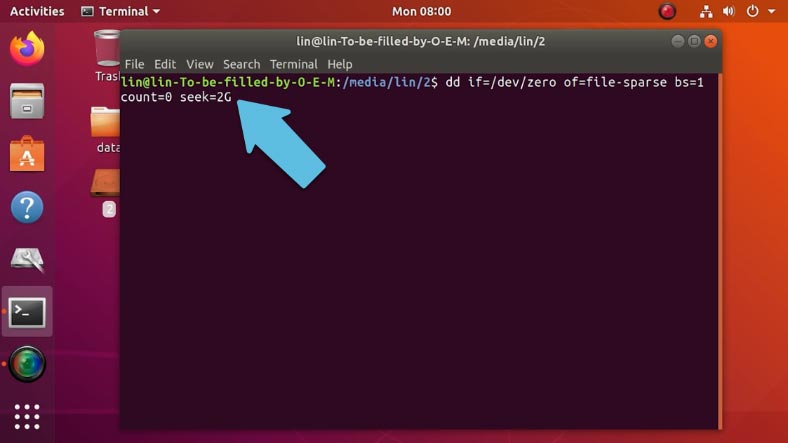
The first command looks like this:
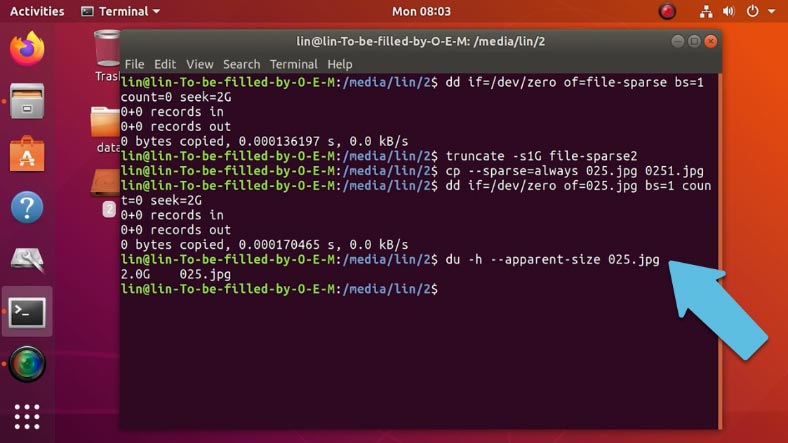
dd if=/dev/zero of=file-sparse bs=1 count=0 seek=2G
Where “file-sparse” is the file name, and the number at the end is the size that can be set in bytes, megabytes, and so on.
The second command is simpler:
truncate -s2G file-sparse
Where the “s” value stands for the file size, and it is followed by the file name.
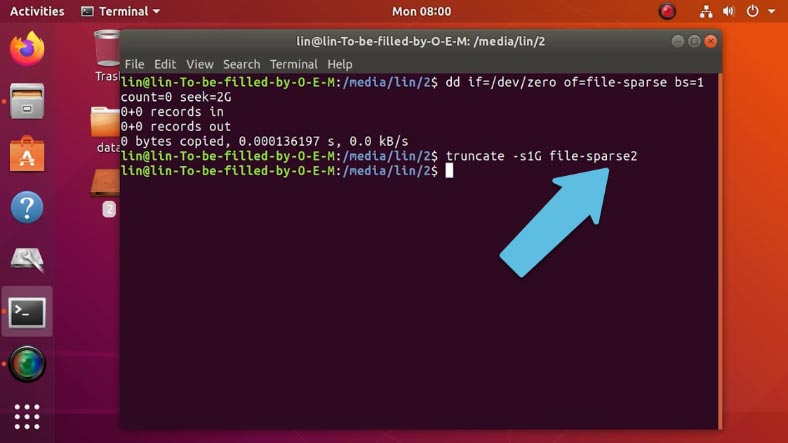
Contrary to Windows, when you create a file with either command it will be a sparse file by default.
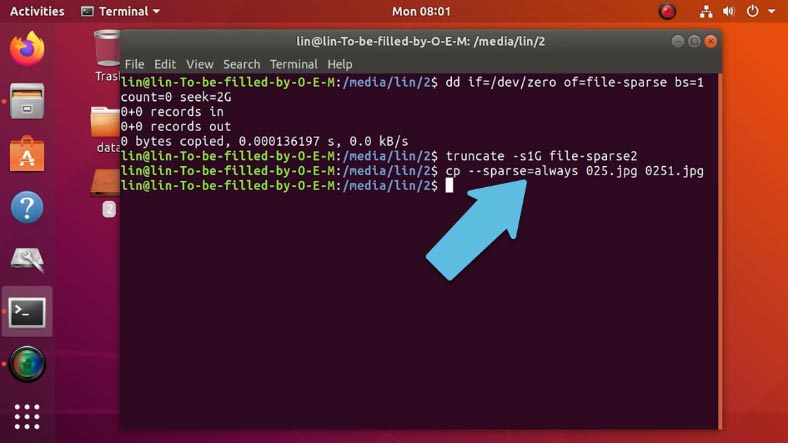
To turn an ordinary file into a sparse one, there is a special command:
cp --sparse=always ./025.jpg ./0251.jpg
Where 025.jpg is the name of the first file, an ordinary one,
and 026.jpg is the name of the second file, a sparse one.
How to expand a file
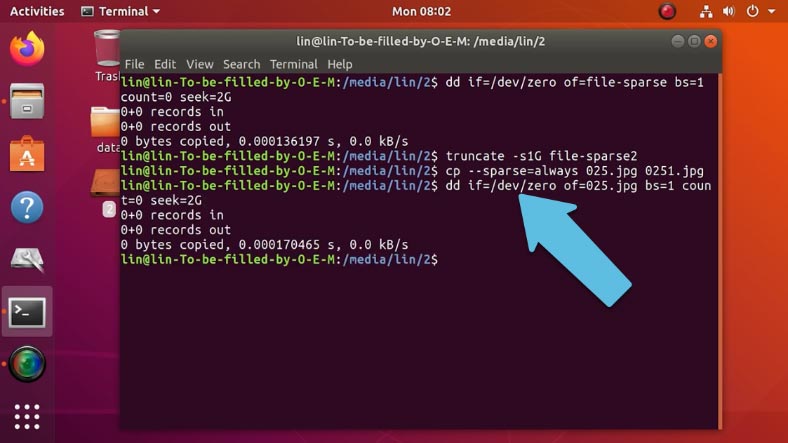
If you need to expand an existing file, use the first command below: replace the name and specify the size you need.
dd if=/dev/zero of=025.jpg bs=1 count=0 seek=2G
This command will increase its size to 2 GB.
Use the following command to check the size:
du -h --apparent-size 025.jpg
Sparse files in ApFS
In fact, this set of commands also works with the Apple file system – ApFS, as Linux and MacOS are based on the Unix core architecture and they both provide access to Unix commands and the Bash command shell.
Launch the Terminal and run any command for creating a sparse file that I have just used in Linux.
In MacOS Catalina, only the first command is supported, and the size should be given in bytes, otherwise the command will generate an error.
sudo dd if=/dev/zero of=sparse_APFS bs=1 count=0 seek=1000000000
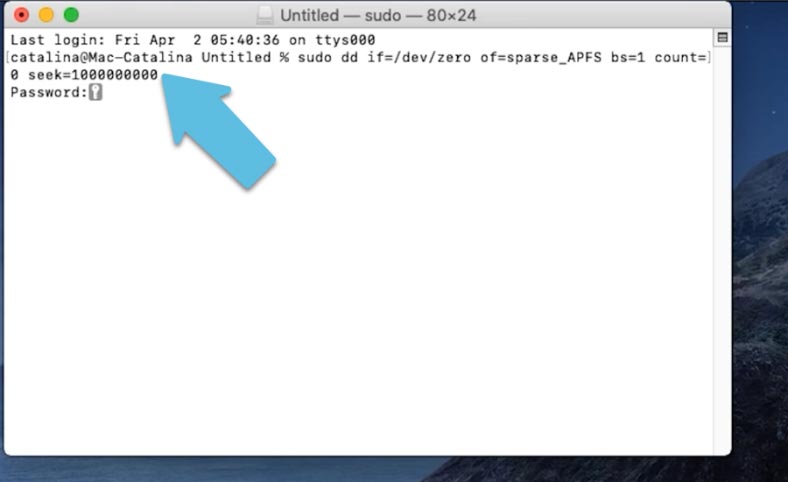
When certain conditions are observed, the ApFS file system creates sparse files by default, so you can expand any file with the command used to increase the size of sparse files in Linux:
dd if=/dev/zero of=187.jpg bs=1 count=0 seek=500000000
Let’s set the size of 500 MB, and remember that in MacOS this size should be specified in bytes.
When you run the command and open file properties, you can see that its size has increased to 500 MB.
How to recover data from this file type
If you removed some files or formatted a disk with important information, and those files turned out to be sparse files, just keep calm and carry on - with Hetman Partition Recovery or Hetman RAID Recovery. Our products can work with sparse files in all operating systems and file systems mentioned in this article. Download, install and run the program to scan your disk.
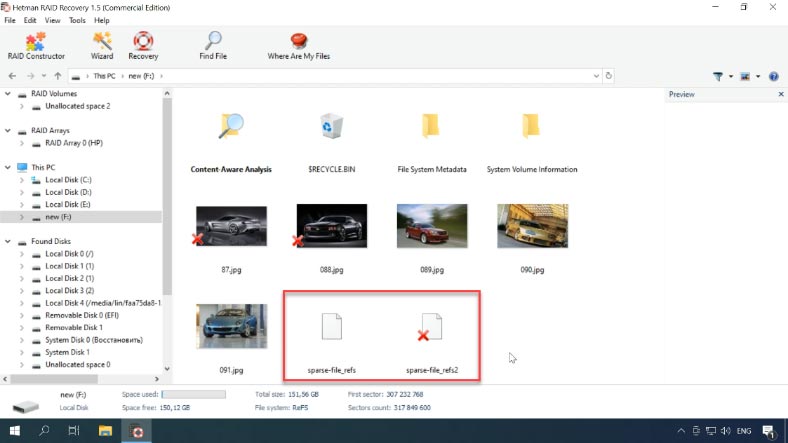
As you can see, this program can find both existing and deleted sparse files easily, and display their contents. When you open the file in HEX editor, you can make sure that is it filled with zeros.
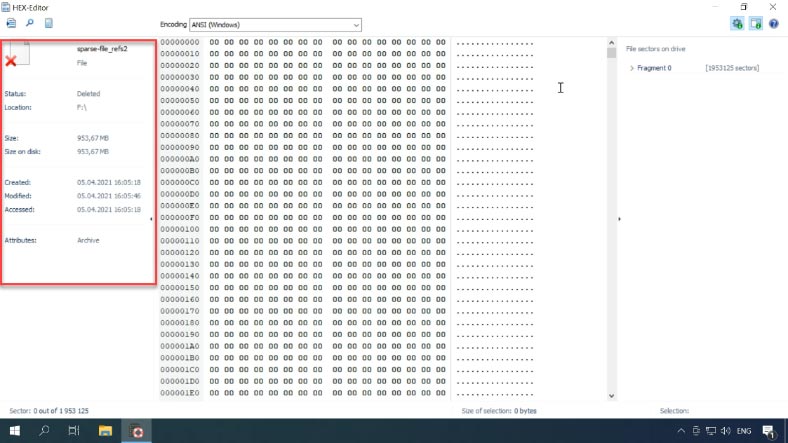
The program managed to find previously removed sparse files on the disk using NTFS, REFS, BtrFS, Ext3, Ext4, and ApFS file systems. Now all you have to do is to click on the “Recovery” button.
When the process is over, all the information will be placed into the folder you have chosen for saving it. Check the file properties to find out that the files have been recovered in full.
Conclusion
Before using this functionality in any operating system, it is important to know all its pros and cons. This knowledge will help you avoid possible problems in the future.


