Expert Tutorial for Recovering Mac from Time Machine Backup
In this article we’ll explore one of the important features in macOS – the Recovery Mode. We’ll have a look at the recovery tools and how they should be used.
- How to start the Recovery Mode
- How to recover from backup
- What should I do if macOS Recovery Mode doesn’t work?
- Conclusion
- Questions and answers
- Comments
Recovery Mode is a special integrated feature that provides access to various tools designed for your computer’s maintenance and recovery. This mode lets users perform various tasks such as system recovery, macOS installation, data recovery from Time Machine backup, hard disk check and recovery with the help of Disk Utility etc.
We are going to examine the functionality of Recovery Mode and explore in detail the backup and restore process with Time Machine.

How to Recover Mac from Time Machine Backup / MacOS Recovery Mode
How to start the Recovery Mode
And the first question to answer is how to start your computer in the Recovery Mode.
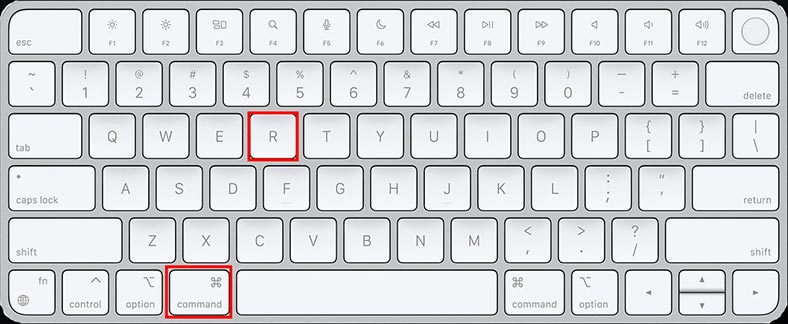
To enter the Recovery Mode on Mac, press and hold the key shortcut Command (⌘) + R when starting your computer or rebooting it, until the Apple logo appears on the screen.
After that, you will see the macOS Recovery window presenting all necessary system recovery tools and options.
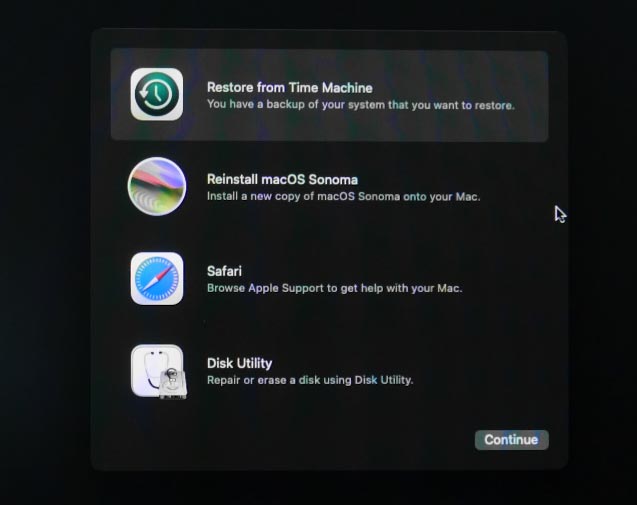
In Recovery Mode users can restore data from Time Machine backups, install new copies of macOS, reinstall the operating system, check and restore disks with the Disk Utility, and perform other operations to maintain and restore their Mac devices.
How to recover from backup
| Recovery Method | Description | When to Use | Advantages | Disadvantages |
|---|---|---|---|---|
| Time Machine Recovery | Full or partial system recovery from a backup created with Time Machine. | The most common way to recover the system and data. | Preserves all settings, applications, and data at the time of backup creation. Ability to restore individual files or folders. | Requires a previously created backup. Can take a long time for full recovery. |
| Reinstall macOS | Complete reinstallation of the operating system. | When the system does not boot or there are serious software issues. | Clears system issues, installs the latest version of macOS. | Loss of all personal data if no backup was created. |
| Disk Utility | Tool for working with disks, including data recovery. | For low-level disk management, checking, and repairing file systems. | Ability to recover individual files or disk partitions. | Requires some knowledge of working with disks. |
| Safari Browser | For accessing the internet and searching for instructions or downloading necessary files. | For internet use. | Safari browser in Recovery Mode on macOS is used to access the internet when your Mac has startup or system issues. | Does not work if there is no internet access. |
| Terminal | Command-line interface for executing system commands. | For experienced users to perform complex operations. | Ability to automate tasks, perform actions not available through the graphical interface. | Requires knowledge of command-line commands. |
| Startup Security Utility | Protects Mac from malware during startup. | For detecting and removing malware. | Protects the system from threats. | May slow down system startup. |
Method 1. Time Machine
If you have previously configured Time Machine to back up your files and operating system to an external hard drive, you’ll be able to recover your Mac from this backup file.
To restore the operating system from a Time Machine backup in Mac Recovery Mode, you need to boot your computer in the recovery mode. Before you begin, make sure that the external Time Machine drive is connected and contains relevant backups.
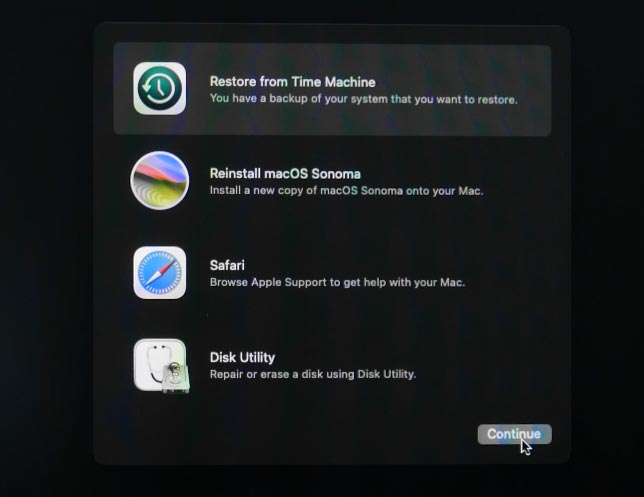
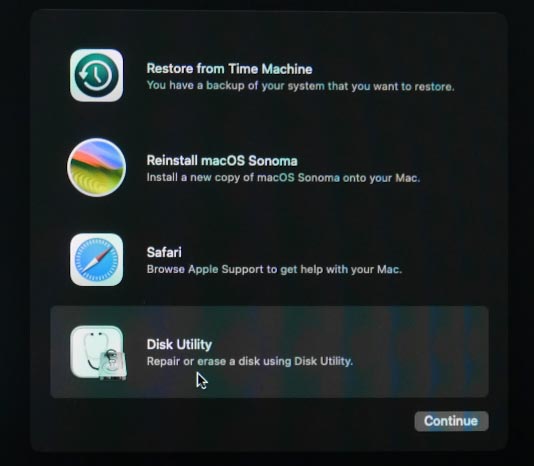
When the macOS Recovery window appears, choose Restore from Time Machine and click the Continue button.
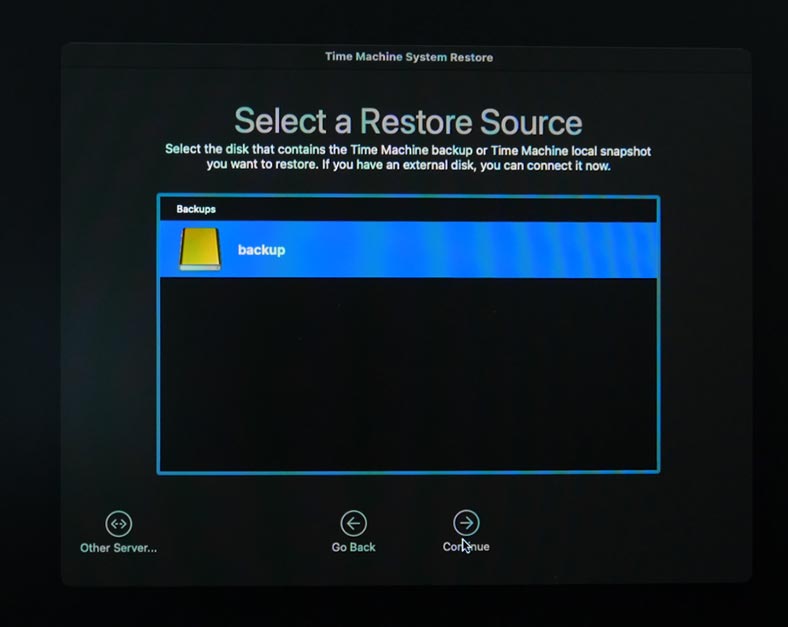
After that, you’ll be suggested to Select a Restore Source. Select the drive where Time Machine backups are stored and click Continue.
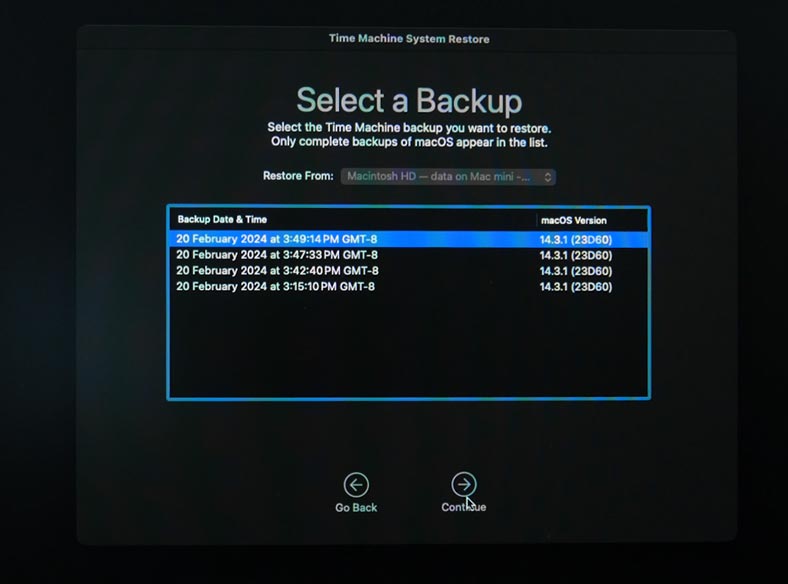
Now select the Time Machine backup file from which the system should be restored. They are arranged by date and time. Choose the one you need and click Continue.
If this is a system drive, you can see a message saying that you must use Migration Assistant to transfer data from this backup. If necessary, you’ll have to reinstall the operating system first and then use Migration Assistant to transfer data from your backup.
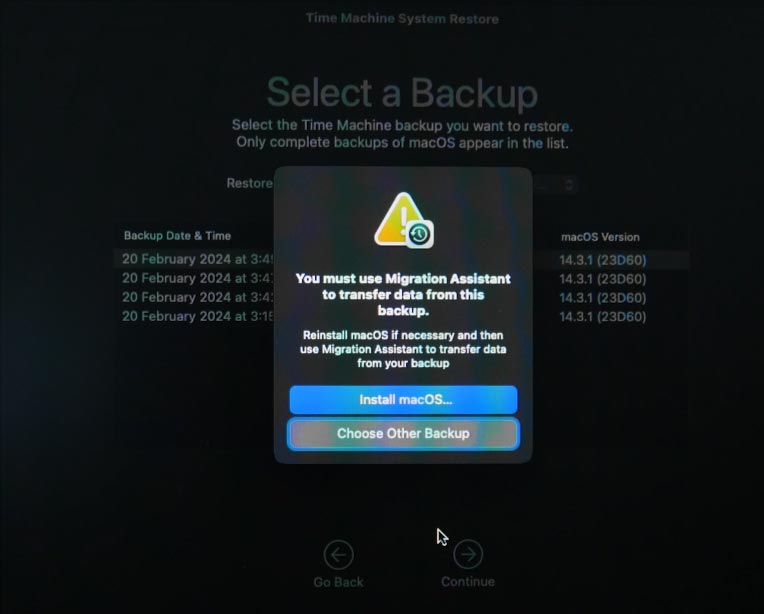
If the drive you are dealing with is not a system one, after choosing the backup to use you need to select the drive or volume that needs to be recovered, and then click Continue. Confirm your choice and start the recovery process by following instructions on the screen.
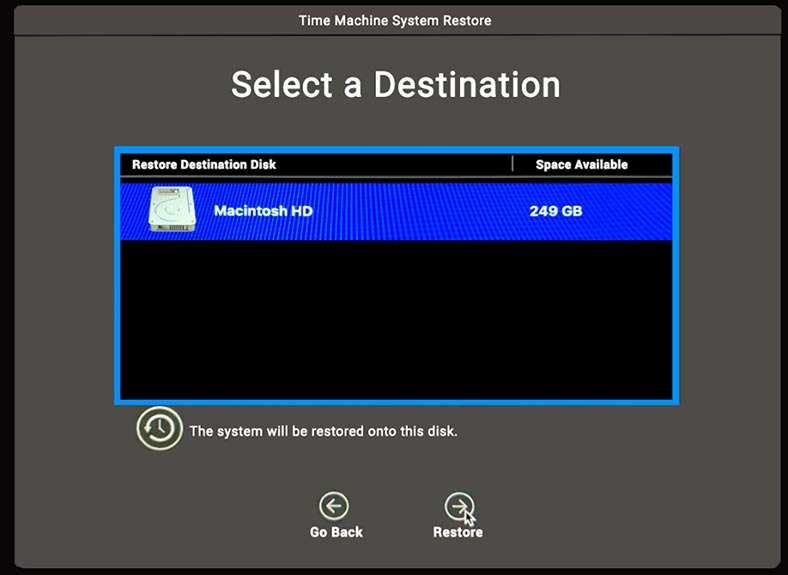
When the recovery operation is over, the computer will restart with the recovered data.
Method 2. Reinstalling the operating system
Another way to recover your computer is to reinstall the operating system. After such reinstallation, you will get an absolutely clean MacOS, while all files, additional software and user data will be removed.
Reinstalling MacOS can help to solve a number of system issues and improve its performance. Before you reinstall the operating system, we recommend backing up important data. For illustration, I’ll show you how to create a backup with Time Machine.
To back up your system with Time Machine on macOS, connect an external hard disk or another storage device which will be used to store Time Machine backups.
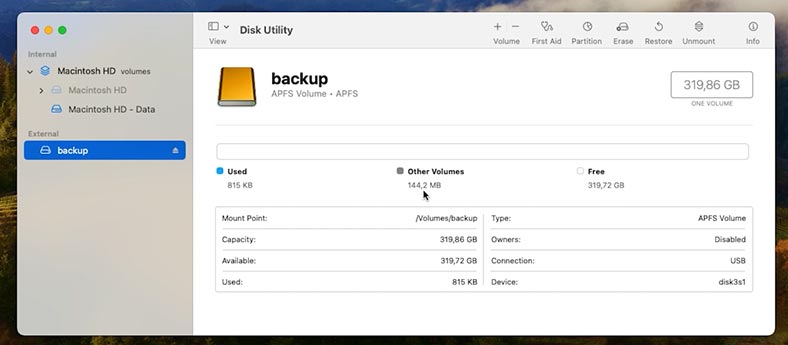
Make sure that such disk has enough capacity to contain all the data you’d like to back up.
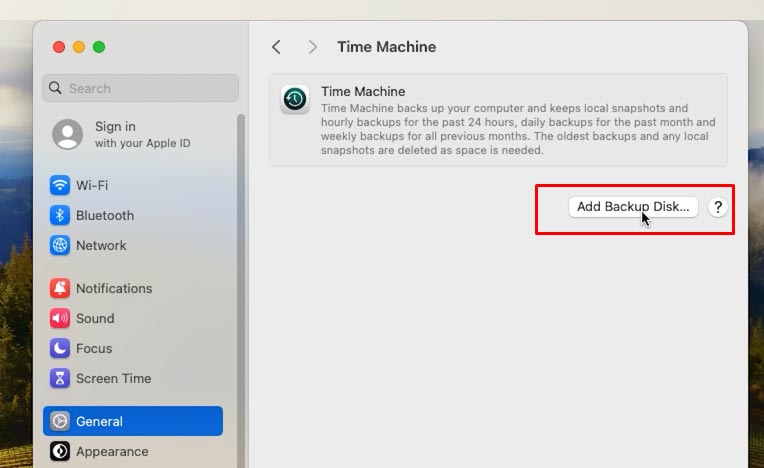
For starters, enable Time Machine. Go to System Settings, General, and select Time Machine.
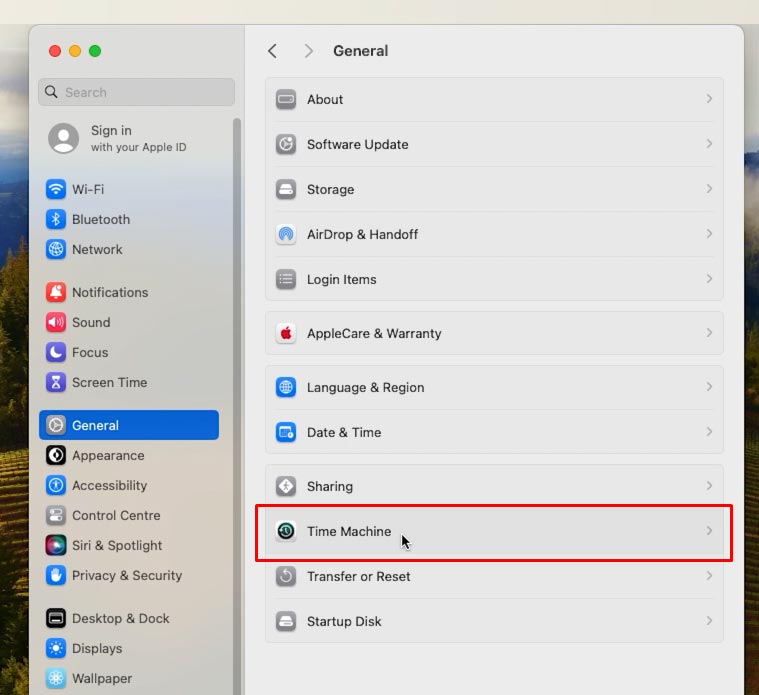
Here, click Add Backup Disk.
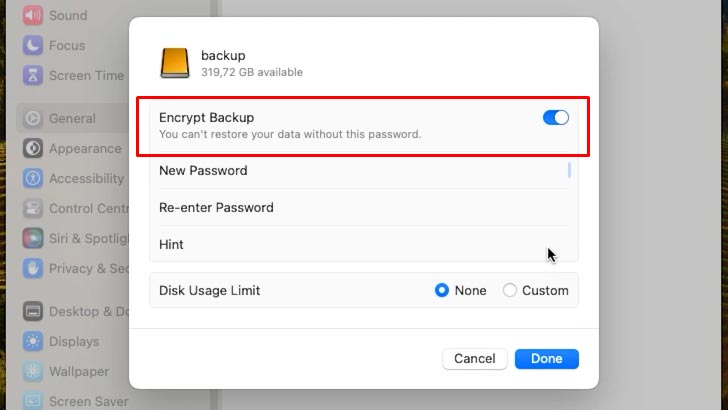
Select a drive from the list and click Set Up Disk.

At this stage, you can configure backup encryption, but I will disable it since I don’t need this option – and then click Done.
This will add the new disk for backup.
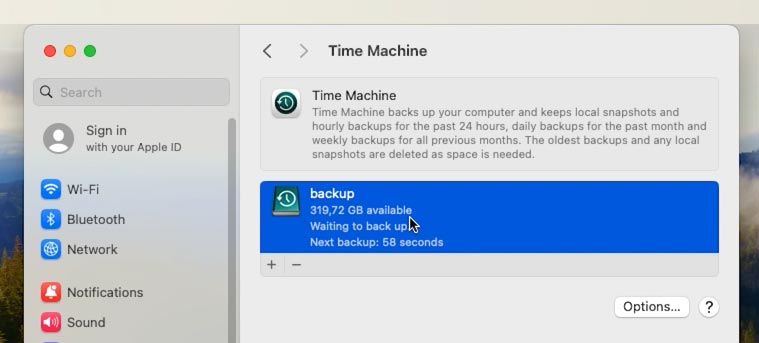
When the disk is selected, you can configure additional Time Machine backup options, such as excluding certain files or folders from backup, backup frequency and so on.
After you’ve finished with options, right-click on the disk and choose Back Up Now to start creating the backup file.
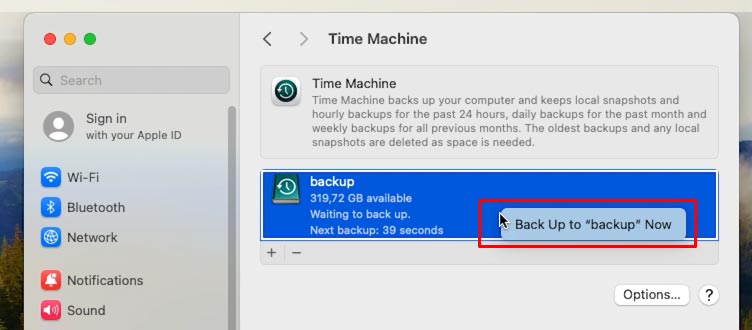
Time Machine starts copying all selected data to your external drive, and you can monitor this process in real-time mode.
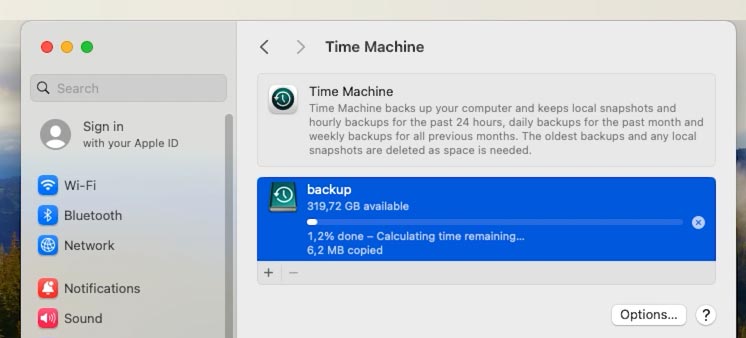
When it’s over, you can get down to reinstalling the operating system. Reboot the computer by pressing and holding the key shortcut Command (⌘) + R until you see the Apple logo. This helps you to boot the computer into the recovery mode.
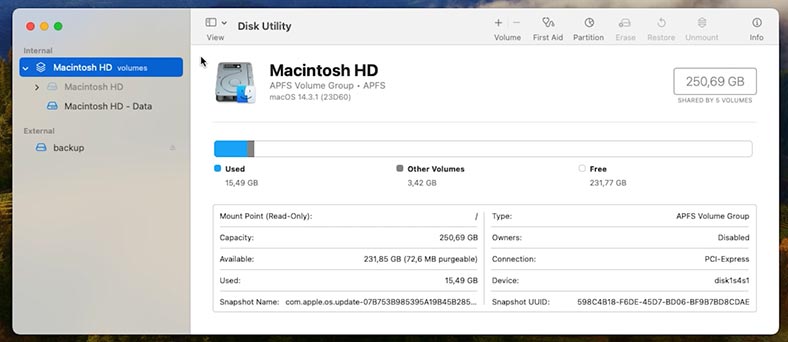
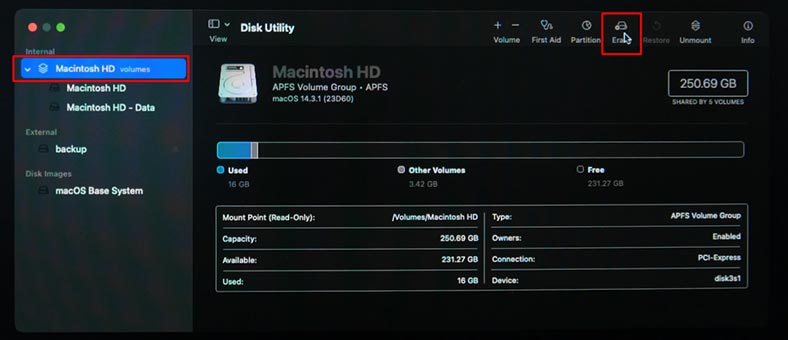
To erase a drive, use Disk Utility. Choose it in the menu and format the disk with the name Macintosh HD.
Select Erase, APFS format, type the new disk name if necessary, and click Erase.
After the disk is formatted, close Disk Utility and select Reinstall macOS in the recovery menu. Follow the instructions on the screen to reinstall the operating system.
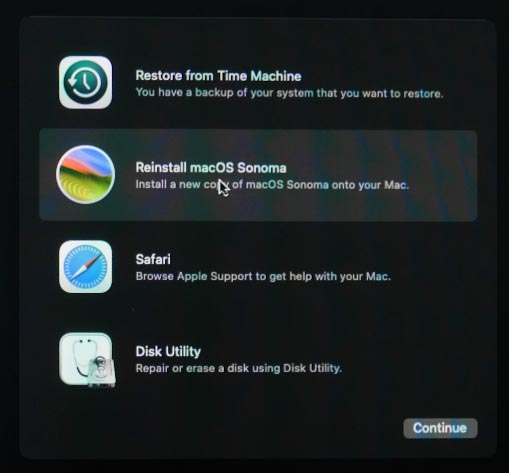
When the reinstallation is complete, you’ll be suggested to recover data from a Time Machine backup or proceed with a clean installation.
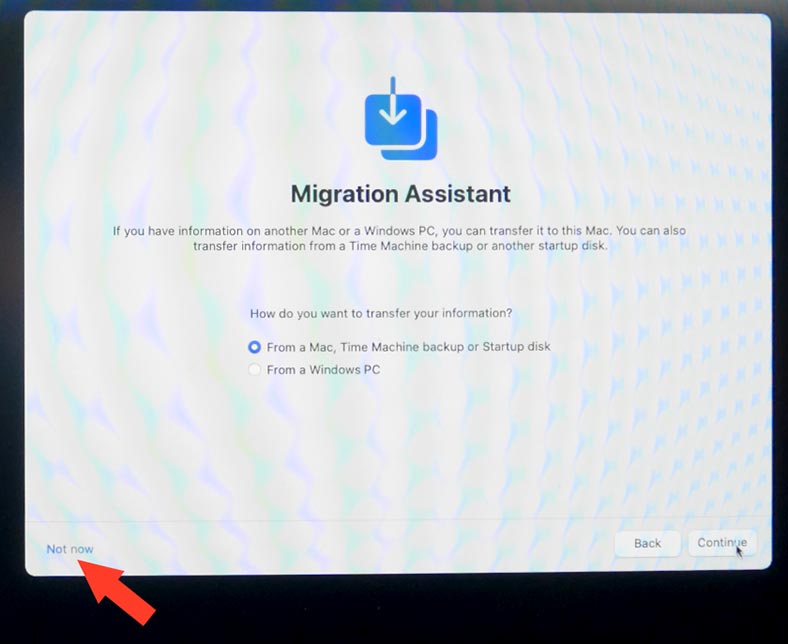
At this stage, in the Migration assistant window, choose the option to transfer data from a Time Machine backup.
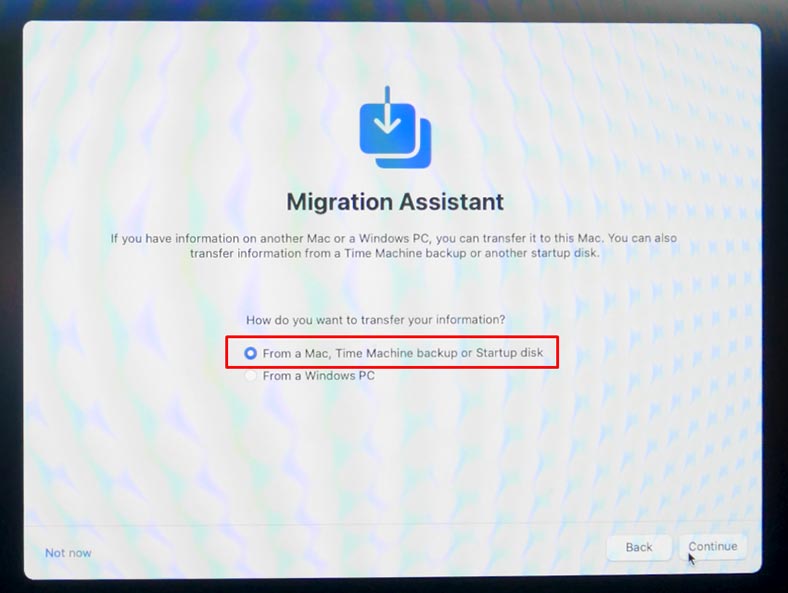
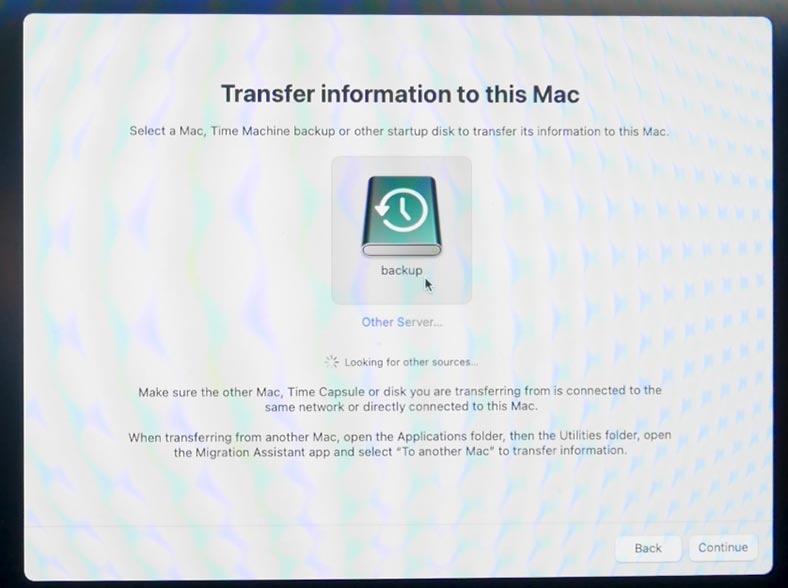
Select the disk containing the Time Machine backup of another startup disk to transfer your data, and click Continue.
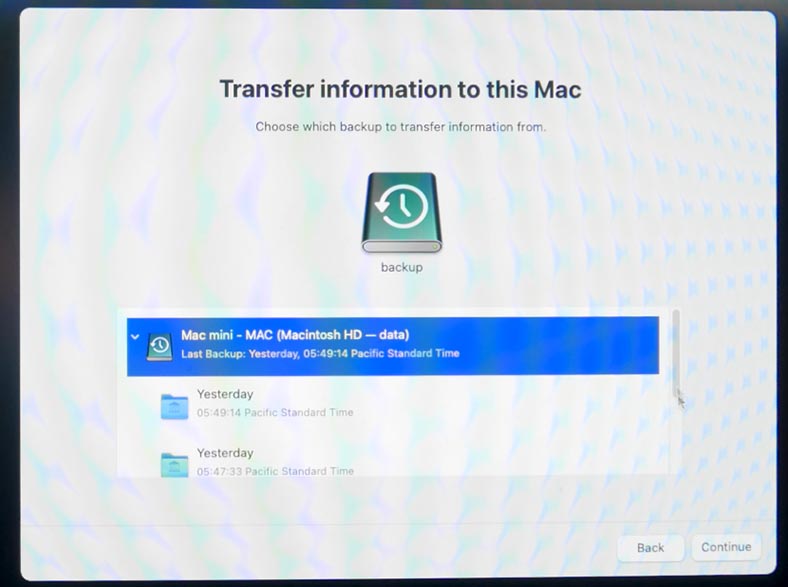
After that, choose the latest backup or open the folder and select a particular backup file, then click Continue.
The Assistant will show you the list of data categories that can be transferred from this Time Machine backup. It includes apps, user accounts, files and settings. Check these boxes for the data you would like to transfer, and click Continue.
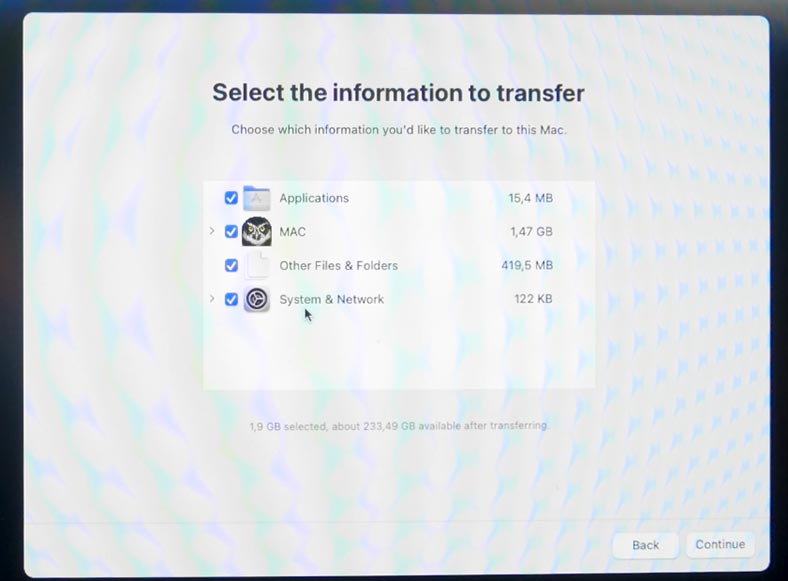
Set the administrator’s password – Continue.
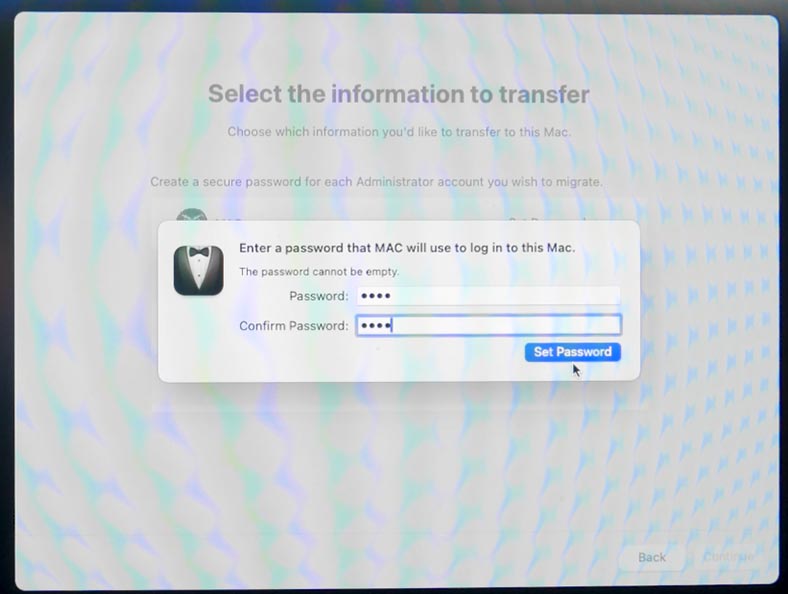
This will start the transfer of data from the Time Machine backup to your Mac. The transfer process may take some time depending on the amount of data and the performance offered by your Mac and the external drive.
When the data migration process is complete, reboot the computer by clicking on the Restart Now button.
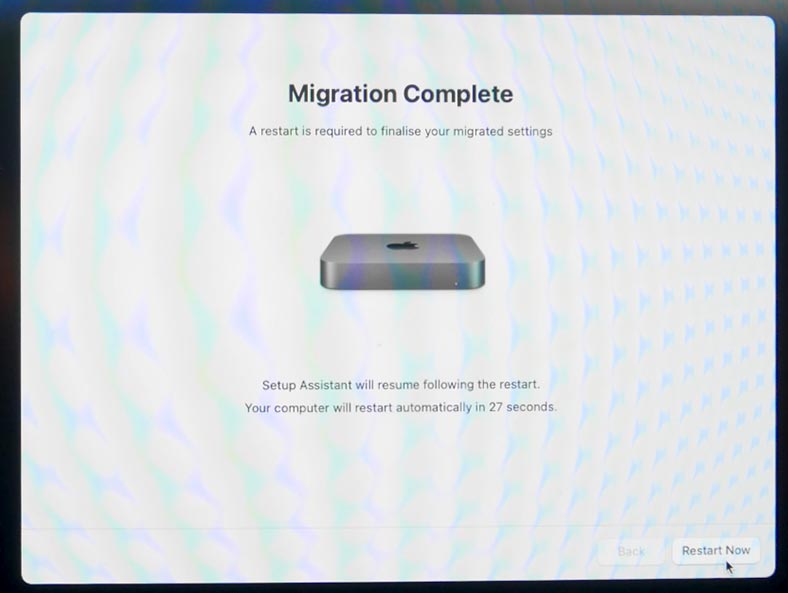
Now migration is complete.
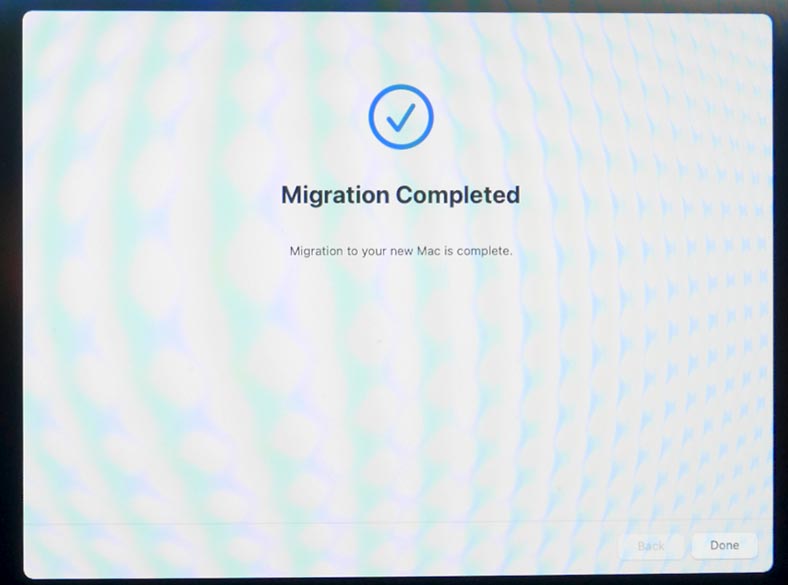
If you don’t need to transfer data, configure the computer as a new system after reinstalling macOS and skip the data transfer option.
Reinstalling macOS may take a while, so make sure you have enough time and a sufficient Internet connection to download all necessary files.
Method 3. Disk Utility
Now let’s take a closer look at Disk Utility, which we used to erase the drive.
Disk Utility is the dedicated tool to check, restore and erase any connected disks including Macintosh HD and external drives. You can use the Erase option in the Disk Utility menu to format your startup disk,

or run Disk Utility First Aid to restore the disk.

After you start Disk Utility, you will see the list of all drives available on your computer. Select the one you would like to restore or erase.
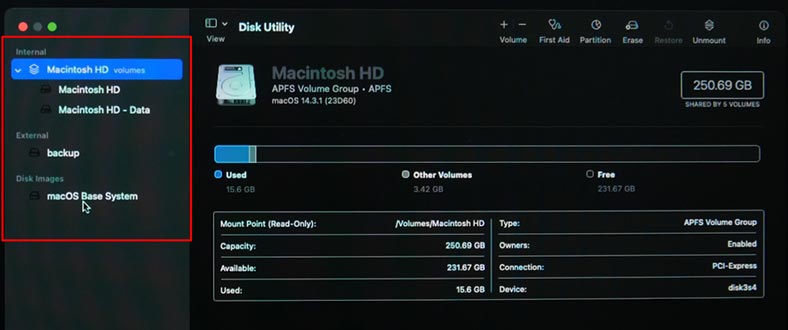
If you need to restore the system with the help of Time Machine backup, choose Restore in the menu. After that, chose the source to restore it from.

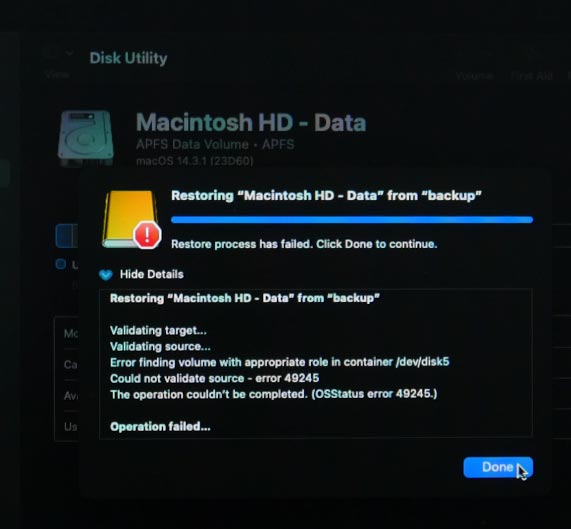
If you encounter this error, it will be impossible to restore data from backup in this way. It means you have chosen the wrong disk or backup file.
We have already explored how to erase a disk.
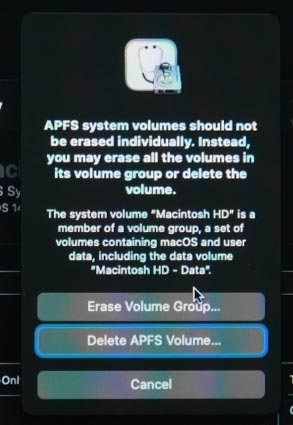
Before you continue with the restore or erase operation, Disk Utility will ask you to confirm this choice. Make sure you have selected the right disk, as all data will be deleted from there without any chances for recovery.
When the disk is restored or erased, you can use it again for any purposes you may have.
Method 4. Safari Browser
Another utility available in the Recovery Mode is Safari browser. It allows you to visit the Apple support page or other webpages when you need extra information. In this mode, bookmarks, plugins and browser extensions are not available.
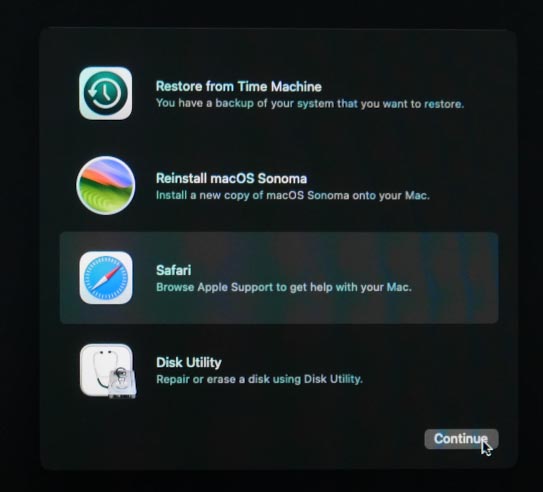
You can use Safari to look up for solutions when you encounter problems in the course of restore operations. It can be useful when dealing with various issues.
In some cases, you may need to download additional files or software to restore the operating system. With this browser, you’ll be able to download the required files from official websites or other sources.
If you need help or guidance with certain restore procedures, you can use Safari to look them up.
In addition to utilities in the main Recovery Mode window, there are a few more recovery tools available in the menu at the top of the page – Terminal and Startup Security Utility.

Method 5. Terminal
In macOS recovery mode, Terminal gives you access to the command line which allows you to perform various operations to restore the system and manage its hard disks.
To start it, open Utilities, and then Terminal.
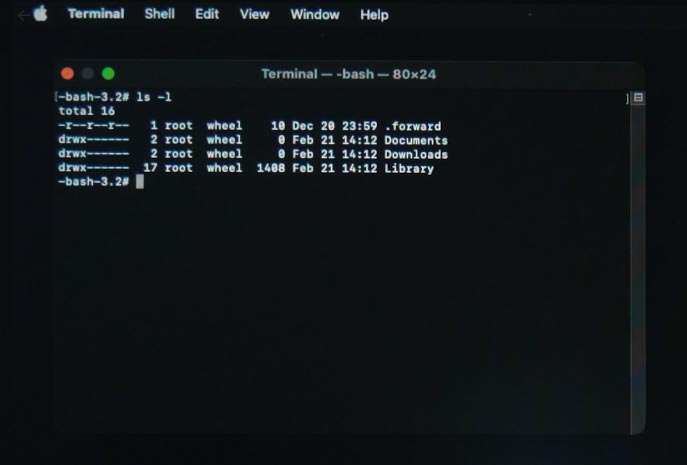
Now that you have access to Terminal, you can use it to perform various operations such as recovering data, changing passwords, checking and restoring disks, and handling other system tasks.
Keep in mind that some commands require additional administrator permissions.
Method 6. Startup Security Utility
Startup Security Utility is a tool for managing security settings and starting your operating system. You can use it configure startup from removable media.
With Startup Security Utility, you’ll be able to configure security settings such as Secure Boot that define which types of operating systems and startup devices are allowed to run on Mac. Also, you can set a password to protect these settings from unauthorized changes.
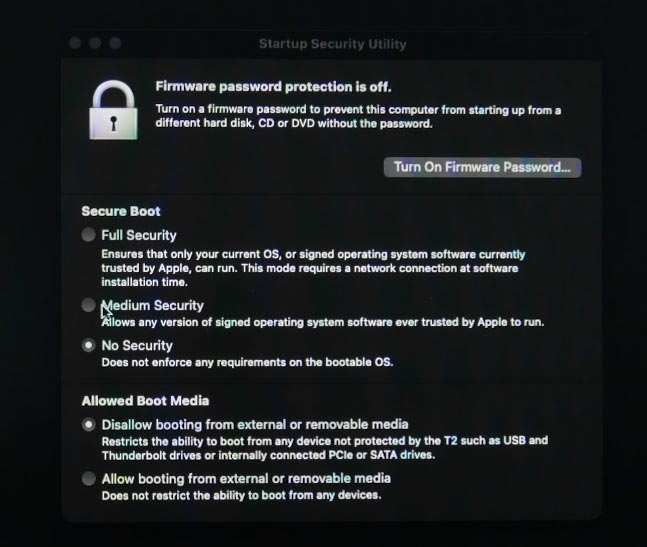
Startup Security Utility is a powerful tool to ensure system protection and monitor its startup processes. However, changing its settings requires caution, since getting these options wrong may cause issues with starting up your computer or accessing it.
What should I do if macOS Recovery Mode doesn’t work?
If you can’t start your Mac in the recovery mode, or there is no such option, it means that either the key shortcut Command + R doesn’t work, or the recovery partition on your disk is damaged. You might be using a wrong combination of keys.
For Intel-based Mac computers, you can start the recovery mode by holding down the shortcut Command + R during startup. On the other hand, Mac computers equipped with M1/M2/M3 processors use a different key shortcut.
To start your Mac in the recovery mode, shut it down, press the power button and hold it until you see Apple logo and the text saying that if you keep holding the button, you’ll be able to access startup options, so keep holding it.

In the end, you can choose Options – Continue – and finally see the Recovery Mode window.
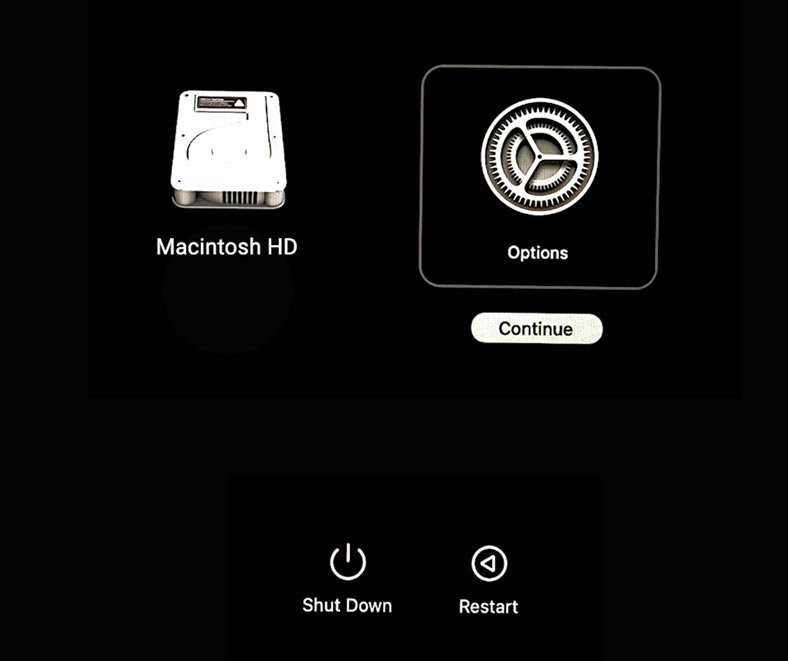
If your Mac was unable to boot from the recovery partition, you will see an error code on the screen – for example, 2003F).

To fix the issue with inoperable recovery mode, connect to the Internet and try restoring it from the same menu.
Conclusion
Summing up, you can see that macOS Recovery Mode is a powerful tool for fixing a wide range of issues that your computer may encounter one day. And now you know how to use its features to maintain and restore your system if necessary.


