Docking Stations – An Extra Tool for RAID Data Recovery
Read this article about docking stations for HDDs and SSDs. They are useful tools for connecting various drives to a computer in a quick and effective way. We’ll explore why people use them, what types of such devices exist, and how they can help you to recover data.
- Docking station interface types
- SSD M.2 types
- What are docking stations used for?
- Docking stations in data recovery
- How to capture a disk image and clone data with docking stations
- How to recover data from a RAID system with a docking station
- Conclusion
- Questions and answers
- Comments
A docking station is a piece of hardware that lets you connect conventional hard disks or SSDs to a computer using various interfaces: USB, Thunderbolt or eSATA. Such stations offer a convenient way to extend the capabilities of your computer and to manage a data storage effectively.
There are a few types of docking stations, from simpler models with a single slot to more advanced devices that support work with several disks at the same time. The choice of a specific model depends on your needs and preferences.
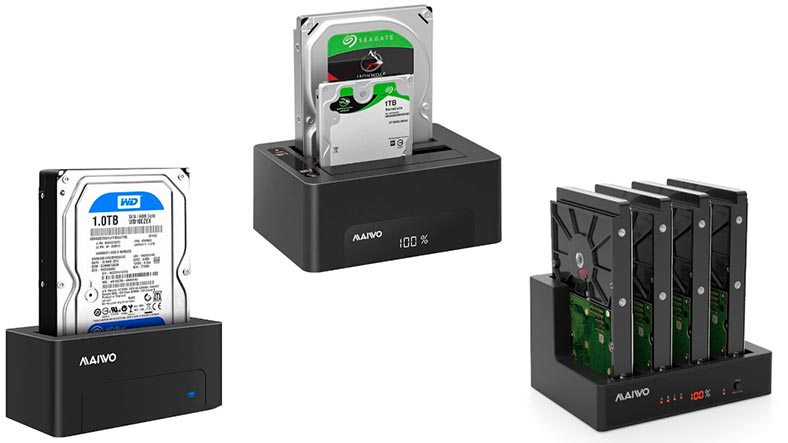
Docking stations for HDDs and SSDs can come in handy in various scenarios, such as creating backup copies, cloning disks, or transferring files between computers. They can also be helpful for hot-swapping disks which makes routine maintenance and upgrade operations quicker and more convenient.

RAID Data Recovery Made Easy with Docking Stations
Docking station interface types
The first and the most widespread interface type is USB. USB ports are widely used in computers and laptops, and that’s why docking stations equipped with such interfaces are very convenient.
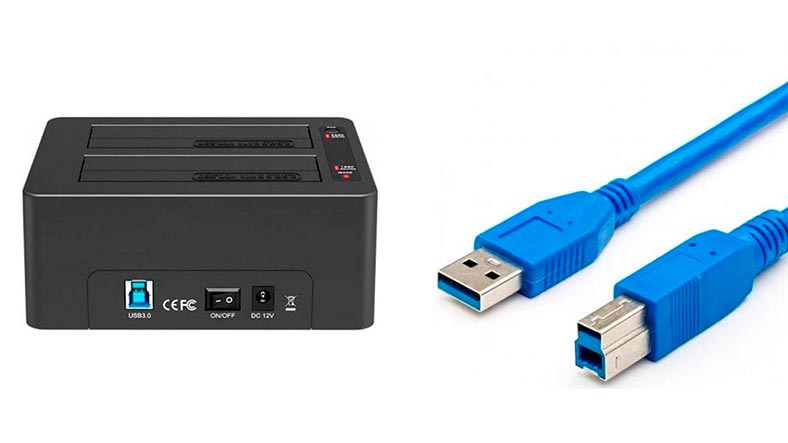
The second interface type is Thunderbolt. It’s a high-speed connection able to transfer data quickly between various devices. Docking stations supporting Thunderbolt are known for their high performance.
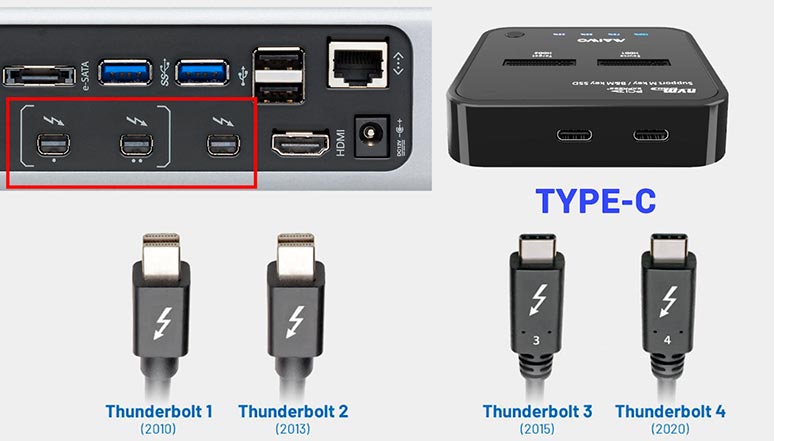
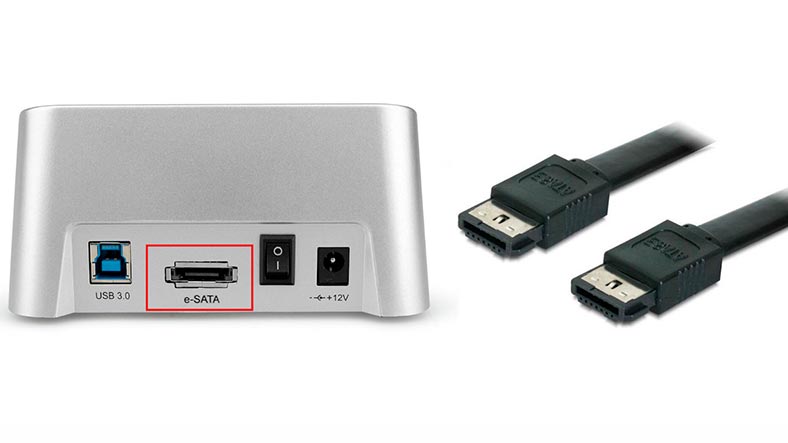
Another interface type is less popular – eSATA. Compared with other types – USB and Thunderbolt – eSATA offers even higher data transmission rates.
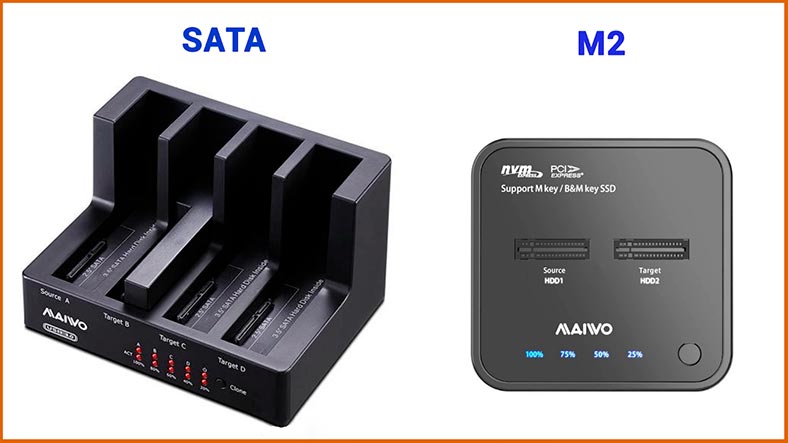
Interfaces are also classified by the type of drives connected: SATA – for hard disks and solid-state drives, and M.2 – for M.2 SATA and M.2 NVME solid-state drives.
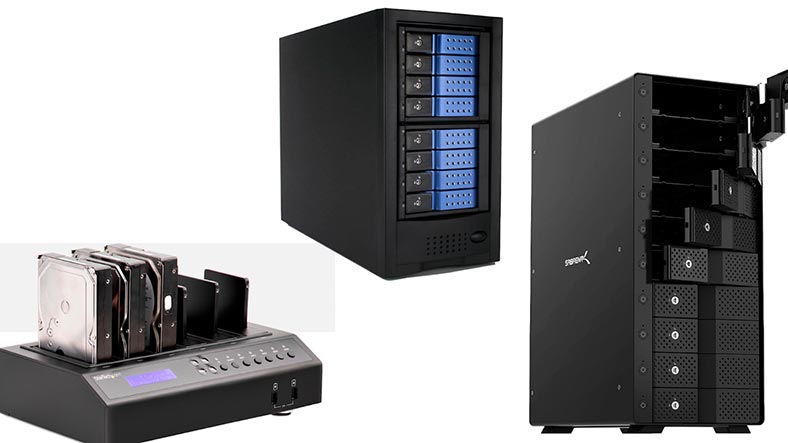
Some docking station models allow connecting 6, 8 or even 10 drives at the same time.
Each interface type has its own pros and cons, so one more time, the choice of a specific model depends on your needs and preferences.
There’s hardly any need to explain the difference between HDDs and SSDs, but what about M.2 SATA and M.2 NVME? Here’s what should be taken into consideration when choosing a docking station to work with M.2 drives.
SSD M.2 types
In terms of connections, there are two main types used by M.2 – SATA and PCIe.
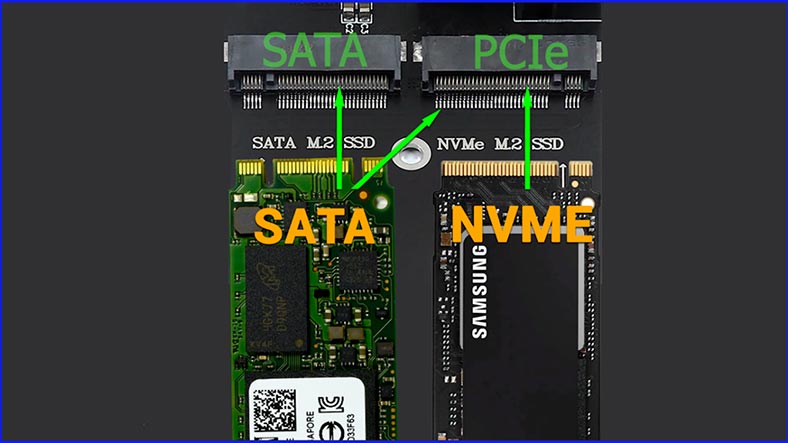
In addition, there are M-type and B-type keys for slots which determines the interface supported by a certain device: the B key supports PCIe and SATA, while the M key is only compatible with PCIe. When choosing an M.2 storage device to buy, think about compatibility between the drive interface and the docking station slot.
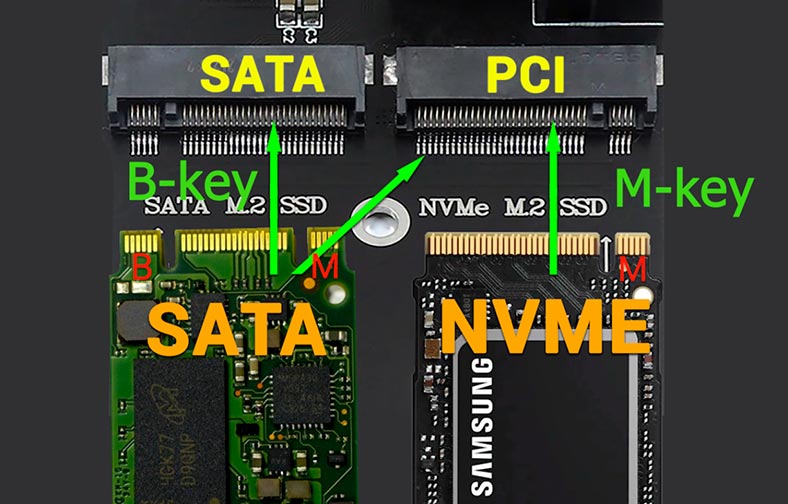
An M.2 SATA SSD card with an M+B key can be installed in most slots, while an M.2 NVMe SSD card with an M key can’t be inserted into a B-key slot. When you choose a station, pay attention to the slot type it has and the kind of drives it supports. The two SSD cards look very similar and only have a slight difference in their connection interface, so it’s important to select mutually compatible drives and docking station.
What are docking stations used for?
Now let’s have a look at some examples of how docking stations can improve your work with computers.
First of all, such stations offer a convenient way to connect HDDs and SSDs to a computer. It is especially handy for users who often deal with huge amounts of data and need a quick access to that information.
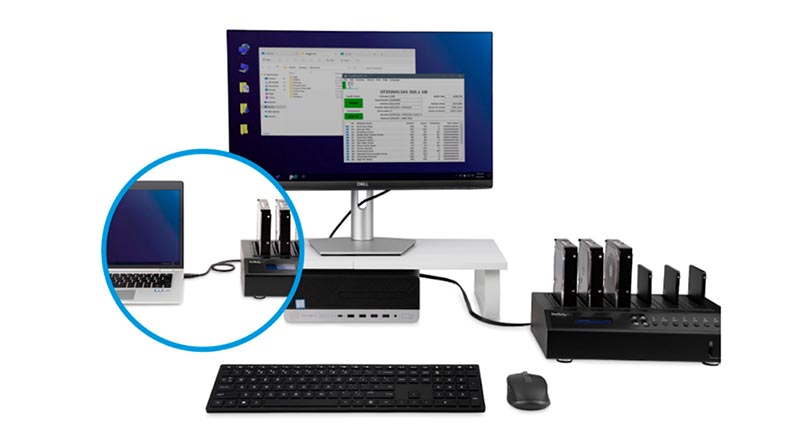
Besides, docking stations let you transfer data between devices quickly and easily. You can connect a station to one computer when you back up its data, and then connect it to another computer and restore that data. This will help you protect your files from loss when there is a system failure, or when a hard disk gets damaged.
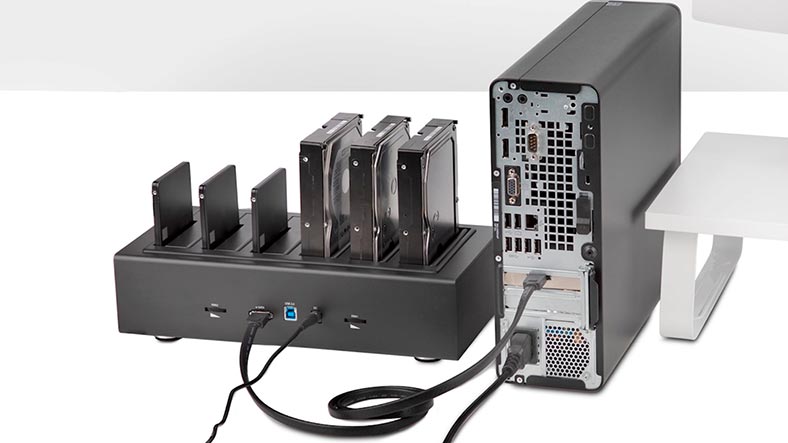
Another practical example is using docking stations to handle several HDDs or SSDs at the same time. This can be especially useful when you work with large amounts of data and having additional space for storage is crucial.
Another important feature of a docking station is disk cloning. Use a station to clone one drive to another by just connecting both storage devices and pressing the clone button. This can be useful when you want to replace an old disk with a new one, or create an accurate copy of your current system.
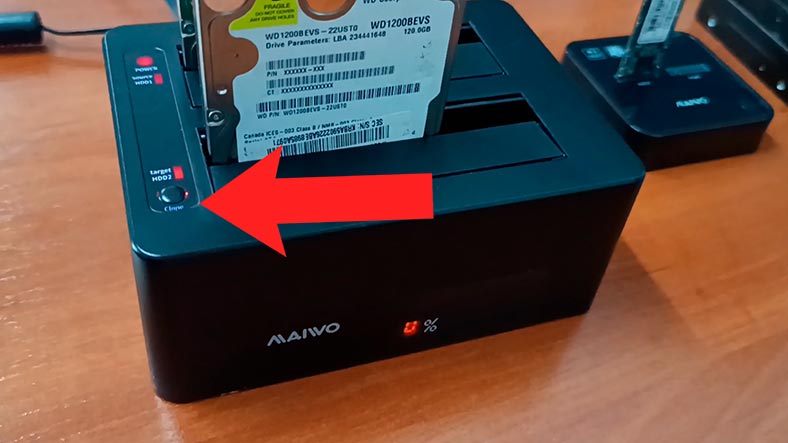
Another important advantage of a docking station is the hot-swap feature. It means that you can connect and disconnect HHDs and SSDs without having to shut down your computer. Hot-swapping makes it easier to service and upgrade your configuration, since you can quickly replace a damaged or outdated disk without actually stopping the work with your computer.
Docking stations in data recovery
Docking stations also play an important role in data recovery. Whenever there are problems with a hard disk drive or SSD, a docking station can be used to capture a disk image or clone data to another drive.
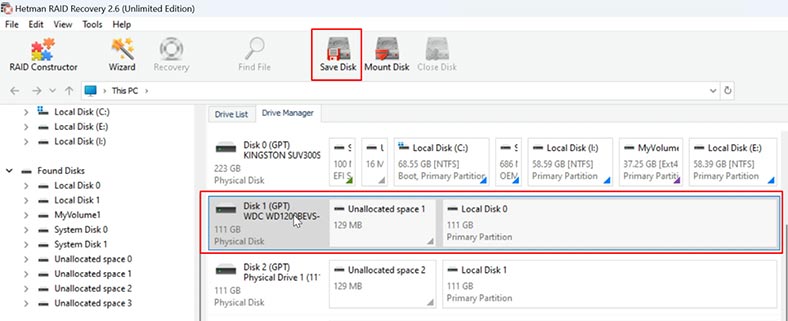
Capturing a disk image allows you to save a copy of the disk contents to a safe place, and this feature becomes useful when the disk has reading issues or if there is a chance to damage it. Afterwards, such disk image can be used for further data recovery or disk analysis.
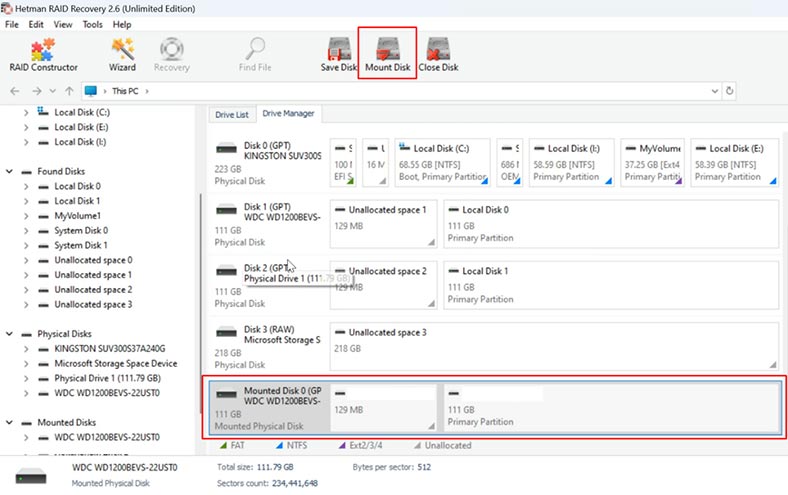
Besides, as we mentioned before, docking stations allow us to clone one disk to another. It can become handy if you want to back up your data or replace an old disk without losing information.
In both cases, using a docking station makes data recovery more convenient and effective, which lets you restore access to your information quickly in case any problems emerge.
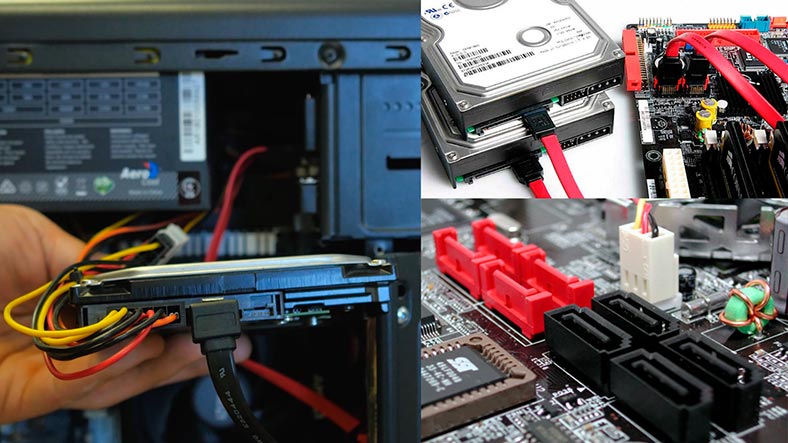
As to data recovery from RAID systems, we know that building a disk array requires a bunch of hard disks and all of them need to be connected to a single computer. An ordinary motherboard has a limited number of SATA ports, and this is when a docking station comes in to help you connect additional drives. Alternatively, you can use it to capture a disk image without rebooting your PC, since the station has the hot swap feature.
How to capture a disk image and clone data with docking stations
Now let’s explore the process of capturing a disk image with the help of a docking station in detail.
To do it, connect the hard disk or SSD to a docking station, and then connect the docking station to a computer. After that, launch a disk imaging utility – I’ll show everything with the example of Hetman RAID Recovery.
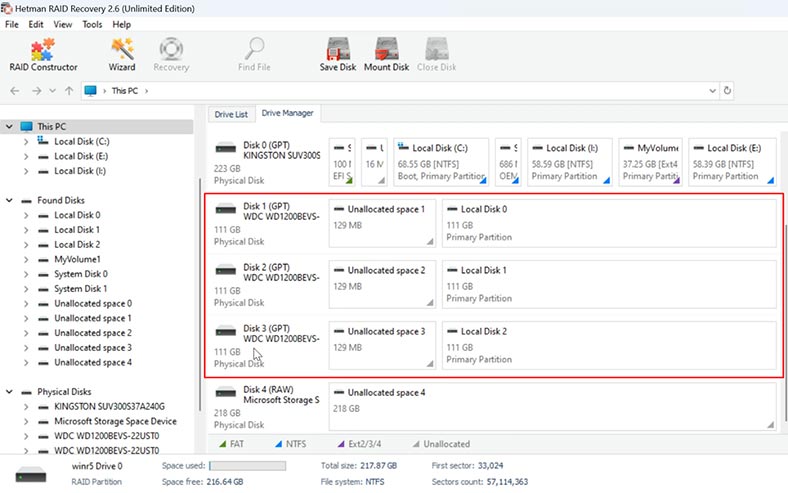
In this case, I have three disks which were used to build a RAID 5. Now let’s see how to use a docking station to recover data from this disk array.
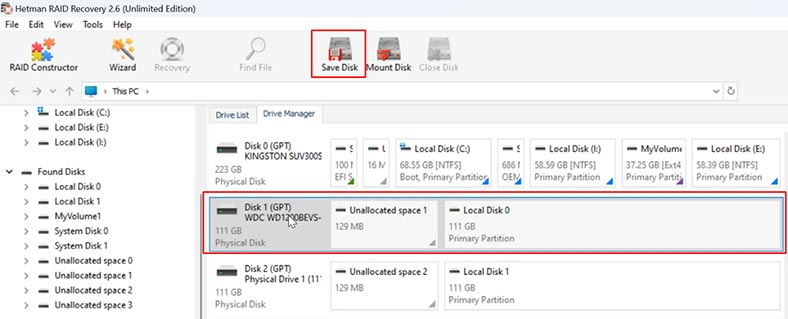
For starters, we need to capture a disk image. To do it, select the required disk and click on Save Disk.
Choose where you want to save it. You need a storage device with the capacity equal to or exceeding the capacity of the disk being saved.
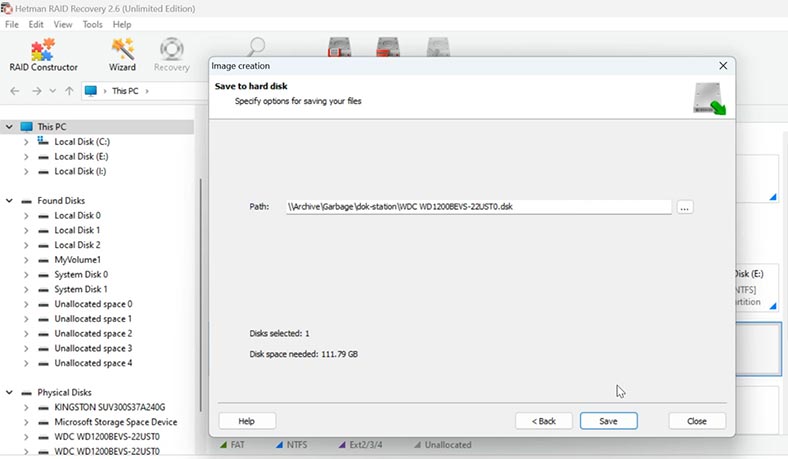
When the directory to save the disk is chosen, the process of creating the disk image begins. It is going to take some time, depending on the disk size and the connection transfer rate.
When it’s over, you’ll be able to mount the disk in the utility. To do it, click on Tools – Mount Disk, and give the path to the image file.

All you need to clone data with the help of a docking station is to connect the disks and press the clone button, and the process will start immediately. When you use a docking station, you don’t need any third-party tools to clone your disks.
When the cloning process is over, you will get an accurate copy of the disk which can now be used as a replacement for the original disk or as a compete backup of your data. It’s a useful feature for cases when you have difficulty reading a disk, or when you are afraid to damage a faulty disk completely.
How to recover data from a RAID system with a docking station
Now that we’re done with images, let’s explore data recovery from RAID.
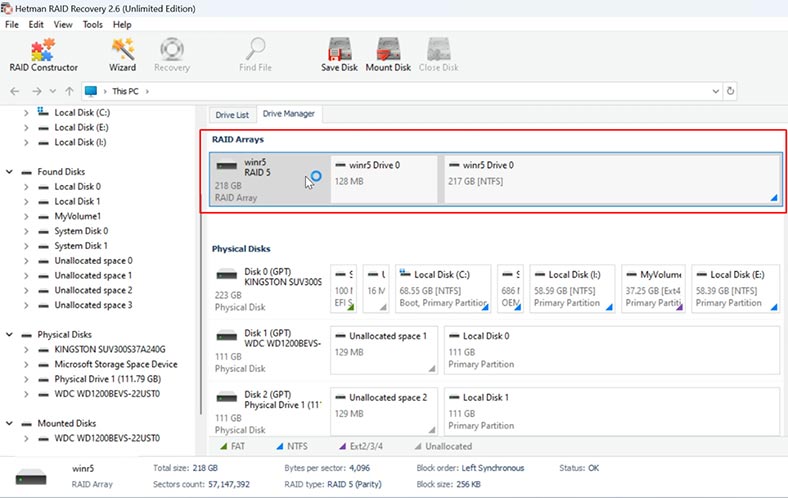
This array consisted of three disks. We have captured the image of one disk, and mounted it in the recovery utility.
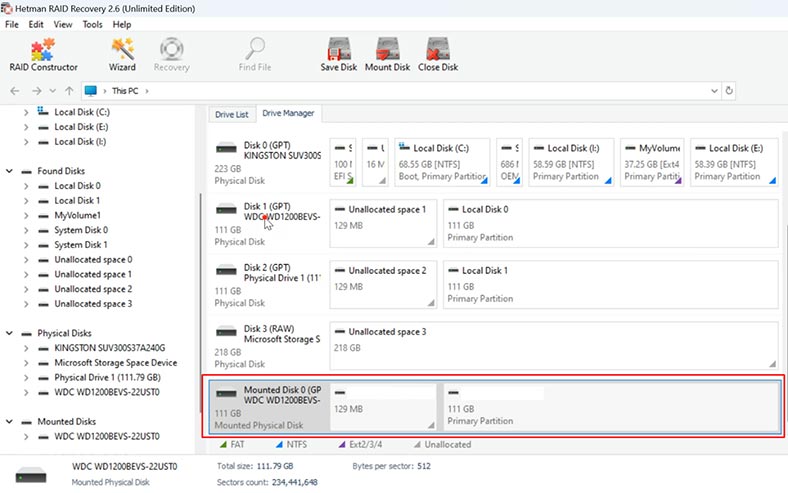
The second disk is connected to the computer’s motherboard through a SATA port, and the third disk is connected to the computer with the help of the docking station. As you can see, it hasn’t prevented the recovery utility from rebuilding the RAID automatically.

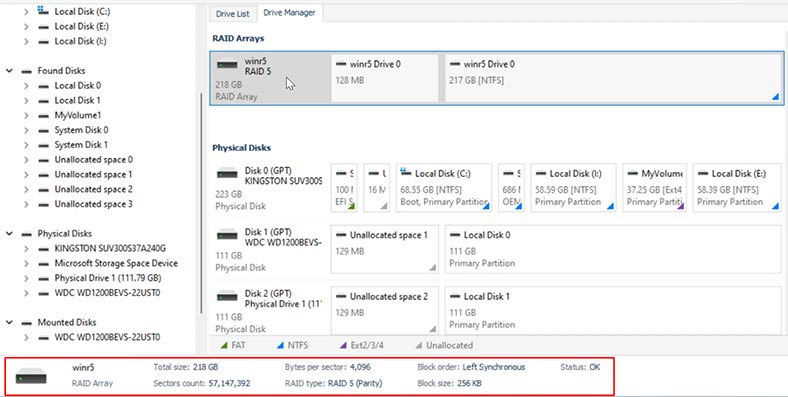
Judging from the information below, the disk array has been built correctly. This is a RAID 5 consisting of three disks.
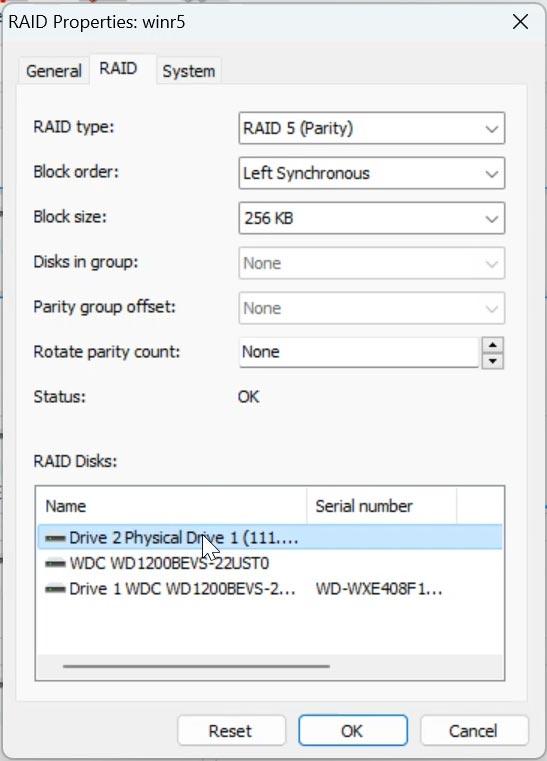
You can check the properties to see which disks were used to build this array. We can see all the three disks: the image, the one connected through SATA, and the one connected through the docking station.
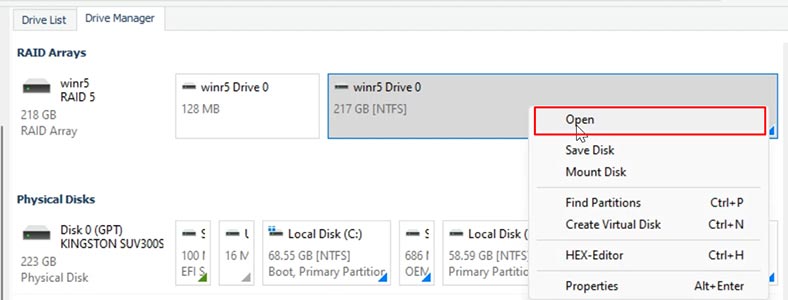
To search for files, right-click on the array and choose Open.
After that, choose the scan type – Fast scan or Full analysis. We recommend beginning with a “Fast scan” – this will take less time, and it works fine in most typical recovery scenarios.
If the utility failed to find the necessary files, then run “Full analysis.” Go back to the main window, right-click on the disk and choose – Analyze again – Full analysis.
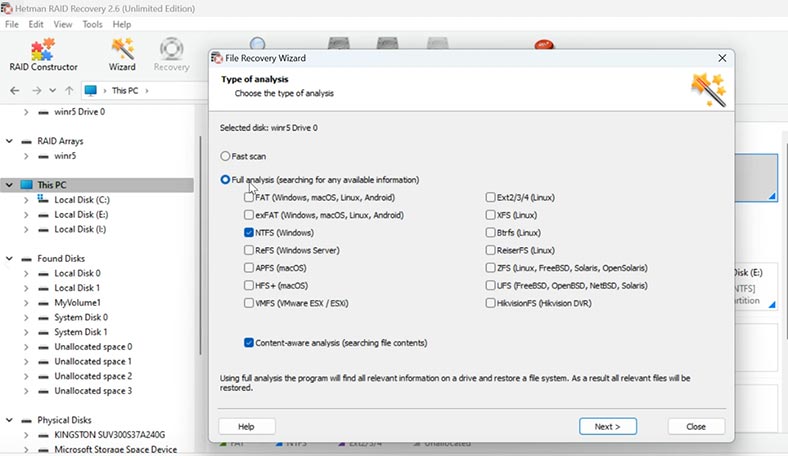
Choose the file system and click Next.
When the scan is over, open the folder where the lost files used to be, select the items you need and click the Recovery button.
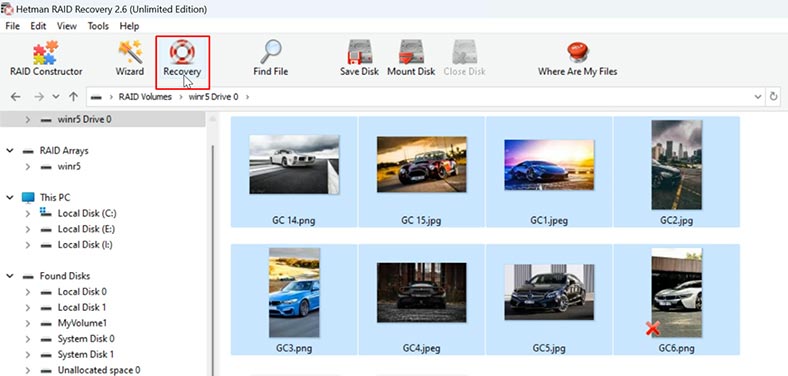
Then choose where to save them (the disk and folder) and hit Recovery again.
When the process is over, you will find the recovered files in the folder you have chosen for saving them.
Conclusion
Docking stations for hard disks are convenient and multifunctional devices that can be used in various situations. They provide quick and convenient connection of hard disks to a computer, allowing users to perform disk cloning, backup, data transfer and data recovery operations.
This connection type and disk image capturing method comprise the most convenient way to recover data from RAID systems.
| Function | Description | Advantages | Application |
|---|---|---|---|
| Multiple Disk Connection | A docking station allows you to connect multiple hard drives simultaneously. | Convenient for working with RAID arrays that use multiple disks. | Data recovery from different RAID disks simultaneously to speed up the process. |
| Data Transfer Speed | Modern docking stations support high-speed interfaces like USB 3.0 or Thunderbolt. | Provides fast access to data and minimizes recovery time. | Fast data transfer to backup media or other equipment. |
| Flexibility in Use | Supports various disk formats: SATA, SSD, HDD. | Ability to work with different types of drives without the need for additional adapters. | Connecting any type of drive to the docking station for data recovery regardless of its form factor. |
| Hot Swap | Allows connecting and disconnecting drives without turning off the docking station or computer. | Convenient for working with multiple RAID drives. | Swapping drives on the fly during data recovery without stopping the process. |
| Disk Cloning | Some docking stations offer cloning without the need to connect to a computer. | Quickly create a copy of the drive for further recovery or data analysis. | Creating a backup copy of the data from the drive before attempting recovery, preserving the original from potential damage. |
| Support for Various RAID Levels | Some docking stations support working with RAID arrays. | Convenient for working with different RAID configurations without the need for a special controller. | Data recovery from RAID arrays of levels RAID 0, RAID 1, RAID 5, and other configurations. |
| Software Compatibility | Docking stations are compatible with various data recovery software. | Provides additional functionality when using specialized recovery software. | Integration with data recovery programs for comprehensive analysis and recovery of information from damaged or faulty RAID arrays. |


