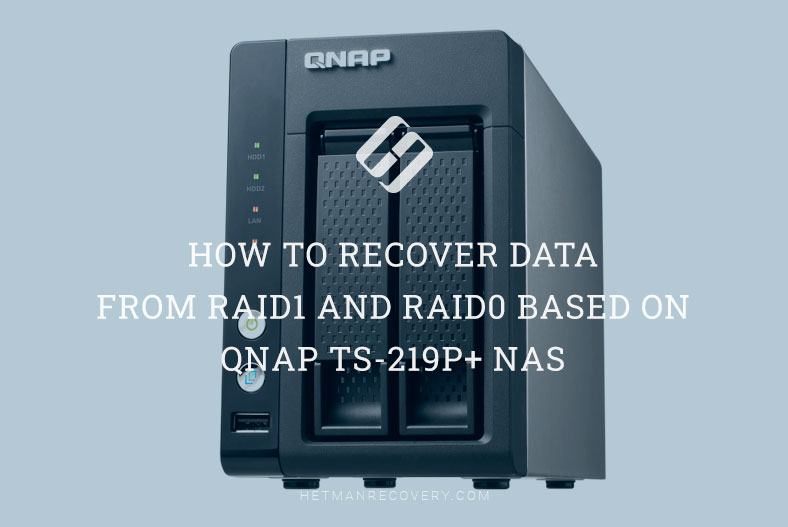
Expert Advice on Data Recovery from RAID1 and RAID0 on QNAP TS-219P+ NAS
In this article, learn how to recover data from RAID1 and RAID0 configurations based on Qnap TS-219P+ NAS. Whether you’re a system administrator or a user facing data loss due to RAID failure, we’ll walk you through the entire recovery process step by step. From identifying the issue to implementing effective recovery strategies, this tutorial equips you with the knowledge and tools needed to successfully retrieve your valuable data and minimize downtime. Don’t let RAID1 or RAID0 configurations leave your data inaccessible!
- How to create a RAID on QNAP NAS TS-219P+
- QNAP TS-219P+ Data Recovery
- Conclusion
- Questions and answers
- Comments
This QNAP NAS model is designed to use two hard disks. To improve resilience and data safety, such devices enable you to create RAID systems of various types. However, even the most reliable storage systems may encounter emergencies like accidental deletion of files, formatting or damaging the hard disk, system errors, controller failures and other hardware issues, which may result in loss of important data.

How to Recover Data from RAID1 and RAID0 Based on QNAP TS-219P+ NAS
This specific model supports two RAID types, RAID1 and RAID0, as well as JBOD, which is sometimes referred to as linear RAID, but technically it isn’t a RAID at all. In the end, redundancy in this NAS is only achieved by using a mirrored RAID. But if one of the disks fails in either RAID0 or JBOD, a part of the information is bound to be lost. In this article, we will explore a situation when the NAS is broken; all the files are still on its disks but it’s impossible to retrieve them unless you use a specialized software tool.
The matter is that a NAS storage device uses its own operating system which builds the RAID in a certain way and then writes data to its disks. Even when the hard disks are connected to another storage device or computer, their condition cannot be restored.
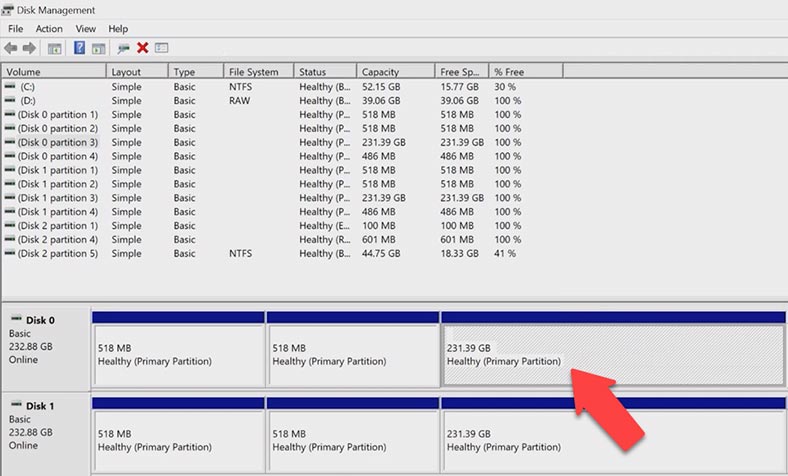
For example, when the disks are connected to a Windows computer, you will see some partitions with an unrecognized file system; another possible case is that the operating system will suggest initializing them in the Disk Management app – which is going to erase all the data still remaining on the disks. So in the end, you are going to lose access to the files or even lose the files forever.
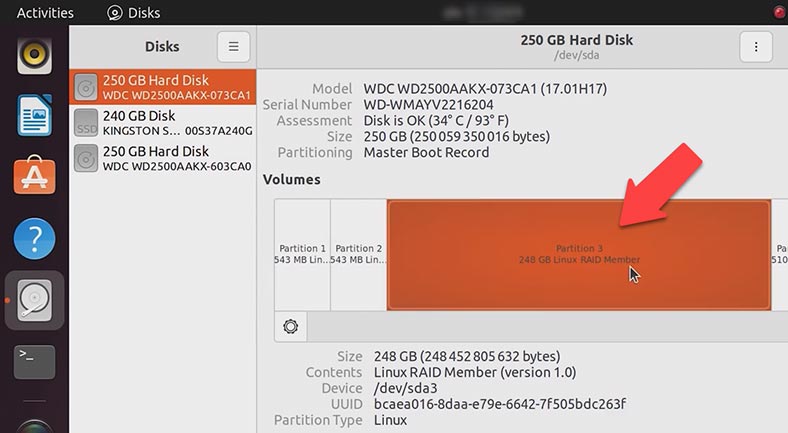
In a Linux operating system, the disk partitions will be displayed as Linux RAID, and the option to mount is unavailable.
You should remember that if you choose to initialize the hard disks in Windows or modify the volume in Linux, this action can erase all the information, and it will make recovery very difficult. Never take any steps involving the hard disks unless you really know what you’re doing, since there is a risk of losing your data permanently.
To retrieve the information from the hard disks, you will need a special tool to rebuild the RAID system and restore access to the files which are stored inside the disk array.
How to create a RAID on QNAP NAS TS-219P+
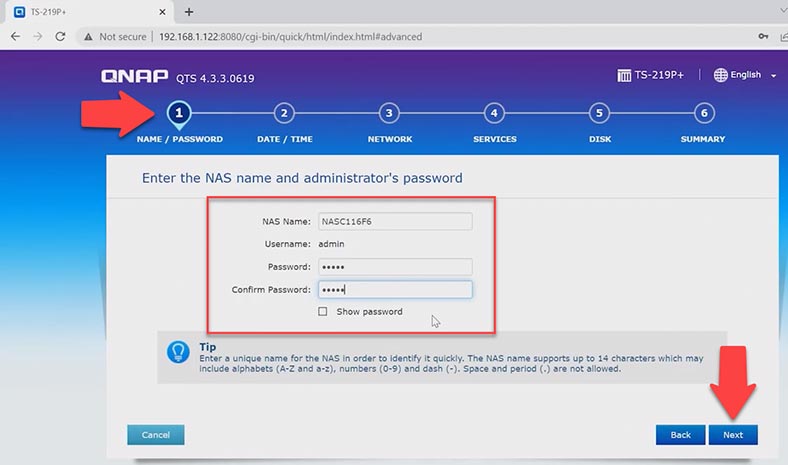
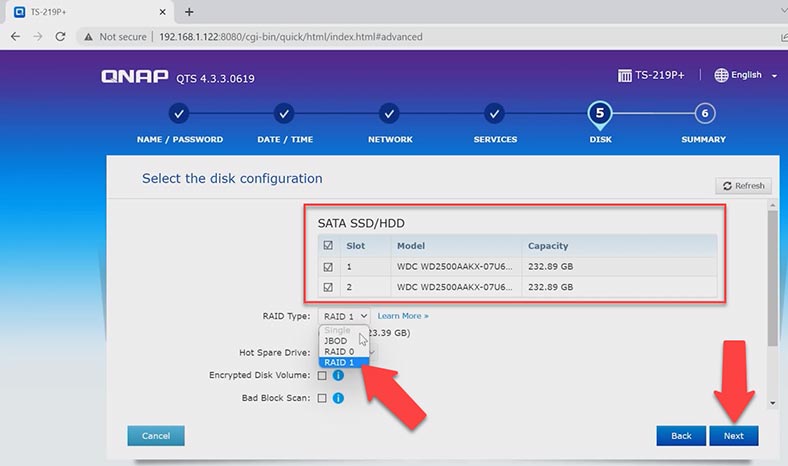
For better understanding of how a disk array is built, let’s explore the process of creating a RAID system on this specific device. When you perform initial configuration, at stage five you’ll be suggested to configure the way your data is stored. The hard disks to be included into the array are already selected, so you should look down and select one of the RAID types – RAID1, RAID0 or JBOD. Select the necessary RAID type and click Next.
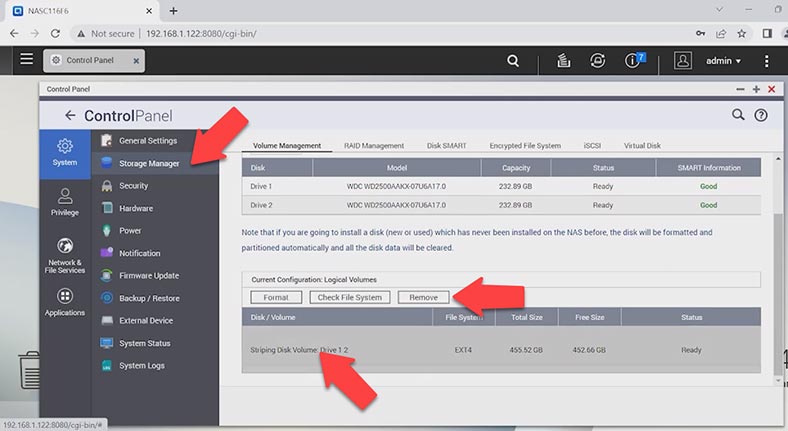
If you want to change the existing RAID, you’ll have to remove the previously created volumes first. To do it, open the menu – Storage Manager. Now select all volumes and click Remove. As a result, you will see a warning window saying that all data will be removed. Click OK to confirm it.
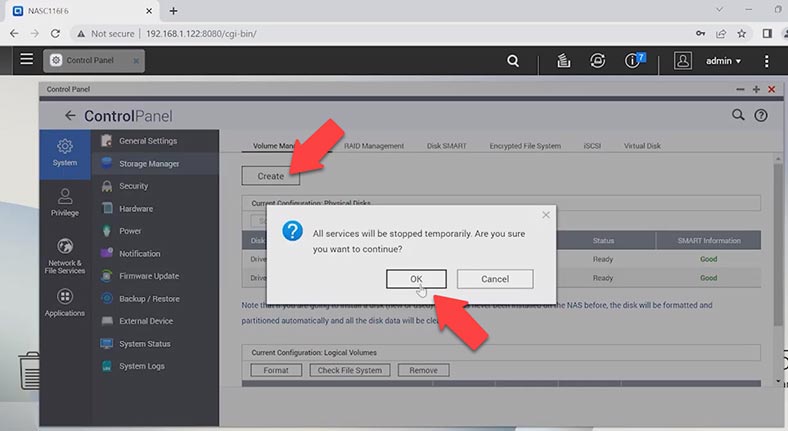
Now create a RAID with the hard disks: click on the Create button above, select the array type, and click Next.
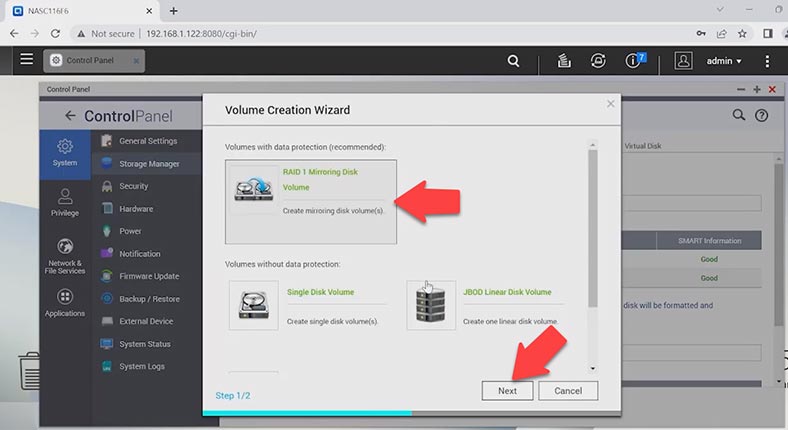
Choose the disks and click Create. Now the system will display a warning that all hard disks will be erased. Click OK to confirm it.
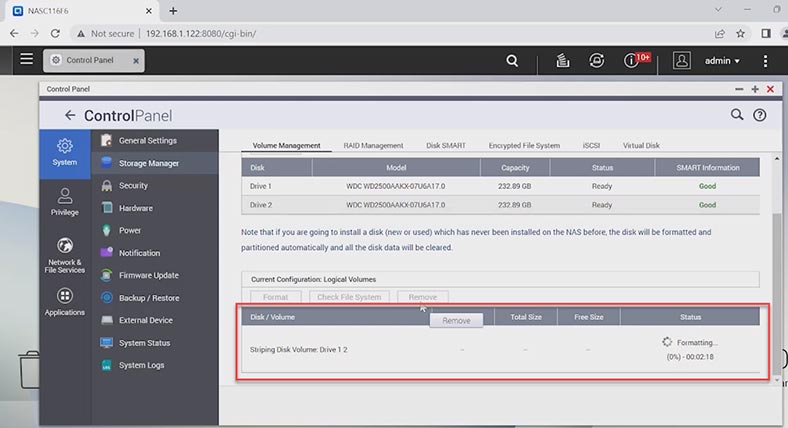
After that, the process of building and initializing the array begins. In the end, a new volume appears.
QNAP TS-219P+ Data Recovery
Method 1. How to restore files from the Recycle Bin
If you have accidentally removed important files from the NAS, the first thing you should do is to check if the network recycle bin option is enabled. This option will help you retrieve the previously deleted files. Luckily, in this NAS model the Recycle Bin feature is activated by default.
In order to restore accidentally deleted files from the Recycle Bin folder, open File Station, go to the directory where your data was stored, and open the bin by clicking on Recycle.
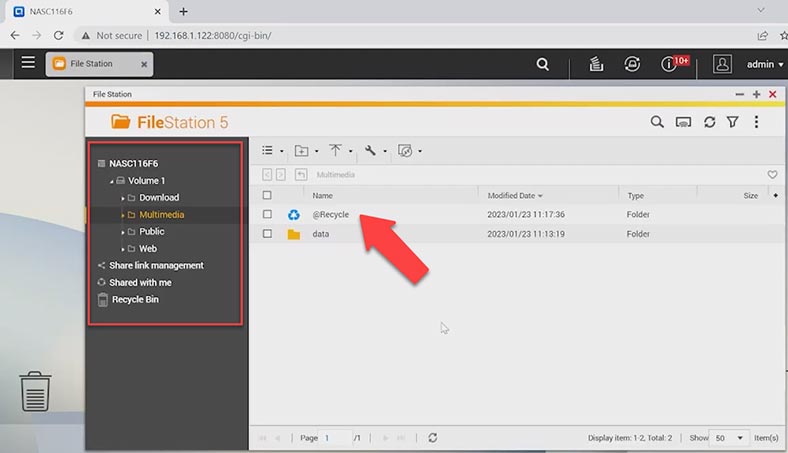
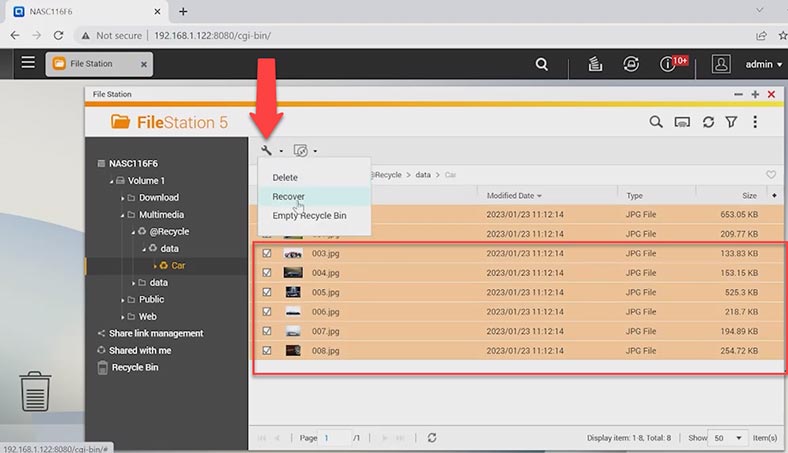
Now open the directory where the data was stored, check the files which you need to restore, click on the wrench-shaped button, select Recover and Yes to confirm it. After that, the files will reappear in the folder from which they were removed.
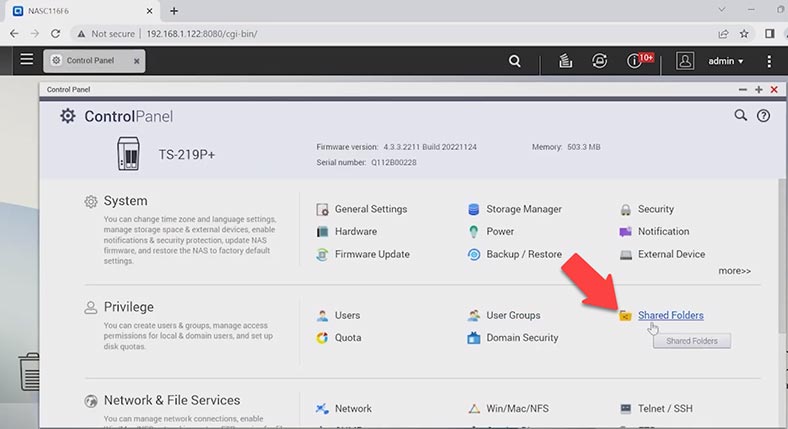
Before restoring files with a specialized software tool, make sure that your deleted files are not stored in the network recycle bin. To see if such option is enabled for this folder, go to Control Panel – Shared folders.
Then open its settings by clicking on the Edit button. The option to “Enable Network Recycle Bin” must be checked.
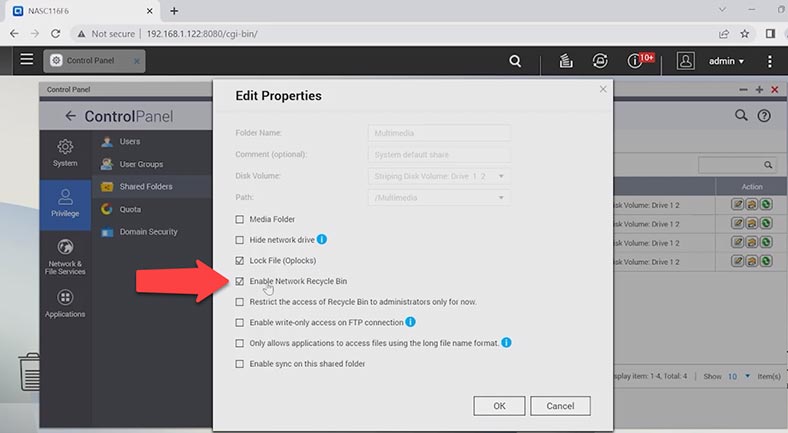
Only in this case you’ll be able to restore the data accidentally removed from the storage system.
Method 2. How to recover data from Qnap
If you failed to retrieve files from the Recycle Bin, and you don’t have a backup, or the storage system is broken so the RAID has crashed and you can’t access the data, your information can still be saved with a data recovery tool.
| Step | Description |
|---|---|
| 1. Assess the Situation |
|
| 2. Check Disk Status |
|
| 3. RAID Recovery |
|
| 4. Use QNAP QTS Recovery Tools |
|
| 5. Recover Deleted Files |
|
| 6. Final Steps |
|
| 7. Consult Professionals |
|
If you lost access to RAID data because the storage device broke down, the RAID was misconfigured or rebuilt, or if you deleted some files or accidentally formatted the hard disks – just download the specialized data recovery tool – Hetman RAID Recovery.
This program supports all popular file systems and RAID types, and it will automatically rebuild the damaged RAID with the available hard disks, so that you’ll be able to retrieve the necessary data.
To start the recovery process, take the drives out of the storage device and connect them directly to the motherboard of a Windows computer. If one of the hard disks breaks down, you can lose a part of your data, depending on the RAID level, and this data is impossible to recover.
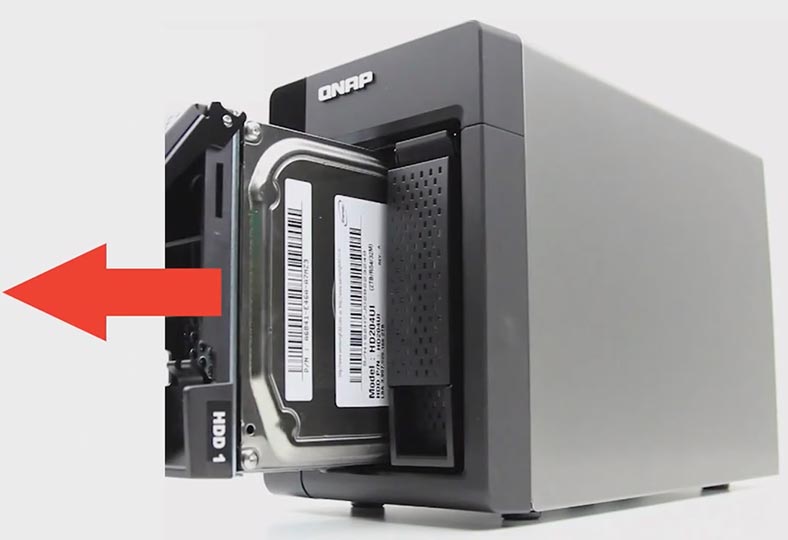
If you’re using RAID 0 and one hard disk is down, some information will be lost for good. The matter is that this array type is meant for higher performance – which is achieved through striping. It means that data is written to either disk in parts which provides users with high input/output performance at a low cost. At the same time, though, it gives you no redundancy at all. So if that’s your case, be ready to face the bitter truth: you won’t be able to recover all your stuff.
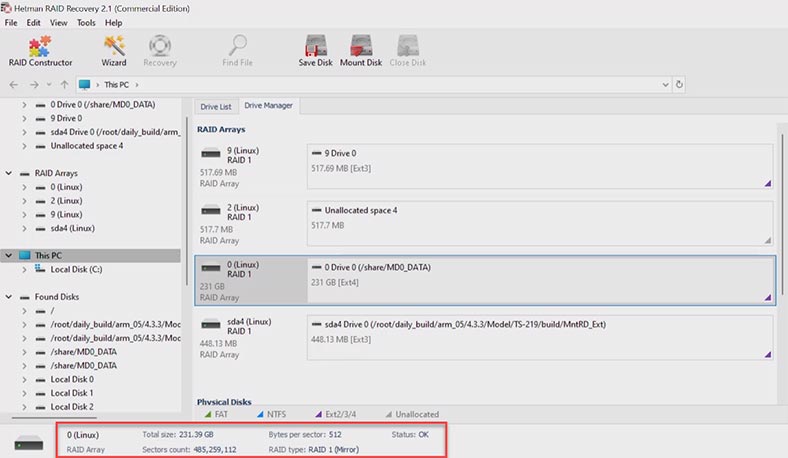
When the hard disks are connected and the program starts, it will automatically scan the disks and rebuild the damaged RAID. Below, you will see detailed information on the RAID which was built.
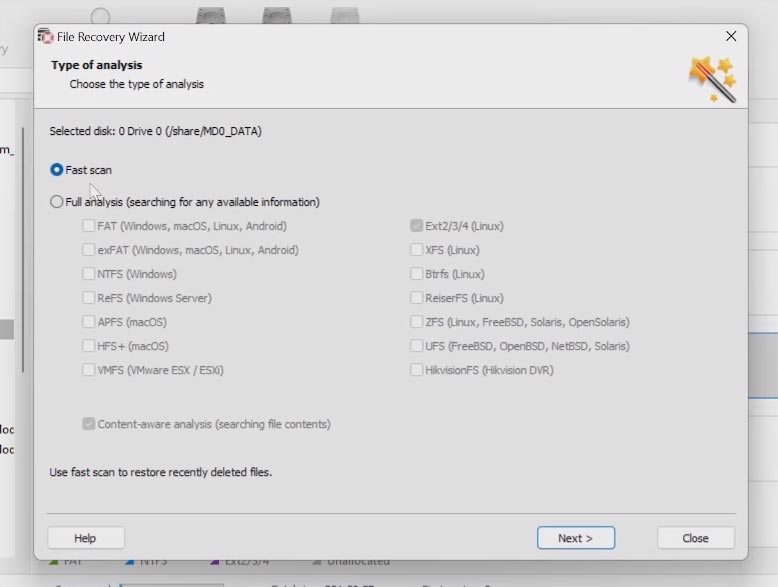
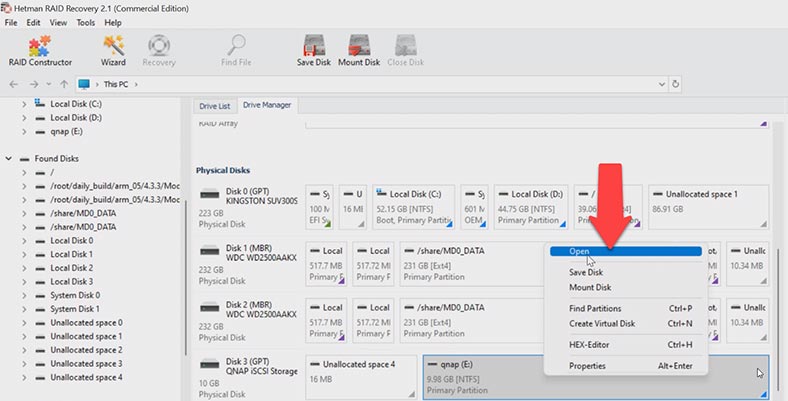
Right-click on the volume and choose Open. After that, select the scan type – Fast scan or Full analysis. For Full analysis, you need to specify the file system type used for the hard disks. For starters, we recommend running a Fast scan. If the program can’t find the missing files, then go back to the main menu and start Full analysis. Right-click on the volume and choose Analyze again. Select Full analysis and choose the file system.
When the scan is over, open the folder where the lost files were stored. This program retains the entire structure and file names, so it will be easy to find the required items, and you can use the preview window to see their contents.
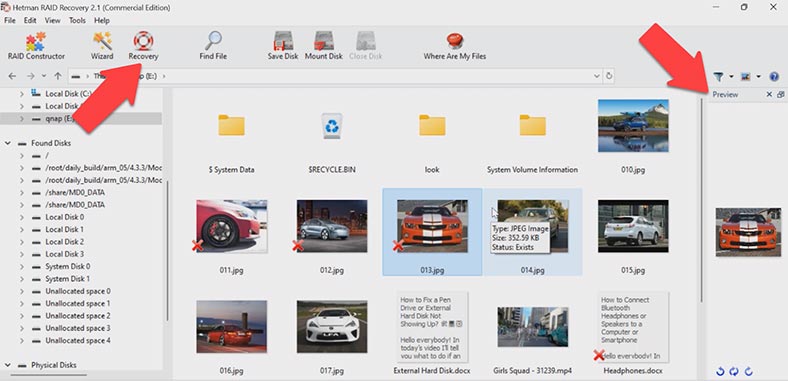
Select all the items you want to recover and click the Recovery button.
Specify where to save the data (choose the disk and folder), then click Recovery and Finish. You will find the recovered files in the folder you have chosen.
Method 3. How to recover data from an iSCSI drive
If you use an iSCSI connection, you accidentally removed some data from the network drive, and you failed to restore it from the Network Recycle Bin, Hetman Partition Recovery will help you.
When files are deleted from a network drive, you don’t need to power off the network-attached storage and take out the hard disks. The point is that Windows shows a network iSCSI drive as a physical one, so that you can scan it with the recovery tool as if it were a physical hard disk. This way, you can recover data only if the storage device is operable and you have access to the network drive; otherwise, you’ll have to use the first method.
As you can see, the program had no difficulty in finding the deleted files -they are marked with a red cross, and their contents can be displayed in the preview window. Select and recover the files you need.
Conclusion
As you can see, it’s not so difficult to recover data from a NAS; the most important thing is to think before you act, since rush actions may cause loss of all your data.
If you lost access to the disks inside your array, don’t try to reconfigure it in order to restore its operability – this process involves formatting the hard disks, which means that all the remaining data will be erased, so the recovery process becomes very complicated or even impossible. In any doubtful situations, take the hard disks out of the storage device as soon as possible, and start the recovery process.


