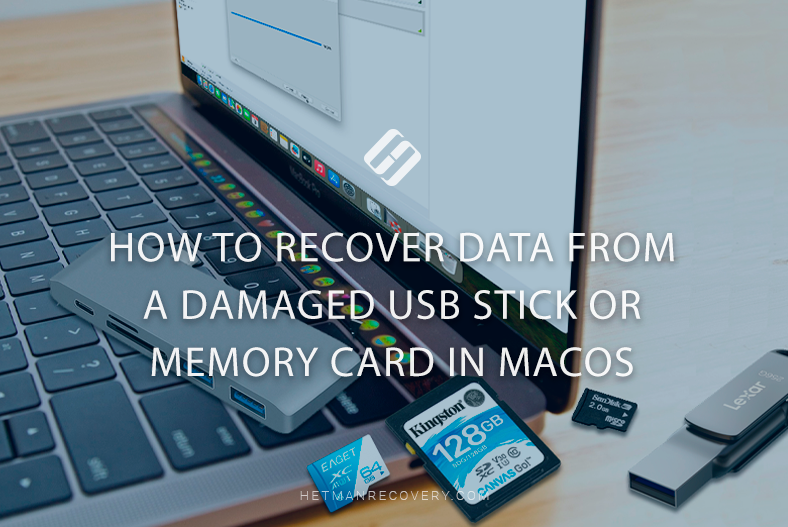
How to Recover Data From a Damaged USB Stick or Memory Card in MacOS
Read this article to find out how to repair a damaged USB stick or memory card on Mac. How to retrieve files from a drive if it isn’t displayed in Finder, and how to recover deleted data from USB drives and memory cards.
- How to check drive operability
- How to create an image of a USB stick or memory card in MacOS
- Recovering data from a damaged USB stick or memory card in MacOS
- How to restore operability of a USB stick or memory card
- Conclusion
- Questions and answers
- Comments
USB sticks and memory cards are very convenient devices to store and transfer data. The only problem is, they have a nasty habit of getting out of order when you least expect it. It often happens due to file system errors, because the devices were removed incorrectly, or even after some physical damage.
We’ll explore a few methods to retrieve information from a damaged USB stick or memory card. How to get your files from a drive which is not displayed in the Finder, and how to recover deleted data from USB drives and memory card.

How to Recover Data From a Damaged USB Stick or Memory Card in MacOS Fast & Easy 2025
How to check drive operability
Step 1. Checking connection
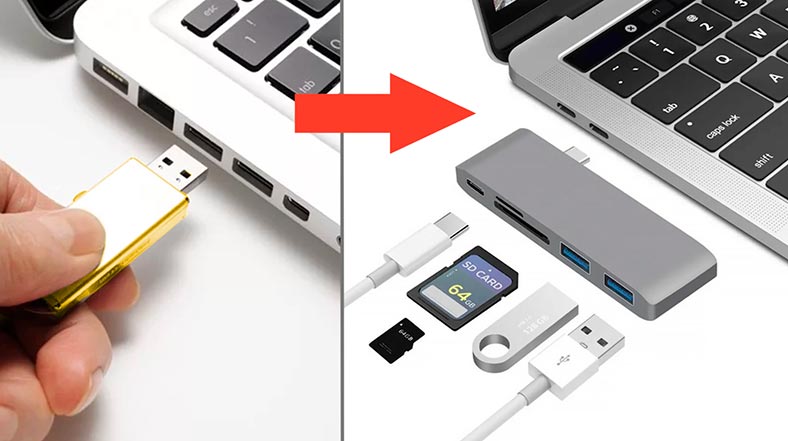
The first step to take is to make sure that the problem comes from your device, and not from the USB port or card reader.
To do it:
- Connect the device to another USB port. If your Mac lacks the required ports, use adapters (for example, USB to Type-C).
- If you work with a memory card, try using another card reader. If it’s connected to your computer with a cable, check this cable for damage.
- Connect your USB stick or card reader to another computer. If your device works well with another Mac, then your computer or laptop might be the actual culprit.
If the device is not recognized, you can move on to the next step.
Step 2. Check and repair your drive with Disk Utility
The next step will help you see if the operability of your device can be restored, and we can try to repair its errors.
To check the status of your USB stick or memory card, let’s use a MacOS integrated tool called Disk Utility.
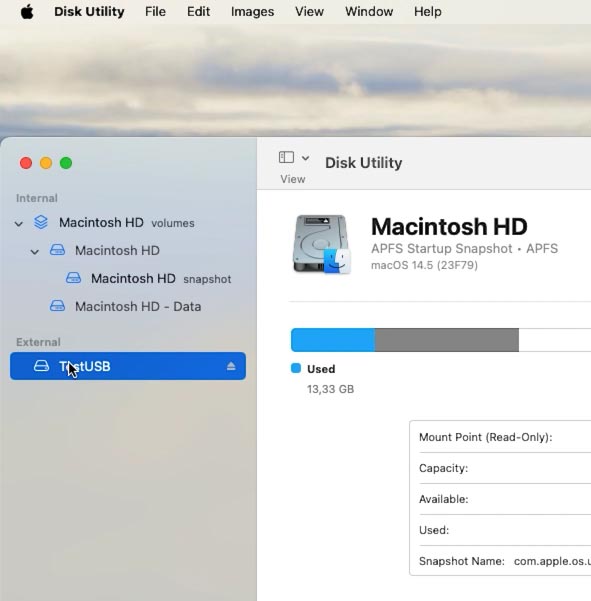
Press the keyboard shortcut – Command + Space, and type “Disk Utility”; otherwise, open the tool from Launchpad – Other.
In the menu on the left, find the drive you need. If it’s not displayed, try reconnecting the drive – remove it and plug it in your Mac again.
Now select the device and click on First Aid. The tool will run disk diagnostics, checking its structure and file system.
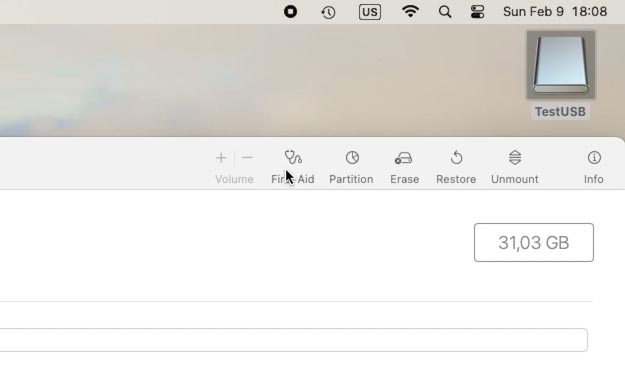
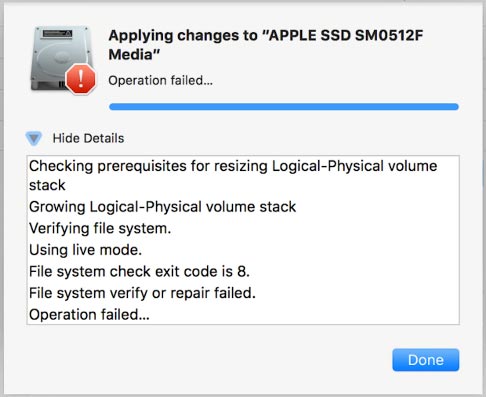
If any errors are detected, the tool will suggest repairing them. If such request appears, confirm this action.
This utility will help you fix many common problems automatically – such as damaged file system or wrong metadata entries.
How to create an image of a USB stick or memory card in MacOS
Before we proceed to other steps in troubleshooting your device, it’s recommended to create a byte-for-byte image of the USB stick / memory card. This will allow you to work with the data safely, without the risk of losing or damaging it.
Method 1: Hetman Partition Recovery
To create a complete image of any disk, use Hetman Partition Recovery – a dedicated data recovery tool. Download it from the official website, choosing the version for MacOS.
| Option | Supported by Hetman Partition Recovery |
|---|---|
| Recovering macOS file systems (HFS+, APFS) | ✅ Yes |
| Recovery from disks formatted in macOS | ✅ Yes |
| Recovery from external disks used in macOS | ✅ Yes |
| Supported file systems | FAT/exFAT, NTFS/ReFS, APFS/HFS+, Ext2/3/4/ReiserFS, and XFS/UFS/ZFS/Btrfs/VMFS/HikvisionFS |
| Supported operating systems | MacOS, Linux, Windows |
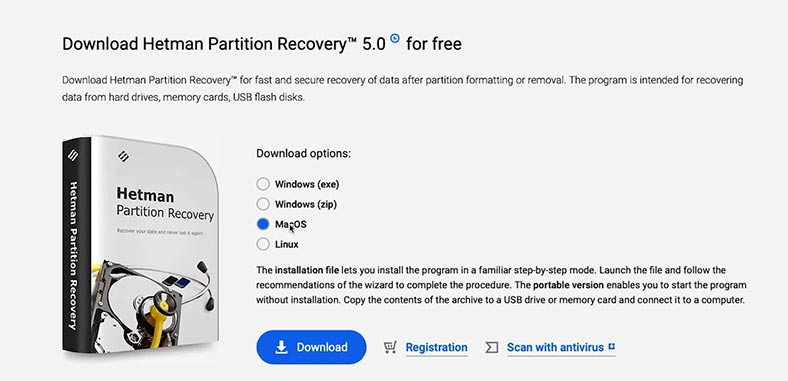
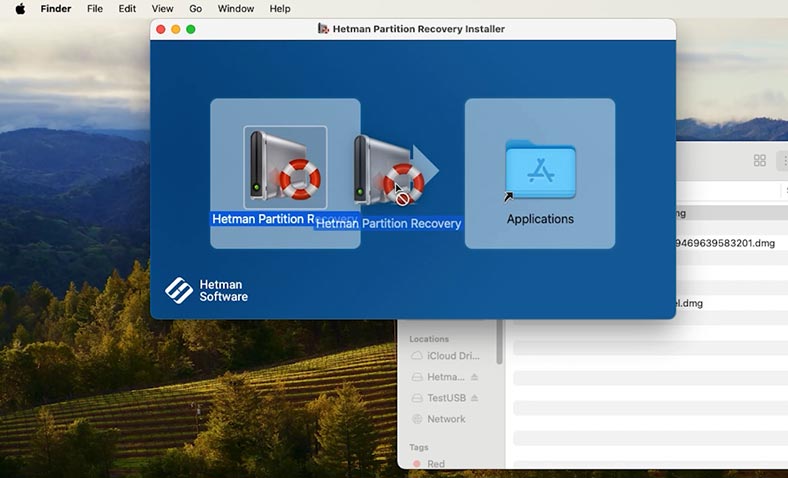
Install the program. Here’s how you do it:
Run the downloaded file by simply double-clicking on it.
-
Drag the shortcut to the folder containing your programs.
-
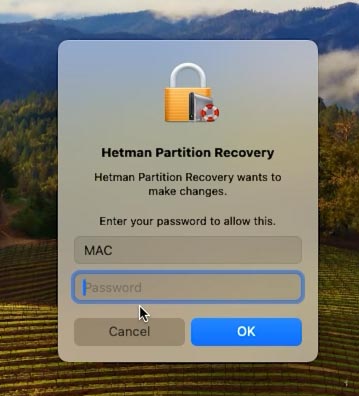
To run the tool you may have to enter your account password.
-
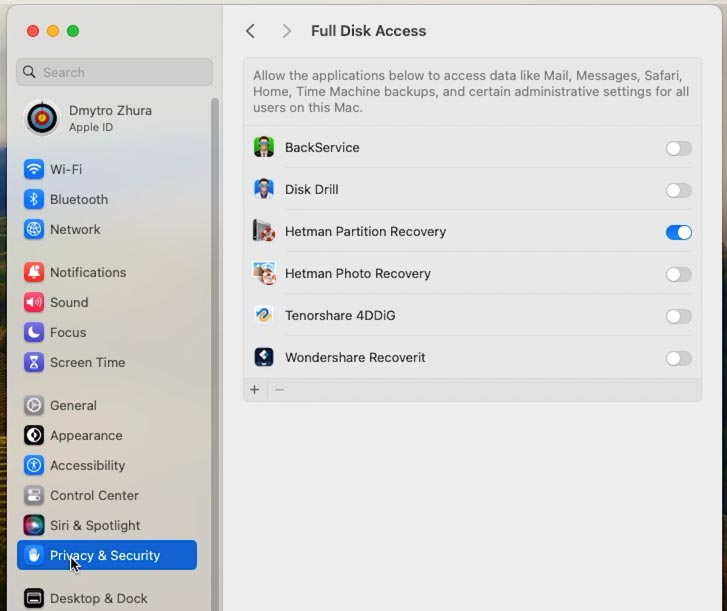
When the tool is launched, you can see that it needs full access to your disks to work properly. Open the Security Settings and enable full disk access.
-
When the tool window opens, find the required drive, select it and click Save Disk – Full, and choose where to save it.
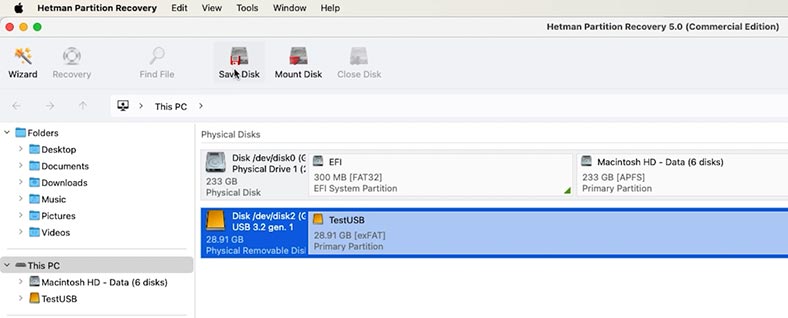
When the process is over, you’ll get a byte-for-byte image of your USB stick or memory card. Now you can experiment with your drive as long as it takes, since you can recover its files from the image at any time.
Method 2: Terminal
Also, such image can be created with the Terminal. Open it from the App menu.
For starters, you need to know the USB stick or memory card identifier. To do it, run the command diskutil list.
diskutil list
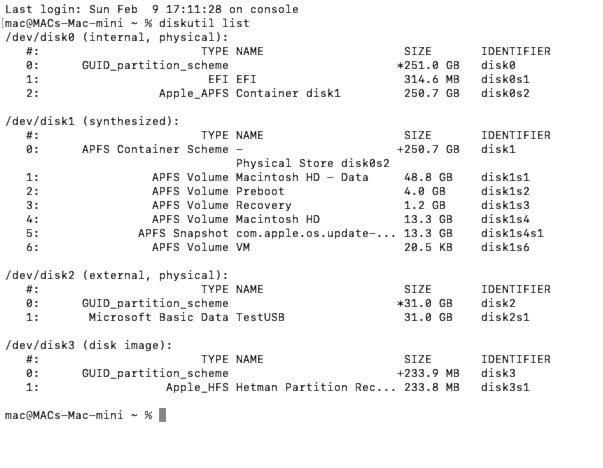
Then run this command to create an image:
sudo dd if=/dev/disk2 of=/Users/mac/Desktop/USB_Backup.img bs=1m

Here, the disk number is the identifier of your drive.
As a result, the image will be saved to your desktop.
Recovering data from a damaged USB stick or memory card in MacOS
Method 1. How to recover data from the disk image
Now that you have a disk image, I’ll show you how to retrieve the files you need.
To do it, open Hetman Partition Recovery and upload the disk image you have just saved.
In the Tools menu, select Mount Disk - RAW images. Give the path to the image - Open.
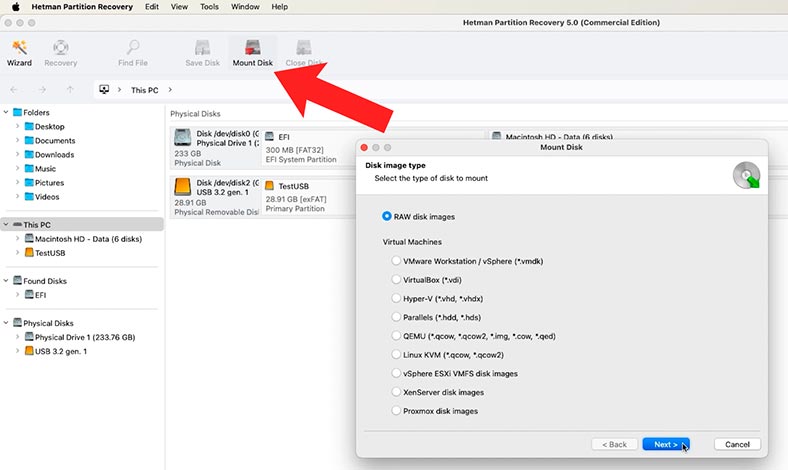
The disk will appear in the program window. Right-click on the disk and choose Open.
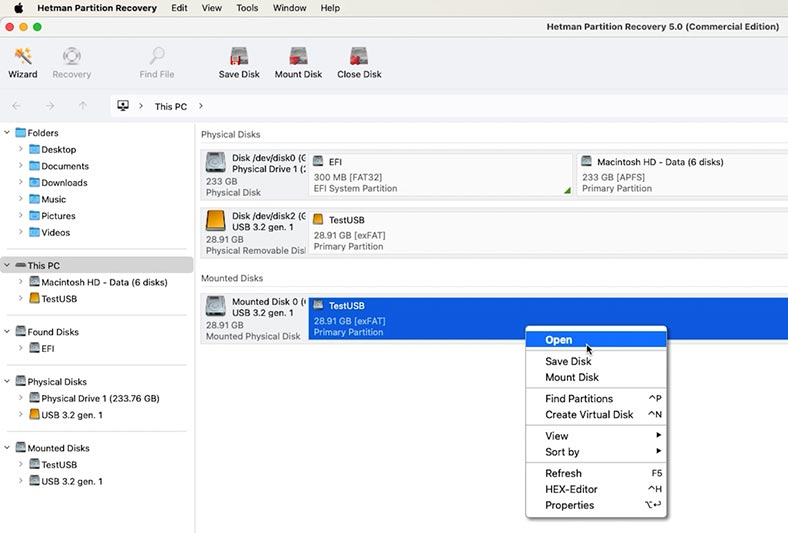
Now select the scan type - Fast scan.
When the scan is over, go to the folder where the deleted files used to be, select them and click Recovery.
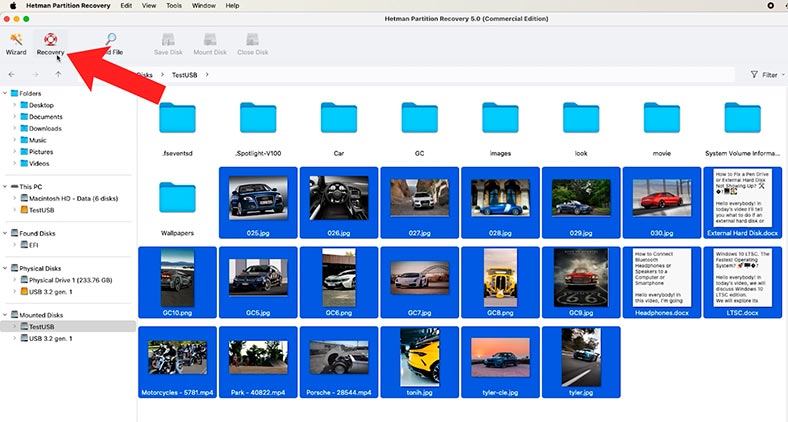
Then choose where to save the items (the disk and folder) and hit Recovery again.
In the end, you will find the recovered files in the folder you have chosen.
Method 2. How to recover deleted data from USB stick or memory card with Hetman Partition Recovery
This recovery tool allows you to run an in-depth analysis on damaged devices, even if they are not recognized by your operating system, and recover deleted files. If you accidentally removed important files from a USB stick or memory card, such files can be recovered in the same way as you’ve just seen.
Two scan types are available:
- Fast scan, which analyzes the disk in no time and displays the files it has found.
- And Full analysis, which takes longer and goes deeper to search for files.
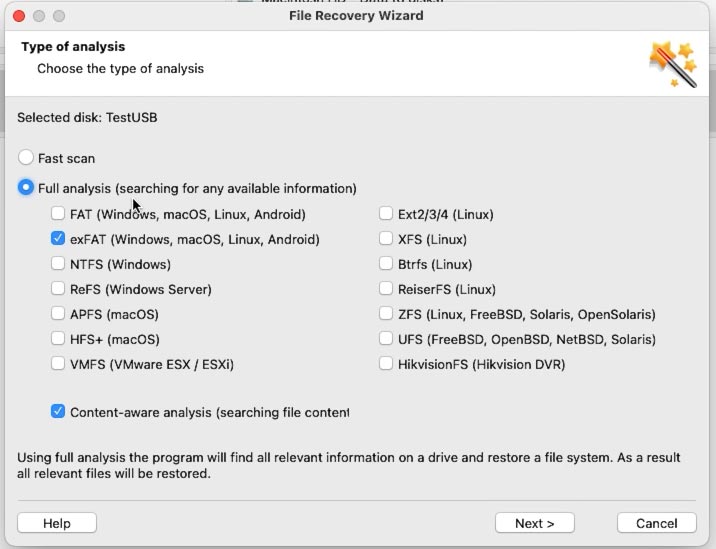
At the next stage, select the file system of your drive. As you can see, the tool supports most popular file systems, and it can help you recover lost files from any kind of storage device.
When the selected scan is over, open the folder from which data was deleted. All deleted files are marked with a red cross.
You can see the contents of every file in the preview window.
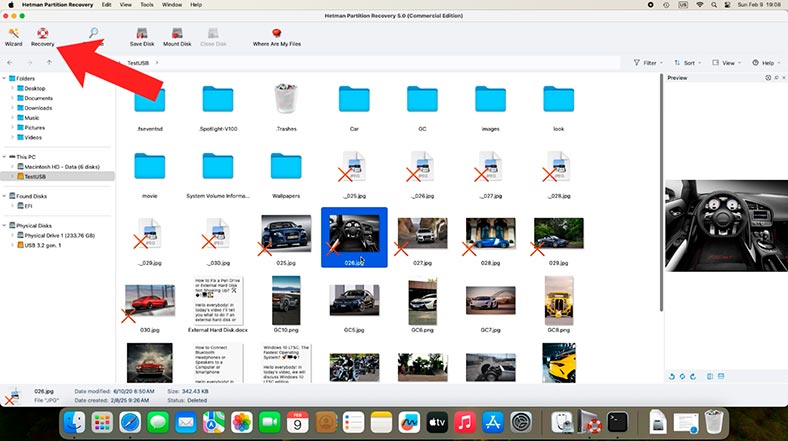
Now - just like you did in the case with recovering files from an image - select the files you need to restore and click Recovery, then give the path where to save them.
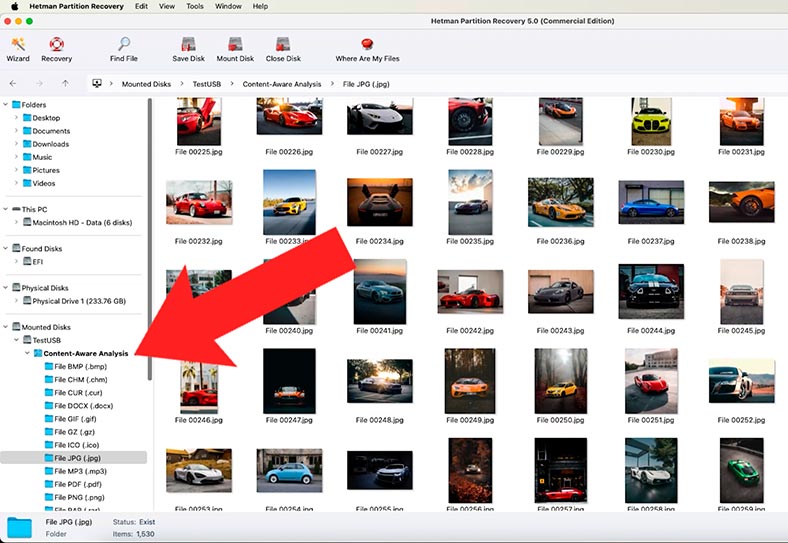
As you can see, the program has no difficulty in finding the files that used to be stored on this USB stick, and recovering them. If there are no files in your folder, then the information about their location might have been erased, so try looking for them in the Content-Aware Analysis folder.
How to restore operability of a USB stick or memory card
Step 1. Recovery with the Terminal
Now that we have explored how to create a disk image and recover its files, it’s time to move on and restore operability of your USB stick or memory card. For that purpose, we’ll need the Terminal.
Open the Terminal and type the following command:
diskutil list
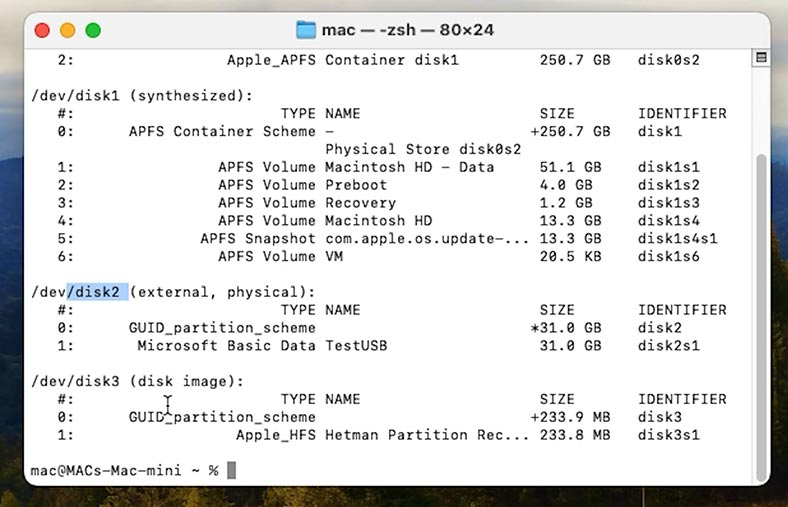
This command will display the list of all disks connected to your computer. Find your USB stick on the list. Remember its identifier.
Now let’s check it for errors and fix them if possible.
Do it with another command:
Sudo diskutil repairDisk /dev/disk2
sudo fsck_msdos /dev/disk2

Specify the drive identifier here. As a result, if the system finds any errors, it is supposed to correct them automatically.
Wait until the process is over. When errors are fixed, the USB stick or memory card should start working properly.
Step 2. Repair MBR or GPT with the Terminal
If the problem is caused by the damaged boot record or partition table, you can also try fixing them with the Terminal.
Let’s use the following commands to get the job done:
-
To repair GPT, use this command:
gpt recover /dev/diskX -
To repair MBR:
sudo fdisk -u /dev/diskX
In both commands, specify the number of the required disk.

Step 3. Creating a new partition with Disk Utility or Terminal
If your device is displayed in Disk Utility but it doesn’t work, try creating a new partition on it. To do it:
-
Open Disk Utility.
-
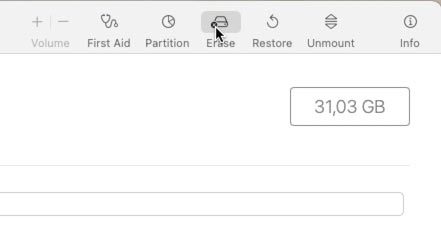
Select your device.
-
Click Erase and choose the format (for example, ExFAT).
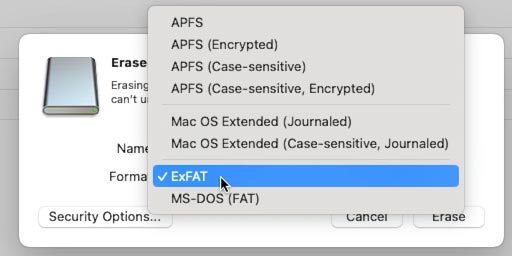
Otherwise, run the following command in the Terminal:
diskutil eraseDisk ExFAT NEW_NAME /dev/diskX
Conclusion
Now you know that a damaged USB stick or memory card can be recovered successfully, with just a bit of effort applied.
However, we recommend removing your USB devices properly through the Finder or Disk Utility - just to avoid such situations. At the same time, keep in mind that important data should always be backed up.


