How to Connect Two or More Displays to Mac
Read this article to find out how to connect several displays to your Mac. You will learn how to connect a second or third display to your Mac Bok or Mac Mini and extend its screen.
- Are there any restrictions concerning the number of displays you can connect to your Mac?
- Getting ready to connect several displays
- How to connect a second display to Mac
- Issues you may encounter when connecting a second display
- How to connect a third or fourth display
- Conclusion
- Questions and answers
- Comments
Adding one more display allows to expand the functionality of your Mac. You may need it to work with graphic images, edit videos, do some programming, or engage in other activities that require more desktop space. The more desktop space you have, the easier it is to work with several apps at the same time.
We are going to show you what difficulties you may encounter when connecting several displays to your Mac device.

How to Connect Two or More Displays to Mac Easily in 2025
Are there any restrictions concerning the number of displays you can connect to your Mac?
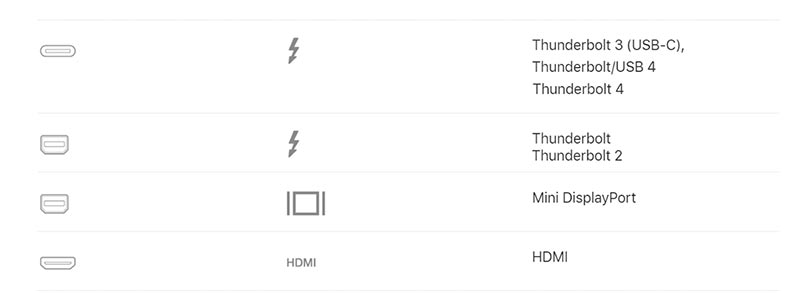
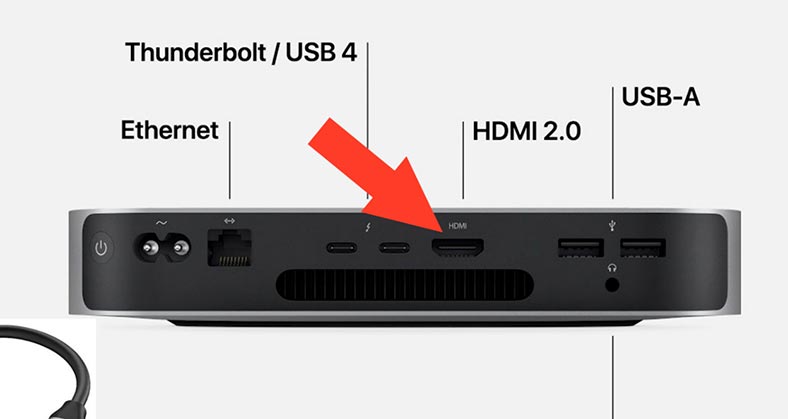
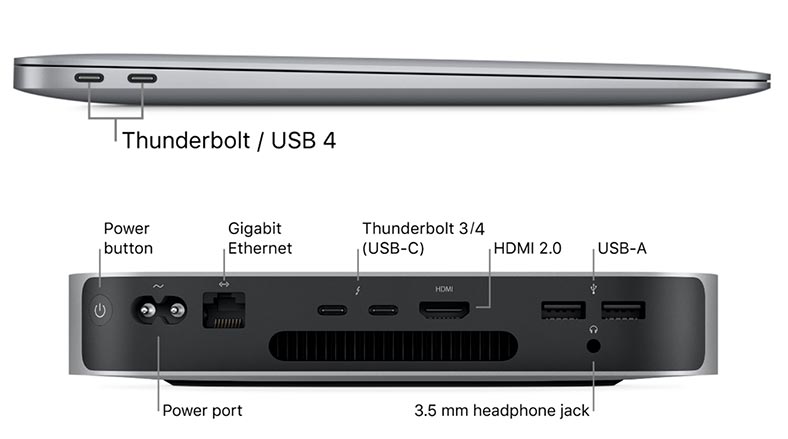
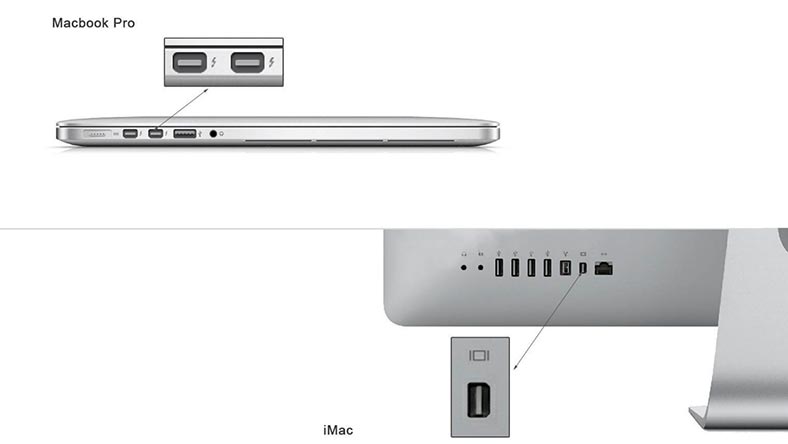
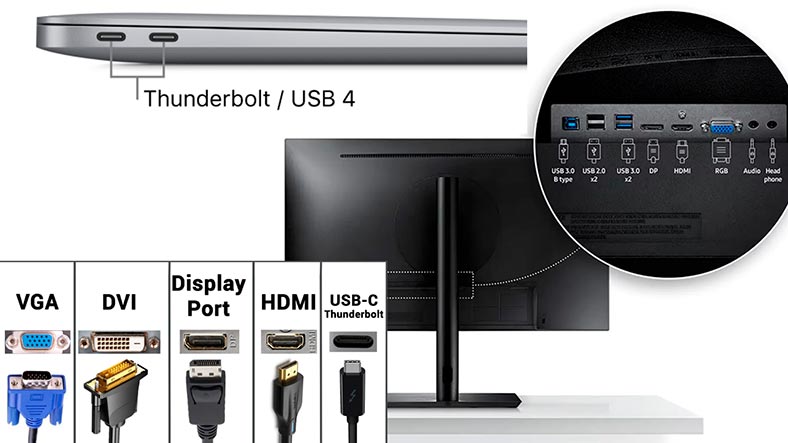
For starters, you should check what video ports your Mac has got. The number of ports logically allows you to understand what kind of displays and how many displays you can connect.
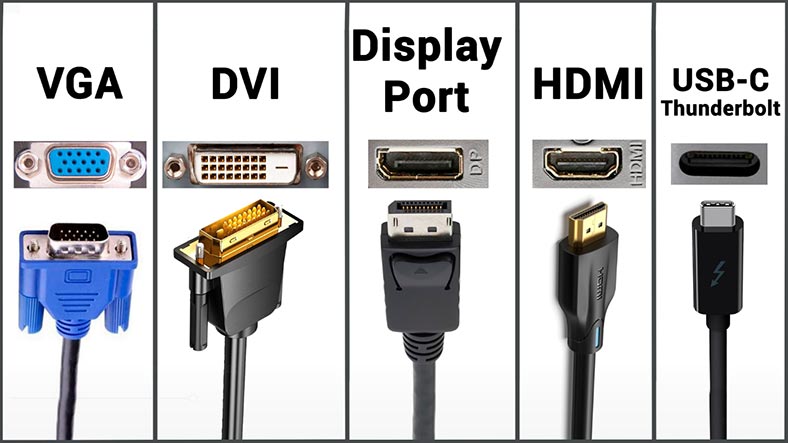
Use the following chart to identify port types:
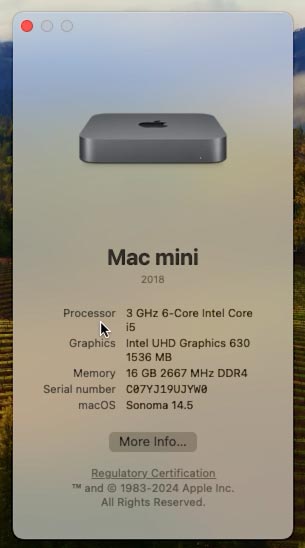
To check how many displays your Mac can be connected to, click on the Apple icon – About This Mac – Processor.
High-end MacBooks based on M1/M2/M3/Pro and Max CPUs support several external displays, while most low-end MacBooks equipped with default chips like M1, M2 or M3 cannot be connected directly to more than one external display.
This is a serious restriction when compared to the previous generation of such laptops. They were built on Intel CPUs that could handle two displays when connected to a docking station, a USB-C hub or Thunderbolt 3 hub.
Let’s explore a few methods to help you get round these restrictions when connecting several displays. However, we always recommend checking this information in your device specifications.
If we consider Mac computers based on Apple M1, one external display can be connected.
With a Mac mini based on M1 CPUs, you can connect another display to the HDMI port.
Mac computers featuring Thunderbolt 3 (USB-C) ports can have one display connected to each port.
Any Mac with Mini DisplayPort can handle two external displays.
Getting ready to connect several displays
Before you go about buying and connecting an external display, you need to make sure that you have the necessary cables, adapters or a docking station, and if they are supported by your Mac.
The best solution would be to use a display with a Type-C output. These days, there is a good choice of displays supporting USB type-c connection.
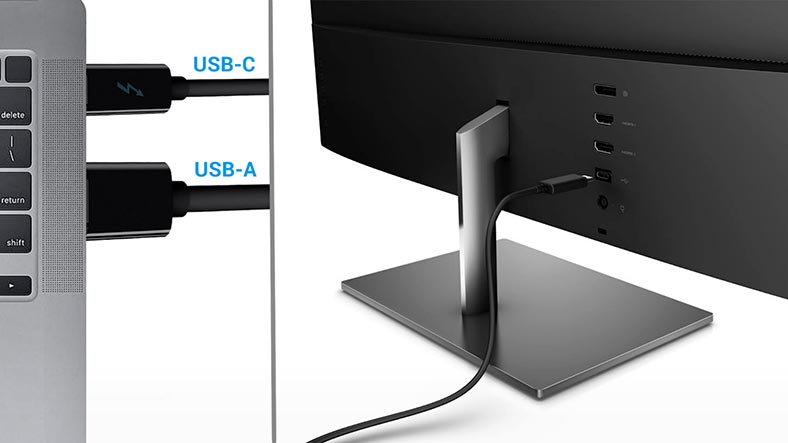
Check how many output ports are available on your display. Usually, they are located on the back panel. This will help you understand what cables and adapters are needed. Since 2018, all Macs come equipped with USB-C ports.
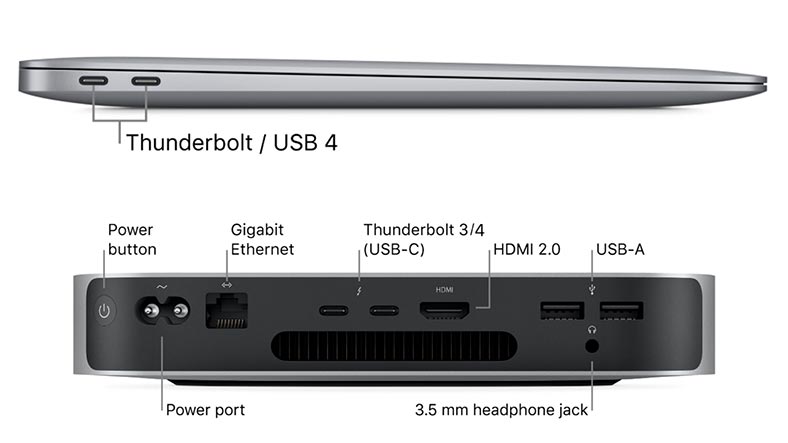
As to displays, the most popular port is definitely HDMI. Meanwhile, a DisplayPort, DVI or VGA output may be an additional option. Newer models can be equipped with USB Type-C ports.
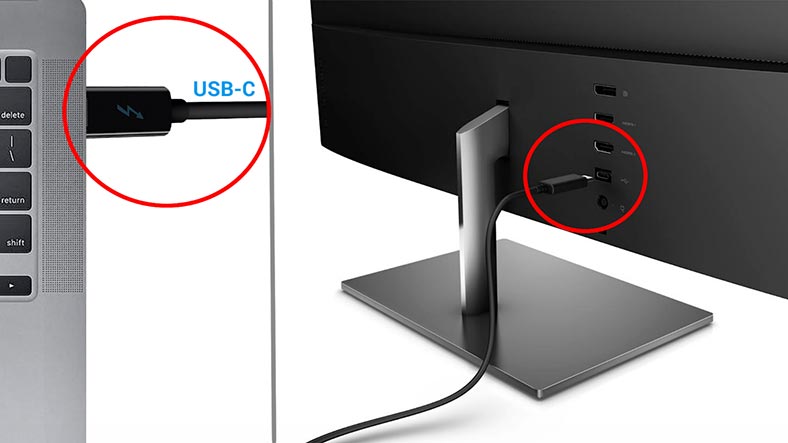
If your device has got one, there shouldn’t be any difficulty in connecting it. Just get a USB type-C cable and connect the display and your Mac. This is how you get an extra display.
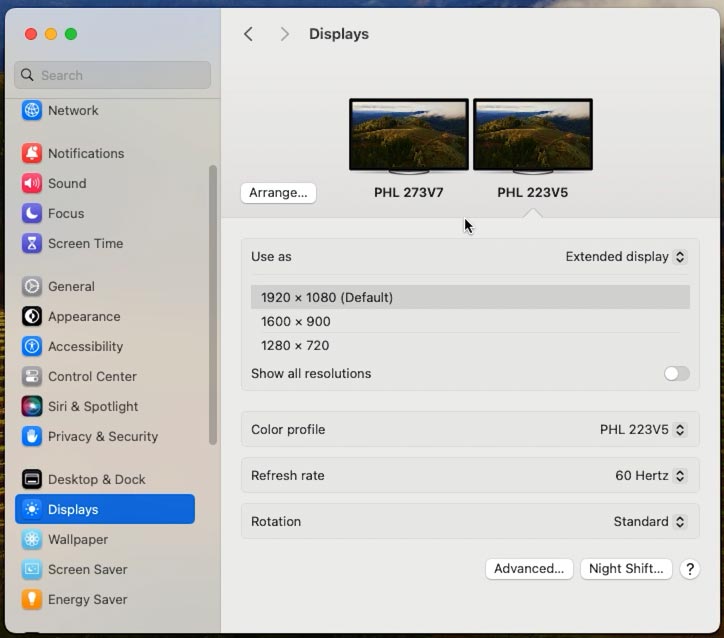
In the display settings, you will see two displays.
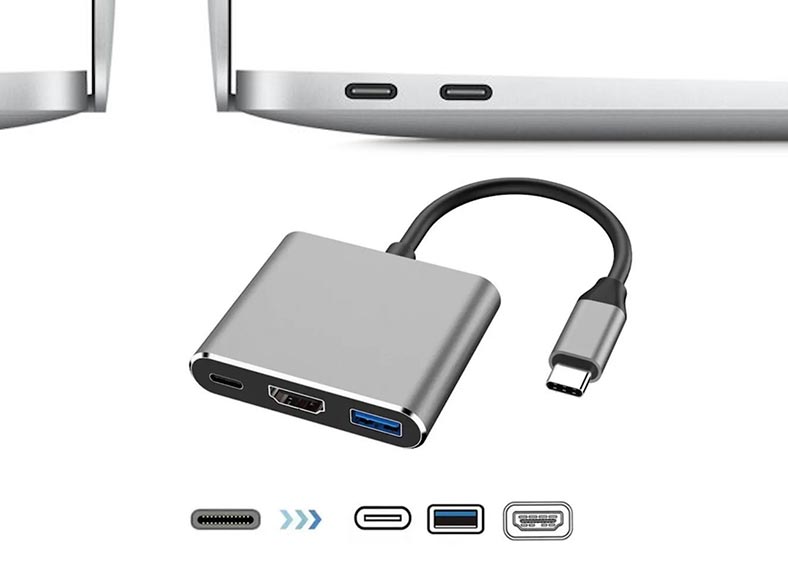
If you don’t have such a port, you’ll need a special USB-C to HDMI adapter, or a docking station with ports to connect an external display.
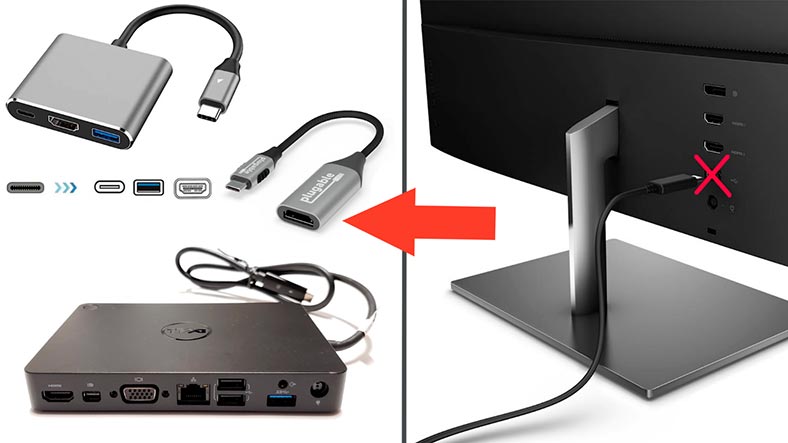
There are all kinds of adapters and docking stations to help you connect an additional display to your Mac:
-
USB type-C to HDMI adapter. It’s good for connecting an HDMI display to a Type-C port on your Mac.
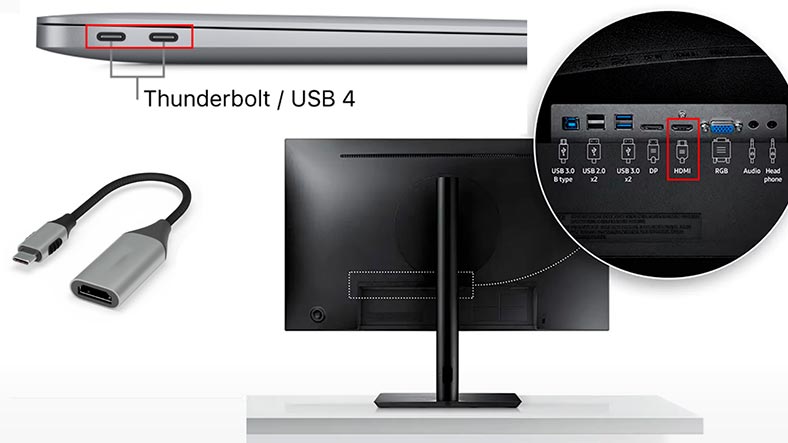
-
Thunderbolt 3 or USB-C to DisplayPort adapter. It can be used to connect displays equipped with DisplayPort.
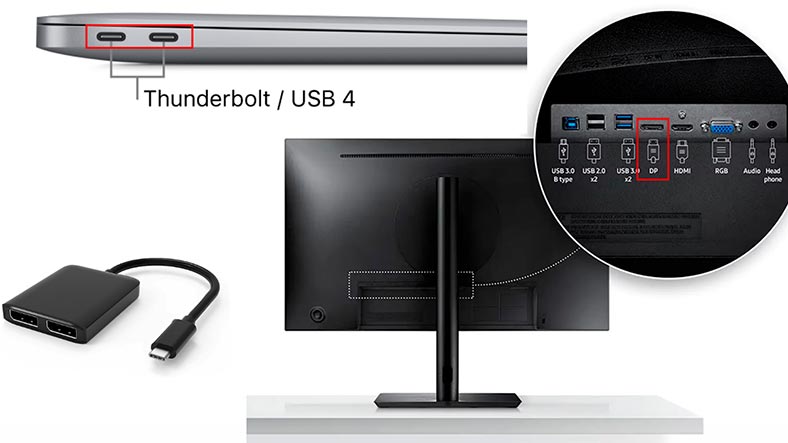
-
Mini DisplayPort to HDMI. You’ll need it to connect a display with an HDMI port to a Mini DisplayPort on your Mac.
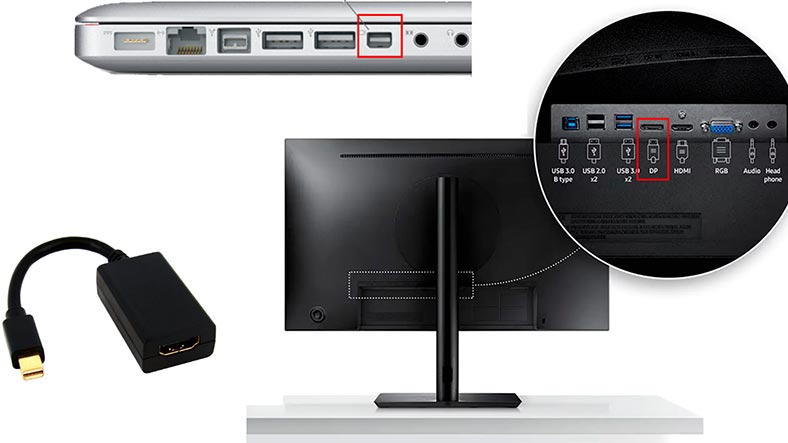
-
Also, there are various hubs and docking stations which are connected to Mac computers by USB 3.0 or Type-C. On such hubs, you can find USB ports, RJ45 network port, HDMI, audio out port, VGA, as well as additional USB and Type-C ports.
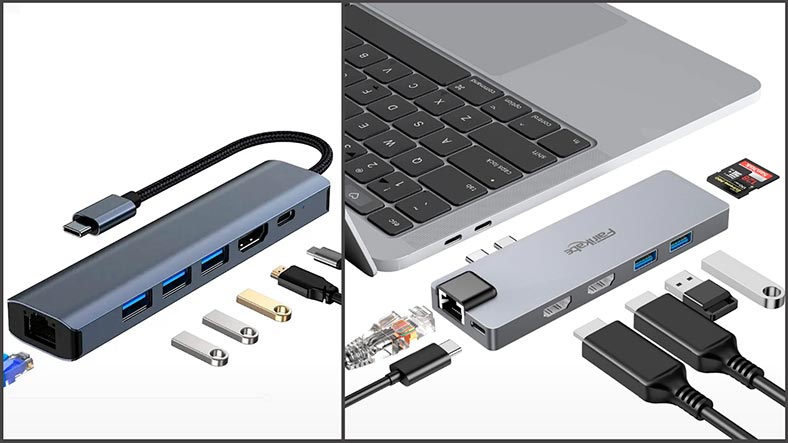
When choosing an adapter, hub, or docking station, there are a few aspects you should consider:
-
Firstly, make sure that your device supports the required number of displays and screen resolution. Some docking stations can only support one extra display, or have the screen resolution restricted (for example, Full HD or 4K).
only). -
Secondly, pay attention to port types. Displays may require specific connector, such as HDMI, DisplayPort, USB-C or Thunderbolt. Make sure that your adapter or docking station have the required ports onboard.
-
Third, check if the selected device can support the throughput sufficient for your tasks. It is especially important when you work with high-definition videos or demanding graphic applications.
-
Finally, make sure that your adapter, hub or docking station is compatible with your Mac and its operating system. Some devices may ask for additional drivers or software to be installed. Such docking stations will help you get round the restrictions for the number of connected displays.
Also, you should bear in mind that connecting more than one external display calls for a docking station with an external power supply. This is crucial, since several displays can consume more power than your Mac can provide through its ports. An external power supply guarantees a stable and steady connection for all displays, prevents possible failures, and brings you top performance.
How to connect a second display to Mac
Finally, we have sorted out cables, adapters and docking stations, and now we know which of them are required to get another display working. Our next step is connecting the devices. That’s pretty easy: just connect your external display with the Mac.
Insert one end of the cable into your Mac or hub port, and the other end into a port on your display. If you use an adapter or docking station, connect them to your USB-C port first.
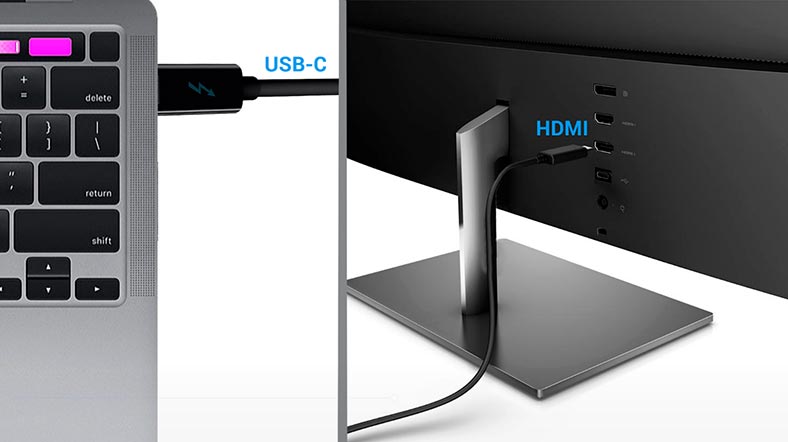
After that, the computer will automatically detect the connected displays. If your Mac is on, the displays may flash during the initial setup. Then, you will see the same picture shown on both displays.
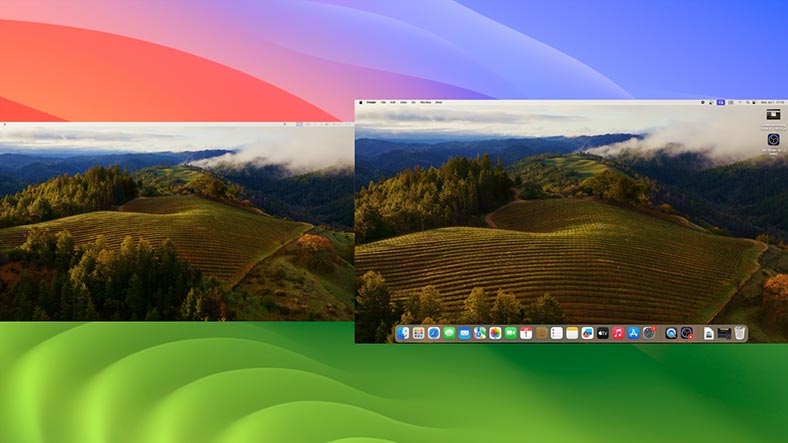
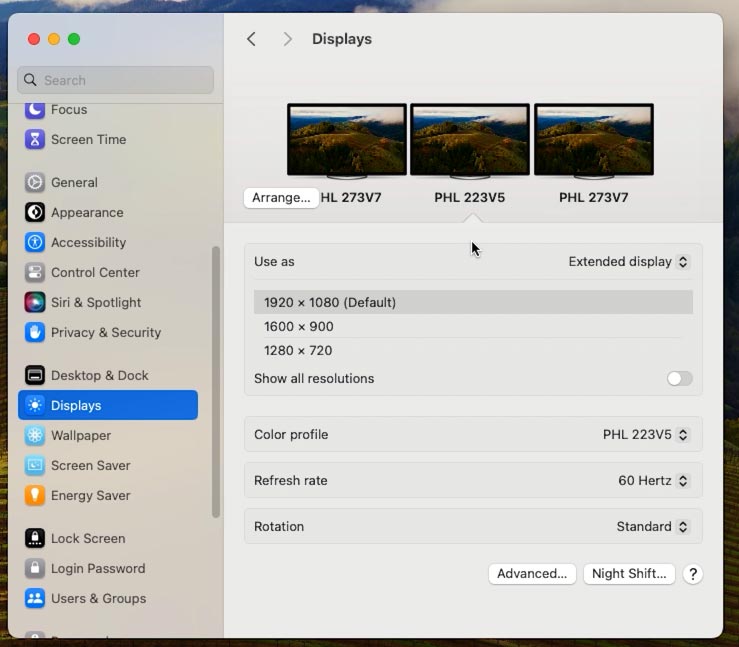
For additional options, click on System Settings – Displays. As you can see, the computer shows all external displays.
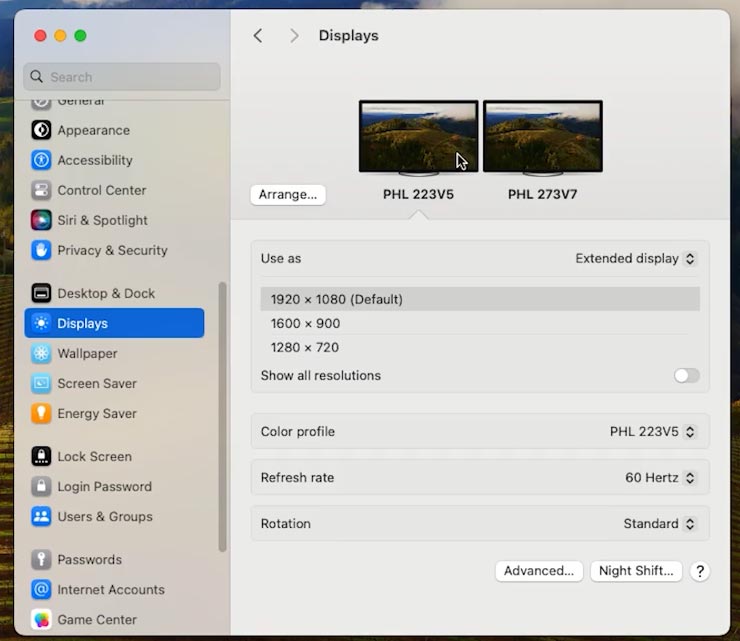
Here, you can adjust their resolution and change their position. This way, you decide where the additional display is located in relation to the main display. Click Arrange, and drag the additional display to where it should be. On the right, on the left, on top, or at the bottom.
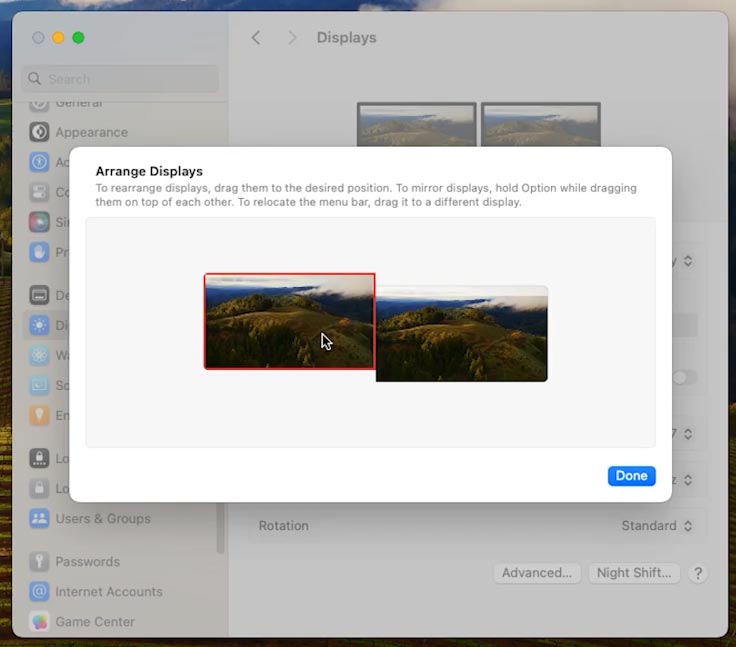
The white panel on top will show you which display will be used as a default device to show menus and dialog boxes. Now you have extended your desktop and your cursor can move seamlessly between the displays.
To place an app window to the additional display, just drag it to where it should be.
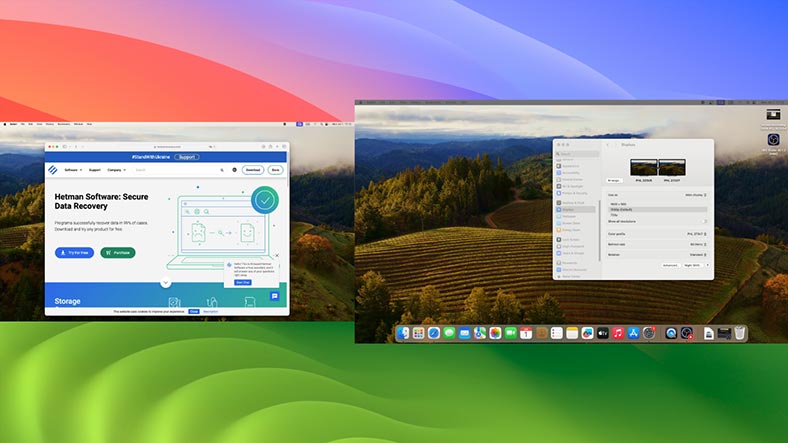
Also, in this menu you can configure the resolution and refresh rate for each display. Additionally, you can choose a color profile for each device to make sure all colors are shown accurately.
Issues you may encounter when connecting a second display
| Issue | Cause | Solution |
|---|---|---|
| Mac doesn’t detect one of the displays | Make sure that all connections are good, and the cable sits tight in the port. | Try disconnecting and reconnecting the cable. |
| Display resolution doesn’t meet your expectations | The cables and adapters you are using don’t support this resolution | Make sure the cables and adapters you are using can support the required resolution |
Sometimes you can fix certain display issues by just rebooting your Mac. Quite often, it works when there’s a problem with connecting additional display, too.
How to connect a third or fourth display
If you need to connect several displays in addition to your main one, you might encounter certain difficulties.
All Mac models have certain restrictions when it comes to connecting external displays. The information about the number of supported devices can be found in official Apple manuals or at their website. Make sure that your specific Mac model supports the required number of external displays.
To bypass the restrictions, special USB-C hubs or docking stations supporting DisplayLink or SiliconMotion features are used.
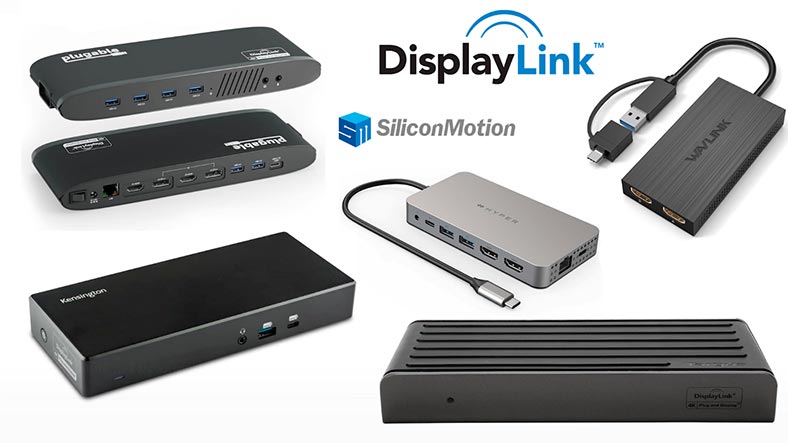
To connect a third and fourth one, you may need to use additional adapters and USB-C hubs.
As mentioned before, only one additional display can be connected to a Мacbook with the help of a Type-C (Thunderbolt)–HDMI adapter. To connect several devices, you’ll need a hub supporting the DisplayLink feature.
To a Mac Mini, you can connect two displays, the main and the additional one, using an adapter or a hub. When you connect a third one, one of the display will be mirrored, and the quality of the picture may deteriorate. In the settings, only two displays will be shown.
To connect an additional third display, you will also need a hub supporting DisplayLink. When choosing a docking station, pay attention to such feature.
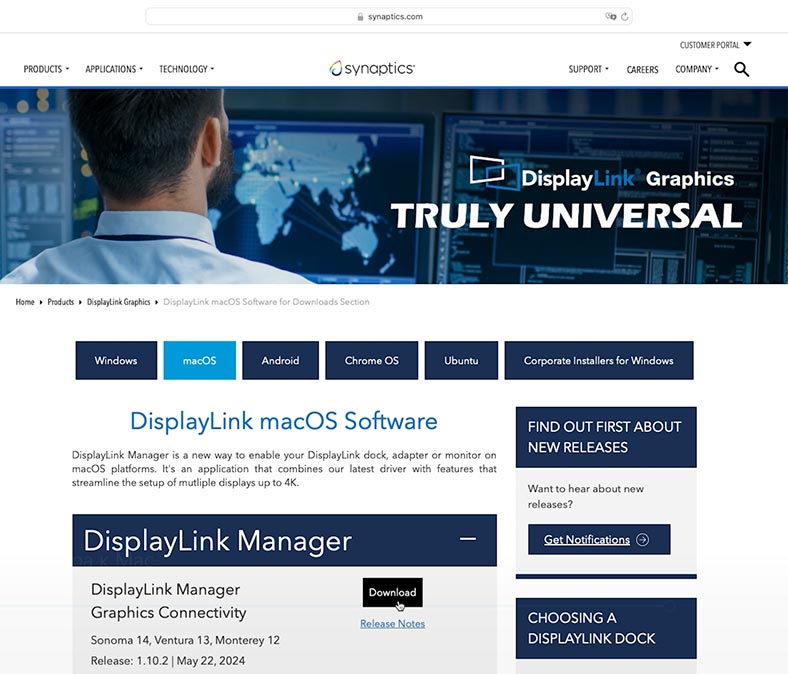
After that, download DisplayLink Manager and install a driver to your Mac.
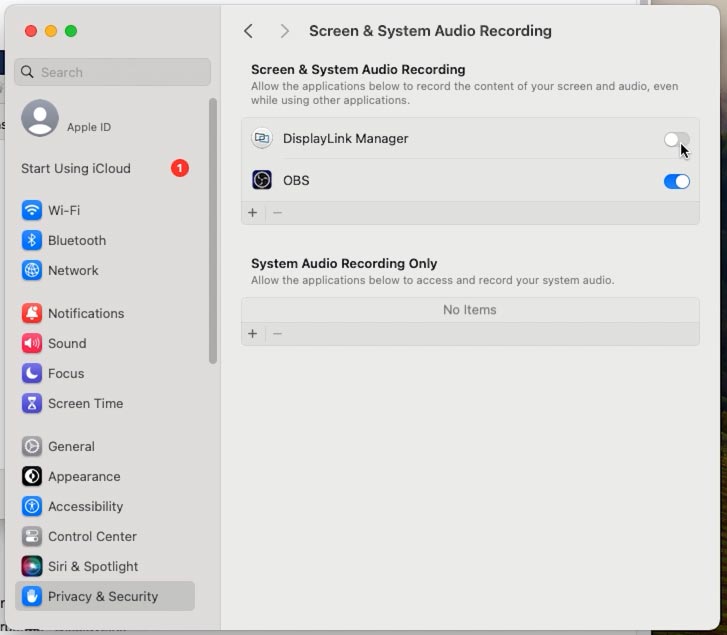
During the installation, you need to allow the app to record your screen. To do it, open System Settings – Privacy & Security – Screen & System Audio Recording.
When you install the software and enable the permission, the driver features will become available, and the third display should appear in the settings. This is where you can set up the display arrangement and other options.
Conclusion
Summing up, now you know how to connect two displays to your Mac and configure them for a most comfortable workflow.
As to DisplayLink and InstantView drivers, they are perfectly suitable for adding several displays to such computers as Mac M1, M2 and M3, but there is a catch: certain protected content may not be played in streaming apps (Netflix, AppleTV, Amazon Prime, Disney+ or YouTube TV). The picture will not be shown, and only the audio will be available.
Everything depends on how macOS interacts with the driver. As soon as one display supporting DisplayLink is connected, the protected content becomes inaccessible on all displays. This issue is related to DRM (Digital Rights Management) protocols that streaming services use to protect their content.
Since DisplayLink and InstantView require your permission to record the screen, the protection feature gets activated because it thinks you are trying to record the protected content, not just watch it on another display. When buying such devices, always remember about this peculiarity.


