Remote Data Rescue Tips: Using RDM, Quick Assist, TeamViewer
Unlock the Power of Remote Data Recovery with RDM, Quick Assist, and TeamViewer! Lost data and unable to access your system physically? No need to worry! In this article, we’ll guide you through the process of recovering lost data remotely using three powerful tools: RDM, Quick Assist, and TeamViewer. Whether you’re facing data loss due to accidental deletion, system crashes, or other issues, these remote solutions offer efficient ways to retrieve your valuable files from anywhere. Join us as we explore step-by-step instructions, expert tips, and practical strategies to ensure successful data recovery without the need for physical access to your device.
- Method 1. How to configure remote access
- Method 2. Remote connection with Microsoft Quick Assist
- Method 3. Remote access with TeamViewer
- Recover deleted data over the Internet
- Questions and answers
- Comments
Method 1. How to configure remote access
The first step you take is to access the remote computer. For this purpose, you need to make some changes to its system settings.
Step 1. Open the Start menu – Windows System – Control Panel. Otherwise, just type “Control Panel” in the search field.


🌐 Recovering Data over the Network with Remote Desktop Rdm/Quick Assist in Windows 🌐
Step 2. Look for System

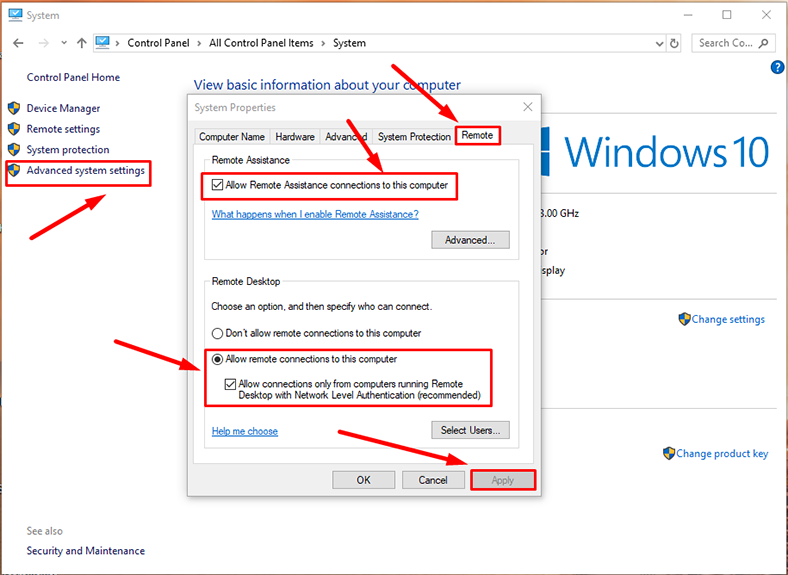
Step 3. Open Advanced system settings and switch to the tab Remote. Check the boxes for Allow Remote Assistance connections to this computer and Allow remote connections to this computer, then click Apply and OK.
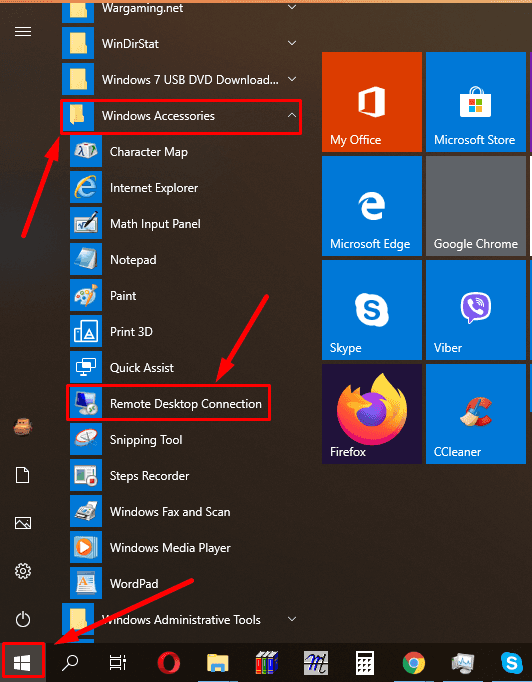
Step 4.On the computer, from which you are going to access the remote PC, click the Start menu button by choosing Windows Accessories and then Remote Desktop Connection.
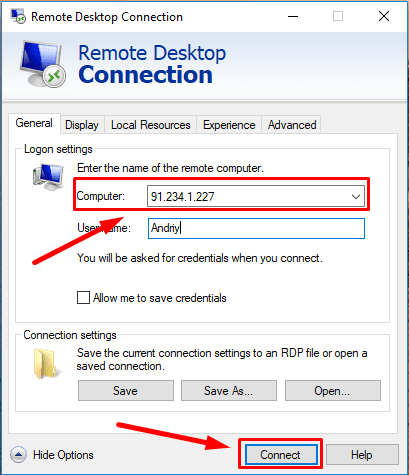
Step 5.Enter the IP address of the remote PC, give the user name, password, and click Connect to get connected.
Step 6. Type the password and click OK.
Now the remote connection is ready to work.
Method 2. Remote connection with Microsoft Quick Assist
One more method to set up a remote connection is by using a special utility, Microsoft Quick Assist. This is one of the easiest ways to establish remote access over the Internet.
It involves a built-in application that can be found in any version of Windows 10.
To start working, you need to run this app on both computers.
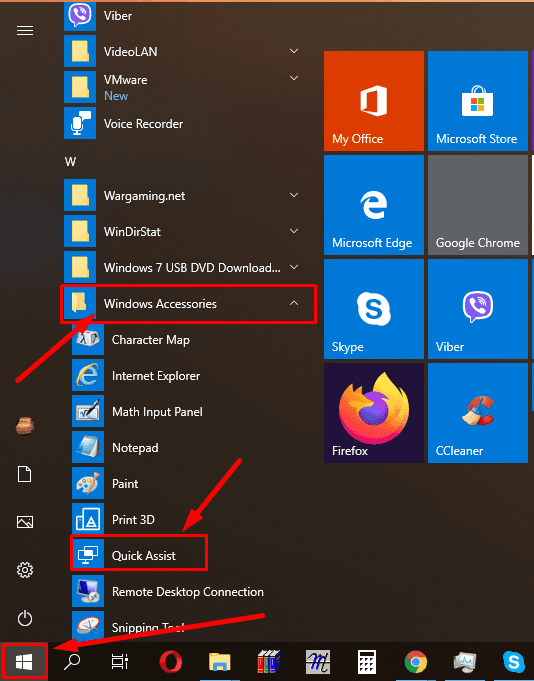
Step 1.Here is how you do it: click on the Start button – Windows Accessories – Quick Assist, or just type “Quick Assist” in the search field.
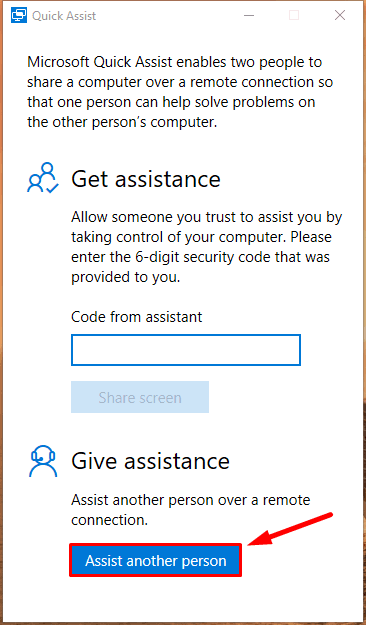
Step 2. On your PC, click Assist another person
Step 3. Sign in to your Microsoft account.
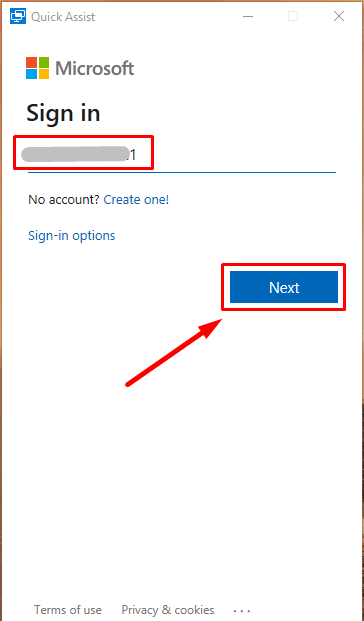
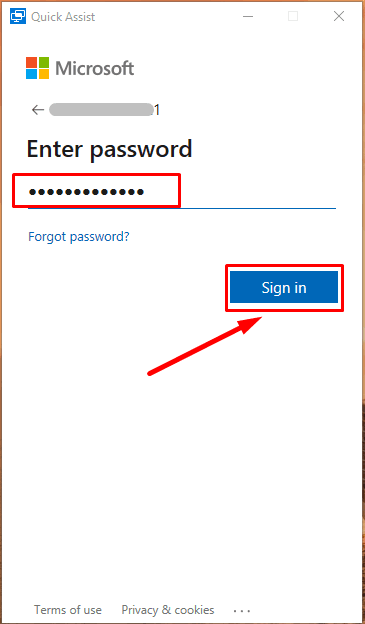
This last step (sign-in) is not required for the person operating the remote PC.
After that you will get a security code which is only valid for 10 minutes.
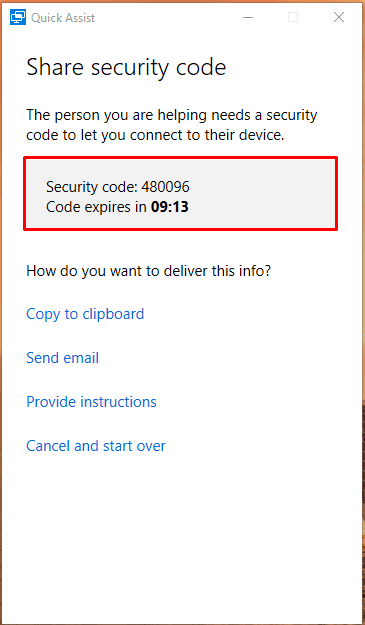
Step 4. Type this code on the remote PC and click Share screen.
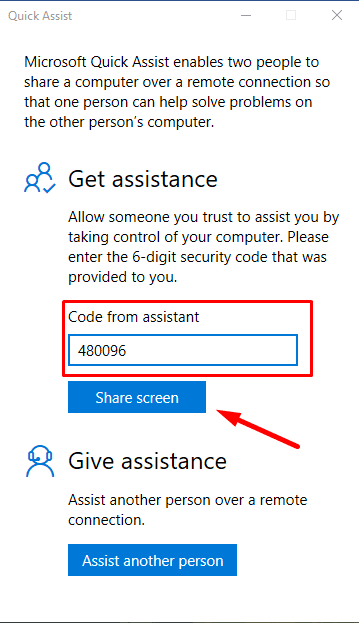
Remember to do it right after the code was received, because it expires in 10 minutes.
Step 5. Choose a sharing option.
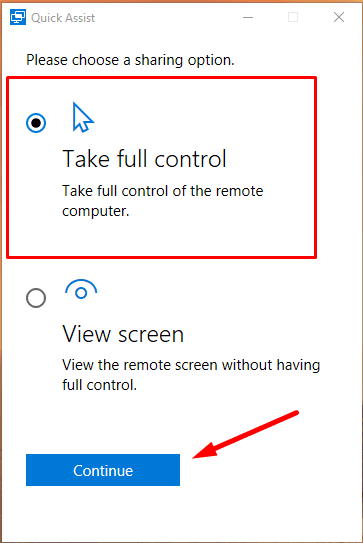
Step 6. After the code is entered, confirm the request for assistance by clicking Allow.
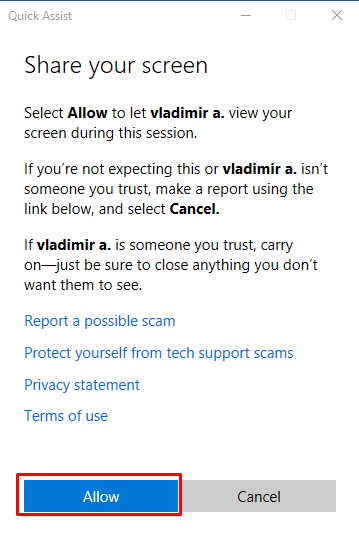
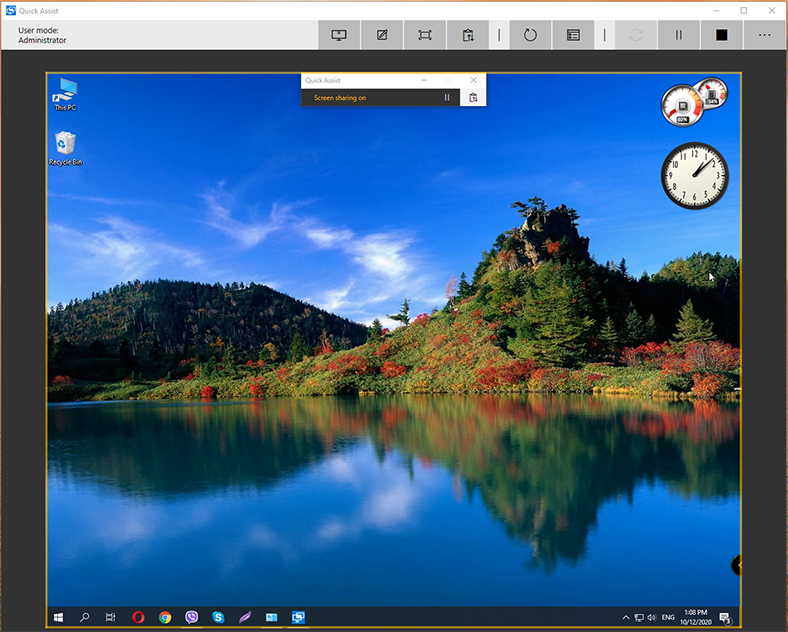
Now the remote connection is ready to work.
Method 3. Remote access with TeamViewer
Also, there are third-party tools over there to help you establish a remote connection between computers.
One of the most popular utilities is TeamViewer. To start working, download the installation file from the official website.
https://www.teamviewer.com/en-us/
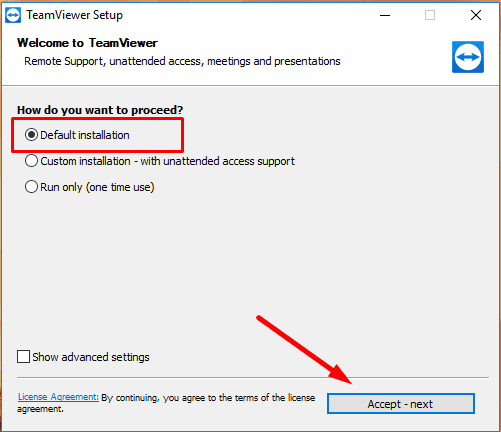
You don’t need to install the program. For one-time use, it’s more convenient to choose the option Run only.
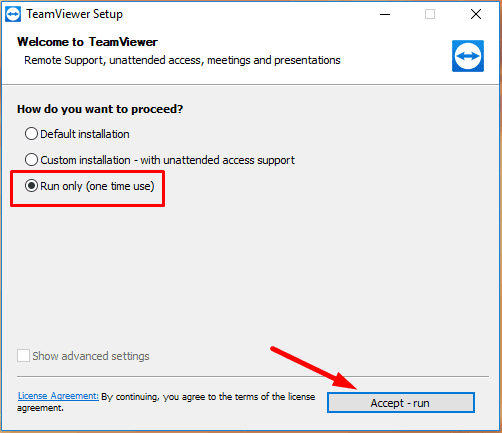
However, it’s better to install the program if you are planning to use it regularly.
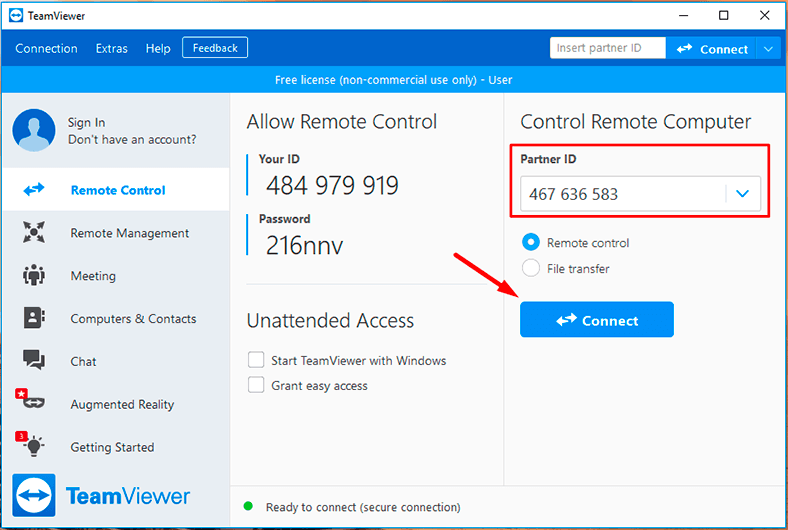
When the program starts, here’s the window you will see. Enter Partner ID
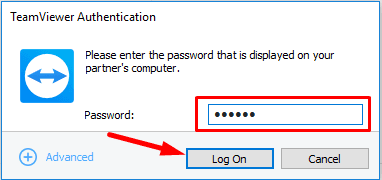
Type the password and click Log on.
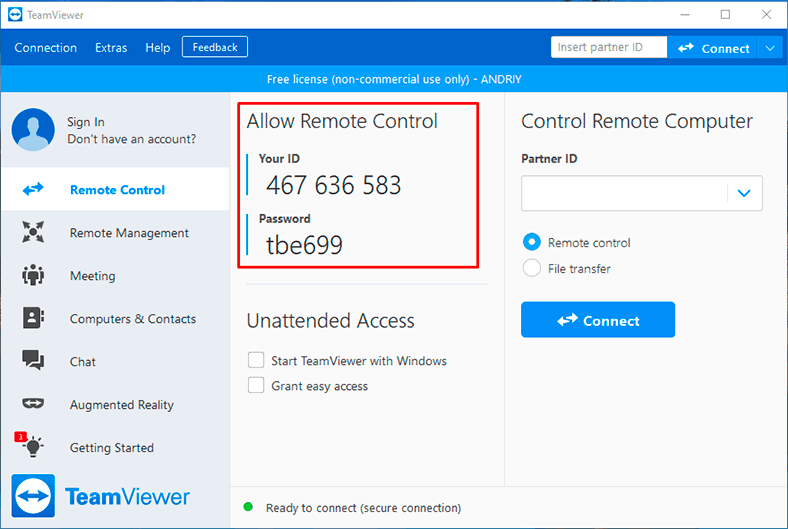
The ID and password are shown in the program’s window on the remote computer.
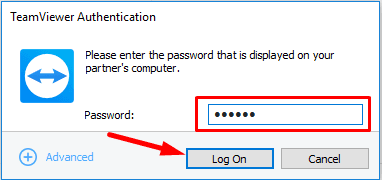
If your Internet is all right, the connection will be established within 10 to 30 seconds, and you’ll be able to start recovering the lost data.
Recover deleted data over the Internet
For recovering lost information, we recommend our product, Hetman Partition Recovery.
It will scan the hard disk or external storage device, find the lost data and help you recover it in a simple and efficient way.
Step 1. Download, install and run the program. Open the disk where the lost information was stored.
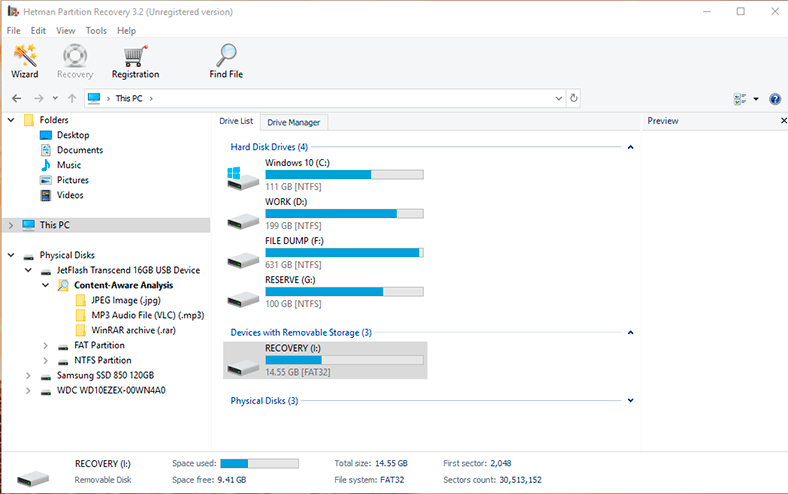
Remember to immediately stop using the hard disk where the important information used to be stored; do not install any programs or write anything there. Also, we don’t recommend reinstalling the operating system, because it can overwrite the data and it will be lost beyond recovery.
Step 2. In the Drive Manager, select the disk, right-click on it and choose Open.
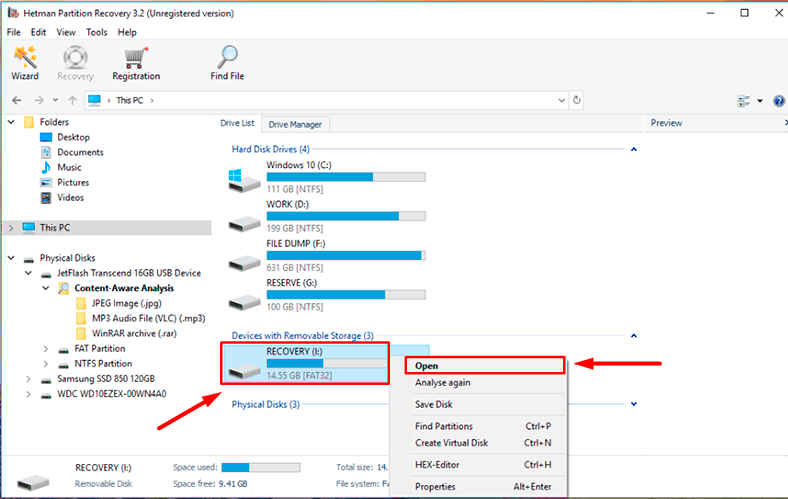
Step 3. At first, try Fast scan – it will take less time.
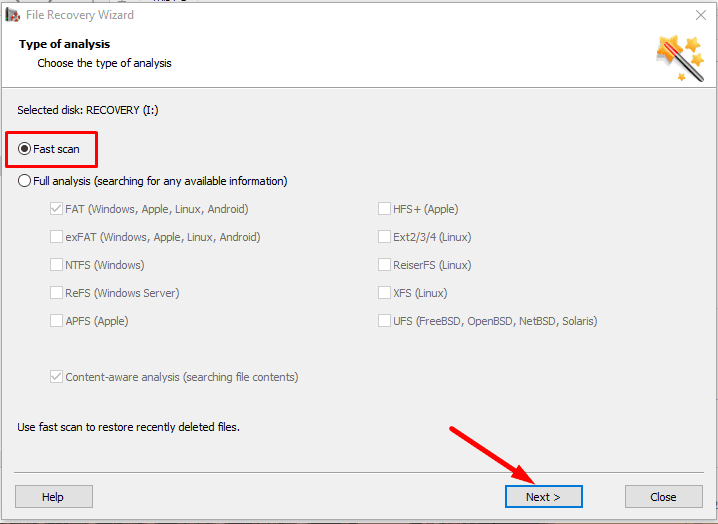
Step 4. If the fast scan doesn’t help to find the deleted data, then go for Full analysis.
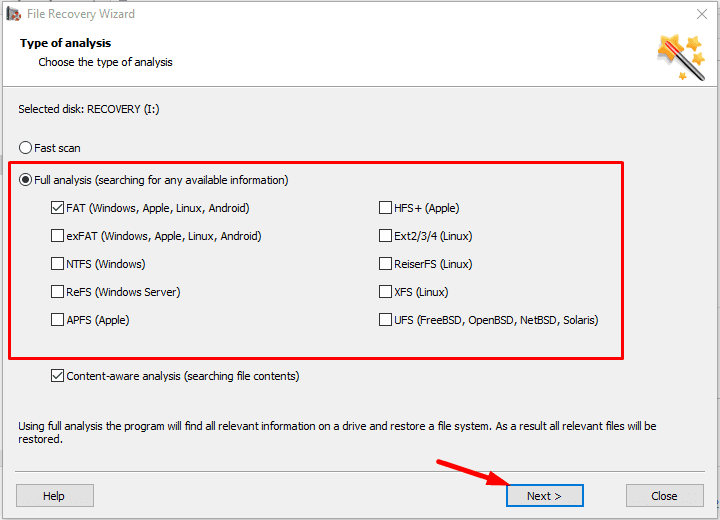
The file recovery wizard will scan the selected volume immediately and display the scan results in the right side of the program’s window.
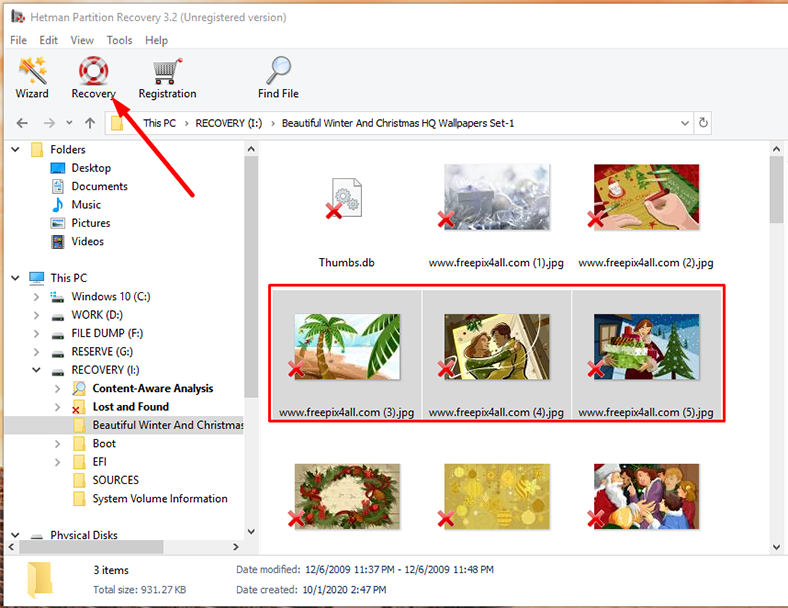
Step 5. When the scan is over, all you need to do is to select the deleted files you want to restore and then click the Recovery button.
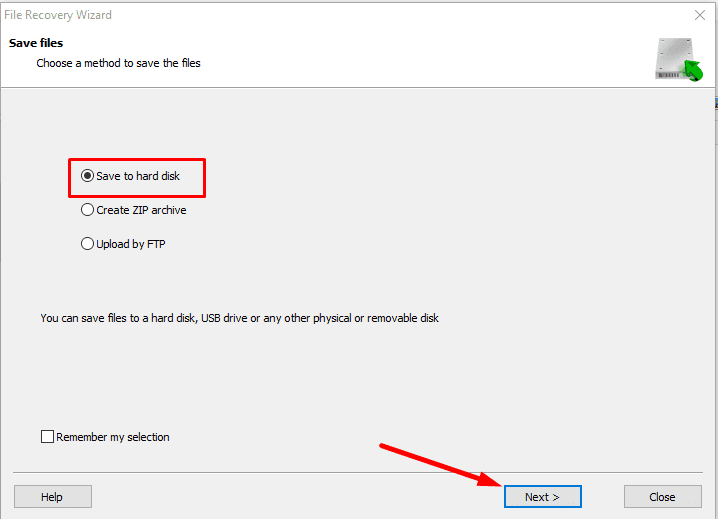
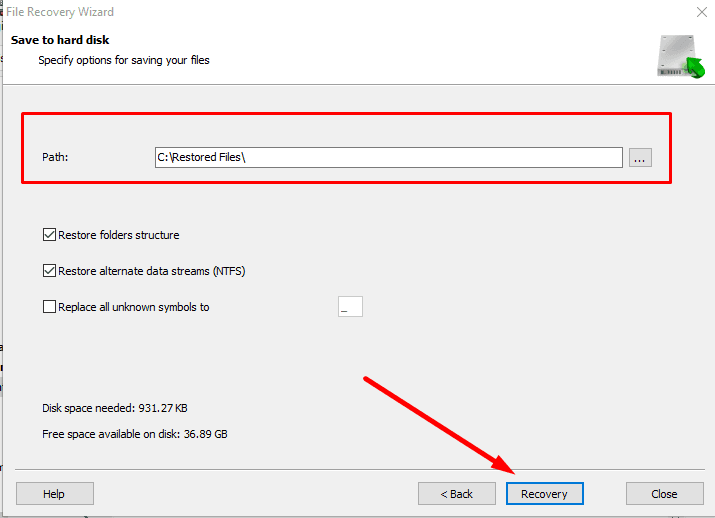
Step 6. Specify where to save the data and click Recovery again.
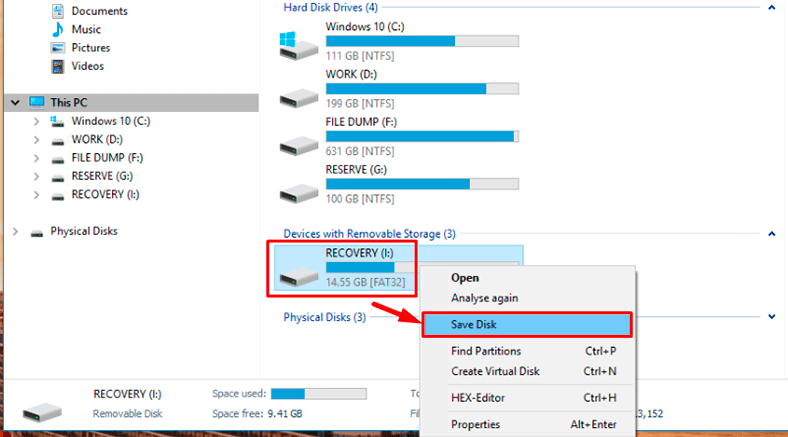
Also, this program can create a disk image and the conduct all recovery operations with this image which increases your chances to restore the deleted information successfully, because multiple rounds of scanning may result in data overwriting.
Hetman Partition Recovery can be used in the following cases:
- To recover files lost after removing or formatting partitions, after disk repartitioning, system errors, virus attacks and other scenarios that involve loss of data.
- To recover data from internal and external hard disks, USB storage devices, SD memory cards, cameras and other devices used to store information.
- and to recover lost photos, videos, music, documents and other file types.
| Feature | Description |
|---|---|
| Supported File Systems | FAT / exFAT, NTFS / ReFS, APFS / HFS+, Ext2 / 3 / 4 / ReiserFS, XFS / UFS / ZFS / Btrfs / VMFS / HikvisionFS |
| Supported Operating Systems | Windows, MacOS, Linux |
| Hard Disk Format Compatibility | Supports the most common hard disk formats used in virtual machines |
| Scanning Modes | Quick and deep scanning for efficient recovery of deleted files |
| File Preview | Allows previewing of the contents of found files before recovery |
| RAID Data Recovery | Supports data recovery from RAID arrays |
| Virtual Disk Image Support | Can work with virtual disk images like VMDK, VHD, etc. |
| Post-Formatting Recovery | Recovers data after formatting or partition damage |
| User Interface | Easy-to-use interface with step-by-step recovery wizard |
Summing up, here is how you can connect to a remote computer over the Internet and help your friends or relatives recover data in a few easy steps.


