Simple Steps to Install Android Apps and Games on Windows 11!
Curious about how to bring the Android experience to your Windows 11 PC? In this video, we’ll provide you with essential tips, step-by-step methods, and best practices for installing Android apps and games on Windows 11. Read now to enhance your Windows 11 experience with your favorite Android apps and games!
- Step 1. Getting a Windows 11 computer ready for WSA installation
- Step 2. Remove any other previously installed WSA packages
- Step 3. Enable Developer mode in Windows 11
- Step 4. WSAConfiguration
- Step 5. Establish connection
- Questions and answers
- Comments
Just a few weeks ago, it was impossible to run Google Play Store on Windows 11. But luckily, now there is a way to use Android apps from Google Play Store with all of their features unlocked on Windows 11. The installation process is not too difficult, and the results you gain are really worth the time you spend.
One little disclaimer here – we decline all responsibility for any possible errors of the software you are going to use, although we haven’t had any system errors or failures in the process of testing.

🤖 How to Install Android Apps and Games on Windows 11 / How to Run Google Play Store on Windows 11
Step 1. Getting a Windows 11 computer ready for WSA installation
Before you proceed to download and install software, make sure that additional features such as Hyper-V and Virtual Machine Platform are enabled on your computer.
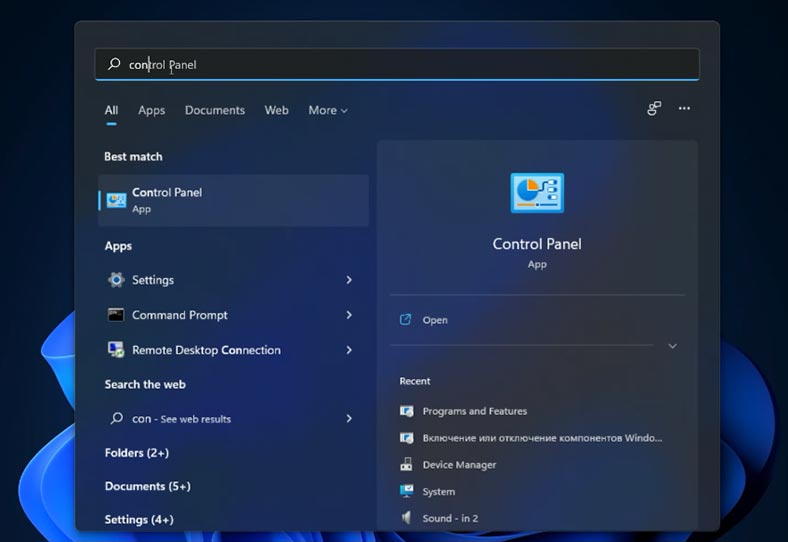
To do it, click the Start button, and type “Control Panel” in the search field.
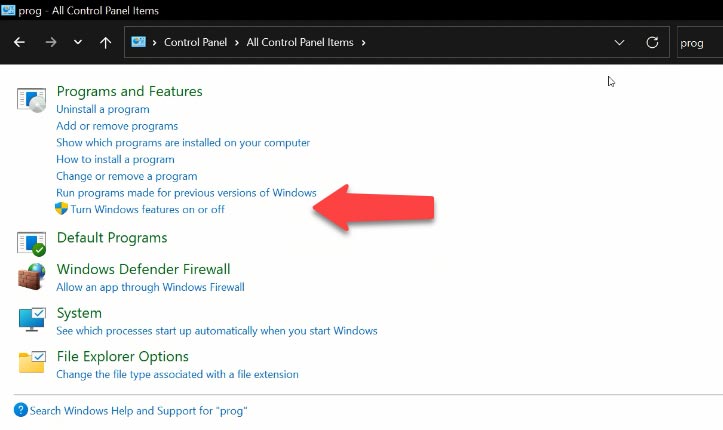
Go to Programs&Features. Find the tab “Turn Windows features on or off”.
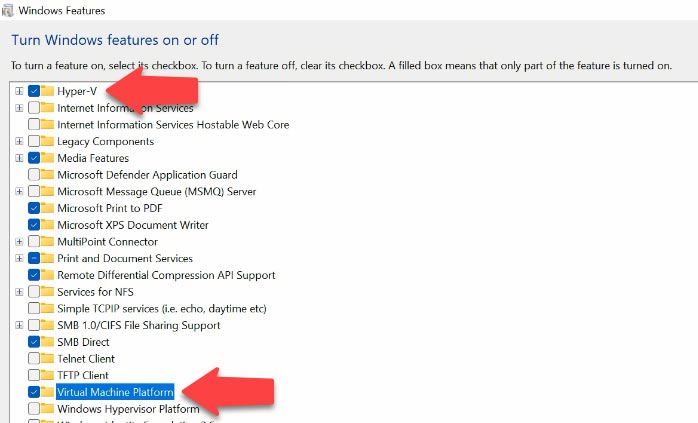
In the window “Windows Features”, check the boxes for Hyper-V and Windows Hypervisor Platform. Click OK. The system will ask you to restart the computer.
Step 2. Remove any other previously installed WSA packages
After that, remove any Windows subsystems for Android if they were installed before. This step should be taken before you can install a new subsystem. To remove them, open the Start menu, find “Windows Subsystem for Android”, right-click on it and delete.
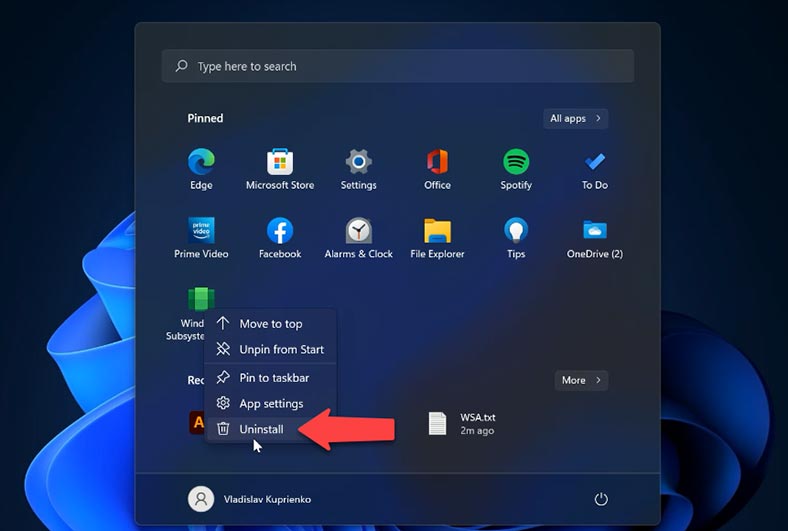
Step 3. Enable Developer mode in Windows 11
Now it’s time to enable Developer mode in Windows. Open Start, go to Settings, and find the “Privacy&Security” tab.
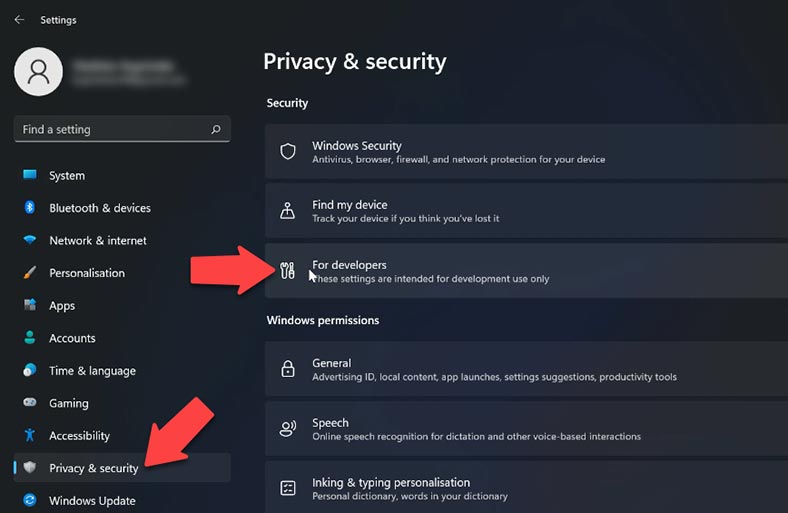
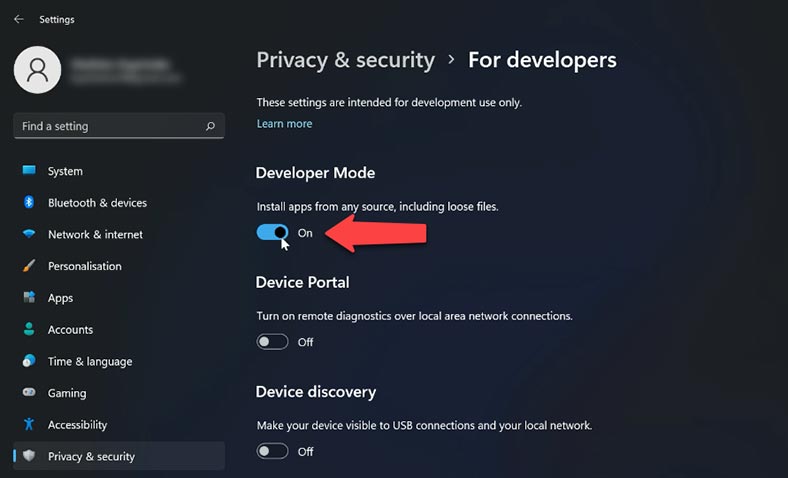
Then go to the tab “For Developers” and enable the developer mode. Click “Yes” in the window that appears.
After that, you’ll need to download the WSA package – which is a modified version of “Windows subsystem for Android”. Follow the link to download it.
https://learn.microsoft.com/en-us/windows-hardware/get-started/adk-install
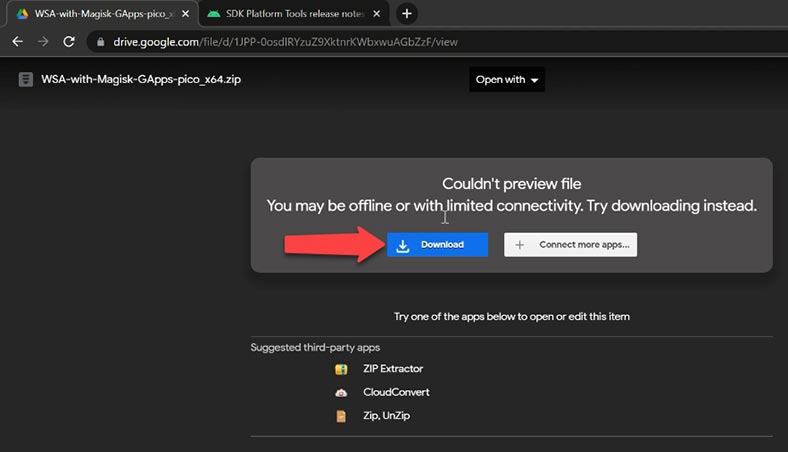
Extract the downloaded file to any directory but remember where exactly, because you will have to specify the path to this file a bit later.
Start PowerShell as administrator. Right-click on the “Start” menu, and open Windows terminal as administrator.
In the Command Prompt, type this command Add-AppxPackage -Register and give the path to the file named AppxManifest.xml.
Add-AppxPackage -Register

To quickly find this path, go to the folder containing the file and right-click on AppxManifest.xml. Choose “Copy as path” to copy the path to this file into the clipboard, then go to the Command Prompt, paste the path and press Enter. The WSA application will be installed, and its shortcut will be added to the Start menu.
Now you need to download the SDK Platform Tools package. Visit the corresponding website:
https://developer.android.com/studio/releases/platform-tools
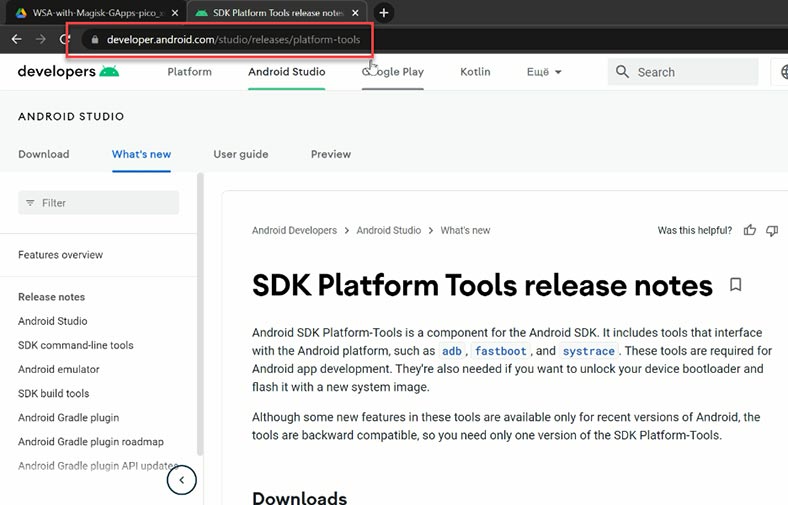
Extract the .zip archive to a convenient location.
Step 4. WSAConfiguration
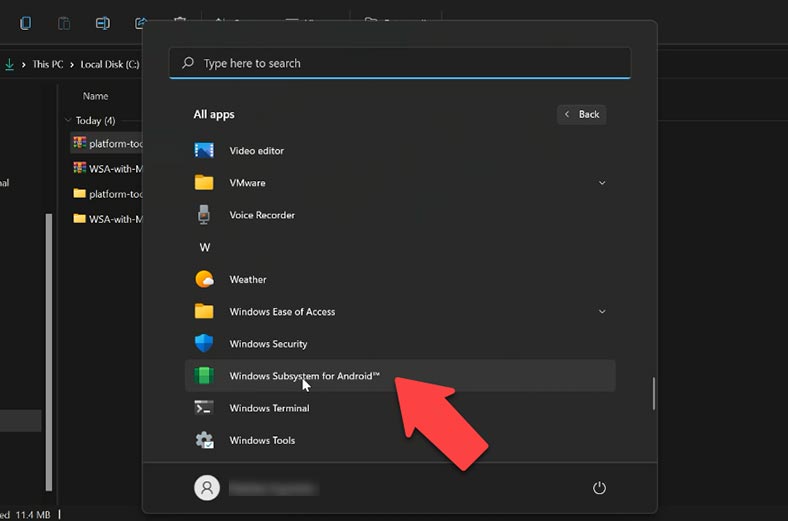
Then click Start, jump to the tab “All apps” and launch the WSA app.
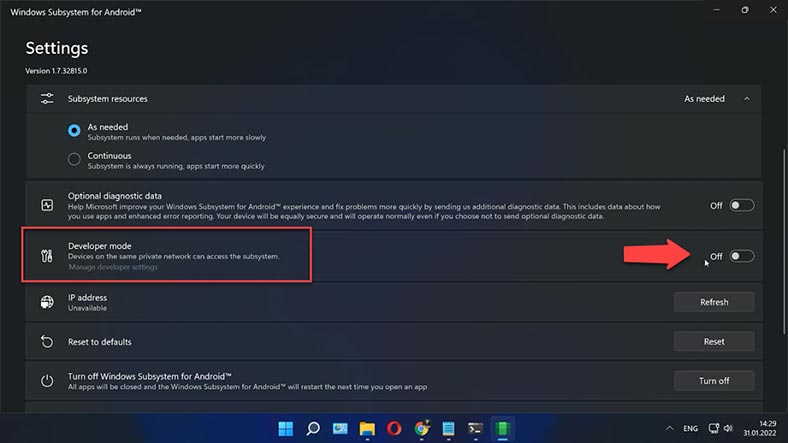
In the “Developer mode” tab, drag the slider to enable it.
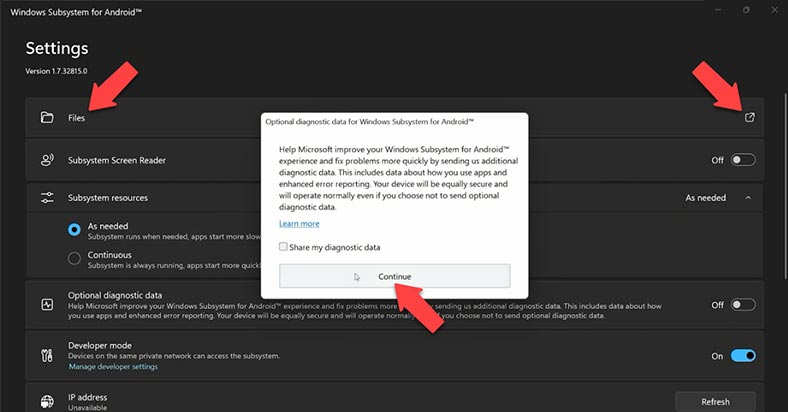
Now you need to open the file option by clicking here, and then the firewall request window appears, so click to allow access. In the window that appears, click “Continue”.
In the IP address tab, click to refresh the address, and copy it.
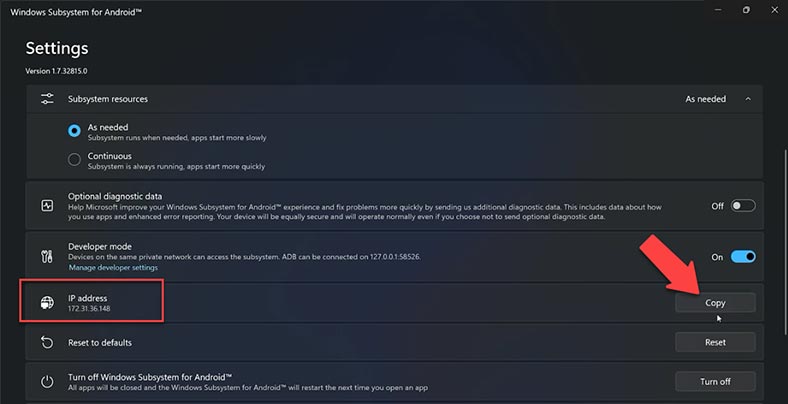
Have a look at the address displayed in the “Developer mode” tab. It should be the same as yours.
Step 5. Establish connection
Now go to the folder where the SDK package has been extracted. Hold down the Shift button and right-click on an empty area in this folder, and choose the option “Open in Windows Terminal”.
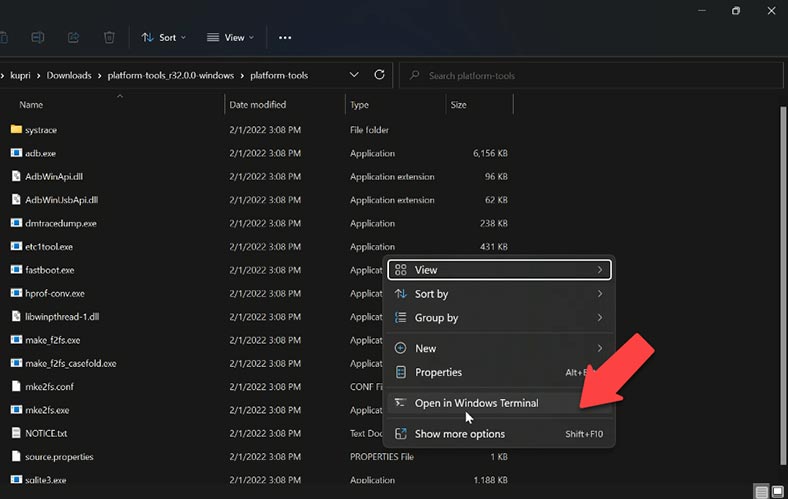
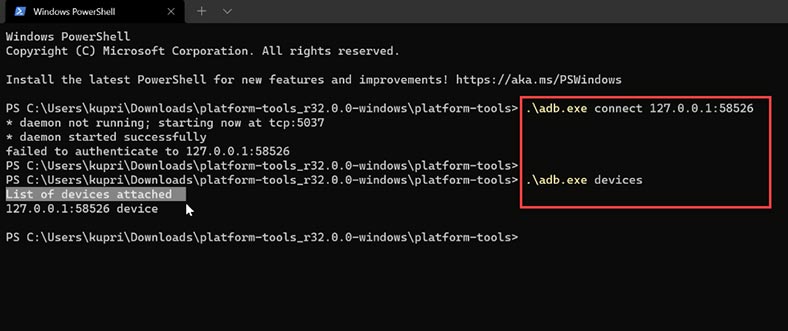
Now run the command
.\adb.exe connect 127.0.0.1:58526
And paste our address 127.0.0.1:58526, then press Enter.
Then type one more command
.\adb.exe devices
Now ADB is connected.
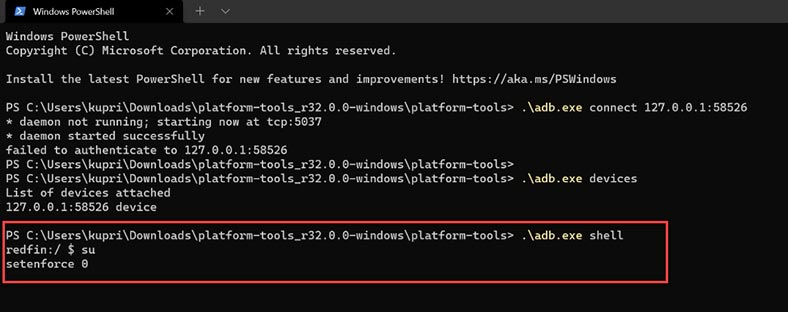
Now you need to authenticate at Google Play Store by running these three commands one by one:
.\adb.exe shell
su
setenforce 0
Sign in to your Google account in the app.
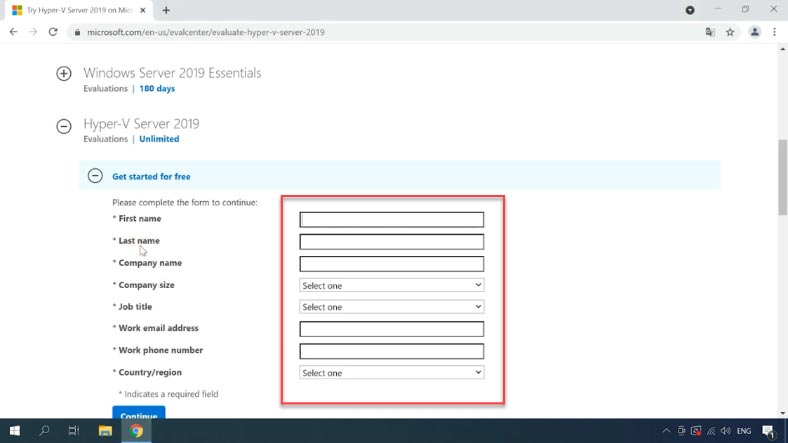
That’s all. Now you can install your favorite apps and games: TikTok, Instagram, YouTube and so on.


Actually, there are system requirements to run Android on Windows 11. Memory : 8 GB (16 GB recommended). Processor: Intel Core i3 8th Gen, AMD Ryzen 3000, Qualcomm Snapdragon 8c or better.
Storage: Solid-state drive (SSD). Games generally work, but not all are comfortable to control with the mouse.
At the same time, it's cool that Android treats the trackpad as a full-fledged touch interface. It even works gestures on the trackpad! So for many games, you don't even end up needing a touchscreen. Heavy games don't really fly.
It also supports a gamepad. And where control is difficult - you can't do without a game controller.