RAID 5 Recovery: How to Restore Data on Synology NAS
In this tutorial, we’ll show you how to recover a degraded RAID 5 Synology NAS and then seamlessly transition from RAID 5 to RAID 6 without losing any data. Whether you’re experiencing issues with your RAID array or simply want to upgrade your storage configuration for added reliability, we’ve got you covered.
- Step 1. How to identify a faulty hard disk
- Step 2. How to migrate from RAID 5 to RAID 6
- Questions and answers
- Comments
There is hardly a more terrifying sound that the one you hear when your hard disk breaks down, or your NAS storage system detects a storage error. At that moment, you are pretty close to losing gigabytes of photos, videos and documents, as your disk array appears to be in a degraded state. Now integrity of your data largely depends on replacing a failed disk properly and recovering the RAID system. If you use a NAS device to store your data, you’ll be able to repair your RAID array easily – provided that you follow the correct approach.

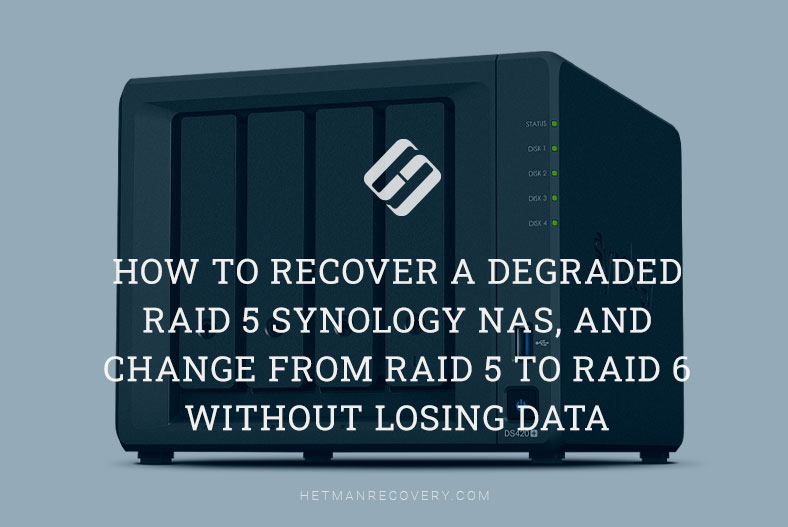
How to Recover a Degraded RAID 5 Synology NAS, and Change from RAID 5 to RAID 6 Without Losing DATA
Before you replace the faulty disk, you need to identify the RAID type and understand if it supports replacement of disks without data loss, and find out how many hard disks can be down without interrupting the operation of this array. We’ll be checking it with a Synology device and a RAID 5 system for illustration.
If your system uses RAID 5 technology to store data across an array of hard disks, and only one disk is down, things are not so bad. This particular technology lets your NAS work as usual even if one hard disk is damaged, so you don’t need to hurry and replace it with whatever disk you have at hand. However, your array has just lost its fault tolerance feature, since the RAID is going to crash as soon as one more disk breaks down. What is more, the remaining disks within the array are now experiencing more workload, because they have to do the work that used to be done by that faulty disk. So, it’s only a matter of time before other disks start suffering from errors. If one more hard disk breaks down, repairing the RAID and recovering data will become even more complicated (and sometimes next to impossible). That is why it is recommended to replace the faulty disk as soon as possible.
When a hard disk is out of order, NAS gives out a loud beep as a signal. Also, when you open DiskStation Manager, you will see a warning that one of the pools has a degraded status, and that it’s recommended to replace the failing disk.
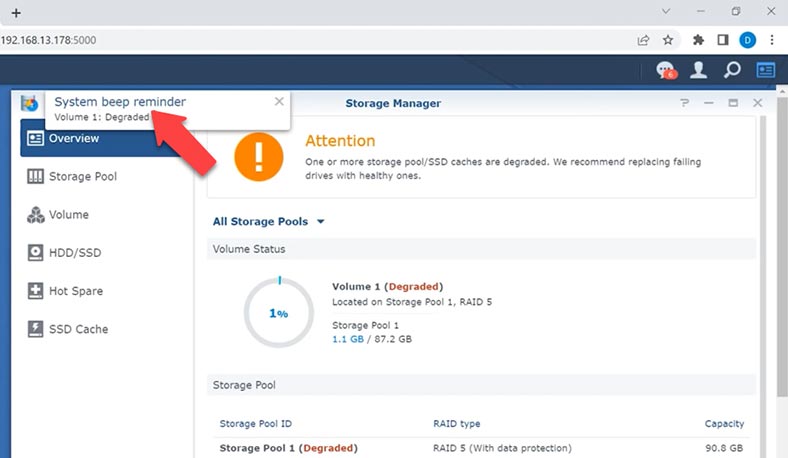
If you set up notifications earlier, you will also receive an email notification about the error.
Step 1. How to identify a faulty hard disk
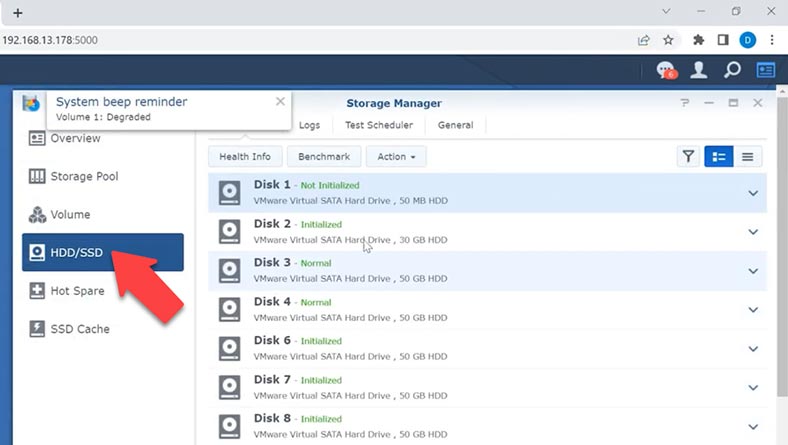
For starters, you need to identify a faulty hard disk. To do it, open the menu – Storage Manager – HDD. Looking at this list, you can use the disk numbers to understand which disk needs to be replaced.
Next to each disk you will see its status, green or red, depending on the disk condition. If everything works properly, there is a green word Normal next to every disk. On the contrary, there will be a red word Crashed or Failed next to a faulty disk. In my case, the faulty hard disk is not displayed at all, because it completely out of order.
Before you ever start any manipulations concerning the hard disks, we strongly recommend backing up important data, marking all hard disks, writing down their order and so on.
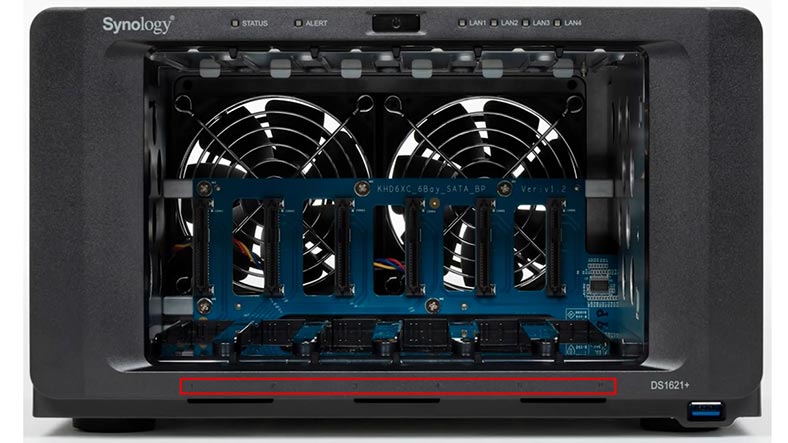
After that, take the faulty disk out of its tray – each tray is numbered.
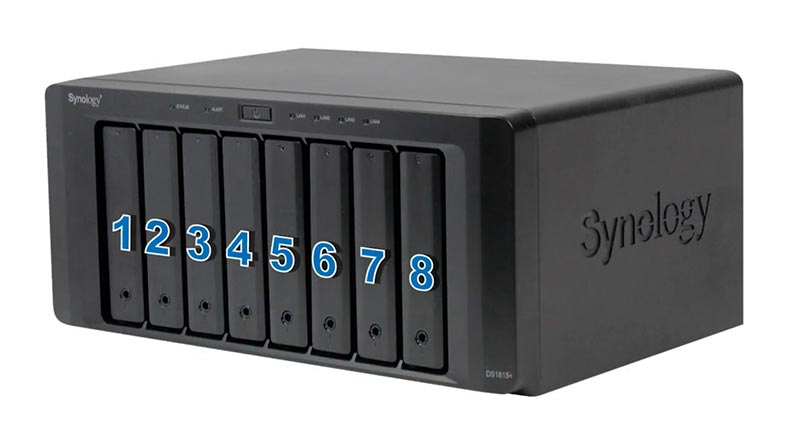
If there are no numbers, you can easily determine disk numbers by their position in the NAS device, counting from left to right. That is, if disk 5 is identified as faulty, it must be the fifth disk, if you count from the left. When you find the faulty disk, take it out of the case. Synology NAS devices support hot swap feature – it means that you don’t need to power off the device every time you want to replace a hard disk.
Put a new disk into the tray instead of the faulty disk, or add a new disk to a vacant tray if there is one.
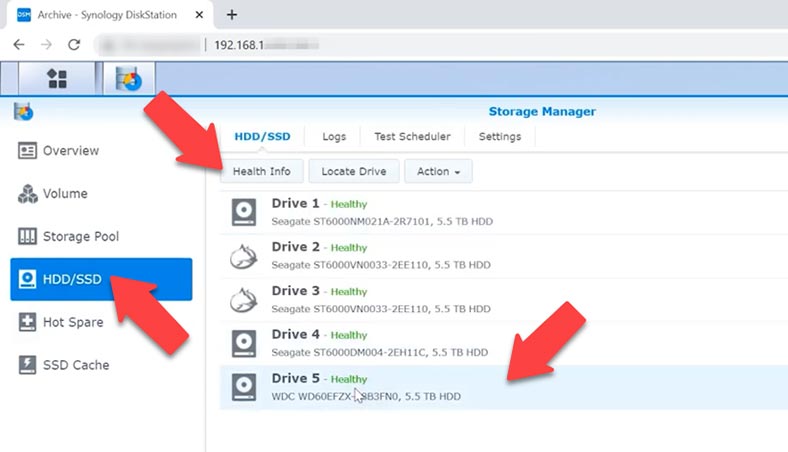
Before adding a disk to the array, you should check it by running a SMART test. Open Storage Manager and go to the HDD/SSD tab. Select the new disk and click on the Health Info button.
Then, look at the right part of the window – SMART Test. Choose a test type and click Start.
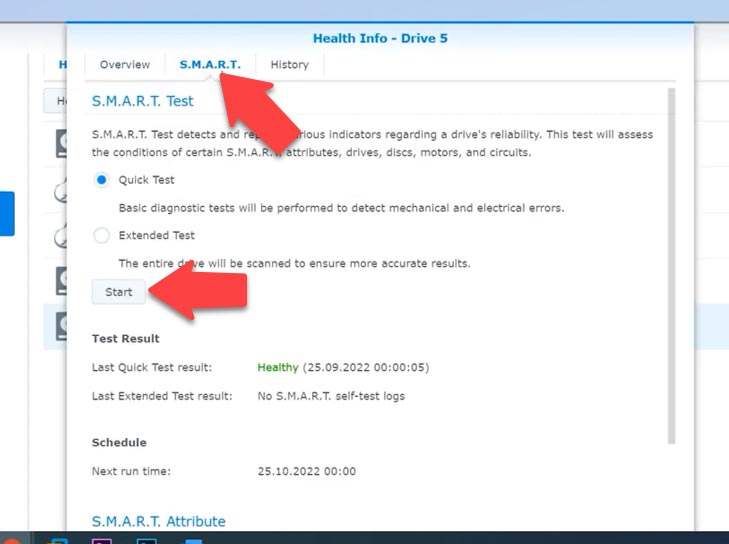
While the test is running, you’ll be able to watch it status and progress. If the test is successful, you can add the disk to your array.
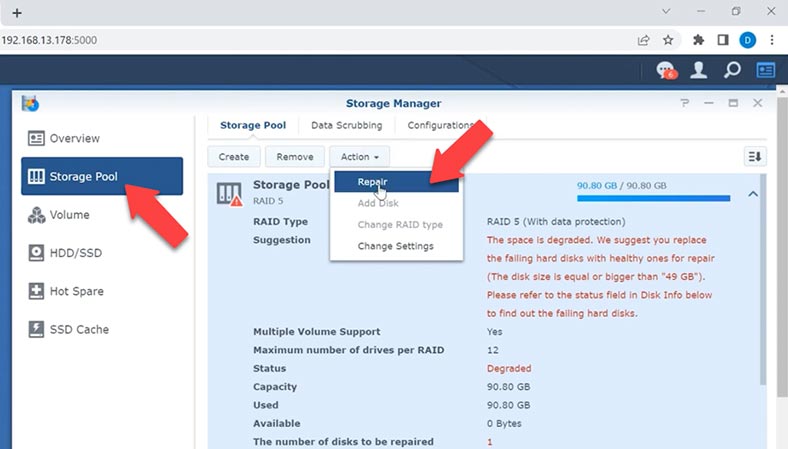
Open the NAS manager – menu – Storage Manager – Storage Pool. Then click on the Actions button and select Add Disk from the list.
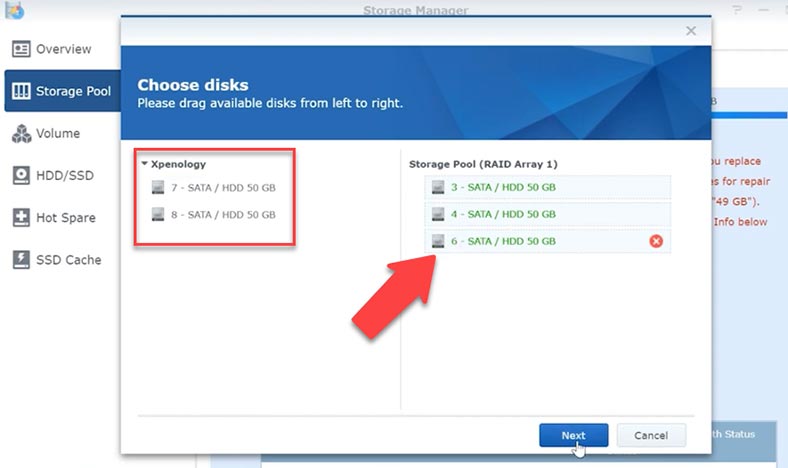
In the window that opens, add the new disk to the list on the right and click Next. There will be a warning that all information on the disk is going to be erased. Click OK to confirm this action, and then Apply. It starts the recovery process.
When this process is over, its status will change to Normal, and all files stored on the device will remain intact.
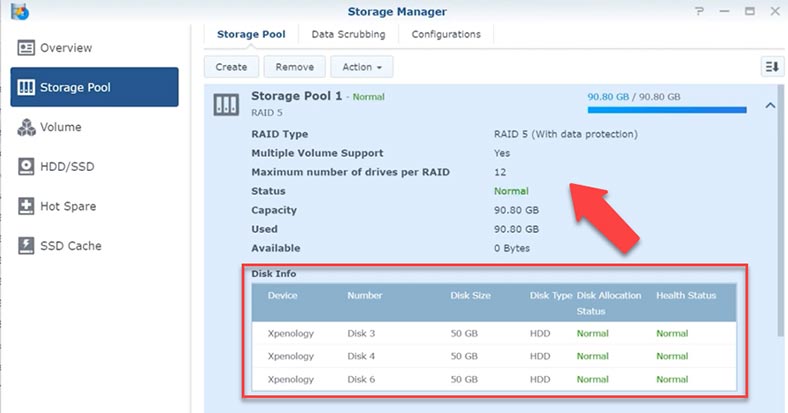
Step 2. How to migrate from RAID 5 to RAID 6
As long as we have described the process of adding a hard disk, let’s also explore how to add more hard disks to a NAS storage device and migrate the whole system from one RAID level to another without losing data – for example, from RAID 5 to RAID 6.
With NAS devices, you can change RAID types for storage pools without worrying about possible data loss. For example, you can create a RAID 1 storage pool, then change it to RAID 5 as soon as more hard disks added, and then transform it into RAID 6 at a later time.
To be able to change RAID type, the NAS should have a sufficient number of hard disks installed in it. The minimal disk number for RAID 5 is three, and you need to add at least one more disk if you want to convert it into RAID 6.
Before changing the RAID type, make sure that your storage pool is healthy. When adding disks to the array, their capacity should be more than the capacity of the smallest disk in this pool, or equal to that capacity. Also, all the disks should be of the same type.
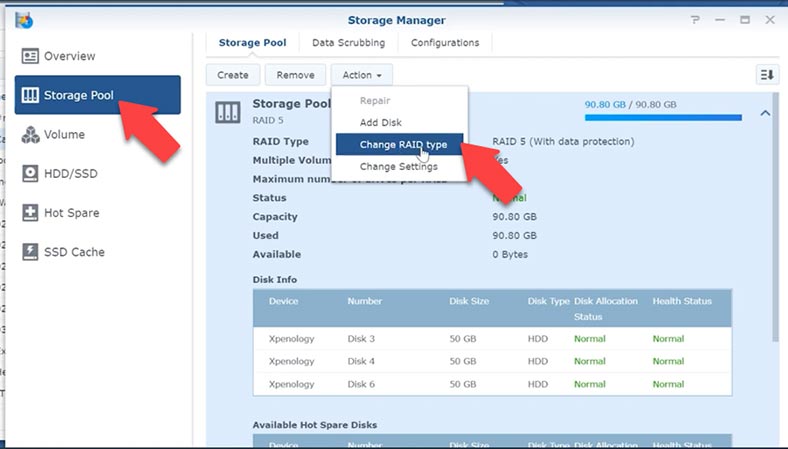
To change the RAID level, open the menu – Storage Manager – Storage pool. Click on the Action button and select Change RAID Type from the list.
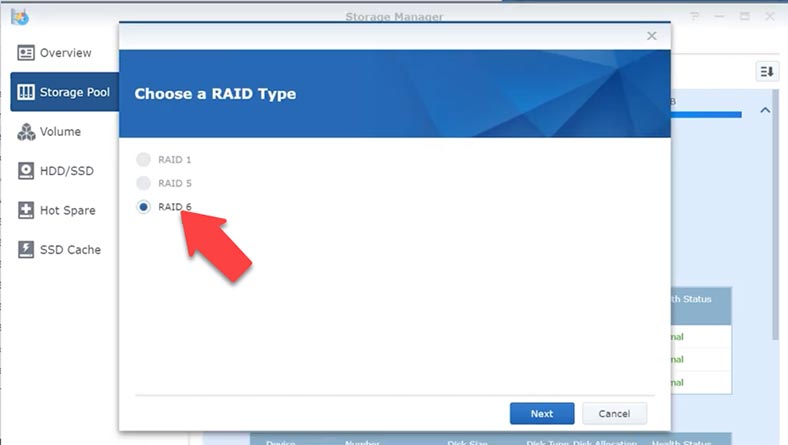
Choose RAID 6 – Next, add the disks to expand the disk array and click Next; when the pop-up window appears to warn you that all data on the disks will be erased, click OK.
Check the configuration and click Apply to confirm it. It starts the process of adding new disks and rebuilding the RAID system. When it’s over, you will see a notice saying that the RAID has been changed successfully.
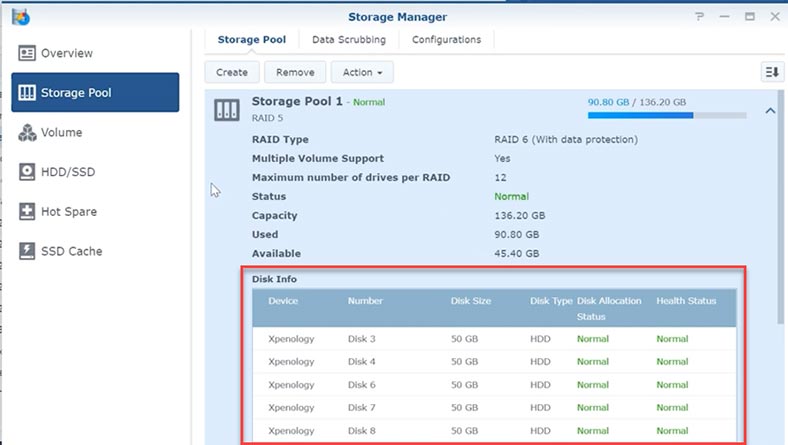
With this kind of transformation, all the data stored on the disk array will remain unchanged, except for situations when the disk array can be damaged by a sudden power outage.
When the disk array is being rebuilt, it involves recalculation of parity and overwriting data to the disks. If there is a power outage at that precise moment, this process is interrupted and all data stored in the volatile memory may be damaged, which results in a RAID crash. In this case, access to all files will be lost, and you’ll need a specialized utility to restore data from the RAID. What may happen to a disk array if there is a power outage during the rebuilding process? The array will crash, the volume will not be available, and all the data will be lost.
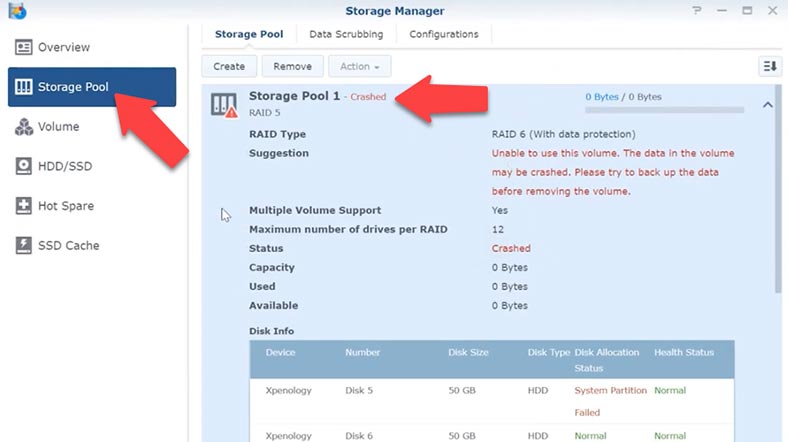
To expand a volume, click on the Action button and open the Volume tab, then click Action and select a configuration from the list.
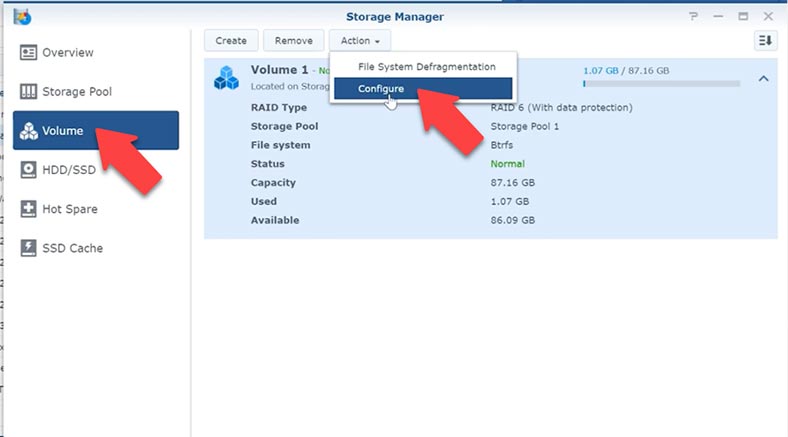
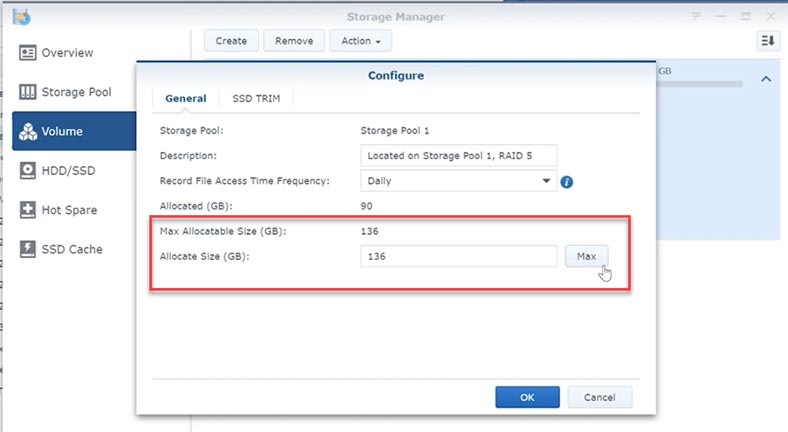
Set the volume size here and click OK to confirm your choice.
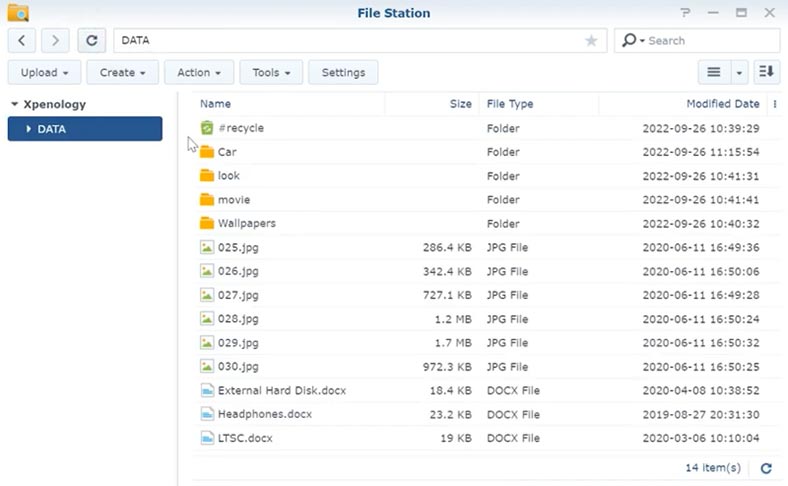
Now the volume has been expanded, the migration from RAID 5 to RAID 6 is successful, and all the files stored on the RAID 5 array have remained unchanged even after the array was rebuilt.
But if there is a power outage during the rebuilding process and your RAID system has crashed, or you deleted important data by mistake – just use a reliable data recovery tool – Hetman RAID Recovery. It will automatically rebuild the damaged RAID system, and you’ll be able to retrieve your files. This program supports all popular RAID types and most NAS devices by various manufacturers.
| Step | Description |
|---|---|
| 1. Identify the Faulty Disk | Open Synology DiskStation Manager (DSM) and go to Storage Manager to identify the degraded disk. |
| 2. Power Off the NAS | Safely power off the Synology NAS and remove the faulty disk. |
| 3. Connect Disks to PC | Connect the remaining RAID disks to a Windows PC using SATA or USB adapters. |
| 4. Install Hetman RAID Recovery | Download and install Hetman RAID Recovery on the Windows PC. |
| 5. Run the Program | Open Hetman RAID Recovery and allow the program to automatically detect the RAID configuration. |
| 6. Scan for Data | Select the detected RAID array and perform a full scan to find lost data. |
| 7. Review and Recover | Review the found files and select the ones you want to recover. Save them to a different storage device. |
| 8. Replace the Faulty Disk | Replace the faulty disk in the Synology NAS with a new one. |
| 9. Rebuild the RAID | Power on the NAS and use DSM to rebuild the RAID array with the new disk. |
| 10. Restore Data | Transfer the recovered data back to the Synology NAS. |


