Step-by-Step Guide: How to Recover Data from Synology Hybrid RAID on DS1621+ NAS
Discover effective methods to recover data from Synology Hybrid RAID on DS1621+ NAS in this comprehensive guide. Whether you’re encountering data loss due to RAID failure or seeking proactive measures, this tutorial provides expert insights and practical solutions. From diagnosing issues to implementing recovery strategies, we’ll equip you with the knowledge and tools necessary to retrieve your valuable data and mitigate downtime effectively.
- How does it work?
- How to create a Synology Hybrid RAID
- How to migrate from SHR to SHR2
- How to recover data from Synology Hybrid RAID-2
- Conclusion
- Questions and answers
- Comments
Synology devices offer their own technology – Synology Hybrid RAID – to organize a storage system. Synology Hybrid RAID (or SHR for short) is the technology developed to prevent loss of disk space when hard disks of different capacity are installed into a NAS device. To cut the long story short, this technology lets you use all – or almost all – available disk space to organize safe storage for your data with sufficient redundancy.

How to Recover Data from Synology Hybrid RAID on DS1621+ NAS
How does it work?
Suppose your Synology NAS has four hard disks – two 1 TB disks and two 2 TB disks.
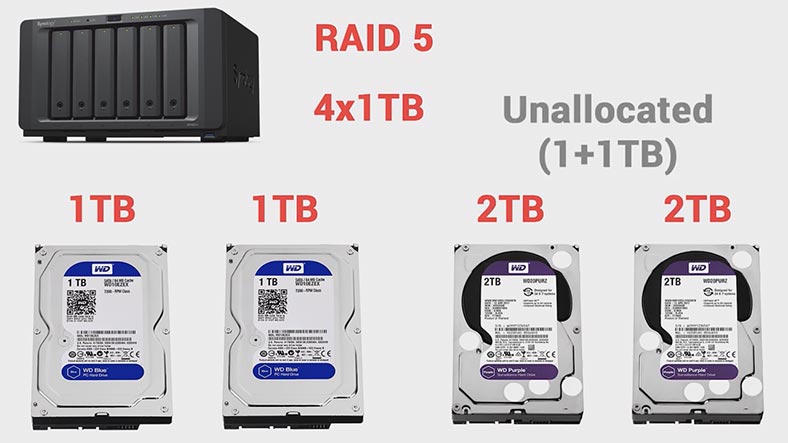
In this case, your NAS creates a classic RAID5 using four pieces of disk space, 1 TB each. For such classic RAID5, some disk space (two pieces of 1 TB each) remains to be unallocated space. However, with a Hybrid RAID these two pieces will be integrated into a mirrored RAID1. After that, the two arrays will be automatically combined into a single storage system. This way, instead of 4 TB (classic RAID5) storage, your NAS will provide 6 TB of disk space with a reliable reserve of one disk for data protection – just in case one of your HDDs fails.
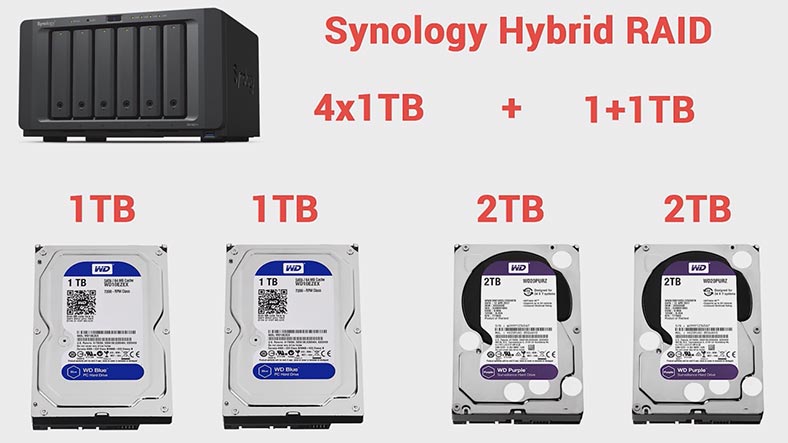
Talking of reliability, a Hybrid RAID cannot offer 100% protection – but a classic disk array is not perfect either. Since a Hybrid RAID is a combination of two classic RAID systems, the issue of data loss remains relevant just like before: failure of more drives than your redundancy level can survive, damaged RAID metadata, wrong configuration, NAS breakdown and so on. Recovering data from a Hybrid RAID is more complicated since there are two array levels combined into one.
With the hard disks of similar capacity, a Hybrid RAID looks just like a classic one – and its data can be restored with the help of any data recovery tool designed to work with RAID systems. But if it includes disks of different capacity, such hybrid structure combines several RAID levels into one. Recovering data from such system requires a software tool capable of determining all offsets correctly, rebuilding the whole array and providing access to its data.
How to create a Synology Hybrid RAID
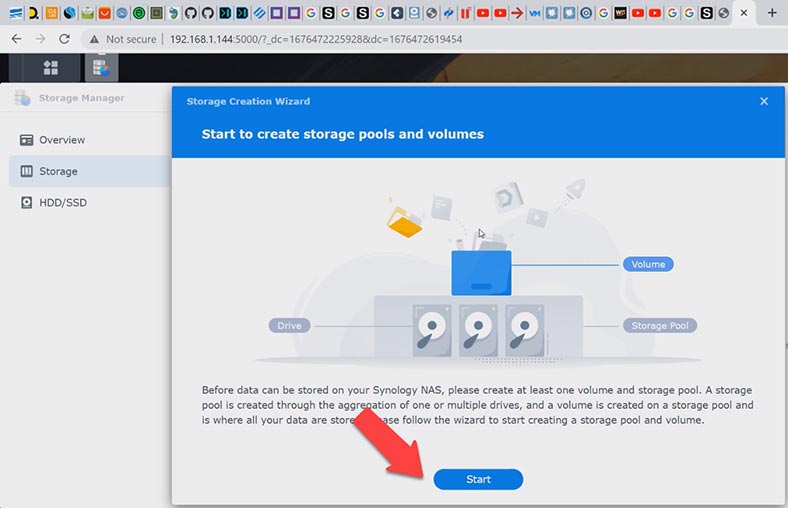
For better understanding of how a Hybrid RAID is built, let’s explore the process of creating it on this specific device. During initial configuration of the network-attached storage, you will be suggested to create a pool and volume for storing data. Click Start.
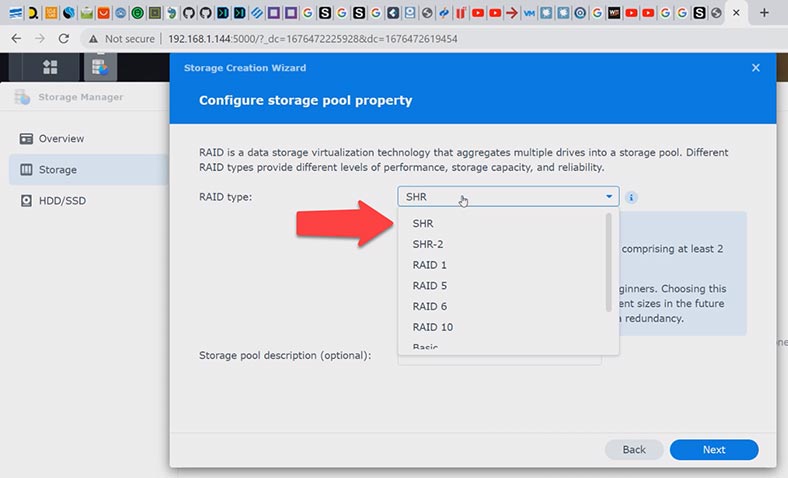
At the next step, you need to choose the RAID type – select Hybrid RAID. As you can see, there are two Hybrid RAID options, SHR and SHR2.
- SHR (Synology Hybrid RAID) is similar to a classic RAID5, with one drive fault tolerance.
- SHR2 (Synology Hybrid RAID 2) is similar to RAID6 with two drives’ fault tolerance.
I will choose SHR, because we’re going to explore how to migrate from this type to Hybrid RAID 2 (SHR2), click Next.
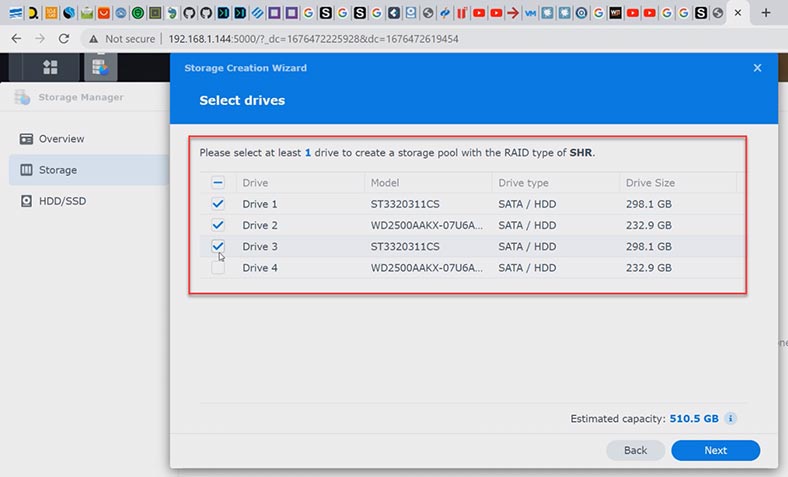
Select the disks that your RAID will consist of, and click Next.
Specify the capacity, choose the file system, and click Apply.
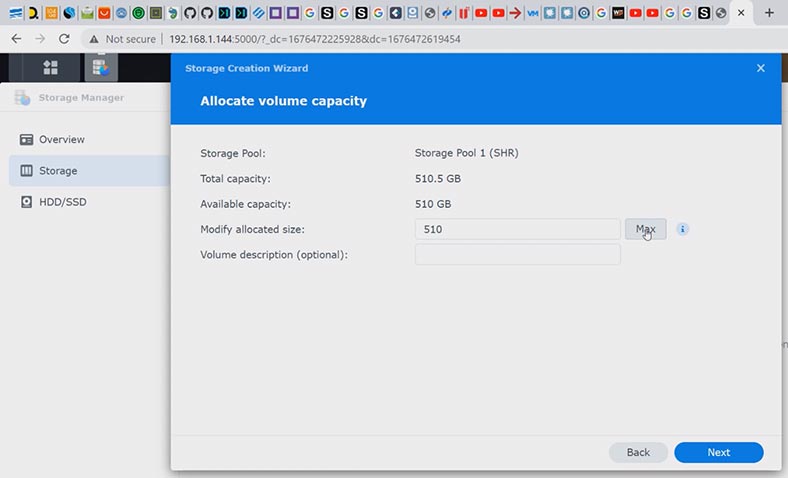
After that, you will see a warning that data on these disks will be erased, so click OK to confirm it.
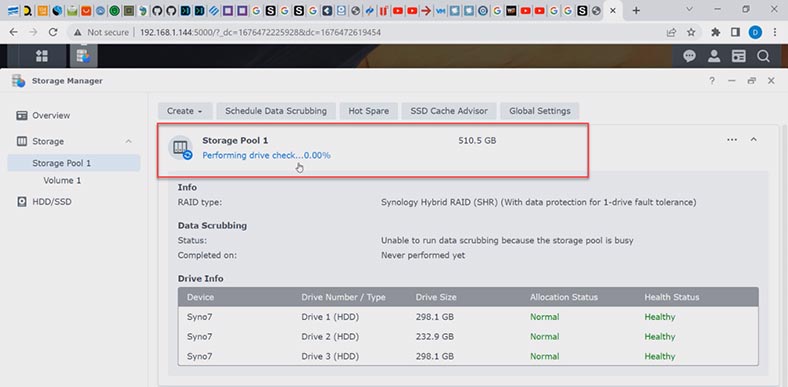
It starts the process of building and optimizing the array in the background mode. When it’s over, you’ll be able to create a shared folder and add some data to your storage system.
How to migrate from SHR to SHR2
To migrate from Synology Hybrid RAID to SHR2 you need at least 4 hard disks.
If your current array consists of three disks, add one more, and it’s even better to add two – this will speed up the rebuilding process. To rebuild the array, open the DSM menu – Storage Manager. Follow these steps go to a partition – Storage, and click on the three-dot button to change the RAID type.
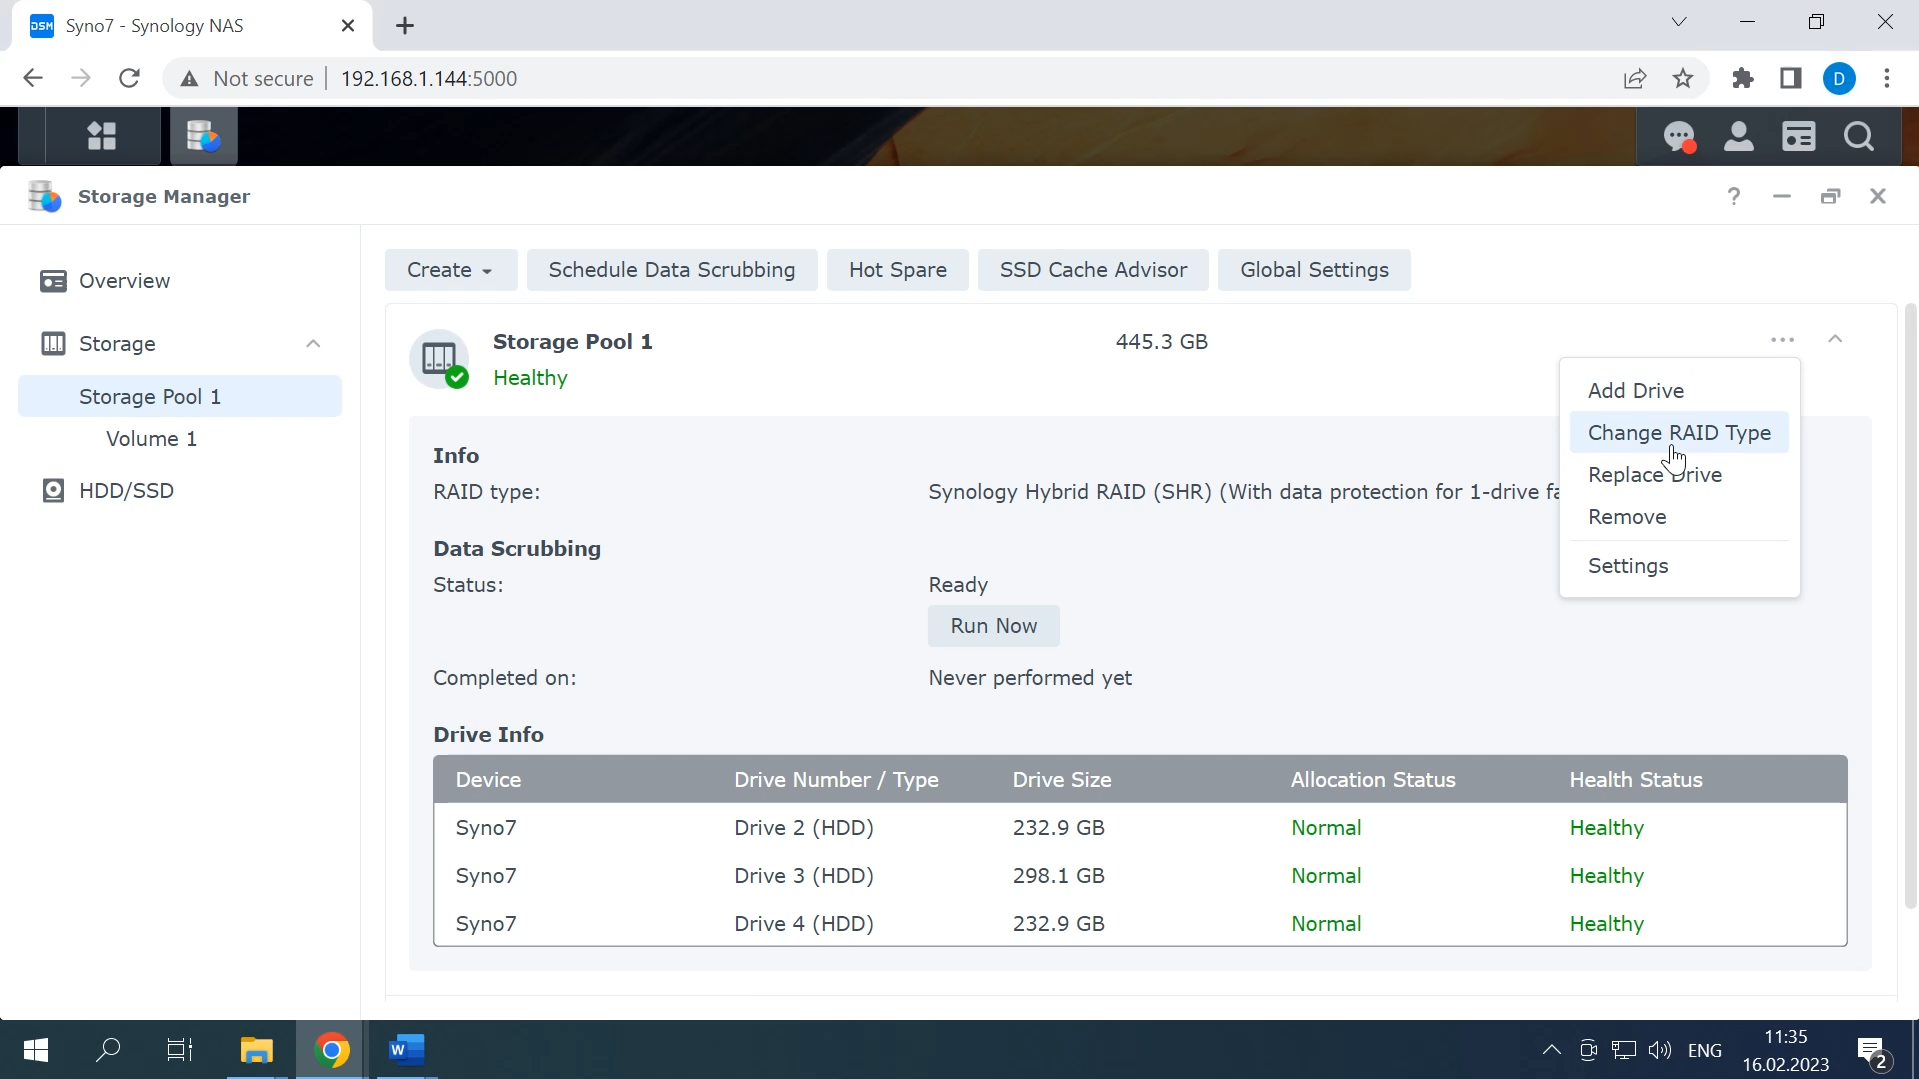
Select SHR-2 and click Next.

Now add the disks; the system suggests you to choose at least two disks to reduce the rebuilding time. If you choose one disk only, the process will be much longer.
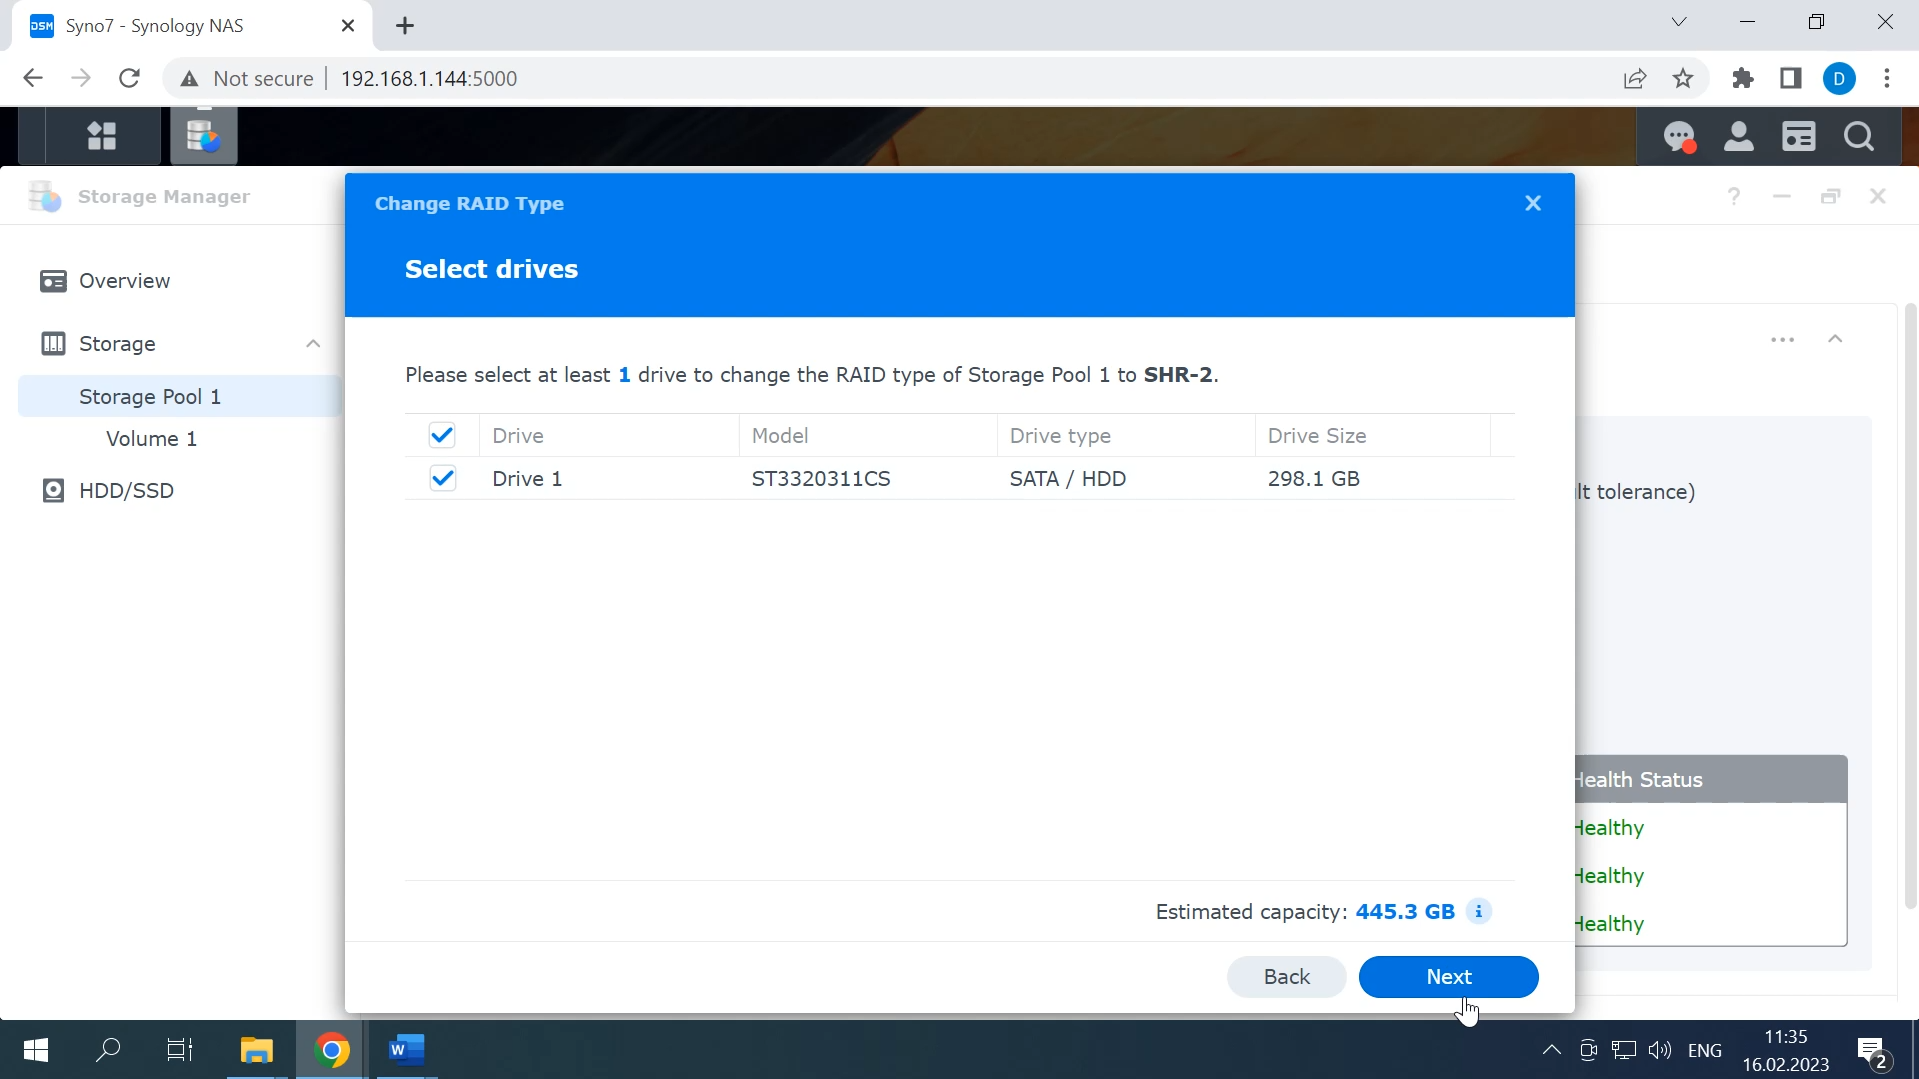
You will see a window that the data from the newly added drive will be erased, but the data from the disks already included into the array won’t be removed. Click OK. It starts disk initialization and array rebuilding process.
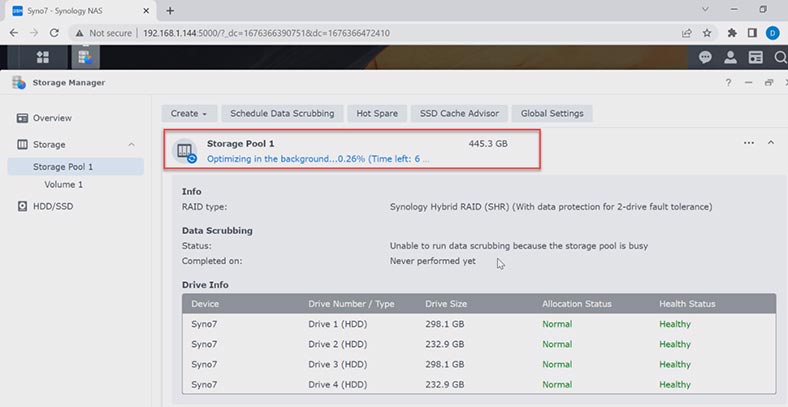
As a result, you’ll get a Synology Hybrid RAID with two-drive fault tolerance.
How to recover data from Synology Hybrid RAID-2
RAID cannot guarantee you 100% protection for your data. Hardware issues, degradation, failures, wrong configuration of your Synology RAID – all of these are critical situations that may result in data loss. However, if you take the right decision in time, you’ll be able to recover data from a damaged RAID system.
| Number | Program Name | SHR/SHR2 Support | Advantages |
|---|---|---|---|
| 1 | Hetman RAID Recovery | SHR, SHR2 |
– High data recovery rate – Automatic RAID configuration detection – Easy to use – Supports Synology Hybrid RAID |
| 2 | R-Studio | SHR | – Supports many file systems – Accurate data recovery |
| 3 | DiskInternals RAID Recovery | SHR | – Specializes in RAID recovery – Synology NAS support |
| 4 | UFS Explorer RAID Recovery | SHR, SHR2 | – High performance – Supports various storage systems |
| 5 | EaseUS Data Recovery Wizard | No | – Easy to use – Wide support for various devices |
The specialized RAID data recovery software – Hetman RAID Recovery – will automatically rebuild the damaged RAID with the available hard disks, so that you’ll be able to retrieve the important data. This utility supports most file systems and all popular RAID types including Synology Hybrid RAID.
To start the recovery process, take the drives out of the storage device and connect them directly to the motherboard of a Windows computer. If your motherboard lacks SATA ports to connect all the disks, or you have a similar problem with power connectors, you can solve the problem by using special expansion cards and adapters.
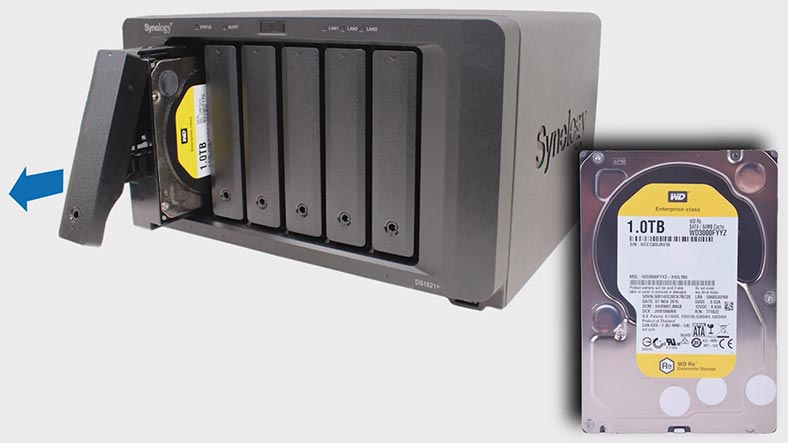
When taking the hard disks out of the NAS, don’t forget to mark them with numbers so that you will put them back into your NAS in the same order they used to have. Also, you will need some space to save the data – and it should be of the same capacity as the data you’re trying to recover.
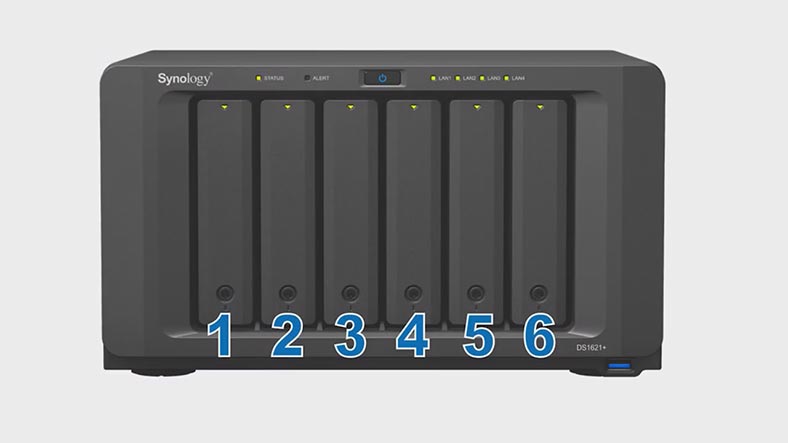
The operating system may suggest initializing of formatting the hard disks for further use when they are connected to the computer. Never agree to that. If you do, there is a high risk of losing any remaining information, and it can make the recovery process much more complicated, either.
Now the RAID consists of four hard disks of different capacity. The utility had no difficulty in identifying the array’s characteristics and file system. It even managed to rebuild the damaged RAID with one hard disk missing.
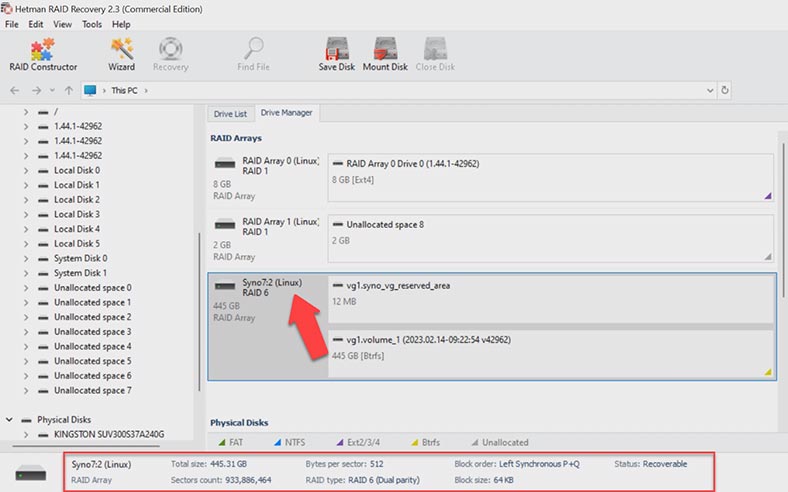
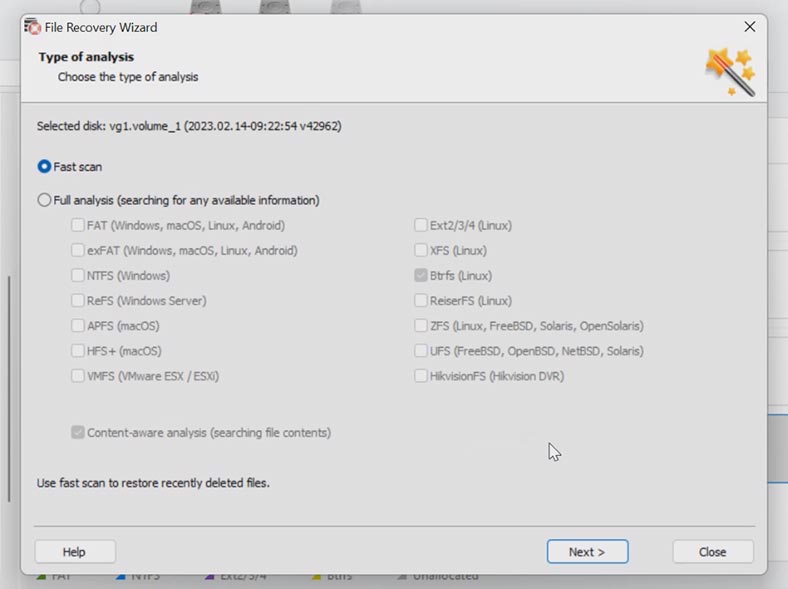
To have your files back, start disk analysis. Right-click on the volume and choose Open. After that, choose the scan type – Fast scan or Full analysis. If the NAS is down, but the program manages to rebuild the RAID correctly, a Fast scan is enough.
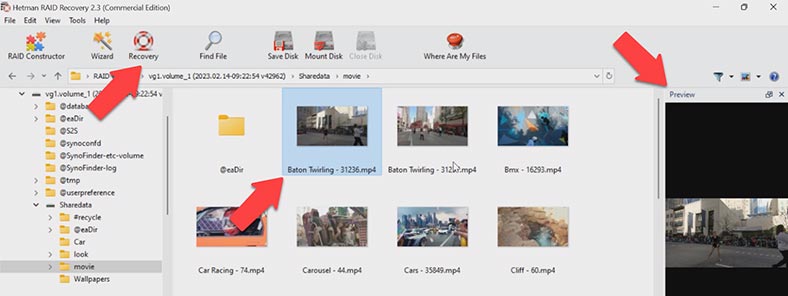
When the scan is over, open the folder where the lost files were stored. You can use the preview window to see the contents of all files, including videos and documents. Select all the items you want to recover and click the Recovery button. Choose the directory where you want to save the files (the disk and the folder), and click Recovery again. In the end, you will find the recovered files in the folder you have chosen.
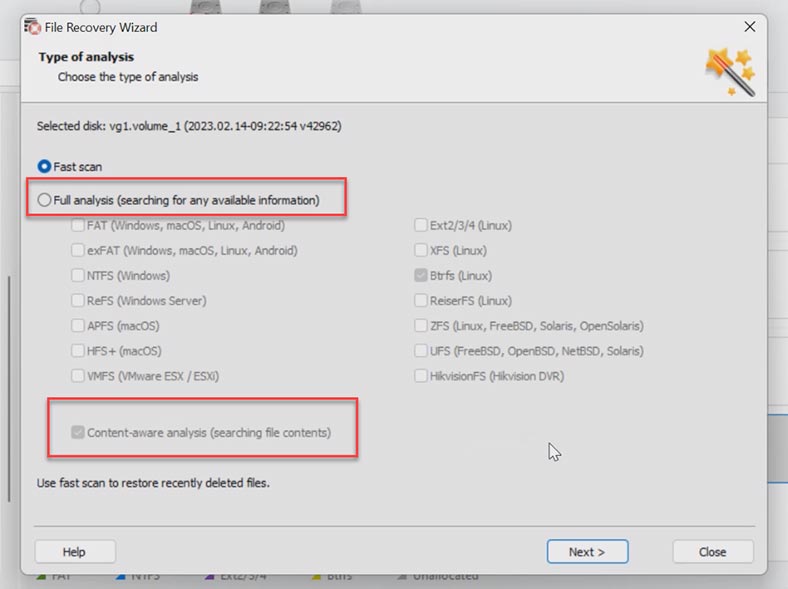
If the Fast scan can’t find the necessary data, then go for Full analysis. To do it, return to the main menu, right-click on the disk and choose Analyze again. Select Full analysis and specify the file system.
You can uncheck the option to search for files by their contents – this will make the scan faster. Now the last step is to recover the files.
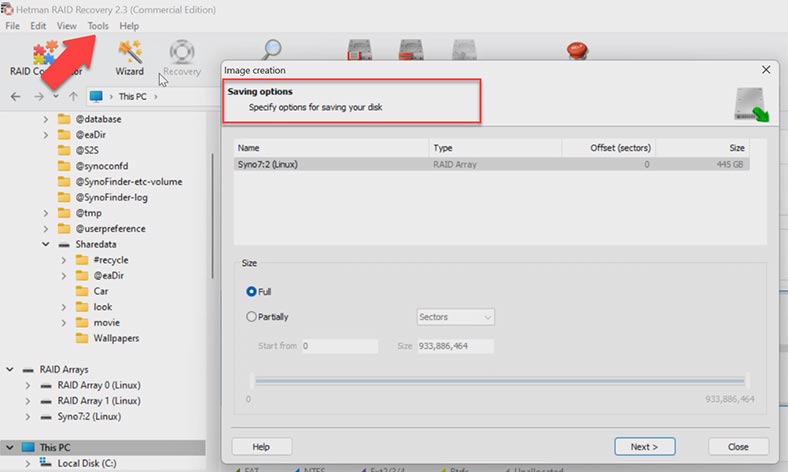
To ensure more safety for working with damaged drives, this program has a feature to scan disk images instead of actual HDDs. This will reduce the disk load and extend their lifespan. To use this feature, click Tools – Save Disk.
Conclusion
Today we have explored the differences between Synology Hybrid RAID and a classic disk array with redundancy, and revealed the factors that make recovery more complicated. Remember that only correct and timely actions let you recover the lost data.


