Rockstor NAS Data Recovery: How to Retrieve Data from a Crashed RAID
In this article, we’ll discover how to recover data from a crashed RAID on Rockstor NAS. Whether you’re a system administrator or a user facing data loss due to a RAID failure, we’ll explore the best methods and techniques for retrieving your valuable data. Follow step-by-step instructions for successful data retrieval.
- 1. How to install Rockstor NAS
- 2. How to create a RAID on Rockstor NAS
- 3. How to recover Rockstor NAS operating system
- 4. How to recover data from a RAID on Rockstor NAS
- 5. Pros and Cons of Rockstor NAS Operating System
- 6. Conclusion
- Questions and answers
- Comments
Rockstor NAS is an operating system for a network-attached storage (abbreviated as NAS) which provides users with a simple and convenient interface to store, manage, and exchange data within a network. Rockstor is based on Linux and is designed for installation on data storage devices like servers with hard disks or NAS systems.
The main features included into Rockstor NAS are as follows:
- Support for various RAID levels to ensure data safety and fault tolerance;
- Ability to create network file systems such as NFS and SMB/CIFS to provide shared access to data over the network.
- Simple and user-friendly interface to manage and configure the system.
- Flexibility to scale the system by adding more hard disks and expanding the data storage.
- A set of file system functions from BTRFS.
Rockstor offers a wide range of functions to store data and ensure its safety, which makes it a perfect choice for home use as well as for small and medium-size businesses. It provides a simple and convenient way to manage data and makes the process of storing and exchanging information easier and more efficient.
RAID arrays are an effective method to ensure safety and reliability of data storage on network-attached systems like Rockstor NAS. However, sometimes data may become inaccessible after a RAID failure or NAS breakdown.

How to Recover Data from a Crashed RAID on Rockstor NAS
1. How to install Rockstor NAS
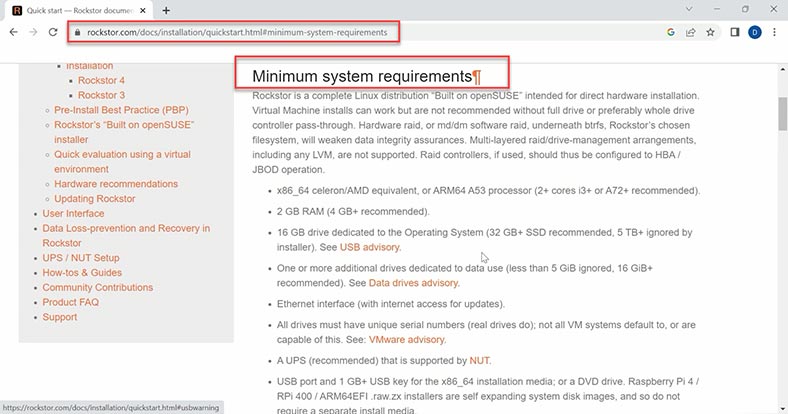
To learn more about Rockstor NAS operating system, let’s explore how it’s installed. Installing Rockstor is quite easy. Before the installation, make sure that your server complies with the system requirements.
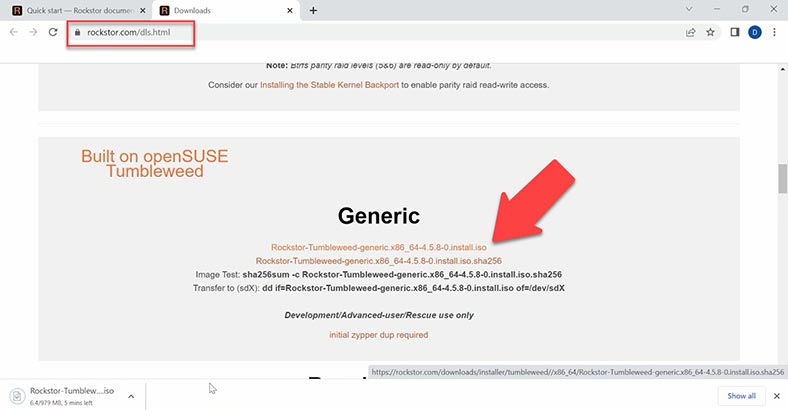
Download the latest version of Rockstor from the official website; you need to download an ISO image and then write it to a USB drive.
Create a bootable USB drive with the help of Rufus or Etcher apps. After that, plug the USB drive into one of the ports of the computer where you want to install Rockstor, and boot it.
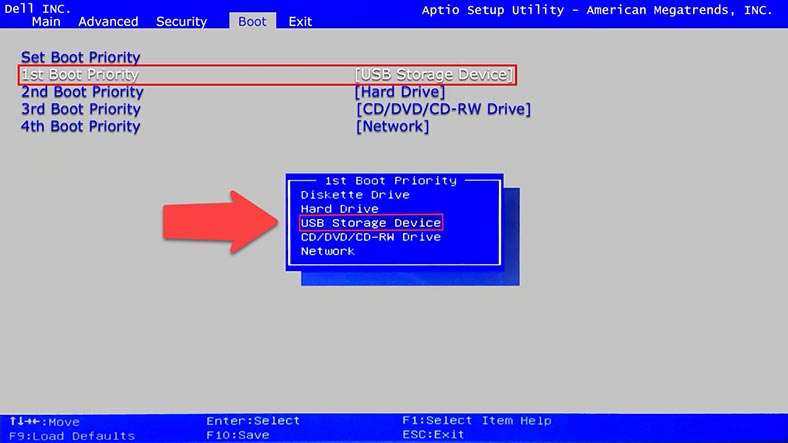
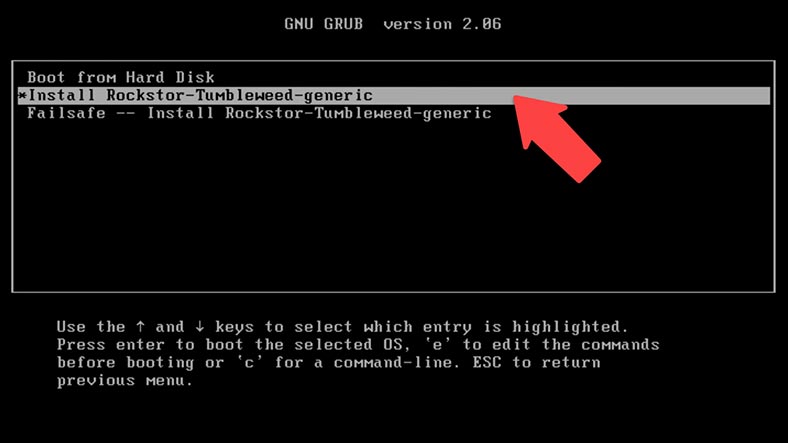
To have the computer boot from the USB drive, change the boot priority in BIOS, or press a certain button to choose a specific boot device. As a result, you’ll see the GRUB window. Choose Install Rockstor NAS.
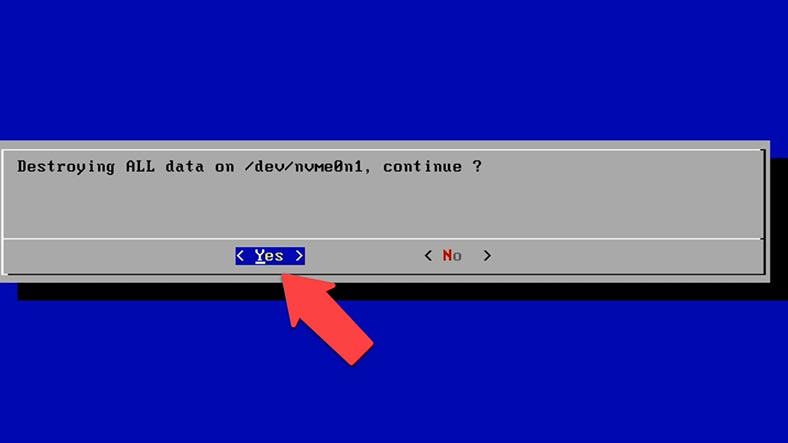
Then you will see an installation screen with a warning that all data will be deleted from the disk. Click Yes to continue.
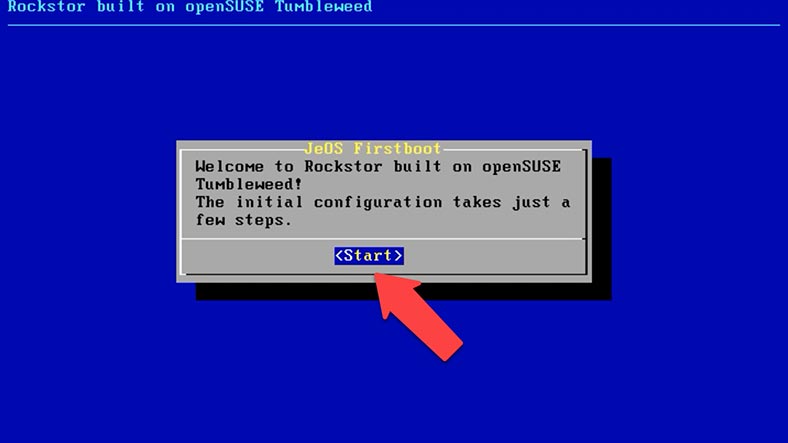
In the welcome screen, click Start.
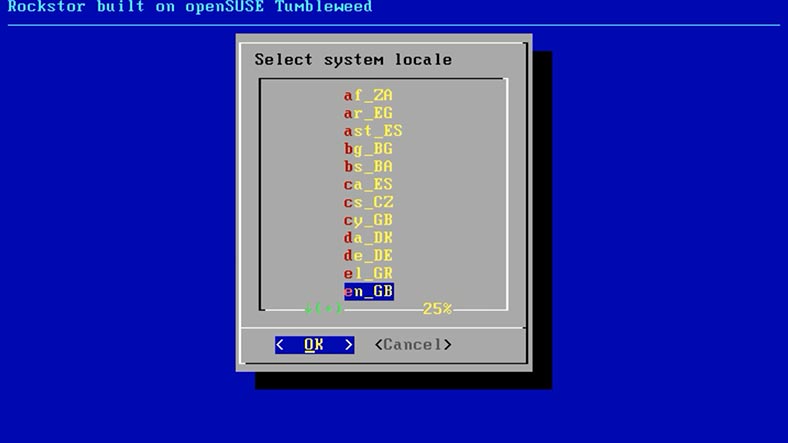
Specify your region.
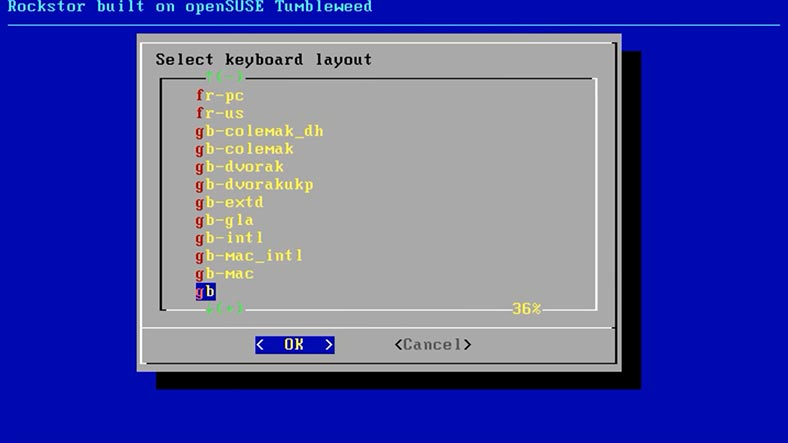
Choose a keyboard layout.
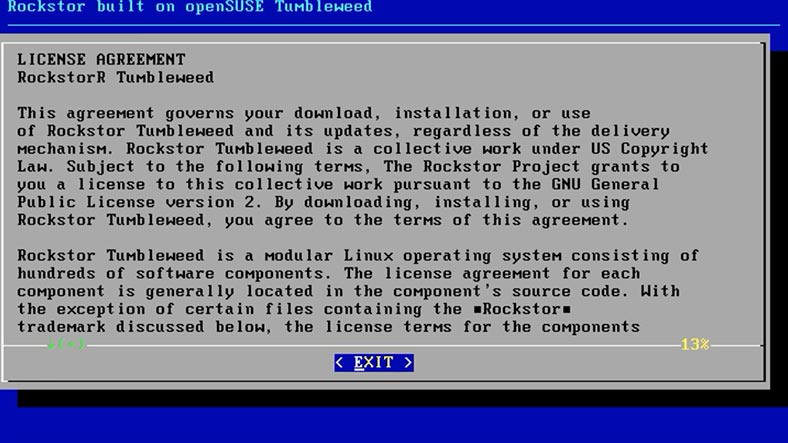
Accept the License Agreement.
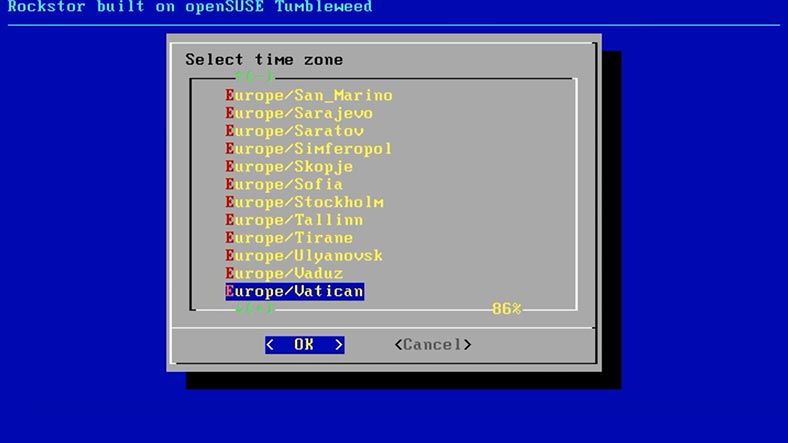
Choose your time zone.
Set the root user password. Enter it one more time to confirm it, and click OK.
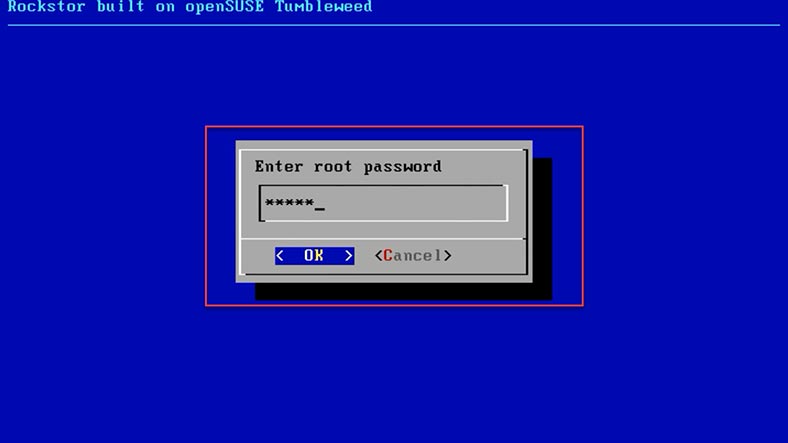
After the installation, Rockstor is ready for work.
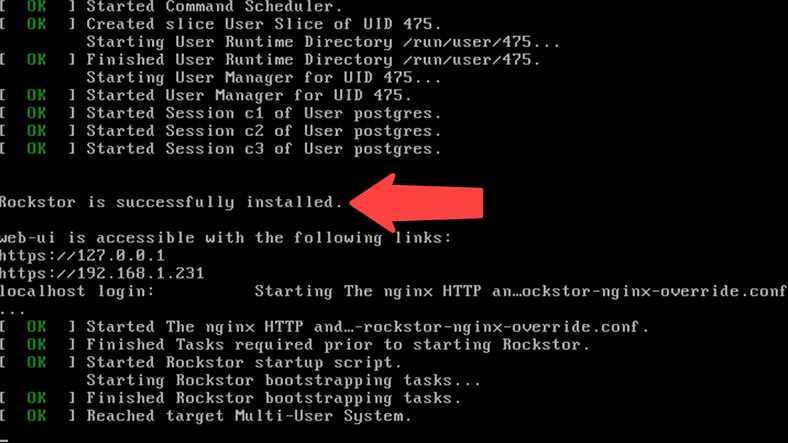
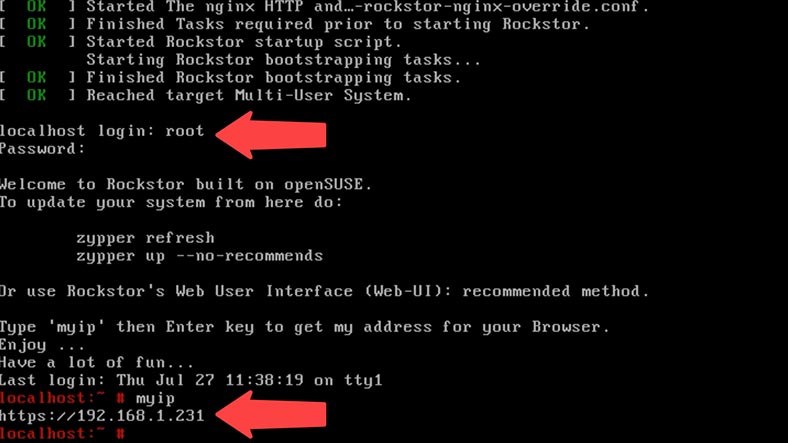
To access the web interface, you need to identify the IP address of your NAS. Enter the login and the root password, and run the command – myip.
After that, open a browser on one of the computers connected to this shared network, and type the IP address of your NAS device. When the web interface opens for the first time, give the domain name, login and password of the new user to get access to all settings.
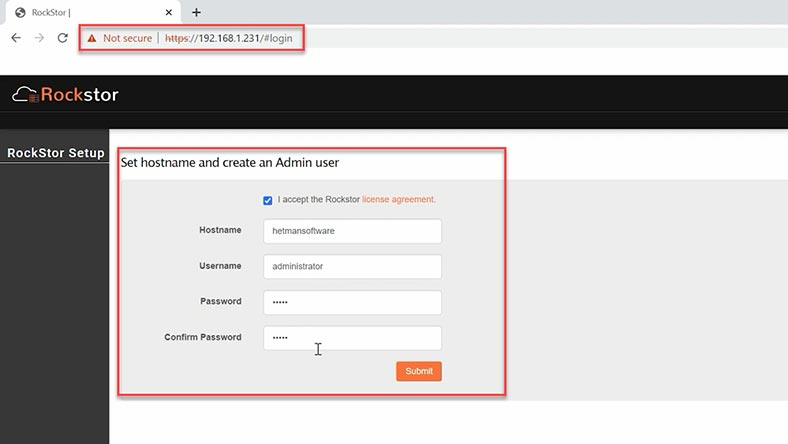
Now you can create a storage system, add a shared folder and configure network access.
2. How to create a RAID on Rockstor NAS
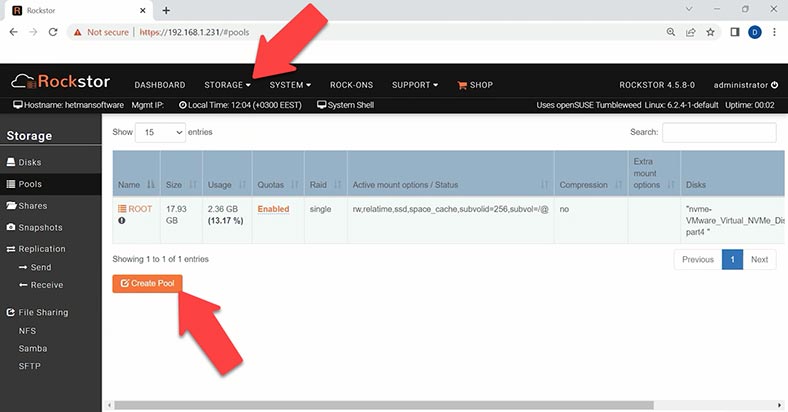
For starters, let’s explore how to build a RAID system on this specific device and add a shared folder. For illustration, I’ll show you how to combine three hard disks into a RAID 5 system. Open the tab Storage – Pools and click Create Pool.
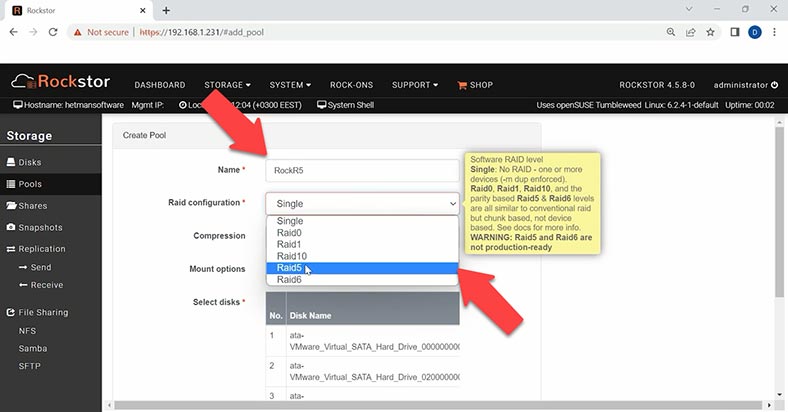
In the settings window, assign a name to it and choose the RAID level. If necessary, choose the compression level and mount point, but I will leave them as they are.
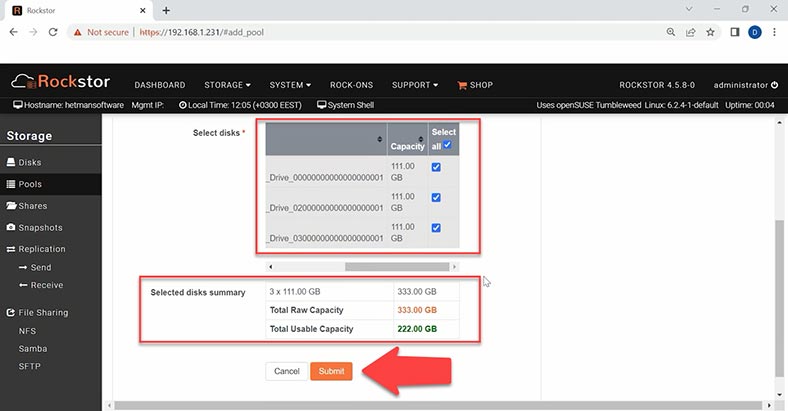
Now select the disks to use in your future array and click Submit below. As a result, you will get a new pool.
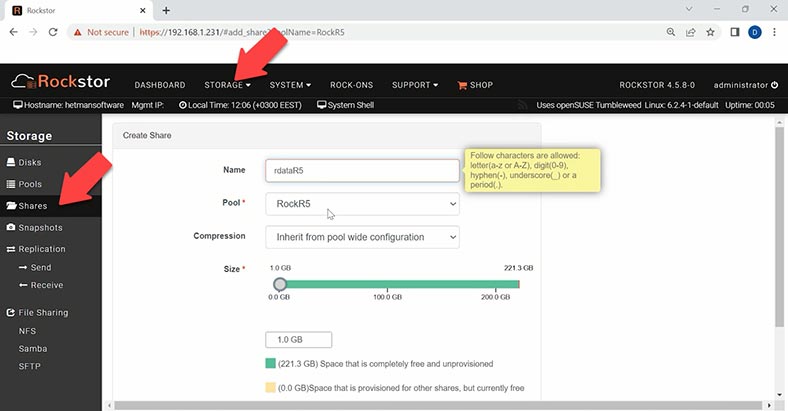
Add a shared folder: in the Shares section, click on Create Share. Give it a name and set other properties.
3. How to recover Rockstor NAS operating system
If your Rockstor NAS operating system won’t boot, you can reinstall it, and then upload the previously existing configuration. With this method, you can restore such configuration if the operating system was installed on a separate disk which was not included into the disk array.
For recovery, you will need the same bootable USB drive again. When booting, choose the last item Failsafe – Install Rockstor.
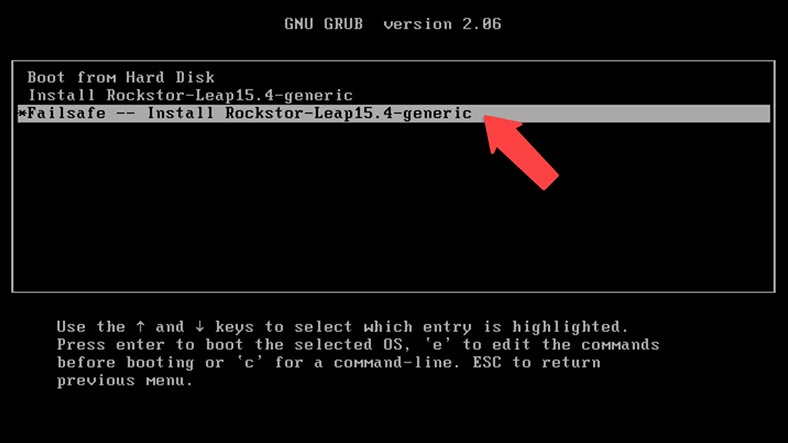
This installation is very similar to the previous one, but you should be careful to choose the right disk where the previous operating system was installed. If you select the wrong disk, the RAID configuration can be removed. After the operating system is installed and boots for the first time, access the web interface and open Storage – Disks. Next to the disks which were included into the RAID, click the import button – it says click to import data.
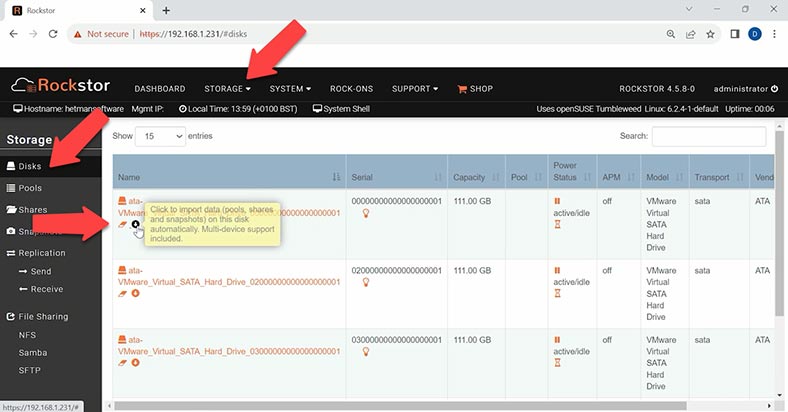
This way, the operating system will automatically import the old configuration which remains on the disks, including pools and snapshots.

After the import, we can’t find the folder containing our files. Most likely, we won’t be able to restore them with this method. If you have a recent snapshot, you can try and use it to recover data.
4. How to recover data from a RAID on Rockstor NAS
If you have accidentally deleted files or your Rockstor NAS device is out of order and the previous method failed to recover the lost files, a specialized data recovery tool for RAID systems will help you, and it’s Hetman RAID Recovery.
This utility lets you recover deleted or damaged data as well as restore access to data on crashed disk arrays. It supports most popular file systems and RAID types. This tool will help you recover data after a device breakdown, accidental removal, formatting, misconfiguration or NAS firmware issues.
If you lose access to data stored on a network-attached device as a result of a hardware error, a controller failure or other hardware issues, the data on the disks remains intact and can be handled with specialized data recovery tools.
To start the recovery process, take the drives out of the storage device and connect them directly to the motherboard of a Windows computer.
In Rockstor NAS, the RAID is built on btrfs file system. The program recognizes the array as a group of individual disks, so if you analyze one of them, you’ll be able to see your files.
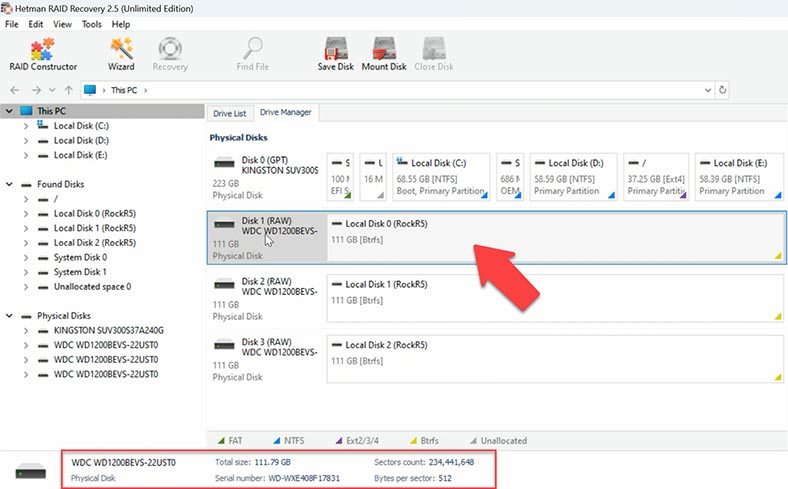
The matter is that when a RAID 5 is created on btrfs file system in Rockstor NAS, the operating system uses a mixed RAID technology that allows combining various RAID levels to ensure maximum effectiveness and flexibility.
This is why the recovery tool can’t identify a specific RAID level for this array. To start searching for files, right-click on any of the disks in the array and choose Open. After that, select the scan type – Fast scan or Full analysis.
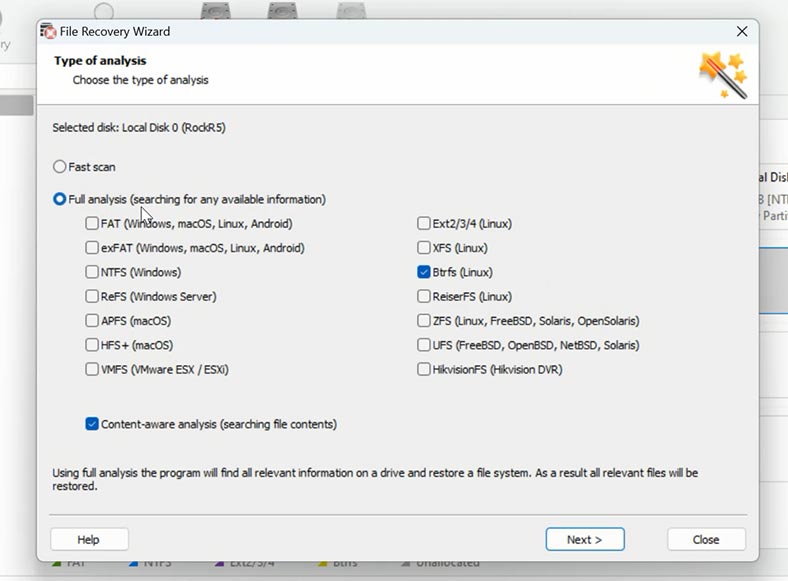
Run a fast scan first – it will take less time. If the program can’t find the missing files after the Fast scan, then go for Full analysis. To do it, go back to the main window, right-click on the volume and choose – Analyze again – Full analysis – specify the file system and click Next.
Open the folder where your files used to be, select the files you want to restore, and click the Recovery button.
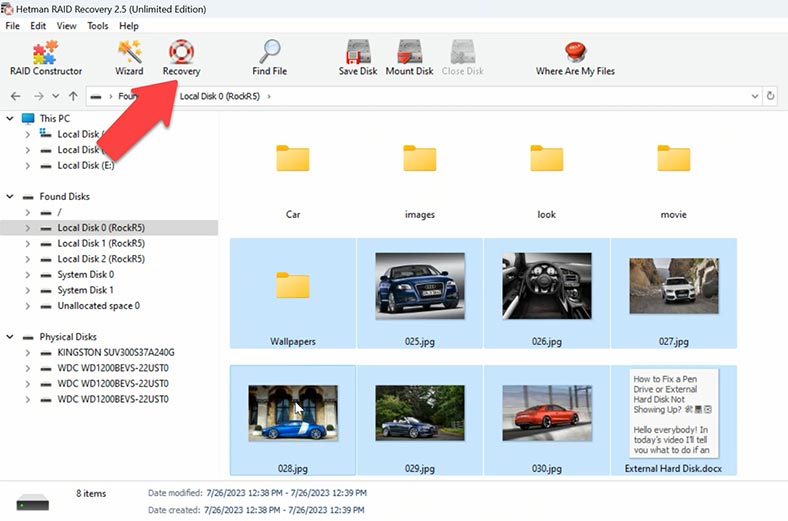
Specify where to save the data (choose the disk and folder), and click Recovery again. When the recovery process is complete, you’ll see all the files in the specified directory.
5. Pros and Cons of Rockstor NAS Operating System
Pros:
- Btrfs Filesystem: Rockstor utilizes the Btrfs filesystem, known for its robustness and extensive feature set. Btrfs offers features like data checksumming, snapshotting, and RAID support, making it a reliable choice for data storage and protection.
- Community Support: Rockstor has an active and supportive community of users and developers who contribute to its development and provide assistance to fellow users. The community-driven nature of Rockstor fosters collaboration and knowledge sharing.
- Rock-ons: Rock-ons are pre-packaged applications and services that can be easily installed and managed via the Rockstor web interface. This feature allows users to extend the functionality of their NAS with various applications for backup, media streaming, and more.
- Secure: Rockstor emphasizes security and provides features to ensure the safety of users’ data. With support for RAID configurations like RAID5 and RAID6, as well as Btrfs features like data checksumming, Rockstor helps mitigate the risk of data loss due to hardware failure or corruption.
- Rockstor Documentation: Rockstor provides comprehensive documentation to guide users through setup, configuration, and troubleshooting. The documentation covers various topics, including installation, storage management, and Rock-on installation, making it easier for users to get started and navigate the system.
Cons:
- Dependence on Btrfs: Rockstor’s reliance on the Btrfs filesystem means that users must familiarize themselves with Btrfs-specific concepts and commands. This dependency may pose a learning curve for users who are accustomed to traditional filesystems like ext4.
- Update Testing: Updates to Rockstor may take time to undergo thorough testing before being released to the production environment. While this ensures stability and reliability, it may result in delays in receiving the latest features or bug fixes.
- Data Loss Risk: Despite its robust features, there is still a risk of data loss due to hardware failure, software bugs, or user error. Users should implement backup strategies and regularly copy critical data to external storage or offsite locations to mitigate this risk.
- Limited RAID Options: While Rockstor supports RAID configurations like RAID5 and RAID6, it may not offer the same level of flexibility as other NAS operating systems that support a wider range of RAID levels. Users with specific RAID requirements may find the options limited.
- Filesystem Overwrite Risk: Users must exercise caution when dealing with filesystem operations, as actions like snapshot deletion or volume resizing can overwrite data if not done correctly. Rockstor’s web interface aims to assist users in performing these tasks safely, but user error remains a risk.
Overall, Rockstor offers a secure and feature-rich NAS operating system with robust community support and comprehensive documentation. However, users should be aware of its dependencies, update testing process, and potential risks related to data loss and filesystem operations.
6. Conclusion
It is important to realize that data recovery from a RAID based on Rockstor NAS can take quite a lot of time and considerable effort. Be prepared for the data recovery process to turn out long and complicated. In some cases, if the array suffered heavy damage, data recovery may become impossible.
But still, with the proper tools at hand and a bit of patience, you can try and recover the lost files successfully. When you start the recovery process, remember about the importance of preserving integrity of original disks in order to reduce the risks of inflicting extra damage on your data.
| Program | Description | Main Features | Cost |
|---|---|---|---|
| R-Studio | A powerful tool for data recovery from various types of RAID arrays, including damaged or broken ones. | Data recovery, file system recovery, support for multiple file systems. | Commercial, with a trial version |
| UFS Explorer | A popular data recovery program specializing in working with RAID arrays and NAS. | RAID configuration recovery, data recovery from NAS, support for various RAID types. | Commercial, with a trial version |
| ReclaiMe | An easy-to-use data recovery tool aimed at users without technical experience. | Automatic detection of RAID parameters, data recovery from various RAID types. | Commercial, with a trial version |
| Hetman RAID Recovery | A powerful program for recovering data from RAID arrays, supporting various RAID configurations. | Automatic detection of RAID parameters, data recovery from RAID 0, RAID 1, RAID 5, RAID 10, support for NAS disk arrays. | Commercial, with a trial version |


