D-Link DNS-343 Data Recovery Unleashed: In-Depth Guide
Need to recover data from a D-Link DNS-343 NAS RAID? Our comprehensive guide has got you covered! Learn step-by-step instructions and expert tips for successfully salvaging your data from the DNS-343 RAID system. Say goodbye to data loss worries and hello to recovered files!
- How to create a RAID array on a D-Link NAS device
- How to create a shared folder
- NAS Data Recovery D-link DNS-343
- Questions and answers
- Comments
These days, D-Link routers and modems are well-known all over the world, but this company also produces home and office storage systems such as network-attached storage (or NAS for short).
Most of the time, these devices are fully compliant with industry standards and do not differ much from similar products by other manufacturers – and to the same extent, they are also affected by risks of data loss due to hardware failures or errors.
Regardless of the actual manufacturer name, all NAS devices are vulnerable to damage or failure, just as ordinary hard disks used in desktop computers and laptops. Unfortunately, this is what happens, sooner or later, to any hard disk actively used on a daily basis.
| Reason | Description |
|---|---|
| Hard Drive Wear | Constant use of the NAS leads to gradual wear of the hard drives, which may cause their failure. |
| Overheating | Insufficient ventilation or high ambient temperature can lead to the overheating of device components. |
| Power Issues | Voltage fluctuations or sudden power outages can damage NAS hardware components. |
| Software Errors | Firmware or software failures in the NAS can cause instability and data access loss. |
| RAID Array Failures | Failure of one or more disks in a RAID array can result in data loss or device malfunction. |
| Mechanical Damage | Physical shocks or damage may cause the failure of NAS components like boards or disks. |
| Malware Attacks | Cybercriminals may exploit NAS vulnerabilities for attacks, leading to data loss or device blockage. |
| Insufficient Maintenance | Irregular maintenance, such as dust cleaning and software updates, can shorten the NAS lifespan. |

🔬How to Recover Data from a RAID System Based on D-Link DNS-343 NAS🔬
Just like any other NAS, D-Link devices let you use a number of volumes, unite several disks into one, and manage network access to the storage while providing sufficient reliability and security for your data.
Although a network-attached storage unites individual hard disks into RAID arrays which are more reliable in terms of keeping your data for a long time, it doesn’t completely exclude the risk of data loss.
Attempts to restore data from NAS devices with the help of various data recovery tools are not always successful. Some tools can only recover a part of the data, while others may even damage the information still remaining on the hard disk. To avoid this misfortune, you should be very careful in selecting the proper software for the job.
| Name | Features |
|---|---|
| Hetman RAID Recovery | Supports all RAID levels, recovery of damaged array configurations, ability to work with NAS devices from various manufacturers. |
| UFS Explorer | Powerful tool for RAID recovery, supports a wide range of file systems, automatic configuration recognition. |
| ReclaiMe | Easy to use, specializes in RAID array recovery, recovery without complex settings. |
| R-Studio | Supports advanced RAID recovery, ability to analyze and recover data even from heavily damaged arrays. |
| Wondershare Recoverit | User-friendly interface, NAS recovery support over the network, optimized for home users. |
| Disk Drill | Intuitive interface, data recovery from various RAID types and NAS devices. |
How to create a RAID array on a D-Link NAS device
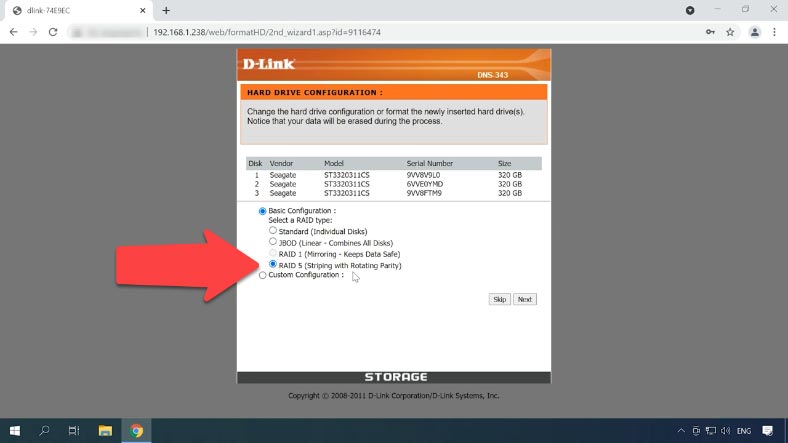
For starters, let’s see how you can build a RAID system on a D-Link NAS device. When the device is started for the first time, you’ll be suggested to configure it. One of the stages of this process involves building an array with the connected hard disks.
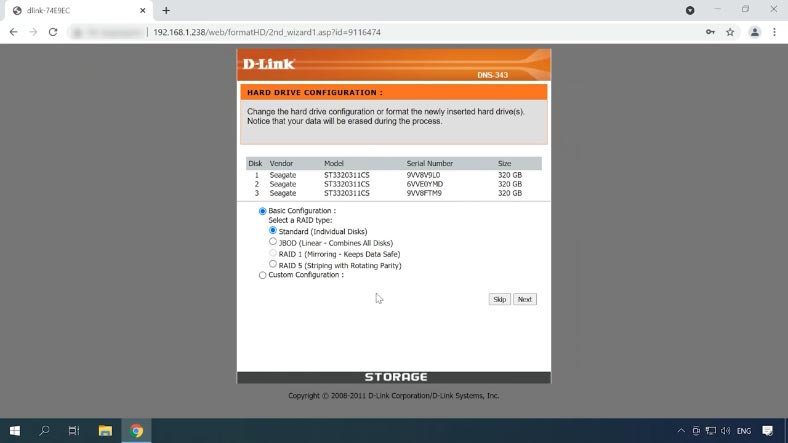
To create a RAID system, select the RAID type, in my case, this is RAID 5 made up of three disks, and click Next.
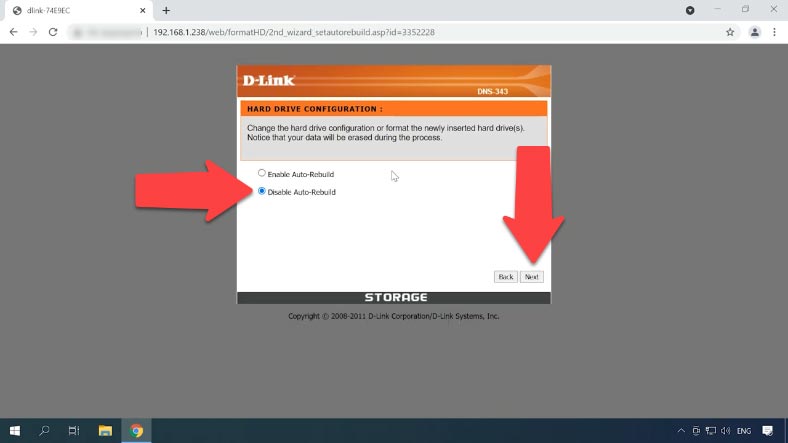
In the next window, you are suggested to enable Auto-Rebuild – click Next to continue.
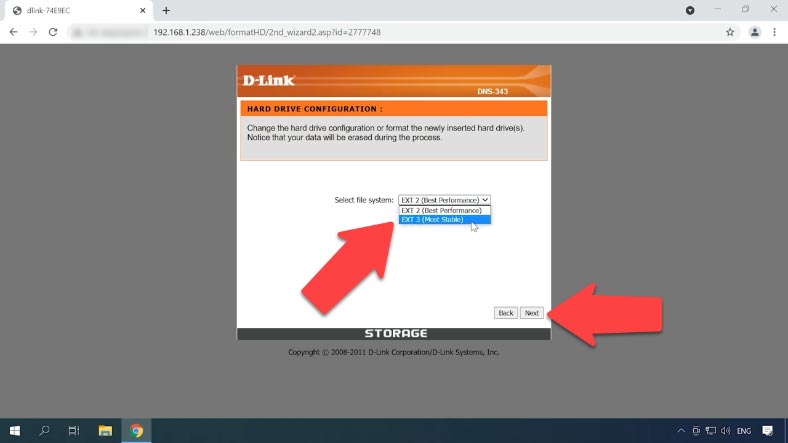
Now it’s time to chose a file system: you can only choose between EXT2 and EXT3. Go for the most stable option, EXT3, and click Next again.
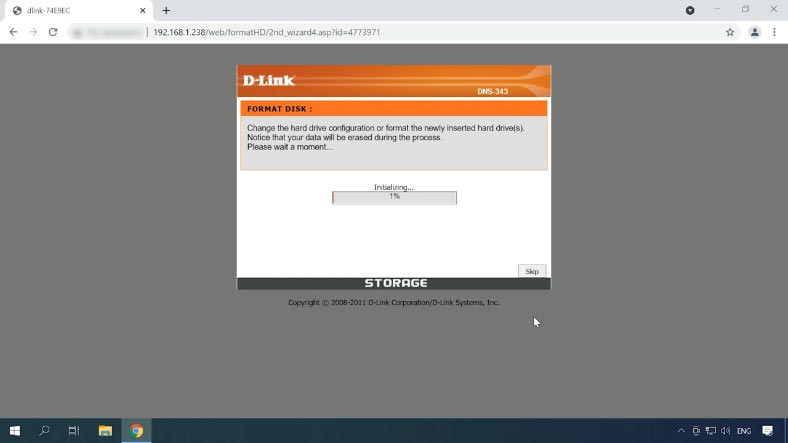
After that, the process of disk initialization and formatting begins. If there is any important information stored on those disks, don’t forget to back it up, as it will be very difficult to recover after formatting.
When the volume is formatted, you’ll be suggested to restart the device. That’s all, the RAID system is created. To change some settings, choose a different the RAID level, set a different size or change it in any other way, click on the reconfiguration button.
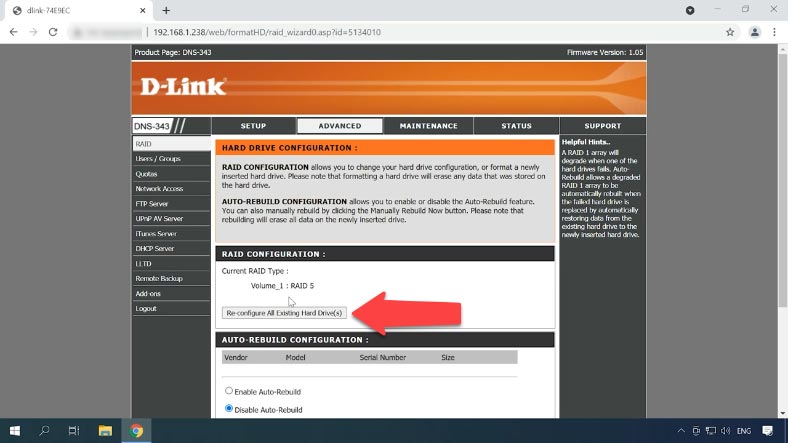
To change the RAID level, select it from this list and change the settings just as you did before. If you want to change its volume (size), go for Custom Configuration, choose a RAID type, enable or disable Auto-Rebuild, select a file system, and set the array capacity, then click Next.

Wait until initialization is complete. When this process is over, the device will be ready to use.
How to create a shared folder
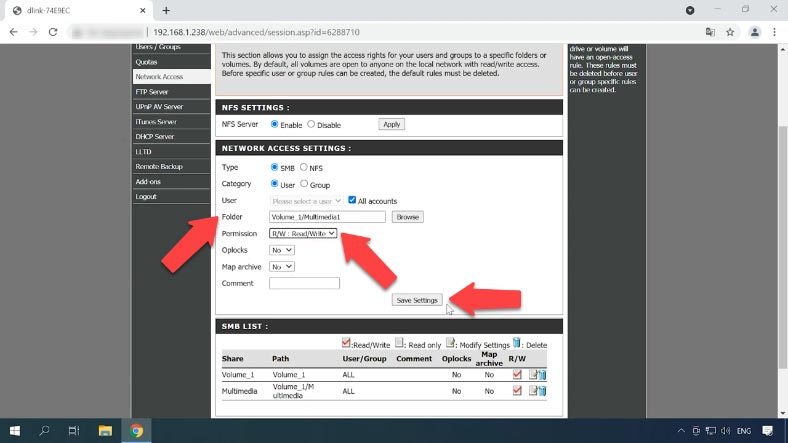
Now you can add a new shared folder and configure network access. To create a shared resource, open the tab Advanced – Network Access.
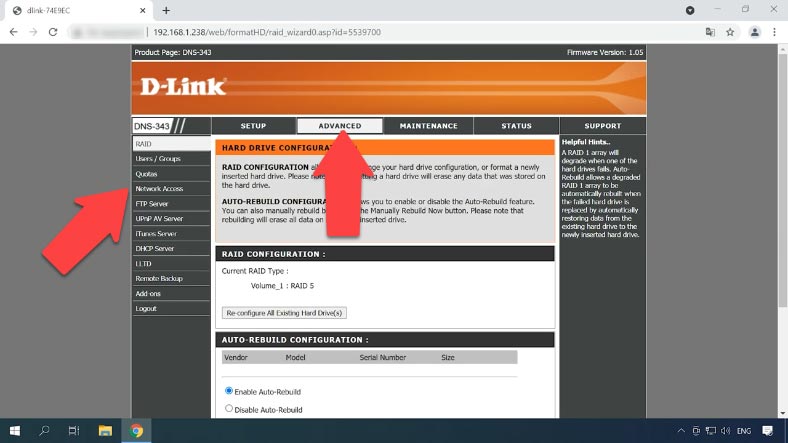
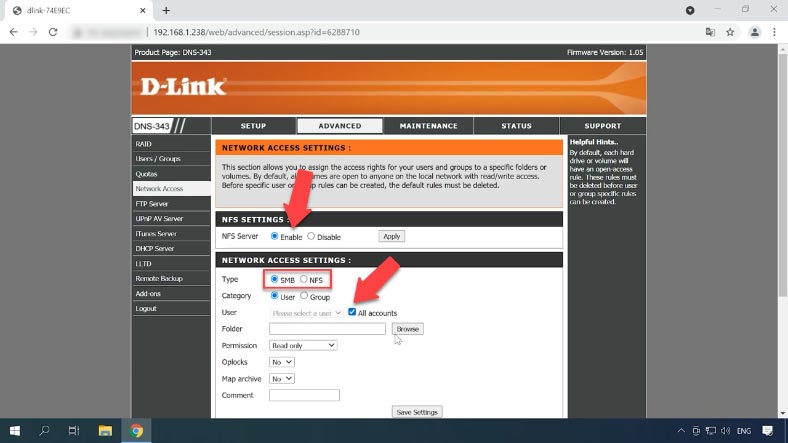
Select network access type – SMMB or NFS, and choose users for this directory – you can even choose all accounts.
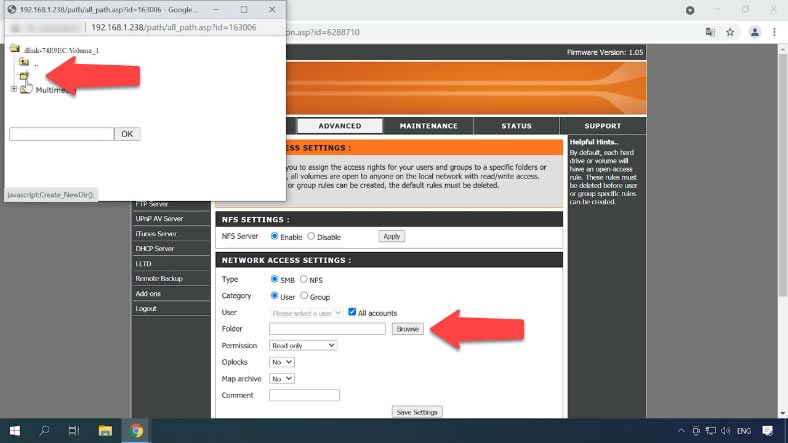
Then click Browse, go to the directory where you want to create a new folder, click to create a new one, give a name – and click OK.
The last step is to add read and write permissions and save the settings to make this folder available on the network. Now connect to it by FTP and write the data.
NAS Data Recovery D-link DNS-343
Method 1. How to recover data from a RAID system based on D-link DNS-343 NAS
There are so many things that may cause loss of data: human errors, formatting or overwriting information, overheating, power failures, hardware and software errors, mechanical issues, and even if one hard disk fails, it puts extra pressure on other disks, so if you overlook to replace a faulty disk in time, it may cause some data to disappear.
If you can’t access the data stored inside your NAS, you can try and extract the files with the help of specialized data recovery software designed with disk arrays in mind – Hetman RAID Recovery.
Most NAS devices format their hard disks for a Linux-family file system, so when such disk arrays are connected to a Windows computer directly, you can’t read their contents without using third-party software. All proprietary RAID management systems used for network-attached storage are based on two Linux RAID technologies, mdadm and LVM. However, Hetman RAID Recovery supports both of them, and in most cases it can rebuild such RAID arrays automatically.
This is a comprehensive solution for NAS data recovery to help you restore your files in a number of different scenarios. This program supports most popular file systems and RAID types.
Take the disks out of the NAS device and connect them to a Windows computer. When the computer to which you have connected the disks has booted its operating system and it asks you to initialize or format them, don’t do that, because it will make recovery a lot more complicated.
Our utility features an advanced mechanism of automatic scanning designed to identify and recover NAS data in various scenarios of data loss.
The program will automatically read the necessary information from the disks which used to make up the damaged RAID, and then rebuild it. The RAID will be displayed in the Drive Manager, and its brief information will be shown at the bottom of the window. Check if the program has identified it correctly.
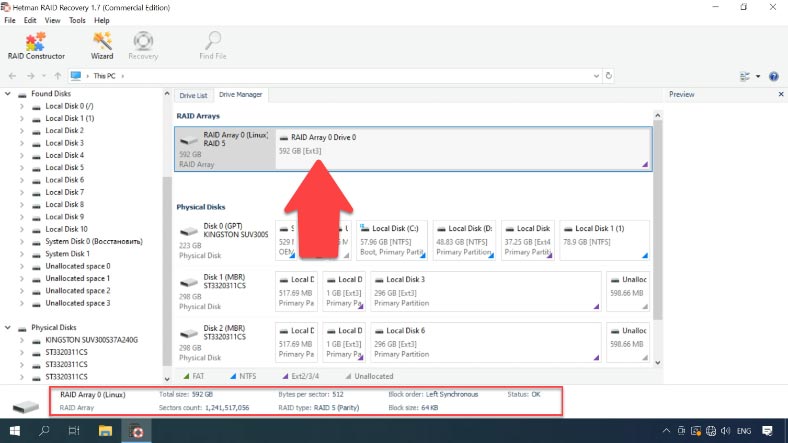
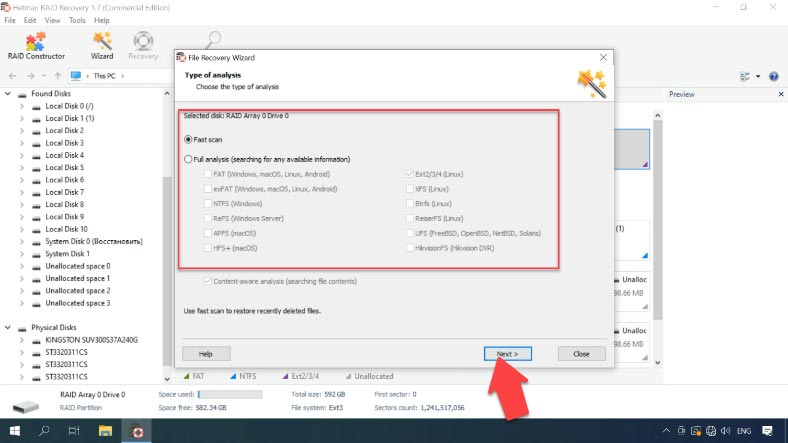
To recover files, right-click on the disk array and choose Open. Then select the scan type and start it.
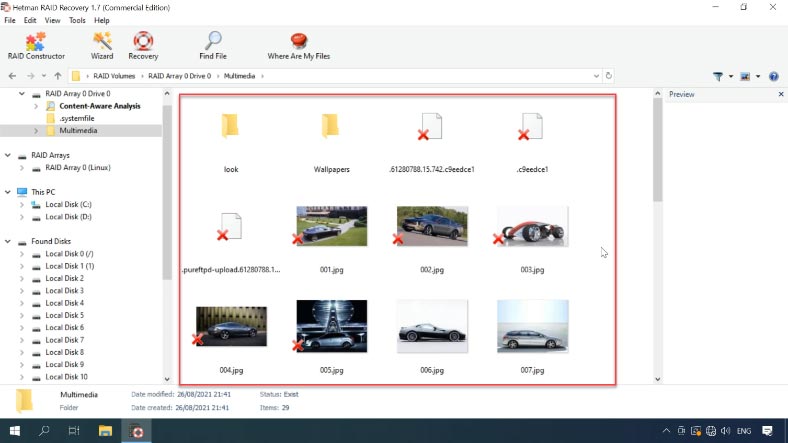
As you can see, in my case the program has easily rebuilt the damaged RAID and found all the files it used to store. It displays all the files, even those that have been deleted (they are marked with a red cross).
Select all the items you want to recover, click Recovery, select where you want to save them, and click Recovery again. When the entire process is over, you will find the recovered files in the folder you have chosen.
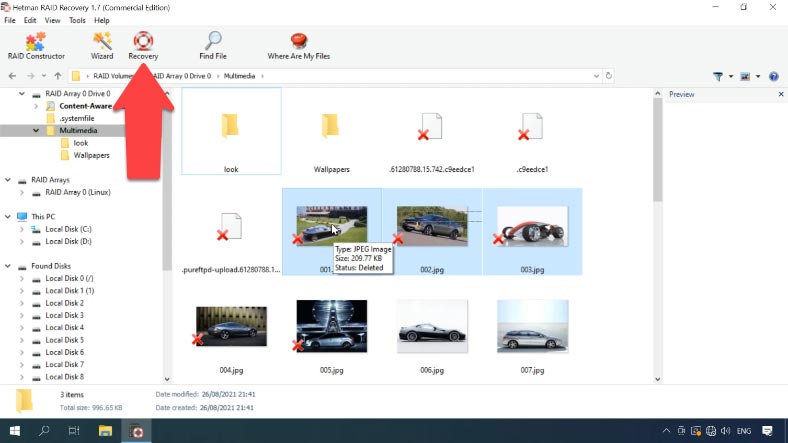
In the case with RAID 5, data can be recovered from a failed NAS device even if one disk is missing. Another similar scenario is when the computer where you connect the hard disks for recovery operations doesn’t have as many SATA ports or power supply connectors as you need for every disk, you may connect two disks instead of three.
Method 2. How to recover data manually, with the RAID Constructor
When a disk is damaged or service information is erased, the program may have difficulties with rebuilding the RAID automatically. However, you can do it manually with the RAID Constructor if you know the properties of this damaged array.
Open the Constructor, select “Manual mode”, and fill in all the information you know about this disk array: the RAID type, block order and size.
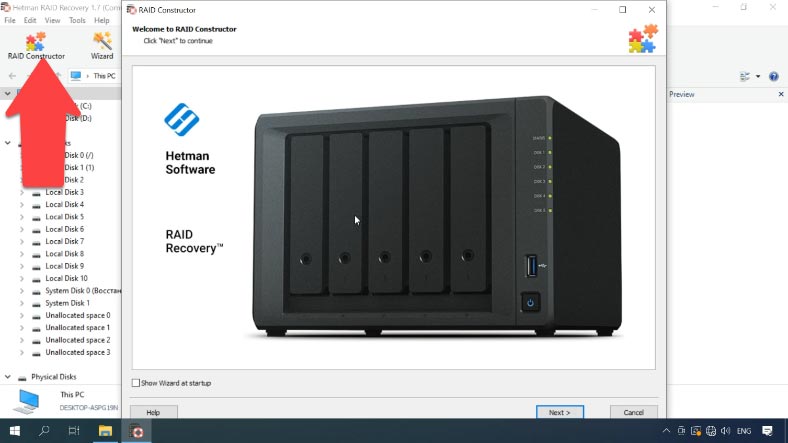
Add the disks it used to include, use the arrows to specify their order, and replace the missing disks with empty drives by clicking the “plus” button. Also, you can specify the offset that helps to locate the beginning of the disk. Sometimes, the program may have difficulty in identifying it automatically, so you’ll have to enter the offset value manually.
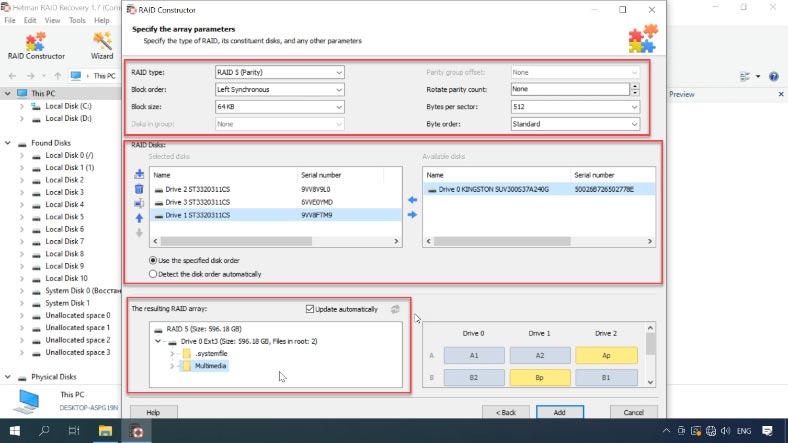
Usually, if you give correct properties, the newly built RAID system has at least one partition. Expand it to check for the folders that you need. If the folders you are looking for are displayed, then you have built this RAID properly.
When you specify all the properties you know, click “Add”, and the array will appear in the Drive Manager.
To have the data recovered, the last step is to scan the array, find the files you want to restore, select them, and recover to the folder you choose.


