Effective RAID Recovery Methods: Recovering Data from a Crashed RAID on a Faulty LaCie 5big Network 2 NAS
In this comprehensive guide, learn how to recover data from a crashed RAID on a faulty LaCie 5big Network 2 NAS. Whether you’re a system administrator or a user facing data loss due to a RAID failure, we’ll walk you through the entire recovery process step by step. From identifying the issue to implementing effective recovery strategies, this tutorial equips you with the knowledge and tools needed to successfully retrieve your valuable data and minimize downtime.
- 1. How to create a RAID
- 2. How to recover data from a crashed RAID 5 LaCie 5Big
- 3. How to recover data from ISCSI volume
- 4. How to build a RAID manually after the configuration was erased
- Questions and answers
- Comments
In today’s world, data is of utmost importance. Network-attached storage devices often hold photos, documents, videos, backups and other precious information. A network-attached storage provides a reliable way to store data thanks to the RAID technology.
RAID is a way to combine several physical hard disks into a single logical data storage. RAID gives you good reliability, high performance and the possibility to recover data if one or several disks fail.
LaCie 5big lets you create disk arrays of various levels (for example, RAID 0, RAID 1, RAID 5 и RAID 6) which ensured protection against data loss.
RAID systems have several advantages including enhanced reliability, fault tolerance and data recovery options. However, there may be various issues like hardware failures, configuration errors, or equipment breakdowns which may result in losing access to your files. If something like that happened, it is important to know how to restore access to your data and recover it.

How to Recover Data from a Crashed RAID on a Faulty LaCie 5big Network 2 NAS
1. How to create a RAID
For starters, let’s explore how to build a RAID system on this specific NAS device. It will give you some insight into the RAID technology and help to recover the data properly.
I have this LaCie device, model 5big Network2. During the initial setup, it automatically creates a RAID, and its properties depend on the number of hard disks you have connected.
To change the RAID level, open the LaCie web interface. Type the IP address of your device into your browser. To identify the IP address, you can use a special utility, LaCie Network Assistant.
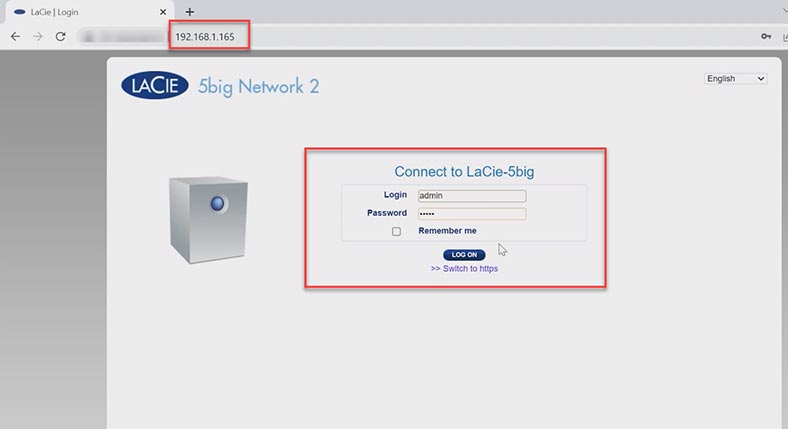
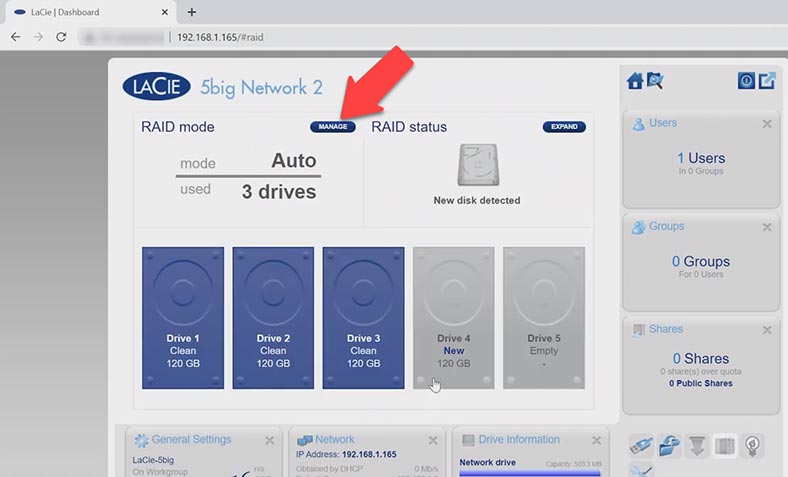
In the storage management window that opens, go to RAID Management. In this section, you will see the information on the current array status. To change the properties and rebuild the array, click on the Manage button.
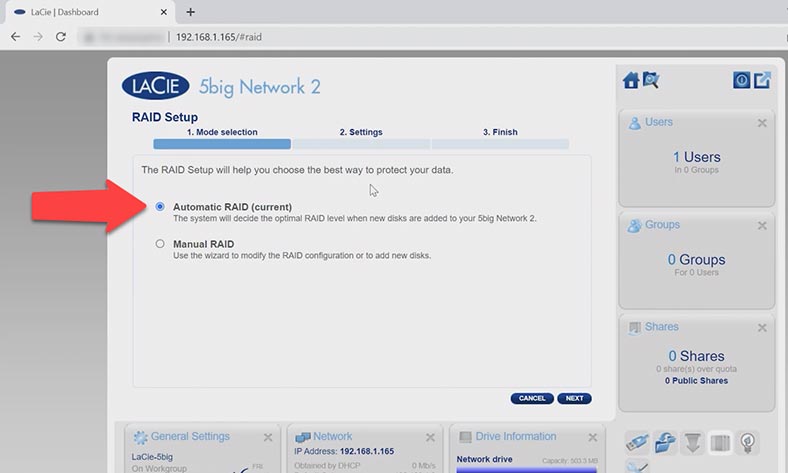
Select the build mode, Automatic or Manual, then click Next.
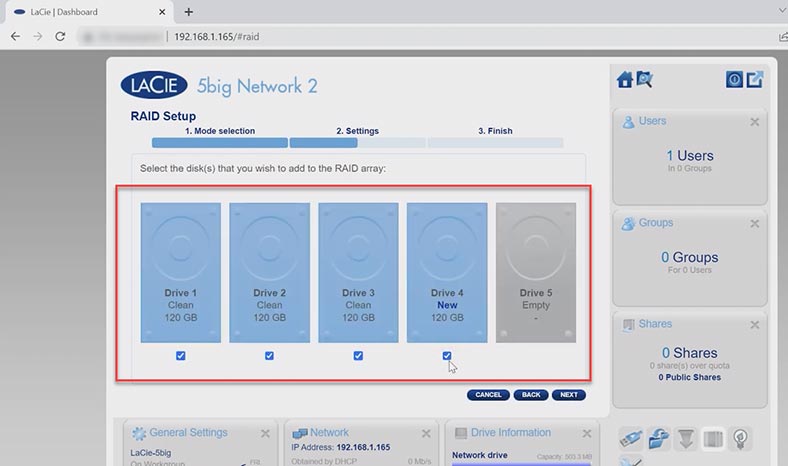
Select the hard disks for the future array and click Next again.
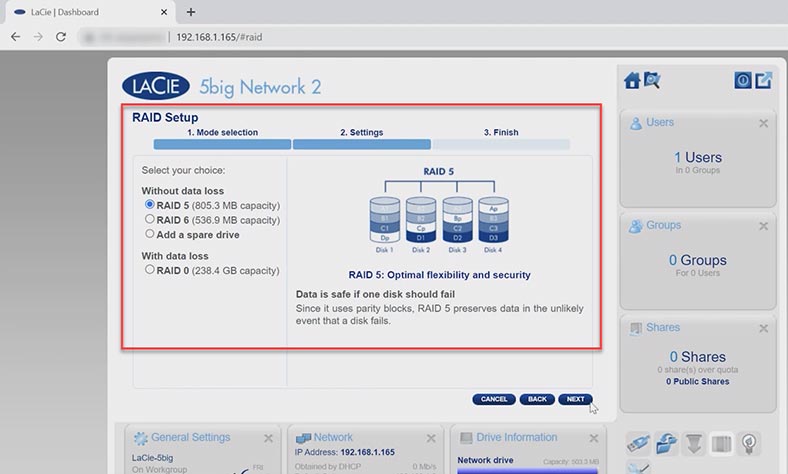
After that, choose the RAID level and click Next.
At this stage, check the array properties and click Finish to confirm them.
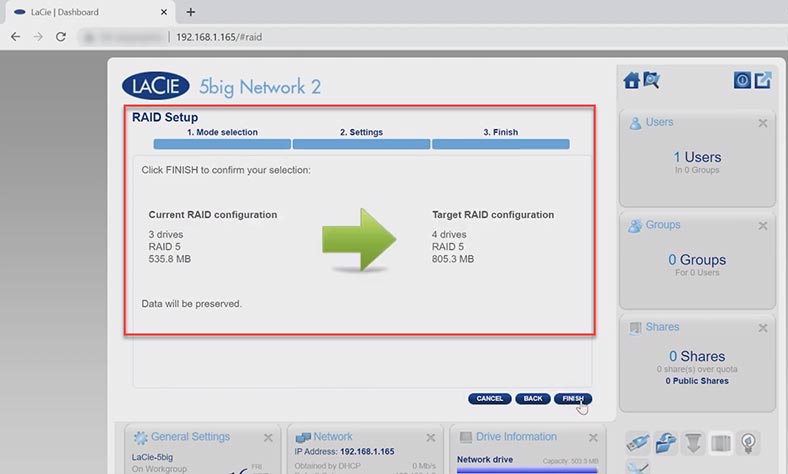
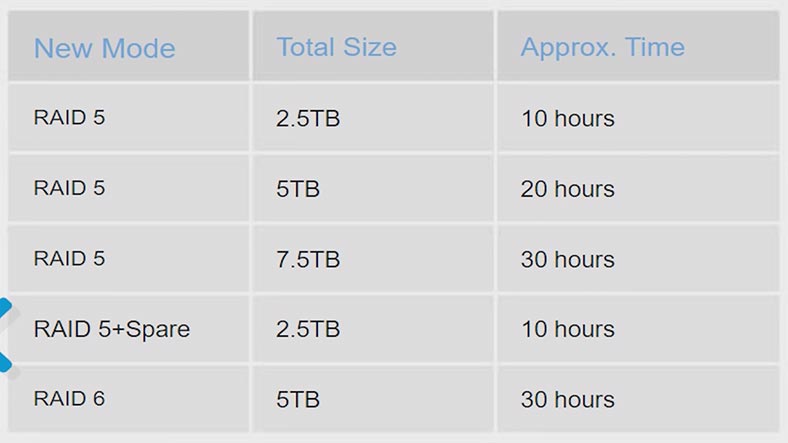
It starts the process of initialization, and depending on the total size of selected disk space, it can take from 10 hours and longer. Have a look at this table for more details.
2. How to recover data from a crashed RAID 5 LaCie 5Big
If you lose access to the network drive when the network-attached storage fails or other hardware breaks down, you’ll have to rebuild the crashed RAID and retrieve important data, and this is when you need a specialized data recovery tool – Hetman RAID Recovery.
Hetman RAID Recovery supports all popular file systems and RAID types, including the technology required to use a LaCie array. The utility will automatically rebuild the crashed array with the available hard disks, and you’ll be able to retrieve your files.
| Program | Platform | RAID Type | Features | Price | Trial Version | Special Features |
|---|---|---|---|---|---|---|
| Hetman RAID Recovery | Windows | RAID 0, 1, 5, 10, and others | Data recovery, RAID reconstruction, support for various file systems | Paid (depending on version) | Yes | Intuitive interface, support for a large number of RAID configurations |
| Stellar Data Recovery Technician | Windows, macOS | RAID 0, 1, 5, 6 | Data recovery, RAID reconstruction, support for various file systems | Paid (depending on version) | Yes | Support for recovery from virtual machines, mailbox recovery |
| ReclaiMe Free RAID Recovery | Windows | RAID 0, 1, 5, 10, JBOD | RAID reconstruction, support for various file systems | Free | No | Easy to use, support for many types of RAID |
| Runtime RAID Reconstructor | Windows | RAID 0, 5 | RAID reconstruction, support for various file systems | Paid (depending on version) | Yes | Fast RAID reconstruction, support for large data volumes |
| DiskInternals RAID Recovery | Windows | RAID 0, 1, 5, 6, 10 | Data recovery, RAID reconstruction | Paid (depending on version) | Yes | User-friendly interface, automatic RAID configuration recovery |
To start the recovery process, take the drives out of the storage device and connect them directly to the motherboard of a Windows computer.
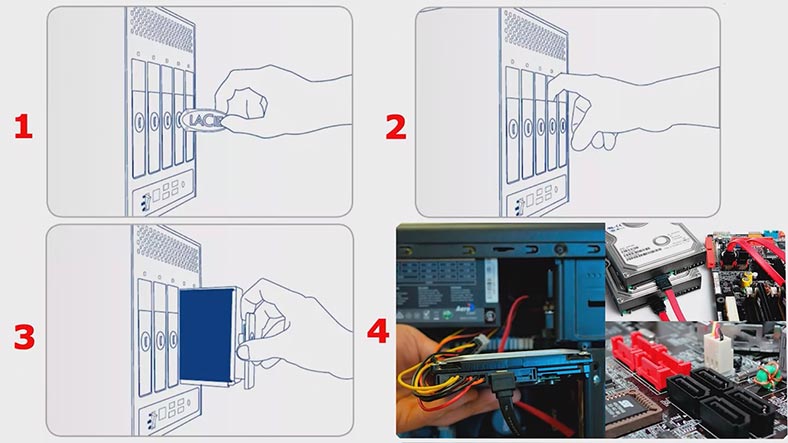
Bear in mind that before starting data recovery operations, you should prepare some free disk space with the capacity equal to the amount of data you’re planning to recover from your disk array.
If your motherboard has less SATA ports or power connectors than necessary, use additional adapters and expansion cards. Also, depending on the RAID level, you can exclude one or two hard disks from the array. For example, RAID 5 retains operability if one of its hard disks is missing.
When the hard disks are connected and the program starts, it will automatically scan the disks and rebuild the damaged RAID. You will see the array properties below.
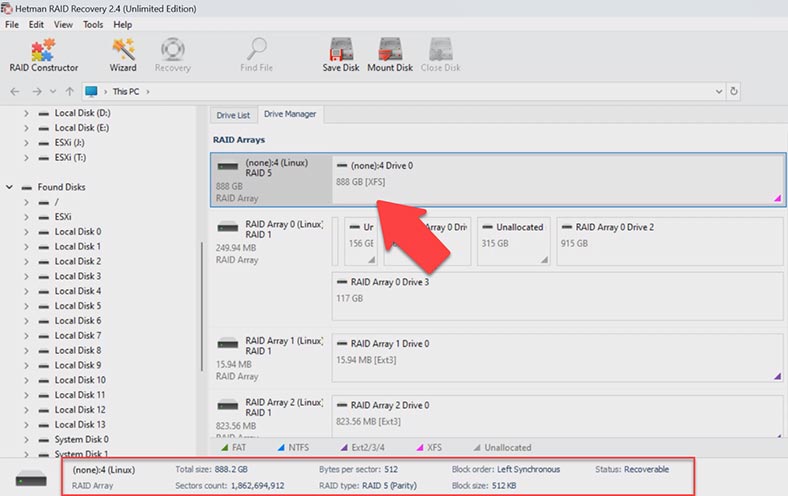
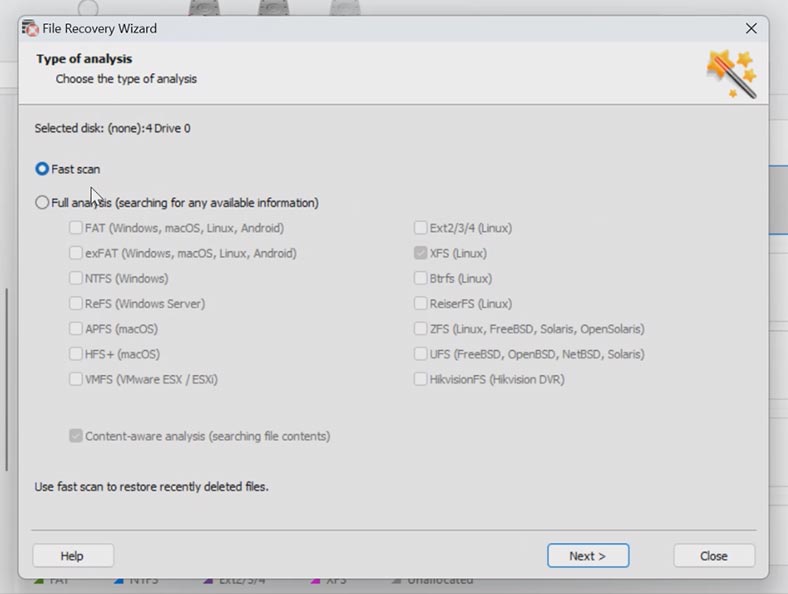
To search for lost files, right-click on the identified volume and choose Open. After that, choose the scan type – Fast scan or Full analysis. If the NAS is down, but the program manages to rebuild the RAID correctly, a Fast scan is enough.
When the scan is over, open the folder where the lost files were stored. This program retains the entire structure and file names, so it will be easy to find the required items, and you can use the preview window to see their contents. The previously removed files are marked with a red cross.
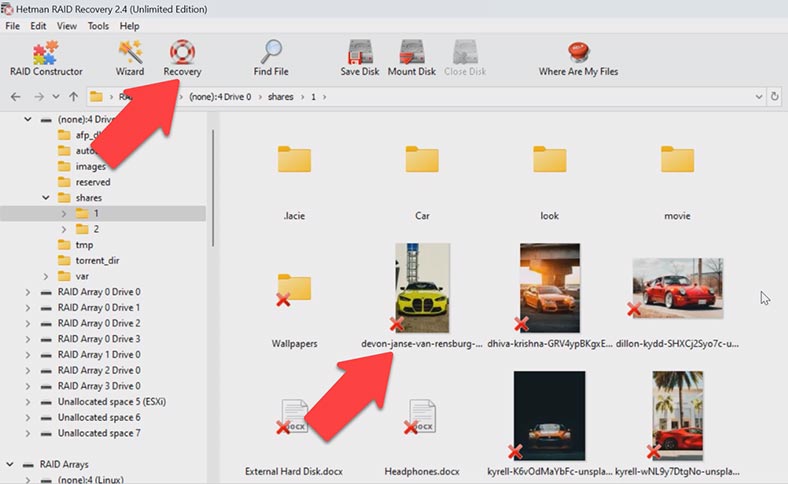
Select all the items you want to recover and click the Recovery button. Specify where to save the data (choose the disk and folder), click Recovery and Finish. You will find the recovered files in the folder you have chosen.
If the program can’t find the missing files after the Fast scan, then go for Full analysis. To do it, return to the main menu, right-click on the disk and choose “Analyze again” – Full analysis. Choose the file system type. You can uncheck the option for Content-Aware analysis, as it will make the process go faster. Later on, if the program fails to find the required files, run the scan again but this time with the content-aware option enabled.
3. How to recover data from ISCSI volume
In case of an iSCSI disk and a properly working NAS storage, you’ll be able to scan the disk right from the client system. Just start the program and scan the network drive, find the files which were accidentally deleted, and recover them.
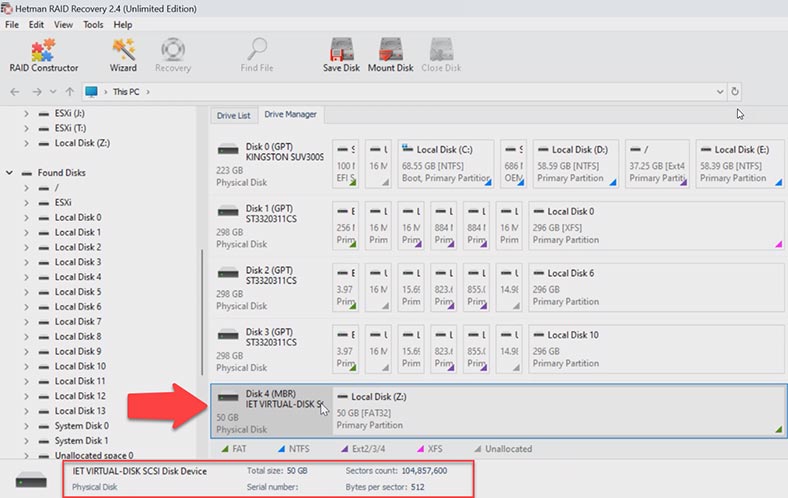
This method can help you if some files were removed from the storage by accident. In this case, you don’t need to take the disks out of the storage case. Set up an iSCSI connection and try scanning the drive from where the files were removed. We have explored how to configure such connection a bit earlier in this video.
4. How to build a RAID manually after the configuration was erased
In some situations, the program may fail to rebuild the RAID automatically. It can happen when the service information on the disks is erased, so the program cannot identify parameters of the crashed RAID. In such cases, the RAID Constructor with a manual build feature will help you.
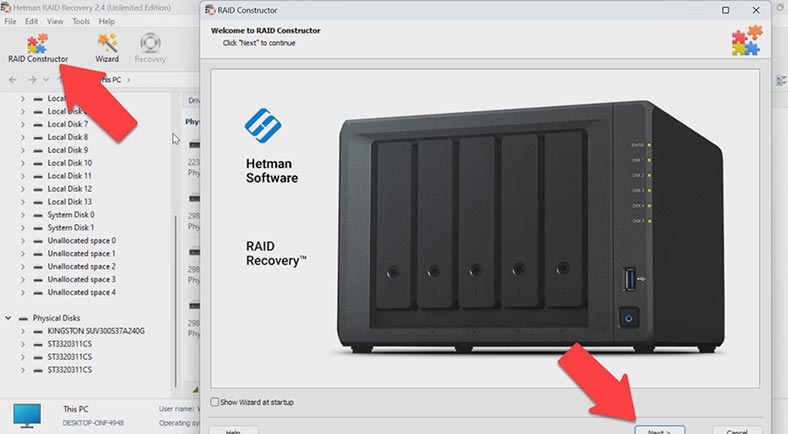
This tool will save the day when the disk beginning is erased, together with the information about the array parameters. This is what typically happens when disks are connected to another controller and the previous configuration is erased, when the RAID is rebuilt, or when disks are initialized. After initialization, data will be erased completely.
If you know the array parameters, start the Constructor, choose Manual Mode – Next. Specify the array type, block order and size. Add the disks it used to include, and replace the missing disks with empty drives by clicking the “plus” button.
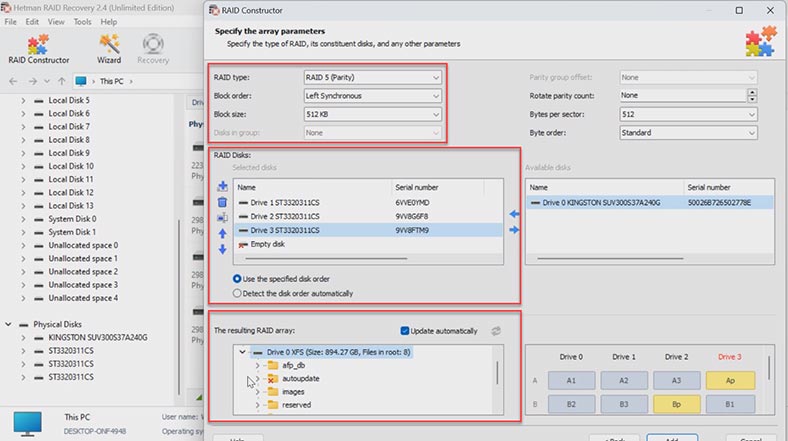
You may have to specify the offset which tells you where the beginning of the disk is located. One more thing to choose is the disk order.
When you specify all the properties you know, you will see a preview of your RAID. If all information is correct, you will see its folders here. Fill in all the properties, and click Add. After that, the RAID system will appear in the Drive Manager. Now start the scan, search for files, and recover the ones you need.
At the end of this tutorial, I’d like to remind you about the importance of backing up your files from RAID regularly. This simple step will help you avoid data loss and make the recovery process easier if any failures occur. Also, don’t forget that data recovery from RAID requires special attention since even one wrong action can result in a total data loss from all involved hard disks. If you’re not too confident, it’s always better to ask professionals for help.


