Recover Data from RAID 50: HP P410 Smart Array Controller
Need to recover data from RAID 50 based on an HP P410 Smart Array Controller? Our comprehensive guide has got you covered! Learn step-by-step instructions and expert tips for successfully salvaging your data from the P410 controller. Say goodbye to data loss worries and hello to recovered files!
- How to build RAID50 in the controller’s BIOS, and with a special utility
- How to recover data
- Conclusion
- Questions and answers
- Comments
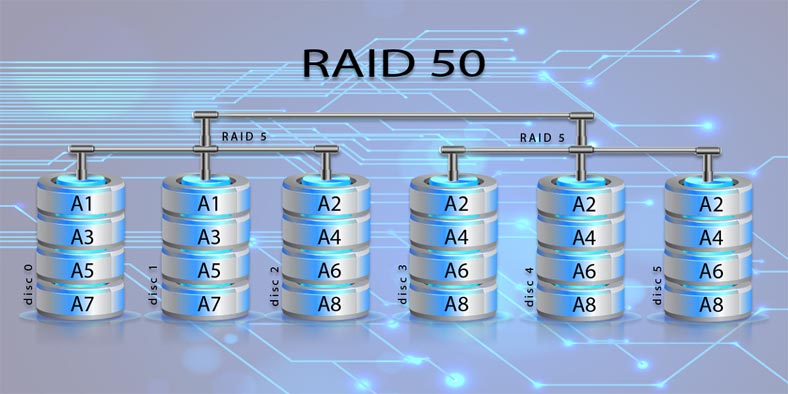
As a disk array type, RAID 5 is one of the most reliable data storage systems, but at the same time, its performance is not as high as we would like it to be. However, if you combine several disk arrays of such type, you get a RAID 50 system which offers very good performance figures, and is more effective in using disk space than an ordinary RAID 5 array.
| Characteristic | Value |
|---|---|
| Structure | RAID 0 + RAID 5 |
| Number of Disks | Minimum 6 (3 for RAID 5 + 3 for RAID 0) |
| Data Protection | Parity (RAID 5) |
| Performance | High (especially for reading) |
| Capacity Cost | 1/(N-1), where N is the number of disks in the RAID 5 group |
| Endurance | Can withstand the failure of one disk in each RAID 5 group |
| Recovery | Possible data recovery from parity |
| Write Speed | Average (due to parity calculation) |
| Read Speed | High |
| Usage | Ideal for critical systems with high reliability and performance requirements |

💿 How to Recover Data from RAID 50 Based on HP P410 Smart Array Controller 💿
In terms of performance, RAID50 is very close to RAID 10, although it is still less reliable. This disk array remains 100% operable even if it loses one drive in each group. In this article, you’ll find a step-by-step guide to creating such arrays, replacing faulty/damaged disks, and recovering accidentally deleted data.
How to build RAID50 in the controller’s BIOS, and with a special utility
To build a RAID 50 system you need at least six disks. The HP P410 controller lets you build a disk array with the help of BIOS options and a special utility.
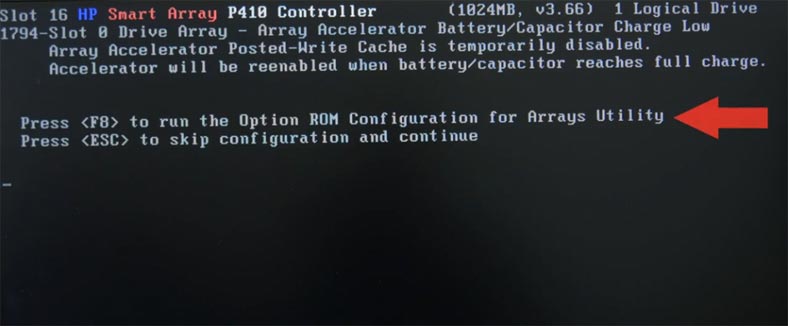
To access the controller’s BIOS while booting, hit the F8 button after device initialization.
If the hard disks are empty and they haven’t been part of other disk arrays, open the option “Create Logical Drive.” If these disks have been used before to build a RAID system, it should be removed because the controller may have issues with displaying them.
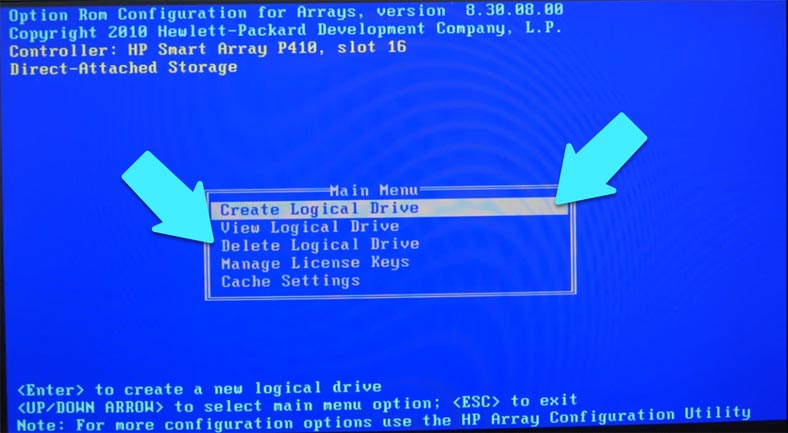
To do it, go down to find the option “Delete Logical Drive” and press Enter to open the option. Use the Up and Down keys to navigate the list of disks and select the ones you don’t need, then remove them by pressing F8 and F3 to confirm your decision. When you’re finished with the array configuration, press Enter.
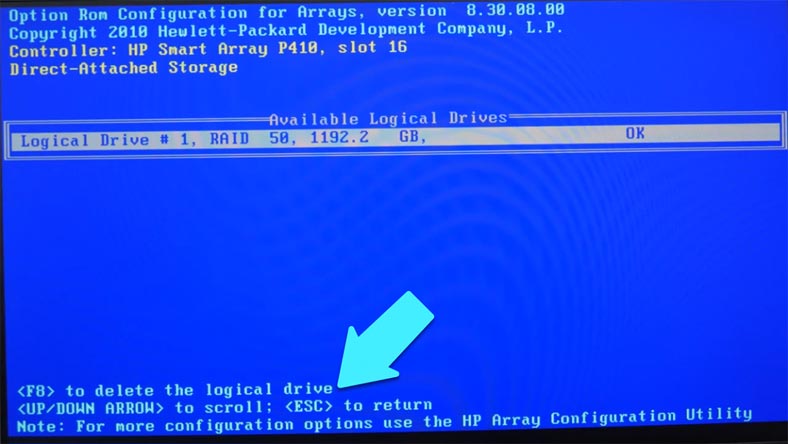
Now let’s move on to build the RAID 50 system. Jump to “Create Logical Drive,” use the Space key to select all disks that you would like to include into the array.
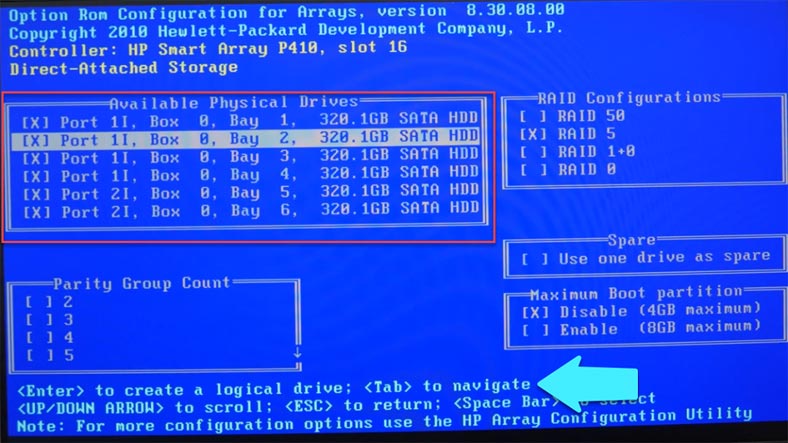
Press the Tab key to access the next part of the configuration process; check the required type, and select how many groups you want in your array. In my case, there will be two groups as I have only six hard disks. When all settings are ready, press Enter, and you’ll see all the information about the array, its size, and type.
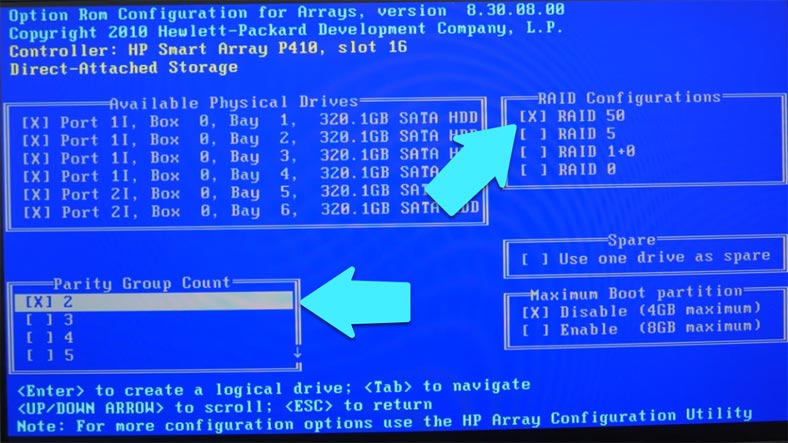
To confirm this configuration, press F8 and hit Enter to proceed. Open the option “View Logical Drive” to have the array information displayed. If everything is correct, press Esc to leave the settings menu and continue with booting.
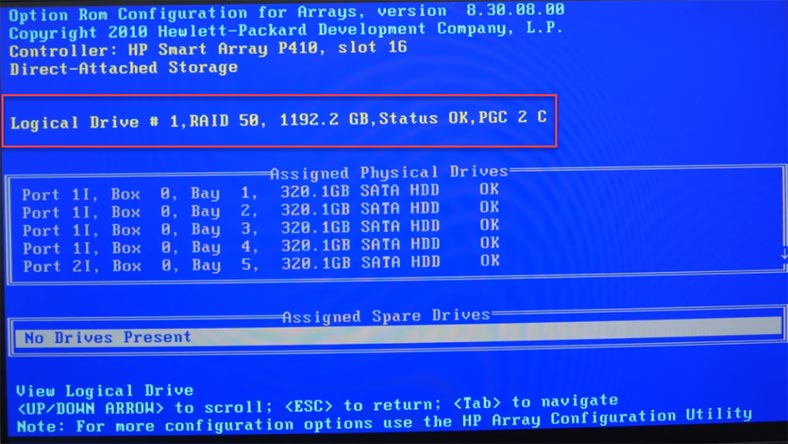
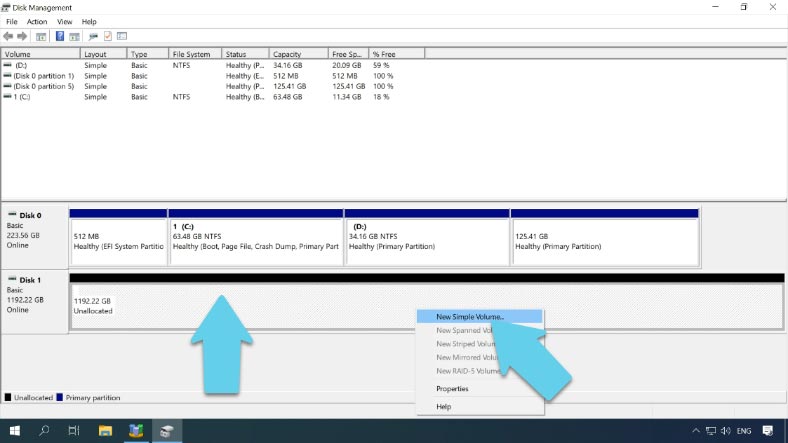
After that, you’ll have to open Disk Management and format the disk array, assigning a drive letter and choosing the desired file system.
Building an array with the help of HP Array Configuration Utility
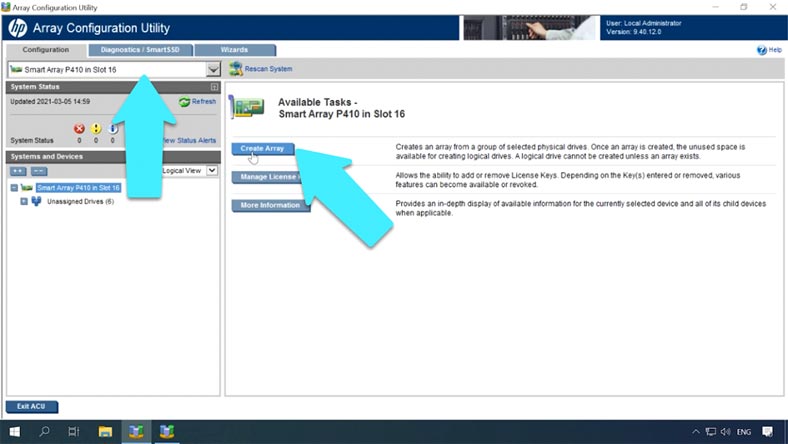
To build an array from the operating system which has booted and is already running, use HP Array Configuration Utility or HPE Smart Storage Administrator, which can be downloaded from the official website.
In the Configuration tab, select your controller and click “Create Array” in the right side of the window.
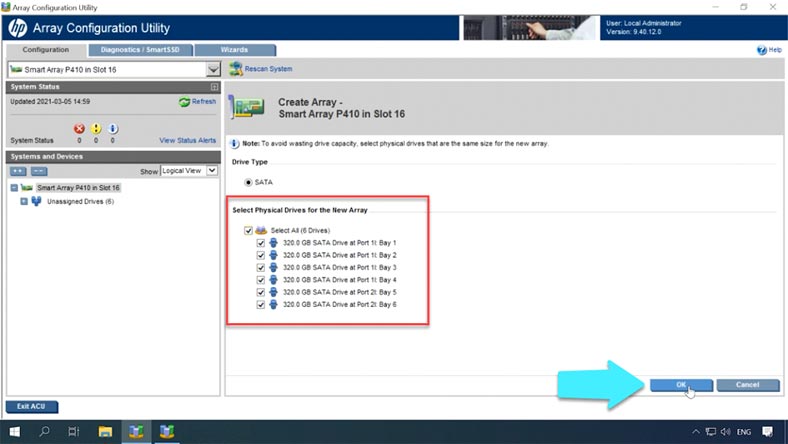
Select the disks that your future RAID is going to include, and click OK.
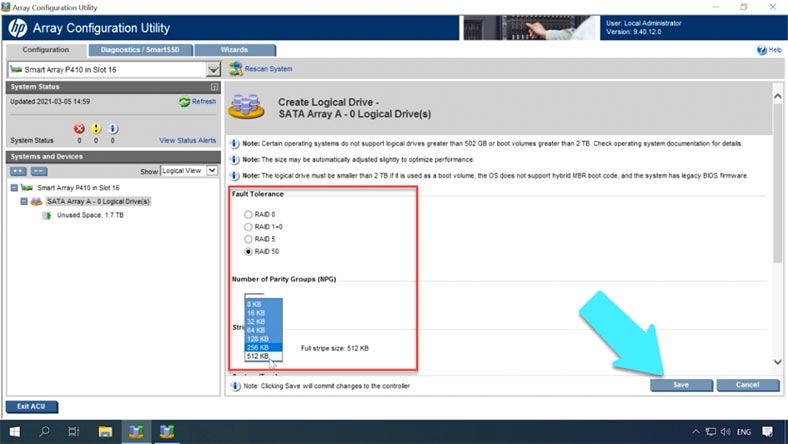
After that, click on “Create Logical Drive,” select the array type, number of groups, block size, set a specific disk size if necessary, enable caching, and finally click “Save” to confirm. Now that the array is built, the last step is to format it with the Disk Management utility.
How to replace a disk
To replace a faulty disk, just replace it with a healthy disk, and the rebuild process should start automatically. To find out which disk is out of order, use the utility to open the storage device tab and check the list of disks by their serial numbers to see which one is missing.
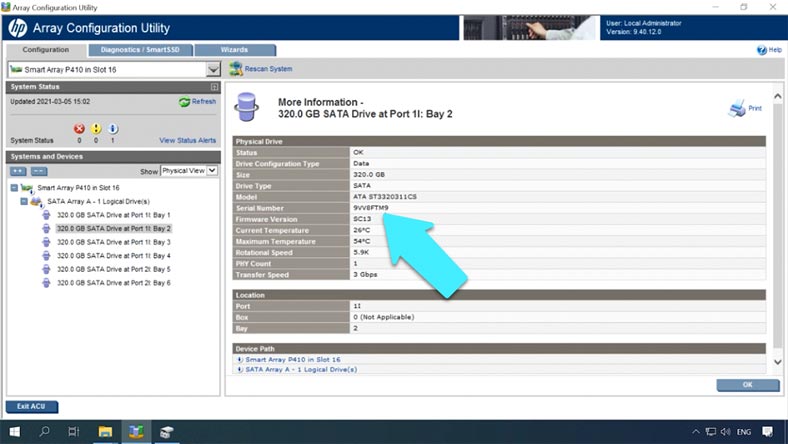
If you have an extra slot for another disk, you can insert the new disk there and assign it as a reserve (spare) one, without replacing the faulty drive; the controller will automatically find the bad disk and start the rebuild process with the new disk you added. A disk can be assigned to reserve in BIOS, in the section “Create Logical Drive.” Here, check it as a spare drive.
The rebuild process can be monitored in HPE Smart Storage Administrator.
How to recover data
If the controller stops working, you won’t be able to access the data in your storage without replacing the faulty component. If you cannot replace the controller or you have to wait until it is delivered, and you need the data right now, you should try a specialized tool, Hetman RAID Recovery. The program will read all the controller data still available on the disks and will rebuild the damaged RAID.
For that, connect all drives, which were included in the array, directly to the computer’s motherboard, boot the operating system and start the program.
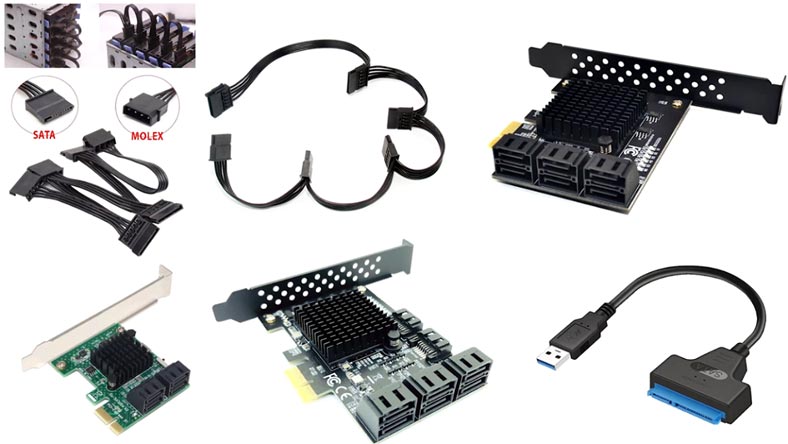
Before you start the recovery process, make sure you have a disk with the same or larger capacity than the amount of data you’re going to recover. While connecting hard disks, you may discover that you don’t have enough SATA ports and power connectors. This problem can be fixed with a variety of expansion cards and power adapters, and they are usually quite cheap.
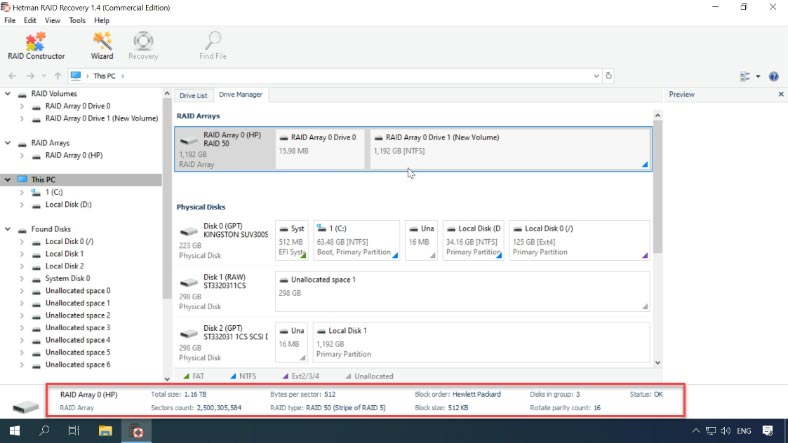
Hetman RAID Recovery managed to rebuild the RAID like a charm, and you can see all of its information displayed.
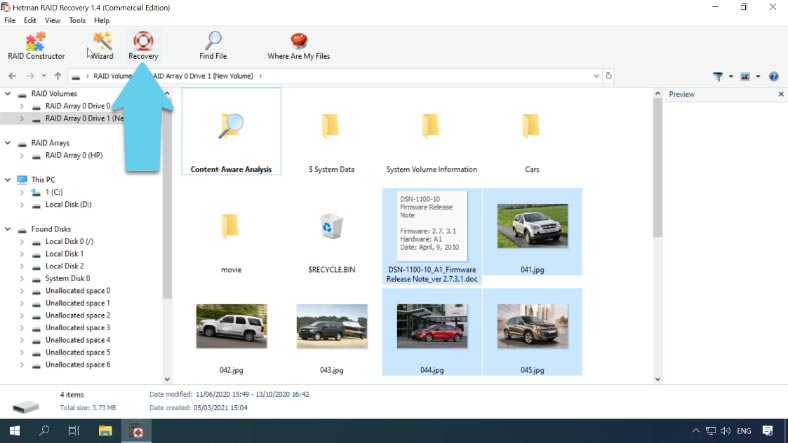
Right-click on the disk icon and start “Fast scan.” Select the files and folders you need to recover and click on “Recovery.” Give the path to save them and click “Recovery” again. When the process is over, all the files will be placed in the folder you have chosen.
If the “Fast scan” failed to help you and most files couldn’t be recovered, then run “Full analysis”.
Recovery with two disks missing, and how to build an array in RAID Constructor
If the program was unable to identify the array type automatically, your RAID can be rebuilt manually with the help of RAID Constructor. However, this requires you to remember all the information about your array.
Select “Manual mode” and click “Next,” then select the block order type, the block size and order, the number of disks in the group, select the disks in the array and specify their order; add empty disks instead of any disks that are shown as missing. .
When all the properties are given, click “Add.” After that, it will appear in the Drive Manager. Now the final step is to scan it and recover your data.
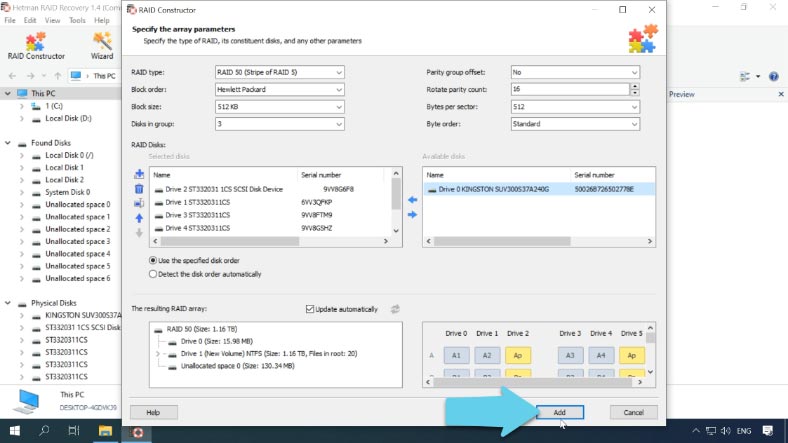
This RAID type remains 100% operable even if one drive in a group fails. That is, if two disks are out of order (one disk in each group), the whole array is still able to work. Our program can recover data even if two disks are missing, but if they were disks from one and the same group, some of the files will be damaged.
Conclusion
Important data can often be lost when the order of hard disks is changed, or when disks are connected to other computers in an attempt to recover data. In this case, you should be very careful with what the other computer’s operating system is doing to the disks, and never agree to initialize and format them. Formatting the boot drive or partition will certainly remove or damage the array structure. Before taking any action, make a backup copy of your drive.

💿 RAID60 Based on IBM ServeRAID M5016 or LSI 9265-8i Controller. Recovering Data from RAID60 💿


RAID 5 availability is the possibility to provide uninterrupted access to data in case of a disk failure. Let’s consider two situations:
- you are using a single disk + a backup copy, and the disk fails;
- you are using RAID 5, and one of its disks fails.
In the first case, the backup copy holds your data, but you can’t get it immediately. Before that, you need to recover a copy of the data from backup. With RAID 5, you can get access to your data all the time, although it will be slower now.