Recovering Data After Formatting: Essential Guide for Hard Disks, USB Drives, and Memory Cards
In this tutorial, we’ll show you how to recover data after formatting a hard disk, USB drive, or memory card. Whether you’ve accidentally formatted your storage device or intentionally erased data, we’ll guide you through the process of retrieving your valuable files with ease.
- How to recover data after formatting a hard disk
- How to recover data after formatting a flash drive or memory card
- Recovering data from an SSD
- Questions and answers
- Comments
When any of them is formatted, a part of the information which tells us how data is located on the disk gets destroyed. Nevertheless, in most cases it is quite possible to recover data after formatting. The chances for success depend on the file system type, the nature of data and the number of files, and it also matters what information and how much of it was written on the disk after it was formatted.
VERY IMPORTANT!!! You mustn’t write any data or perform other operations involving a freshly formatted disk, because it greatly reduces the chances to recover anything! To avoid this kind of problem, always remember back up your stuff, and it will help you one day.

💾 How to Recover Data After Formatting a Hard Disk, USB Drive or a Memory Card 💾
How to recover data after formatting a hard disk
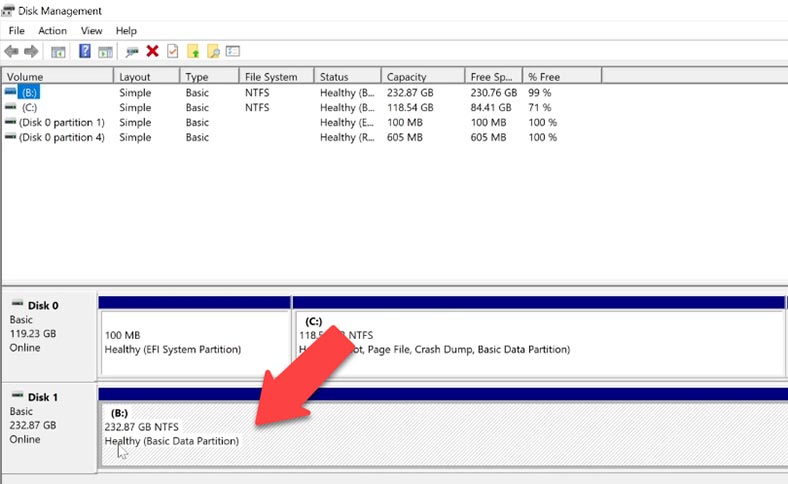
Suppose we have a hard disk containing some data. Open Disk Management, and you can see that it’s healthy and it has NTFS file system. In fact, the file system by itself doesn’t matter.
And soon you will see why. Let’s go back to that disk and format it. Right-click on the disk, select “Format” and look at the Format options.
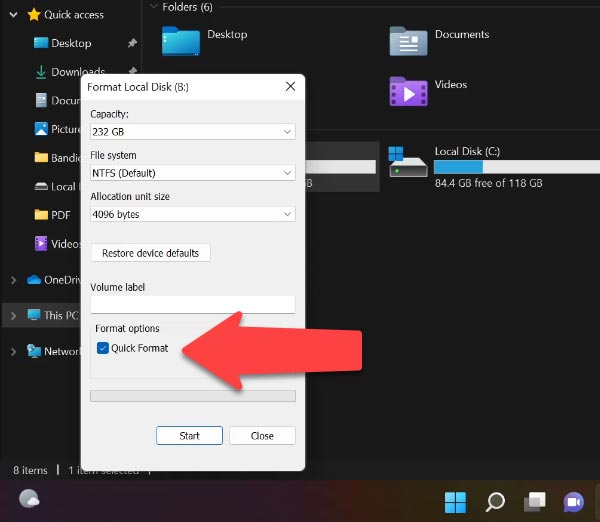
If you check the box next to Quick format it will only overwrite the file allocation table. The files themselves will be intact. They will just become invisible for your operating system. After such operations, it is possible to recover information form a hard disk even with the means of the operating system.
Instead, Full format does not only make the files invisible, but also analyzes the disk state and repairs any errors or damage that were found during the analysis. After that, a new file allocation table is formed. If you format the disk in this way, its data can only be recovered with a specialized software tool. However, there’s no guarantee that all information is going to be restored.
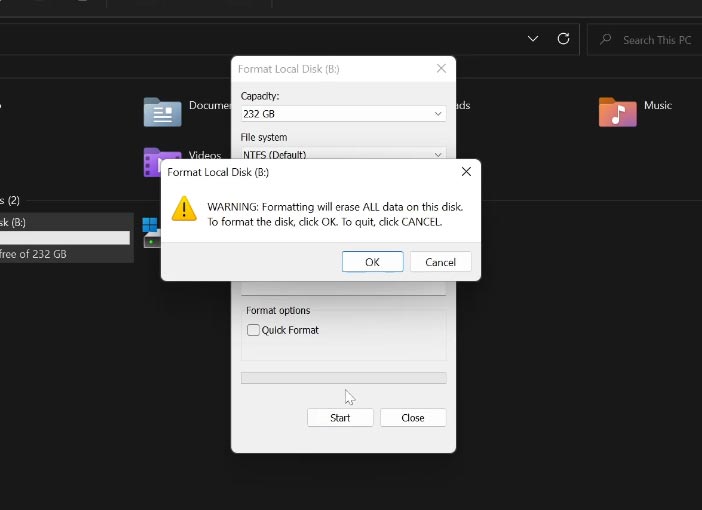
Select Full format / ОК. Now that the disk is formatted, what can we do?
Run Hetman Partition Recovery. The first thing you’ll see is the File Recovery Wizard, select the disk, and then choose “Full analysis,” and select the file system. You can see that the program supports data recovery from almost any file system. That is why I said that the file system of the formatted disk doesn’t matter. In various file systems, data is recovered in the same way.
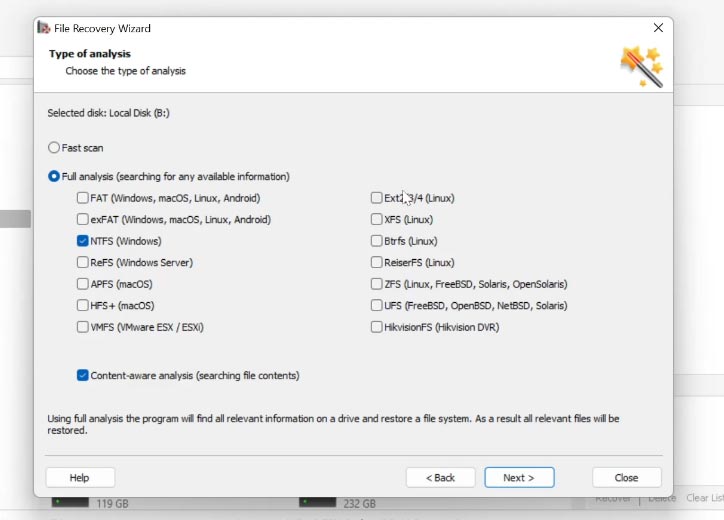
To find out what kind of file system your disk has, right-click on the disk inside the program (or in Windows) and select Properties. The information you need will be displayed in the File system field. Click Next. Click Finish when the analysis is over.
As you can see, the program has found several partitions that were created on this disk some time ago. Go to this partition and see that the program has found the files. You can use the preview window to see their contents.
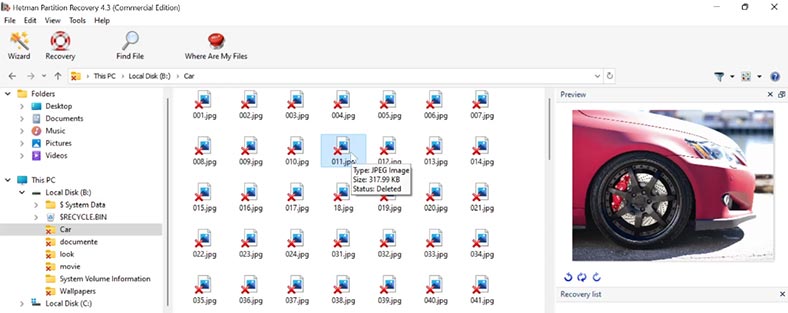
To recover the files you need, drag them to the Recovery List. If you don’t see it, go to View / Toolbars / Recovery List.
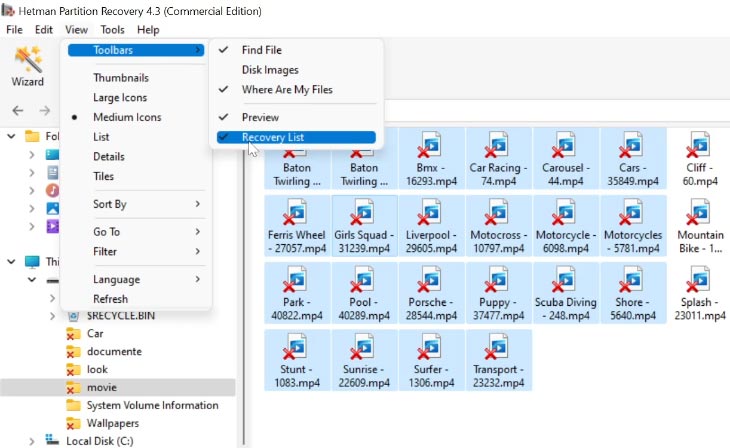
Specify the recovery method and click Next, after that choose a folder and click Recovery.
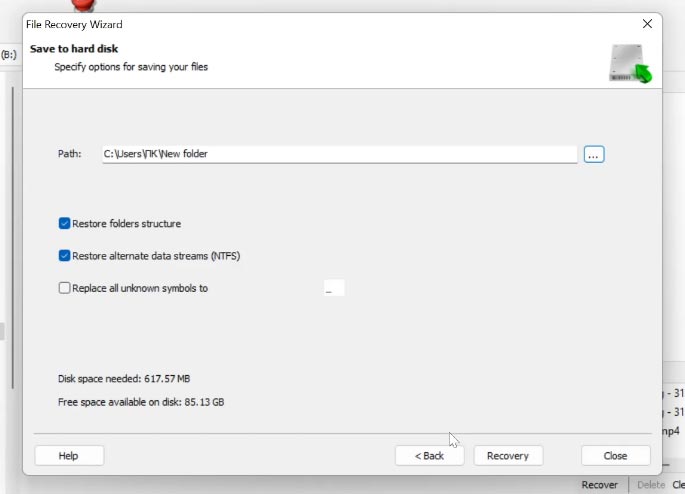
Now you can see that the files have been recovered.
How to recover data after formatting a flash drive or memory card
I have shown these steps with the example of the hard disk installed in my computer. However, by following the same sequence of actions, you can recover data after formatting a USB drive or a memory card, an external hard disk, or any other media regardless of the interface used to connect it to a PC: it doesn’t matter if it’s a card reader, a conventional USB port or a Type-C port.
| № | Step | Description |
|---|---|---|
| 1 | Connect the device to the PC | Connect the flash drive or memory card to the computer via USB or card reader. |
| 2 | Run Hetman Partition Recovery | Install and run Hetman Partition Recovery on a Windows computer. |
| 3 | Scan the device | Select the flash drive or memory card to recover and start a full scan. |
| 4 | Analyze found files | Review the scan results and the files found. |
| 5 | Select files for recovery | Select the necessary files and begin the recovery process, saving them to another device. |
| 6 | Save the data | Save the recovered files on your computer or another secure storage device. |
Recovering data from an SSD
Talking of data recovery from SSD drives, there are certain peculiarities about it. The main principle is always the same, but the use of TRIM command in their operation adds some aspects. If this command is enabled, it will be very difficult to recover data. Watch a step-by-step video tutorial about recovering data from an SSD:

⚕️ Recovering Data from SSD After File Deletion or Disk Formatting in 2021
| № | Method | Description |
|---|---|---|
| 1 | TRIM Command on SSD | TRIM is a command that informs the SSD which data blocks are no longer in use and can be erased to improve disk performance. |
| 2 | Impact of TRIM on Data Recovery | Once the TRIM command is executed, data recovery becomes harder or nearly impossible as data on these blocks is physically deleted. |
| 3 | Recovery Time Window | If the TRIM command has not yet been executed, partial data recovery may still be possible using specialized software. |
| 4 | SSD Data Recovery Software | Software like Hetman Partition Recovery or Diskinternals can be used to recover data before the TRIM command is executed. |


