What Should You Do After a VirtualBox Failure? How to Recover Data On MacOS
Read this article to find out how to retrieve files from a non-operational VirtualBox virtual machine on MacOS. How to restore accidentally removed VDI files and recover data after a virtual machine crashed or got damaged.
- Why data can be lost
- Method 1. Locating and retrieving the VDI virtual disk
- Method 2. How to recover virtual machine files with Hetman Partition Recovery
- Method 3. How to recover files with Time Machine
- Method 4. How to recover data from a non-operational virtual machine
- Method 5. VirtualBox snapshots
- Conclusion
- Questions and answers
- Comments
In this article, we’ll explore how to fix this problem and restore access to your data if you accidentally deleted it from a virtual machine, if its virtual disk got damaged or the virtual machine suffered a failure, and now you’ve lost access to the files stored inside such virtual machine.

How to Recover Data from a Damaged VirtualBox Virtual Machine on MacOS
Why data can be lost
Before we get down to recovery, let’s learn more about why data gets lost in VirtualBox. This will help you understand what went wrong and select the most appropriate recovery method.
- Accidental removal of VDI, VMDK, and VHD files, file transfer or file damage. All of these things may happen when you delete files manually or empty the Recycle Bin where the files were sent by accident. The files can often get damaged due to an emergency shutdown or when the VirtualBox app crashes.
- Formatting or reinstalling the operating system inside the virtual machine. When you do it, all data stored on the system partition is lost.
- MacOS file system failure. The container where virtual machine files are stored can be damaged and then the machine can’t boot.
- A failed rollback attempt. In in some cases, reverting the virtual machine to its previous state results in the loss of new data.
In each of these situations, a different recovery approach will be chosen — from performing a simple manual check to using specialized data recovery tools like Hetman Partition Recovery.
Method 1. Locating and retrieving the VDI virtual disk
If the virtual machine won’t boot, check if the virtual disk is available. If VirtualBox refers to a folder which doesn’t contain the corresponding virtual disk file, make sure the correct path is used, and if there is the virtual disk file inside the destination folder.
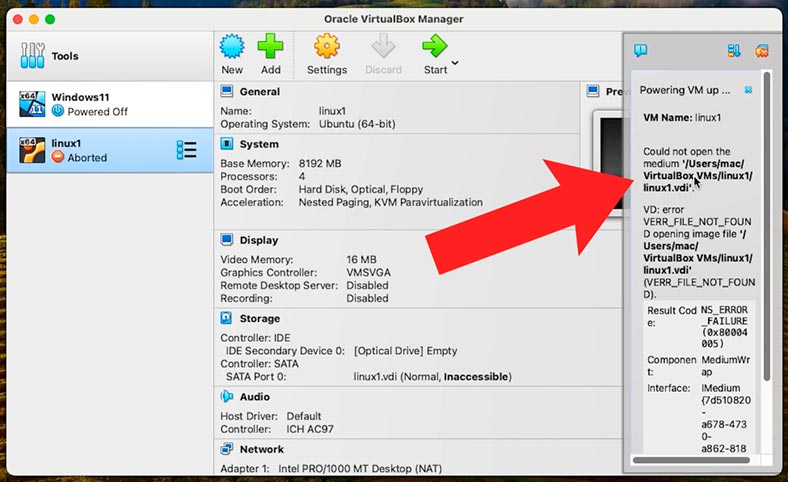
If it’s not there, check the Recycle Bin. Open the Bin and restore the file to its original location.
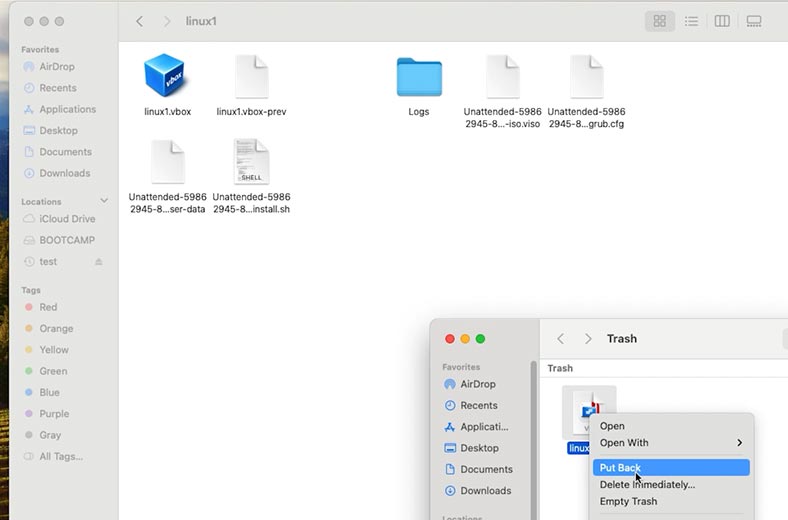
If there are no virtual machine files inside the Bin, it means they might have been deleted without using the Bin, or the Bin has already been emptied. In this case, you need some specialized software to get your files back and restore the data.
Method 2. How to recover virtual machine files with Hetman Partition Recovery
If the virtual machine files weren’t stored on the system drive, a professional tool like Hetman Partition Recovery will get you covered.
This utility supports all popular file systems as well as most hypervisor apps. It will certainly help you recover deleted files on macOS, or retrieve files from a non-operational VirtualBox machine.
| Feature | Description |
|---|---|
| Virtual disk support | VHD, VHDX, VMDK, VDI (Hyper-V, VMware, VirtualBox disks) |
| Recovery type | Recovering deleted files, partitions and data from damaged or formatted virtual disks |
| File system support | NTFS, FAT32, FAT16, exFAT, ReFS, Ext2/3/4, HFS+ |
| Preview | Viewing the contents of a virtual disk, including documents, images, videos etc. |
| Work without mounting | Opening and analyzing virtual disks without launching the hypervisor |
| RAID support | Recovering data from virtual machines with RAID systems |
| Creating images | Options to create and save a copy of the virtual disk for further recovery |
| Scanning | Quick and deep scan for virtual drive contents |
| OS compatibility | Windows, MacOS, Linux |
Download the app. While doing it, choose the version for Mac operating systems..
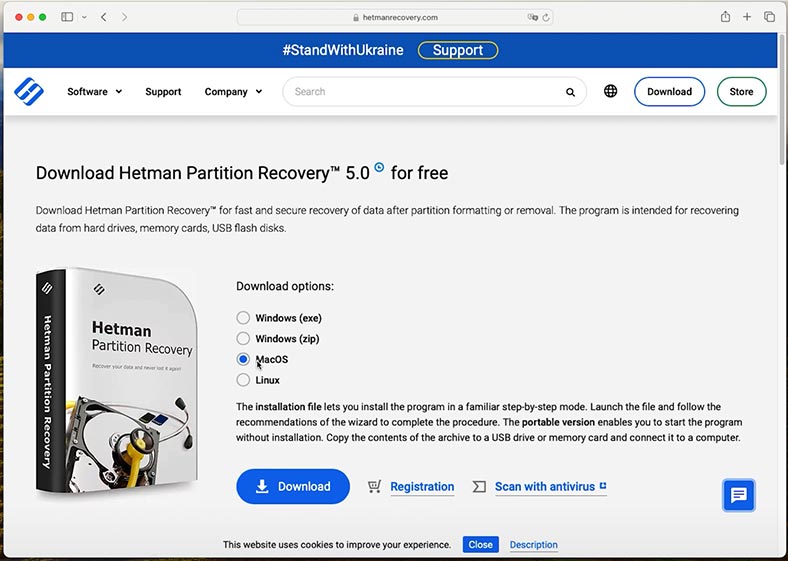
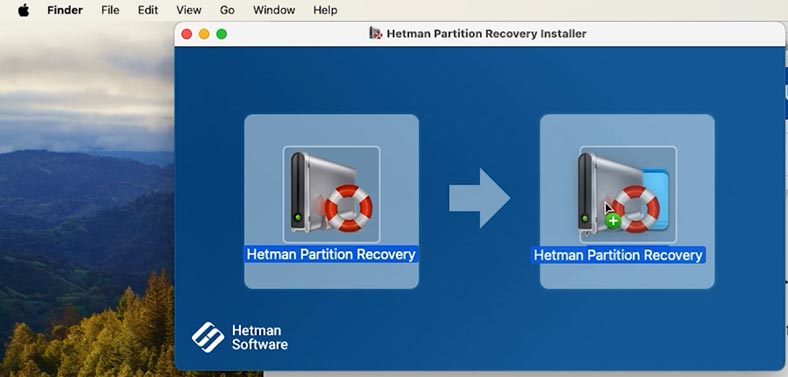
After that, install the app by clicking on the downloaded file and following the wizard directions. Drag the shortcut to the folder containing your programs.
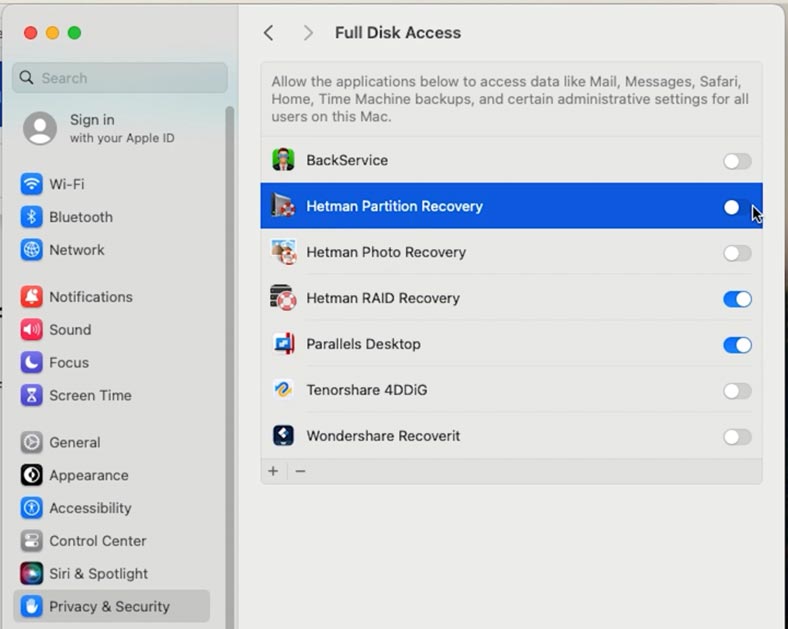
The utility needs full access to hard disks to work properly. To do it, go to security settings and grant access to disks.
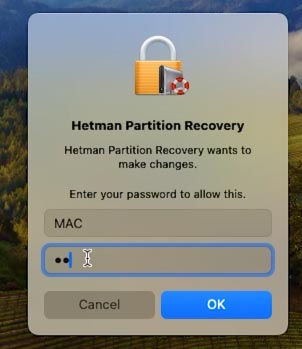
After that, open Launchpad and start the utility. You’ll need to type the administrator password.
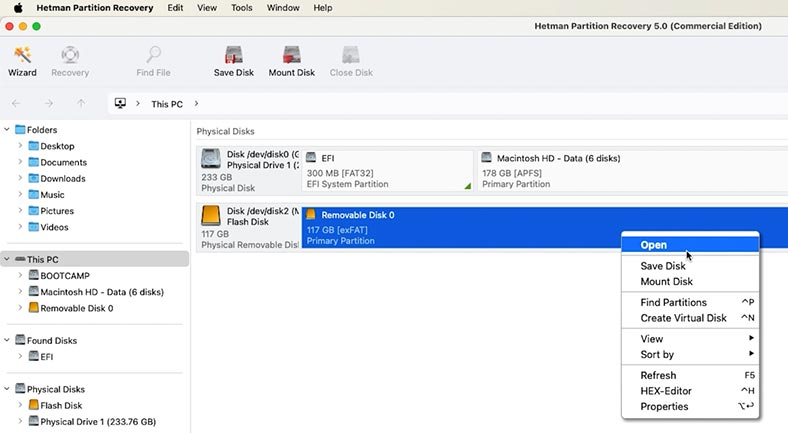
To search for deleted files, right-click on the disk where they used to be stored and choose Open.
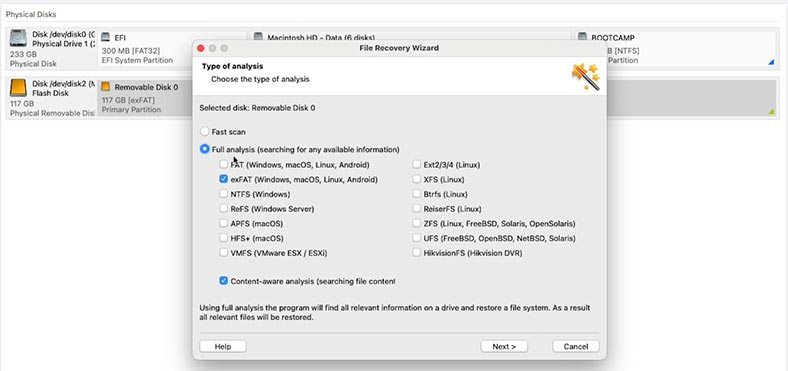
Then choose the scan type – Fast scan or Full analysis.
We recommend beginning with a Fast scan – this will take less time, and it will help you recover data in most typical scenarios.
As a result, the tool will scan the disk in no time and display all files and folders it has found. Open the folder where the virtual machine files were stored.
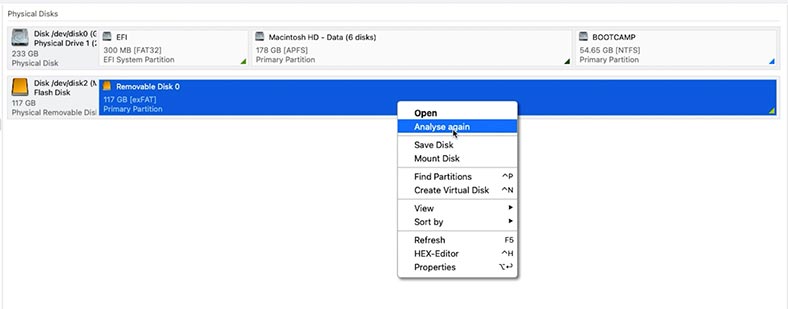
If the files aren’t there, run Full analysis. To do it, return to the main menu, right-click on the disk and choose Analyze again – Full analysis, and select the file system.
To have your files back, select the ones you need and hit the Recovery button.
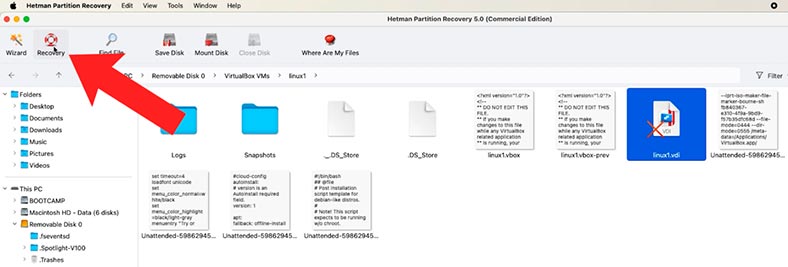
Then choose where to save the files, select the disk and folder, and hit Recovery again.
In the end, you will find the recovered files in the folder you have chosen. By default, they are saved to the Documents folder – in its subfolder called Restored Files.
Now the last step is to specify the path to these files in your VirtualBox settings, or move the files to another directory where you need them.
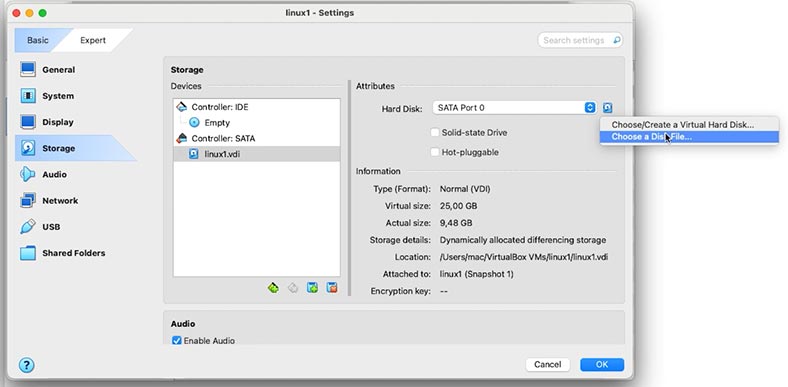
After the operation is over, the virtual machine should start working as before, and you’ll be able to access the virtual disk data with no effort.
Method 3. How to recover files with Time Machine
If you back up your virtual machine regularly with Time Machine, you’ll be able to recover accidentally deleted files and restore operability of the virtual machine within a few minutes.
Go to the folder where your virtual machine used to be stored and open Time Machine.
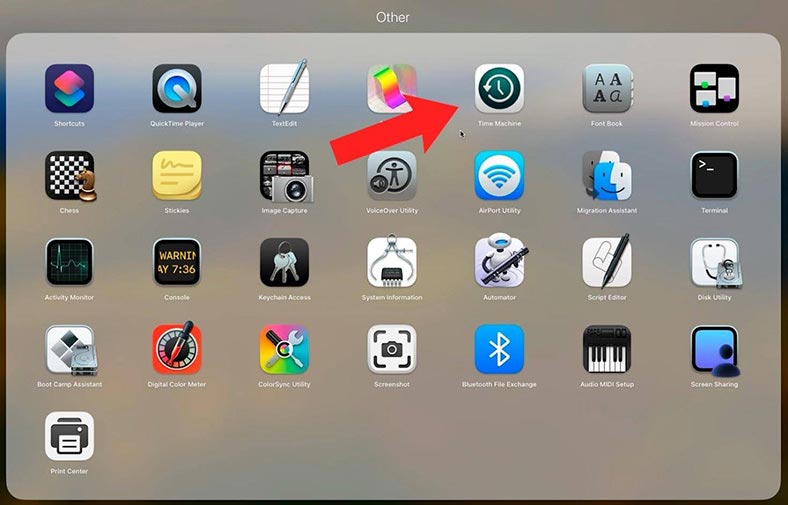
Now select a backup with the date when your virtual disk file still existed, and click Restore.
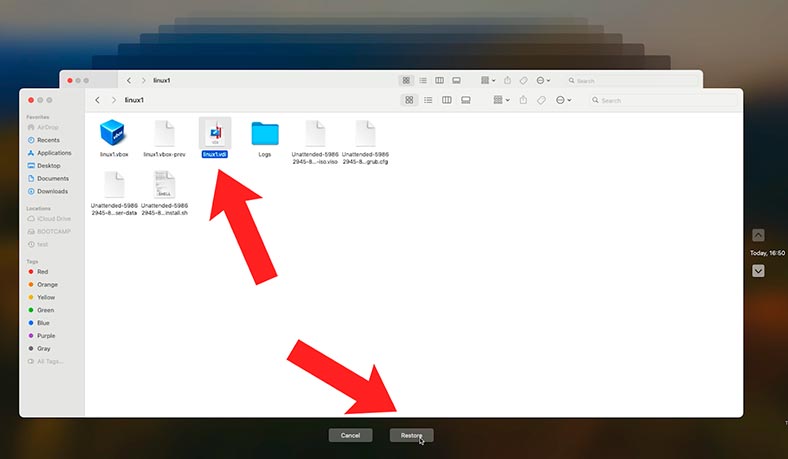
After the operation is over, the virtual machine should start working as before.
If the virtual machine won’t run, try connecting it manually.
Method 4. How to recover data from a non-operational virtual machine
If you failed to restore operability of your virtual machine, or if you accidentally deleted some of its data, you’ll still be able to fix everything with the help of Hetman Partition Recovery.
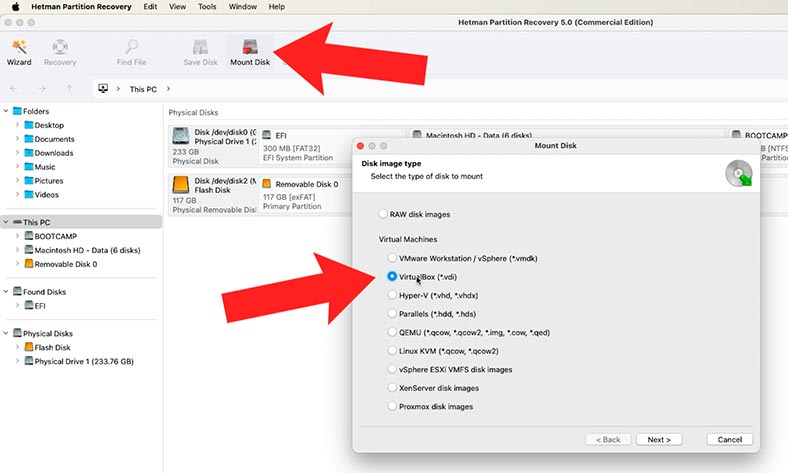
Start the app, and look at the top of the menu to find and click on the button Mount Disk.
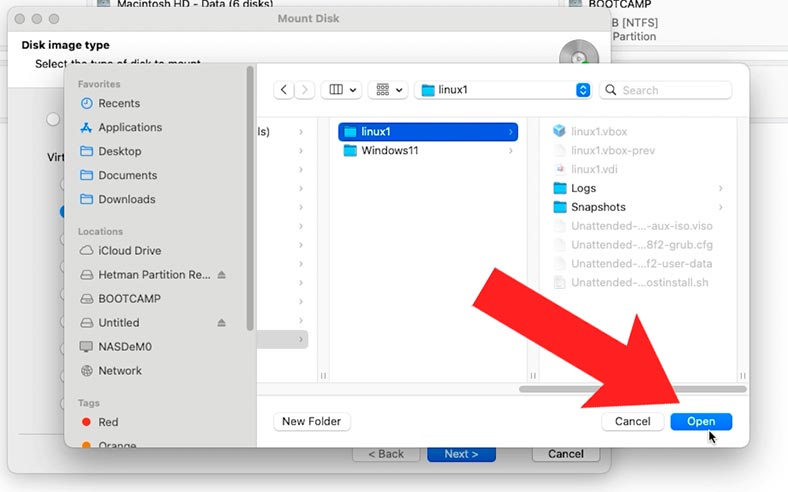
Give the path to the folder containing VDI files (i.e. virtual disk files), and click Open.
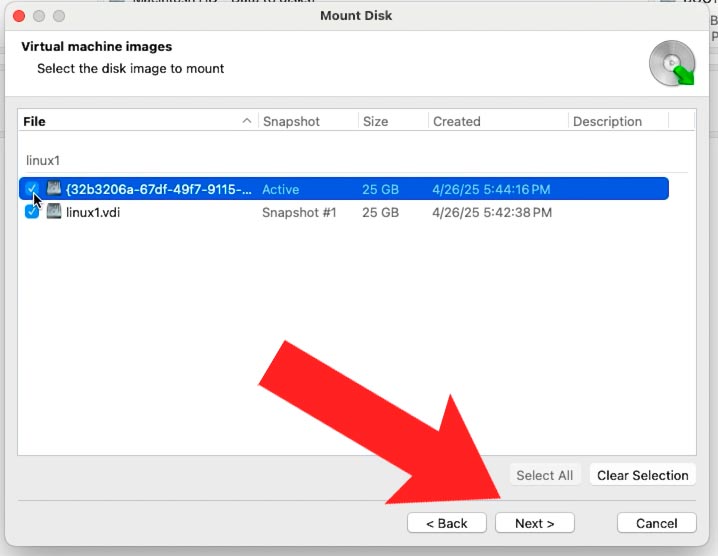
If there are several virtual machine files, select the one you need and click Next. Otherwise, leave all selections as they are, and then all virtual disks will be mounted.
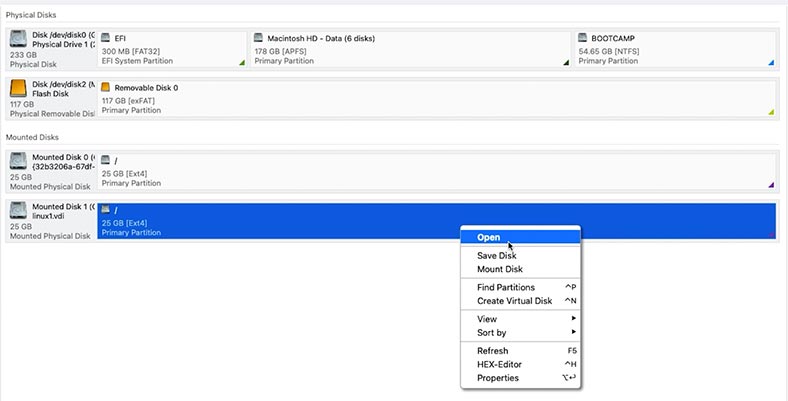
As a result, you will see the mounted disk in the program’s window. To start searching for data, right-click on the disk and choose Open.
Then choose the scan type – Fast scan or Full analysis.
When the search is over, open the folder where the lost files were stored, and recover them.
Typically, users keep their files in the Documents folder.
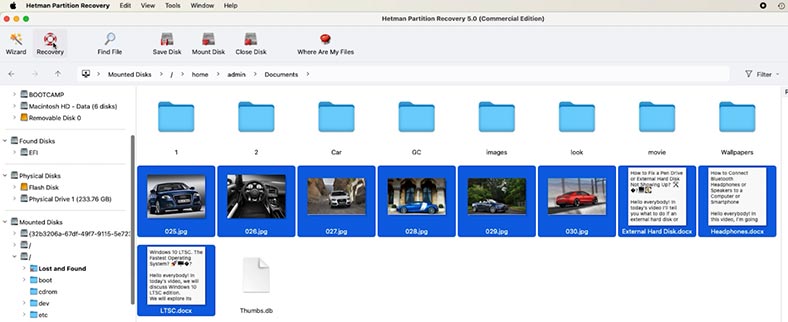
Select all the files you want to restore, and click the Recovery button. Choose where to save the files.
Method 5. VirtualBox snapshots
Another method to restore operability of your virtual machine involves using VirtualBox snapshots.
A snapshot is a saved state of a virtual machine. Snapshots can be created both manually and automatically.
When a snapshot is taken, you can continue working with the virtual machine, and go back to the state saved in this snapshot at any time.
Such a snapshot will help you restore operability of the virtual machine if it gets damaged.
To create a snapshot, open VirtualBox and the virtual machine where such snapshot should be taken.
In the Mac menu, click – Tools – Snapshots – Take Snapshot.
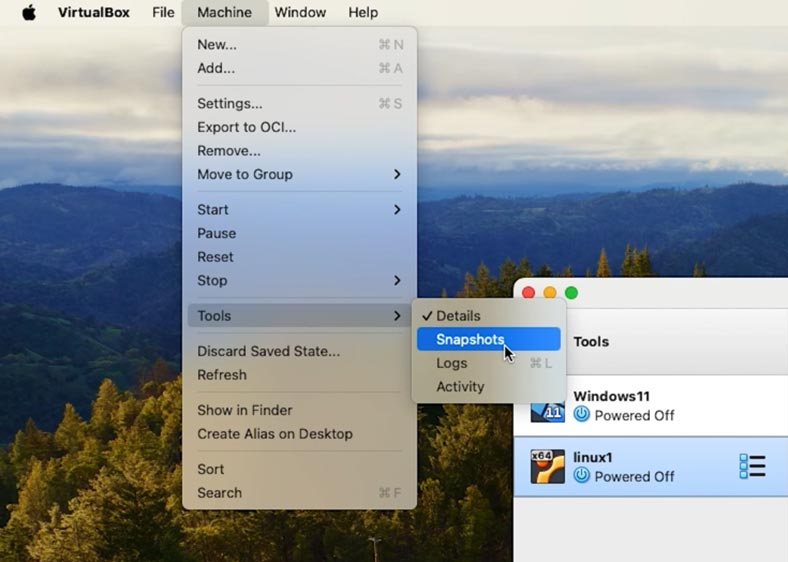
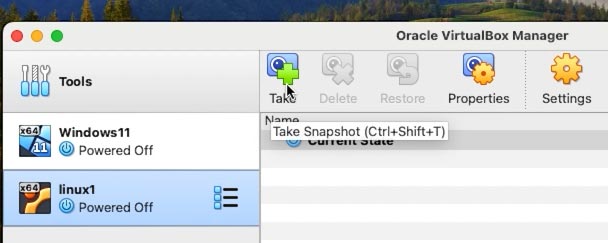
Now, in order to get back to such a snapshot, you should click on Restore Snapshot option in the same menu.

This is how you can restore operability of your virtual machine with a snapshot.
Conclusion
We have just explored several ways of restoring access to the files of a non-operational VirtualBox virtual machine.
To avoid similar issues in the future, remember to back up important data to an external drive or a cloud storage.
Also, try not to run a virtual machine after a loss of data occurs, and avoid copying large files to the machine, so that the deleted data will not be overwritten.


