Diskpart Tutorial: Comprehensive Guide to Recovering Memory Cards, USB Drives, or Hard Disks
Unlock the Power of Diskpart for Data Recovery! Accidentally lost data from your memory card, USB flash drive, or hard disk? Diskpart can help you recover it! In this comprehensive tutorial, we’ll show you step-by-step how to master Diskpart for recovering memory cards, USB drives, or hard disks. Whether you’re a beginner or an experienced user, the process is straightforward and easy to follow. From identifying the device to executing recovery commands, we’ll cover everything you need to know to retrieve your lost data with Diskpart. Don’t let data loss ruin your day—watch now and learn how to recover like a pro!
- Step 1. Launch the Command prompt as Administrator
- Step 2. Diskpart
- Step 3. Creating partitions and disk formatting
- DISKPART Basic Syntax and Commands
- Questions and answers
- Comments
The trick will also remove partitions which cannot be deleted with other Windows integrated tools such as Disk Management. This process will completely remove the disk partition table so that you can create it from the scratch.
It will erase your disk completely so take care to back up your files. Also, it is very important to make sure that you have chosen the right device, otherwise you risk to delete data from the wrong disk.
Step 1. Launch the Command prompt as Administrator
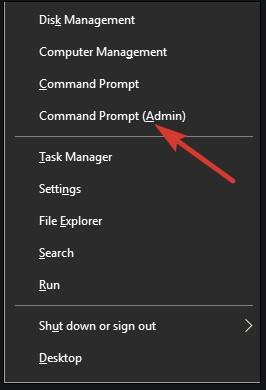
First of all, start the Command prompt as Administrator:
- Windows 10 or 8.1: just right-click on the Start menu and select Command Prompt (Admin).
- Windows 7: find Command Prompt in the Start menu. Right-click and select Run as Administrator.
Step 2. Diskpart
To clean the disk, use the command Diskpart. Before doing it, make sure that the USB drive, memory card or another device you want to clean is connected to the computer.
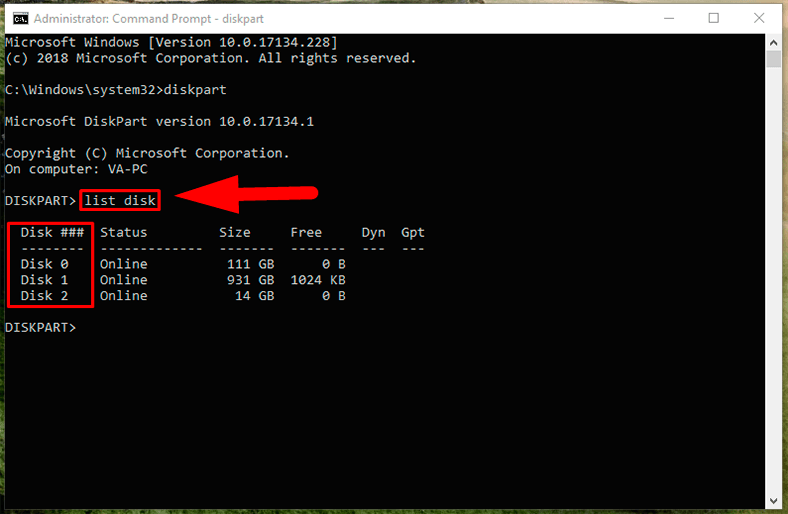
To run the Diskpart utility, type the corresponding command in the Command Prompt and press Enter:
Diskpart

Use this command to see the list of all disks installed in this computer:
list disk
View the result and decide on the digit of the disk you want to clean.
If you choose a wrong disk digit, the disk will be erased and important data may be lost.
In the screenshot below, you can see that Disk 0 has the capacity of 111 GB, Disk 1 – 931 GB, and Disk 2 – 14 GB. We know that we need to work with the disk having 14 GB of space. Then Disk 2 is the USB drive, and Disk 0 is the computer’s system disk, while Disk 1 is its main internal hard disk.
After you’ve decided on the disk digit, type the following command, replacing the symbol # with the disk digit.
Be very attentive. If you give the wrong disk digit, you may erase all data from the wrong disk.
select disk #
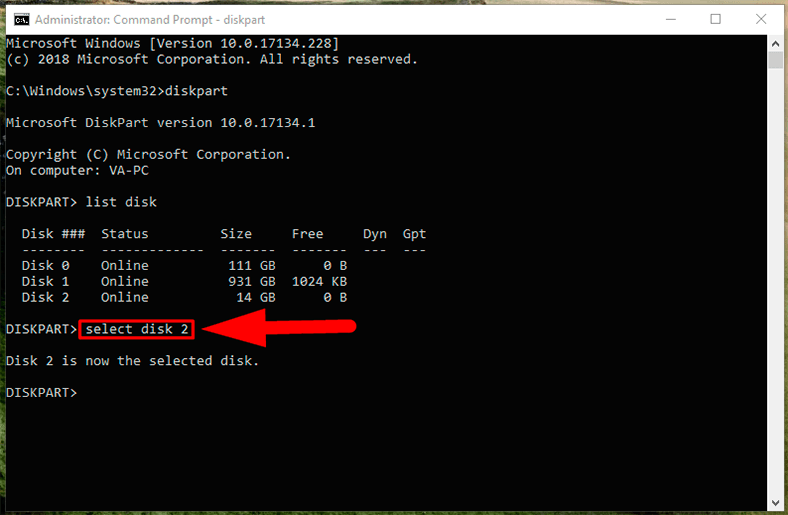
Diskpart has selected the disk you specified. Now all actions you take will affect this disk. To clean the partition table, type the following command and press Enter:
This command will remove all data from this disk! Make sure you have backed up all important information before you proceed.
Clean
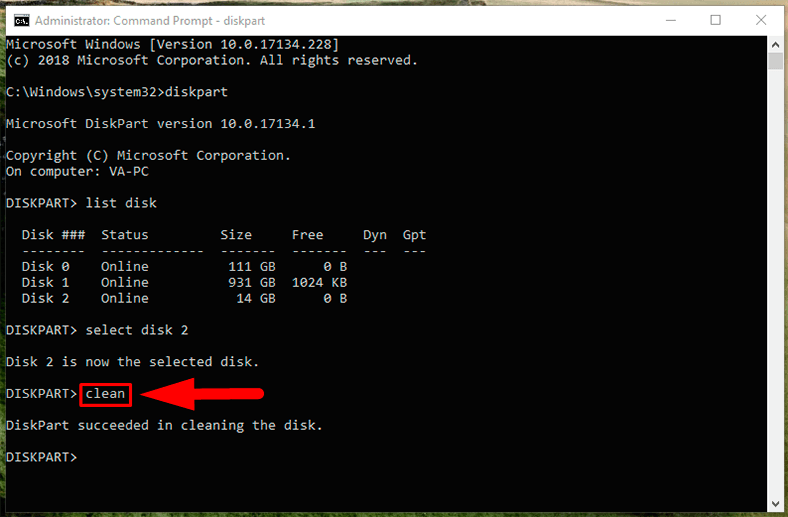
If everything was correct, you will see a message saying the disk was cleaned successfully. Close the Command Prompt.
Step 3. Creating partitions and disk formatting
Now use a Windows-integrated tool, Disk Management, to create partitions on this disk and format it. This can be done with the diskpart command, too, but it’s much easier with Disk Management.
- In Windows 10 or 8.1, you can start Disk Management by right-clicking on the Start menu and selecting Disk Management.

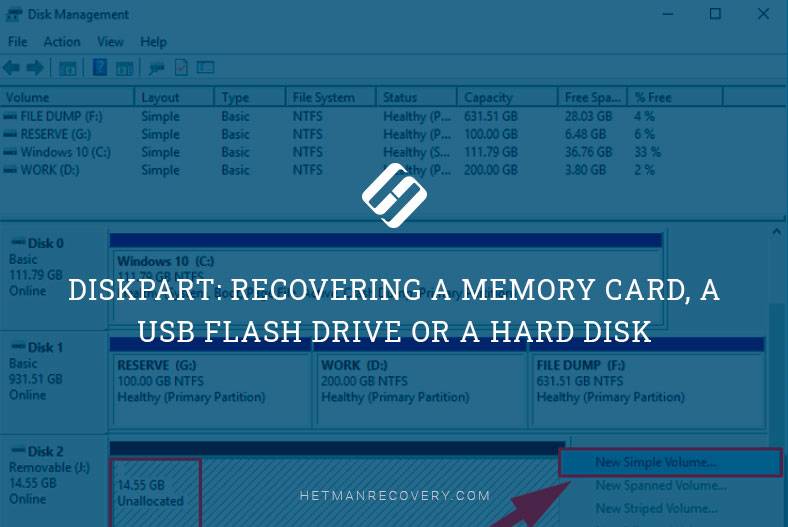
- Now you can see that the disk you were dealing with has no partitions at all. Right-click on this unallocated space and select New Simple Volume to create a partition and then format it into the file system you prefer. By default, Windows will create one partition covering the entire disk.
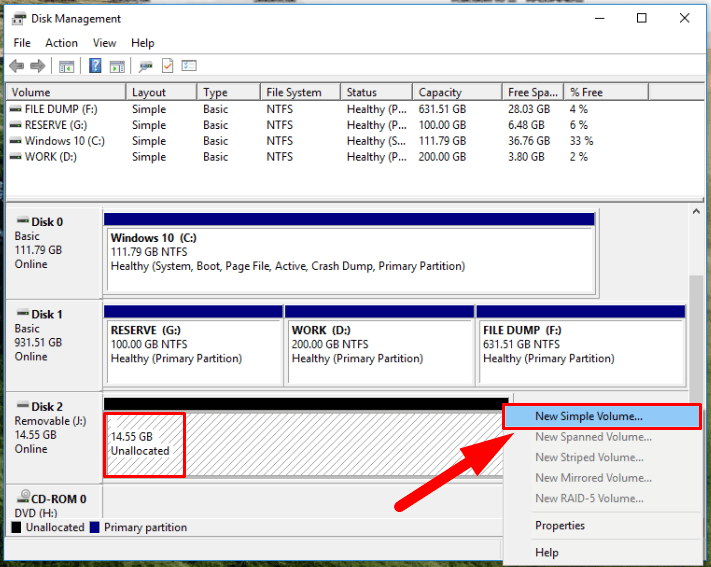
If this method doesn’t work - for example, the disk was cleaned but it can’t be partitioned or formatted, or the diskpart command can’t detect it - it means the disk is damaged physically and is unable to work properly. However, cleaning with the diskpart command is a simple solution capable of reviving seemingly hopeless disks.
And even if you overlooked all the warnings and cleaned the wrong disk (in fact, it does happen TOO often), don’t get upset. That data can still be recovered. For this purpose, your perfect choice would be a data recovery tool by Hetman Software – Hetman Partition Recovery.
DISKPART Basic Syntax and Commands
Basic diskpart syntax:
| Parameter | Description |
|---|---|
| diskpart | To start the diskpart command |
| list disk | Displays a list of disks |
| select disk | Shifts the focus to a disk |
| list partition | Displays a list of partitions |
| select partition | Shifts the focus to a partition |
| list volume | Displays a list of volumes |
| select volume | Shifts the focus to a volume |
Basic diskpart commands:
| Command | Description |
|---|---|
| create partition primary [size=(size_in_MB)] | Creates a partition on a disk |
|
format fs= |
Formats a disk to accept files |
| assign letter=(letter) | Assigns a drive letter |
| delete partition | Deletes a partition |
| active | Marks the disk's partition with focus, as active |


